Archives for February 2013

crescent rolls

crescent rolls 5

I want my crescent rolls to bridge the gap between a regular dinner roll and a croissant. I want them intensely buttery, soft in the middle, with a slight crackle to the crust. I want the rolled layers to come apart when you bite into a browned edge. I don’t want them to be flaky; that’s too far down the croissant path. Basically, I want what you get when you pop open one of those tubes from the grocery store, except those tend to be soft to the point of mushy and too pale on the outside. It’s been surprisingly hard to find this ideal.

crescent rolls 3

Most recipes turn out rolls that are too similar to dinner rolls, without enough butter and without distinct layers. The recipe I started from for these rolls looked like they’d go too far the other direction, with flaky layers of dough separated by butter, like a croissant. You get those layers through folding butter into the dough and rolling it flat, then folding the dough into thirds and rolling again. In a croissant, this process is repeated to make hundreds of alternating paper-thin dough and butter layers.

crescent rolls 4

By reducing the number of turns, I was able to create the layers I wanted without making them so thin they’d turn flaky, so the dough layers were distinctly bread-like. The bread needed to be tender, which I guaranteed by adding a couple tablespoons of oil. The butter layers would add plenty of butter flavor, but the oil would keep the bread soft and moist. At last – the perfect crescent roll, halfway between a dinner roll and a croissant.

crescent rolls 8

One year ago: Yogurt Hollandaise Sauce
Two years ago: Yellow Cake (comparison of 3 recipes)
Three years ago: Jalapeno Baked Fish with Roasted Tomatoes and Potatoes
Four years ago: Pot Roast
Five years ago: Salmon Cakes, Flaky Biscuits, Hashed Brussels Sprouts

Printer Friendly Recipe
Crescent Rolls (adapted from eat live run)

Makes 16 rolls

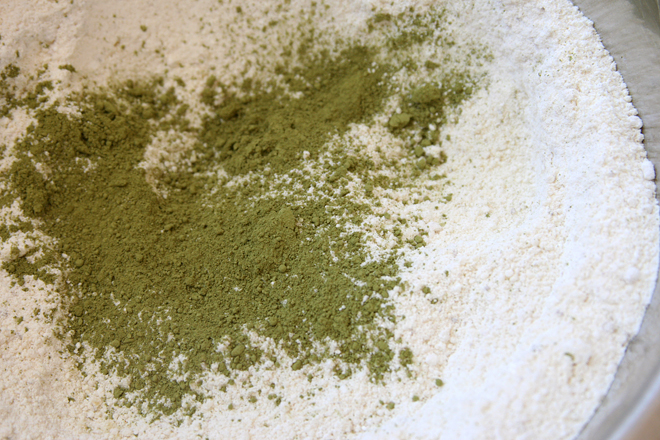
I made these slightly whole wheat by using this trick, but if you’d rather they were made completely with white flour, just skip step one, adding the pre-dough ingredients (white flour instead of whole wheat) with the rest of the dough ingredients.

Pre-dough:
4 ounces (about ¾ cup) whole wheat flour
⅓ cup (2.67 ounces) water
¼ teaspoon salt

Dough:
2½ cups (12 ounces) all-purpose flour
2 teaspoons instant yeast
2 tablespoons sugar
¾ teaspoon salt
¾ cup milk plus 1 tablespoon
1 egg
2 tablespoons vegetable or canola oil
6 tablespoons butter, softened
egg wash

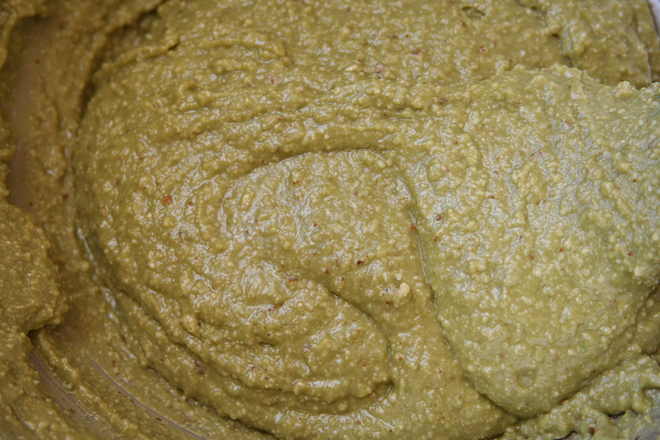
1. For the pre-dough: Combine the flour, salt, and water, mixing until a shaggy dough forms. Cover and set aside at room temperature for at least 8 hours or overnight.

2. Combine the pre-dough, flour, yeast, sugar, salt, ¾ cup milk, egg, and oil in the bowl of a stand mixer. Knead about 4 minutes. (You can mix and knead the dough by hand in a large bowl.) Cover and refrigerate for 1 hour.

3. Roll the dough out to about ¼-inch thick. Starting at a short end, spread the softened butter over two-thirds of the dough. Fold the unbuttered third of dough over the buttered middle. Fold the other buttered side over the middle. You’ve just folded the dough in thirds, like a letter, with the butter trapped inside between layers of dough. Wrap the dough in plastic wrap and chill 30 minutes. Roll out to ¼-inch thick again; fold in thirds again; chill another 30 minutes.

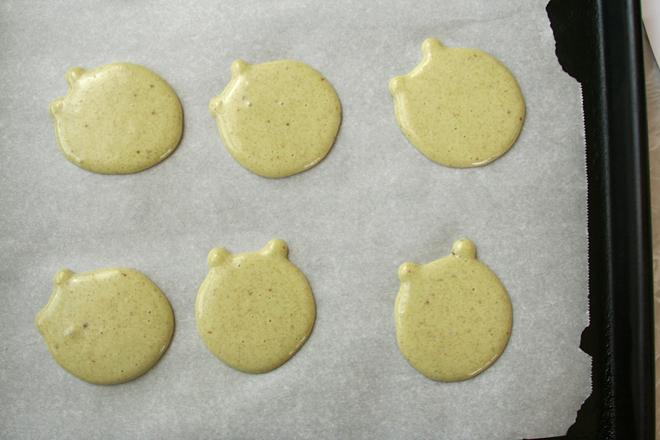
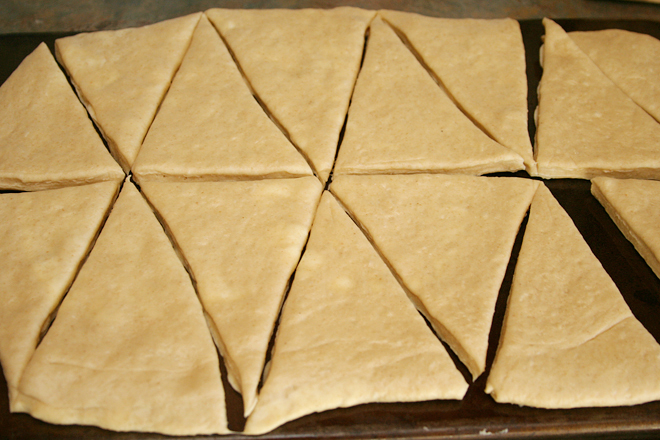
4. Roll the dough to ¼-inch thick to a rectangle about 10 by 14-inches. Slice in half lengthwise, creating two 5 by 14-inch rectangles, then alternate diagonal cuts to make 8 triangles from each half of dough. Cut a 1-inch slit in the wide end of each triangle (the side opposite the point). Roll up the triangles, starting at the wide end and pulling the corners away from the slit in the middle. Arrange the rolls on parchment- or silicone-lined baking sheets, about 2 inches apart. Spray with nonstick spray, cover with plastic wrap and let rise until doubled in size, about 1 hour.

5. Meanwhile, heat the oven to 400 degrees. About 5 minutes before baking, remove the plastic wrap and brush the rolls with the egg wash; leave them uncovered. Bake until golden brown, about 18 minutes.

crescent rolls 6

green pig macarons (green tea macarons with vanilla bean swiss meringue buttercream)

pig macarons 14

These might have come out okay in the end, but it was looking bleak at first – and in the middle, and even a bit toward the end. I might have been overly confident when I agreed to make shaped macarons, with just one previous attempt at the notoriously finicky cookie. To make matters worse, the inspiration blog entry was written in Hebrew.

pig macarons 1

I’m not the first person to make shaped macarons, but most people are using the traditional method for macarons, the one I used last year, in which egg whites are beaten with granulated sugar until stiff peaks form, then almond meal and powdered sugar are folded into the mixture. It’s fussy – the egg whites need to be aged overnight, just the right amount of folding is necessary to deflate the meringue just so, and the piped batter needs to sit at room temperature for an hour before baking. Annie promised to have a simpler, more dependable method, and I wanted to try it.

pig macarons 2

In this method, half of the egg whites are mixed into the almond meal and powdered sugar; the other half are whipped into a meringue with hot sugar syrup, then folded into the pasty almond meal mixture. The cookies are piped and baked immediately.

pig macarons 5

It sounded simple enough, but things started going wrong early on. First I ran out of almond meal, which I discovered after I’d measured out egg whites, sugar, and water to the gram. I had some slivered (not blanched; they still had skins) almonds in the pantry, so I ground those up and mixed them into the batter. One obstacle was overcome.

pig macarons 6

My next mistake was adding too much of the meringue mixture to the almond meal mixture. You’re only supposed to add as much of the meringue mixture for “thick ribbons to batter to run off the spatula”, but that required all of the meringue for me, and at that point, the batter was too loose, and the cookies spread when I piped them.

pig macarons 7

My next problem – there was always a next problem on this particular day – was trying to get the nose and ears on top of the main body of the cookie. Eventually I found that the best method seemed to be baking the plain macarons for the specified time, then piping the nose and ears on the firm surface of the cookie and rebaking them for a few minutes until the smaller portions set. The cookies seemed no worse for the extra time in the oven.

pig macarons 10

It’s a good thing that the Angry Birds pigs aren’t pristine shapes even in their original format on the game, because my cookies were anything but round, with ears of indeterminate size and shape. Sometimes the ears blended right into the rest of the cookie; sometimes the noses caved in. And by this point, my kitchen was covered in macaron batter, which, by the way, turns into concrete when it dries, and my bread dough was overrising while seemingly infinite batches of macarons hogged the oven.

pig macarons 11

The piggie faces, thankfully, were mostly saved by the addition of nostrils and pupils. Eyebrowns drawn on with a edible marker didn’t hurt either. And I think it speaks volumes about the dependability of this recipe that with all my foibles, the macarons rose enough to somewhat form those elusive foamy feet. (Not that my troubles were completely over.) But while they might not be as pristine as I had intended, the 6-year-old birthday boy didn’t seem to mind. I’m going to call this kitchen battle conquered, though it wasn’t easy.

pig macarons 13

One year ago: Chocolate Sugar Cookies
Two years ago: Fettuccini Alfredo
Three years ago: Toasted Vegetable Subs
Four years ago: Red Velvet Cake (comparison of 5 recipes)
Five years ago: Vanilla Frosting (comparison of 4 recipes)

Printer Friendly Recipe
Green Pig Macarons (Green Tea Macarons with Vanilla Bean Swiss Meringue Buttercream) (adapted from Thomas Keller and Sebastien Rouxel’s Bouchon Bakery via Annie’s Eats)

Makes 24 sandwich cookies

The very small amounts of almond meal, powdered sugar, and egg whites are for the white eyes. If you’re just making regular green tea macarons, you can skip that.

Where I went wrong with the batter was adding too much meringue. Once I got to the point where I had thick ribbons of batter, it was definitely too much meringue and the batter was too loose, spreading on the baking sheet. All I can recommend to correct this, until I gain more experience with macaron-making, is that you watch for VERY thick ribbons of batter falling off the spatula.

Green tea cookies:
212 grams almond meal, plus 16 grams
212 grams powdered sugar, plus 16 grams
1½ teaspoons matcha powder
82 and 90 grams egg whites, plus 6 grams (about 6 eggs total)
236 grams granulated sugar, plus ¼ teaspoon
158 grams water

Vanilla bean buttercream:
2 egg whites
½ cup (3.5 ounces) granulated sugar (vanilla sugar if you have it)
pinch table salt
12 tablespoons (1½ sticks) unsalted butter, softened
seeds from ½ vanilla bean
1 teaspoon vanilla extract

1. For the cookies: Preheat the oven to 350 degrees and place a rack in the middle of the oven. Line baking sheets with parchment paper. Fit one pastry bag with a ½-inch round tip and two with ¼-inch round tips (for the white eyes and the green ears and nose).

2. In a large bowl, combine the 212 grams almond meal, 212 grams powdered sugar, and matcha powder. Whisk together to blend and break up any clumps. Make a well in the center of the dry ingredients and pour in 82 grams of the egg whites. Blend the egg whites into the dry ingredients until evenly mixed. The mixture will be thick and paste-like. For the white eyes, in a small bowl, mix together the 16 grams of powdered sugar, 16 grams of almond meal, and 6 grams of egg whites.

3. Combine 236 grams granulated sugar and the water in a small saucepan over medium-high heat. When the temperature is around 210 degrees, combine the 90 gram portion of egg whites with ¼ teaspoon sugar in the bowl of a stand mixer. Begin whipping on medium-low speed. Continue whipping the whites on medium speed until they form soft peaks. If soft peaks are achieved before the syrup reaches the target temperature, reduce the speed to low to keep the whites moving.

4. Once the syrup reaches 248 degrees, immediately remove it from the heat. Increase the mixer speed to medium and pour the syrup down the side of the bowl in a slow drizzle until fully incorporated. Increase the mixer speed to medium-high and whip the meringue until stiff, glossy peaks form.

5. Add one third of the meringue mixture to the bowl with the almond mixture with the matcha. Fold in gently until the mixture is smooth. A bit at a time, gently fold in the remaining meringue until the batter is smooth and runs in thick ribbons off of the spatula. You may not need all of the meringue, so add it gradually. Repeat the process with the white batter.

6. Add most of the green batter to the pastry bag with the ½-inch tip. Hold the bag perpendicular to the baking sheet about ½-inch above the surface of the pan. Steadily pipe rounds about 1¼- to 1½-inches in diameter. The batter may create small peaks immediately after piping, but if it is the correct texture these will smooth themselves away after a minute or two. If the batter is too stiff, the peaks will remain and the tops of the shells may not be totally smooth. If the batter is too thin, the rounds will spread further.

7. For the ears: Transfer some green batter to a piping bag with a ¼-inch tip. Pipe small ears adjacent to the larger circles of batter.

8. Transfer the baking sheet to the oven and immediately reduce the temperature to 325 degrees. Bake for 9-12 minutes, until the tops are smooth and set and “feet” have formed around the bottom.

9. Transfer the white batter to a piping bag with an ⅛-inch tip. Remove the baked cookies from the oven and immediately pipe on a green nose in the middle of the circle and 2 white eyes to the side of the nose. Return the cookies to the oven for 3-4 minutes, until the nose and eyes are set. Add noses and eyes only to every other batch; the backs of the sandwiches will just need ears.

10. Transfer the baking sheet with the cookies to a cooling rack; cool 5 minutes, then peel the cookies away from the parchment and transfer to a cooling rack. Repeat as needed with the remaining batter, replacing the parchment paper with each batch, bringing the oven temperature back up to 350 degrees before baking each sheet.

11. For the buttercream: In the bowl of a stand mixer (or a large bowl if using a hand-held mixer), combine the egg whites, sugar, and salt. Set the bowl over a pot of simmering water, making sure the bottom of the bowl does not touch the water. Whisk constantly until the mixture reaches 160 degrees.

12. Fit the mixer with the whisk attachment; beat the egg white mixture on medium-high speed until stiff peaks form and it has cooled to room temperature, about 8 minutes. Reduce the mixer speed to medium and add the butter 2 tablespoons at a time, adding more once each addition has been incorporated. Increase the mixer speed to medium-high and beat until the buttercream is thick and smooth, 3-5 minutes. Add the vanilla seeds and extract; mix until incorporated.

13. To assemble: Pipe the buttercream onto the flat sides of half of the cookies. Top with the remaining cookies. Serve immediately or cover and store overnight in the refrigerator (bring to cool room temperature before serving).

Thirteen steps, and I forgot to tell you how to make the project-saving eyes and nostrils. Powdered sugar + milk + food coloring, stirred until smooth and dripped off the end of a toothpick.  Tedious, but it got the job done.

pig macarons 15

argentinian hot dogs

argentinian hot dogs 3

Dave and I had an impromptu get-together last fall, the same day I made cupcakes for a wedding. I already had these hot dogs planned for dinner that night, and without time to plan and shop for anything new, I had to accept that hot dogs would be the first thing I would ever cook for some of these friends. But at least they were fancy hot dogs.

argentinian hot dogs 1

They were one topping less fancy than when Dave and I made these recently during what was basically Hot Dog Week, because I simply ran out of time and energy to make chimichurri. But homemade buns, all-beef dogs, chorizo, pickled onions, Hatch green chile, and queso fresco were plenty of toppings. These were declared the fanciest hot dogs anyone had eaten. The chorizo stole the show, as it usually does.

argentinian hot dogs 5

But it’s too bad I didn’t get to the chimichurri the first time I made these, because it really does add a nice green element to the sandwich, which balances all the fat in the meats and cheese. Chorizo on its own makes one heck of a great hot dog topper, and I know one of our guests that day won’t make hot dogs at home without it now, but I love my hot dogs with something intensely vinegary, and this is even better because it has two different ways of drawing that flavor in, the onions and the chimichurri.  The only disadvantage is that this is so much stuff to fit into a hot dog bun that you’re bound to lose some of it on the plate, but serving hot dogs with a fork to scoop up extra goodies is a small price to pay.

argentinian hot dogs 4

One year ago: Marinated Roasted Tofu
Two years ago: Pasta e Fagioli
Three years ago: Oatmeal Pancakes
Four years ago: Crispy Bagel Sushi Roll
Five years ago: Olive Oil Bread

Printer Friendly Recipe
Argentinian Hot Dogs (from San Jose Mercury News via Oishii)

Makes 8 sandwiches

For the pickled onions:
1 red onion, halved and thinly sliced
¼ cup white wine or champagne vinegar
¼ teaspoon salt
½ teaspoon sugar

For the chimichurri:
2 cloves garlic, peeled
1 bunch parsley leaves
¼ cup extra virgin olive oil
1 small lemon
2 tablespoons red wine vinegar
½ teaspoon red pepper flakes
⅛ teaspoon salt

To assemble:
8 grilled beef hot dogs
8 buns
8 ounces ground chorizo, cooked
8 ounces queso fresco , crumbled

1. For the onions: In a small bowl, combine the onion, vinegar, salt, and sugar. Set aside for at least 15 minutes.

2. For the chimichurri: Add the garlic to a food processor; process until minced. Scrape down the sides of the bowl; add the parsley and process until chopped. Add the remaining ingredients; process to combine.

3. Heat a grill to medium-high heat. Grill the hot dogs until they are browned and heated through, about 5 minutes. Toast the buns on both sides. Transfer the buns and hot dogs to plates. Fill each bun with a hot dog, chorizo, queso fresco, pickled onions, and chimichurri. Serve immediately.

argentinian hot dogs 2

banana cake with cream cheese frosting

banana cake 6

I was very excited about both making and eating this cake, so of course I screwed it up. Things were going suspiciously smoothly while I was baking it, as they should have been, considering that I’d put extra effort into making sure it was an easy process. All that means is that I already had the dry ingredients measured and the rest of the ingredients and equipment out and ready to go, but every little bit helps when you’re squeezing cake-baking into short weekday evenings.

banana cake 1

All I had to do was mix up a simple batter, then make an easy dinner while the cake baked in the oven. The cake was done right about when dinner was, but I thought it might be on the early side of ready, so I left it in the oven for a few more minutes while I served up our meal. I did turn the oven off, but apparently the plate of hot food in front of me was too distracting, because I wandered off to enjoy my dinner, completely forgetting about the cake still in the oven.

banana cake 3

When I took it out, it was more brown than the blonde I had planned on.  Fortunately, bananas keep desserts nice and moist, so even fifteen minutes of extra baking couldn’t ruin this cake. It wasn’t quite as fluffy and tender as I’d been counting on, but it was far from inedible, especially once smeared with cream cheese frosting. I know no one who ate the cake noticed that it wasn’t perfect except for me, and I loved it anyway – not that that means I’ve completely forgiven myself for screwing it up.

banana cake 4

One year ago: Black Bean Avocado Brownies
Two years ago: Almond Biscotti
Three years ago: Oatmeal Raisin Muffins
Four years ago: Tofu Croutons
Five years ago: Potstickers

Printer Friendly Recipe
Banana Cake with Cream Cheese Frosting (adapted from allrecipes via Just Baked)

Makes one 9-by-13-inch pan; 18-24 servings

For the cake:
2 cups (9.6 ounces) all-purpose flour
1 teaspoon baking soda
8 tablespoons (1 stick) unsalted butter, softened
½ teaspoon salt
1¼ cups (8.75 ounces) sugar
2 large eggs, room temperature
1 teaspoon vanilla extract
1 cup mashed ripe bananas (about 3 bananas)
1 cup sour cream, room temperature

For the frosting:
1 (8-ounce) package cream cheese, softened
8 tablespoons (1 stick) unsalted butter, softened
salt
2 cups (8 ounces) powdered sugar
1 teaspoon vanilla extract

1. Heat the oven to 350 degrees. Spray a 9-by-13-inch pan with baking spray (or spray it with regular nonstick spray and distribute flour over the spray). In a medium bowl, combine the flour and baking soda.

2. Place the butter and salt in the bowl of an electric mixer fitted with the paddle attachment. Beat on medium speed for 2 minutes, until light and creamy. Gradually add the sugar to the butter mixture while the mixer is running. Add the eggs one at a time, beating well after each addition. Add the vanilla and banana, mixing until incorporated. With the mixer on low speed, add one-third of the flour mixture, followed immediately by half of the sour cream, mixing just until incorporated. Repeat with another third of the flour and the rest of the sour cream, then the last of the flour. Scrape down the sides of the bowl and mix for 15 seconds longer.

3. Transfer the batter to the prepared pan, smoothing the top. Bake for 30-35 minutes, until a toothpick inserted into the center of the cake comes out clean. Transfer to a wire rack to cool.

4. For the frosting: Place the cream cheese, butter, and a pinch of salt in the bowl of an electric mixer fitted with the whisk attachment. Beat on medium-high speed until creamy, about 1 minute. Gradually add the powdered sugar, and mix on medium-high speed until smooth, about 2 minutes, scraping the sides of the bowl as necessary. With the mixer on medium-low speed, blend in the vanilla. When the cake has cooled completely, spread the frosting evenly over the surface. Cut the cake into squares and serve.

banana cake 5