Archives for March 2014

corn tortillas

corn tortillas 18

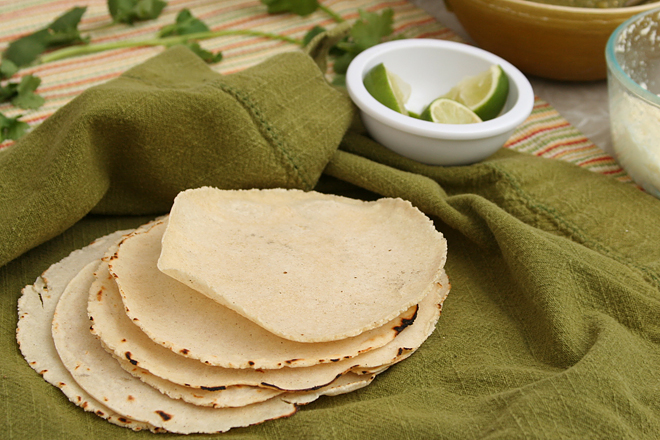
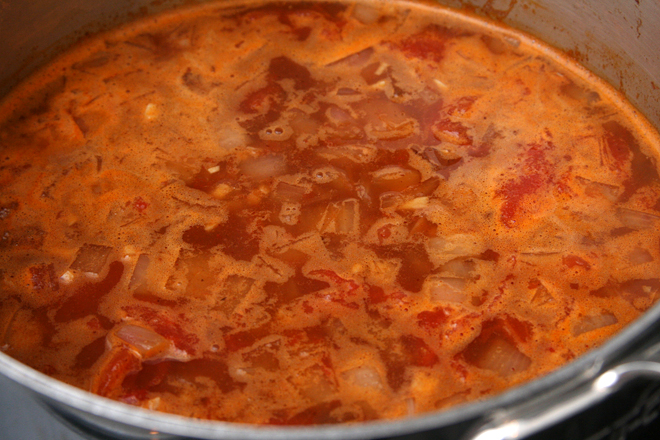
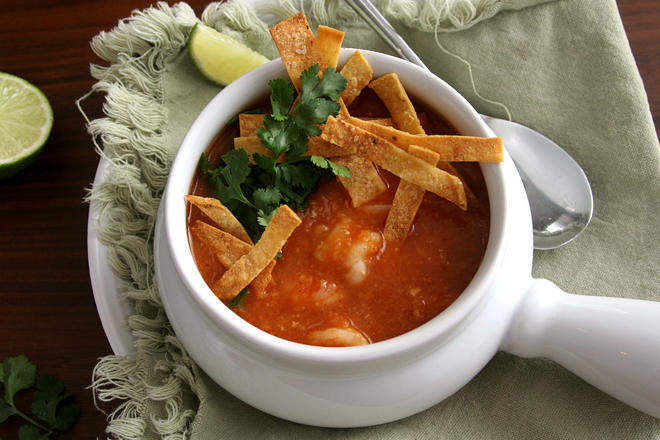
I don’t want to get melodramatic here, but these are almost life-changing. Certainly dinner-changing, and especially taco-changing.

corn tortillas 4

I have told you before about my quest for the best way to soften store-bought corn tortillas. My favorite method had to be effective and easy without adding a ton of fat. Fried tortillas are so good, but a significant amount of work, and obviously not healthy.

corn tortillas 8

I tried heating them under a damp kitchen towel, which worked okay, but the tortillas could get soggy and limp. The best I’d found was to spray both sides of the tortillas with oil and bake them until pliable but not crisp. Besides the addition of some, although not a lot, of fat, my biggest problem with this was that the tortillas would occasionally get too crisp to fold, and sometimes would just get chewy.

corn tortillas 11

Okay, so making fresh tortillas isn’t all that easy. But they’re so good – even as good as real deep-fried tortillas – and so healthy (no fat, whole grains), that I’ll spend the extra 15 minutes making them, even on a weeknight. If I only make enough for one meal, for the two of us, it isn’t so bad – just mix up two ingredients, maybe three if you want to add a pinch of salt, let it rest for a few minutes while you chop some taco fillings, roll it into balls, smash it with a tortilla press, sear it on a hot comal (or skillet) for a minute.

corn tortillas 12

As soon as you mix the masa harina with water, the dough will smell like the best corn tortillas, before you even cook them. Once you add some smoky char from the hot pan, then wrap them around fillings while they bend without breaking, you’ll see what I mean about a dinner-changing experience. But considering how often we make tacos now and how much better they are, life-changing isn’t too far of a stretch for me.

corn tortillas 14

Printer Friendly Recipe
Corn Tortillas (adapted from Serious Eats)

Makes 8 tortillas

I confess I have some specialized tools for tortillas. The cleaning lady at my office gave me the comal; she had two and hates to cook. I’m sure a cast-iron skillet will work just fine. I haven’t tried making tortillas without a press, but supposedly you can smash them under a skillet. They won’t get as thin, but a thicker fresh tortilla is still better than anything you can buy. The last item isn’t so special – just a scale – but I’ve had much more consistent results with getting the dough to the right hydration with a scale than I did with measuring cups.

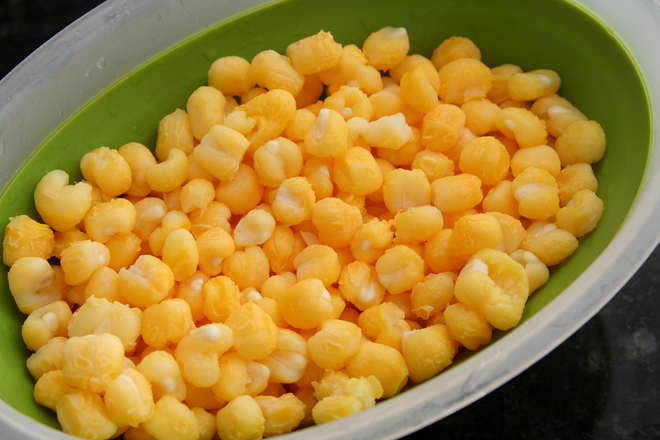
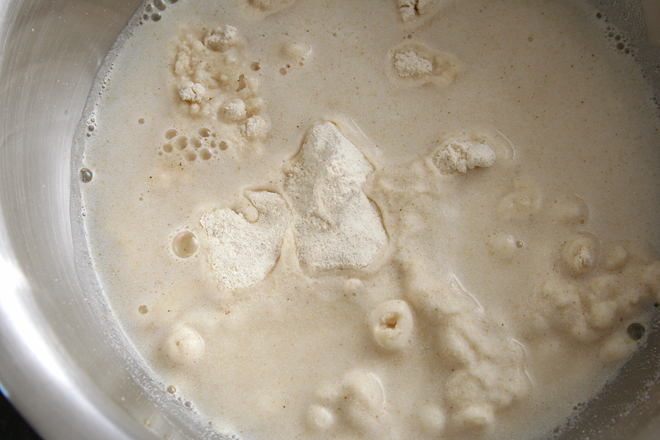
4 ounces (about ¾ cup) masa harina
5 ounces water
pinch salt

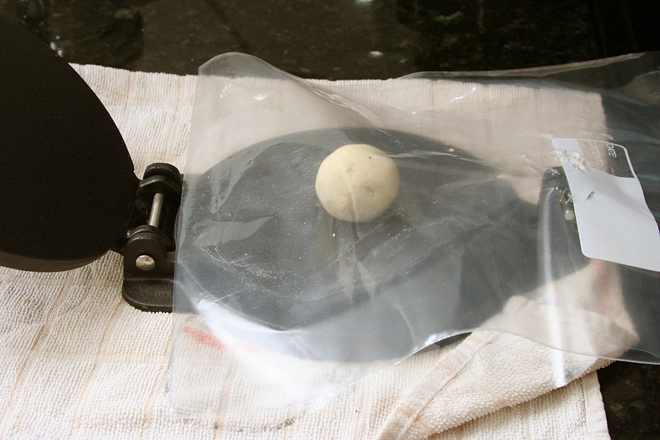
1. In a medium bowl, mix the three ingredients until large crumbles form, then bring the dough together into a ball. Wrap in plastic wrap and set aside for ten minutes. Meanwhile, cut both sides of a gallon zip-top bag. Transfer the bag to a tortilla press with the crease of the bag at the hinge of the press.

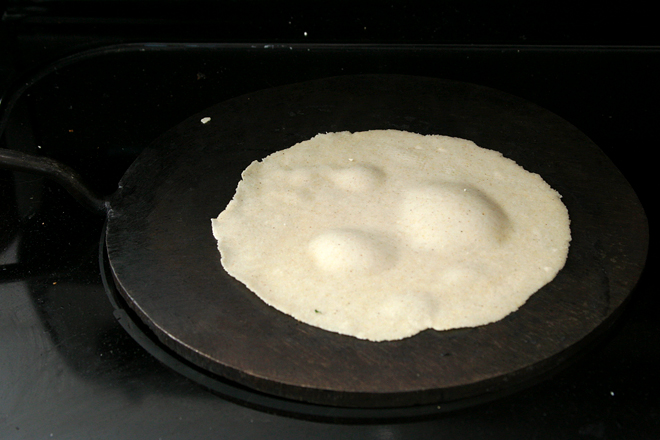
2. Heat a not-nonstick skillet (preferably cast iron) over medium-high heat for at least 5 minutes.

3. Divide the dough into 8 equal portions. Roll each portion into a ball.

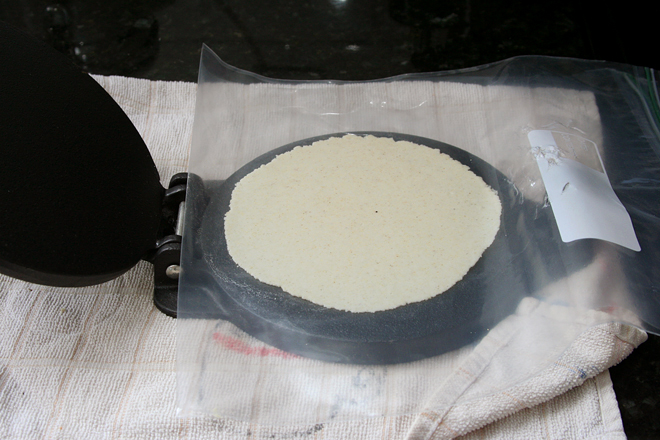
4. Place a ball onto the plastic-lined tortilla press, slightly off-center toward the hinge of the press. Press the tortilla just until it shows around the edges of the tortilla press. Open the press, peel the plastic wrap off the top of the tortilla, and invert the tortilla, still on the plastic, onto a towel. Slowly peel the plastic off of the tortilla. Replace the plastic in the tortilla press and repeat with the remaining balls of dough.

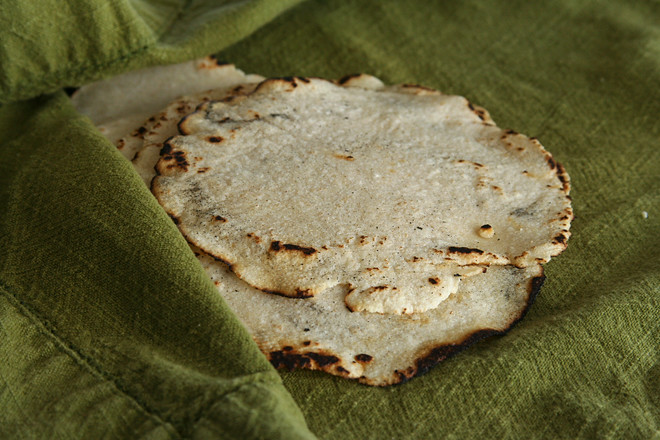
5. Transfer one tortilla to the hot pan; cook, without moving, until the tortilla bubbles and smokes, 30 seconds to 1 minute. Using a thin spatula, flip the tortilla; cook for another 15 to 30 seconds. Transfer the tortilla to a kitchen towel, wrapping it loosely. Repeat with the remaining tortillas, stacking them in the towel.

6. Let the tortillas sit in the towel to steam for a few minutes after the last tortilla is cooked, then serve. Kept wrapped, the tortillas will stay warm for about half an hour.

corn tortillas 1

beer ice cream

beer ice cream 3

I wish I could think of a more appetizing name for this. If I’d used one of the chocolate porters in my fridge, I could have called it Chocolate Porter Ice Cream, which sounds good, because, you know, chocolate. Scotch Ale Ice Cream sounds marginally better, but this recipe isn’t limited to scotch ales. A variety of beers can be used, and therefore Beer Ice Cream really is the most appropriate name.

beer ice cream 2

Not necessarily any beer can be used though. You want something full-flavored, but not too hoppy. IPAs are out. The original recipe specifically recommends Samuel Smith’s Yorkshire Stingo, with Oskar Blue’s Old Chub Scotch Ale as a close second. I happened to have a can of Old Chub in the fridge, and, bonus, we were celebrating my friend’s birthday by drinking beer, and this is one of his favorites.

beer ice cream 1

So beer ice cream sounds a little weird, and to be honest, it tasted a little weird right after I mixed up the custard. Once I froze it though, it was much better; it almost had a caramel flavor to it, with a little extra something. No matter what you call it, it’s a great match for chocolate stout cake.

beer ice cream 4

Printer Friendly Recipe
Beer Ice Cream (slightly adapted from America’s Test Kitchen Feed)

Makes about 1 quart

ATK notes: This recipe is best made with a malty beer that is 8–11% ABV. Avoid overly hoppy beers since hops become bitter once cooked. Make sure to cook the custard slowly in step 3 so that it thickens properly, which will ensure a creamy, rich-tasting ice cream.

The article accompanying this recipe has some specific recommendations for beer options to use.

12 ounces 8-11% ABV beer
1 teaspoon vanilla extract
¾ cup sugar
½ teaspoon kosher salt
6 large yolks
2 cups heavy cream

1. Pour 5 ounces of the beer into an 8-inch skillet and bring to a simmer over medium heat. Simmer until the beer is reduced by half, about 10 minutes, lowering the heat as necessary to avoid creating too much foam. Mix the reduced beer with the remaining 7 ounces of beer; add the vanilla and stir to combine.

2. Place a fine-mesh strainer over a medium shallow bowl. In a large bowl, prepare an ice bath.

3. In a large saucepan, whisk together the sugar, salt, and egg yolks until smooth. Whisk in the cream and cook, stirring constantly, over medium-low heat, until the mixture thickens to a custardy consistency and registers 180 degrees on an instant-read thermometer, about 10 minutes. (The custard should coat the back of a spoon so that dragging your finger through the custard on the spoon’s back leaves a visible trail).

4. Immediately pour the mixture through the strainer into the shallow bowl. Whisk in the beer mixture, and set the bowl into the ice bath. Whisk occasionally until the custard reaches room temperature, then cover tightly with plastic wrap and refrigerate for at least 8 hours.

5. Freeze the custard in an ice cream maker according to the manufacturer’s instructions. Transfer to a glass or plastic container, pressing plastic wrap or waxed paper against the surface of the ice cream, and cover with a tight-fitting lid. Freeze until firm, at least 8 hours and preferably 24 hours. Ice cream will keep, frozen, up to 5 days.

chocolate stout cake

chocolate stout cake 6

We celebrated my friend’s 40th birthday by eating meat and drinking beer. He’s a hunter with friends who are hunters, so we had two types of venison, Barbary sheep, rabbit, quail, partridge, and dove. We also compared ten different stouts. It was a nice manly birthday party.

chocolate stout cake 2

Obviously chocolate stout cake is the perfect birthday cake for Game and Stout Night. (And just wait until I tell you about the perfect ice cream for Game and Stout Night.) For one thing, a glazed bundt cake is simple to put together compared to a layered, filled, iced, and decorated cake, which was good because I also contributed baguettes, ravioli filled with homemade venison sausage, and ice cream.

chocolate stout cake 5

Small slices of bundt cake are also easier to handle than a triple-layer wedge of cake when you’ve been eating meat and drinking heavy beer all night. But there’s a lot of flavor packed into a small serving, with lots of rich chocolate and a hint of bitterness from the stout and the espresso powder in the glaze. I left the leftovers with the hosts, and I was so annoyed the next morning when I didn’t have any cake to eat with my coffee, but at least it was the perfect cake for Game and Stout Night.

chocolate stout cake 8

Printer Friendly Recipe
Chocolate Stout Cake (via Bon Appetit via Smitten Kitchen)

Cake:
2 cups (9.6 ounces) all-purpose flour
2 cups (14 ounces) granulated sugar
1½ teaspoons baking soda
¾ teaspoon salt
1 cup stout (such as Guinness)
16 tablespoons (2 sticks) unsalted butter
¾ cup unsweetened cocoa powder (preferably Dutch-process)
2 large eggs, room temperature
⅔ cup sour cream

Glaze:
6 ounces good semisweet chocolate, chopped
6 tablespoons heavy cream
¾ teaspoon espresso powder

1. For the cake: Heat the oven to 350 degrees. Spray a bundt pan with baking spray, or spray with cooking spray and then dust with flour. In a small bowl, whisk together the flour, sugar, baking soda, and salt.

2. In a medium saucepan over medium heat, heat the stout and butter together until the mixture comes to a simmer; add the cocoa powder and whisk until smooth; set aside to cool slightly.

3. In a large bowl, whisk the eggs and sour cream until smooth. Slowly whisk in the stout mixture. Add the flour mixture; using a rubber spatula, fold the flour into the batter until just combined. Pour the batter into the prepared pan and smooth the top.

4. Bake until a toothpick inserted into the center of the cake comes out clean, 50 to 60 minutes. Cool the cake on a rack for 10 minutes, then invert onto the rack to cool completely.

5. For the glaze: In a heatproof bowl set over a saucepan containing 1 inch of simmering water, melt the chocolate, cream, and espresso powder until smooth and glossy. Drizzle over cooled cake.

chocolate stout cake 7

shrimp tortilla soup

shrimp tortilla soup 5

Hominy. It just isn’t one of my favorites. It’s no green pepper – blech – but I struggle with the texture. I don’t want soggy popcorn in my soup. I’ve never cooked with it myself, and I almost left it out of this soup – until I saw that it was pureed. That seemed safe enough.

shrimp tortilla soup 1

When I opened the can to make dinner, I noticed that hominy smells like one of my favorite foods – fresh corn tortillas. It’s the same nixtamalization process that it used for masa harina, and I love that intensely corny aroma.

shrimp tortilla soup 2

It was great in this soup; pureeing the hominy binds the broth together and makes it thick but not starchy or gloppy. And now that I know how good hominy tastes, I might try it whole. I could learn to like hominy after all…unlike green peppers, which are a lost cause.

shrimp tortilla soup 3

Printer Friendly Recipe
Shrimp Tortilla Soup (adapted from America’s Test Kitchen’s Simple Weeknight Favorites via Pink Parsley)

4 main course servings

4 (6-inch) corn tortillas
1 tablespoon vegetable oil, plus more for spraying the tortillas
salt
1 large onion, diced
4 garlic cloves, minced
1 teaspoon ground cumin
1 teaspoon chili powder
1 chipotle chile in adobo sauce
4 cups low-sodium chicken broth
2 (15-ounce) cans hominy, drained and rinsed
1 (14.5-ounce) can diced tomatoes (preferably fire-roasted)
2 pounds shrimp, peeled, deveined, and tails removed, halved crosswise
¼ cup chopped fresh cilantro
2 tablespoons fresh lime juice

1. Heat the oven to 425 degrees. Spray the tortilla strips with oil (or nonstick spray) and season with salt. Halve and cut crosswise into ¼-inch strips. Arrange in a single layer on a baking sheet and cook until deep-golden brown and crispy, 10 to 12 minutes, tossing halfway through.

2. Meanwhile, heat the remaining 1 tablespoon of oil in a large pot or Dutch oven over medium-high heat. Add the onion and cook until softened, about 4 minutes. Add the garlic, cumin, chili powder, and chipotle chile; cook, stirring constantly, until fragrant, about 1 minute. Add the broth, hominy, and tomatoes. Increase the heat to medium-high and bring to a simmer, then reduce the heat to medium-low; cover and simmer for 15 minutes.

3. Puree the soup, either with an immersion blender or by transferring it in batches to a standup blender. Add the shrimp and cook, stirring occasionally, until they are just cooked through and opaque, about 3 minutes. Remove from heat and stir in the cilantro and lime juice. Serve immediately, topping each portion with tortilla strips.

shrimp tortilla soup 4

walnut cinnamon slices

walnut cinnamon slices 5

I was kind of embarrassed by these cookies. Or maybe I was embarrassed for them. They’re so plain. And brown. And not even the deep, rich, tempting brown of chocolate.  More like a pale, flat beige.

walnut cinnamon slices 2

For all that, they’re surprisingly delicious. Well, I wasn’t surprised, because the recipe is from Tartine, and that cookbook is full of home runs. The cookies are so soft and tender, but not too fragile to pile into a plastic container and bring to a wine-tasting party to share with friends.

walnut cinnamon slices 3

They’re a great match for wine, and not one cookie was left by the end of the night. Which is probably for the best, but I admit I was disappointed that I couldn’t have one with coffee the next morning. I guess cookies don’t need to be flashy as long as they’re buttery and sweet, lightly spiced and studded with meaty walnuts.

walnut cinnamon slices 4

Printer Friendly Recipe
Walnut Cinnamon Slices (slightly adapted from Tartine)

Makes about 3 dozen cookies

Dough:
9 ounces (1¾ cups) all-purpose flour
¾ cup (3 ounces) walnuts, coarsely chopped
½ teaspoon ground cinnamon
¼ teaspoon baking soda
11 tablespoons butter, at room temperature
⅔ cup (4.65 ounces) sugar
1 large egg
½ teaspoon salt

Sugar coating:
1 egg yolk
1 tablespoon heavy cream
1 cup (7 ounces) sugar

1. In a medium bowl, mix the flour, walnuts, cinnamon, and baking soda; set aside.

2. In a stand mixer fitted with the paddle attachment, beat together the butter and sugar until it is blended and creamy but not too aerated. In a small measuring cup, whisk together the egg and salt. Slowly pour the egg mixture into the butter mixture, still beating on medium speed. Reduce the speed to low and add the flour mixture, beating until just combined.

3. Working on a large sheet of parchment paper, shape the dough into a rectangular log about 18 inches long with one side 2 inches wide and the other 1 inch wide. Wrap tightly in parchment paper or plastic wrap and refrigerate until firm, about 4 hours.

4. Preheat the oven to 325 degrees. Line a baking sheet with parchment paper or a silicone mat.

5. To make the sugar coating, whisk the egg yolks and cream together in a small bowl. Spread the sugar on a rimmed baking sheet. Unwrap the dough and brush the log well but sparingly with the egg wash. One at a time, dredge the log in the sugar, coating evenly on all sides. Cut crosswise into ¼ to ⅓-inch slices. Arrange the rectangles on the prepared baking sheet.

6. Bake until the edges are golden but the centers remain pale, 7-10 minutes. Transfer the cookies to a wire rack and let cool.

walnut cinnamon slices 6