Archives for December 2015

salted chocolate caramels

chocolate salted caramels 5

It might be silly, but one of the things I was the most upset about when my house got flooded was that I wouldn’t be able to do all of the Christmas baking I’d planned. I didn’t enjoy sharing a hotel room with two cats who take out their anxiety by playing in the litter box in the middle of the night, I don’t like the concrete floors in my house, and I wish my favorite black boots hadn’t been among the many casualties, but it was the baking that I kept coming back to. I started planning my holiday baking in October; I remember trying to order packaging and not being able to find anything but Halloween themes. (I did order packaging in early November, but it unfortunately was another casualty and had to be reordered.)

chocolate salted caramels 1

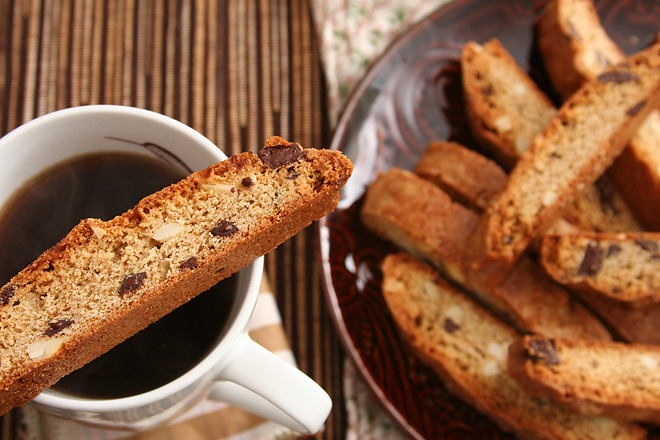
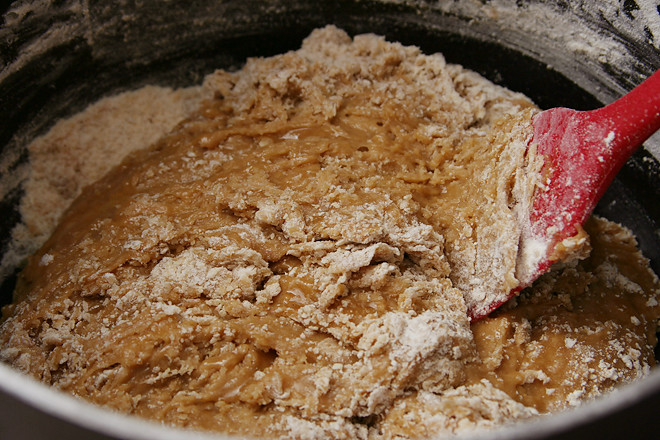
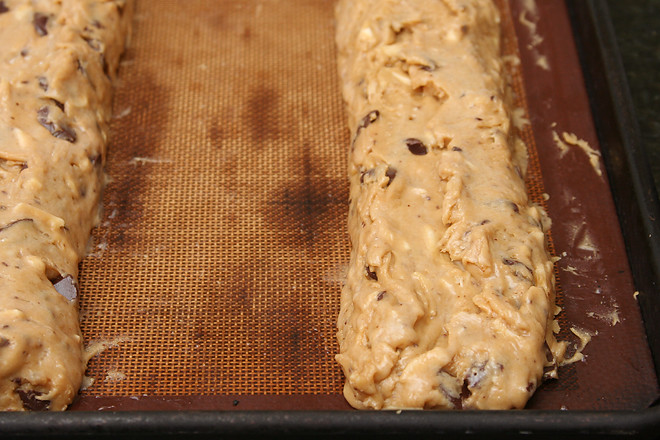
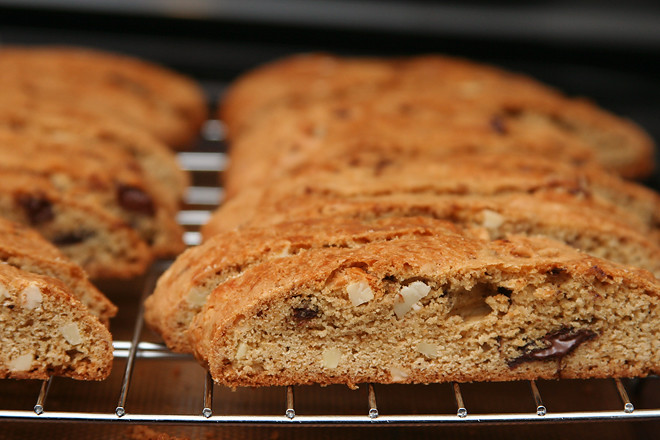
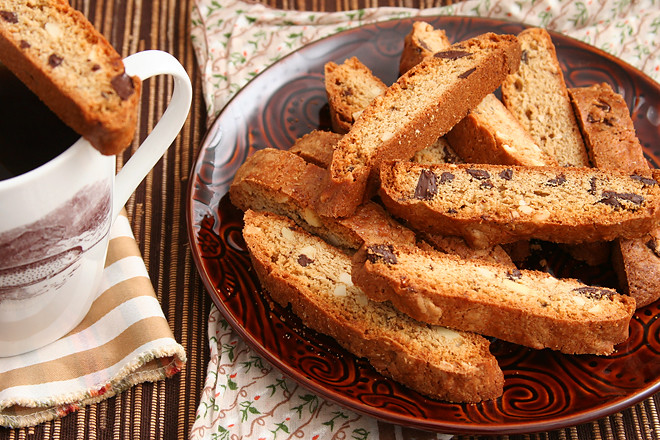
But a little flood damage can’t hold me back. The weekend we were stuck in a hotel while contractors tore out our carpet and cut the bottom two feet from all the walls, a friend of ours was going out of town and was generous enough to give us the keys to his house. His kitchen didn’t give me much to work with – I was able to carve out just a few square feet of workspace – but when there’s a will, there’s a way. In that tiny kitchen, I baked cranberry-orange bread, mocha biscotti, and lemon spritz wreaths, which actually put me ahead of the schedule I’d originally planned for the month.

chocolate salted caramels 2

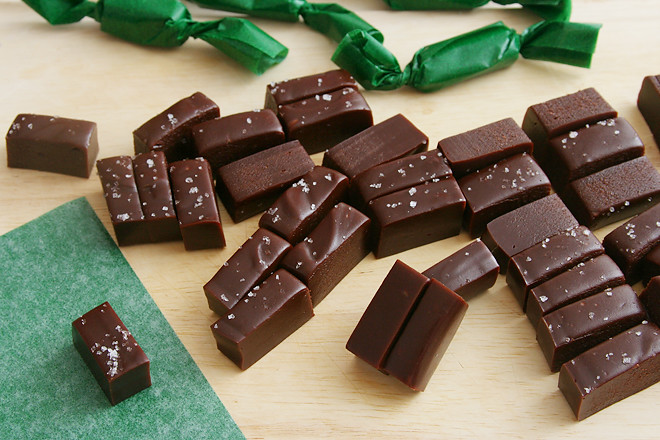
We’ve now spent two weeks at home in our torn up house before construction starts, and I was able to make almost everything else I’d planned, including a tiered Christmas tree cake for the office holiday party, which I got the idea for all the way back in the summer. (Fortunately, the cakes were already baked and in the freezer, but decorating it was not trivial.) These caramels were the last treat I needed to make, and I had the recipe picked before I read the very mixed reviews – about half of the reviewers raved, but the other half had massive failures. I had neither the time nor the mental fortitude for a failure.

chocolate salted caramels 3

Fortunately, the recipe came together perfectly. I wasn’t expecting it to take quite so long for the chocolate-caramel mixture to reach the right temperature, but I knew how important that was, since most of the problems people had were with the consistency of the final caramels, which is based on that temperature. Another problem I read about was butter separating from the caramel mixture after it had hardened. I remembered all of the pan sauce recipes that specifically call for cold butter because it emulsifies better and was sure to keep my butter, cut into tiny cubes, in the fridge until I was ready for it. I don’t know if it was that, or if the universe is just cutting me a break after a rough month, but I’m grateful for a recipe that came together easily and flawlessly, so I was able to finish my holiday baking and enjoy the part of the season I was looking forward to the most.

chocolate salted caramels 4

Printer Friendly Recipe
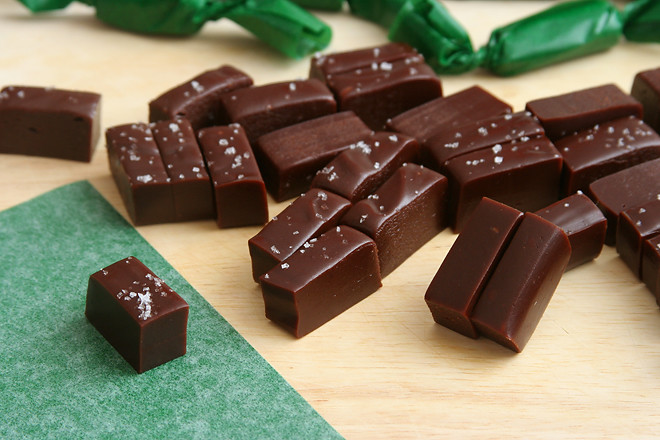
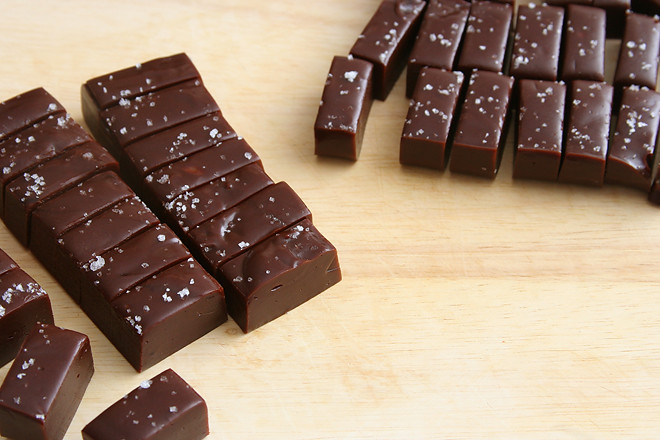
Chocolate Salted Caramels (adapted from Gourmet via Smitten Kitchen)

64-96 candies, depending on how you cut them

Here’s what I’ve changed: reducing the final temperature to 246 degrees, based on many reviews that said their candies were too hard at 255 degrees; keeping the butter cold before adding it; and putting more salt into the mixture and less salt on top.

2 cups heavy cream
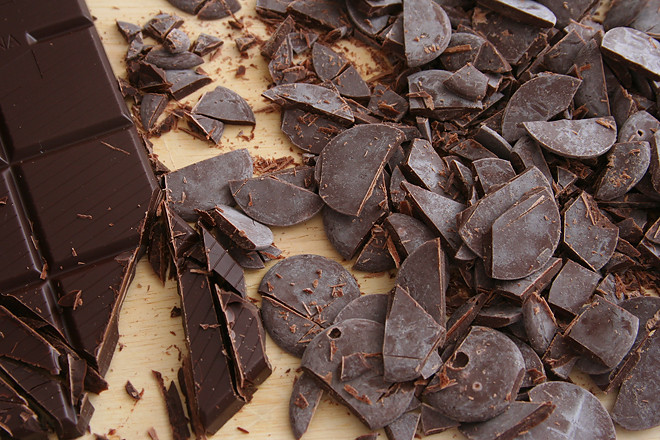
10½ ounces bittersweet chocolate, chopped
1¾ cups (12.25 ounces) granulated sugar
½ cup light corn syrup
¼ cup water
1 teaspoon flaky salt, plus more for garnish
2 tablespoons unsalted butter, cut into ¼-inch diced, cold

1. Line the bottom and sides of an 8-by-8-inch square pan with two sheets of crisscrossed parchment paper.

2. In a 1- or 2-quart saucepan over medium-high heat, bring the heavy cream to a simmer. Remove from the heat and add the chocolate. Let set for 1 minute, then stir the cream and chocolate together until evenly mixed.

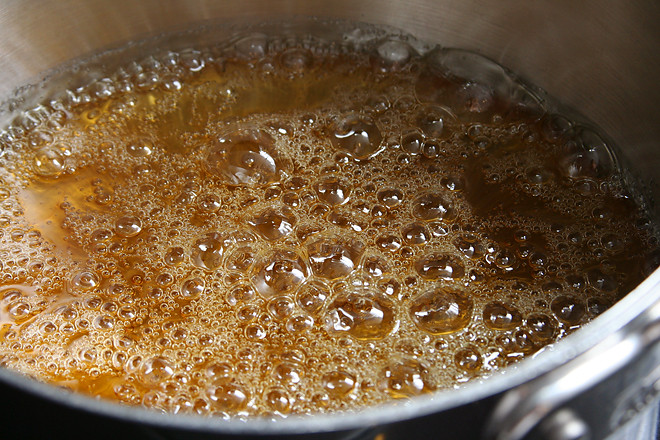
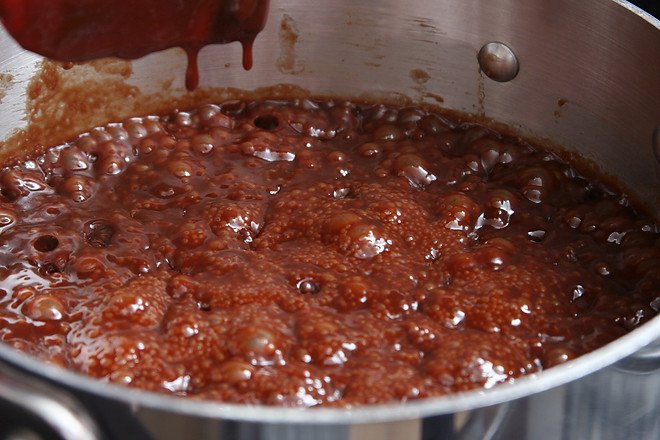
3. In a 3-quart saucepan over medium-high heat, combine the sugar, corn syrup, water, and 1 teaspoon salt. Bring to a simmer, then reduce the heat the medium. Simmer, occasionally swirling the pan or stirring with a metal spoon, until the mixture is reddish-amber in color. Immediately add the chocolate mixture; the caramel with bubble vigorously. Continue to cook over medium heat, stirring very frequently, until the mixture reads 146-148 degrees on an instant-read thermometer, 10 to 15 minutes. Remove from the heat and stir in the butter.

4. Immediately pour the mixture into the prepared pan. Let set for 10 minutes, then sprinkle with flaky salt. Let cool on a wire rack for at least 2 hours before cutting and serving. Wrapped tightly, the caramels with keep for about 2 weeks.

chocolate salted caramels 6

julia child’s boeuf bourguignon

boeuf bourguignon 6

I wanted winey beef stew. I knew there were easier recipes out there, and maybe even better recipes, but Julia Child’s boeuf bourguignon is a bucket list recipe for me. I guess sometimes I can’t resist using every pot and skillet I own just to make one dish.

boeuf bourguignon 3

But it was worth it for one single thing I learned from this recipe: how to enjoy pearl onions. The French seem to love using them in their fancy braises, but I’ve never liked their texture in the coq au vin or other beef burgundy recipes I’ve tried. Instead of the quick saute most recipes call for, Julia braises them in broth for almost an hour. At the end, they’re meltingly tender – okay, maybe they’re mushy. But that’s a lot better than the feeling that there are crunchy eyeballs in my stew. They also soak up meaty flavor from the broth, which doesn’t hurt matters.

boeuf bourguignon 1

Other than that, the stew was very good, but probably not any better than my favorite pot roast recipe. Am I allowed to say that about one of Julia Child’s most famous recipes? It’s not that it wasn’t good, because I always really enjoy braising beef in wine. It’s just that I also enjoy using one pot for that braise. But now I can check this one off the bucket list, and that, plus those soft pearl onions, makes this a win.

boeuf bourguignon 7

Julia Child’s Boeuf Bourguignon (adapted from Mastering the Art of French Cooking)

Serves 4

I liked the onions a lot, but I would have preferred the mushrooms cooked until they were drier and browner.

6 ounces (about 6 slices) bacon, sliced ¼-inch thick
2 tablespoons vegetable oil, divided
3 pounds chuck roast, trimmed, cut into 2-inch cubes
salt
1 large or 2 small carrots, cut into ½-inch dice
1 medium onion, diced
ground black pepper
2 tablespoons flour
1 (750-liter) bottle medium red wine, such as pinot noir, cotes du rhone, or chianti
2 cups beef broth, plus ½ cup to cook the onions
1 tablespoon tomato paste
2 cloves garlic, smashed
1 bay leaf
4 tablespoons butter, divided
24 pearl onions, peeled (or frozen)
1 sprig fresh thyme
1 small bay leaf
4 sprigs parsley, plus more for garnish
1 pound mushrooms, halved or quartered in large

1. Heat the oven to 450 degrees. In a medium saucepan over high heat, bring the bacon and 6 cups of water to a simmer. Reduce the heat to medium and simmer for 10 minutes. Drain and dry the bacon. In a 5-quart Dutch oven over medium heat, cook the bacon until it’s slightly browned, 2 to 3 minutes. Use a slotted spoon to remove it from the pot, leaving the rendered fat in the pot; set the bacon aside.

2. Add 1 tablespoon of oil to the pot with the bacon fat and heat over medium-high heat until just smoking. Season the beef generously with salt. Add half of the beef in a single layer, leaving space between each piece. Cook without moving until the bottom side is browned, about 2 minutes. Rotate each piece, searing and rotating until all sides are browned. Transfer to a plate and repeat with the remaining beef.

3. Add the carrots and diced onion to the pot and cook until lightly browned, about 2 minutes. Return the beef and bacon to the pot with the vegetables; add 1 teaspoon salt and ¼ teaspoon ground black pepper; stir to combine. Sprinkle the flour evenly over the mixture; stir to evenly distribute the flour. Transfer the pot to the oven and cook for 4 minutes. Stir, then cook in the oven for an additional 4 minutes. Transfer the Dutch oven back to the stove. Reduce the oven temperature to 325 degrees.

4. Add the wine and 2 cups of broth to the pot with the beef and vegetables. Add the tomato paste, garlic, and herbs. Bring to a simmer over medium-high heat. Cover the pot, transfer it to the oven, and cook until the meat is tender, 2½ to 3 hours, stirring about once an hour.

5. Meanwhile, in a medium skillet over medium heat, melt 2 tablespoons butter. Add the pearl onions and cook, stirring frequently, until they’re browned. Add ½ cup of broth, the thyme, bay leaf, parsley, and a generous sprinkling of salt, then cover the skillet, reduce the heat to low, and cook until the onions are very tender, about 40 minutes. If there is any liquid left in the pan at this point, let it evaporate. Set aside.

6. In a medium skillet over high heat, heat 2 tablespoons butter and the oil. Add the mushrooms and cook, stirring constantly, until they are lightly browned, 4 to 5 minutes. Set aside.

7. Remove the Dutch oven from the oven. Strain the liquid into a separate saucepan, returning the beef and bacon to the Dutch oven or a serving dish. Add the mushrooms and onions to the beef. Skim the liquid in the saucepan of fat and simmer until it’s reduced to about 2½ cups and is thick enough to lightly coat a spoon. Pour the reduced sauce over the meat and vegetables. Serve, topped with minced parsley.

boeuf bourguignon 8

quinoa with roasted brussels sprouts, pine nuts, and parmesan

quinoa brussels sprouts pine nuts 4

We had a great visit with family over Thanksgiving, but not nearly so nice a homecoming. Instead of the hour or two of relaxing we were picturing after a long day of travel home, we had half an inch of water covering the entire house, caused by a leak in the hose that feeds the refrigerator’s icemaker. This also put a kink in my plans to eat healthier after a week of pie, cookies, and cheesecake.

quinoa brussels sprouts pine nuts 1

Fortunately, I hoard freezer meals. If I make a recipe that freezes well and makes enough for multiple meals, I freeze some, but then I have trouble convincing myself to ever eat them. What if I need those one day?

quinoa brussels sprouts pine nuts 2

Well, I need them now. We ate hastily defrosted chili in between stunned shop-vaccing the first night, squash-black bean burritos the next night while we watched contractors cut into the walls and set out fans, and four cheese lasagna over the weekend when we were staying in a hotel but had an out-of-town friend’s housekey.

quinoa brussels sprouts pine nuts 3

I’m quickly depleting my freezer stash, so while things are somewhat stabilized and we’re living at home in our torn up house before reconstruction begins, I’m still keeping things very simple. This has become a staple. It’s not quite as easy as dumping a ziploc bag of stew into a pot and heating it up, but it’s straightforward enough to make in a kitchen full of boxes in between doing load after load of laundry. Best of all, it tastes like comfort food to us – maybe not tomato soup and grilled cheese level of comfort, but close enough for something so healthy. But now it’s time to start thinking about building my freezer stash back up to help get us through reconstruction.

quinoa brussels sprouts pine nuts 6

Printer Friendly Recipe
Quinoa with Roasted Brussels Sprouts, Pine Nuts, and Parmesan (adapted from a recipe I adapted from Gourmet)

Serves 4

1½ cups water
salt
1 cup quinoa, rinsed and drained
2 pounds brussels sprouts, trimmed and halved lengthwise
black pepper
2 tablespoons olive oil, divided
½ cup (6 ounces) pine nuts
2 cloves garlic, minced
¼ teaspoon red pepper flakes
3 tablespoons lemon juice
1 cup (2 ounces) parmesan, shredded

1. Place a rimmed baking sheet in the middle of the oven and heat the oven to 450 degrees. In a large saucepan over high heat, bring the water and ½ teaspoon salt to a boil. Add the quinoa, reduce the heat to low, cover, and cook for 15 minutes. Without removing the lid, remove the pot from the heat and set aside for another 15 minutes.

2. While the quinoa cooks, remove the heated baking sheet from the oven and spread 1 tablespoon of oil over its surface. Place the brussels sprouts on the sheet, generously season with salt and pepper, and stir to coat with the oil. Arrange the sprouts cut-side down. Transfer to the oven and cook for 12 minutes.

3. Meanwhile, in a small bowl, combine the remaining 1 tablespoon olive oil, the pine nuts, garlic, and red pepper flakes. After the brussels sprouts have roasted for 12 minutes, add the pine nut mixture to the baking sheet and roast for an additional 2-3 minutes, until the brussels sprouts are browned and tender and the nuts are just toasted. (Keep an eye on the nuts; they burn easily.)

4. Stir the lemon juice into the quinoa, then add the roasted sprouts and pine nuts and the parmesan. Stir to combine; serve immediately.

quinoa brussels sprouts pine nuts 5

mocha biscotti

cappuccino biscotti 5

My brother isn’t a coffee drinker, but when he travels with me and Dave, he indulges our desire for fancy coffee every morning. In Oregon last fall, he tried a variety of drinks, from the oversugared coffee slushy to a fancy shakerato. He was just going along with the crowd though; none of the drinks seemed to impress him.

cappuccino biscotti 2

In Iceland this summer, however, he settled on one drink, getting a swiss mocha every day with our morning pastries. I hadn’t tried a mocha since high school, but these were good – the bitter espresso balances the sweet hot cocoa. My favorite has always been a good cappuccino, but I even ordered my own mocha one afternoon.

cappuccino biscotti 3

Coffee is often added to chocolate desserts to enhance the chocolate flavor, but it was the coffee that I wanted to stand out here. With plenty of espresso powder and a shot of Kahlua, I think I succeeded. Even a non-coffee drinker would like these – although my brother can no longer count himself in that crowd, because now he makes mochas a regular treat even when he’s not on vacation.

cappuccino biscotti 4

Printer Friendly Recipe
Mocha Biscotti

Makes about 40 biscotti

3¼ cups (15.6 ounces) all-purpose flour
1 tablespoon baking powder
3 large eggs
8 tablespoons (1 stick) unsalted butter, melted
1¼ cups (8.75 ounces) sugar
½ teaspoon salt
1 tablespoon vanilla extract
1 tablespoon Kahlua or coffee liqueur
4 teaspoons espresso powder
6 ounces (about 1 cup) bittersweet chocolate chips or chopped chocolate
3 ounces (about ⅔ cup) slivered almonds

1. Adjust a rack to the middle position and heat the oven to 325 degrees. Line a baking sheet with parchment paper or a silicone mat. In a medium bowl, combine the flour and baking powder. Break the eggs into a small bowl or measuring cup, but do not whisk them together.

2. In a large pot over medium-low heat, heat the butter until it’s just melted. Remove the pot from the heat and stir in the sugar, then the salt, vanilla, Kahlua, and espresso powder. Stir in the egg yolks, then the egg whites, reserving about 1 tablespoon of egg white to use for an egg wash. Stir in the flour mixture until almost combined, then add the chocolate and almonds, folding until evenly combined and there are no pockets of dry flour.

3. Divide the dough into two portions and shape each into a log that is 2-inches wide and as long as your baking sheet. The dough is very sticky; it’s easiest to use a spatula and butter knife to push the dough into position instead of trying to use your hands.

4. Transfer the baking sheet to the oven and bake until just golden, 30-35 minutes. Transfer the pan to a cooling rack and let the loaves cool on the baking sheet for about 5 minutes, then use two spatulas to transfer the loaves from the pan to the cooling rack. Cool completely, about 30 minutes.

5. Place an oven-proof cooling rack on a rimmed baking sheet. Use a sharp knife to cut the loaves into ½-inch slices, on the diagonal if desired. Transfer half of the biscotti to the cooling rack in the pan, spaced about ¼-inch apart. Transfer the pan to the oven and bake for 15 minutes, until the edges just start to brown. (This baking step is to crisp the biscotti, but they’ll still feel somewhat soft when they’re hot.) Repeat with the remaining biscotti. (You can bake all of the biscotti at once if two pans fit on one level in your oven or if you have cooling racks that stack.) Let the biscotti cool completely on the rack before serving.

cappuccino biscotti 7