
Dave’s co-workers tease him about how he always gets to eat gourmet food. “So she makes gourmet lunches for you to bring to work, and then you go home and eat gourmet dinners, and before bed have a gourmet dessert.” Um. Not always. I wonder what they’ll have to say about the leftovers from this meal?

I wasn’t sure what to do with the hot dogs leftover from the franks and beans. In my opinion, the only good way to eat hot dogs is crispy and a bit blackened from a grill or fire, preferably topped with chili. Since I don’t have a grill, my options were limited. Boiled (or worse – microwaved) hot dogs didn’t sound appetizing.
Updated 3/20/09: Also good in mini!
Lemontartlet inspired me to wrap them in bread and bake them. It solves the problem of how to cook the hot dogs indoors, and I guarantee that my homemade bread is far tastier than a storebought hot dog bun. (Lemontartlet used biscuit dough, but I made a yeast bread.)
I based the bread recipe on a recipe for Parker House rolls, thinking that the butter in the recipe would give make it nice and tender, while the sugar would provide the flavor I wanted. It was a perfect match. The bread did expand more than I was expecting when I baked it, and I might (if such a thing is possible) have ended up with too much bread per dog. I’ll adjust the recipe and give better proportions below.

I found that the best method for rolling out the dough was to use my fingertips to flatten the dough balls a bit, and then roll in only one direction. I was using Nathan’s Beef Franks (recommended by Cooks Illustrated and definitely the best hot dogs I’ve had), which I think are a little shorter than most. Most of my rolls ended up just the right width to almost-but-not-quite coat the whole dog.

If you’re a perfectionist and want your pigs perfectly wrapped in those blankets, which I did but I didn’t figure out this trick until the last one, you can roll the bread dough out a little wider than the dog, then fold in the edges and roll a few times in the other (long) direction. You’ll have a more perfect rectangle, which will more perfectly coat your hot dog and evenly distribute your bread. And look a teensy bit better.
Either way, these are super fun, and other than roasting them over a fire until they’re slightly blackened, this has to be my favorite way to eat hot dogs!

Pigs in a Blanket (bread recipe adapted from Ultimate Bread, by Eric Treuille and Ursula Feriggno)
This is enough bread dough for 10 hot dogs. If your package only has 8, you can make dinner rolls out of the remaining dough.
Bread dough:
3 tablespoons unsalted butter
¾ cup milk
1½ tablespoons sugar
2 eggs
3½ cups (17½ ounces) unbleached flour
1½ teaspoons instant yeast
1½ teaspoons salt
10 hot dogs
2 tablespoons milk
1. Heat butter in small saucepan over medium heat until just melted. Add ¾ cup milk and sugar. If butter re-solidifies, heat until it’s completely melted. Remove from the heat and beat in the eggs.
2. Mix flour, salt, and yeast in bowl of standing mixer fitted with dough hook. Turn machine to low and slowly add milk mixture. When dough comes together, increase speed to medium (setting number 4 on a KitchenAid mixer) and mix until dough is smooth, shiny, and elastic, stopping machine two or three times to scrape dough from hook if necessary, about 8 minutes. Knead in extra flour, 1 tablespoon at a time, if the dough is too sticky. The dough should be not be dry, but soft. Turn dough onto lightly floured work surface; knead to form smooth, round ball, about 15 seconds. (Alternatively, you can knead by hand for 10 minutes.)
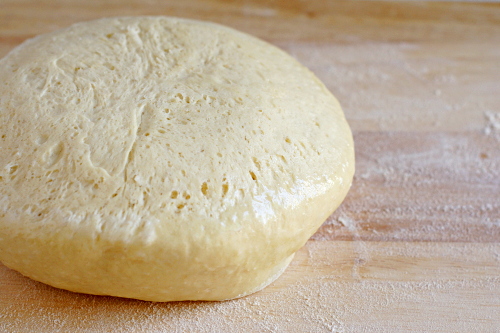
2. Place dough in very lightly oiled bowl, rubbing dough around bowl to lightly coat. Cover bowl with plastic wrap; place in warm, draft-free spot until dough doubles in size, about 1-1½ hours.
3. Divide the dough into 10 pieces. Shape each piece into a smooth ball. Let rest 10 minutes. Line baking pan with silicon baking mat or parchment paper.
4. Flatten each piece into a rough rectangle using the tips of your fingers. Roll in one direction until dough is ¼-inch thick. Roll in opposite direction (across shorter width) a few times, then fold in long edges to make perfect rectangle. Roll in long direction until dough is 1/8-inch thick. Place 1 hot dog near a short end, then tightly roll, keeping the tips of the hot dog exposed. Place seam side down on prepared baking pan. Repeat with remaining dough and hot dogs.
5. Cover with plastic wrap and let rise until dough is slightly inflated, about 30 minutes. Meanwhile, heat oven to 375 degrees.
6. Brush the dough with milk. Bake for 20-25 minutes, until golden. Let cool 15 minutes before serving.


