summer fruit galette (twd)

It’s safe to say that this Summer Fruit Galette, chosen for TWD by Michelle, wasn’t my best effort. My baking has gotten really out of control lately – my freezer is full of cupcakes, cookies, muffins, and breads. There’s cookie dough and half a cake in my refrigerator. (But I finally found someone to offload some of this excess onto, so I’m excited about that!) My capacity to bake has far outstripped our capacity to eat. I thought the galette would fit into this pattern perfectly because I could pare down the recipe, which would be tricky with a regular pie.

Last time I made Dorie’s pie crust, I was pretty happy with it, but was put off by the shortening. Mari suggested substituting lard for the shortening, and since the galette uses the same dough as the blueberry pie did, I had that opportunity. I didn’t notice any big differences between the crusts made with shortening and with lard – they seemed equally easy to work with and flavorful. But a few weeks ago, I had noticed two or three TWD members who had problems with the pie crust sort of melting in the oven, and I had a little of that problem this time. In short, I’m going to stick with my old favorite pie crust. They’re both good, but I’ve been using that one for years and I’ve always been happy with it. (I’ll put it on my blog at some point or another – probably the next pie recipe TWD makes.)

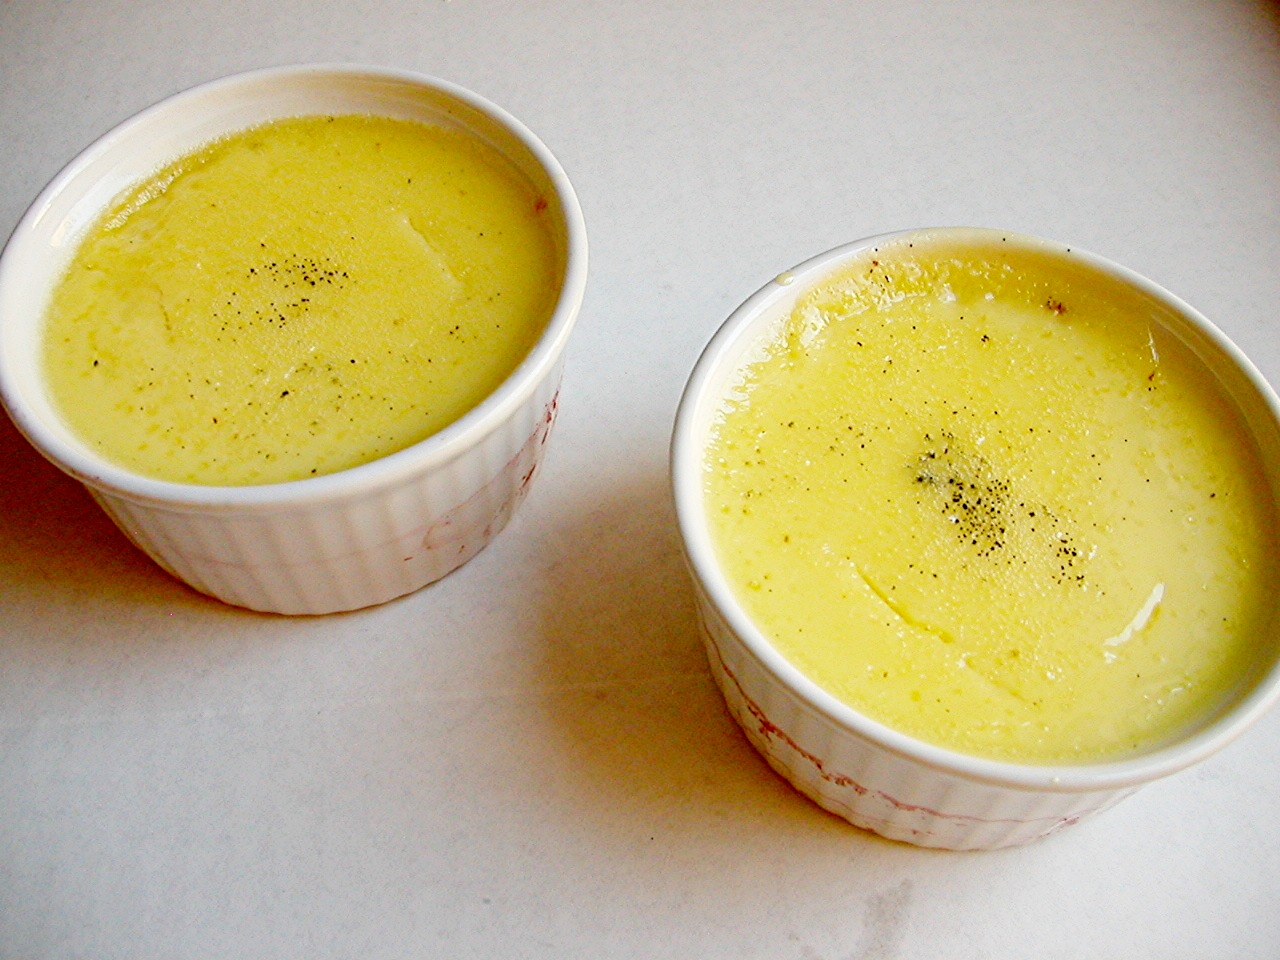
The rest of my problems with the galette were my fault. I only made a quarter of the recipe, and I’m afraid that that’s an impractically small fraction. The ratio between the area necessary to hold fillings and the area necessary to pleat the edges gets thrown off, and you end up with far more crust per filling than the recipe intended. And one of the parts of this recipe that I was very interested in was the custard topping that gets poured over the fruit, but again, with so little filling exposed, I was only able to dribble in the slightest amount of custard mix before it overflowed and made a mess.

Despite all of my foibles making this dessert, I still really enjoyed it. I can tell the potential for a really amazing dessert is there. This is another example of how Dorie takes just a few ingredients and shows them off to their best advantage.

The recipe can be found on Melissa’s website.

chocolate pudding (twd)

Melissa’s TWD pick of chocolate pudding really hit the spot for me this week. I hadn’t made anything chocolately in a while, and something smooth and cool like pudding is perfect for the hot summer weather right now. Also, as much as I like to cook, it’s nice to have something simple every once in a while.

Oh, except that I’m incapable of keeping things simple in the kitchen. I’ve had my eye on the chocolate pudding recipe that Deb posted a few months ago. Deb was looking for an easy pudding recipe after making her way through a disappointing one that sounds suspiciously familiar now that I’ve made Dorie’s pudding recipe. Deb’s pudding looks dark and chocolately and delicious, and as an added bonus, there’s no egg yolks to mess with. I decided to make both recipes and compare them. (I made a third recipe as well, but it didn’t set properly, so I’m not going to review it on the assumption that I screwed something up.)

Both puddings had their strong points. The eggless pudding had a much darker chocolate flavor, which I like but Dave isn’t crazy about. It was also really firm. Overall, it reminded me more of chocolate pots de crème than good ol’ pudding. In contrast, the chocolate flavor of Dorie’s pudding seemed weak, at least to me. However, the texture was that of a perfectly smooth and refreshing pudding.

Clearly, Dorie’s recipe requires more effort, what with moving the pudding back and forth between the food processor and the stove. I haven’t decided if it was worth it. I’d like to take Deb’s recipe (or maybe the third recipe I tried, which was similar), and tweak it. I think if I just add a little more milk, it won’t be so overpoweringly chocolately and the texture will soften to be more like a pudding. But we’ll see.

Dorie’s pudding recipe can be found on her blog.

Silky Chocolate Pudding (adapted from Smitten Kitchen; originally from John Sharffenberger)

Serves 6

Bridget note: There was no coating the back of a spoon after 20 minutes on a double boiler over gently simmering water. I’m assuming this is because I used a glass bowl instead of a metal bowl. I cranked the heat up and cooked it for another 10 minutes or so over a very lively simmer, and that did the trick.

¼ cup cornstarch
½ cup sugar
⅛ teaspoon salt
3 cups whole milk
6 ounces 62% semisweet chocolate, coarsely chopped
1 teaspoon pure vanilla extract

1. Combine the cornstarch, sugar and salt in the top of a double boiler. Slowly whisk in the milk, scraping the bottom and sides with a heatproof spatula to incorporate the dry ingredients. Place over gently simmering water and stir occasionally, scraping the bottom and sides. Use a whisk as necessary should lumps begin to form. After 15 to 20 minutes, when the mixture begins to thicken and coats the back of the spoon, add the chocolate. Continue stirring for about 2 to 4 minutes, or until the pudding is smooth and thickened. Remove from the heat and stir in the vanilla.

2. Strain through a fine-mesh strainer into a serving bowl or into a large measuring cup with a spout and pour into individual serving dishes.

3. If you like pudding skin, pull plastic wrap over the top of the serving dish(es) before refrigerating. If you dislike pudding skin, place plastic wrap on top of the pudding and smooth it gently against the surface before refrigerating. Refrigerate for at least 30 minutes and up to 3 days.

vanilla ice cream

I love it when I get food as gifts. There’s so many great foods out there that I’m too frugal to splurge on for myself even though I really want to try them. I’ve never had artisanal balsamic vinegar or Valrhona chocolate, and I can never bring myself to get the expensive bottle of olive oil. My sister gave me this chocolate wine sauce for Christmas, and it’s a perfect example. I would have tried the free sample of this and thought “oh, it’s so good, I want to take some home!” and then I would have looked longingly at it and talked myself out of buying any.

So I was really excited to get it as a gift – so excited, in fact, that I waited 6 months to open it. That’s right, I’m one of those people who has to wait for the perfect opportunity for open that special bottle. I had told myself that I wanted to have the sauce on homemade vanilla ice cream, and I just never got around to making it earlier in the year. What’s really silly is that I made three pound cakes in March! But I was too stubborn to open the bottle for pound cake.

Ah, but it was worth the wait. Of course I knew that I liked red wine and that I liked chocolate, but I had forgotten how much I like red wine and chocolate together. The sauce has the perfect proportions of each component. It seems really sweet to me, but that’s probably because I like chocolate really dark.

The ice cream should in no way be passed over in favor of the sauce. This is the third vanilla ice cream recipe I’ve made (after Cook’s Illustrated’s and Alton Brown’s) and by far the smoothest. I do have in mind to try one more vanilla ice cream recipe, but it has a lot of live up to after this one.

Vanilla Ice Cream (from David Lebovitz)

About 1 quart

1 cup milk
a pinch of salt
¾ cups sugar
1 vanilla bean
5 egg yolks
2 cup heavy cream
a few drops of vanilla extract

1. Heat the milk, salt, and sugar in a saucepan. Split the vanilla bean lengthwise and scrape the seeds into the milk with the tip of a paring knife. Add the bean pod to the milk.

2. Stir together the egg yolks in a bowl and gradually add some of the warmed milk, stirring constantly as you pour. Pour the warmed yolks back into the saucepan.

3. Cook over low heat, stirring constantly and scraping the bottom with a heat-resistant spatula until the custard thickens enough to coat the spatula. Strain the custard into the heavy cream. Rinse the vanilla bean and put it back into the custard and cream to continue steeping. Chill thoroughly, then remove the vanilla bean and freeze in your ice cream maker according to the manufacturer’s instructions.

lemon cream tart (twd)

I don’t deal well with lemon desserts. I lose self-control. Lemon tastes so light and fresh that I have trouble wrapping my mind around all the butter that’s usually paired with it. The Extraordinary Lemon Cream Tart that Mary chose for this week’s Tuesdays With Dorie recipe is extreme in the amount of butter called for – just shy of a full pound for a 9-inch tart.

With only Dave to share it with, I had to consider my options concerning this dessert. Unless I planned to serve nothing but salads or do nothing but exercise for several days, I was going to have to find a way to control my lemon tart intake. I decided that I needed tartelette pans so I could cut the recipe in half. Plus tartelette pans are super cute.

One of the fun aspects of being in a group like TWD is the opportunity to troubleshoot recipes. When my gooey chocolate cakes were a bit overcooked the first time I made them, my first thought was that my oven temperature was off, but with 100 other people making the recipe and most having the same problem, it seemed like it was the recipe that was off.

This week the problem that popped up involved the temperature that our lemon mixture was supposed to reach while being stirred over a double boiler. Dorie wanted our mixture to get to 180 degrees, which she said would take about 10 minutes. That seemed accurate for about half of us, but for the other half (myself included), the temperature topped out around 155 degrees and stayed there. In our ongoing discussion of the recipe, it seemed like there might be a correlation between the material of the mixing bowl used and the temperature reached – metal bowls were more likely to reach 180 degrees than glass bowls (although there were a couple outliers). I’m interested in trying the recipe again with a metal bowl instead of the pyrex bowl I used.

But I doubt I’ll be making this again. Not that it wasn’t good, because it was – very good in fact. But there’s just so much butter in it. I don’t generally shy away from rich foods, but they have to be worth it. And with over 600 calories per slice at the serving size that Dorie suggests, this tart has a lot to live up to.

The lemon cream was delicious – smooth with just the right balance of sweet and tart. But lemon curd is delicious too, and it only takes 4 tablespoons to make enough curd for a 9-inch tart, as opposed to 21 tablespoons that this cream needed. I’ll have to settle for rich-but-not-ridiculous lemon curd in the future.

The Most Extraordinary Lemon Cream Tart (from Dorie Greenspan’s From My Home To Yours)

The filling in this tart is everything. It is the lemon cream I learned to make from Pierre Hermé, and it is the ne plus ultra of the lemon world. The tart is basic-a great crust, velvety lemon cream-and profoundly satisfying. It is also profoundly play-aroundable. You can add a fruit topping (circlets of fresh rasp-berries are spectacular with this tart) or a layer of fruit at the bottom; you can finish the tart with meringue; or you can serve it with anything from whipped cream to raspberry coulis.

1 9-inch tart shell made with Sweet Tart Dough, fully baked and cooled
1 cup sugar
Finely grated zest of 3 lemons
4 large eggs
½ cup fresh lemon juice (from 4-5 lemons)
2 sticks plus 5 tablespoons (10½ ounces) unsalted butter, cut into tablespoon-size
pieces, at room temperature

Getting Ready: Have an instant-read thermometer, a strainer and a blender (first choice) or food processor at hand. Bring a few inches of water to a simmer in a saucepan.

Put the sugar and zest in a large heatproof bowl that can be set over the pan of simmering water. Off the heat, rub the sugar and zest together between your fingers until the sugar is moist, grainy and very aromatic. Whisk in the eggs, followed by the lemon juice.

Set the bowl over the pan, and start stirring with the whisk as soon as the mixture feels tepid to the touch. Cook the lemon cream until it reaches 180 degrees F. As you whisk-you must whisk constantly to keep the eggs from scrambling-you’ll see that the cream will start out light and foamy, then the bubbles will get bigger, and then, as it gets closer to 180 degrees F, it will start to thicken and the whisk will leave tracks. Heads up at this point-the tracks mean the cream is almost ready. Don’t stop whisking or checking the temperature, and have patience-depending on how much heat you’re giving the cream, getting to temp can take as long as 10 minutes.

As soon as it reaches 180 degrees F, remove the cream from the heat and strain it into the container of the blender (or food processor); discard the zest. Let the cream stand, stirring occasionally, until it cools to 140 degrees F, about 10 minutes.

Turn the blender to high (or turn on the processor) and, with the machine going, add the butter about 5 pieces at a time. Scrape down the sides of the container as needed as you incorporate the butter. Once the butter is in, keep the machine going-to get the perfect light, airy texture of lemon-cream dreams, you must continue to blend the cream for another 3 minutes. If your machine protests and gets a bit too hot, work in 1-minute intervals, giving the machine a little rest between beats.

Pour the cream into a container, press a piece of plastic wrap against the surface to create an airtight seal and refrigerate for at least 4 hours or overnight. (The cream will keep in the fridge for 4 days and, or tightly sealed, in the freezer for up to 2 months; thaw it overnight in the refrigerator.)

When you are ready to assemble the tart, just whisk the cream to loosen it and spoon it into the tart shell. Serve the tart, or refrigerate ‘until needed.

Serving: It’s a particular pleasure to have this tart when the cream is cold and the crust is at room temperature. A raspberry or other fruit coulis is nice, but not necessary; so is a little crème fraîche. I know it sounds odd to offer something as rich as crème fraîche with a tart like this, but it works because the lemon cream is so light and so intensely citric, it doesn’t taste or feel rich.

Storing: While you can make the lemon cream ahead, once the tart is constructed, it’s best to eat it the day it is made.

Sweet Tart Dough:
Makes enough for one 9-inch crust

Storing: Well wrapped, the dough can be kept in the refrigerator for up to 5 days or frozen for up to 2 months. While the fully baked crust can be packed airtight and frozen for up to 2 months, I prefer to freeze the unbaked crust in the pan and bake it directly from the freezer-it has a fresher flavor. Just add about 5 minutes to the baking time.

In French, this dough is called pâte sablée because it is buttery, tender and sandy (that’s what sablée means). It’s much like shortbread, and it’s ideal for filling with fruit, custard or chocolate.

The simplest way to make a tart shell with this dough is to press it into the pan. You can roll out the dough, but the high proportion of butter to flour and the inclusion of confectioners’ sugar makes it finicky to roll. I always press it into the pan, but if you want to roll it, I suggest you do so between sheets of plastic wrap or wax paper or inside a rolling slipcover.

1½ cups all-purpose flour
½ cup (2 ounces) confectioners’ sugar
¼ teaspoon salt
1 stick plus 1 tablespoon (9 tablespoons) very cold (or frozen) unsalted butter, cut into small pieces
1 large egg yolk

Put the flour, confectioners’ sugar and salt in a food processor and pulse a couple of times to combine. Scatter the pieces of butter over the dry ingredients and pulse until the butter is coarsely cut in-you should have some pieces the size of oatmeal flakes and some the size of peas. Stir the yolk, just to break it up, and add it a little at a time, pulsing after each addition. When the egg is in, process in long pulses-about 10 seconds each-until the dough, which will look granular soon after the egg is added, forms clumps and curds. Just before you reach this stage, the sound of the machine working the dough will change-heads up. Turn the dough out onto a work surface and, very lightly and sparingly, knead the dough just to incorporate any dry ingredients that might have escaped mixing.

To press the dough into the pan: Butter a 9-inch fluted tart pan with a removable bottom. Press the dough evenly over the bottom and up the sides of the pan, using all but one little piece of dough, which you should save in the refrigerator to patch any cracks after the crust is baked. Don’t be too heavy-handed-press the crust in so that the edges of the pieces cling to one another, but not so hard that the crust loses its crumbly texture. Freeze the crust for at least 30 minutes, preferably longer, before baking.

Center a rack in the oven and preheat the oven to 375 degrees F.

Butter the shiny side of a piece of aluminum foil and fit the foil, buttered side down, tightly against the crust. (Since you froze the crust, you can bake it without weights.) Put the tart pan on a baking sheet and bake the crust for 25 minutes. Carefully remove the foil. If the crust has puffed, press it down gently with the back of a spoon.

Bake for another 8 minutes or so, or until it is firm and golden brown. (I dislike lightly baked crusts, so I often keep the crust in the oven just a little longer. If you do that, just make sure to keep a close eye on the crust’s progress-it can go from golden to way too dark in a flash.) Transfer the tart pan to a rack and cool the crust to room temperature before filling.

To patch a partially or fully baked crust, if necessary: If there are any cracks in the baked crust, patch them with some of the reserved raw dough as soon as you remove the foil. Slice off a thin piece of the dough, place it over the crack, moisten the edges and very gently smooth the edges into the baked crust. If the tart will not be baked again with its filling, bake for another 2 minutes or so, just to take the rawness off the patch.

chocolate cream pie

copy-of-dscn4482.jpg

After weeks of pound cakes, I’d had enough of vanilla-flavored desserts. I was in the mood for chocolate! And I wanted to make a chocolate pie, which I had never done before. I wanted something rich and intensely chocolately. I had 6 ounces of unsweetened chocolate, 4 ounces of bittersweet chocolate, and cocoa. (Fun fact: so far, about 10% of the words in this blog post are “chocolate.”) My dairy options were also limited.

Chocolate Mousse Pie is exactly what I was in the mood for, but it didn’t fit my ingredient limitations. (I’m stubborn about extra trips to the grocery store.) I had to settle for Chocolate Cream Pie.

Chocolate cream pie is just pudding in a pie crust. I was starting to get disappointed that I wasn’t going to end up with a dessert as rich as I had originally intended.

copy-of-dscn4459.jpg

I needn’t have worried. This chocolate pie was plenty rich and chocolatey and delicious. See how I’ve nicely spread the filling into the pie shell here? Okay, now look at the edges, and you can see where I took a spoon around the edge of the pie to scoop up some filling. Just to taste, you know? I had to make sure it was edible. I needed several spoonfuls to really make sure.

Oh, it was edible all right. Topped with whipped cream and dusted with cocoa, this definitely fulfilled my chocolate craving.

Chocolate Cream Pie (adapted from epicurious.com and Cooks Illustrated)

8 to 10 servings

Epicurious note: Pie (without topping) can be chilled up to 1 day.

Bridget note: I made the pie on Friday and we finished it on Tuesday, and I didn’t notice any loss of quality over time. I topped each piece with whipped cream as it was served rather than spreading it on the pie. Also, I used 4 ounces semisweet chocolate and 3 ounces unsweetened chocolate, plus 2 teaspoons extra sugar.

Chocolate Cookie Crumb Crust
16 Oreo cookies (with filling), broken into rough pieces, about 2½ cups
2 tablespoons unsalted butter, melted and cooled

Chocolate Cream Filling
2/3 cup sugar
¼ cup cornstarch
½ teaspoon salt
4 large egg yolks
3 cups whole milk
5 oz fine-quality bittersweet chocolate (not unsweetened), melted
2 oz unsweetened chocolate, melted
2 tablespoons unsalted butter, softened
1 teaspoon vanilla

Whipped Cream Topping
1 cups heavy cream (cold)
1 tablespoons granulated sugar
½ teaspoon vanilla extract

1. For the Crust: Adjust oven rack to middle position and heat oven to 350 degrees. In bowl of food processor fitted with steel blade, process cookies with 15 one-second pulses, then let machine run until crumbs are uniformly fine, about 15 seconds. (Alternatively, place cookies in large zipper-lock plastic bag and crush with rolling pin.) Transfer crumbs to medium bowl, drizzle with butter, and use fingers to combine until butter is evenly distributed.

2. Pour crumbs into 9-inch Pyrex pie plate. Following illustration below, press crumbs evenly onto bottom and up sides of pie plate. Refrigerate lined pie plate 20 minutes to firm crumbs, then bake until crumbs are fragrant and set, about 10 minutes. Cool on wire rack while preparing filling.

3. For the filling: Whisk together sugar, cornstarch, salt, and yolks in a 3-quart heavy saucepan until combined well, then add milk in a stream, whisking. Bring to a boil over moderate heat, whisking, then reduce heat and simmer, whisking, 1 minute (filling will be thick).

4. Force filling through a fine-mesh sieve into a bowl, then whisk in chocolates, butter, and vanilla. Cover surface of filling with a plastic wrap and cool completely, about 2 hours.

5. Spoon filling into crust and chill pie, loosely covered, at least 6 hours.

6. For the topping: Just before serving, beat cream, sugar, and vanilla in bowl of standing mixer on low speed until small bubbles form, about 30 seconds. Increase speed to medium; continue beating until beaters leave a trail, about 30 seconds more. Increase speed to high; continue beating until cream is smooth, thick, and nearly doubled in volume and forms soft peaks, about 20 seconds. Spread or pipe whipped cream over chilled pie filling. Cut pie into wedges and serve.

copy-of-dscn4439.jpg

rice pudding

copy-of-dscn4349.jpg

While I was visiting my family in New Mexico last week, I came across a recipe for rice pudding. My mom and grandmother said that they liked it, but sister said she’s never cared for it, because it’s…rice. For dessert. I had never tried it, but I wanted to make a dessert (without guar gum or anything else weird) that my gluten-intolerant grandmother could eat, so I gave rice pudding a try.

And it was good, but it was definitely…rice. For dessert. That ain’t right. My mom and grandmother liked it. My dad was unsure at first, so he scooped out just a few spoonfuls for himself and then came back for more after he established that it was good. I seemed to be the only one unconvinced on the rice pudding. It had a lot of good traits – sweet, creamy, a bit nutty. But you know what else it had? Grains of rice floating in it. That ain’t right.

copy-of-dscn4347.jpg

Simple Stovetop Rice Pudding (from Cooks Illustrated September 1996)

Serves 6 to 8

CI note: We prefer pudding made from medium-grain rice, but long-grain is perfectly acceptable if that’s what you happen to have on hand.

Bridget note: I used long-grained rice.

¼ teaspoon table salt
1 cup medium-grain rice (white), or long grain white rice
2½ cups whole milk
2½ cups half-and-half
2/3 cup granulated sugar
1¼ teaspoons vanilla extract

1. Bring 2 cups water to boil in large, heavy-bottomed pot (at least 3 quarts) or small soup kettle (4 to 5 quarts). Stir in salt and rice; cover and simmer over low heat, stirring once or twice until water is almost fully absorbed, 15 to 20 minutes.

2. Add milk, half-and-half and sugar. Increase heat to medium-high to bring to simmer, then reduce heat to maintain simmer. Cook uncovered, stirring frequently, until mixture starts to thicken, about 30 minutes. Reduce heat to low and continue to cook, stirring every couple of minutes to prevent sticking and scorching, until a spoon is just able to stand up in the pudding, about 15 minutes longer.

3. Remove from heat and stir in vanilla extract. Cool and serve at room temperature or chilled. (Can be covered with plastic wrap on surface of pudding and then refrigerated up to 2 days.)

because i’ve always been your biggest flan (creme caramel/flan)

1.jpg

Flan, crème caramel, whatever. Turns out, there’s only the teeniest of differences. I was struggling to think of a dessert that fit a precise set of requirements – compatibility with the red wine we’d be drinking that night, not chocolate, and most importantly, not requiring any trips to the store. I really thought I’d hit on the perfect idea with flan, and it had even been on my list of things I’m all too eager to cook for some time now. But I kept hitting a snag, in that most of the recipes on epicurious called for sweetened condensed milk, and I didn’t have any.

Finally, I hit upon one that I had all the ingredients for. And I noticed something – the only significant difference between this recipe and Cooks Illustrated’s recipe for crème caramel is the fat content of the dairy. The flan recipe uses almost twice as much whipping cream as milk, whereas the crème caramel recipe uses an equal amount of light cream and milk. This was perfect for me, because I had made the crème caramel before and found the custard to be a little too light for my tastes. Furthermore, I had heavy cream on hand.

Well, I sort of had heavy cream. What I actually had was not one, but two expired cartons of cream, neither of which was the ultra-pasteurized stuff that lasts forever. Eww. But I was determined to make this, and I decided that one of the cartons was passable. I didn’t tell Dave about the questionable dairy in the custard, as I don’t think he’d have been pleased.

Oh, this dessert turned out really well. Much better than the previous time I’d made the crème caramel, when I believe I had overcooked the caramel. This time I fussed over it determinedly, swirling and watching, and even getting a container of honey out so I could judge just when the caramel became the “honey-caramel color” that the recipe instructed. It was perfect. I did have a little adventure with divvying up the caramel among only 3 ramekins instead of the four I was supposed to use, then hurriedly trying to scoop quickly hardening caramel into the 4th ramekin.

copy-of-2.jpg

After that, everything went pretty smoothly. This really isn’t a hard dessert to make, although the water bath is a bit of a pain. The blood-colored streaks on the ramekins are stains from the maroon towel I used to keep the ramekins stable in the water bath. Don’t they look so appetizing? Oh, and the stab wounds are from my tests to check if the custard was done cooking. Next time I need to be careful not to puncture the caramel. Between the bloody ramekins and the knife marks, I bet these just look so tempting, right? But this is actually an easy, fairly cheap, impressive recipe that can be made days in advance, and might therefore be perfect for a dinner party.

copy-of-3.jpg

Classic Crème Caramel (from Cooks Illustrated)

CI note: Though you can make one large creme caramel, we find that custards baked in individual ramekins cook faster, are more evenly textured, and unmold more easily. You can vary the amount of sugar in the custard to suit your taste. Most tasters preferred the full two-thirds cup, but you can reduce that amount to as little as one-half cup to create a greater contrast between the custard and the sweetness of the caramel. Cook the caramel in a pan with a light-colored interior, since a dark surface makes it difficult to judge the color of the syrup. Caramel can leave a real mess in a pan, but it is easy to clean. Simply boil lots of water in the pan for 5 to 10 minutes to loosen the hardened caramel.

Crumblycookie changes: I used heavy cream instead of light cream, 2% milk instead of whole milk, ½ of a vanilla bean instead of extract, and vanilla sugar instead of regular sugar.

Serves 8

Caramel
1 cup granulated sugar
1/3 cup water
2 tablespoons corn syrup
¼ teaspoon lemon juice

Custard
1½ cups whole milk
1½ cups light cream
3 large eggs
2 large egg yolks
2/3 cup granulated sugar
1½ teaspoons vanilla extract
Pinch table salt

1. For the caramel: In a medium nonreactive saucepan and without stirring, bring sugar, water, corn syrup, and lemon juice to simmer over medium-high heat, wiping sides of pan with wet cloth to remove any sugar crystals that might cause syrup to turn grainy. Continue to cook until syrup turns from clear to golden, swirling pan gently to ensure even browning, about 8 minutes. Continue to cook, swirling pan gently and constantly, until large, slow bubbles on mixture’s surface turn honey-caramel in color, 4 to 5 minutes longer. Remove pan immediately from heat and, working quickly but carefully (the caramel is over 300 degrees and will burn you if it touches your skin), pour a portion of the caramel into each of 8 ungreased 6-ounce ovenproof ramekins. Allow caramel to cool and harden, about 15 minutes. (Can be covered with plastic wrap and refrigerated for up to 2 days; return to room temperature before adding custard.)

2. For the custard: Adjust oven rack to center position and heat oven to 350 degrees. Heat milk and cream, stirring occasionally, in medium saucepan over medium heat until steam appears and/or an instant-read thermometer held in the liquid registers 160 degrees, 6 to 8 minutes; remove from heat. Meanwhile, gently whisk eggs, yolks, and sugar in large bowl until just combined. Off heat, gently whisk warm milk mixture, salt, and vanilla into eggs until just combined but not at all foamy. Strain mixture through fine mesh sieve into large measuring cup or container with pouring spout; set aside.

3. Bring 2 quarts water to boil in kettle. Meanwhile, fold dish towel to fit bottom of large baking dish or roasting pan and position in pan. Divide reserved custard mixture among ramekins; place filled ramekins on towel in pan (making sure they do not touch) and set pan on oven rack. Fill pan with boiling water to reach halfway up ramekins; cover entire pan loosely with aluminum foil so steam can escape. Bake until a paring knife inserted halfway between center and edge of the custards comes out clean, 35 to 40 minutes. Transfer custards to wire rack; cool to room temperature (Can be covered with plastic wrap and refrigerated up to 2 days.)

4. To unmold, slide a paring knife around entire mold perimeter, pressing knife against side of the dish. Hold serving plate over top of ramekin and invert; set plate on work surface and shake ramekin gently to release custard. Serve immediately.

For one large crème caramel: Follow recipe for Classic Crème Caramel, pouring caramel and custard into 1½-quart straight-sided soufflé dish rather than individual ramekins. Fill roasting pan with boiling water to reach halfway up sides of soufflé dish; increase baking time to 70 to 75 minutes or until an instant-read thermometer inserted in center of custard registers 175 degrees.

The Perfect Flan (from epicurious)

1¾ cups whipping cream
1 cup milk (do not use low-fat or nonfat)
Pinch of salt
½ vanilla bean, split lengthwise

1 cup sugar
1/3 cup water

3 large eggs
2 large yolks
7 tablespoons sugar

Position rack in center of oven and preheat to 350°F. Combine cream, milk and salt in heavy medium saucepan. Scrape seeds from vanilla bean into cream mixture; add bean. Bring to simmer over medium heat. Remove from heat and let steep 30 minutes.

Meanwhile, combine 1 cup sugar and 1/3 cup water in another heavy medium saucepan. Stir over low heat until sugar dissolves. Increase heat to high and cook without stirring until syrup turns deep amber, brushing down sides of pan with wet pastry brush and swirling pan occasionally, about 10 minutes. Quickly pour caramel into six ¾-cup ramekins or custard cups. Using oven mitts as aid, immediately tilt each ramekin to coat sides. Set ramekins into 13x9x2-inch baking pan.

Whisk eggs, egg yolks and 7 tablespoons sugar in medium bowl just until blended. Gradually and gently whisk cream mixture into egg mixture without creating lots of foam. Pour custard through small sieve into prepared ramekins, dividing evenly (mixture will fill ramekins). Pour enough hot water into baking pan to come halfway up sides of ramekins.

Bake until centers of flans are gently set, about 40 minutes. Transfer flans to rack and cool. Chill until cold, about 2 hours. Cover and chill overnight. (Can be made 2 days ahead.)

To serve, run small sharp knife around flan to loosen. Turn over onto plate. Shake gently to release flan. Carefully lift off ramekin allowing caramel syrup to run over flan. Repeat with remaining flans and serve.

copy-of-4.jpg

daring bakers jan 2008: lemon meringue pie

copy-of-dscn2807.jpg

I saw so excited to see that this month’s Daring Baker challenge was lemon meringue pie! Not only do I love lemon, but the one lemon meringue pie I’ve made was several years ago and was only partially successful. It seemed to me like this had to potential to be a fairly difficult challenge – pie crust, lemon curd, meringue. But when Jen of The Canadian Baker revealed this recipe to us, she expressed some concern that it might not be challenging enough for everyone.

She needn’t have worried. As one person after another wrote in to the DB private blog that they had followed the recipe exactly and had lemon meringue soup to show for their efforts, I started to get worried. And it seemed that for every disaster, there was another DBer chiming in that they had followed the recipe exactly and had perfect results. It goes without saying that I was hoping to be in the latter group.

I was not. I, however, cannot claim that I followed the recipe exactly. Because I screwed up.

copy-of-dscn2861.jpg

It was all going swimmingly until I baked the pie at the end. The crust was a bit thicker than I’m used to, and the filling overflowed the crust a bit after I added the meringue, but these are minor qualms. (Ah – I see now that the recipe is developed for a 10-inch pan, and I only have 9-inch pans. That explains it.) The problem arose when I opened the oven to bake the pie and realized that I needed to adjust the racks and add a sheet pan below to catch drips. As I fumbled around with these corrections, I cranked the oven thermometer up to make sure the heater stayed on.

About five minutes after I put the pie in, a smell reminiscent of marshmallows roasting on a campfire reminded me that I hadn’t turned the oven back down. At this point the meringue was a beautiful mix of almost black, tan, and white. Afraid of it turning entirely black, I took the pie out far earlier than the recipe instructed.

And like many DBers, my filling did not set. Is it because I baked the pie at 450 degrees for 5 minutes instead of 375 degrees for 20 minutes? I don’t know. The next day, however, the filling was nice and solid, although the meringue was insufficiently cooked.

copy-of-dscn2868.jpg

I do know that this unsatisfactory pie did not satisfy the desire for lemon meringue pie that I had by now developed. I also knew that I wasn’t taking any chances with the same recipe. Instead, I tried a Cooks Illustrated recipe. Unsurprisingly, it went off without a hitch. Gotta love Cooks Illustrated.

Check to see how the rest of the Daring Bakers pie experiences went!

copy-of-dscn3246.jpg

Lemon Meringue Pie (from Wanda Beaver’s Wanda’s Pie in the Sky)

Makes one 10-inch (25 cm) pie

For the Crust:
¾ cup (180 mL) cold butter; cut into ½-inch (1.2 cm) pieces
2 cups (475 mL) all-purpose flour
¼ cup (60 mL) granulated sugar
¼ tsp (1.2 mL) salt
⅓ cup (80 mL) ice water

For the Filling:
2 cups (475 mL) water
1 cup (240 mL) granulated sugar
½ cup (120 mL) cornstarch

5 egg yolks, beaten
¼ cup (60 mL) butter
¾ cup (180 mL) fresh lemon juice
1 tbsp (15 mL) lemon zest
1 tsp (5 mL) vanilla extract

For the Meringue:
5 egg whites, room temperature
½ tsp (2.5 mL) cream of tartar
¼ tsp (1.2 mL) salt
½ tsp (2.5 mL) vanilla extract
¾ cup (180 mL) granulated sugar

For the Crust: Make sure all ingredients are as cold as possible. Using a food processor or pastry cutter and a large bowl, combine the butter, flour, sugar and salt. Process or cut in until the mixture resembles coarse meal and begins to clump together. Sprinkle with water, let rest 30 seconds and then either process very briefly or cut in with about 15 strokes of the pastry cutter, just until the dough begins to stick together and come away from the sides of the bowl. Turn onto a lightly floured work surface and press together to form a disk. Wrap in plastic and chill for at least 20 minutes.

Allow the dough to warm slightly to room temperature if it is too hard to roll. On a lightly floured board (or countertop) roll the disk to a thickness of ⅛ inch (.3 cm). Cut a circle about 2 inches (5 cm) larger than the pie plate and transfer the pastry into the plate by folding it in half or by rolling it onto the rolling pin. Turn the pastry under, leaving an edge that hangs over the plate about ½ inch (1.2 cm). Flute decoratively. Chill for 30 minutes.

Preheat oven to 350ºF (180ºC). Line the crust with foil and fill with metal pie weights or dried beans. Bake for 20 to 25 minutes. Carefully remove the foil and continue baking for 10 to 15 minutes, until golden. Cool completely before filling.
For the Filling: Bring the water to a boil in a large, heavy saucepan. Remove from the heat and let rest 5 minutes. Whisk the sugar and cornstarch together. Add the mixture gradually to the hot water, whisking until completely incorporated.

Return to the heat and cook over medium heat, whisking constantly until the mixture comes to a boil. The mixture will be very thick. Add about 1 cup (240 mL) of the hot mixture to the beaten egg yolks, whisking until smooth. Whisking vigorously, add the warmed yolks to the pot and continue cooking, stirring constantly, until mixture comes to a boil. Remove from the heat and stir in butter until incorporated. Add the lemon juice, zest and vanilla, stirring until combined. Pour into the prepared crust. Cover with plastic wrap to prevent a skin from forming on the surface, and cool to room temperature.

For the Meringue: Preheat the oven to 375ºF (190ºC). Using an electric mixer beat the egg whites with the cream of tartar, salt and vanilla extract until soft peaks form. Add the sugar gradually, beating until it forms stiff, glossy peaks. Pile onto the cooled pie, bringing the meringue all the way over to the edge of the crust to seal it completely. Bake for 15 to 20 minutes, or until golden. Cool on a rack. Serve within 6 hours to avoid a soggy crust.

The Ultimate Lemon Meringue Pie (from Cooks Illustrated)

Makes one 9-inch pie

Graham Cracker-Coated Pie Shell
1¼ cups unbleached all-purpose flour
½ teaspoon table salt
1 tablespoon granulated sugar
6 tablespoons unsalted butter , chilled and cut into 1/4-inch pieces
4 tablespoons vegetable shortening , chilled
3-4 tablespoons cold water
½ cup graham cracker crumbs

Lemon Filling
1 cup granulated sugar
¼ cup cornstarch
1/8 teaspoon table salt
1½ cups cold water
6 large egg yolks
1 tablespoon lemon zest from 1 lemon
½ cup lemon juice from 2 to 3 lemons
2 tablespoons unsalted butter

Meringue Topping
1 tablespoon cornstarch
¼ teaspoon cream of tartar
½ cup granulated sugar
4 large egg whites
½ teaspoon vanilla extract
1. For the pie shell: Mix flour, salt and sugar in food processor fitted with steel blade. Scatter butter pieces over flour mixture, tossing to coat butter with a little of the flour. Cut butter into flour with five 1 second pulses. Add shortening; continue cutting in until flour is pale yellow and resembles coarse cornmeal with butter bits no larger than a small pea, about four more 1-second pulses. Turn mixture into medium bowl.

2. Sprinkle 3 tablespoons cold water over mixture. Using rubber spatula, fold water into mixture; press down on dough mixture with broad side of spatula until dough sticks together. If dough will not come together, add up to 1 tablespoon more cold water. Shape dough into ball, then flatten into 4-inch-wide disk. Dust lightly with flour, wrap in plastic, and refrigerate for 30 minutes before rolling.

3. Generously sprinkle work area with 2 tablespoons graham cracker crumbs. Place dough on work area. Scatter a few more crumbs over dough. Roll dough from center to edges, turning it into a 9-inch disk, rotating a quarter turn after each stroke and sprinkling additional crumbs underneath and on top as necessary to coat heavily. Flip dough over and continue to roll, but not rotate, to form a 13-inch disk slightly less than 1/8-inch thick.

4. Fold dough into quaarters; place dough point in center of 9-inch Pyrex pie pan. Unfold to cover pan completely, letting excess dough drape over pan lip. To fit dough to pan, lift edge of dough with one hand and press dougn in pan bottom with other hand; repeat process around circumferences of pan to ensure dough fits properly and is not stretched. Trim all around, ½-inch past lip of pan. Tuck ½ inch of overhanging dough under so folded edge is flush with lip of pan; press to seal. Press thumb and index finger about ½-inch apart against outside edge of dough, then use index finger or knuckle of other hand to poke a dent on inside edge of dough through opening created by the other fingers. Repeat to flute around perimeter of pie shell.

5. Refrigerate until firm, about 30 minutes. Use fork to prick shell at ½-inch intervals; press a doubled 12-inch square of aluminum foil into pie shell; prick again and refrigerate at least 30 minutes.

6. Adjust oven rack to lowest position, heat oven to 400 degrees. Bake, checking occasionally for ballooning, until crust is firmly set, about 15 minutes. Reduce oven temperature to 350 degrees, remove foil, and continue to bake until crust is crisp and rich brown in color, about 10 minutes longer.

7. For the filling: Mix sugar, cornstarch, salt, and water in a large, nonreactive saucepan. Bring mixture to simmer over medium heat, whisking occasionally at beginning of the process and more frequently as mixture begins to thicken. When mixture starts to simmer and turn translucent, whisk in egg yolks, two at a time. Whisk in zest, then lemon juice, and finally butter. Bring mixture to a brisk simmer, whisking constantly. Remove from heat, place plastic wrap directly on surface of filling to keep hot and prevent skin from forming.

8. For the meringue: Mix cornstarch with 1/3 cup water in small saucepan; bring to simmer, whisking occasionally at beginning and more frequently as mixture thickens. When mixture starts to simmer and turn translucent, remove from heat. Let cool while beating egg whites.

9. Heat oven to 325 degrees. Mix cream of tartar and sugar together. Beat egg whites and vanilla until frothy. Beat in sugar mixture, 1 tablespoon at a time; until sugar is incorporated and mixture forms soft peaks. Add cornstarch mixture, 1 tablespoon at a time; continue to beat meringue to stiff peaks. Remove plastic from filling and return to very low heat during last minute or so of beating meringue (to ensure filling is hot).

10. Pour filling into pie shell. Using a rubber spatula, immediately distribute meringue evenly around edge then center of pie to keep it from sinking into filling. Make sure meringue attaches to pie crust to prevent shrinking. Use spoon to create peaks all over meringue. Bake pie until meringue is golden brown, about 20 minutes. Transfer to wire rack and cool to room temperature. Serve.

copy-of-dscn3221.jpg

happy birthday to the husband (banana cream pie)

dscn2396.jpg

Dave’s birthday is today! He’s a few years older than me, which can be nice sometimes. It’s not that I think I’m old, or that I get all “I can’t believe I’m [blank] already.” But I can’t deny that when I hit those landmark numbers, those ages when it’s hard not to think “I’m [blank], and this is where I am in life?”, that the impact is lessened a bit by the fact that my husband’s been there for a few years.

Every year on his birthday, Dave requests banana cream pie. I’ve tried a number of recipes, and so far, according to Dave, none of them have lived up to Baker’s Square Restaurant. I’m pretty sure he hasn’t had Baker’s Square pie in quite a few years, and if he were to try it now (after living with me), he’d have a different opinion. But until then, I’ll just make my own favorite recipe.

This recipe starts with a graham cracker crust, which I’m a big fan of, especially for custard pies. The crust has a bit of banana right in it, which is a really great touch.

dscn2339.jpg

The custard is undeniably rich. I have no problems with that! After both the crust and custard have cooled to room temperature, two layers of banana and three layers of custard are filled into the crust. Then the pie is covered and chilled for at least eight hours to set the custard and soften the crust. Yeah right. I wasn’t that organized. We ate it after four hours of chilling.

dscn2360.jpg

It’s so good! It may not live up to Baker’s Square fame, but Dave had a number of complimentary comments to give, including “Scrumdelilicious.”

The original recipe is from epicurious.com, but I’m going to give my own adaptations below. The original is made in a 10-inch pie pan, which seems silly, because most people, including myself, don’t have such a beast. The recipe I’ve given below is adjusted for a standard 9-inch pie pan. I also made a few tweaks to the crust.

Banana Cream Pie (adapted from epicurious.com)

Serves 8

Crust:
9 graham crackers, processed to fine crumbs (about 1 cup)
2 tablespoons sugar
½ banana
2½ tablespoons unsalted butter, melted

Filling
6½ tablespoons (2.8 ounces) sugar
¼ cup (1.1 ounces) cornstarch
1/4 teaspoon salt
1¼ cups whipping cream
1¼ cups whole milk
3 large egg yolks
½ vanilla bean, split lengthwise
1½ tablespoons unsalted butter
¾ teaspoon vanilla extract

4½ ripe bananas, peeled, cut crosswise into 1/4-inch-thick slices

For crust:
Preheat oven to 350 degrees. Process graham cracker crumbs, sugar, and banana until evenly mixed and there are no visible chunks of banana. Add unsalted butter and process to moisten evenly. Press onto bottom and up sides of 9-inch glass pie dish. Chill until firm, about 30 minutes. Bake crust until set and pale golden, about 15 minutes. Cool completely.

For filling:
Whisk sugar, cornstarch, and salt in heavy medium saucepan to blend. Gradually whisk in whipping cream and whole milk, then egg yolks. Scrape in seeds from vanilla bean; add vanilla bean. Whisk over medium-high heat until custard thickens and boils, about 6 minutes. Pour through mesh strainer into medium bowl. Whisk in unsalted butter and vanilla extract. Cool completely, whisking occasionally, about 1 hour. Remove vanilla bean.

Stir custard to loosen, if necessary. Spread ¾ cup custard over bottom of prepared crust. Top with half of sliced bananas, then ¾ cup custard, covering bananas completely. Repeat layering with remaining bananas and remaining custard. Chill banana cream pie until filling is set and crust softens slightly, at least 8 hours and up to 1 day. Cut pie into wedges and serve with sweetened whipped cream, if desired.

dscn2402.jpg