pigs in a blanket

Dave’s co-workers tease him about how he always gets to eat gourmet food. “So she makes gourmet lunches for you to bring to work, and then you go home and eat gourmet dinners, and before bed have a gourmet dessert.” Um. Not always. I wonder what they’ll have to say about the leftovers from this meal?

I wasn’t sure what to do with the hot dogs leftover from the franks and beans. In my opinion, the only good way to eat hot dogs is crispy and a bit blackened from a grill or fire, preferably topped with chili. Since I don’t have a grill, my options were limited. Boiled (or worse – microwaved) hot dogs didn’t sound appetizing.
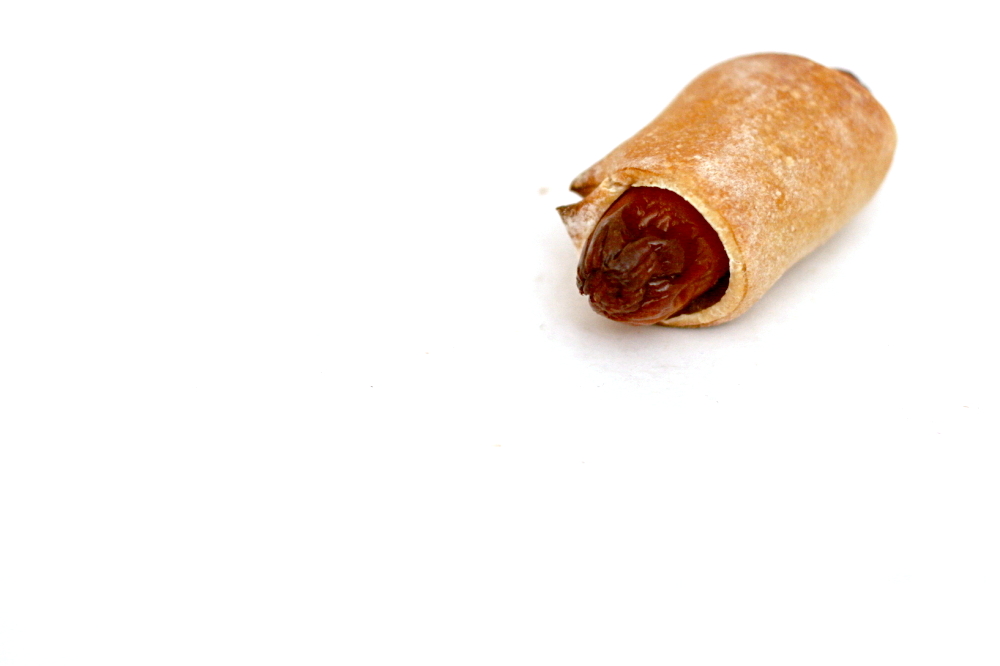
copy-of-img_1739Updated 3/20/09: Also good in mini!

Lemontartlet inspired me to wrap them in bread and bake them. It solves the problem of how to cook the hot dogs indoors, and I guarantee that my homemade bread is far tastier than a storebought hot dog bun. (Lemontartlet used biscuit dough, but I made a yeast bread.)

I based the bread recipe on a recipe for Parker House rolls, thinking that the butter in the recipe would give make it nice and tender, while the sugar would provide the flavor I wanted. It was a perfect match. The bread did expand more than I was expecting when I baked it, and I might (if such a thing is possible) have ended up with too much bread per dog. I’ll adjust the recipe and give better proportions below.

I found that the best method for rolling out the dough was to use my fingertips to flatten the dough balls a bit, and then roll in only one direction. I was using Nathan’s Beef Franks (recommended by Cooks Illustrated and definitely the best hot dogs I’ve had), which I think are a little shorter than most. Most of my rolls ended up just the right width to almost-but-not-quite coat the whole dog.

If you’re a perfectionist and want your pigs perfectly wrapped in those blankets, which I did but I didn’t figure out this trick until the last one, you can roll the bread dough out a little wider than the dog, then fold in the edges and roll a few times in the other (long) direction. You’ll have a more perfect rectangle, which will more perfectly coat your hot dog and evenly distribute your bread. And look a teensy bit better.

Either way, these are super fun, and other than roasting them over a fire until they’re slightly blackened, this has to be my favorite way to eat hot dogs!

Pigs in a Blanket (bread recipe adapted from Ultimate Bread, by Eric Treuille and Ursula Feriggno)

This is enough bread dough for 10 hot dogs.  If your package only has 8, you can make dinner rolls out of the remaining dough.

Bread dough:
3 tablespoons unsalted butter
¾ cup milk
1½ tablespoons sugar
2 eggs
3½ cups (17½ ounces) unbleached flour
1½ teaspoons instant yeast
1½ teaspoons salt

10 hot dogs
2 tablespoons milk

1. Heat butter in small saucepan over medium heat until just melted. Add ¾ cup milk and sugar. If butter re-solidifies, heat until it’s completely melted. Remove from the heat and beat in the eggs.

2. Mix flour, salt, and yeast in bowl of standing mixer fitted with dough hook. Turn machine to low and slowly add milk mixture. When dough comes together, increase speed to medium (setting number 4 on a KitchenAid mixer) and mix until dough is smooth, shiny, and elastic, stopping machine two or three times to scrape dough from hook if necessary, about 8 minutes. Knead in extra flour, 1 tablespoon at a time, if the dough is too sticky. The dough should be not be dry, but soft. Turn dough onto lightly floured work surface; knead to form smooth, round ball, about 15 seconds. (Alternatively, you can knead by hand for 10 minutes.)

2. Place dough in very lightly oiled bowl, rubbing dough around bowl to lightly coat. Cover bowl with plastic wrap; place in warm, draft-free spot until dough doubles in size, about 1-1½ hours.

3. Divide the dough into 10 pieces. Shape each piece into a smooth ball. Let rest 10 minutes. Line baking pan with silicon baking mat or parchment paper.

4. Flatten each piece into a rough rectangle using the tips of your fingers. Roll in one direction until dough is ¼-inch thick. Roll in opposite direction (across shorter width) a few times, then fold in long edges to make perfect rectangle. Roll in long direction until dough is 1/8-inch thick. Place 1 hot dog near a short end, then tightly roll, keeping the tips of the hot dog exposed. Place seam side down on prepared baking pan. Repeat with remaining dough and hot dogs.

5. Cover with plastic wrap and let rise until dough is slightly inflated, about 30 minutes. Meanwhile, heat oven to 375 degrees.

6. Brush the dough with milk. Bake for 20-25 minutes, until golden. Let cool 15 minutes before serving.

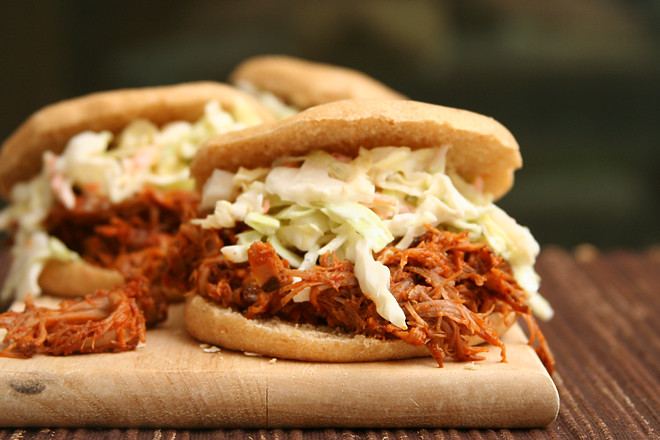
crockpot pulled pork

crockpot pulled pork new
Updated photo 5/31/12

My brother has a habit of giving out remarkably vague “recipes.” For example: “Put some pig or cow in the slow cooker with some liquid. Use a spice rub if you want. Cook until you get home from work, then give the fat to the dog and shred the meat.”

Um. Right.

I needed more information. Does the size of the roast matter? Whether it has a bone? I used pork shoulder, and Cooks Illustrated has a recipe for barbecue pulled pork, so I adapted some of their instructions – the ingredients and method for the spice rub – for this slow cooker version. I was reluctant to add liquid to the slow cooker liner with the meat, because I had some idea that it would dilute the flavor in the meat, so I added just a bit of water and some liquid smoke. I cooked it for about 10 hours, added some barbecue sauce, then cooked it for 1 hour longer.

Oh my gosh, it’s so good. I almost didn’t want to add barbecue sauce, because the meat tastes so good without it, but of course it was that much better once I added it. And it makes a ton of food. I’m going to guess that the pork shoulder I used, which was probably the smallest I could find, was about twenty servings. I froze most of it, and it reheats really well.

I learned a few things from this. For one, there’s no need to worry about liquid diluting the flavor of the meat – the meat exudes a surprising amount of liquid anyway. It’s best to add just a bit of water to help the slow cooker get the cooking started. Also, as far as cooking times go, longer seems to be better. So, as my brother said, start dinner cooking before you go to work, and when you get home 9 or 10 hours later, you’ll be just in time to shred the meat, add the barbecue sauce, and let that all cook together for a bit.

Overall, served with coleslaw, this makes for a fantastic meal. I know that crockpot pulled pork recipes are a dime a dozen, but trust me that this spice rub adds far more flavor than root beer ever could. Plus, it’s not much work at all, so with minimal effort you can stock your freezer with multiple nights’ worth of easy and tasty meals.

Update 9.21.08: Last time I made this, I used a pork shoulder that just barely fit in my crockpot; I think it was in the 7.5 pound range.  After 8.5 hours, the pork wasn’t tender enough to be pulled, at least on the inside.  So I recommend erring on the longer side of this cooking range, especially if you’re using a large roast.

Slow Cooker Pulled Pork (spice rub from Cooks Illustrated)

Spice Rub:
1 tablespoon ground black pepper
1-2 teaspoons cayenne pepper
2 tablespoons chili powder
2 tablespoons ground cumin
2 tablespoons dark brown sugar
1 tablespoon dried oregano
4 tablespoons paprika
2 tablespoons table salt
1 tablespoon granulated sugar
1 tablespoon ground white pepper

1 (6-8 pound) bone-in pork shoulder
½ teaspoon liquid smoke (optional)
2 cups barbecue sauce

1. Mix all spice rub ingredients in small bowl.

2. Massage spice rub into meat. Wrap tightly in double layer of plastic wrap; refrigerate for at least 3 hours. (For stronger flavor, the roast can be refrigerated for up to 3 days.)

3. Unwrap roast and place it in slow cooker liner. Add liquid smoke, if using, and ¼ cup water. Turn slow cooker to low and cook for 8-10 hours, until meat is fork-tender.

4. Transfer roast to cutting board; discard liquid in liner. “Pull” by tearing meat into thin shreds with two forks or your fingers. Discard fat.

5. Place shredded meat back in slow cooker liner; toss with 1 cup barbecue sauce, and heat on low for 30-60 minutes, until hot. Serve with additional barbecue sauce.

franks and beans

I can’t remember how I got it in my head to make franks and beans. I thought I had mentioned it in a blog post, but I can’t find it. Was it a comment on someone else’s blog? I thought I just idly mentioned it somewhere, and then I started thinking “yum…pork and beans…”  (Ah, Elizabeth found it for me – in my post about red beans and rice.)

Of course, god forbid I take the easy way out and buy some baked beans, add hot dogs and brown sugar and bake them for a while, like I used to do when I was a kid. (Of course, we used the cheese-filled hot dogs then. Ew!) No, I have to go all out and make beans from scratch. Glutton for punishment.

But I couldn’t find any recipes for hot dogs and beans with the beans made from scratch, so I made a Boston baked beans recipe and added cut up hot dogs to the onions while they sautéed.

I figured that if I cut the hot dogs on a diagonal, they were more elegant and I could pretend that I wasn’t eating incredibly low-class food.

But if I cut them straight across, they were more bite-sized. Ah well.

I messed up the recipe just a bit. I was cutting it in half, but I used a saucepan less than half the area of the pan called for for a full recipe, so the sauce didn’t thicken as much as I would have liked. You can see in the picture how liquidy the beans are. Also, when adding hot dogs, I might skip the salt pork next time and maybe increase the bacon by an ounce or two. Other than those minor glitches, though, this was a fun way to revisit childhood!

Boston Baked Beans (from Cooks Illustrated January 2003)

Serves 4 to 6

CI note: The beans can be made ahead. After cooking, cool them to room temperature and refrigerate in an airtight container for up to 4 days.

Bridget note: I added 2 hot dogs, cut into bite-sized pieces, to the sautéing onions.

4 ounces salt pork, trimmed of rind and cut into ½-inch cubes
2 ounces bacon (2 slices), cut into ¼ -inch pieces
1 medium onion, chopped fine
½ cup mild molasses
1 tablespoon mild molasses
1½ tablespoons brown mustard
1 pound dried small white beans (about 2 cups), rinsed and picked over
Table salt
1 teaspoon cider vinegar
Ground black pepper

Adjust oven rack to lower-middle position; heat oven to 300 degrees. Add salt pork and bacon to 8-quart Dutch oven; cook over medium heat, stirring occasionally, until lightly browned and most fat is rendered, about 7 minutes. Add onion and continue to cook, stirring occasionally, until onion is softened, about 8 minutes. Add ½ cup molasses, mustard, beans, 1¼ teaspoons salt, and 9 cups water; increase heat to medium-high and bring to boil. Cover pot and set in oven. Bake until beans are tender, about 4 hours, stirring once after 2 hours. Remove lid and continue to bake until liquid has thickened to syrupy consistency, 1 to 1½ hours longer. Remove beans from oven; stir in remaining tablespoon of molasses, vinegar, and additional salt and pepper to taste. Serve.

rice and beans

I love beans. This is a recent revelation, as the only beans I remember eating as a kid were refried or mixed with hot dogs. (And just like that, pork and beans has been added to my “To Cook” list.) I’m not sure if it’s the beans that are so good, or the type of recipes that beans tend to be in – mishmashes of various flavors and textures blended together so each bite is just a little bit different from the last, but equally delicious.

Rice and beans is beans at their simplest. I have a Puerto Rican friend who makes fantastic rice and beans, and I’m kicking myself for not getting the recipe from him before I moved away. However, I’m finding that rice and beans is completely adaptable to personal tastes and availability of ingredients. The first time I made it, I used a recipe, but I don’t find myself following it very closely these days.

The original recipe uses sausage, onions, garlic, beans, chicken broth, and some seasoning. It’s a great recipe, but the beauty of rice and beans is that you can ignore the recipe and still get something fantastic. This time I used a bit of celery, a chipotle chile, and as many tomatoes as beans. Last time I used red pepper and less tomatoes. Any number of additions would be great – green pepper, squash, maybe even sweet potatoes. The only requirement is beans, although I admit that I wouldn’t make it without onions, and now I’m loving the tomatoes. I also love the sausage, even though I prefer not to use meat in my staple weeknight meals. If you can think of a great substitute, let me know!

I’ve linked to the original recipe above, and I’ll provide a recipe for what the pictures show, but keep in mind that this is a fun meal to adapt to your own preferences.

Rice and Beans

Serves 4

8 ounces cooked sausage, such as kielbasa (I used salami this time)
1 medium onion, diced small
1 stalk celery, minced (red pepper would be great too)
4 garlic cloves, minced
1 teaspoon cumin (I’ve also used Old Bay)
2 (15-ounce) cans red kidney beans, rinsed and drained
1 (15-ounce) can diced tomatoes (I used 2 cans, but it was admittedly very tomatoey)
1 cup chicken broth (I didn’t use this, but I should have)

6 cups cooked long-grain white rice (from 1 cup uncooked rice)

In a 3- or 4-quart saucepan over medium heat, cook the sausage until it begins to brown and fat begins to render. Add the onions and celery/pepper/whatever and cook, stirring occasionally, until softened and just beginning to brown. Add the garlic and spice(s) and cook, stirring constantly, until fragrant, about 30 seconds. Add the beans, tomatoes, and broth. Bring to a simmer over medium-high heat, then cover and reduce the heat to low. Simmer, stirring occasionally, until the mixture is thick and the flavors have blended, about 45 minutes (or as long as you want actually – I’m not sure I’ve ever cooked it for the full 45 minutes). Serve over rice.

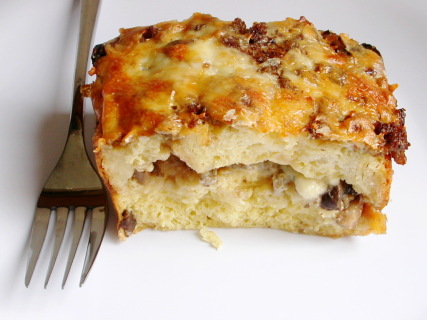
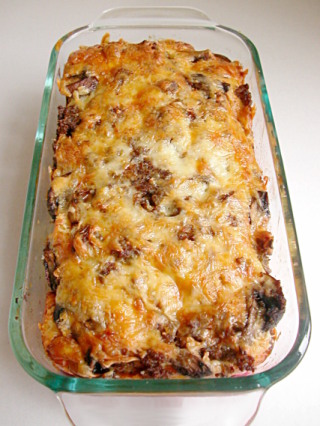
breakfast strata with sausage, mushrooms, and monterey jack

I hear a lot of requests for breakfast casserole recipes. They’re popular for good reason. Waking up to a tasty and filling breakfast that needs nothing more than to be thrown into a hot oven is a great way to start the weekend. I’ve made and loved Deb’s Boozy Baked French Toast, but it’s missing some sort of fruit to round out the nutrition. This sausage and mushroom strata has it all – protein, starch, and vegetables.

I’ve eaten a lot of different breakfast casseroles, and I’ve found that there are some tricks to making a good one. One is to use hearty bread and to dry it out so you don’t have a soggy casserole. You want to replace the moisture that’s naturally in the bread with your own flavored liquids. Also, don’t use so many eggs that they can’t be evenly mixed in and absorbed. I have a recipe for a breakfast casserole that I love the flavors of, but the original recipe calls for so many eggs that I once got a bite of nothing but unmixed egg white while eating it. Finally, of course you need to use a combination of flavors that you love, and adding lots of cheese never hurts.

Casseroles like this are perfect when you have a long day ahead of you and don’t have time to prepare a good breakfast in the morning. I’ve eaten them before skiing, hiking, and moving. They also make a great addition to a brunch menu.

Breakfast Strata with Sausage, Mushrooms, and Monterey Jack (from Cooks Illustrated November 2001)

Makes one 8 by 8-inch strata, serving 6

CI note: To weigh down the assembled strata, we found that two 1-pound boxes of brown or powdered sugar, laid side by side over the plastic-covered surface, make ideal weights. A gallon-sized zipper-lock bag filled with about 2 pounds of sugar or rice also works. This recipe doubles easily; use a 9 by 13-inch baking dish greased with only 1½ tablespoons butter and increase the baking time as directed in step 4. Feel free to substitute any good melting cheese, such as Havarti, sharp cheddar, or colby.

Bridget note: This time when I made this recipe, it ended up a bit too salty. I’m guessing the necessary salt will vary based on the sausage, so start low and add more if necessary. Pictures show a half recipe made in a loaf pan.

8-10 slices supermarket French bread (½-inch thick) or Italian bread (6 – 7 ounces)
3 tablespoons unsalted butter, softened
8 ounces bulk breakfast sausage, crumbled
3 medium shallots, minced (about 1/3 cup)
8 ounces white button mushrooms, cleaned and quartered
Table salt and ground black pepper
½ cup medium-dry white wine, such as Sauvignon Blanc
6 ounces Monterey Jack cheese, grated (about 1½ cups)
6 large eggs
1¾ cups half-and-half
2 tablespoons minced fresh parsley leaves
1. Adjust oven rack to middle position and heat oven to 225 degrees. Arrange bread in single layer on large baking sheet and bake until dry and crisp, about 40 minutes, turning slices over halfway through drying time. (Alternatively, leave slices out overnight to dry.) When cooled, butter slices on one side with 2 tablespoons butter; set aside.

2. Fry sausage in medium nonstick skillet over medium heat, breaking sausage apart with wooden spoon, until sausage has lost raw color and begins to brown, about 4 minutes; add shallots and cook, stirring frequently, until softened and translucent, about 1 minute longer. Add mushrooms to skillet, and cook until mushrooms no longer release liquid, about 6 minutes; transfer mixture to medium bowl and season to taste with salt and pepper. Add wine to skillet, increase heat to medium-high, and simmer until reduced to ¼ cup, 2 to 3 minutes; set aside.

3. Butter 8-inch square baking dish with remaining 1 tablespoon butter; arrange half the buttered bread slices, buttered-side up, in single layer in dish. Sprinkle half of sausage mixture, then ½ cup grated cheese evenly over bread slices. Arrange remaining bread slices in single layer over cheese; sprinkle remaining sausage mixture and another ½ cup cheese evenly over bread. Whisk eggs and parsley in medium bowl until combined; whisk in reduced wine, half-and-half, 1 teaspoon salt, and pepper to taste. Pour egg mixture evenly over bread layers; cover surface flush with plastic wrap, weigh down (see note, above), and refrigerate at least 1 hour or up to overnight.

4. Remove dish from refrigerator and let stand at room temperature 20 minutes. Meanwhile, adjust oven rack to middle position and heat oven to 325 degrees. Uncover strata and sprinkle remaining ½ cup cheese evenly over surface; bake until both edges and center are puffed and edges have pulled away slightly from sides of dish, 50 to 55 minutes (or about 80 minutes for doubled recipe). Cool on wire rack 5 minutes; serve.

sichuan green beans

I’m not very good at mise en place. I know that isn’t a sign of a particularly good cook, but I must be getting better lately because the kitchen isn’t so messy when I’m done cooking. I didn’t do a good job with this recipe though. I read “cook beans for 5-8 minutes” and I think Perfect! I’ll have just enough time to mince garlic, chop ginger, get the pork out of the fridge, measure out 3 liquids and 5 powders for the sauce, and slice the scallions! While stirring frequently. Dork.

Sichuan green beans was one of my favorite meals to make when I lived alone, and I still make it fairly often for me and Dave. It’s a quick, easy, balanced, healthy one pot meal. The recipe (according the Cooks Illustrated article) is based on a traditional Chinese meal involving deep-fried green beans. This recipe gets the same effect with just a couple tablespoons of oil over very high heat. The beans are cooked until they’re shriveled and blackened. It sounds like they’d be overcooked and soggy, but I swear they’re not. They’re crisp and sweet. It’s similar to what you get when you roast vegetables.

I did a quick scan on the internet of similar recipes, but I can see immediately that they’re not going to get the same sweet crunchiness out of the green beans. One steams the beans separately, one adds water to the pan to steam/boil them in the pan, one sautés them for a few minutes over medium heat. Bland (and extra work and dishes), boring, raw. No good. The high heat searing is necessary to get the most flavor out of the beans. I tried using Chinese long beans for this recipe once, but I actually didn’t like it as much. Besides costing far more than regular green beans, they weren’t as sweet.

The rest of the recipe is no problem. Cook some ground pork, add garlic and ginger, stir in some sauce ingredients, serve over white rice. You can leave the pork out and add shiitakes instead. This would make a nice side dish, but doesn’t have any protein source for a full meal. Either way, just make sure you do your chopping and measuring before you do your cooking. Otherwise you’ll be scrambling around like a dork, like I was.

Stir-Fried Sichuan Green Beans (from Cooks Illustrated January 2007)

Serves 4 as a side dish or 2 as a main course

CI note: To make this dish vegetarian, substitute 4 ounces of shiitake mushrooms, stemmed and minced, for the pork. If using mushrooms, you will need to add a teaspoon of oil to the pan in step 3 before adding the mushrooms. The cooking of this dish goes very quickly, so be sure to have all of the ingredients prepped before you start. Serve this dish with steamed white rice.

2 tablespoons soy sauce
1 tablespoon dry sherry
1 teaspoon sugar
½ teaspoon cornstarch
¼ teaspoon ground white pepper
¼ teaspoon red pepper flakes
¼ teaspoon dry mustard
2 tablespoons water
2 tablespoons vegetable oil
1 pound green beans, ends trimmed, cut into 2-inch pieces
¼ pound ground pork
3 medium cloves garlic, minced or pressed through a garlic press (about 1 tablespoon)
1 tablespoon minced fresh ginger
3 scallions, white and light green parts sliced thin
1 teaspoon toasted sesame oil

1. In small bowl, stir together soy sauce, sherry, sugar, cornstarch, white pepper, pepper flakes, mustard, and water until sugar dissolves; set aside.

2. Heat oil in 12-inch nonstick skillet over high heat until just smoking. Add beans and cook, stirring frequently, until crisp-tender and skins are shriveled and blackened in spots, 5 to 8 minutes (reduce heat to medium-high if beans darken too quickly). Transfer beans to large plate.

3. Reduce heat to medium-high and add pork to now-empty skillet. Cook, breaking pork into small pieces, until no pink remains, about 2 minutes. Add garlic and ginger; cook, stirring constantly, until fragrant, 15 to 20 seconds. Stir sauce to recombine and return beans to pan with sauce. Toss and cook until sauce is thickened, 5 to 10 seconds. Remove pan from heat and stir in scallions and sesame oil. Serve immediately.

Per Serving:
Cal 200; Fat 14 g; Sat fat 3 g; Chol 20 mg; Carb 12 g; Protein 8 g; Fiber 4 g; Sodium 680 mg

scotch eggs

1.jpg

I’m always hearing about people frying crazy things. There’s the twinkies, and the snickers bars, and now brownies. I had a fried oreo at a street fair in Manhattan, and it was delicious. Of course it was delicious – it’s a deep-fried oreo. It’s also kind of absurd.

Speaking of absurd, what about peeling a hard-boiled egg, covering it in sausage, breading it, and frying it? Oh, and then serving it for breakfast (alongside cake).

In the Scotch egg’s defense, my understanding is that these are pub fare in Scotland, and therefore probably not served for breakfast. Whatever, we ate them for breakfast, and we were happy.

My mom used to make these for brunch parties when I was a kid. When I asked her for the recipe, she gave me two and was wishy-washy on which she uses. I found two more and ended up with four similar but distinct recipes.

My biggest question concerned the sausage to egg ratio. My four recipes had four different ratios varying from 2 to 5 ounces of sausage per hard-boiled egg. I settled on three ounces, which ended up being pretty much perfect. Any more and the sausage would overwhelm the egg, but with much less, it would be difficult to evenly coat the egg.

5.jpg

Each recipe had a different frying temperature as well, ranging from 325 to 375 degrees. I generally try to maintain an oil temperature between 350 and 375 degrees while deep-frying, and that worked perfectly here. Two recipes used fresh bread crumbs, one used cracker meal, one used dried bread crumbs. I used panko (Japanese coarse-grained dried bread crumbs) because it’s all I had, but I’m thinking fresh would work great as well.

So, there you go. Scotch eggs. Not very healthy, but really freakin’ good. Serve with beer! Or for breakfast! But probably don’t drink beer for breakfast. Ew.

Scotch Eggs

1 egg, beaten
1 teaspoon Dijon mustard
½ cup (2½ ounces) unbleached flour
1 pound bulk sausage
2 cups breadcrumbs, either panko or fresh
5 eggs, hard-boiled and peeled
vegetable or peanut oil for frying

Mix egg and mustard in a medium bowl to blend. Place flour in another bowl. Place breadcrumbs in another bowl. Roll 1 hard-boiled egg in flour. Using wet hands, press 1/5 of sausage around egg to coat. Roll sausage-covered egg in beaten egg mixture, then roll in breadcrumbs, covering completely and pressing to adhere. Place Scotch egg on plate. Repeat with remaining eggs. (Can be made 1 day ahead. Cover and refrigerate.)

Add enough oil to heavy large saucepan to reach depth of 1½ inches. Attach deep-fry thermometer and heat oil to 360-370 °F. Add 3 prepared eggs to oil; fry until sausage is cooked through and coating is deep brown, about 6 minutes. Using slotted spoon, transfer eggs to paper towels to drain. Repeat with remaining 2 eggs. Serve warm.

6.jpg

smitten kitchen recipes

t1.jpg

Smitten Kitchen is my new favorite cookbook. In the past month since discovering Deb’s blog, I’ve made seven of her recipes. When I’m trying to come up with cooking ideas, I just scan through her recipe page. Rather than rehash each dish in detail, I’m combining them into one entry.

bft.jpg

Boozy Baked French Toast

Of all of Deb’s recipes that I’ve made recently, this is my and Dave’s favorite. For one thing, it takes all of 10 minutes to put together, and that can be done the night before. In the morning, just cook it in the oven for half an hour, and voila – a great breakfast. The recipe is supposedly adaptable to whatever flavors you’re in the mood for or you have available, but I’ve only made it one way. I was planning to follow Deb’s recent favorite, with triple sec and orange zest, but I use “planning” loosely, as I didn’t actually bother to get either triple sec or orange zest. Instead, I used Grand Marnier as the alcohol, the zest of one grapefruit, and a splash of vanilla extract. It was fantastic. It was like Creamsicle French Toast. I made it again a week later, exactly the same way. This is why I have a loaf of challah in my freezer right now, and a grapefruit languishing in my crisper drawer, waiting for me to get back from New Mexico and make this great and easy dish for my friends who will be visiting.

copy-of-dscn3652.jpg

Artichoke Ravioli

I love the idea of homemade ravioli. I enjoy working with fresh pasta, and I like the option of customizing my ravioli filling to whatever strikes my interest – mushrooms, squash, seafood, and in this case, artichokes. The problem is, I sort of suck at making it. Both times I’ve tried, the pasta has been too watery after being boiled. This particular recipe is baked after being boiled, which helped dry it out somewhat, but clearly I need to work on my technique. Ravioli is too much tedious work to get anything less than amazing results. I’m not ready to give up yet. This filling was, fortunately, very good. The simple sauce was good too, although I used canned tomatoes instead of fresh, it being February and all.

copy-of-dscn3833.jpg

Creamy Baked Macaroni and Cheese

I already have a macaroni and cheese recipe that I love, but Deb’s photos of a crispy cheesy crust and creamy cheesy sauce had me intrigued to try a new recipe. Did I mention that it’s cheesy? This recipe uses twice as much cheese per pasta as my other favorite recipe. So I made it, and it was delicious, but Dave and I couldn’t decide if it was as good as my other favorite. So I made them side-by-side, which was, well, confusing. Neither recipe is particularly difficult, but I was making half recipes of each sauce, then storing half of that in the fridge so we could have an easy but fresh meal a few days later, which means that each sauce was topping only a quarter recipe of pasta. There was a screw-up here and there, but nothing vital. We weren’t able to pick a favorite. I know they’re both macaroni and cheese, but it felt like comparing apples and oranges. The Cooks Illustrated recipe is creamy and smooth, both in texture and flavor, while the new recipe was far sharper (did I mention that it has twice as much cheese as the other?) and a bit grainy, but oh, that crisp crust was fun. I think I’ll be combining the two in the future. I know Cooks Illustrated uses half cheddar because of its great flavor, and half Monterey jack because of its smooth melting qualities, but I’m going to try using 75% cheddar and 25% Monterey jack next time to get some more of that sharp flavor. I’m also going to skip the bread crumb topping and use more cheese instead, then put that under the broiler to brown the cheese. I think this will combine my favorite aspects of each recipe. (I was also just reminded of a recipe I used to love that uses smoked gouda, so I need to revisit that one. Hey, I love cheesy pasta.)

ribs.jpg

Hoisin and Honey Pork Ribs

When I was a kid, pork ribs were my favorite meal, and I requested them for every birthday. I grew out of that when I decided that ribs were too much effort and mess to eat when there was so little meat. But these ribs were certainly worth the effort. I wanted to make them because I recently tried hoisin sauce for the first time and loved it. This was my first time cooking pork ribs, plus I’m not usually very good with the broiler, but everything worked out great. Because the ribs are boiled first, the broiler is just to crisp them and caramelize the sauce, so it was easy.

ddl2b.jpg

Dulce de Leche Cheesecake Squares

This recipe called to me as soon as Deb posted it. Cheesecake filling, graham cracker crust, chocolate glaze, all mixed up with dulce de leche. I’m not really familiar with dulce de leche, but caramelized milk certainly sounds great. But wow, these were rich. I can usually handle rich foods without a problem, but these were too much even for me. It helped when I thought of them like candy instead of like a bar cookie and started cutting them into the 1-inch squares that the recipe recommends. I did enjoy them, but I don’t think I’ll be making them again.

t3.jpg

Truffles

It sounds like Valentine’s Day is becoming mostly an excuse for couples to enjoy a good meal together, which I think is great. Dave and I weren’t even going to do that (we were having the second day of mac and chz comparison on V-Day), and I was okay with that. I found out on February 13th that Dave wanted to do something extra, so I surprised him by making truffles the next day. I loosely followed the recipe for Robert Linxe’s truffles, except, less fancy. I didn’t use Volrhona chocolate, I didn’t wear gloves, and I didn’t simmer the cream multiple times. It wasn’t worried about details this time. It was my first time making truffles, and I think they came out well. I want to try them again, but comparing a number of different quality chocolates to see how much it really matters.

Pizza Dough

Deb discussed a recipe for pizza dough that replaced some of the water with white wine and added a little honey. I tried it, and while the dough wasn’t sweet and the wine flavor wasn’t obvious, it made a really good pizza crust. Even Dave, who didn’t know that I had changed the recipe, pointed out that it was particularly good. I forgot that this recipe was related to this entry in my blog, so I didn’t think to take a picture, which is unfortunate because the crust was really crisp and light.

Next on the list is Lighter-Than-Air Chocolate Cake. Flourless chocolate cakes are usually dense confections, so I’m interested in this very light version. And then, who knows? World Peace Cookies? Pretzel rolls? Risotto alla Barolo? There’s so many great recipes to choose from, all beautifully photographed and enticingly described.

ddl1.jpg

four soups

1-copy.jpg

I have backlog of soups to be blogged, so I’m going to throw them all into one soupfest entry.

First up is lentil soup, which I was excited about because I found the fancy French lentils, but it seems like I’m cursed to never quite have all the right ingredients for this soup. The first time I made it, I was entrenched in step 3, after the vegetables are softened and the lentils are darkened, adding the wine, and running out of wine. Eh. I played around with some other acidic ingredients, and ended up with a delicious but teensy bit vinegary soup. This time it was chicken broth that I ran out of. Chicken broth! I never run out of chicken broth! I carefully monitor my Better Than Bouillon supply because I loooove Better Than Bouillon. Bummer. I substituted some vegetable (not better than) bouillon. Still a damn good soup. And healthy! The only non-healthy item in the whole thing is a few slices of bacon. That’s nothing.

4-copy.jpg

Next up is white chicken chili. This is the second time I’ve made this recipe, and I seem to remember liking it more the first time. It was far from bad this time – look at all that flavory goodness, how could it be bad?

2-copy.jpg

I just didn’t feel excited about it. Maybe it would have been as simple as adding salt. Another possibility is that adding 50% more beans than the recipe called for made the soup a little bland. I will make it again, but it’s on trial.

5-copy.jpg

Poor cream of mushroom soup. It’s been relegated to nothing more than an ingredient in bad casseroles, so when I saw a recipe for the real deal, I did a double take. People actually eat mushroom soup? Unheard of! Dave and I are both big mushroom fans, so I was excited about this soup. Unfortunately, it just didn’t deliver. It wasn’t bad, it was just so dominated by pureed mushrooms. It was a little intense, even for mushroom lovers like us. Maybe because I used all cremini mushrooms instead of the button mushrooms that the recipe calls for? Whatever, next time I’ll be trying this highly recommended recipe.

6-copy.jpg

And finally, we have my favorite of these four soups. I served this hot and sour soup with the potstickers, which we’re a little crazy about, so this soup had a tough job standing up to that. But it holds it’s own, oh yes. I loved the moo shu I made a few weeks ago, and this has most of the same ingredients, but in soup form. I also really like when tofu is used in recipes where it’s actually the original ingredient, instead of covering for some maligned but more flavorful meat. Mmm, and black vinegar. This is good stuff. And I’m all about the texture that the cornstarch gives the soup. It doesn’t thicken it to a paste, it just provides a little body. The soup has so many strong and contrasting flavors, I just love it. And, it’s healthy! In fact, it’s so light, that I don’t know if I can recommend serving it as a meal on its own. I made the full recipe, we ate it with potstickers for two meals, and then we snacked on it throughout the week. I wasn’t complaining about having hot and sour soup around all week!

So there you have it – a January’s worth of soups. Yum!

Hearty Lentil Soup (from Cooks Illustrated)

Lentils du Puy, sometimes called French green lentils, are our first choice for this recipe, but brown, black, or regular green lentils are fine, too. Note that cooking times will vary depending on the type of lentils used. Lentils lose flavor with age, and because most packaged lentils do not have expiration dates, try to buy them from a store that specializes in natural foods and grains. Before use, rinse and then carefully sort through the lentils to remove small stones and pebbles. The soup can be made in advance. After adding the vinegar in step 2, cool the soup to room temperature and refrigerate it in an airtight container for up to 2 days. To serve, heat it over medium-low until hot, then stir in the parsley.

Makes about 2 quarts, serving 4 to 6

3 slices bacon (about 3 ounces), cut into ¼-inch pieces
1 large onion, chopped fine (about 1½ cups)
2 medium carrots, peeled and chopped medium (about 1 cup)
3 medium cloves garlic, minced or pressed through garlic press (about 1 tablespoon)
1 can (14½ ounces) diced tomatoes, drained
1 bay leaf
1 teaspoon minced fresh thyme leaves
1 cup lentils (7 ounces), rinsed and picked over
1 teaspoon table salt
ground black pepper
½ cup dry white wine
4½ cups low-sodium chicken broth
1½ cups water
1½ teaspoons balsamic vinegar
3 tablespoons minced fresh parsley leaves

1. Fry bacon in large stockpot or Dutch oven over medium-high heat, stirring occasionally, until fat is rendered and bacon is crisp, 3 to 4 minutes. Add onion and carrots; cook, stirring occasionally, until vegetables begin to soften, about 2 minutes. Add garlic and cook until fragrant, about 30 seconds. Stir in tomatoes, bay leaf, and thyme; cook until fragrant, about 30 seconds. Stir in lentils, salt, and pepper to taste; cover, reduce heat to medium-low, and cook until vegetables are softened and lentils have darkened, 8 to 10 minutes. Uncover, increase heat to high, add wine, and bring to simmer. Add chicken broth and water; bring to boil, cover partially, and reduce heat to low. Simmer until lentils are tender but still hold their shape, 30 to 35 minutes; discard bay leaf.

2. Puree 3 cups soup in blender until smooth, then return to pot; stir in vinegar and heat soup over medium-low until hot, about 5 minutes. Stir in 2 tablespoons parsley and serve, garnishing each bowl with some of remaining parsley.

White Chicken Chili (from Cooks Illustrated)

Adjust the heat in this dish by adding the minced ribs and seeds from the jalapeño as directed in step 6. If Anaheim chiles cannot be found, add an additional poblano and jalapeño to the chili. This dish can also be successfully made by substituting chicken thighs for the chicken breasts. If using thighs, increase the cooking time in step 4 to about 40 minutes. Serve chili with sour cream, tortilla chips, and lime wedges.

Serves 6 to 8

3 pounds bone-in, skin-on chicken breast halves, trimmed of excess fat and skin
Table salt and ground black pepper
1 tablespoon vegetable oil
3 medium jalapeño chiles
3 poblano chiles (medium), stemmed, seeded, and cut into large pieces
3 Anaheim chile peppers (medium), stemmed, seeded, and cut into large pieces
2 medium onions, cut into large pieces (2 cups)
6 medium cloves garlic, minced or pressed through garlic press (about 2 tablespoons)
1 tablespoon ground cumin
1½ teaspoons ground coriander
2 (14.5-ounce) cans cannellini beans, drained and rinsed
3 cups low-sodium chicken broth
3 tablespoons fresh lime juice (from 2 to 3 limes)
¼ cup minced fresh cilantro leaves
4 scallions, white and light green parts sliced thin
1. Season chicken liberally with salt and pepper. Heat oil in large Dutch oven over medium-high heat until just smoking. Add chicken, skin side down, and cook without moving until skin is golden brown, about 4 minutes. Using tongs, turn chicken and lightly brown on other side, about 2 minutes. Transfer chicken to plate; remove and discard skin.

2. While chicken is browning, remove and discard ribs and seeds from 2 jalapeños; mince flesh. In food processor, process half of poblano chiles, Anaheim chiles, and onions until consistency of chunky salsa, ten to twelve 1-second pulses, scraping down sides of workbowl halfway through. Transfer mixture to medium bowl. Repeat with remaining poblano chiles, Anaheim chiles, and onions; combine with first batch (do not wash food processor blade or workbowl).

3. Pour off all but 1 tablespoon fat from Dutch oven (adding additional vegetable oil if necessary) and reduce heat to medium. Add minced jalapeños, chile-onion mixture, garlic, cumin, coriander, and ¼ teaspoon salt. Cover and cook, stirring occasionally, until vegetables soften, about 10 minutes. Remove pot from heat.

4. Transfer 1 cup cooked vegetable mixture to now-empty food processor workbowl. Add 1 cup beans and 1 cup broth and process until smooth, about 20 seconds. Add vegetable-bean mixture, remaining 2 cups broth, and chicken breasts to Dutch oven and bring to boil over medium-high heat. Reduce heat to medium-low and simmer, covered, stirring occasionally, until chicken registers 160 degrees (175 degrees if using thighs) on instant-read thermometer, 15 to 20 minutes (40 minutes if using thighs).

5. Using tongs, transfer chicken to large plate. Stir in remaining beans and continue to simmer, uncovered, until beans are heated through and chili has thickened slightly, about 10 minutes.

6. Mince remaining jalapeño, reserving and mincing ribs and seeds (see note above), and set aside. When cool enough to handle, shred chicken into bite-sized pieces, discarding bones. Stir shredded chicken, lime juice, cilantro, scallions, and remaining minced jalapeño (with seeds if desired) into chili and return to simmer. Adjust seasonings with salt and pepper and serve.

Per Serving:
Cal 370; Fat 6 g; Sat fat 1 g; Chol 115 mg; Carb 25 g; Protein 52 g; Fiber 7 g; Sodium 710 mg

Creamy Mushroom Soup (from Cooks Illustrated)

To make sure that the soup has a fine, velvety texture, puree it hot off the stove, but do not fill the blender jar more than halfway, as the hot liquid may cause the lid to pop off the jar.

Makes 8 cups, serving 6 to 8

6 tablespoons unsalted butter
6 large shallots, minced (about 3/4 cup)
2 small cloves garlic, minced (about 1 1/2 teaspoons)
½ teaspoon ground nutmeg, freshly grated
2 pounds white button mushrooms, wiped clean and sliced 1/4 inch thick
3½ cups chicken stock or canned low-sodium chicken broth
4 cups hot water
½ ounce dried porcini mushrooms, rinsed well
1/3 cup dry sherry or Madeira
1 cup heavy cream
2 teaspoons lemon juice from 1 lemon
Table salt and ground black pepper

Sauteed Wild Mushroom Garnish (optional)
2 tablespoons unsalted butter
8 ounces shiitake mushrooms or chanterelle, oyster, or cremini mushrooms, stems
trimmed and discarded, mushrooms wiped clean and sliced thin
Table salt and ground black pepper

1. Melt butter in large, heavy-bottomed Dutch oven over medium-low heat; when foaming subsides, add shallots and saute, stirring frequently, until softened, about 4 minutes. Stir in garlic and nutmeg; cook until fragrant, about 1 minute longer. Increase heat to medium; add sliced mushrooms and stir to coat with butter. Cook, stirring occasionally, until mushrooms release liquid, about 7 minutes. Reduce heat to medium-low, cover pot, and cook, stirring occasionally, until softened and mushrooms have released all liquid, about 20 minutes. Add chicken stock, water, and porcini mushrooms; cover and bring to simmer, then reduce heat to low and simmer until mushrooms are fully tender, about 20 minutes longer.

2. Pour soup into a large bowl. Rinse and dry Dutch oven. Puree soup in batches in blender until smooth, filling blender jar only halfway for each batch. Return soup to Dutch oven; stir in Madeira and cream and bring to simmer over low heat. Add lemon juice, season to taste with salt and pepper, and serve with sauteed mushroom garnish, if desired. (Can be cooled to room temperature and refrigerated up to 4 days.) If making ahead, add cream at serving time.

3. For the Sauteed Wild Mushroom Garnish (optional): Heat butter in medium skillet over low heat; when foam subsides, add mushrooms and sprinkle with salt and pepper. Cover and cook, stirring occasionally, until mushrooms release their liquid, about 10 minutes for shiitakes and chanterelles, about 5 minutes for oysters, and about 9 minutes for cremini. Uncover and continue to cook, stirring occasionally, until liquid released by mushrooms has evaporated and mushrooms are browned, about 2 minutes for shiitakes, about 3 minutes for chanterelles, and about 2 minutes for oysters and cremini. Sprinkle a portion of mushrooms over individual bowls of soup and serve.

Hot and Sour Soup (from Cooks Illustrated)

To make slicing the pork chop easier, freeze it for 15 minutes. We prefer the distinctive flavor of Chinese black vinegar; look for it in Asian supermarkets. If you can’t find it, a combination of red wine vinegar and balsamic vinegar approximates its flavor. This soup is very spicy. For a less spicy soup, omit the chili oil altogether or add only 1 teaspoon.

Serves 6 to 8 as an appetizer

7 ounces extra-firm tofu, drained
4 tablespoons soy sauce
1 teaspoon toasted sesame oil
3 tablespoons cornstarch, plus an additional 1 1/2 teaspoons
1 boneless, center-cut, pork loin chop (1/2 inch thick, about 6 ounces), trimmed of fat and cut into 1 inch by 1/8-inch matchsticks
3 tablespoons cold water, plus 1 additional teaspoon
1 large egg
6 cups low-sodium chicken broth
1 cup bamboo shoots (from one 5-ounce can), sliced lengthwise into 1/8-inch-thick strips
4 ounces fresh shiitake mushrooms, stems removed, caps sliced 1/4 inch thick (about 1 cup)
5 tablespoons black Chinese vinegar or 1 tablespoon red wine vinegar plus 1 tablespoon balsamic vinegar (see note above)
2 teaspoons chili oil (see note above)
1 teaspoon ground white pepper
3 medium scallions, sliced thin

1. Place tofu in pie plate and set heavy plate on top. Weight with 2 heavy cans; let stand at least 15 minutes (tofu should release about ½ cup liquid). Whisk 1 tablespoon soy sauce, sesame oil, and 1 teaspoon cornstarch in medium bowl; toss pork with marinade and set aside for at least 10 minutes (but no more than 30 minutes).

2. Combine 3 tablespoons cornstarch with 3 tablespoons water in small bowl and mix thoroughly; set aside, leaving spoon in bowl. Mix remaining ½ teaspoon cornstarch with remaining 1 teaspoon water in small bowl; add egg and beat with fork until combined. Set aside.

3. Bring broth to boil in large saucepan set over medium-high heat. Reduce heat to medium-low; add bamboo shoots and mushrooms and simmer until mushrooms are just tender, about 5 minutes. While broth simmers, dice tofu into ½-inch cubes. Add tofu and pork, including marinade, to soup, stirring to separate any pieces of pork that stick together. Continue to simmer until pork is no longer pink, about 2 minutes.

4. Stir cornstarch mixture to recombine. Add to soup and increase heat to medium-high; cook, stirring occasionally, until soup thickens and turns translucent, about 1 minute. Stir in vinegar, chili oil, pepper, and remaining 3 tablespoons soy sauce; turn off heat.

5. Without stirring soup, use soupspoon to slowly drizzle very thin streams of egg mixture into pot in circular motion. Let soup sit 1 minute, then return saucepan to medium-high heat. Bring soup to gentle boil, then immediately remove from heat. Gently stir soup once to evenly distribute egg; ladle into bowls and top with scallions.

Per Serving:
Cal 120; Fat 5 g; Sat fat 1 g; Chol 12 mg; Carb 12 g; Protein 8 g; Fiber 1 g; Sodium 1110 mg

potstickers

11.jpg


I am not good at timing my cooking. I had grand plans for these potstickers to be part of an all day sporadic eating event during the NFL championship games. We’d eat potstickers in the first game, hot and sour soup at the beginning of the second game, and dessert sometime later. But my timing is so bad that I ended up sitting down with a plate full of potstickers right during halftime of the first game. Boring!

My plan got another wrench thrown in it after our first plate of potstickers, when we looked at each other and both said “we want more!” It’s always like that when I make potstickers – neither of us can ever get enough!

Another thing that’s great about potstickers is that they adapt to your schedule. You can make the filling and then forget about it until you’re ready, even if it isn’t until the next day. You can fill the potstickers and then forget about them for months! This time, I filled enough for our first serving, and then filled some more when we decided that we absolutely had to have more. I left the rest of the filling in the fridge overnight, formed more dumplings the next afternoon, and steamed them when we wanted to eat dinner. I was planning on freezing some for later, but it was clear early on that that wasn’t happening.

3.jpg

And you know what else? They’re actually healthy. Look at those ingredients – 3 cups minced cabbage, scallions, egg whites. Two tablespoons of oil in the whole thing, and to be honest, you won’t need that much with a good nonstick pan. I bet I only used a few teaspoons. So we can eat all we want!

2.jpg

Pork and Cabbage Dumplings – Wor Tip (from Cooks Illustrated)

We prefer to use gyoza wrappers. You can substitute wonton wrappers, but the cooking time in step 4 will be reduced from 10 minutes to 5 or 6 minutes and note that the yield will increase to 40 potstickers (see chart below Step 4 for more information). These dumplings, also known as potstickers, are best served hot from the skillet; we recommend that you serve the first batch immediately, then cook the second batch. To freeze, place filled, uncooked dumplings in the freezer in a single layer on a plate until frozen, then transfer to a storage bag. There’s no need to thaw frozen dumplings; just proceed with the recipe.

Makes 24 dumplings, 6 first course servings

Filling
3 cups minced napa cabbage leaves (about ½ medium head)
¾ teaspoon table salt
¾ pound ground pork
4 minced scallions (about 6 tablespoons)
2 egg whites, lightly beaten
4 teaspoons soy sauce
1½ teaspoons minced or grated fresh ginger
1 medium garlic clove, minced or pressed through a garlic press (about 1 teaspoon)
1/8 teaspoon ground black pepper

Dumplings
24 round gyoza wrappers (see note)
2 tablespoons vegetable oil
1 cup water, plus extra for brushing
1. For the filling: Toss cabbage with the salt in colander set over a bowl and let stand until cabbage begins to wilt, about 20 minutes. Press the cabbage gently with rubber spatula to squeeze out any excess moisture, the transfer to a medium bowl. Add the remaining filling ingredients and mix thoroughly to combine. Cover with plastic wrap and refrigerate until mixture is cold, at least 30 minutes or up to 24 hours.

2. For the dumplings: Working with 4 wrappers at a time (keep the remaining wrappers covered with plastic wrap), follow the photos below to fill, seal, and shape the dumplings using a generous 1 teaspoon of the chilled filling per dumpling. Transfer the dumplings to a baking sheet and repeat with the remaining wrappers and filling; you should have about 24 dumplings. (The dumplings can be wrapped tightly with plastic wrap and refrigerated for up to 1 day, or frozen for up to 1 month. Once frozen, the dumplings can be transferred to a zipper-lock bag to save space in the freezer; do not thaw before cooking.)

3. Line a large plate with a double layer of paper towels; set aside. Brush 1 tablespoon of the oil over the bottom of a 12-inch nonstick skillet and arrange half of the dumplings in the skillet, with a flat side facing down (overlapping just slightly if necessary). Place the skillet over medium-high heat and cook the dumplings, without moving, until golden brown on the bottom, about 5 minutes.

4. Reduce the heat to low, add ½ cup of the water, and cover immediately. Continue to cook, covered, until most of the water is absorbed and the wrappers are slightly translucent, about 10 minutes. Uncover the skillet, increase the heat to medium-high, and continue to cook, without stirring, until the dumpling bottoms are well browned and crisp, 3 to 4 minutes more. Slide the dumplings onto the paper towel-lined plate, browned side facing down, and let drain briefly. Transfer the dumplings to a serving platter and serve with scallion dipping sauce (see related recipe). Let the skillet cool until just warm, then wipe it clean with a wad of paper towels and repeat step 3 with the remaining dumplings, oil, and water.

Choosing the Right Wrap
Tasters preferred the slightly chewy texture of gyoza-style wrappers to thinner wonton wrappers, but both styles produced terrific potstickers. Although we developed our recipe using round wrappers, square or rectangular wrappers can be used as well. Here’s how to adjust filling amount and steaming time. Because the smaller wrappers yield more dumplings, you’ll need to cook them in multiple batches.

Instructions for different size wrappers:
Round gyoza (3¾ inches diameter), fill with 1 rounded tablespoon, steam for 10 minutes
Round wonton (3¾ inches diameter), fill with 1 rounded tablespoon, steam for 6 minutes
Square wonton (3 3/8 inches square), fill with 2 rounded teaspoons, steam for 6 minutes
Rectangular wonton (3¼ inches by 2¾ inches), fill with 1 rounded teaspoon, steam for 5 minutes

Scallion Dipping Sauce

The sauce can be refrigerated overnight.

Makes ¾ cup

¼ cup soy sauce
2 tablespoons rice vinegar
2 tablespoons mirin
2 tablespoons water
1 teaspoon chili oil (optional)
½ teaspoon toasted sesame oil
1 medium scallion , white and green parts, minced

Combine all ingredients in bowl and serve.