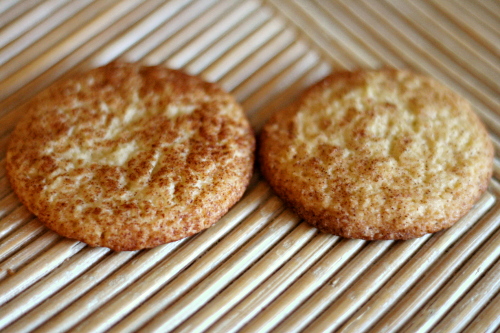
snickerdoodle experiments

Copy of IMG_6966
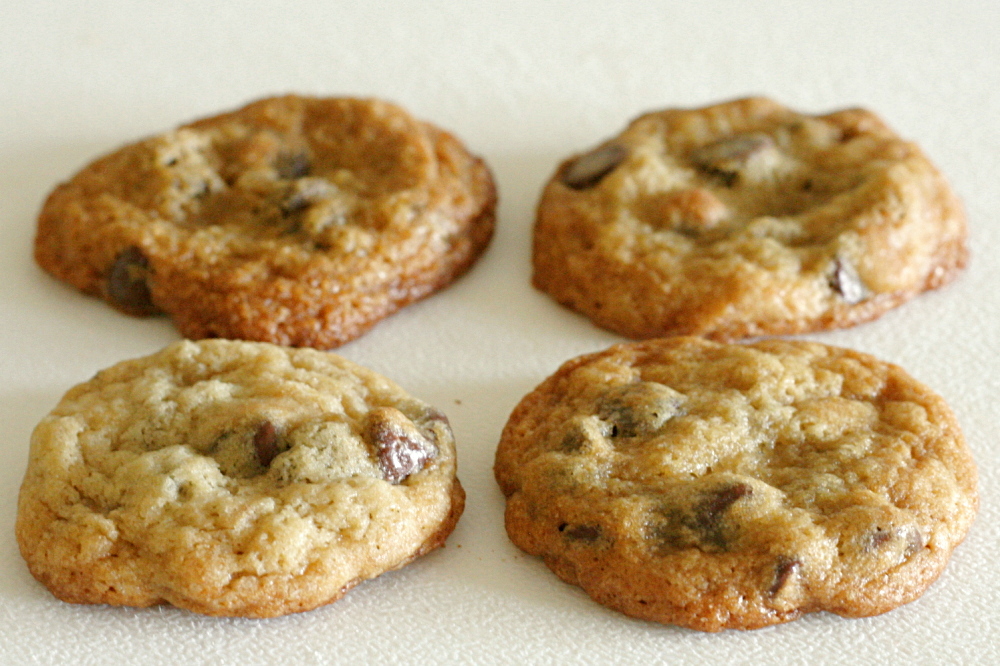
Uh…sorta forgot to write down which cookie is which, but, does it really matter?  They’re just about identical.

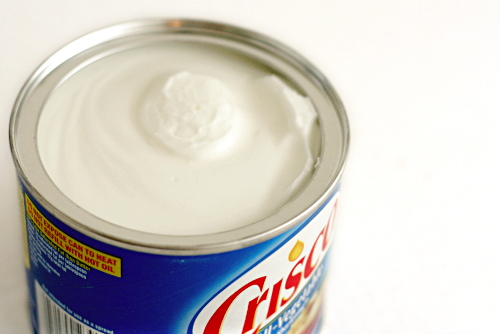
I don’t cook with shortening.  I just don’t.  Look, I know a tablespoon here or there isn’t going to kill me, but my granola-like reasons go beyond my health.  For one thing, it kind of grosses me out.  Mmm, chemically solidified oil, yum.  No.  Also, and here is where I really start to sound like a crazed liberal, but I try to vote with my dollar.  So if I don’t like how a product is produced or what the product stands for, I try not to buy it.

Copy of IMG_6572

Besides, shortening isn’t any good.  Its only advantage is it doesn’t melt as easily as butter, but if you know how to work with butter correctly, that isn’t an issue.

I absolutely don’t judge you if you cook with shortening, okay?  To each his own.  I’m fully aware that I’m being stubborn and probably impractical.  If I was at your house and you made a light, flaky pie crust with shortening, I would absolutely eat it and enjoy it.  And heck, good for you for not being as close-minded as I apparently am.

Copy of IMG_6901

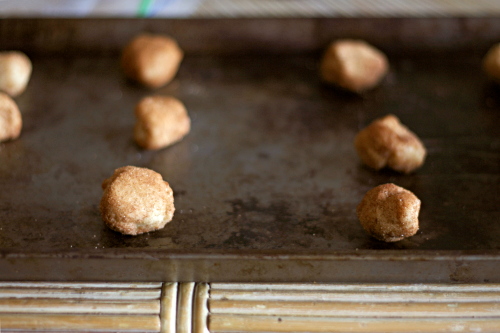
So.  When I saw that Cooks Illustrated requires shortening in their snickerdoodle recipe, I had my doubts.  Yes, maybe the cookies would spread just a tiny bit more if they’re made with only butter, but is it significant?  To see how big of a difference the shortening would make, I made the recipe both ways and compared.  (Yes, I had to buy shortening to do this.)

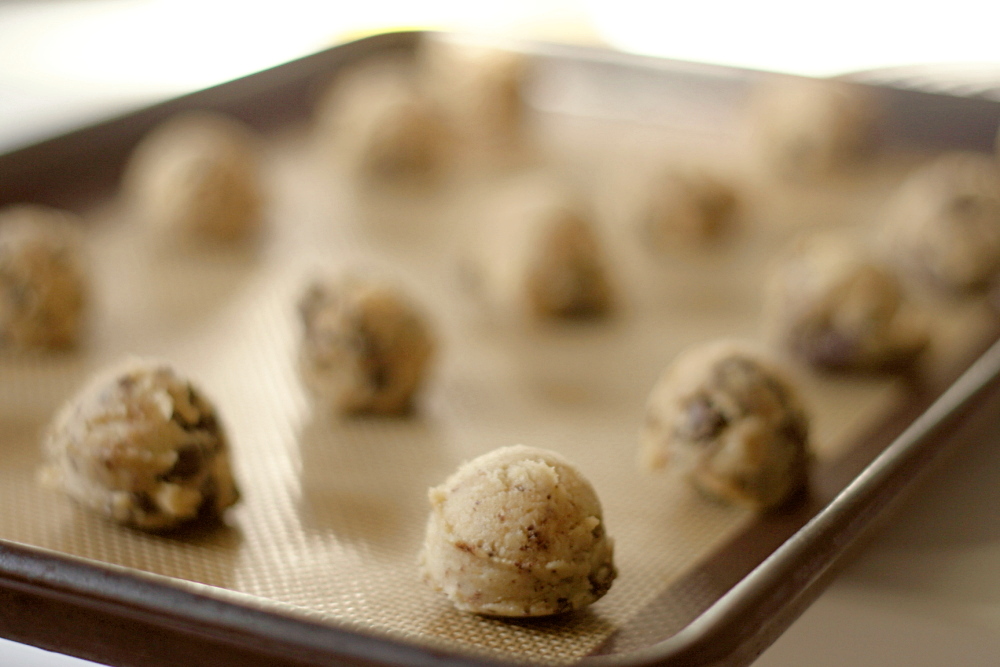
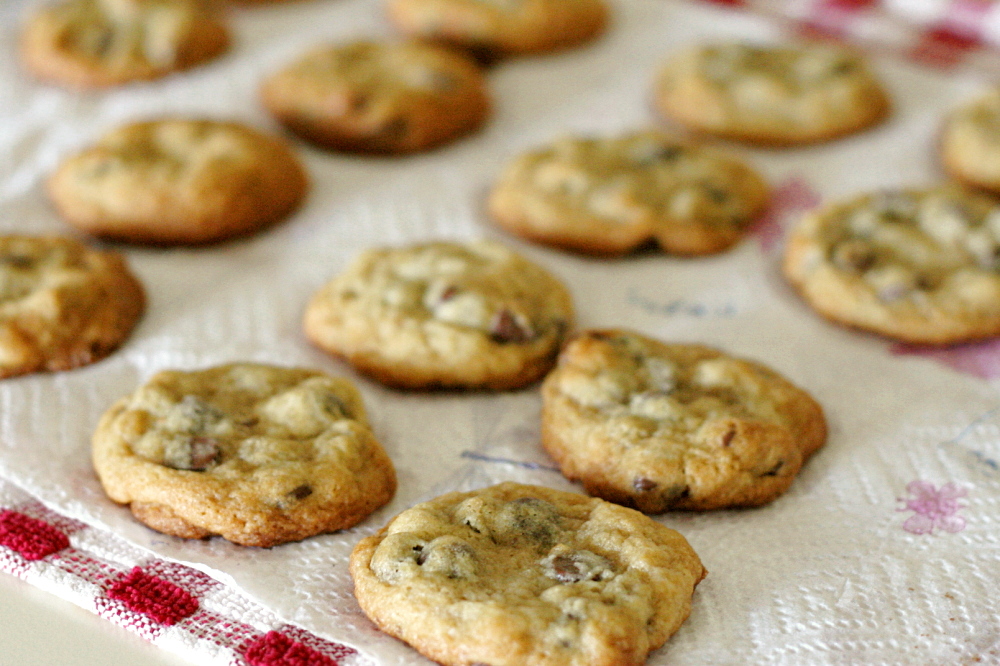
I made the dough and baked some immediately.  I sent most of those away, but my initial impression was that the cookies were identical.  I also froze some of each batch after forming it into balls, then toted in on a 9-hour drive for vacation, then refroze it, then defrosted it and left it in the fridge for a few days until I finally got around to baking it.  Way to respect my food, right?  Fortunately, they came out just fine.

Copy of IMG_6909

There were four of us comparing the cookies, and the others didn’t know which cookie had shortening and which used all butter.  Here are some of the comments:

  • Shortening: uniform texture; dry; generic; tastes storebought
  • All-butter: buttery; delicate; firm edges, soft middle; tastes like a snickerdoodle should taste; better

Copy of IMG_6964
butter + shortening

Are those conclusive results or what?  Also, I didn’t see an issue with the all-butter cookies spreading.  But in the interest of full disclosure, one of my friends didn’t really notice a difference between the two, so while the all-butter cookie did undoubtedly have a better, more buttery flavor and the other tasted a little flat in comparison, the difference isn’t huge.  Both cookies were good, of course.

But, I will certainly be leaving the shortening out of my snickerdoodles (and my pie crust and my biscuits and everything else) in the future.

Copy of IMG_6955
all butter

Printer Friendly Recipe
Snickerdoodles
(from Cooks Illustrated via Annie’s Eats)

Makes about 30 cookies

I recommend replacing the shortening with more (4 tablespoons) butter.  Also, I made my cookies smaller, didn’t flatten them, and baked them for about 2 minutes less.  I only ever bake one sheet of cookies at a time.

2¼ cups (11¼ ounces) unbleached all-purpose flour
2 teaspoon cream of tartar
1 teaspoon baking soda
½ teaspoon salt
12 tablespoon unsalted butter, softened but still cool
¼ cup vegetable shortening
1½ cups (10½ ounces) granulated sugar, plus 3 tablespoon for rolling dough
2 large eggs
1 tablespoon ground cinnamon, for rolling dough

1. Adjust oven racks to upper- and lower-middle positions.  Preheat the oven to 400ºF.  Line baking sheets with parchment paper.  In a medium bowl, whisk together the flour, cream of tartar, baking soda and salt; set aside.  In the bowl of an electric mixer fitted with the paddle attachment, cream the butter, shortening and 1½ cups sugar on medium speed until well combined, 1 to 1½ minutes.  Scrape down the sides of the bowl, add the eggs, and beat again until combined, about 30 seconds.  Add in the dry ingredients and beat at low speed until just combined, about 20 seconds.

2. In a small, shallow bowl, combine the 3 tablespoons sugar and the cinnamon for rolling the dough.  Stir or shake well to combine.  Working with a heaping tablespoon of dough each time, roll the dough into 1½-inch balls.  Roll the balls in the cinnamon sugar mixture and place them on the prepared baking sheets, about 2 inches apart.  Use a drinking glass with a flat bottom to gently flatten the dough balls to ¾-inch thickness (butter the bottom of the glass before starting, and dip it in sugar between cookies if it begins to stick).

3. Bake until the edges of the cookies are beginning to set and the center are soft and puffy, 9-11 minutes, rotating the baking sheets front to back and top to bottom halfway through the baking time.  Let the cookies cool on the baking sheets 2-3 minutes before transferring them to a wire rack to cool completely.
pumpkin cupcake comparison

Copy of IMG_9772

You know what’s totally unfair, considering that I’m in general more interested in food than Dave? He has a more sensitive palate than me. What the hell?

I made these cupcakes when he wasn’t around, and I had to do three separate “tastings” (eating all three in one sitting, unfrosted) over a couple of days before I could really narrow down my opinion. Dave came home, ate one of each, and described them almost exactly as I would have. Gah!

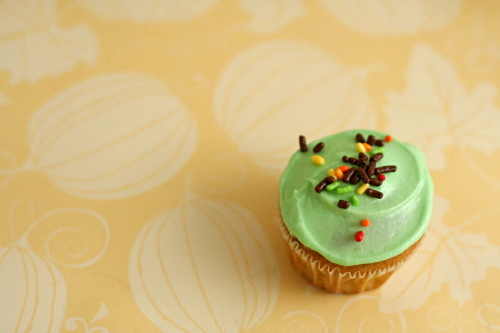
My primary goal for the pumpkin cupcakes was for them to be pumpkin cupcakes, not pumpkin muffins with frosting. I originally thought I’d make this recipe from Smitten Kitchen, but then I found two other recipes, one from the newest issue of Bon Appetit which everyone is raving about, and one from Martha Stewart, and of course I’m incapable of making a decision, so: comparison time!

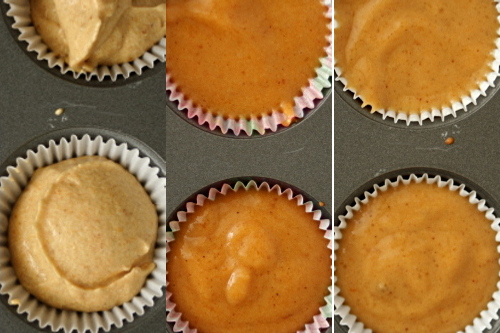
batter combo
left to right: david leite, martha stewart, bon appetit

Method:
Bon Appetit: This recipe got demerit points from the start for calling for self-rising flour and pumpkin pie spice, both of which I had to look up conversions for. (And I was surprised to find that there apparently is no straight substitution for self-rising flour.) Plus it called for the brown sugar to be mixed with the dry ingredients – clumps!  The mixing method is a simple wet ingredients-dry ingredients-combine process, which…sounds like a muffin. It was the only recipe that used oil instead of butter, and it included sour cream.

Martha Stewart: This was also mixed similar to muffins are, with the pumpkin added after the wet and dry ingredients are combined.

David Leite (via Smitten Kitchen): This recipe was the most promising from the beginning, because it’s actually mixed using the cake method, where butter and sugar are creamed, the eggs are mixed in, then the dry ingredients and liquid (buttermilk in this case) are alternately added.

Copy of IMG_9566
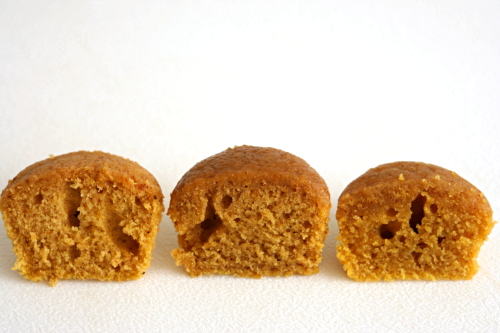
left to right: david leite, martha stewart, bon appetit

Results:
Bon Appetit: They were very dense; I could always identify these cupcakes just by the weight of them. The tangy flavor of the sour cream was definitely noticeable, which I thought masked the flavor of the pumpkin. This was both Dave and my least favorite.

Martha Stewart: These were good – light and moist, with a nice pumpkin flavor. The tops were sticky, but that doesn’t matter after they’re frosted. I was impressed with these until I tried the David Leite cupcakes, and then these seemed too muffiny.

David Leite: Perfect. So light, with just the right amount of resiliency. (It’s hard to describe this trait of cakes, but I like when they’re a little springy.) The pumpkin flavor was nicely balanced. They were just really good cupcakes, pumpkin flavored.

Copy of IMG_9573
left to right: david leite, martha stewart, bon appetit

For once, a comparison post where the results are clear! Even my dumb palate can tell the difference between these three cakes. David Leite’s recipe is certainly the way to go, unless you’re in a big hurry or hate to bake or something, in which case nobody is going to complain about Martha Stewart’s recipe.

Copy of IMG_9771

Printer Friendly Recipe
Pumpkin Cupcakes
(adapted from David Leite via Smitten Kitchen)

18 cupcakes

1 stick unsalted butter, room temperature, plus more for greasing pans
1 cup firmly packed dark-brown sugar
⅓ cup granulated sugar
2 cups cake flour
2 teaspoons baking powder
1 teaspoon baking soda
1 teaspoon ground cinnamon
1 teaspoon ground ginger
½ teaspoon ground nutmeg
⅛ teaspoon ground cloves
½ teaspoon salt
¼ teaspoon freshly ground black pepper
2 large eggs
½ cup buttermilk mixed with 1 teaspoon vanilla
1¼ cups canned solid-pack pumpkin

1. Preheat the oven to 350° (175°C). Line a cupcake pan with 18 liners.

2. In a stand mixer, beat the butter and sugars on medium speed until fluffy, about 5 minutes. Meanwhile, sift the flour, baking powder, baking soda, cinnamon, ginger, nutmeg, cloves, salt, and pepper into a medium bowl.

3. Add the eggs 1 at a time to the mixer, scraping down the sides after each addition. Alternate adding the flour and milk mixtures, beginning and ending with the flour. Beat in the pumpkin until smooth. Divide the batter equally between the cups. (They’ll be about ¾ full.) Rap the filled pans once on the counter to release any air bubbles. Bake the cakes until a toothpick inserted into the center comes out clean, about 20 to 25 minutes. Cool the cupcakes on racks completely.

Printer Friendly Recipe
Pumpkin Cupcakes
(from Martha Stewart)

Makes 18

2 cups all-purpose flour
1 teaspoon baking soda
1 teaspoon baking powder
1 teaspoon coarse salt
1 teaspoon ground cinnamon
1 teaspoon ground ginger
¼ teaspoon freshly grated nutmeg
¼ teaspoon ground allspice
1 cup packed light-brown sugar
1 cup granulated sugar
1 cup (2 sticks) unsalted butter, melted and cooled
4 large eggs, lightly beaten
1 can (15 ounces) pumpkin puree

1. Preheat oven to 350 degrees. Line cupcake pans with paper liners; set aside. In a medium bowl, whisk together flour, baking soda, baking powder, salt, cinnamon, ginger, nutmeg, and allspice; set aside.

2. In a large bowl, whisk together, brown sugar, granulated sugar, butter, and eggs. Add dry ingredients, and whisk until smooth. Whisk in pumpkin puree.

3. Divide batter evenly among liners, filling each about halfway. Bake until tops spring back when touched, and a cake tester inserted in the center comes out clean, 20 to 25 minutes, rotating pans once if needed. Transfer to a wire rack; let cool completely.

Printer Friendly Recipe
Mini Pumpkin Cupcakes
(adapted from Bon Appétit October 2009)

24 mini-cupcakes

The original recipe called for self-rising flour and pumpkin pie spice, but in the absence of both of those, I had to make substitutions.

½ cup cake flour
½ cup all-purpose flour
¼ teaspoon salt
1½ teaspoon baking powder
⅔ cup (packed) golden brown sugar
½ teaspoon cinnamon
¼ teaspoon ground ginger
⅛ teaspoon allspice
⅛ teaspoon nutmeg
2 teaspoons pumpkin pie spice
1 large egg
½ cup canned pure pumpkin
⅓ cup vegetable oil
⅓ cup sour cream
1½ teaspoons vanilla extract

Preheat oven to 350°F. Line 24 mini muffin cups with 1¾ x 1-inch paper liners. Mix flour, golden brown sugar, and pumpkin pie spice in large bowl. Whisk egg, canned pure pumpkin, vegetable oil, sour cream, and vanilla extract in medium bowl. Add mixture to dry ingredients; stir to fully combine. Spoon batter into paper liners (batter will almost fill liners). Bake cupcakes until tester inserted into center comes out clean, about 16 minutes. Remove cupcakes from pan and let cool completely on rack.

Copy of IMG_9773

chocolate chip cookie experimentation

Copy of IMG_6823
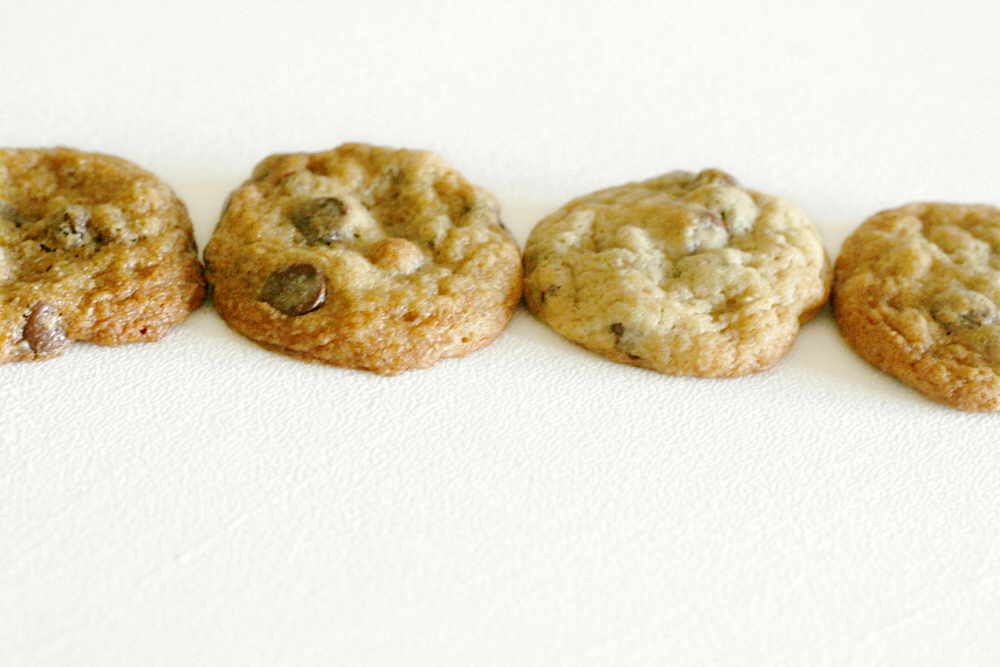
clockwise from upper left: #4 (whole wheat) #3 (yeast) #1 (control) #2 (bread)

I’m a scientist. I spent years working in labs, and I kid you not that what I did was combine ingredients and bake them. I did not, however, eat the results of those experiments. My cooking lately has become increasingly similar to my lab work. Notes are laboriously taken, samples are diligently labeled, variables are carefully controlled. But in this case, I do get to eat the results.  It’s a key difference.

This comparison is a little different than ones I’ve done in the past, because I wasn’t looking at different recipes. Instead, I used a master recipe and varied just one component in each batch of cookies. I mixed the dough, flash-froze the dough balls, transferred them to plastic bags, then took them on a 9-hour (make that 10-hour, because we missed a turn) drive. I baked each batch without adjusting the oven temperature in between. I had four tasters (including myself). I did not tell the other tasters what the differences between the cookies were.

Copy of IMG_5967

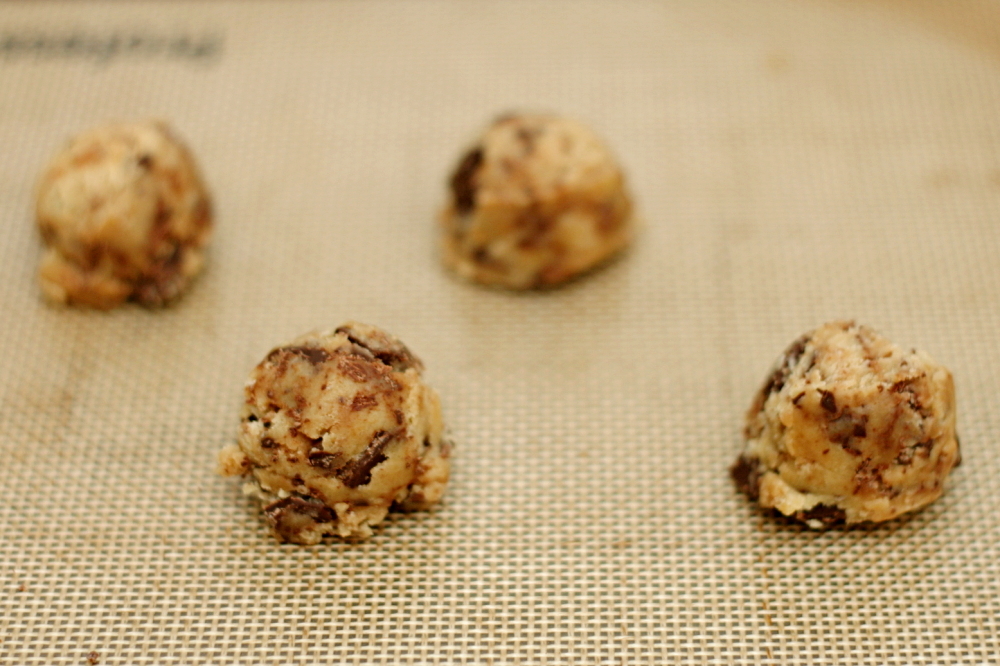
Batch #1: This was my control recipe. A fairly standard chocolate chip cookie recipe, the only difference between this recipe and Tollhouse is an increase in the ratio of brown sugar to white sugar.

Batch #2: This was the same as Batch #1, except I used bread flour instead of all-purpose flour.

Batch #3: This was the same as Batch #1, except I added 2 teaspoons instant yeast. The idea to use yeast in chocolate chip cookies came from this recipe, which I liked quite a bit. (Thanks to branny for bringing this to my attention.) However, since the recipe differs from traditional chocolate chip cookie recipes in a number of ways – bread flour, browned butter, less butter per flour – I couldn’t be sure what roll the yeast played. This is what spurred this whole comparison.

Batch #4: This was the same as Batch #1, except I used whole wheat pastry flour instead of all-purpose flour.

Copy of IMG_6014

The results:

Batch #1: Frankly, these aren’t my ideal chocolate chip cookies. That’s okay, because the purpose of this experiment was to identify differences, not necessarily find an ideal. (My notes say, simply, “soft.” So much for laborious note-taking!) They tend to be a little too flat, a little greasy, and, yes, very soft.

Batch #2: Alton Brown knows what he’s doing when he uses bread flour to make his cookies chewy. These were the overall favorite, with a nice balance between the greasy side and the cakey side – i.e., chewy.

Batch #3: Yeast apparently makes cookies fluffy. We found this one a little too cakey for our tastes.

Batch #4: I probably should have substituted just half of the all-purpose white flour for whole wheat pastry flour. A complete substitution resulted in cookies that were greasy, flat, and grainy. The flavor was a bit nutty. Kind of what you’d expect from whole wheat cookies, I suppose.

Copy of IMG_6814a

Overall conclusions:

  1. Bread flour makes cookies chewier, taller, and less greasy (or drier).
  2. Yeast makes cookies more cakey.
  3. A 1:1 substitution of whole wheat pastry flour for all-purpose flour in cookies is a bad idea.
  4. I am obsessive, at least when it comes to cookies!

Copy of IMG_6820a
left to right: #4 (whole wheat) #3 (yeast) #2 (bread) #1 (control)

One year ago: Summer Rolls

Chocolate Chip Cookies, previously:
Chocolate Chip Cookies (4 recipes)
Chocolate Chip Cookie (Cook’s Illustrated’s “Perfect”)

Master Recipe for Chocolate Chip Cookie Experiments

Please note that I’m not saying that you can’t make good cookies without bread flour, or that yeast will make all cookies too cakey. These were just the results with this particular recipe. All I’m saying is that yeast makes cookies cakier, and bread flour makes them chewier.

2¼ cups (10.8 ounces) all-purpose flour
1 teaspoon table salt
1 teaspoon baking soda
16 tablespoons (2 sticks) unsalted butter, at room temperature
¼ cup (1.75 ounces) sugar
1¼ cups (8.75 ounces) brown sugar
2 eggs
2 teaspoons vanilla extract
2 cups (12 ounces) semisweet chocolate chips

1. Adjust an oven rack to the middle position. Heat the oven to 375F. Line a baking sheet with parchment paper or a silicone baking mat. In a small bowl, combine the flour, salt, and baking soda.

2. In the bowl of a stand mixer fitted with the paddle attachment (or a hand mixer, or a spoon or whatever), beat the butter until creamy. Add the sugars and beat on medium speed until fluffy. Add the eggs, one a time, mixing for one minute after each addition. Add the vanilla. Reduce the mixer speed to low and add the flour, mixing just until almost combined. Add the chocolate chips and pulse the mixer on low speed until the chips are dispersed and the flour is incorporated.

3. Drop rounded tablespoons of dough onto the lined baking pan, spaced an inch or two apart. Bake the cookies for 7-10 minutes, until slightly browned around the edges and just set in the middle. Cool the cookies for at least 2 minutes on the sheet before transferring to a rack to finish cooling. (If they still seem fragile after 2 minutes of cooling, you can just leave them on the sheet to cool completely.)

white cake comparison 2

Copy of IMG_7198

Last year, I compared three white cake recipes, including Dorie’s Perfect Party Cake. I was torn between Dorie’s recipe, which I thought tasted great, and Cooks Illustrated’s, which had the perfect texture. I had an idea for what I would try the next time I made white cake, but at the time, I was white caked out, and, indeed, I haven’t made it since. Since the Perfect Party Cake was chosen by Carol for Tuesdays with Dorie this month, it was a great opportunity to try out my adaptation and compare it to my two previous favorites.

Copy of IMG_7065

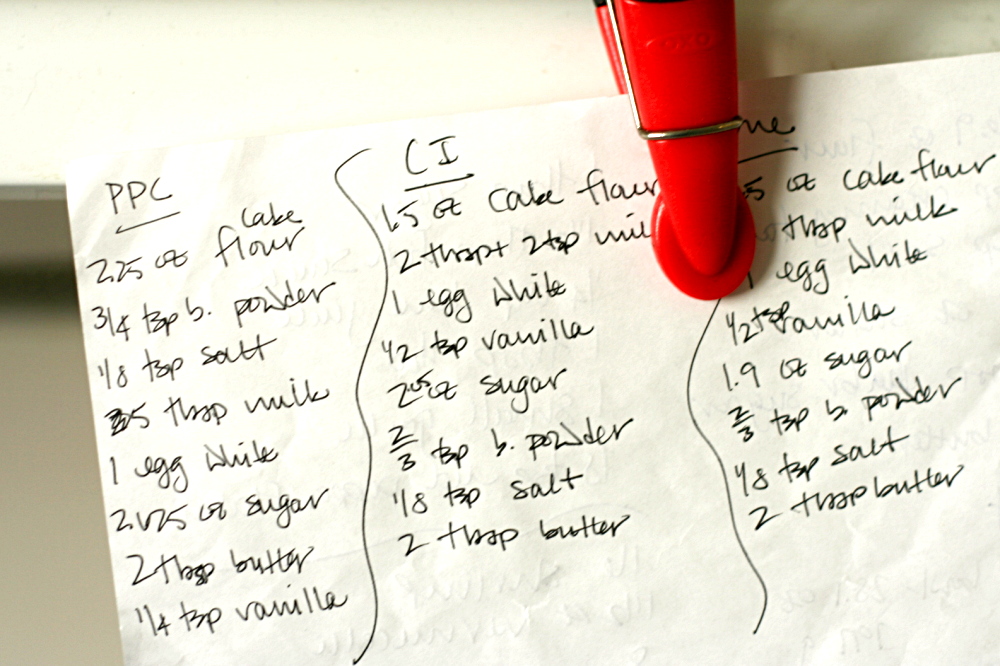
Cooks Illustrated’s white cake recipe and Dorie’s Perfect Party Cake have different mixing methods and different ratios of ingredients, but the end results are actually quite similar. I had really enjoyed the moistness and springiness of CI’s recipe, but found it a bit too sweet. Dorie’s recipe tasted great – it’s less sweet, so a bit of tanginess is detectable. Her recipe does have less sugar, plus more milk than CI’s, presumably to make up for the moisture that sugar provides. My idea was to reduce the sugar of CI’s recipe slightly and increase the milk, keeping the other ingredients and the mixing method the same.

Copy of IMG_7034

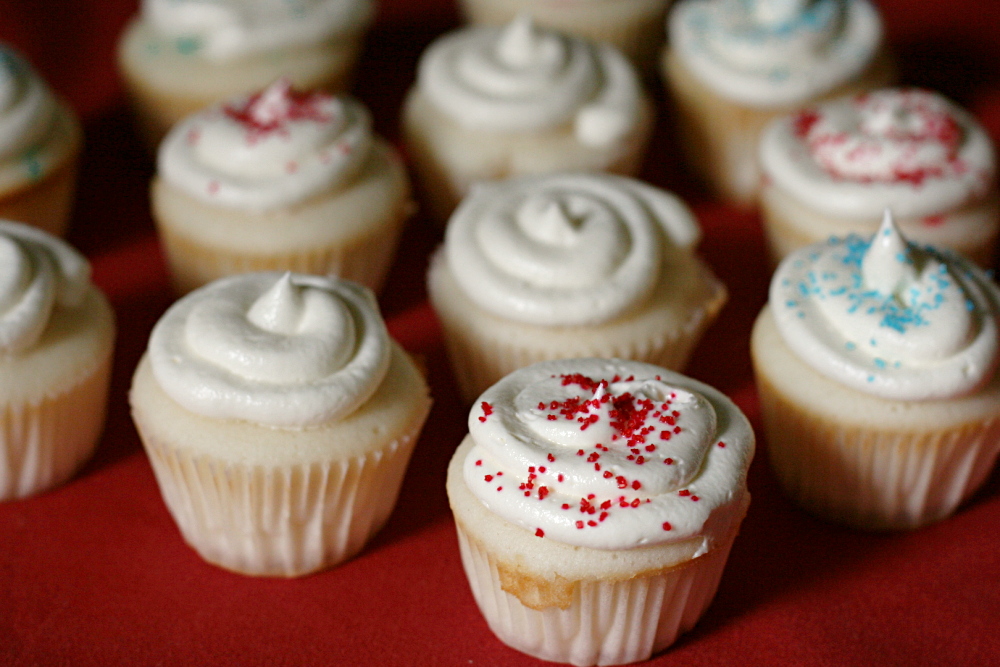
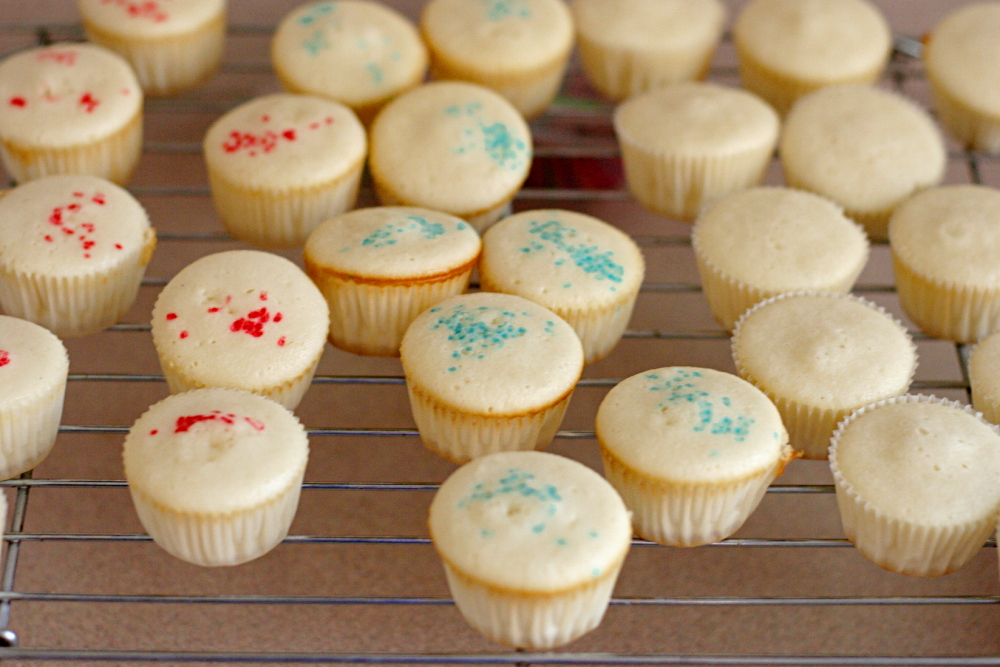
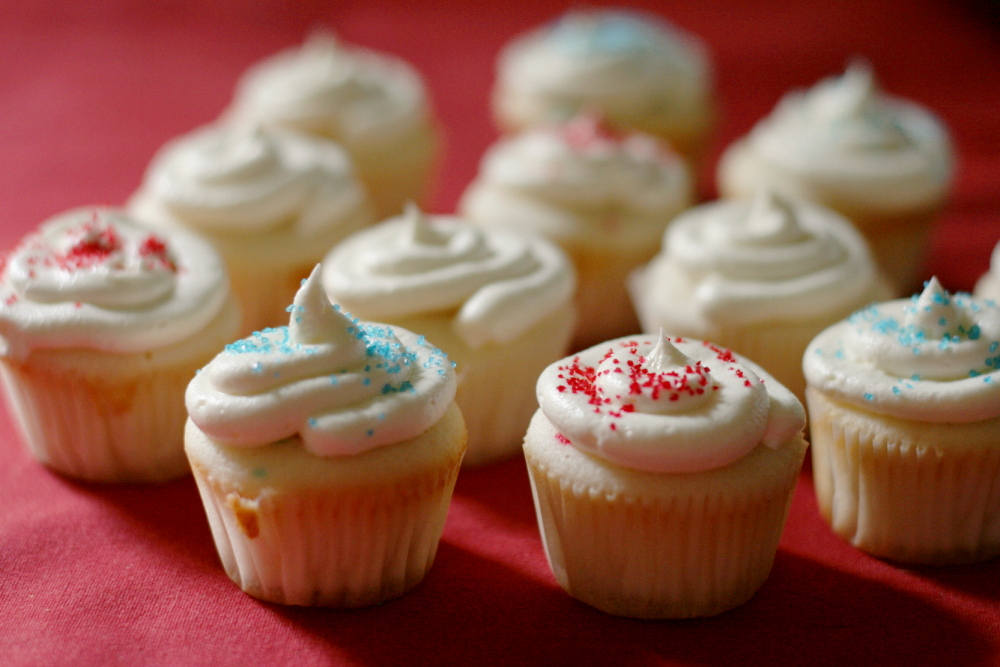
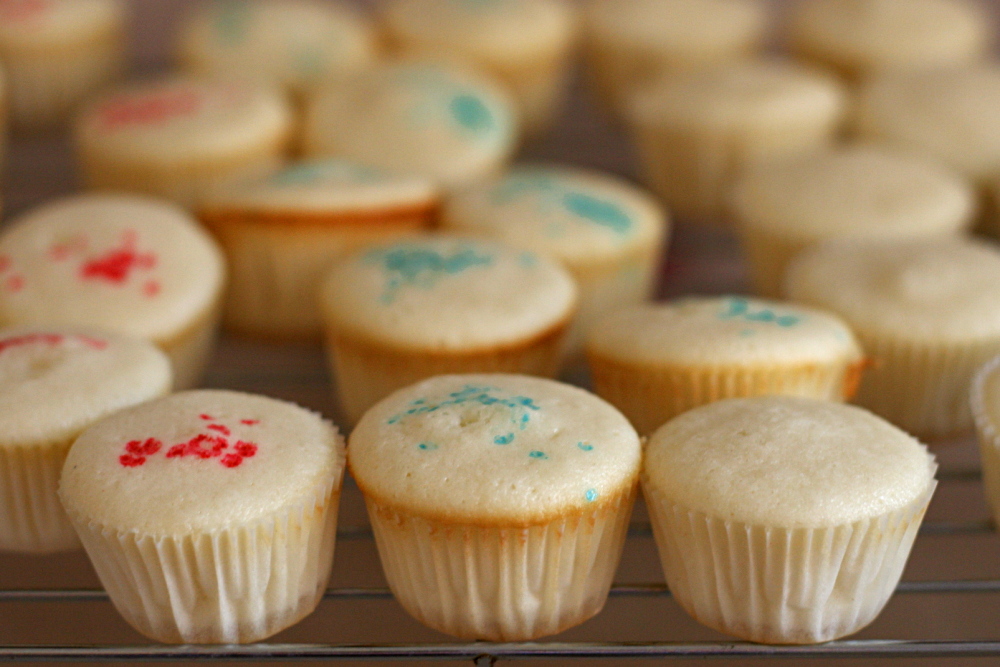
This time, I made three recipes – Dorie’s and CI’s as written, plus my adjustment of CI’s. I made mini-cupcakes of each and baked them all at 350F for 12 minutes. I did make small portions of each recipe, but I’m a pretty precise measurer, so I’m confident that this won’t have a significant impact. I flavored each cake with only vanilla, leaving out lemon and almond flavors. The sprinkling of sugar on top of each cupcake is to keep the recipes straight – white is Dorie’s, blue is CI’s, and red is my adaptation.

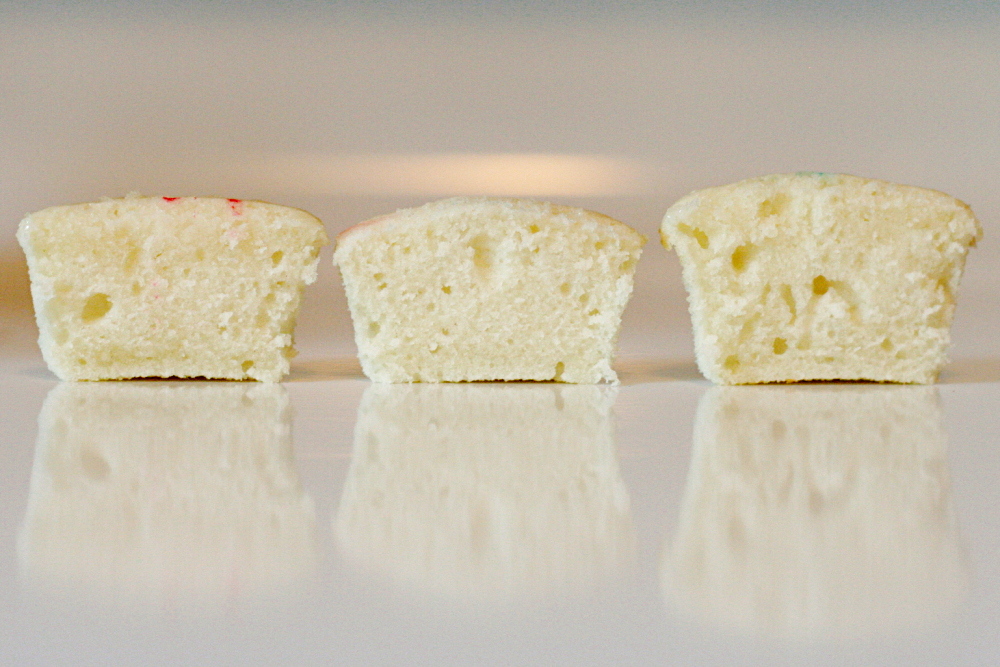
Copy of IMG_7096left – my recipe; middle – Dorie’s; right – CI’s
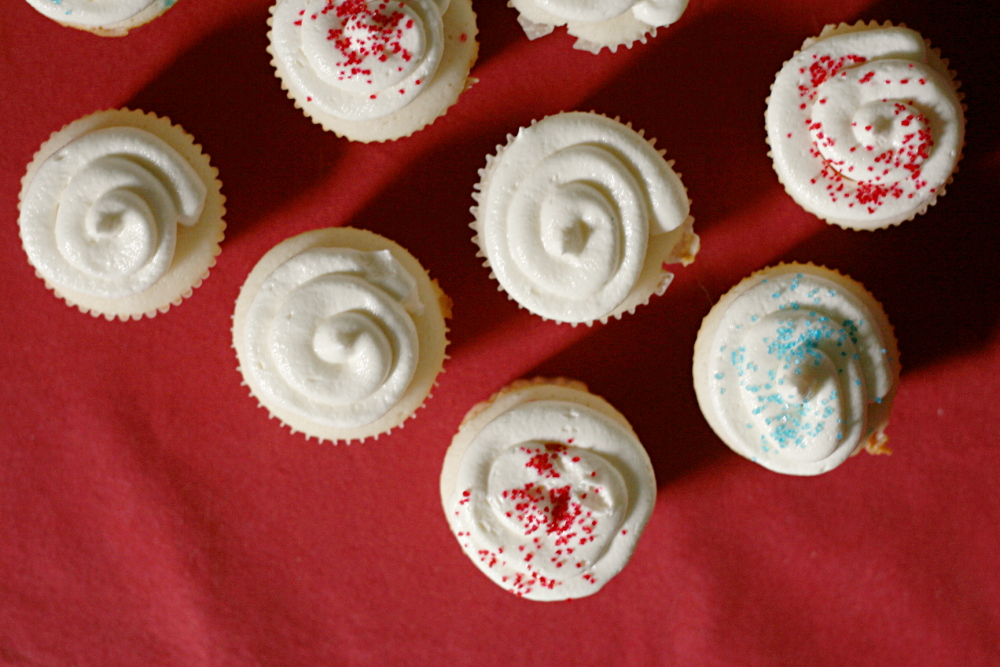
I still like the texture of CI’s better than Dorie’s. Dorie’s was just a bit dry, and CI’s has a fun sponginess to it. And I still like the flavor of Dorie’s better than CI’s – again, that slight tanginess gives some contrast to the sweetness. And, just personally, I thought my adaptation was pretty much perfect. It had the flavor I like, and it had the moist, springy texture that I like.
Copy of IMG_7067

However, let me perfectly honest. First, all three recipes are really really good. And, frankly, really really similar. I’m really splitting hairs here. And second, Dave’s (my only other tester) preferences were exactly the opposite of mine. He liked Dorie’s recipe the best because the other two were too moist. He’s cute and all, but I’m still going to make my favorite, the adaptation of Cooks Illustrated’s recipe, in the future.
Copy of IMG_7195

One year ago: Croque-Madame – I really need to come up with an excuse to make this again.  4th of July, maybe?

Classic White Layer Cake (from Cooks Illustrated)

Serves 12

CI note: If you have forgotten to bring the milk and egg white mixture to room temperature, set the bottom of the glass measure containing it in a sink of hot water and stir until the mixture feels cool rather than cold, around 65 degrees. Cake layers can be wrapped and stored for one day.

Nonstick cooking spray
2¼ cups cake flour (9 ounces), plus more for dusting the pans
1 cup whole milk, at room temperature
6 large egg whites (¾ cup), at room temperature
2 teaspoons almond extract
1 teaspoon vanilla extract
1¾ cups granulated sugar (12¼ ounces)
4 teaspoons baking powder
1 teaspoon table salt
12 tablespoons unsalted butter (1½ sticks), softened but still cool

1. For the Cake: Set oven rack in middle position. (If oven is too small to cook both layers on a single rack, set racks in upper-middle and lower-middle positions.) Heat oven to 350 degrees. Spray two 9-inch round cake pans with nonstick cooking spray; line the bottoms with parchment or waxed paper rounds. Spray the paper rounds, dust the pans with flour, and invert pans and rap sharply to remove excess flour.

2. Pour milk, egg whites, and extracts into 2-cup glass measure, and mix with fork until blended.

3. Mix cake flour, sugar, baking powder, and salt in bowl of electric mixer at slow speed. Add butter; continue beating at slow speed until mixture resembles moist crumbs, with no powdery streaks remaining.

4. Add all but ½ cup of milk mixture to crumbs and beat at medium speed (or high speed if using handheld mixer) for 1½ minutes. Add remaining ½ cup of milk mixture and beat 30 seconds more. Stop mixer and scrape sides of bowl. Return mixer to medium (or high) speed and beat 20 seconds longer.

5. Divide batter evenly between two prepared cake pans; using rubber spatula, spread batter to pan walls and smooth tops. Arrange pans at least 3 inches from the oven walls and 3 inches apart. (If oven is small, place pans on separate racks in staggered fashion to allow for air circulation.) Bake until thin skewer or toothpick inserted in the center comes out clean, 23 to 25 minutes.

6. Let cakes rest in pans for 3 minutes. Loosen from sides of pans with a knife, if necessary, and invert onto wire racks. Reinvert onto additional wire racks. Let cool completely, about 1½ hours.

Perfect Party Cake (from Dorie Greenspan’s Baking: From my Home to Yours)

For the Cake
2¼ cups (9 ounces) cake flour
1 tablespoon baking powder
½ teaspoon salt
1¼ cups whole milk or buttermilk (I prefer buttermilk with the lemon)
4 large egg whites
1½ cups (10½ ounces) sugar
2 teaspoons grated lemon zest
1 stick (8 tablespoons or 4 ounces) unsalted butter, at room temperature
½ teaspoon pure lemon extract

For the Buttercream
1 cup sugar
4 large egg whites
3 sticks (12 ounces) unsalted butter, at room temperature
¼ cup fresh lemon juice (from 2 large lemons)
1 teaspoon pure vanilla extract

For Finishing
2/3 cup seedless raspberry preserves stirred vigorously or warmed gently until spreadable
About 1½ cups sweetened shredded coconut

Getting Ready:
Center a rack in the oven and preheat the oven to 350 degrees F. Butter two 9 x 2 inch round cake pans and line the bottom of each pan with a round of buttered parchment or wax paper. Put the pans on a baking sheet.

To Make the Cake:
Sift together the flour, baking powder and salt.

Whisk together the milk and egg whites in a medium bowl.

Put the sugar and lemon zest in a mixer bowl or another large bowl and rub them together with your fingers until the sugar is moist and fragrant. Add the butter and working with the paddle or whisk attachment, or with a hand mixer, beat at medium speed for a full 3 minutes, until the butter and sugar are very light. Beat in the extract, then add one third of the flour mixture, still beating on medium speed. Beat in half of the milk-egg mixture, then beat in half of the remaining dry ingredients until incorporated. Add the rest of the milk and eggs beating until the batter is homogeneous, then add the last of the dry ingredients. Finally, give the batter a good 2- minute beating to ensure that it is thoroughly mixed and well aerated.

Divide the batter between the two pans and smooth the tops with a rubber spatula. Bake for 30-35 minutes, or until the cakes are well risen and springy to the touch – a thin knife inserted into the centers should come out clean. Transfer the cakes to cooling racks and cool for about 5 minutes, then run a knife around the sides of the cakes, unfold them and peel off the paper liners. Invert and cool to room temperature, right side up (the cooled cake layers can be wrapped airtight and stored at room temperature overnight or frozen for up to two months).

To Make the Buttercream:
Put the sugar and egg whites in a mixer bowl or another large heatproof bowl, fit the bowl over a plan of simmering water and whisk constantly, keeping the mixture over the heat, until it feels hot to the touch, about 3 minutes. The sugar should be dissolved, and the mixture will look like shiny marshmallow cream. Remove the bowl from the heat. Working with the whisk attachment or with a hand mixer, beat the meringue on medium speed until it is cool, about 5 minutes.

Switch to the paddle attachment if you have one, and add the butter a stick at a time, beating until smooth. Once all the butter is in, beat in the buttercream on medium-high speed until it is thick and very smooth, 6-10 minutes. During this time the buttercream may curdle or separate – just keep beating and it will come together again. On medium speed, gradually beat in the lemon juice, waiting until each addition is absorbed before adding more, and then the vanilla. You should have a shiny smooth, velvety, pristine white buttercream. Press a piece of plastic against the surface of the buttercream and set aside briefly.

To Assemble the Cake
Using a sharp serrated knife and a gentle sawing motion, slice each layer horizontally in half. Put one layer cut side up on a cardboard cake round or a cake plate protected by strips of wax or parchment paper. Spread it with one third of the preserves. Cover the jam evenly with about one quarter of the buttercream. Top with another layer, spread with preserves and buttercream and then do the same with a third layer (you’ll have used all the jam and have buttercream leftover). Place the last layer cut side down on top of the cake and use the remaining buttercream to frost the sides and top. Press the coconut into the frosting, patting it gently all over the sides and top.

Serving
The cake is ready to serve as soon as it is assembled, but I think it’s best to let it sit and set for a couple of hours in a cool room – not the refrigerator. Whether you wait or slice and enjoy it immediately, the cake should be served at room temperature; it loses all its subtlety when it’s cold. Depending on your audience you can serve the cake with just about anything from milk to sweet or bubbly wine.

Storing
The cake is best the day it is made, but you can refrigerate it, well covered, for up to two days. Bring it to room temperature before serving. If you want to freeze the cake, slide it into the freezer to set, then wrap it really well – it will keep for up to 2 months in the freezer; defrost it, still wrapped overnight in the refrigerator.

White Cake (my adaptation from Cooks Illustrated’s Classic White Cake)

Serves 12

Nonstick cooking spray
2¼ cups cake flour (9 ounces), plus more for dusting the pans
1 cup + 2 tablespoons whole milk, at room temperature
6 large egg whites (¾ cup), at room temperature
2 teaspoons almond extract
1 teaspoon vanilla extract
1½ cups + 2 tablespoons granulated sugar (11.35 ounces)
4 teaspoons baking powder
1 teaspoon table salt
12 tablespoons unsalted butter (1½ sticks), softened but still cool

1. For the Cake: Set oven rack in middle position. (If oven is too small to cook both layers on a single rack, set racks in upper-middle and lower-middle positions.) Heat oven to 350 degrees. Spray two 9-inch round cake pans with nonstick cooking spray; line the bottoms with parchment or waxed paper rounds. Spray the paper rounds, dust the pans with flour, and invert pans and rap sharply to remove excess flour.

2. Pour milk, egg whites, and extracts into 2-cup glass measure, and mix with fork until blended.

3. Mix cake flour, sugar, baking powder, and salt in bowl of electric mixer at slow speed. Add butter; continue beating at slow speed until mixture resembles moist crumbs, with no powdery streaks remaining.

4. Add all but ½ cup of milk mixture to crumbs and beat at medium speed (or high speed if using handheld mixer) for 1½ minutes. Add remaining ½ cup of milk mixture and beat 30 seconds more. Stop mixer and scrape sides of bowl. Return mixer to medium (or high) speed and beat 20 seconds longer.

5. Divide batter evenly between two prepared cake pans; using rubber spatula, spread batter to pan walls and smooth tops. Arrange pans at least 3 inches from the oven walls and 3 inches apart. (If oven is small, place pans on separate racks in staggered fashion to allow for air circulation.) Bake until thin skewer or toothpick inserted in the center comes out clean, 23 to 25 minutes.

6. Let cakes rest in pans for 3 minutes. Loosen from sides of pans with a knife, if necessary, and invert onto wire racks. Reinvert onto additional wire racks. Let cool completely, about 1½ hours.

Copy of IMG_7190

strawberry cake

copy-of-img_5603

I do not like oddball mixing methods. In fact, unless they’re explained, my habit is to ignore them completely. I know that muffins are sometimes mixed like cakes and that there are different types of cookies, but in general, I’m familiar with the normal mixing methods, and if something strays too far from what I recognize, it annoys me and I adapt the recipe to what seems more sensible.

copy-of-img_5021

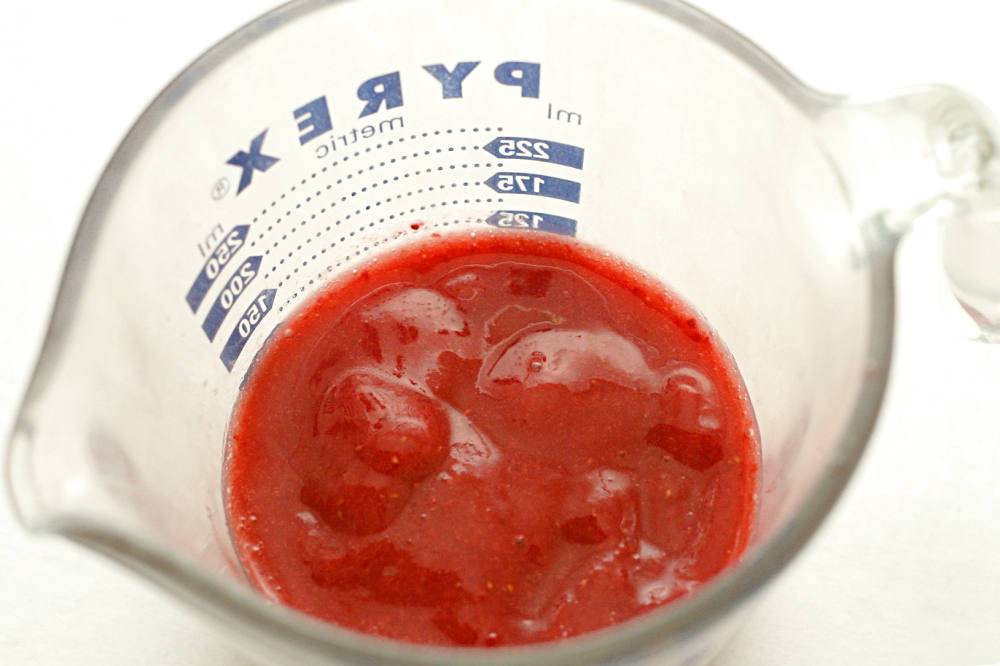
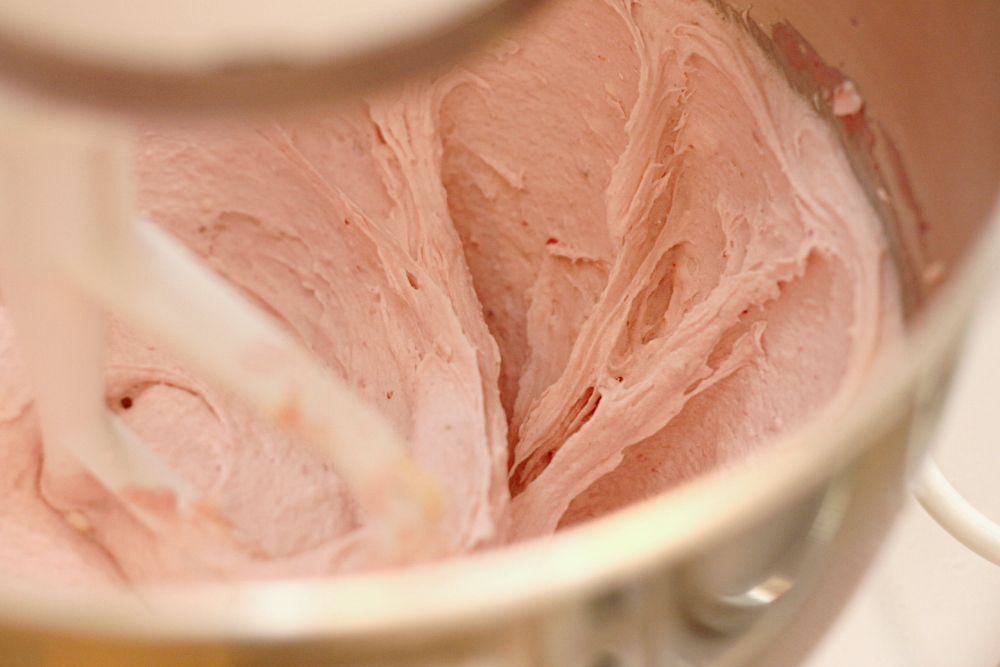
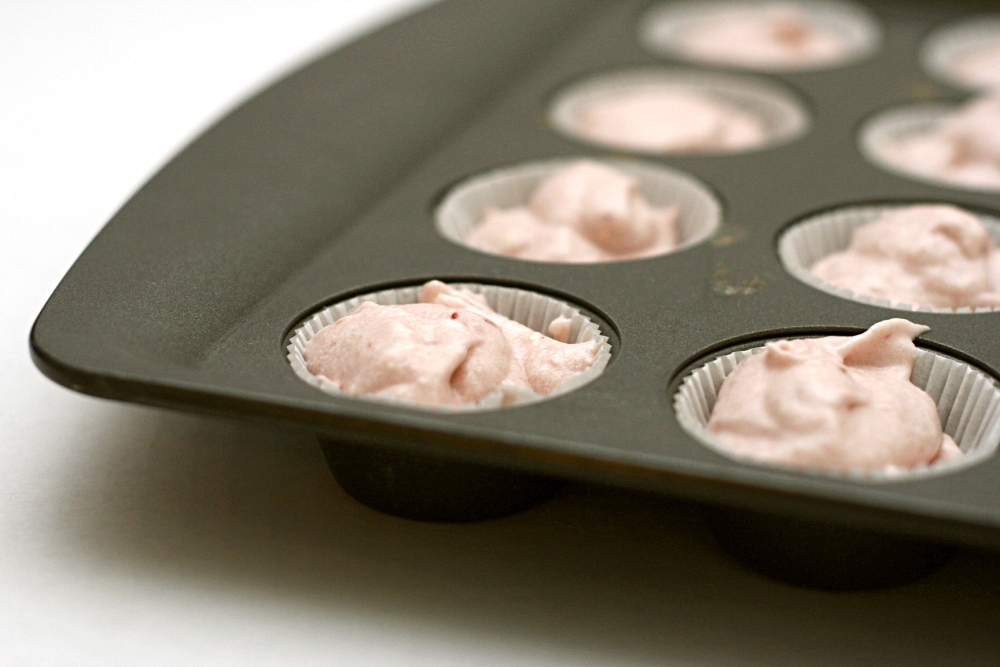
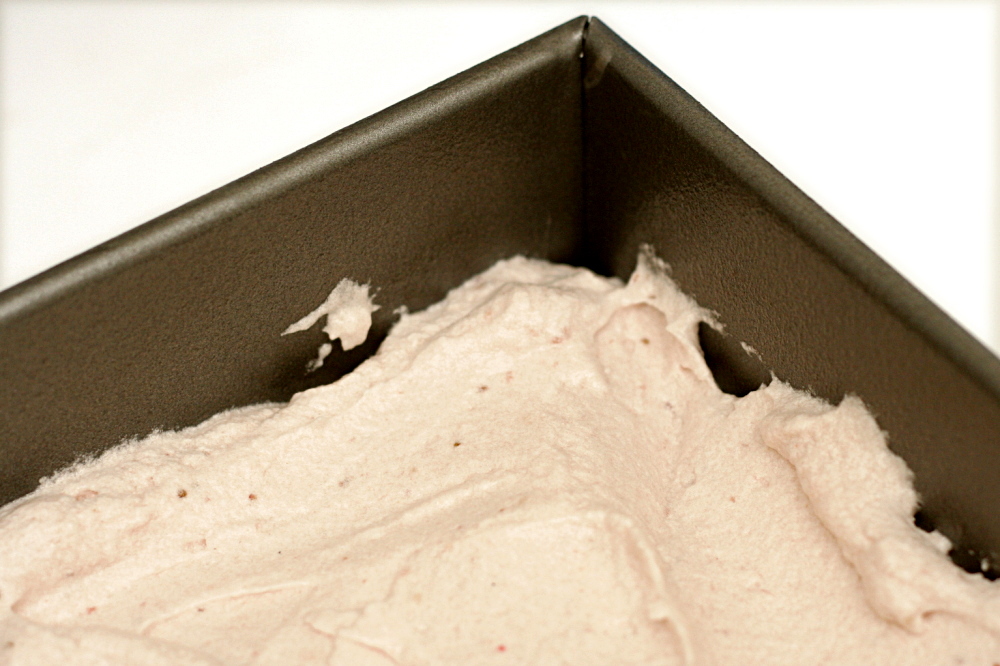
The first strawberry cake I made has a weird mixing method. You mix the dry ingredients in the mixer bowl, then add strawberry puree and softened butter and beat the mixture until it’s fluffy. Only then do you add milk and the egg whites in a few additions, mixing just until they’re mixed in.

copy-of-img_5026

The egg whites are added at the end? Bizarro.

*Disclaimer: I accidentally added the milk with the strawberry puree. I don’t think this would have a significant effect on the outcome, but I can’t be sure.

copy-of-img_5033

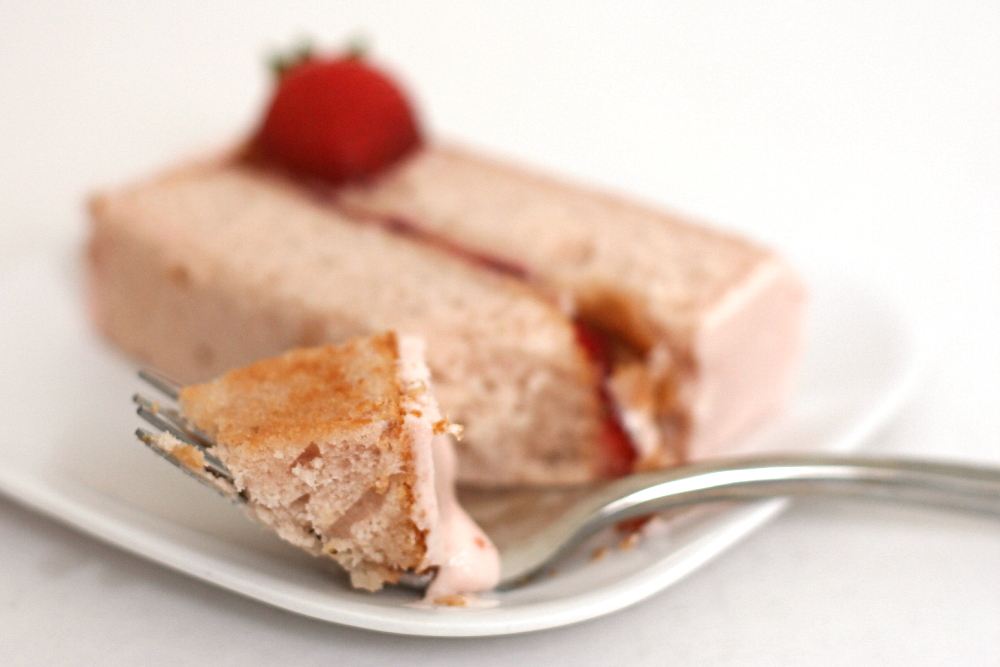
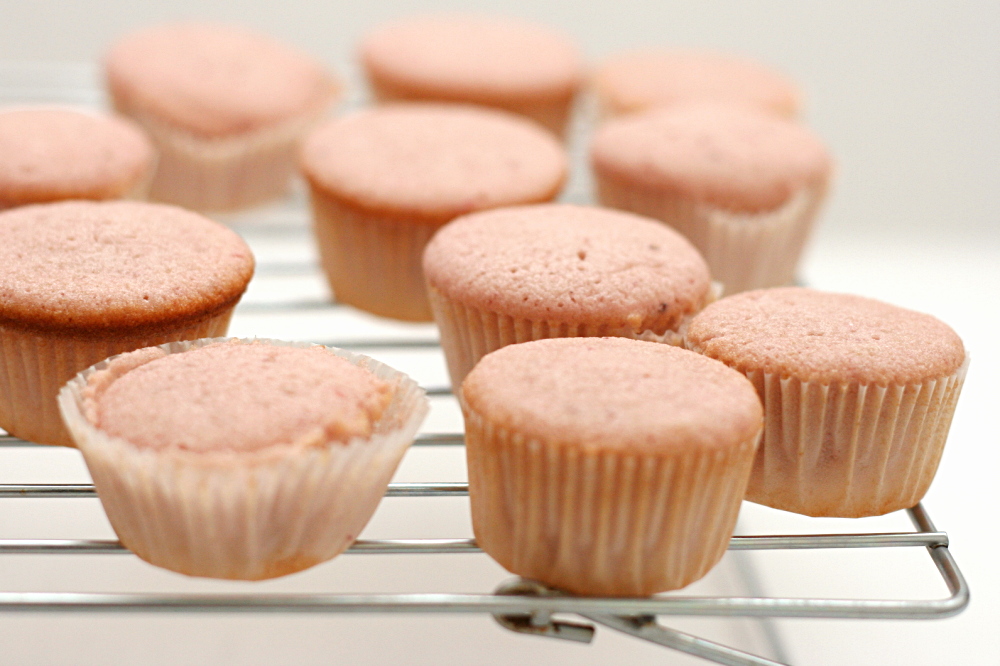
The cake was good, but, to me, not perfect. My mini cupcakes were a little sticky, or maybe gummy is a better word. What’s stranger is that all of the cupcake wrappers detached themselves from the cupcake within a few hours of baking. The flavor was great though, and every time I opened the lid to the container, I got a nice whiff of strawberries.

copy-of-img_5042

The other recipe I tried, from Good Things Catered, is similar to Cooks Illustrated’s white cake recipe, which I have previously enjoyed, with strawberry puree substituted for a portion of the milk. This recipe also has an unusual method – dry ingredients, then butter, most of the eggs + liquid, and then the rest of the eggs and liquid, followed by about a minute of beating the batter.

copy-of-img_5565

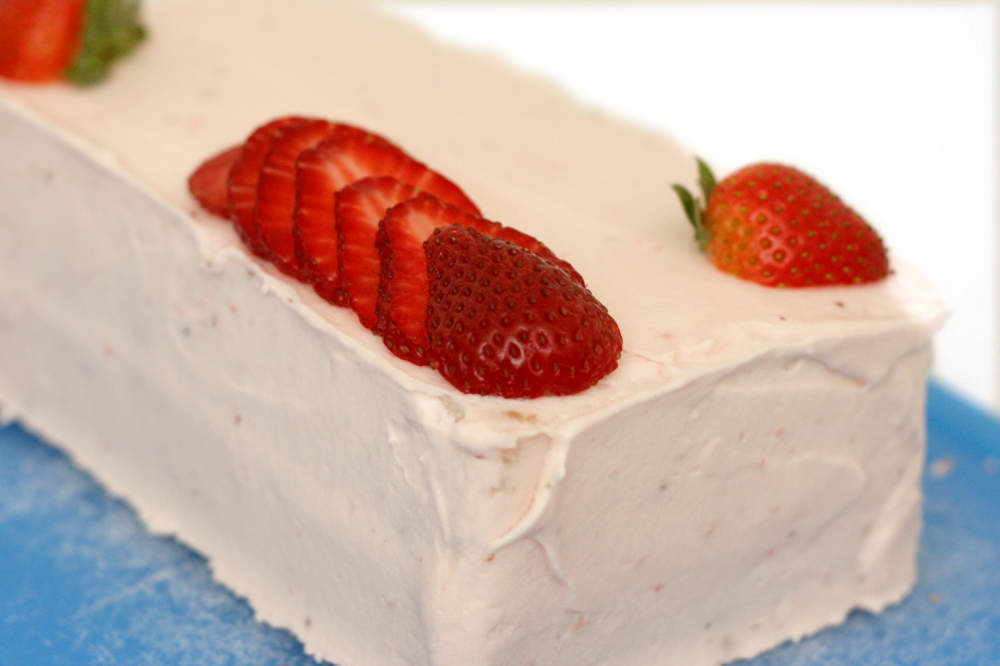
This cake, I have to admit, seemed a little dry. On the other hand, I did refrigerate it almost immediately after cooling, and then it was in and out of the freezer as I tried to neatly frost it, so perhaps I was a little too rough with it.

copy-of-img_5043

Both cakes were good. The strawberry flavor is definitely noticeable, which is nice. If I had to choose between the two, I’d choose the first one, from the Sky High cookbook, because it seemed more tender. However, what I really want to do is try the ingredients of the first one with a different mixing method. I have a feeling you can’t combine those ingredients and end up with anything that isn’t good, but I love to experiment.

copy-of-img_5568

One year ago: Baba Ghanoush and Fafafel

Pink Lady Cake (from Sky High via Smitten Kitchen)

Keep in mind that Sky High designs recipes for big cakes. If you’re not feeding a crowd, don’t be afraid to cut the recipe in half, which will yield the same amount of cake as most other cake recipes. Divide the batter between two 8- or 9-inch round pans and bake for 23-25 minutes.

All of the cupcake pictures are of this cake.

4½ cups cake flour
3 cups sugar
5¼ teaspoons baking powder
¾ teaspoon salt
3 sticks (12 ounces) unsalted butter, at room temperature
1½ cups pureed frozen strawberries (from about 12 ounces of strawberries)
8 egg whites
⅔ cup milk
1 to 2 drops red food dye, optional (to make the pink color more intense)

1. Preheat the oven to 350F. Butter three 9-inch round or 8-inch square cake pans. Line with parchment or waxed paper and butter the paper.

2. Put the flour, sugar, baking powder, and salt in a large mixer bowl. With the electric mixer on low speed, blend for 30 seconds. Add the butter and strawberry puree and mix to blend the ingredients. Raise the speed to medium and beat until light and fluffy, 2 to 3 minutes; the batter will resemble strawberry ice cream at this point.

3. In another large bowl, whisk together the egg whites, milk and red food dye, if using, to blend. Add the whites to the batter in two or three additions, scraping down the sides of the bowl well and mixing only to incorporate after each addition. Divide the batter among the three prepared pans.

4. Bake the cakes for 30 to 34 minutes, or until a cake tester or wooden toothpick inserted into the center comes out clean. Allow the layers to cool in the pans for 10 to 15 minutes. Invert and turn out onto wire racks and peel off the paper liners. Let stand until completely cooled before assembling the cake, at least an hour.

copy-of-img_5054

Strawberry Cake (adapted from Good Things Catered and Cooks Illustrated’s Classic White Layer Cake)

All of the layer cake pictures are from this cake.

Serves 12

Nonstick cooking spray
2¼ cups cake flour (9 ounces), plus more for dusting the pans
¼ cup whole milk, at room temperature
¾ cup strawberry puree (from about 6 ounces strawberries)
6 large egg whites (¾ cup), at room temperature
1 tablespoon vanilla extract
1¾ cups granulated sugar (12¼ ounces)
4 teaspoons baking powder
1 teaspoon table salt
12 tablespoons unsalted butter (1½ sticks), softened but still cool

1. Set oven rack in middle position. (If oven is too small to cook both layers on a single rack, set racks in upper-middle and lower-middle positions.) Heat oven to 350 degrees. Spray two 9-inch round cake pans with nonstick cooking spray; line the bottoms with parchment or waxed paper rounds. Spray the paper rounds, dust the pans with flour, and invert pans and rap sharply to remove excess flour.

2. Pour milk, strawberry puree, egg whites, and extract into 2-cup glass measure, and mix with fork until blended.

3. Mix cake flour, sugar, baking powder, and salt in bowl of electric mixer at slow speed. Add butter; continue beating at slow speed until mixture resembles moist crumbs, with no powdery streaks remaining.

4. Add all but ½ cup of strawberry mixture to crumbs and beat at medium speed (or high speed if using handheld mixer) for 1½ minutes. Add remaining ½ cup of strawberry mixture and beat 30 seconds more. Stop mixer and scrape sides of bowl. Return mixer to medium (or high) speed and beat 20 seconds longer.

5. Divide batter evenly between two prepared cake pans; using rubber spatula, spread batter to pan walls and smooth tops. Arrange pans at least 3 inches from the oven walls and 3 inches apart. (If oven is small, place pans on separate racks in staggered fashion to allow for air circulation.) Bake until thin skewer or toothpick inserted in the center comes out clean, 23 to 25 minutes.

6. Let cakes rest in pans for 3 minutes. Loosen from sides of pans with a knife, if necessary, and invert onto wire racks. Reinvert onto additional wire racks. Let cool completely, about 1½ hours.

copy-of-img_5597

croissants 1 (tartine)

copy-of-img_4769

Someone must have told me “if at first you don’t succeed, try, try again” at a particularly impressionable age. Either that, or I’ve struggled through learning enough new subjects that I recognize the value of practice. Or maybe I’m just obsessive.

copy-of-img_4717

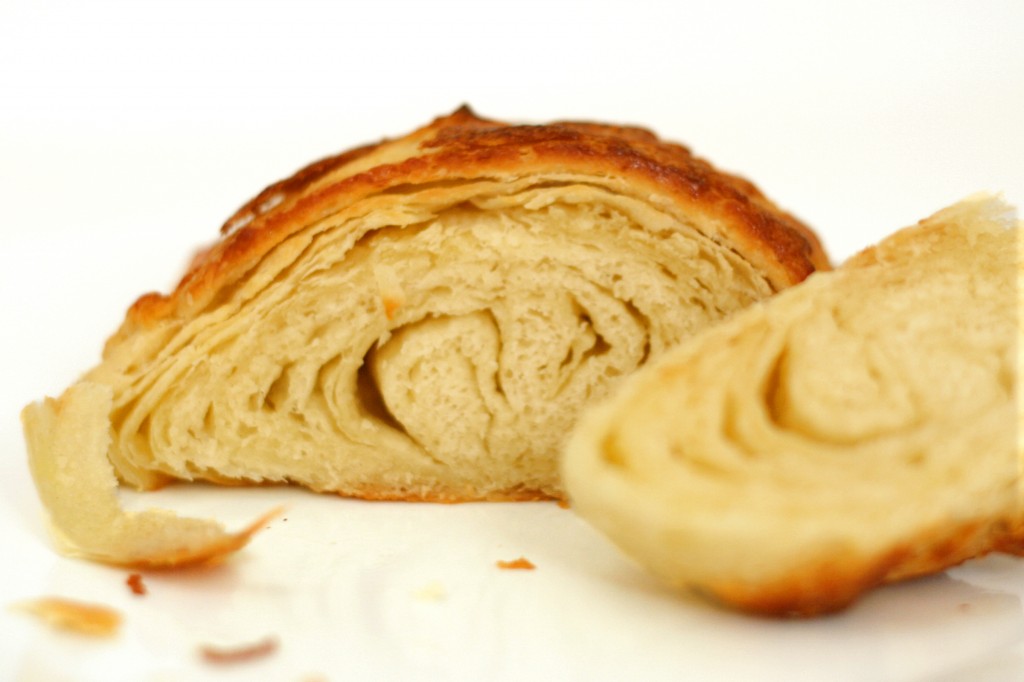
This was my first time making croissants, and it wasn’t perfect, which immediately sparked my desire to try a bunch of other croissant recipes. (Not side-by-side, mind you. My head spins just thinking about it.) The thing is that I can’t figure out exactly where I went wrong. I’m hoping that by gaining experience with different recipes, I’ll become more familiar with the process and pick up some nice tips along the way.

copy-of-img_4746

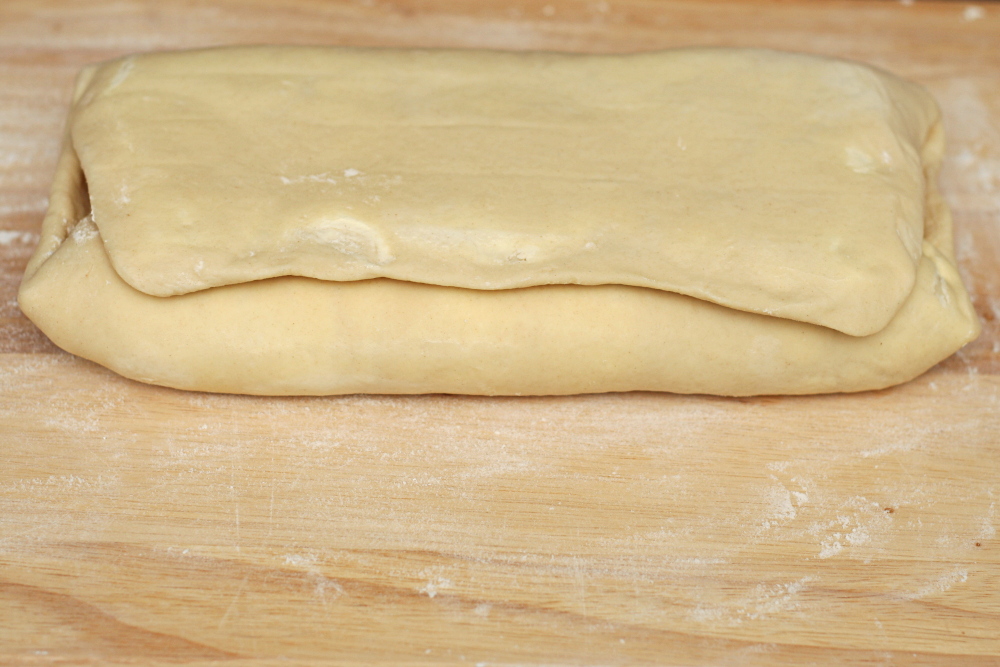
Of the recipes I’ve considered trying, this one is the most complex. First, a pre-ferment is made, two days before you want to bake the croissants. That gets turned into croissant dough the next day, and from there, most recipes are the same. Knead a little, then roll it out with a bunch of butter and fold it like a letter. Chill, then repeat the folding twice. Chill overnight. Roll out, cut, shape, rise, bake.

copy-of-img_4752

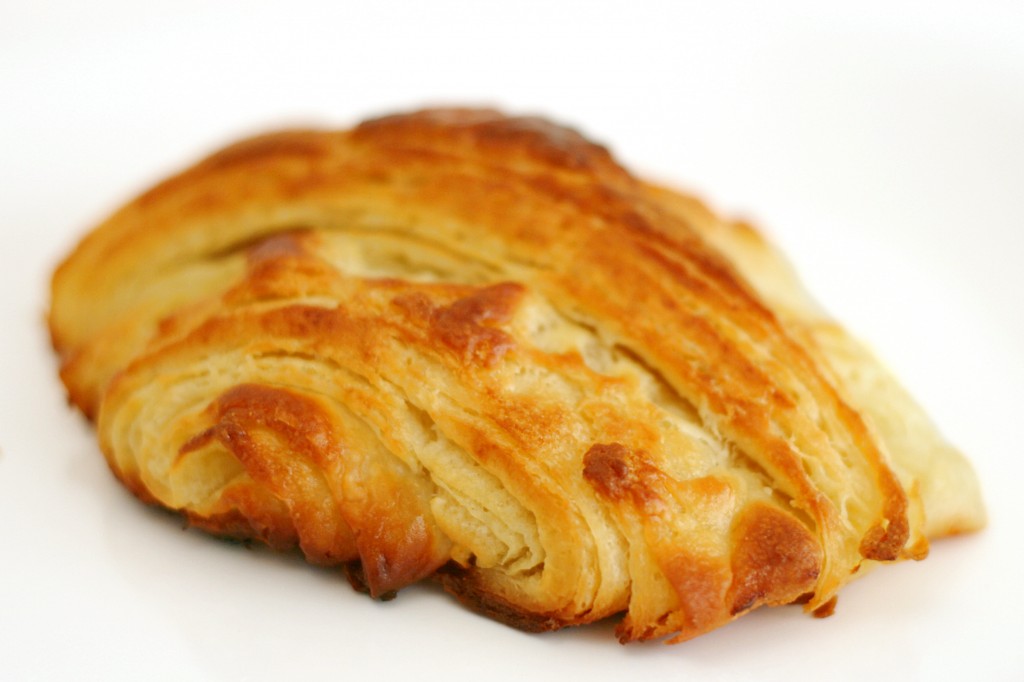
The author of the recipe, Elisabeth Prueitt, gives a lot of detail, turning my 60-word summary of the recipe into 5 pages of instructions, tips, and advice. She does not mention that the dough will be so elastic that it will fight you every time you have to roll it out, which makes me think I did something wrong. (Overkneading is my guess.) She also does not say anything about a huge pool of butter left behind in the baking pan after the croissants are removed from the oven. And I’m guessing the yeasty flavor of the croissants isn’t right either. And clearly they’re not supposed to look like this:

copy-of-img_4772

The croissants were still way better than edible – flaky, light, buttery delicious – but clearly my technique needs some refining. After I made this recipe, I was chomping at the bit to try another, and in fact, I have a handful of recipes I want to try. (Although one of them was the recipe that the Daring Bakers made a few years ago – which I just realized is this one. So never mind that one.) Expect to see reviews of one croissant recipe after another as I attempt to master this pastry.

copy-of-img_4764

One year ago: Snickery Squares

Croissants (from Tartine by Elisabeth M. Prueitt and Chad Robertson)

Preferment:
¾ cup non-fat milk (6 ounces/150 ml)
1 tablespoon active dry yeast (15ml)
1⅓ cup all-purpose flour (6¼ ounces/175g)

Dough:
1 tablespoon + 1 teaspoon active dry yeast (20ml)
1¾ cup whole milk (14 ounces/425 ml)
6 cups all-purpose flour (28 ounces/800g)
⅓ cup sugar (2½ ounces/70g)
1 tablespoon + 1 teaspoon salt (20 ml)
1 tablespoons unsalted butter (15ml)

Roll-in butter:
2¾ cup unsalted butter (22 ounces/625 g)

Egg wash:
4 large egg yolks (2 ounces/60 ml)
¼ cup heavy cream
pinch salt

To Make the Preferment:

In a small saucepan, warm the milk to take the chill off (between 80° to 90 °F). Pour the milk into a mixing bowl, sprinkle the yeast over the milk, stir to dissolve the yeast with a wooden spoon, and then add the flour, mixing with a wooden spoon until a smooth batter forms. Cover the bowl with cheesecloth and let the mixture rise until almost double in volume, 2 to 3 hours at moderate temperature or overnight in the refrigerator.

To Make the Dough:

First measure out all your ingredients and keep them near at hand. Transfer the preferment and then the yeast to the large bowl of a stand mixer fitted with the dough hook. Mix on low speed until the yeast is incorporated into the preferment batter, which will take a minute or two. Stop the mixer as needed and use a spatula to clean the bottom and sides of the bowl, folding the loosened portion into the mixture to incorporate all the elements fully. When the mixture has come together into an even, well-mixed mass, increase the speed to medium, and mix for a couple of minutes. Slowly add half of the milk and continue to mix until the milk is fully incorporated.

Reduce the speed to low, add the flour, sugar, salt, melted butter, and the rest of the milk, and mix until the mass comes together in a loose dough, about 3 minutes. Turn off the mixer and let the dough rest for 15 to 20 minutes. This resting period helps to shorten the final mixing phase, which comes next.

Engage the mixer again on low speed and mix until the dough is smooth and elastic, a maximum of 4 minutes. If the dough is very firm, add a little milk, 1 tablespoon at a time. Take care not to overmix the dough, which will result in a tough croissant that also turns stale more quickly. Remember, too, you will be rolling out the dough several times, which will further develop the gluten structure, so though you want a smooth dough, the less mixing you do to achieve that goal, the better. Cover the bowl with cheesecloth and let the dough rise in a cool place until the volume increases by half, about 1½ hours.

Lightly flour a work surface. Transfer the dough to the floured surface and press into a rectangle 2 inches thick. Wrap the rectangle in plastic wrap, or slip it into a plastic bag and seal closed. Place the dough in the refrigerator to chill for 4 to 6 hours.

To Make the Roll-in butter:

About 1 hour before you are ready to start laminating the dough, put the butter that you will be rolling into the dough in the bowl of the mixer fitted with the paddle attachment. Mix on medium speed until malleable but not warm or soft, about 3 minutes. Remove the butter from the bowl, wrap in plastic wrap, and place in the refrigerator to chill but not resolidify.

Laminating the dough:

Lightly dust a cool work surface, and then remove the chilled dough and the butter from the refrigerator. Unwrap the dough and place it on the floured surface. Roll out the dough into a rectangle 28 by 12 inches. With the long side of the rectangle facing you, and starting from the left side, spread and spot the butter over two-thirds of the length of the rectangle. Fold the uncovered third over the butter and then fold the left-hand third over the center, as if folding a business letter. The resulting rectangle is known as a plaque. With your fingers, push down along the seams on the top and the bottom to seal in the plaque.

Second turn:

Give the plaque a quarter turn so the seams are to your right and left, rather than at the top and bottom. Again, roll out the dough into a rectangle 28 by 12 inches, and fold again in the same manner. Wrap in plastic wrap or slip into a plastic bag and place in the refrigerator for 1½ to 2 hours to relax the gluten in the dough before you make the third fold, or “turn”.

Third turn:

Clean the work surface, dust again with flour, and remove the dough from the refrigerator. Unwrap, place on the floured surface, and again roll out into a rectangle 28 by 12 inches. Fold into thirds in the same manner. You should have a plaque of dough measuring about 9 by 12 inches, about the size of a quarter sheet pan, and 1½ to 2 inches thick. Wrap in plastic wrap or slip into the plastic bag, place on a quarter sheet pan, and immediately place in the freezer to chill for at least 1 hour. If you intend to make the croissants the next morning, leave the dough in the freezer until the evening and then transfer it to the refrigerator before retiring. The next morning, the dough will be ready to roll out and form into croissants, proof, and bake. Or, you can leave the dough in the freezer for up to 1 week; just remember to transfer it to the refrigerator to thaw overnight before using.

Making the croissant:

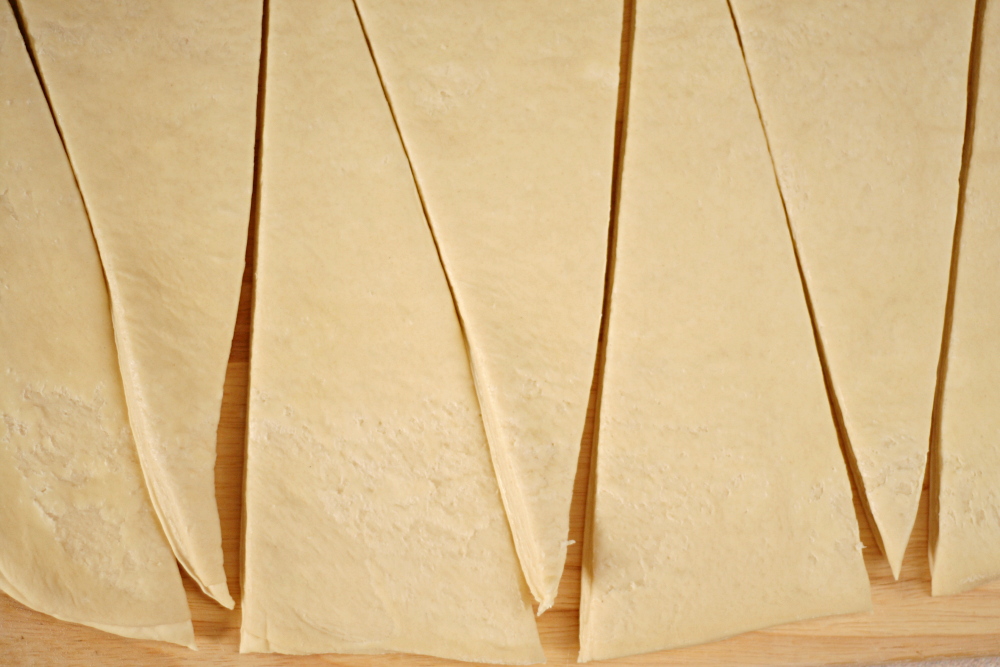
When you are ready to roll out the dough, dust the work surface again. Roll out the dough into a rectangle 32 by 12 inches and 3/8 inches thick. Using a pizza wheel or chef’s knife, cut the dough into long triangles that measure 10 to 12 inches on each side and about 4 inches along the base.

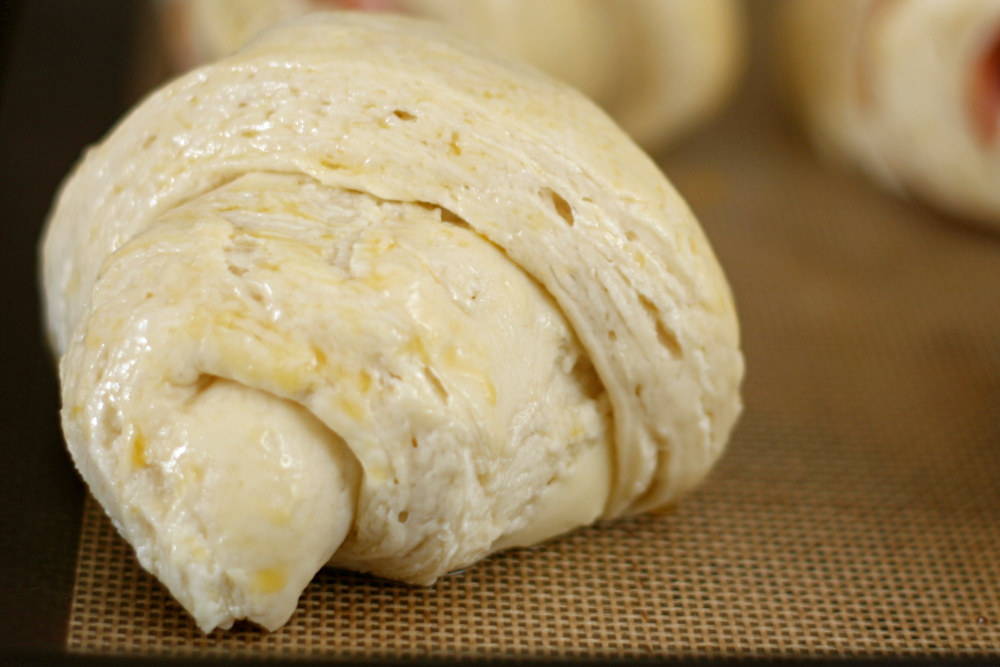
Line a half sheet pan (about 13 by 18 inches) with parchment paper. To shape each croissant, position a triangle with the base facing you. Positioning your palms on the two outer points of the base, carefully rolling the base toward the point. To finish, grab the point with one hand, stretching it slightly, and continue to roll, tucking the point underneath the rolled dough so that the croissant will stand tall when you place it on the sheet pan. If you have properly shaped the croissant, it will have 6 or 7 ridges.
As you form the croissants, place them, well-spaced, on the prepared half-sheet pan. When all the croissants are on the pan, set the pan in a draft-free area with relatively high humidity, and let the pastries rise for 2 to 3 hours. The ideal temperature is 75 °F. A bit cooler or warmer is all right, as long as the temperature is not warm enough to melt the layers of butter in the dough, which would yield greasy pastries. Cooler is preferable and will increase the rising time and with it the flavor development. For example, the home oven (turned off) with a pan of steaming water placed in the bottom is a good place for proofing leavened baked items. To make sure that no skin forms on the pastries during this final rising, refresh the pan of water halfway through the rising.

During this final rising, the croissants should at least double in size and look noticeably puffy. If when you press a croissant lightly with a fingertip, the indentation fills in slowly, the croissants are almost ready to bake. At this point, the croissants should still be slightly “firm” and holding their shape and neither spongy nor starting to slouch. If you have put the croissants into the oven to proof, remove them now and set the oven to 425 °F to preheat for 20 to 30 minutes.

About 10 minutes before you are ready to bake the croissants, make the egg wash. In a small bowl, whisk together the egg yolks, cream, and salt until you have a pale yellow mixture. Using a pastry brush, lightly and carefully brush the yolk mixture on the pastries, being careful not to allow the egg wash to drip onto the pan. Let the wash dry slightly, about 10 minutes, before baking.

Place the croissants into the oven, immediately turn down the oven temperature to 400 °F, and leave the door shut for the first 10 minutes. Then working quickly, open the oven door, rotate the pan 180 degrees, and close the door. This rotation will help the pastries to bake evenly. Bake for 6 to 10 minutes longer, rotating the pan again during this time if the croissants do not appear to be baking evenly. The croissants should be done in 15 to 20 minutes total. They are ready when they are a deep golden brown on the top and bottom, crisp on the outside and light when they are picked up, indicating that the interior is cooked through.

Remove the croissants from the oven and place them on a wire rack to cool. As they cool, their moist interiors will set up. They are best if eaten while they are still slightly warm. If they have just cooled to room temperature, they are fine as well, or you can rewarm them in a 375°F oven for 6 to 8 minutes to recrisp them before serving. You can also store leftover croissants in an airtight container at room temperature for 1 day, and then afterward in the refrigerator for up to 3 days. If you have stored them, recrisp them in the oven before serving.

copy-of-img_4779

brownie comparison

copy-of-img_4059
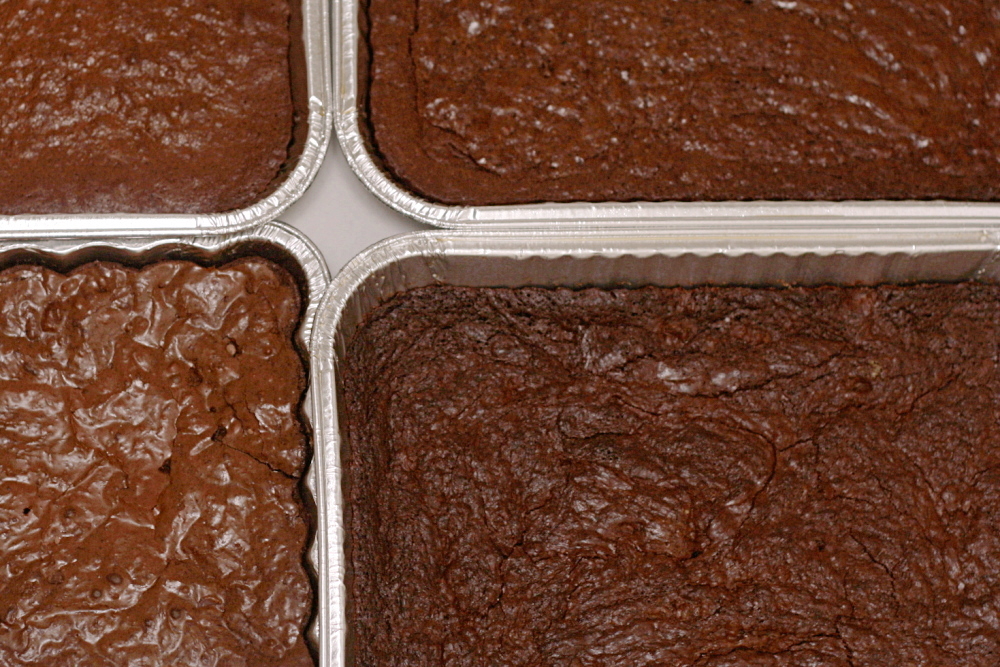
clockwise from upper left: CI, Baked, Outrageous, box

Sometimes these recipe comparisons are a little silly. Once recipes reach a certain point of outstanding-ness, it’s almost meaningless to try to pick a favorite. Plus, we’re talking about brownies – how picky do we really need to be?

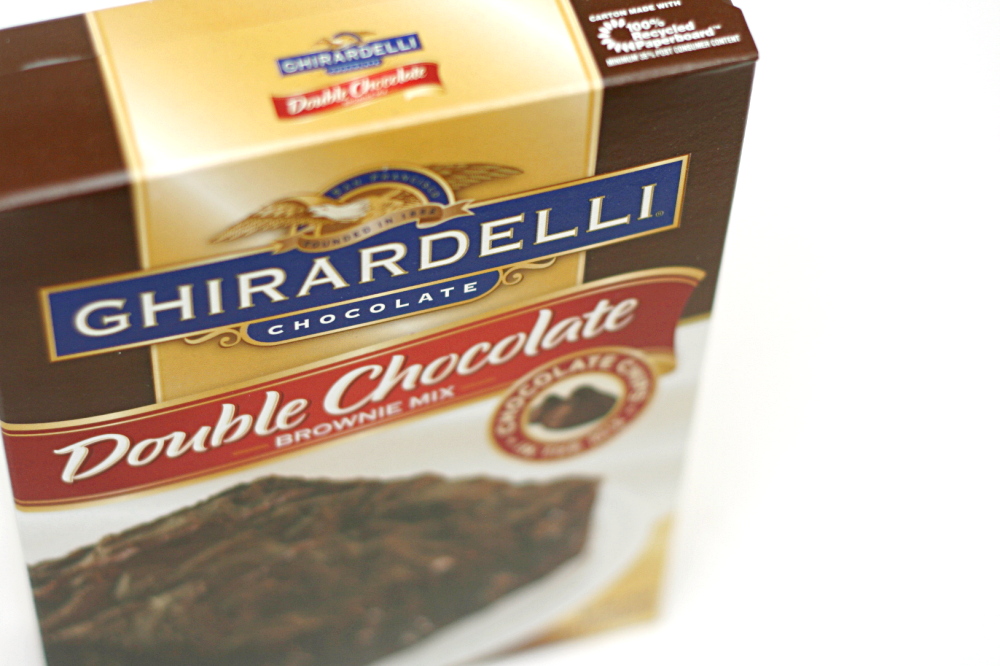
But since I’m not one to be deterred by practicalities, I went ahead with a brownie comparison post. I chose three superstars – Cooks Illustrated’s Classic Brownies, my favorite for years; Ina Garten’s Outrageous Brownies, very popular and the clear winner of another comparison; and the Baked (a bakery in Brooklyn) brownie, famous among people who care about these things. I also threw a boxed mix into the roundup. I chose Ghirardelli because it’s widely available in stores and often receives positive reviews. Plus it was on sale.

copy-of-img_4016

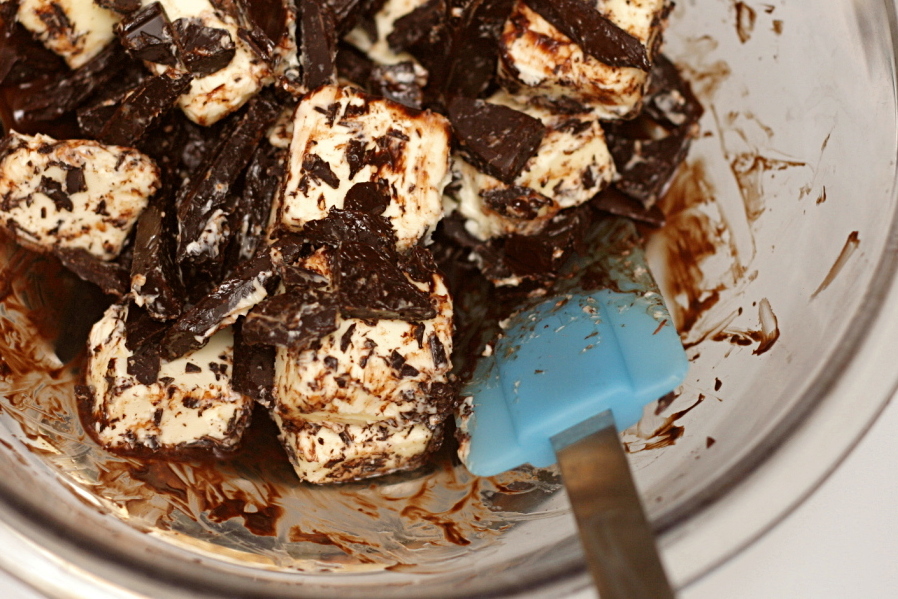
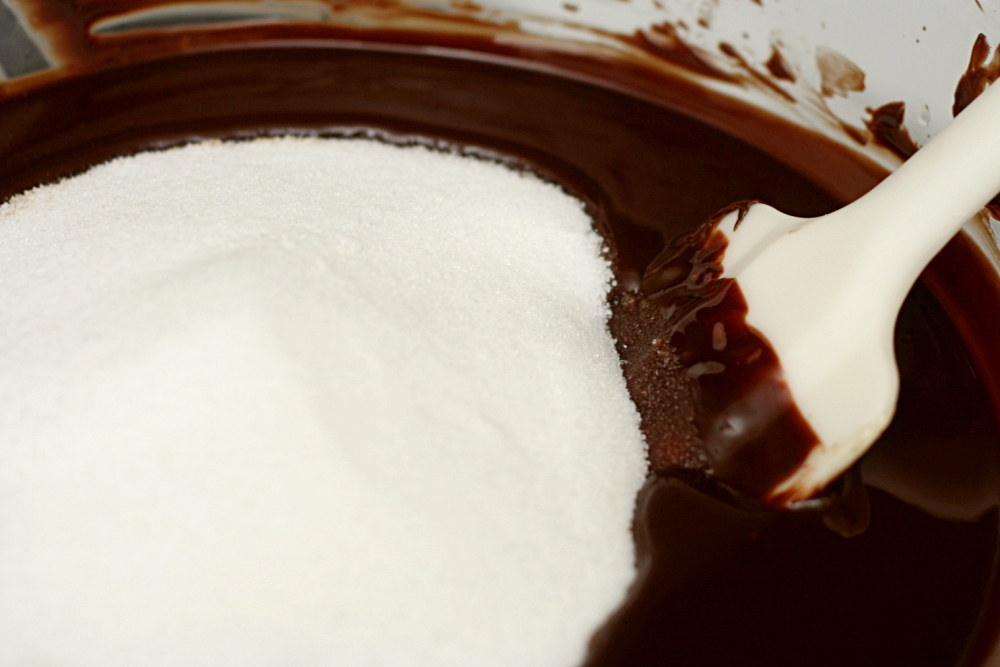
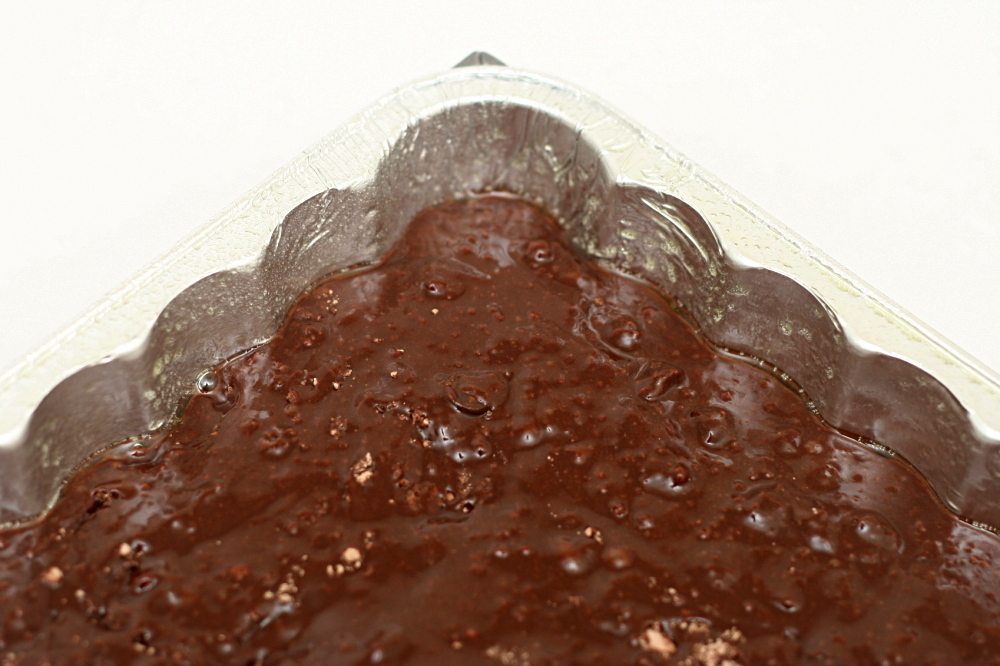
All three homemade recipes are made the same way, by melting the chocolate and butter together, whisking in the sugar, then the eggs, and finally folding in the dry ingredients. I baked the brownies in disposable foil pans (sorry, Earth!) because I was taking them camping. For baking, each foil pan was placed in a metal baking pan of the same size, in an effort to encourage more even heating than the thin foil pans could manage on their own. I chose a basic boxed mix and kept the homemade recipes at their most basic as well, leaving out nuts, spices, etc. I used Ghirardelli brand chocolate for everything.

copy-of-img_4013

It’s a good thing I had 9 tasters, because all of the recipes were good and no clear winner emerged. Here’s the breakdown:

-Ghirardelli boxed mix: This was the favorite of one person. Take that for what it’s worth – the same person had a McDonald’s chicken biscuit for breakfast after I’d made strawberry scones for him. He liked that the brownies were “sugary and moist.” Everyone else thought they were too sweet and not chocolately enough.

-Ina’s Outrageous brownies: When I made these, I was surprised by how much instant coffee powder the recipe calls for. I checked and double-checked. It was the correct amount, and that was the deciding factor for opinions of these brownies. Those who liked the bitter coffee taste (Dave was one) liked these brownies best.

-Cook’s Illustrated brownies: These were the general favorite of those who weren’t as excited about the Outrageous brownies’ coffee flavor. They were described as “cakey” by one person, and while they shouldn’t be confused with truly cakey brownies, I do think they have the most balanced texture. I guess I don’t want my brownies to be “outrageously” rich. They also have a nice strong chocolate flavor. One friend noted that both the initial taste and finish were chocolately, with none of the bitterness associated with the other homemade recipes. Perhaps because this was the only homemade recipe without coffee added?

-The Baked brownies: Major caveat – I underbaked the Baked brownies. (Ironic, no?) The toothpick came out clean, and it isn’t even supposed to be clean for brownies.  Apparently the crispy top was scraping the batter off the toothpick during my tests. I think that really affected people’s opinions of these brownies, which were often described as “too fudgy.” I did think the flavor was well balanced between sweetness and chocolate, and I liked the texture of the less-gooey edge pieces. (There’s an update below after I correctly cooked this recipe.)

copy-of-img_4052

I’m going to have to conclude that any well-reviewed homemade brownie recipe (and there are many more than these three) is going to be great. I often hear people say that they’ve never had homemade brownies better than a boxed mix, and that I don’t understand at all. Either they’re making the wrong brownies or they’re buying a much better mix than I did (or they like sugar a lot more than chocolate, like my chicken biscuit-eating friend). And since homemade brownies take only a few minutes longer to make than boxed brownies, I really don’t see the point.

copy-of-img_4055

Unfortunately, I don’t feel like this was the fairest comparison. What really matters with a brownie recipe is texture and chocolate flavor. But Ina’s brownies were dominated by the coffee flavor, which is very easy to vary by adding more or less instant coffee powder. The Baked brownies were impossible to judge because of my baking screw-up. I’d love to do another comparison that corrects these errors, but that will have to wait. One result of these comparison posts is that I end up burned out on the food for months to come. And I still have brownies in the freezer.

Okay, I guess I’m not that upset about it.

copy-of-img_4049

(I apologize for the lack of photos of each brownie’s texture, which I know would have been informative.  I was camping and hanging out with friends I rarely see, and there was just a lot going on.)

Update: I made the Baked brownie again, this time actually baking them, you know, all the way. I really like them, and they got great reviews from the people I sent them to. But, I still like Cooks Illustrated’s Classic Brownies better.  For one thing, the Baked brownies are so fudgy that it’s difficult to accurately test their doneness.

One year ago: Buttermilk Coleslaw

Classic Brownies (from Cook’s Illustrated)

CI note: Be sure to test for doneness before removing the brownies from the oven. If underbaked (the toothpick has batter clinging to it) the texture of the brownies will be dense and gummy. If overbaked (the toothpick comes out completely clean), the brownies will be dry and cakey.

1 cup (4 ounces) pecans or walnuts, chopped medium (optional)
1¼ cups (5 ounces) cake flour
½ teaspoon salt
¾ teaspoon baking powder
6 ounces unsweetened chocolate, chopped fine
12 tablespoons (1½ sticks) unsalted butter, cut into six 1-inch pieces
2¼ cups (15¾ ounces) sugar
4 large eggs
1 tablespoon vanilla extract

1. Adjust oven rack to middle position; heat oven to 325 degrees. Cut 18-inch length foil and fold lengthwise to 8-inch width. Fit foil into length of 13 by 9-inch baking dish, pushing it into corners and up sides of pan; allow excess to overhand pan edges. Cut 14-inch length foil and, if using extra-wide foil, fold lengthwise to 12-inch width; fit into width of baking pan in same manner, perpendicular to first sheet. Spray foil-lined pan with nonstick cooking spray.

2. If using nuts, spread nuts evenly on rimmed baking sheet and toast in oven until fragrant, 5 to 8 minutes. Set aside to cool.

3. Whisk to combine flour, salt, and baking powder in medium bowl; set aside.

4. Melt chocolate and butter in large heatproof bowl set over saucepan of almost-simmering water, stirring occasionally, until smooth. (Alternatively, in microwave, heat butter and chocolate in large microwave-safe bowl on high for 45 seconds, then stir and heat for 30 seconds more. Stir again, and, if necessary, repeat in 15-second increments; do not let chocolate burn.) When chocolate mixture is completely smooth, remove bowl from saucepan and gradually whisk in sugar. Add eggs on at a time, whisking after each addition until thoroughly combined. Whisk in vanilla. Add flour mixture in three additions, folding with rubber spatula until batter is completely smooth and homogeneous.

5. Transfer batter to prepared pan; using spatula, spread batter into corners of pan and smooth surface. Sprinkle toasted nuts (if using) evenly over batter and bake until toothpick or wooden skewer inserted into center of brownies comes out with few moist crumbs attached, 30 to 35 minutes. Cool on wire rack to room temperature, about 2 hours, then remove brownies from pan by lifting foil overhang. Cut brownies into 2-inch squares and serve. (Store leftovers in airtight container at room temperature, for up to 3 days,

Outrageous Brownies (from Ina Garten/Barefoot Contessa)

2 sticks unsalted butter
8 ounces, plus 6 ounces semisweet chocolate, chopped
3 ounces unsweetened chocolate
3 extra-large eggs
1½ tablespoons instant coffee powder
1 tablespoons real vanilla extract
1.125 (7.85 ounces) cups sugar
½ cup (2.4 ounces) all-purpose flour, plus 2 tablespoons
1½ teaspoons baking powder
½ teaspoon kosher salt

Preheat oven to 350 degrees F. Grease and flour a 13 by 9 by 1 ½-inch baking pan.

Melt together the butter, 8 ounces chocolate, and unsweetened chocolate on top of a double boiler. Cool slightly. Stir together the eggs, instant coffee, vanilla and sugar. Stir in the warm chocolate mixture and cool to room temperature.

Stir together ½ cup of the flour, baking powder and salt. Add to cooled chocolate mixture. Toss the 6 ounces of chocolate chips with 2 tablespoons flour to coat. Then add to the chocolate batter. Pour into prepared pan.

Bake for about 30 minutes, or until tester just comes out clean. Halfway through the baking, rap the pan against the oven shelf to allow air to escape from between the pan and the brownie dough. Do not over-bake! Cool thoroughly, refrigerate well and cut into squares.

The Baked Brownie (from Baked: New Frontiers in Baking from the Baked Bakery in Red Hook, Brooklyn, via Smitten Kitchen)

1¼ cups (6 ounces) all-purpose flour
1 teaspoon salt
2 tablespoons dark unsweetened cocoa powder
11 ounces dark chocolate (60 to 72% cacao), coarsely chopped
1 cup (2 sticks) unsalted butter, cut into 1-inch pieces
1 teaspoon instant espresso powder
1½ cups (10.5 ounces) granulated sugar
½ cup (3.5 ounces) firmly packed light brown sugar
5 large eggs, at room temperature
2 teaspoons pure vanilla extract

1. Preheat the oven to 350 degrees F. Butter the sides and bottom of a 9×13 glass or light-colored metal baking pan.

2. In a medium bowl, whisk the flour, salt, and cocoa powder together.

3. Put the chocolate, butter, and instant espresso powder in a large bowl and set it over a saucepan of simmering water, stirring occasionally, until the chocolate and butter are completely melted and smooth. Turn off the heat, but keep the bowl over the water and add the sugars. Whisk until completely combined, then remove the bowl from the pan. The mixture should be room temperature.

4. Add 3 eggs to the chocolate mixture and whisk until combined. Add the remaining eggs and whisk until combined. Add the vanilla and stir until combined. Do not overbeat the batter at this stage or your brownies will be cakey.

5. Sprinkle the flour mixture over the chocolate mixture. Using a spatula (not a whisk), fold the flour mixture into the chocolate until just a bit of the flour mixture is visible.

6. Pour the batter into the prepared pan and smooth the top. Bake in the center of the oven for 30 minutes, rotating the pan halfway through the baking time, until a toothpick inserted into the center of the brownies comes out with a few moist crumbs sticking to it. Let the brownies cool completely, then cut them into squares and serve.

7. Tightly covered with plastic wrap, the brownies keep at room temperature for up to 3 days.

copy-of-img_4070
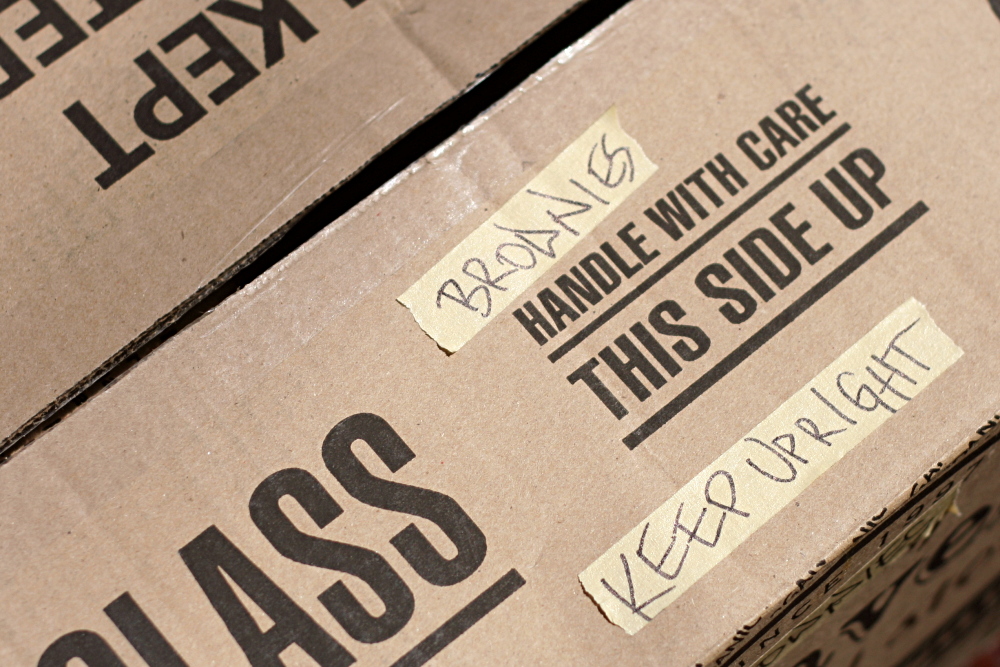
(Another apology: I didn’t realize until I uploaded this picture that it says ASS on the bottom left corner.  I’m too lazy to fix it.  Plus, it’s appropriate for a box full of brownies, no?)

cook’s illustrated’s perfect chocolate chip cookies

copy-of-img_3471

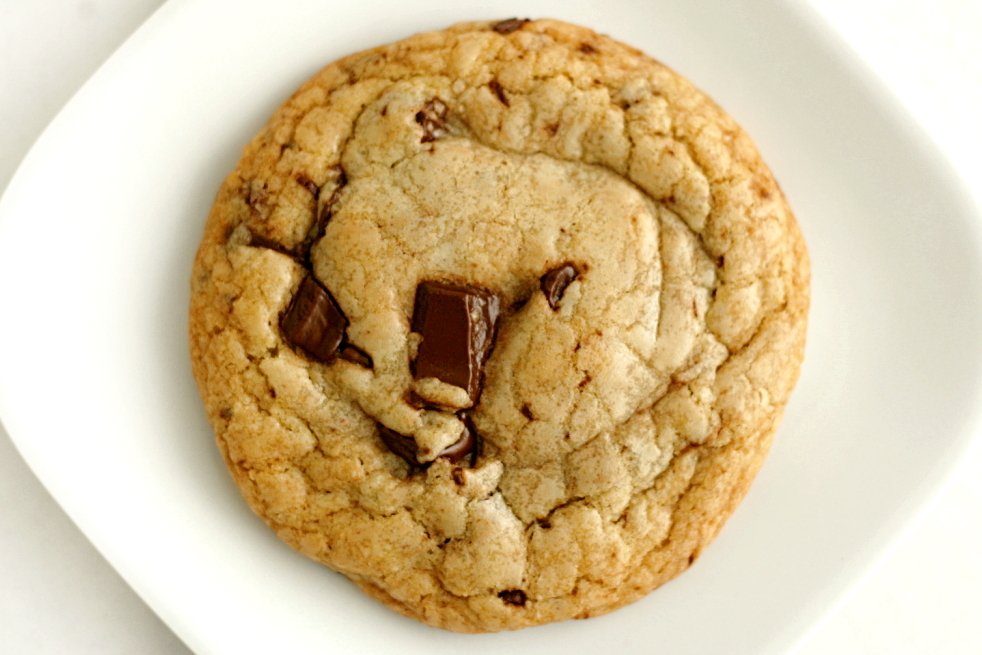
If you’re at all familiar with my blog, you must have known that I would be all over Cooks Illustrated’s new chocolate chip cookie recipe. Not because it might become my new favorite – I knew beforehand that it wouldn’t. The thing is, I’m a major cookie dough eater. To me, the baked cookies are just a bonus dessert; the dough is the reason I make chocolate chip cookies. And I don’t like dough made with melted butter.

copy-of-img_3459

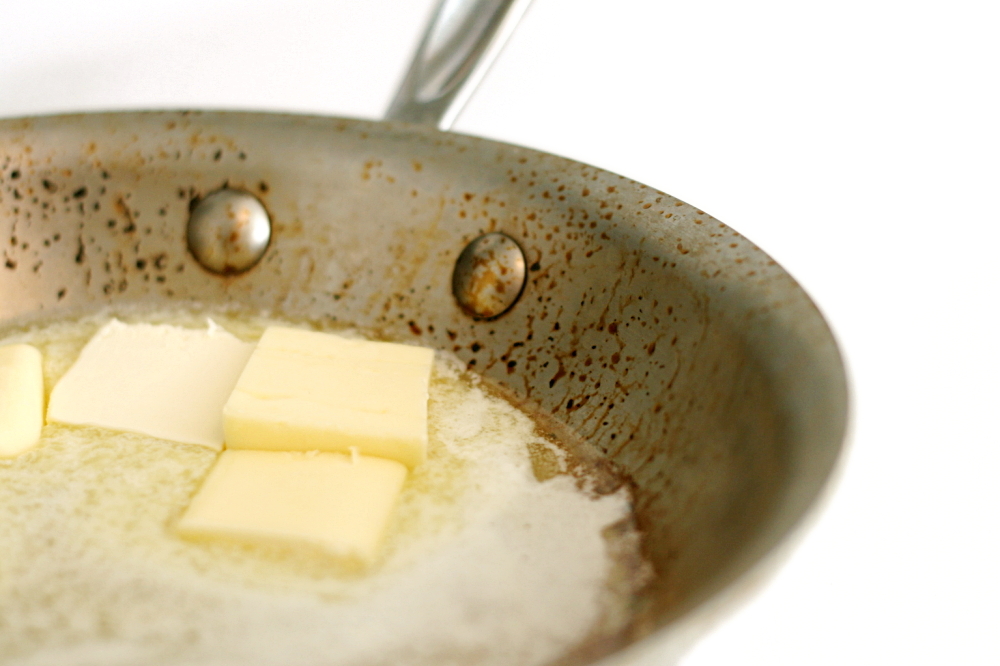
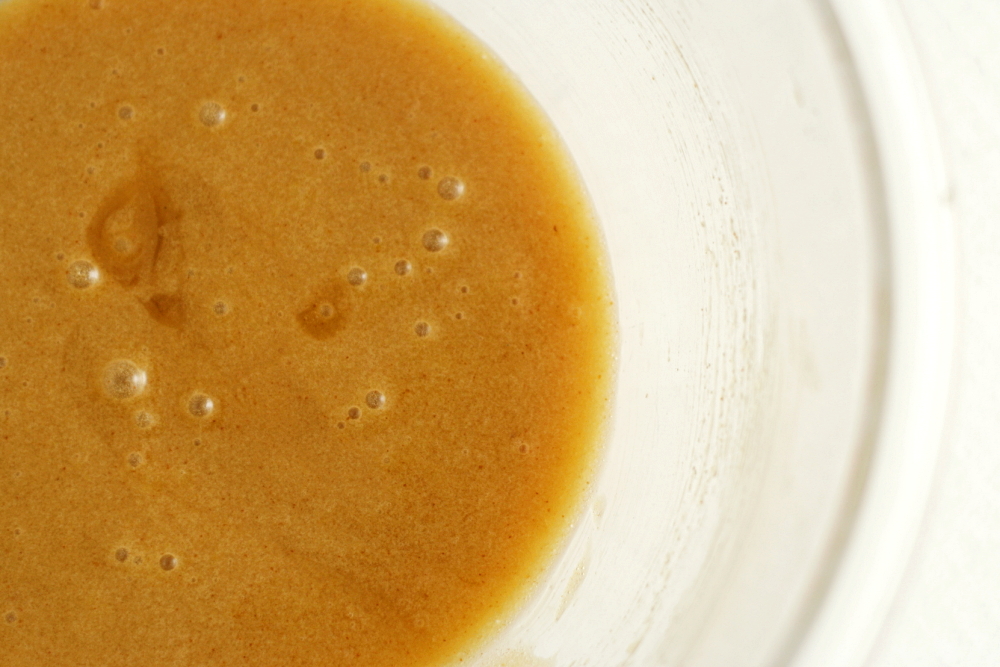
No, the real reason I wanted to try this recipe is because it has some interesting tricks in it, and I thought I might learn something. First, a portion of the butter is browned. Then the sugar is mixed into the melted butter and left to set for 10 minutes, which apparently dissolves the sugars and gives them more opportunity to caramelize in the oven.

copy-of-img_3466

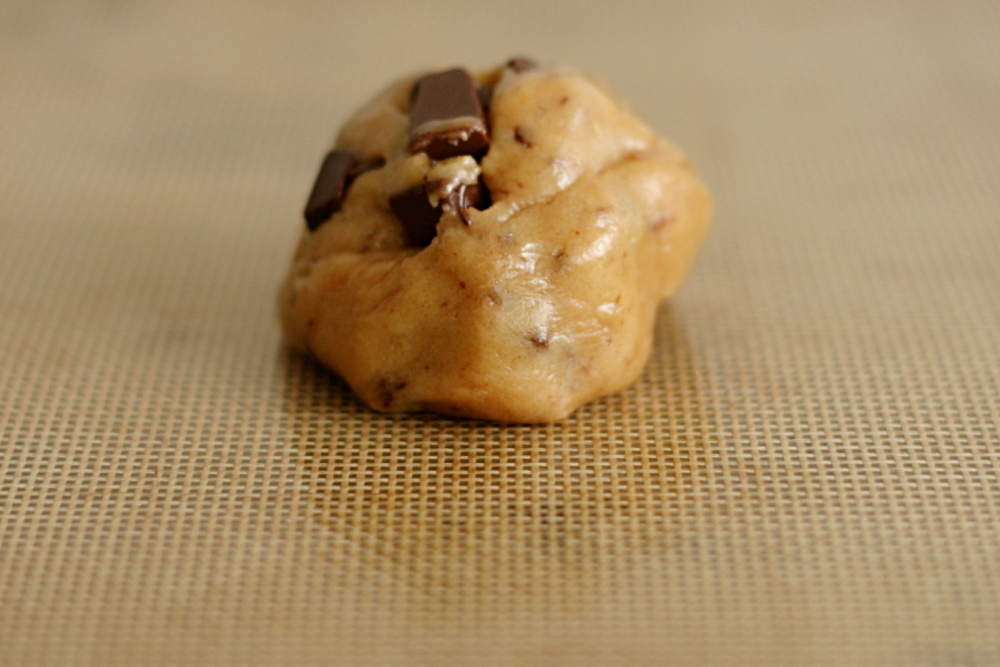
It also makes the recipe very easy – you just melt the butter, whisk in a few more ingredients, let it set, then stir in the remaining ingredients. Divide the dough into 16 portions and bake.

copy-of-img_3468

Here are, for me, the things the recipe has against it. 1) The dough has a greasy texture from the melted butter. 2) It uses portions of eggs. This is a pet peeve of mine, because I hate having containers of egg parts in my freezer or refrigerator. For something I make as often as chocolate chip cookies, I’d rather use whole eggs. 3) It doesn’t use a stand mixer. Dude, stand mixers are fun. That’s why everyone these days has one.

copy-of-img_3477

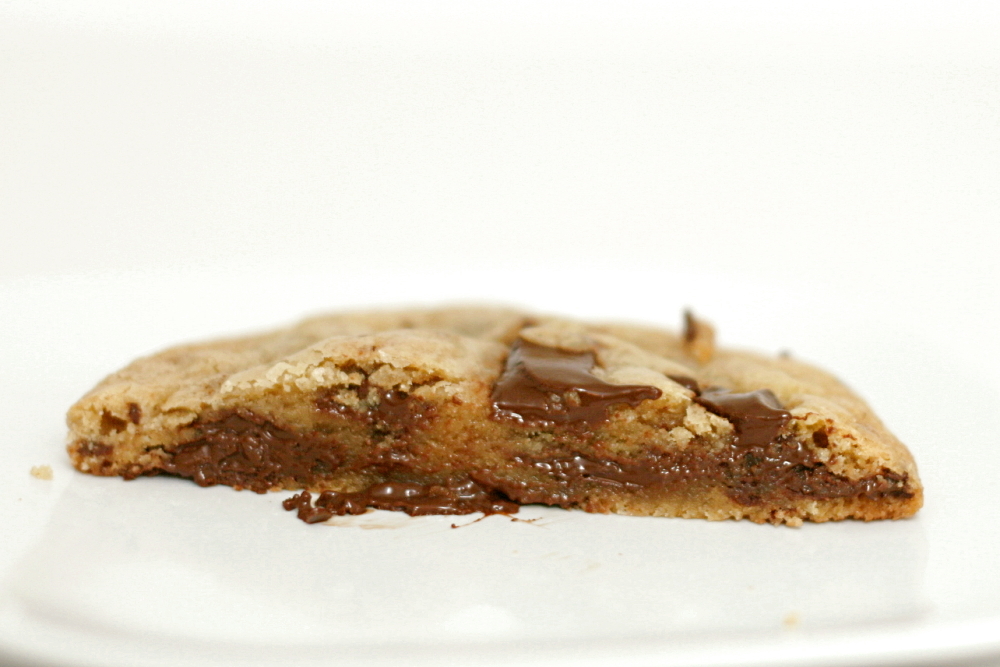
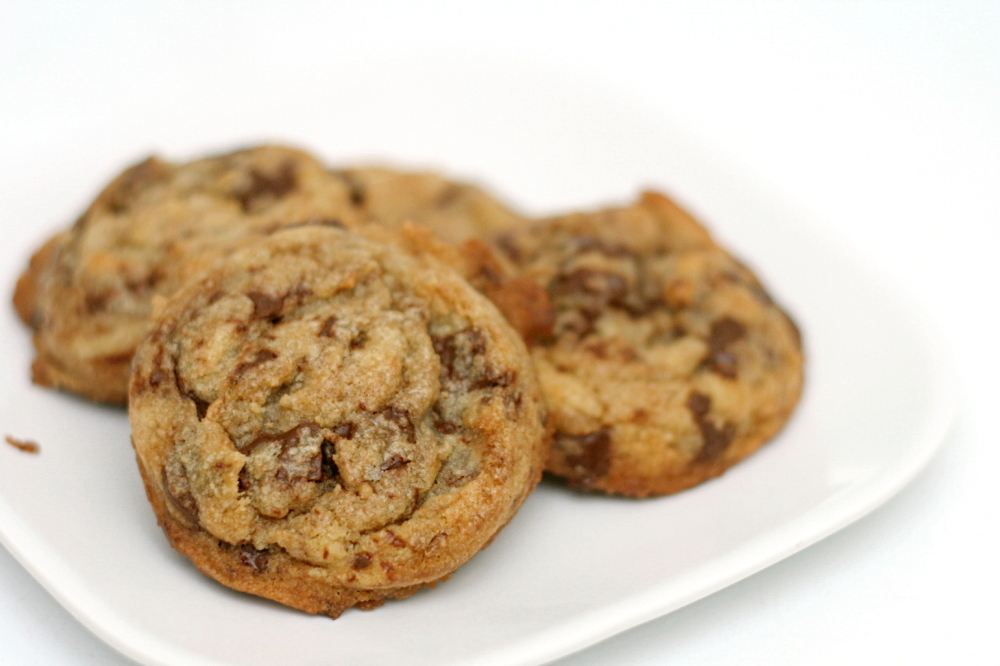
You may have noticed that none of my complaints take issue with the outcome of the baked cookie? That’s because the cookies were really good. This wasn’t a side-by-side comparison, so it’s hard for me to say exactly where they stand in my chocolate chip cookie rating, but they’re certainly in the upper echelon of chocolate chip cookies. So if you’re normal, and all you want out of your chocolate chip cookie recipe is really good cookies without a lot of effort, then definitely check this recipe out. It’s certainly up there with Alton Brown’s popular The Chewy and the NY Times recipe.

copy-of-img_3474

One year ago: Spinach Feta Pine Nut Tart and Dorie’s Perfect Party Cake

Perfect Chocolate Chip Cookies (from Cook’s Illustrated May/June 2009)

Note from Bridget: The recipe makes large cookies in an effort to maximize the difference in texture between the crisp exterior and the tender center. However, I prefer small cookies. I tried baking both sizes, and preferred the texture of the smaller cookies anyway. They still had a great mix of textures. If you do this, you’ll want to reduce the baking time to 7-9 minutes.

1¾ cups (8¾ ounces) unbleached all-purpose flour
½ teaspoon baking soda
14 tablespoons (1¾ sticks) unsalted butter
½ cup (3½ ounces) granulated sugar
¾ cup (5¼ ounces) packed dark brown sugar
1 teaspoon table salt
2 teaspoons vanilla extract
1 large egg
1 large egg yolk
1¼ cups semisweet chocolate chips or chunks
¾ cup chopped pecans or walnuts, toasted (optional)

1. Adjust oven rack to middle position and heat oven to 375 degrees. Line 2 large baking sheets with parchment paper. Whisk flour and baking soda together in medium bowl; set aside.

2. Heat 10 tablespoons butter in 10-inch skillet over medium-high heat until melted, about 2 minutes. Continue cooking, swirling pan constantly until butter is dark golden brown and has nutty aroma, 1 to 3 minutes. Remove skillet from heat and, using heatproof spatula, transfer browned butter to large heatproof bowl. Stir remaining 4 tablespoons butter into hot butter until completely melted.

3. Add both sugars, salt and vanilla to bowl with butter and whisk until fully incorporated. Add egg and yolk and whisk until mixture is smooth with no sugar lumps remaining, about 30 seconds. Let mixture stand for 3 minutes, then whish for 30 seconds. Repeat process of resting and whisking 2 more times until mixture is thick, smooth and shiny. Using rubber spatula or wooden spoon, stir in flour mixture until just combined, about 1 minute. Stir in chocolate chips and nuts (if using), giving dough final stir to ensure no flour pockets remain.

4. Divide dough into 16 portions, each about 3 tablespoons (or use a #24 cookie scoop). Arrange 2 inches apart on prepared baking sheets, 8 dough balls per sheet.

5. Bake cookies 1 tray at a time until cookies are golden brown and still puffy, and edges have begun to set but centers are still soft, 10-14 minutes, rotating baking sheet halfway through baking. Transfer baking sheet to wire rack; cool cookies completely before serving.

copy-of-img_3479

red velvet cake comparison

copy-of-img_1985

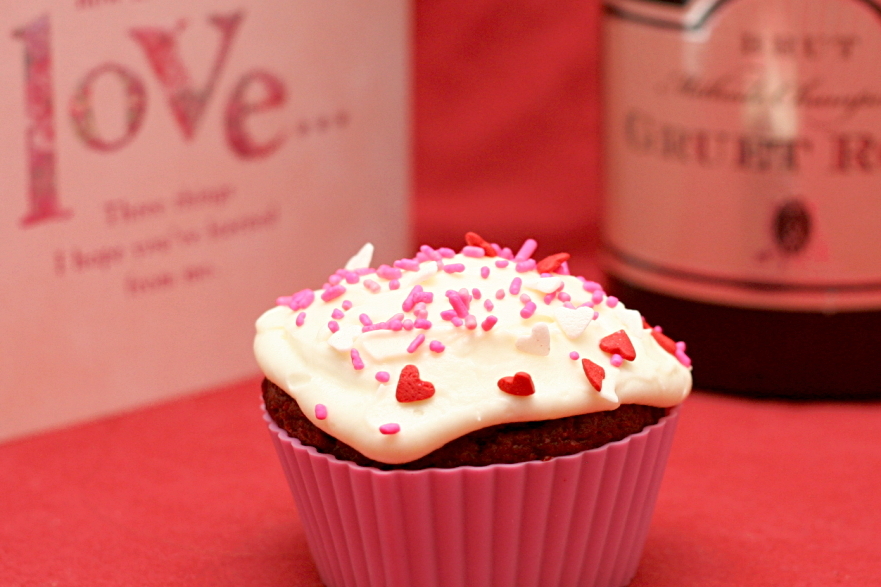
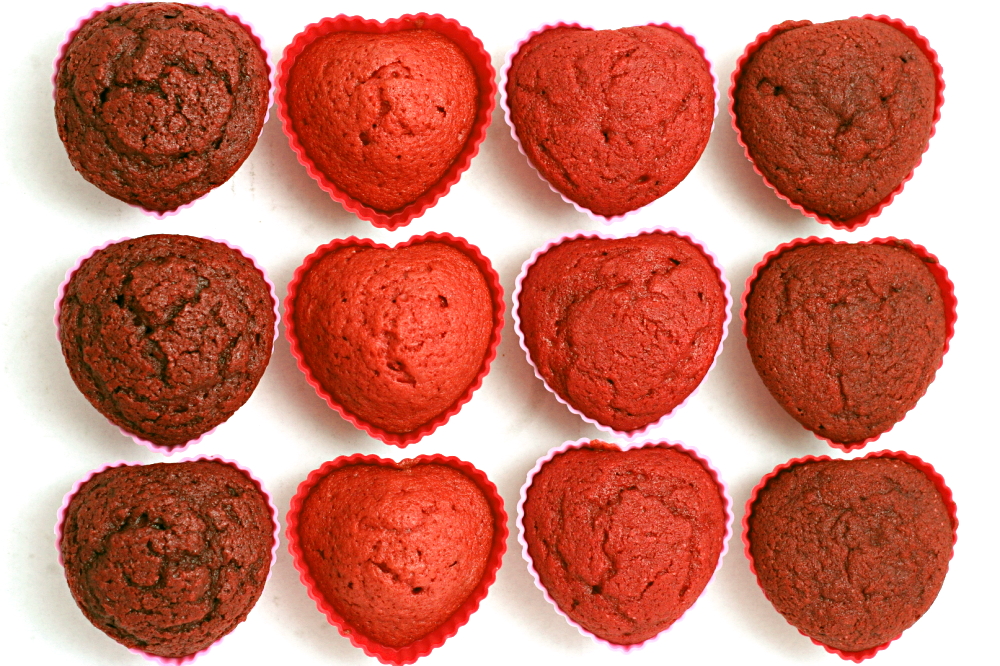
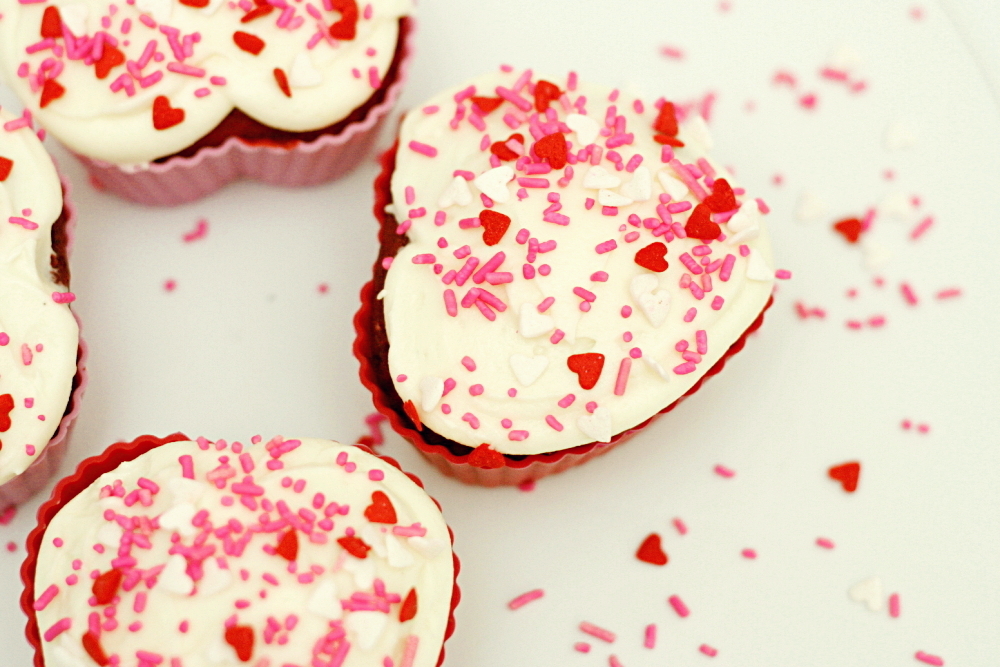
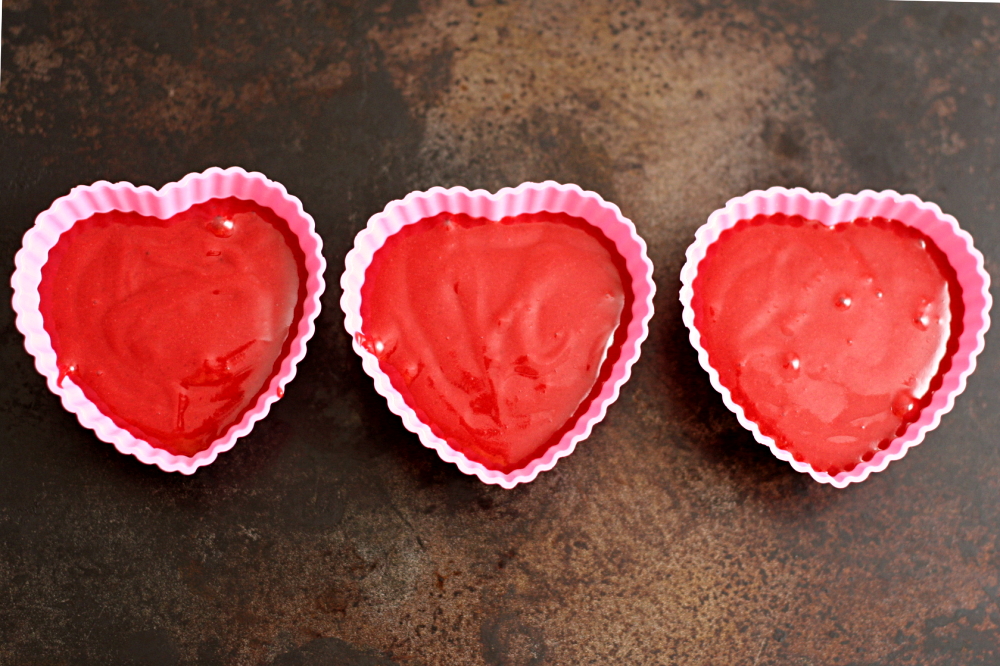
I started thinking about a Valentine’s Day blog post as soon as I pulled these heart-shaped silicone baking cups out of my Christmas stocking. And if you’re making heart-shaped cupcakes, they should be bright red. And if you’re making heart-shaped bright red cupcakes, they should be covered in heart-shaped pink and red sprinkles. My philosophy toward Valentine’s Day is, if you’re going to do it, overdo it.

copy-of-img_1789

What’s weird is that the closest I can remember to eating red velvet cake is these whoopie pies that I made a couple months ago. In fact, I didn’t even know that red velvet cake existed until college, when one of my professors told me a story about someone throwing it up on her carpet and the stain never coming out.

copy-of-img_1791

My lack of red velvet cake experience is even stranger considering that my mom was recently telling me about a great recipe that my grandmother has for it. My sister made that recipe recently and said it was a little dry, but she’s baking at high altitude, which makes cakes prone to problems. I wanted to give the recipe a try myself.

copy-of-img_1808

But Deb has a recipe she recommends as well, and I’ve had very good experiences with almost everything I’ve made from her site. And Kelsey describes herself as a red velvet cake enthusiast, and she recently found a recipe she loves. And Cooks Illustrated (via Cooks Country, their slightly less OCD magazine) has a recipe, and in general their stuff is worth trying.

copy-of-img_1797

Four recipes, all highly recommended from trusted sources. There was no good way for me to choose just one, so this seemed like a perfect opportunity to spend an entire evening baking something as simple as cupcakes do a recipe comparison.

copy-of-img_1803

Before I discuss detailed comparisons between each, let me cut to the chase and tell you that every single cake was really good, both in taste and texture. There were differences, but they were subtle. Dave and I had a hard time choosing favorites. That being said, once I ate enough cupcakes, preferences started to emerge.

In the discussion below, I will use the following abbreviations: SK for Smitten Kitchen; G for my grandmother’s recipe; AD for Apple a Day, and CC for Cooks Country.

copy-of-img_1810

Effort: None of the cakes were exceptionally difficult. AD was the simplest – the dry and wet ingredients were mixed separately, then combined in the mixer. SK and G called for the vinegar and baking soda to be mixed together before being added to the already-mixed remaining ingredients, which I’d never seen before. And G and CC call for the cocoa and food coloring to be stirred into a paste initially, which Cooks Country explains is to distribute the cocoa more evenly.

copy-of-img_1907from left to right: SK, AD, G, CC

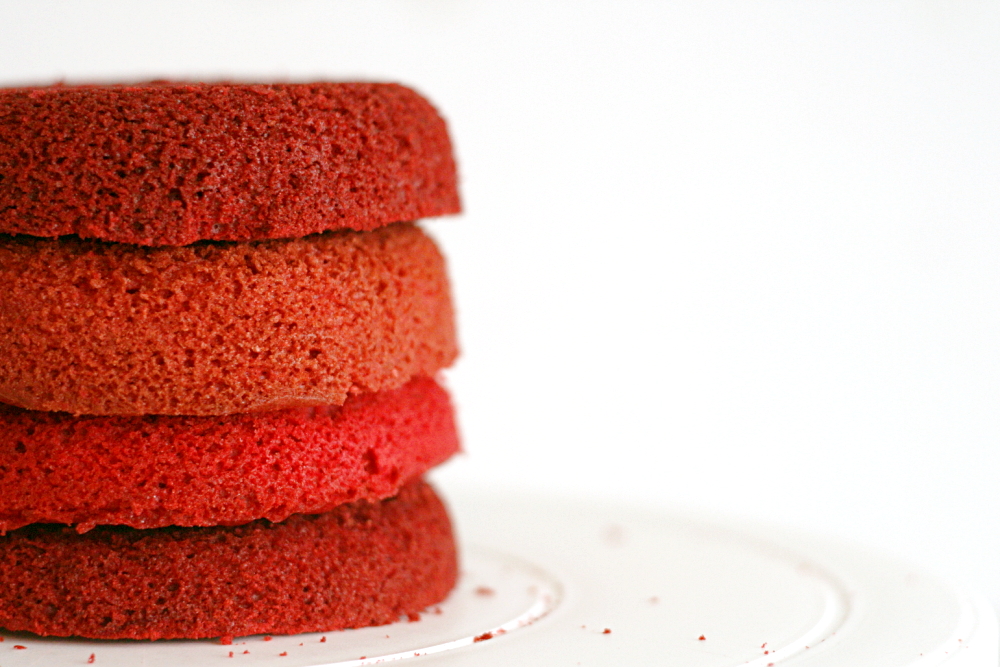
Color: While the shades of red vary, all of the cakes are definitely red. I have no preference. I should note that I used a little less food coloring in G and SK than the recipes called for, because I thought I was going to run out. Even so, I think their color is fine.

copy-of-img_1911from left to right: SK, AD, G, CC

Texture: While I wouldn’t call any of the cakes dry, G did seem less moist than the others. This isn’t surprising considering that it uses the least fat of these recipes and only a third of the fat of one of them (AD). AD and SK, both of which used oil as the fat, were perhaps a little moister than CC and G, which call for butter. None of the cakes were too dense, but SK and CC seemed especially fluffy. I was expecting a different texture in CC compared to the rest, because it was the only recipe that called for all-purpose instead of cake flour, but it wasn’t noticeable.

copy-of-img_1969

Taste: One thing that I think it important to note about Red Velvet cake, that Cooks Country clarifies in their article, is that it not meant to be a chocolate cake. The small amount of cocoa is just there to provide the red color. Unfortunately, CC’s cake was my least favorite. I think it’s because of one very small difference between their recipe and the others – the rest call for a teaspoon of salt, CC has just a pinch in it. The flavor of this cake was definitely muted compared to the others. The rest were all really good. SK calls for over twice as much cocoa as the others, which was enough so that I could actually taste a little chocolatiness. I like chocolate of course, but in this case, it masked that classic Red Velvet tanginess. AD and G tasted somewhat similar, but I think G had a little bit of a metallic taste to it (which I have no explanation for).

So, in the end, I choose AD (found through Kelsey’s Apple a Day and originally from Saveur) as my favorite, for its moistness, its bright, pinky red color, the ease with which it comes together, and especially its sweet but tangy flavor.

copy-of-img_1970
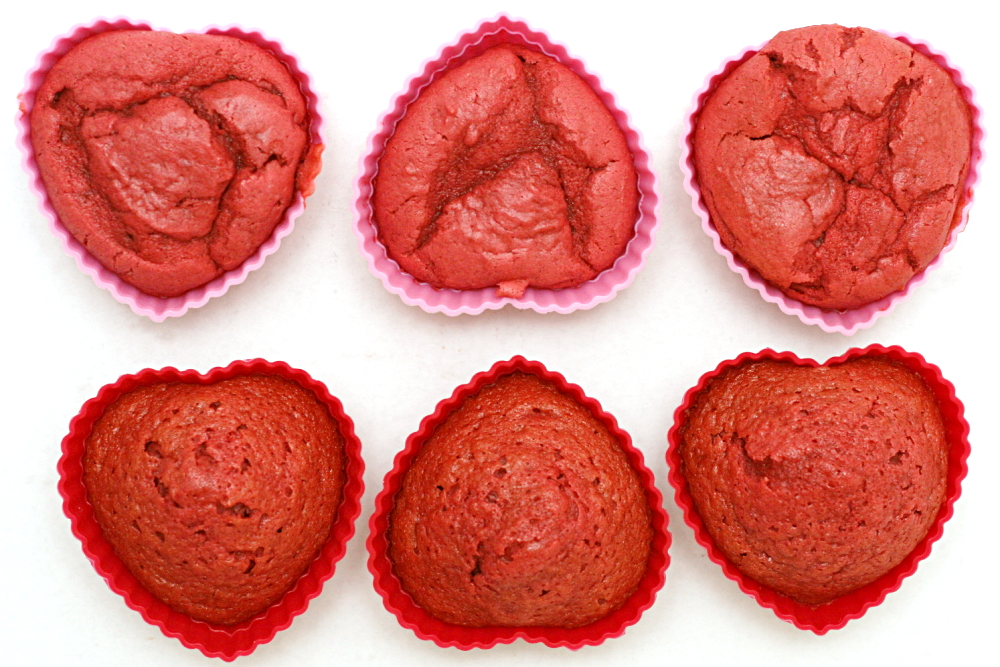
Update 2/15/09: When BMK pointed me in the direction of another oft-recommended Red Velvet cake recipe, I used amazing restraint in waiting a whole 6 hours before I tried it. The Pastry Queen’s recipe uses butter instead of oil as the fat, and it includes sour cream. Other than the sour cream and calling for both all-purpose and cake flour, the ingredient list was similar to the other recipes I tried.

copy-of-img_2003top – Pastry Queen; bottom – Apple a Day
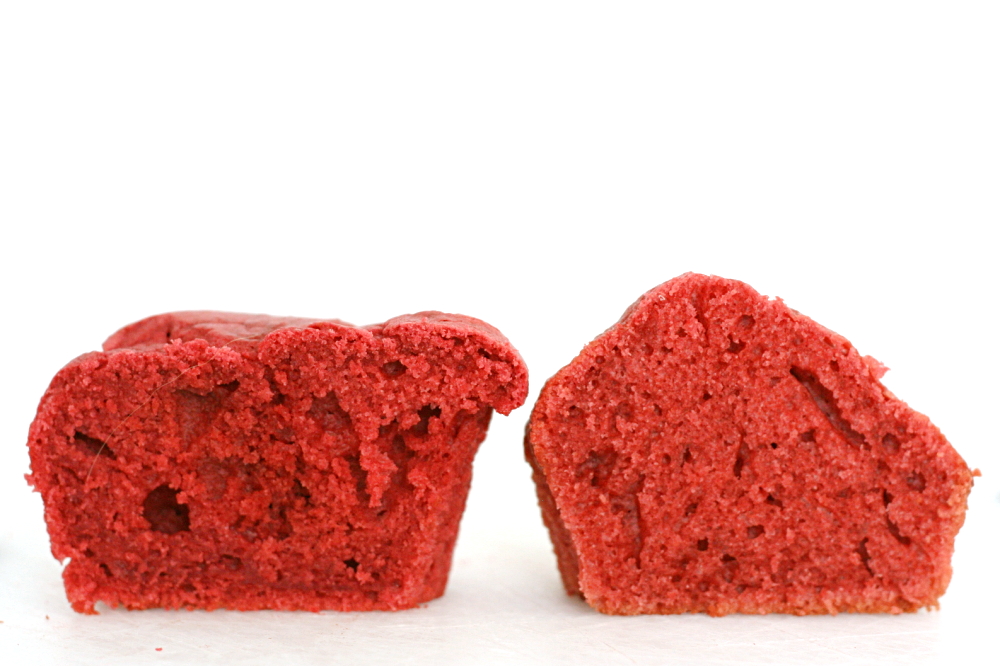
I generally prefer butter over oil in desserts, and I think sour cream makes cakes really tender, so I was pre-disposed toward liking the Pastry Queen’s cake. And it really was great – fluffy, moist, tangy, even-textured (although it doesn’t look like that here – the recipe specifically warns not to overbake the cupcakes, so of course I underbaked them). However, in the end, I still preferred the recipe from Kelsey’s Apple A Day, originally from Saveur, which also has great texture, and I like the flavor a little more. But this is definitely a personal preference – you can’t go wrong with either recipe. Next time I might experiment with using the ingredients from AD, substituting butter for the oil, and using the mixing method from the Pastry Queen’s recipe.

copy-of-img_2005left – Pastry Queen; right – Apple a Day
One year ago: A comparison of four vanilla frostings

Red Velvet Cake with Cream Cheese Frosting (from Saveur via Apple a Day)

Makes 1 8-inch 3-layer cake

After making this recipe a few times, I’m finding that it’s actually too moist from all that oil.  A number of commenters have agreed.  When I make the recipe now, I often reduce to the oil to 1 to 1¼ cups.

For the cake:
2½ cups (10 ounces) cake flour
1½ cups (10.5 ounces) sugar
1 teaspoon baking soda
1 tablespoon cocoa powder
1 teaspoon salt
2 eggs
1½ cups vegetable oil (see note)
1 cup buttermilk
2 tablespoons (1 ounce) red food coloring
1 teaspoon vanilla extract
1 teaspoon white distilled vinegar

For the frosting:
12 ounces cream cheese, softened
12 ounces butter, softened
1½ teaspoons vanilla extract
3 cups confectioners’ sugar
1½ cups chopped pecans (optional)

1. For the cake: Preheat oven to 350°.

2. Sift together flour, sugar, baking soda, cocoa, and salt into a medium bowl.

3. Beat eggs, oil, buttermilk, food coloring, vanilla, and vinegar in a large bowl with an electric mixer until well combined. Add dry ingredients and beat until smooth, about 2 minutes.

4. Divide batter evenly between 3 greased and floured 8″ round cake pans.

5. Bake cakes, rotating halfway through, until a toothpick inserted in the center of each cake comes out clean, 25-30 minutes. Let cakes cool 5 minutes, then invert each onto a plate, then invert again onto a cooling rack. Let cakes cool completely.

6. For the frosting: Beat cream cheese, butter, and vanilla together in a large bowl with an electric mixer until combined. Add sugar and beat until frosting is light and fluffy, 5-7 minutes.

4. Put 1 cake layer on a cake plate, level off with a serrated knife, and spread one-quarter of the frosting on top. Set another layer on top, level, and repeat frosting. Set remaining layer on top, level, and frost top and sides with the remaining frosting. Press pecans into the sides of the cake, if desired. **Tip: after leveling cake, turn it upside down to reduce numbers of crumbs. I also did a crumb coat on the outside, let it set for ten minutes, then finished with remaining frosting.

5. Chill for 2 hours to set frosting.

Red Velvet Cake (from Smitten Kitchen, who adapted it from “The Confetti Cakes Cookbook” by Elisa Strauss via the New York Times 2/14/07)

Bridget note: This is the frosting that I used. It was great. (I’ve never met a homemade cream cheese frosting that I didn’t like.) Also, note that this recipe makes 50% more than the others.

Makes 1 9-inch 3-layer cake

1 tablespoon unsalted butter
3½ cups (14 ounces) cake flour
½ cup unsweetened cocoa (not Dutch process)
1½ teaspoons salt
2 cups canola oil
2¼ cups (15.75 ounces) granulated sugar
3 large eggs
6 tablespoons (3 ounces) red food coloring or 1 teaspoon red gel food coloring dissolved in 6 tablespoons of water
1½ teaspoons vanilla
1¼ cup buttermilk
2 teaspoons baking soda
2½ teaspoons white vinegar.

1. Preheat oven to 350 degrees. Place teaspoon of butter in each of 3 round 9-inch layer cake pans and place pans in oven for a few minutes until butter melts. Remove pans from oven, brush interior bottom and sides of each with butter and line bottoms with parchment.

2. Whisk cake flour, cocoa and salt in a bowl.

3. Place oil and sugar in bowl of an electric mixer and beat at medium speed until well-blended. Beat in eggs one at a time. With machine on low, very slowly add red food coloring. (Take care: it may splash.) Add vanilla. Add flour mixture alternately with buttermilk in two batches. Scrape down bowl and beat just long enough to combine.

4. Place baking soda in a small dish, stir in vinegar and add to batter with machine running. Beat for 10 seconds.

5. Divide batter among pans, place in oven and bake until a cake tester comes out clean, 40 to 45 minutes. Let cool in pans 20 minutes. Then remove from pans, flip layers over and peel off parchment. Cool completely before frosting.

Red Cake (from my grandmother)

Makes 1 9-inch 2-layer cake

My grandmother isn’t known for adding a lot of detail to her recipes. I’ve added some.

Also, the frosting here isn’t the cream cheese frosting you usually see associated with red velvet cakes these days. Instead, it’s based on a cooked flour mixture similar to this.

2 ounces red food coloring
2 tablespoon cocoa
2¼ cups cake flour
1 teaspoon salt
½ cup shortening (I used butter of course), softened
1½ cups sugar
2 eggs
1 teaspoon vanilla
1 cup buttermilk
1 teaspoon vinegar
1 teaspoon baking soda

1. Adjust an oven rack to the middle position and preheat oven to 350C. Butter and flour two 9-inch cake pans. Make a paste out of the food coloring and the cocoa. Mix together the flour and salt.

2. Cream shortening and sugar until fluffy. Add eggs, one a time, then the vanilla. Mix in food coloring paste. Add a third of the flour mixture, then half the buttermilk, a third of the flour, half the buttermilk, and ending with the rest of the flour. Holding a small dish over the mixing bowl, add vinegar to baking soda, pouring it into the mixing bowl as it foams. (The original recipe now says “Beat as you would any cake.” That’s helpful!) Beat at medium speed for 30 seconds.

3. Pour the batter into the prepared pans and bake for 30 minutes, until a toothpick comes out clean. Let cool slightly in pans, then invert the cakes onto a cooling rack. When cool, split each later in two and frost.

Frosting:

3 tablespoons flour
1 cup milk
1 cup sugar
1 teaspoon vanilla
16 tablespoons (2 sticks) butter

Cook flour and milk until thick. Cool. Cream butter and sugar and vanilla until fluffy. Blend the creamed mixture into cooked mixture. Beat. The longer you beat it, the better it gets.

Red Velvet Cake (from Cooks Country Dec 2006/Jan 2007)

Serves 12

CC note: The recipe must be prepared with natural cocoa powder. Dutch-processed cocoa will not yield the proper color or rise.

Cake
2¼ cups all-purpose flour
1½ teaspoons baking soda
Pinch salt
1 cup buttermilk
1 tablespoon white vinegar
1 teaspoon vanilla extract
2 large eggs
2 tablespoons natural cocoa powder
2 tablespoons red food coloring
12 tablespoons (1½ sticks) unsalted butter, softened
1½ cups granulated sugar

Frosting
16 tablespoons unsalted butter, softened
4 cups confectioners’ sugar
16 ounces cream cheese, cut into 8 pieces, softened
1½ teaspoons vanilla extract
Pinch salt

1. For the cake: Adjust oven rack to middle position and heat oven to 350 degrees. Grease and flour two 9-inch cake pans. Whisk flour, baking soda, and salt in medium bowl. Whisk buttermilk, vinegar, vanilla, and eggs in large measuring cup. Mix cocoa with food coloring in small bowl until a smooth paste forms.

2. With electric mixer on medium-high speed, beat butter and sugar together until fluffy, about 2 minutes, scraping down bowl as necessary. Add one-third of flour mixture and beat on medium-low speed until just incorporated, about 30 seconds. Add half of buttermilk mixture and beat on low speed until combined, about 30 seconds. Scrape down bowl as necessary and repeat with half of remaining flour mixture, remaining buttermilk mixture, and finally remaining flour mixture. Scrape down bowl, add cocoa mixture, and beat on medium speed until completely incorporated, about 30 seconds. Using rubber spatula, give batter final stir. Scrape into prepared pans and bake until toothpick inserted in center comes out clean, about 25 minutes. Cool cakes in pans 10 minutes then turn out onto rack to cool completely, at least 30 minutes.

3. For the frosting: With electric mixer, beat butter and sugar on medium-high speed until fluffy, about 2 minutes. Add cream cheese, one piece at a time, and beat until incorporated, about 30 seconds. Beat in vanilla and salt. Refrigerate until ready to use.

4. When cakes are cooled, spread about 2 cups frosting on one cake layer. Top with second cake layer and spread top and sides of cake with remaining frosting. Cover and refrigerate until ready to serve, up to 3 days.

chocolate truffles

copy-of-img_1354

You know how at the end of every month, you think to yourself some variation of “December already?! What happened to November?!” I have a trick for making the days of the month crawl by: make a commitment to write a blog entry every day for a month. Instead, you’ll be thinking “only a third of the way done? There’s still 20 more blog entries to write!” and “yes, only four more days!”

copy-of-img_1330

In all honesty though, this was a valuable experience. My primary goal of cleaning out my “To Blog” folder was achieved. But, not because everything got put into the blog. On the contrary, a lot of recipes were moved into the “Probably Not” folder. If I couldn’t find anything to say about a recipe after considering it every day for a month, it’s time to admit that it isn’t worth writing about.

copy-of-img_1334

I started the month with a recipe that’s languished on my hard drive for several months before I finally blogged about it, and I’ll end it the same way. I first made Robert Linxe’s truffles in February. They were good, but what really caught my eye about the recipe was his insistence that it be made with Valrhona chocolate. I’m all about using the best ingredients that are available and affordable, but generally I think the choice of ingredients should be left up to the baker. Insisting on a certain expensive hard-to-find brand of chocolate seems unnecessarily snobby.

copy-of-copy-of-img_1328

So I set out to determine how big a factor chocolate quality really is. My plan was to get four chocolates of widely different quality and compare truffles made with each. I was thinking of using Baker’s Chocolate, Ghirardelli, Scharffen Berger, and Valrhona, or possibly using Hershey’s or Nestlé instead of the Sharffenberger. That plan did not work out. I needed to keep the bitterness of each chocolate approximately the same to make sure we were comparing chocolate brand instead of level of sweetness. That limited my options, and I ended up with the following brands – El Rey, Ghirardelli, Nestlé, Scharffen Berger. I was too lazy to make the extra trip to Williams-Sonoma for Valrhona.

copy-of-img_1335

What I found was that the favorite brand was largely a matter of personal preference. I had seven people tasting the truffles, and we discussed the differences between each as we tasted. I also found that it’s much easier to detect small differences in flavor when you’re focused completely on the food. As soon as my family decided we were done tasting and ready to just eat, I stopped paying attention to the subtle flavors of the chocolates.

copy-of-img_1358

Scharffen Berger had a fruity taste and was the favorite of my mom and brother. Ghirardelli was a little metallic at first and was more bitter than Scharffen Berger. The Nestle was similar to Ghirardelli but with a hint of fruit and a little waxiness. It was the favorite of my dad and sister. El Rey was a bit grainy and was more bitter than the others. It was Dave’s favorite, but my brother didn’t like it much. (I didn’t record my favorite or my brother-in-law’s, and this was months ago so I don’t remember. D’oh!)

Really, I think you could use any chocolate that you like. If Valrhona is your favorite, go for it, but you’ll make some delicious truffles with good ol’ Ghirardelli, or even a fancy bar of Nestlé.

copy-of-img_1365

Robert Linxe’s Chocolate Truffles (from Gourmet via Smitten Kitchen)

Makes about 60 truffles (Linxe says not to double the recipe)

I have not found that this makes anywhere near 60 truffles. I tend to make the truffles small, about ¾-inch diameter, and I only get about 30 with this recipe. I noticed some of the reviewers on epicurious had a similar result.

I skipped the 3 ounces of chocolate for the pre-cocoa coating, because I didn’t want to mix the chocolates, and I was only making ¼ of each recipe, and that would have meant I needed melt ¾ ounces of chocolate, and that sounded like a hassle.

11 ounces Valrhona chocolate (56% cacao)
⅔ cup heavy cream
Valrhona cocoa powder for dusting

Finely chop 8 ounces of the chocolate and put in a bowl.

Bring heavy cream to a boil in a small heavy saucepan. Make sure your pan is small, so you’ll lose the least amount of cream to evaporation, and heavy, which will keep the cream from scorching. Linxe boils his cream three times – he believes that makes the ganache last longer. If you do this, compensate for the extra evaporation by starting with a little more cream.

Pour the cream over the chocolate, mashing any big pieces with a wooden spoon.

Then stir with a whisk in concentric circles (don’t beat or you’ll incorporate air), starting in the center and working your way to the edge, until the ganache is smooth.

Let stand at room temperature until thick enough to hold a shape, about 1 hour, then, using a pastry bag with a 3/8-inch opening or tip, pipe into mounds (about ¾ inch high and 1 inch wide) on parchment-lined baking sheets. When piping, finish off each mound with a flick of the wrist to soften and angle the point tip. Freeze until firm, about 15 minutes.

Meanwhile, melt 3 more ounces of the same Valrhona and smear some on a gloved hand. Gently rub each chilled truffle to coat lightly with chocolate. The secret to a delicate coating of chocolate is to roll each truffle in a smear of melted chocolate in your hand. Linxe always uses gloves.

Toss the truffles in unsweetened Valrhona cocoa powder so they look like their namesakes, freshly dug from the earth. A fork is the best tool for tossing truffles in cacao. Shake truffles in a sieve to eliminate excess cacao.

Store truffles in the refrigerator.