I’ve made focaccia before, years ago, but since Peter Reinhart claims so assertively that his recipe is superior to most focaccia found in America, I thought I’d better give it a try. It has a lot of good things going for it, like herb-scented oil poured on top and a cold overnight fermentation – always a sign of good flavor to come in yeast breads.
It’s fun to make too. The mixer (if you have one) does most of the messy work, but you still get to play with the soft and stretchy dough to shape it. Then you stick your fingers in the oiled dough to create dimples and spread it into the pan. After that, you throw it in the fridge until you’re ready for it, which is always a good trick for convenience.
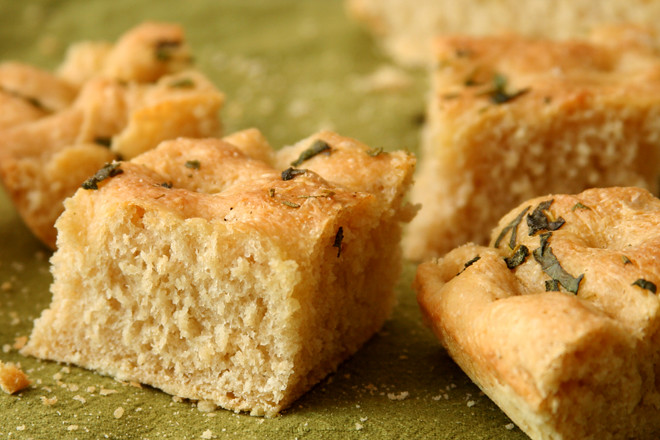
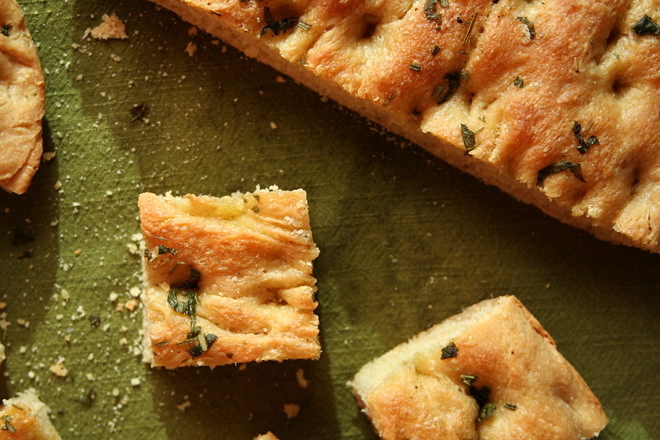
It was definitely good bread, soft in the middle, just a little crisp and almost flaky on top, scented with herbs and olive oil. But – I’m not sure it was the height of focaccia perfection, despite Reinhart’s usually well-deserved swagger. For me, adding a touch more salt or a spoonful of sugar would have given the bread a welcome flavor boost. On the plus side, this gives me the perfect excuse to make more focaccia.
One year ago: Tartine Country Bread
Two years ago: Spinach Artichoke Pizza
Three years ago: Tofu Mu Shu
Four years ago: Crockpot Pulled Pork
Printer Friendly Recipe
Focaccia (slightly reworded from Peter Reinhart’s Bread Baker’s Apprentice)
For the herb oil:
½ cup olive oil
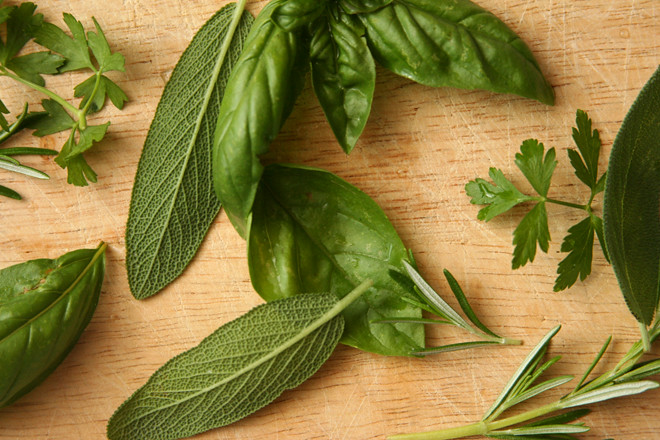
4 tablespoons chopped fresh herbs (any combination of basil, parsley, rosemary, sage)
¾ teaspoon coarse salt
¼ teaspoon ground black pepper
1 garlic clove, minced
For the bread:
5 cups (22.5 ounces) high-gluten or bread flour
2 teaspoons salt
2 teaspoons instant yeast
2 cups water, at room temperature
6 tablespoons olive oil
½ cup herb oil
Extra olive oil for the pan
1. For the herb oil: Warm the olive oil to about 100 degrees. Add the remaining ingredients; let steep while you prepare the dough.
2. For the bread: In the bowl of a stand mixer, stir together the flour, salt, and yeast. Add the water and oil; mix on low speed with the paddle attachment until all the ingredients form a wet, sticky ball. Switch to the dough hook and mix on medium speed for 5 to 7 minutes, or as long as it takes to create a smooth, sticky dough. The dough should clear the sides of the bowl but stick to the bottom of the bowl. You may need to add additional flour to firm up the dough enough to clear the sides of the bowl, but the dough should still be quite soft and sticky.
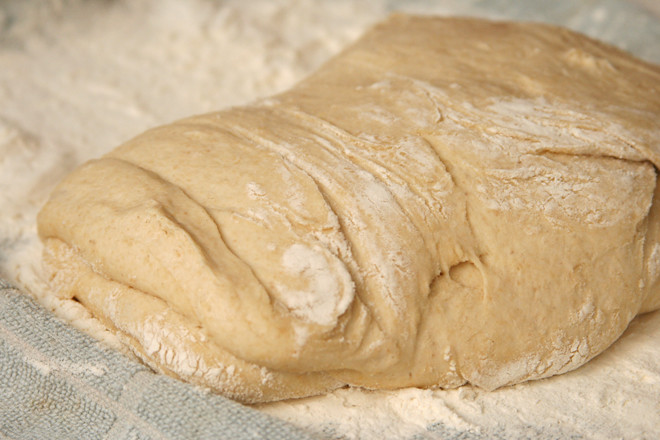
3. Sprinkle enough flour on the counter to make a bed about 6 inches square. Using a scraper or spatula dipped in water, transfer the sticky dough to the bed of flour and dust liberally with flour, patting the dough into a rectangle. Let the dough relax for 5 minutes.
4. Coat your hands with flour and stretch the dough from each end to twice its size. Fold it, letter style, over itself to return it to a rectangular shape. Loosely cover with plastic wrap and let it rest for 30 minutes. Repeat the stretching, folding, and resting twice more. After the last (third) fold, cover the dough and let it ferment at room temperature for 1 hour. It should swell but not necessarily double in size.
5. Oil an 18-by-13-inch pan and line with parchment paper. Use a pastry scraper and lightly oiled hands to lift the dough off the counter and transfer it to the prepared pan, maintaining the rectangular shape as much as possible.
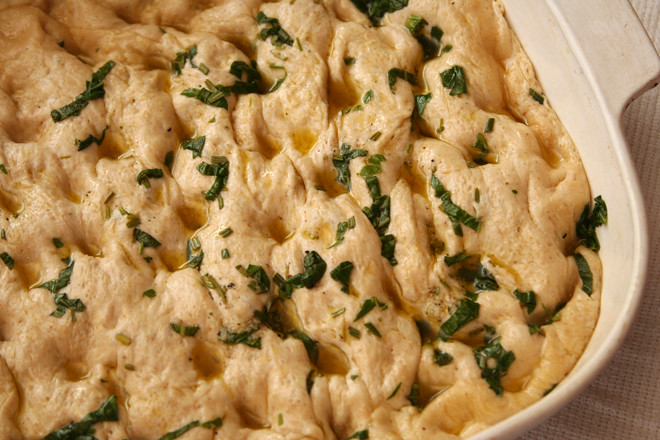
6. Spoon half of the herb oil over the dough. Use your fingertips to dimple the dough and spread it to fill the pan simultaneously. Try to keep the thickness as uniform as possible across the surface. If the dough becomes too springy, let it rest for about 15 minutes and then continue dimpling. Don’t worry if you are unable to fill the pan perfectly, especially the corners. As the dough relaxes and proofs, it will spread out naturally. Use more herb oil as needed to ensure that the entire surface is coated with oil.
7. Loosely cover the pan with plastic wrap. Refrigerate the dough overnight (or for up to 3 days).
8. 3 hours before baking, remove the dough from the refrigerator and drizzle the remaining herb oil over the surface; dimple it in. This should allow you to fill the pan completely with the dough to a thickness of about ½-inch. Cover the pan with plastic and proof the dough at room temperature for 3 hours, or until the dough doubles in size, rising to a thickness of nearly 1 inch.
9. Preheat the oven to 500 degrees.
10. Place the pan in the oven. Lower the oven temperature to 450 degrees and bake for 10 minutes. Rotate the pan 180 degrees and continue baking the focaccia for another 5 to 10 minutes, or until it begins to turn a light golden brown. The internal temperature of the dough should register above 200 degrees (measured in the center).
11. Remove the pan from the oven and immediately transfer the focaccia out of the pan onto a cooling rack. Allow the focaccia to cool for at least 20 minutes before slicing or serving.


This looks scrumptious!!
Was wondering if you’ve tried the Nancy Silverton Mozza focaccia recipe. There’s a terrific demonstration by her in the Los Angeles Times in their Masterclass series and the recipe is there as well. It does call for a sponge—Wondering how the Reinhart recipe compares in taste? From the pictures I’ve seen the crumb looks quite different.
Beautiful focaccia! The herb oil sounds amazing. I’ve never made focaccia but I still dream about one I ate in Italy when I was 12 – inside each of the dimples was a whole (pitted) black olive and I can still taste the olive oil that was brushed on top.
saluki – I haven’t tried it, but I looked it up and really want to now. I love the idea of topping it like pizza too.
I lent my copy of Reinhart’s BBA to a friend earlier this year (big mistake!!!) so I was really glad to find this. Made the focaccia today. Fantastic!
Thank you