strawberry crinkle cookies

strawberry cookies 4

It’s May, and strawberries are in season! Delicious red fresh strawberries are available for snacking, baking, and daiquiris. And I’ve done my share of snacking and daiquiri-ing. But when it comes to baking, I have to confess, I often prefer frozen strawberries, no matter what time of year it is.

strawberry cookies 1

Maybe using frozen strawberries defeats the purpose of eating seasonally, but I like that they puree more thoroughly. Plus, because they’re not so perishable and delicate, frozen strawberries can be picked when they’re really ripe, unlike fresh strawberries you buy at the store, even this time of year. I have no shame in using frozen strawberries for baking, even in the peak of their season.

strawberry cookies 2

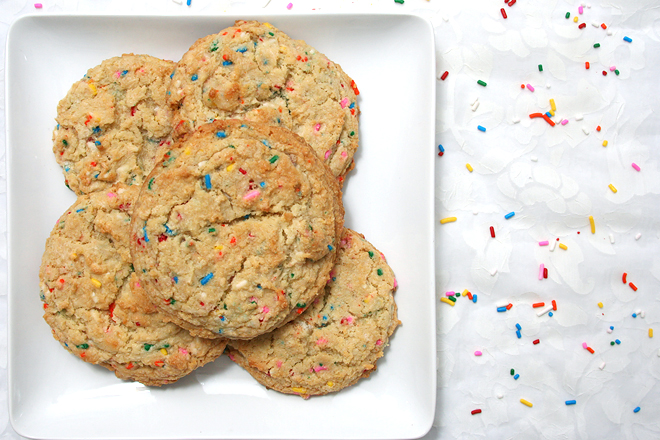
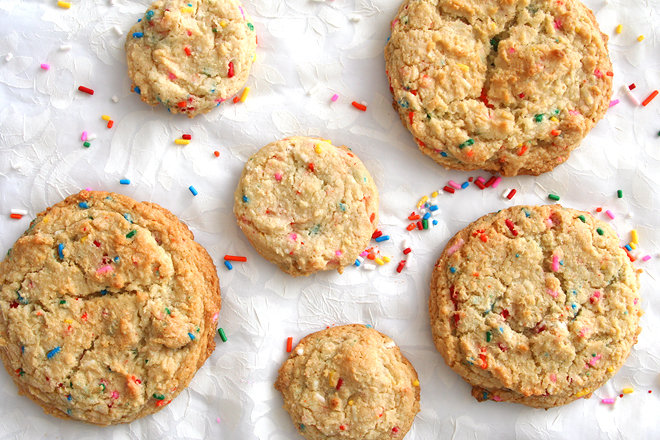
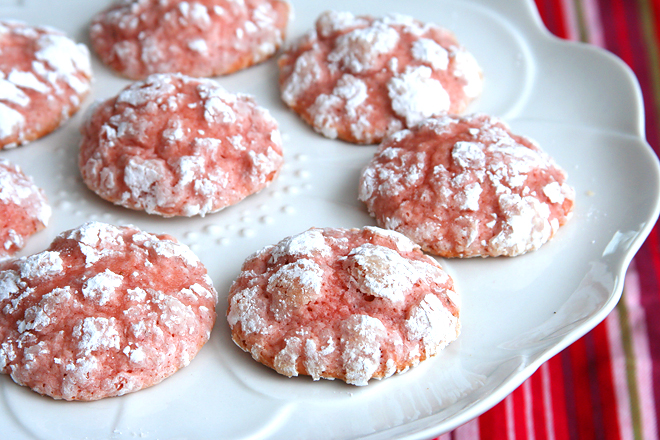
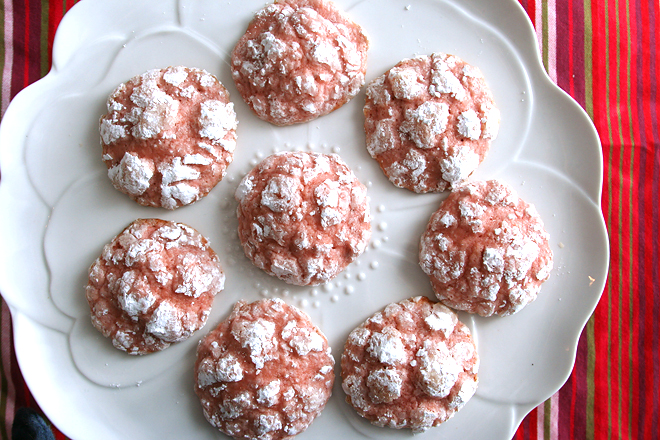
I was impressed by how much strawberry puree was in these cookies. The dough (almost more of a batter) was delicious – like strawberry ice cream, except without the brain freeze. Once baked, the strawberry flavor was more muted, but still evident. These might become a spring tradition for me – or any other time of the year, since frozen strawberries are available whenever I want them.

strawberry cookies 3

Printer Friendly Recipe
Strawberry Crinkle Cookies (slightly adapted from Merry Gourmet)

I used one drop of Americolor red food coloring, which made the batter the perfect color, but the baked cookies weren’t quite as pink as I wanted.

3 cups (375 grams) all-purpose flour
1 teaspoon baking powder
8 tablespoons (1 stick; 113 grams) unsalted butter, room temperature
½ teaspoon salt
1½ cups (300 grams) granulated sugar, plus ¼ cup for rolling
2 large eggs
½ teaspoon vanilla extract
¾ cup strawberry puree (from 6 ounces or 2 cups strawberries)
2 drops red food coloring (optional)
½ cup confectioner’s sugar

1. Heat the oven to 350 degrees. Line two baking sheets with parchment paper or silicone mats. In a medium bowl, mix the flour and baking powder.

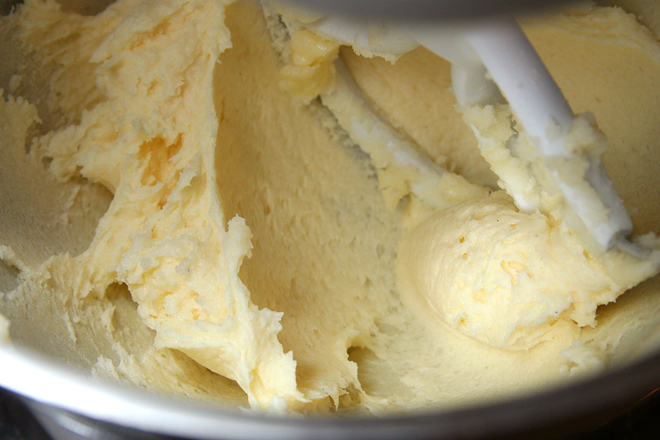
2. In the bowl of a stand mixer fitted with the paddle attachment (or a large bowl if using a hand mixer), beat the butter, salt, and 1½ cups sugar on medium speed until light and fluffy, 2-3 minutes. Add the eggs, one at a time, beating until incorporated, then mix in the vanilla, strawberry puree, and red food coloring. Reduce the mixer speed to low and gradually add the flour mixture, mixing just until incorporated. Chill the dough for 4 hours or up to 3 days.

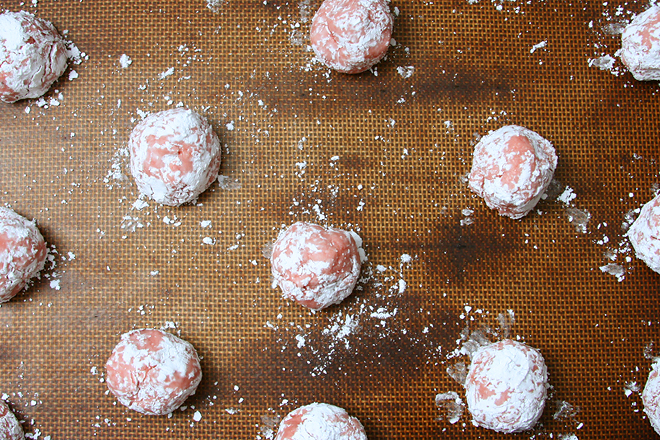
3. Transfer the ¼ cup granulated sugar and the confectioner’s sugar to separate small bowls. Roll the dough into 1-inch balls. Coat the balls of dough with granulated sugar, then powdered sugar. Transfer to the prepared baking sheets. Bake the cookies, one sheet at a time, until they are puffed and do not look wet in the cracks, 12-16 minutes. Let the cookies cool on the cookie sheets for 5 minutes, then transfer to wire racks to cool completely.

strawberry cookies 5

confetti cookies

confetti cookies 7

I had this great idea at the beginning of the year to send my eight nephews and one niece cookies for each of their birthdays. That’s less than one package per month, how hard could it be?

confetti cookies 2

Of course, that’s assuming that their birthdays are evenly dispersed, which they definitely are not. There were three the first week of February, which I scrambled to keep on top of, and then there are three the first week of April. At least I get two-thirds of them out of the way within a few months, I suppose.

confetti cookies 4

I haven’t been able to find the perfect cookie for each kid, but for my girlie-girl niece, it was an easy choice. Sprinkles! Pink! Crumbles of cake within the cookies that have more pink sprinkles! These really do scream “Happy Birthday!”, which makes them the perfect package for the birthday girl halfway across the country. And the Facebook picture of the cookies being enjoyed makes it all worth it. Only three more birthdays to go this year!

confetti cookies 6
Printer Friendly Recipe
Confetti Cookies (from Christine Tosi’s Momofuko Milk Bar via Eva Bakes)

I doubled the sprinkles in the cookie dough. The cookies needed more color, I decided.

Birthday Cake Crumbs:
50 grams (¼ cup) granulated sugar
13 grams (1 tablespoons) light brown sugar, lightly packed
45 grams (6 tablespoons) cake flour
¼ teaspoon baking powder
¼ teaspoon salt
1 tablespoon rainbow sprinkles
2 tablespoons vegetable or canola oil
1½ teaspoons vanilla extract

Cookies:
400 grams (3 cups) all-purpose flour
50 grams (⅔ cup) instant dry milk powder
2 teaspoons cream of tartar
1 teaspoon baking soda
80 grams (½ cup) rainbow sprinkles
16 tablespoons butter, at room temperature
1¼ teaspoons salt
1½ cups (300 grams) granulated sugar
1 tablespoon light corn syrup
2 large eggs
2 teaspoons vanilla extract
Birthday Cake Crumbs

1. For the Birthday Cake Crumbs: Heat the oven to 300 degrees. Line a rimmed baking sheet with parchment paper or a silicone mat.

2. In a medium bowl, combine the sugars, flour, baking powder, salt, and sprinkles. Add the oil and vanilla and stir until the mixture forms small clusters. Spread the clusters on the prepared pan. Bake for 20 minutes, stirring occasionally. The crumbs should still be slightly moist to the touch; they will dry and harden as they cool. Let the crumbs cool completely before using. (Stored in an airtight container, the crumbs will keep fresh for 1 week at room temperature or 1 month in the freezer.)

3. For the cookies: Line two baking sheets with parchment paper or silicone mats. In a medium bowl, mix the flour, dry milk powder, cream of tartar, and baking soda.

4. In the bowl of a stand mixer fitted with the paddle attachment (or a large bowl if using a hand mixer), beat the butter, salt, sugar, and corn syrup on medium-high speed until light and fluffy, 2 to 3 minutes. Add the eggs, one at a time, beating until incorporated, then mix in the vanilla; continue to beat on medium-high speed for 6 to 7 minutes. Reduce the mixer speed to low and gradually add the flour mixture, mixing just until incorporated. Stir in the Birthday Cake Crumbs.

5. Using an ice cream scoop, scoop the dough 4 inches apart onto the prepared baking sheets. Transfer the pans to the refrigerator and chill for at least one hour. (The prepared and portioned dough can be chilled for up to 1 week; if storing for longer than an hour, wrap the pans tightly in plastic wrap. If you’re storing for a while, you can save space by arranging the dough portions closer together on one baking sheet, then dividing them onto separate pans right before baking.)

6. Heat the oven to 350 degrees. Bake the cookies until very lightly browned around the edges, about 18 minutes.

7. Cool the cookies completely on the pans before transferring to a plate or to an airtight container for storage. The cookies can be stored for up to five days.
confetti cookies 5

devil’s food cookie butter cookie sandwiches

devils food cookie butter cookies 5

I thought these were going to be all about the cookie butter, that delicious mashup of ground cookies and stabilizers and fat, but the devil’s food cookie itself was remarkably good. It was meltingly tender, but somehow the very edge had just a big of crackle to it. It turns out that I hadn’t added enough cookie butter to the middle of the sandwiches, but I didn’t even care because the cookies themselves were perfect.

devils food cookie butter cookies 1

Another reason I wish I’d spread more cookie butter on the cookies is that now I have an open jar of cookie butter in the pantry, constantly tempting me to eat it by the spoonful. This is the first time I’d baked with it, and I’m glad I chose a recipe that put the spotlight on the cookie butter, because I love the graham cracker flavor. That delicious spread, combined with a perfectly cakey chocolate cookie? I haven’t stopped thinking about it since I ate the last one.

devils food cookie butter cookies 4

Printer Friendly Recipe
Devil’s Food Cookie Butter Cookie Sandwiches
(slightly adapted from Le Pain Quotidien)

¾ cup plus 2 tablespoons (4.25 ounces) all-purpose flour
⅓ cup (1 ounce) cocoa powder
½ teaspoon baking soda
7 tablespoons butter, softened
4 ounces cream cheese, softened
2 tablespoons cookie butter
¾ cup plus 1 tablespoon (5.65 ounces) granulated sugar
½ teaspoon salt
1 large egg
2 teaspoons vanilla
additional cookie butter for assembly

1. In a small bowl, combine the flour and baking soda.

2. Place the butter, cream cheese, and 2 tablespoons cookie butter in the bowl of a stand mixer fitted with the paddle attachment (or a large mixing bowl if you’re using a hand-held mixer). Beat on medium-low speed until the mixture is smooth, then add the salt and sugar. Continue beating on medium-low until the mixture is light and fluffy, about 2 minutes, scraping the sides of the bowl as needed. With the mixer running, add the egg, then the vanilla, mixing until thoroughly incorporated. Reduce the mixer speed to low and gradually add the flour mixture, mixing just until evenly combined. Cover the dough and refrigerate for at least 2 hours or up to 2 days.

3. Heat the oven to 350 degrees. Line two baking sheets with parchment paper or silicone mats.

4. Scoop the dough in heaping tablespoons onto the prepared baking sheets. Bake the cookies, one sheet at a time, until they no longer look wet on top, about 10 minutes. Let the cookies cool on the cookie sheets for 5 minutes, then transfer to wire racks to cool completely. Repeat with the remaining dough.

5. Spread the bottom of half of the cookies with additional cookie butter. Top with the remaining cookies.

devils food cookie butter cookies 3

cranberry swirl shortbread

cranberry shortbread 5

I was not feeling it the Monday night I made this shortbread. I was, however, feeling it the day before, when I had a relatively chore-free Sunday, and went ahead and made the cranberry filling, a double batch. In fact, I was so in the mood to bake that afternoon that I made a batch of my favorite Christmas cookies, just for the heck of it. But I forgot how long it takes to shape those cookies into their spirals and stripes and by the time that was over, I’d pretty much had my fill of baking.

cranberry shortbread 1

Which left me with a weeknight to make the shortbread dough, roll out four circles, chill the circles, partially bake two of the circles, layer them with cranberries, add more dough, pipe on more cranberry filling, score the dough, and add designs in the filling. All when I just wasn’t feeling it.

cranberry shortbread 2

My coworkers, however, were definitely feeling it the next day when a double batch disappeared in no time. Not only are these bright and attractive – even when you rush through making the design – but they’re tender and sweet with refreshingly tart filling. I will definitely make these again, but next time I’ll make sure I’m in the mood.

cranberry shortbread 3

Printer Friendly Recipe
Cranberry Swirl Shortbread (from Cook’s Illustrated)

Makes 16 wedges

4 ounces (1 cup) fresh or frozen cranberries
½ cup (3½ ounces) granulated sugar
½ teaspoon grated orange zest plus 2 tablespoons juice
¼ teaspoon ground cinnamon
2 cups (10 ounces) all-purpose flour
½ cup (2 ounces) confectioners’ sugar
½ teaspoon salt
14 tablespoons unsalted butter, cut into ½-inch pieces and chilled

1. Bring the cranberries, ¼ cup granulated sugar, orange zest and juice, and cinnamon to a boil in a medium saucepan over medium-high heat. Cook, stirring frequently, until the cranberries have burst and the juice has just started to thicken, 2 to 4 minutes; let cool for 1 hour.

2. Adjust an oven rack to the middle position and heat the oven to 375 degrees. Process the flour, confectioners’ sugar, salt, and remaining ¼ cup granulated sugar in a food processor until combined, about 5 seconds. Scatter the butter over the top and process until the dough starts to come together, about 1 minute. Gently knead the dough by hand until no floury bits remain. (Do not wash the food processor bowl.) Divide the dough in half and roll each half into a 9-inch circle on parchment paper; refrigerate for 20 minutes. Process the cooled cranberry mixture in the food processor until smooth, about 20 seconds.

3. Press one dough circle into a 9-inch tart pan with a removable bottom and poke all over with fork. Bake on a baking sheet until the edges are light golden brown, 15 to 17 minutes, rotating the tart pan halfway through baking. Spread the dough with ¼ cup cranberry puree, the top with second dough circle, and poke all over with fork. Pipe the remaining cranberry puree over the dough in a spiral shape. Score the dough into 16 wedges. Between the score marks, lightly run a knife in the opposite direction of the cranberry spiral. Bake until the top is pale golden, 25 to 30 minutes, rotating the tart pan halfway through baking. Let the shortbread cool for 10 minutes, then remove the outer ring of the tart pan. Cut through the score marks, transfer the wedges to a wire rack, and let cool completely before serving.

cranberry shortbread 4

cocoa nib peanut butter bites

hippie cookies 4

You can call these Peanut Butter Bites if you want, but for me, they will forever be known as Hippie Cookies. Sweetened with dates? Fat from all-natural peanut butter? Cocoa nibs, of all things?! I kept hearing people talk about cocoa nibs, so I bought some, and it turns out that they’re not even good. They’re like chocolate, but mean. There’s no sugar in them at all, just bitterness, like that time when you were a kid and accidentally ate your mom’s unsweetened baking chocolate.

hippie cookies 2

Still, the cocoa nibs are perfect in these cookies, because it turns out that you don’t need processed sugar to make a very sweet snack; dates are plenty sweet on their own. The bitter cocoa nibs are actually the perfect balance.

hippie cookies 3

I just loved these cookies so much, and not just because I filed them under “snack” instead of “dessert” and therefore enjoyed them without guilt. They’re shockingly good, or maybe it’s just shocking to someone used to adding refined sugar and butter to everything sweet. Who knew hippie cookies would be so delicious?

hippie cookies 6

Printer Friendly Recipe
Cocoa Nib Peanut Butter Bites (adapted from Sprouted Kitchen)

Because these aren’t baked, feel free to taste and add – more salt, more cinnamon, more cocoa nibs – to your taste, as well as more peanut butter to bring the mixture together, if necessary.  The amount of salt you add will also depend on whether you use salted or unsalted peanut butter.  You could also add dark chocolate instead of cocoa nibs, although the cocoa nibs balanced the sweet dates really well.

1 cup almonds
¼-½ teaspoon table salt
1 cup pitted dates
1 teaspoon vanilla extract
¼ teaspoon cinnamon
½ cup natural peanut butter
½ cup cocoa nibs

In the bowl of a food processor, process the nuts and salt until evenly ground; do not, however, process long enough to make almond butter. Add the dates, vanilla, and cinnamon, and process until the dates are minced and evenly dispersed. Add the peanut butter and pulse to combine, then repeat with the cocoa nibs. Form the mixture into 1-inch balls, then flatten gently to about ⅓-inch thick. Cookies can be covered and stored in the refrigerator for up to a week.

hippie cookies 5

strawberry rhubarb crisp bars

strawberry rhubarb crisp bars 4

I never make pies anymore. Most of what I bake is meant to be easily shared by a large crowd, either at work or at a party. That’s fine, but pies are fine too.

strawberry rhubarb crisp bars 1

This was part of my annual frenzy to use rhubarb as much as possible during its short season. When the grocery store has it, I buy it, whether I have a plan for it or not. That’s easy when you have a bunch of coworkers who will eat anything – preferably anything handheld, easy to grab along with a cup of coffee.

strawberry rhubarb crisp bars 2

Until I find a small gathering – with plates and even forks – to make a pie for, these bars are a good stand in. The balance of tart, juicy fruit to buttery flour is spot on, and although the crispness isn’t like a flaky pie crust, the oaty crunch is a good stand-in. Best of all, I actually had an opportunity to share them, unlike a silverware-demanding pie.

strawberry rhubarb crisp bars 3

Printer Friendly Recipe
Strawberry Rhubarb Crisp Bars (adapted from Yvonne Rupert’s One Bowl Baking via Smitten Kitchen)

Makes 9 to 16 bars

I un-one bowled this. I’m spoiled by my dishwasher and would rather mix things conveniently than use less dishes.

1 cup (80 grams) rolled oats
¾ cup (95 grams) all-purpose flour
½ cup (95 grams) light brown sugar
¼ teaspoon table salt
6 tablespoons unsalted butter, melted
1 cup (125 grams) small-diced rhubarb (from about 1½ medium stalks)
1 cup (155 grams) small-diced strawberries
1 tablespoon granulated sugar, divided
1 tablespoon lemon juice
1 teaspoon cornstarch
Powdered sugar, for decoration, if desired

1. Heat oven to 375 degrees. Spray an 8-by-8 inch square pan with cooking spray.

2. In a medium bowl, mix the oats, flour, brown sugar, and salt. Add the butter and stir until clumps form. Set aside ½ cup of the crumble mixture and press the rest of the crumb mixture evenly in the bottom of the prepared pan.

3. In a medium bowl (you could even use the same bowl; see, one less dish to wash!), combine the rhubarb, strawberries, granulated sugar, lemon juice, and cornstarch. Evenly distribute the fruit over the crust, then scatter the reserved crumbs over the fruit.

4. Bake the bars until the fruit is bubbling and the crisp portion is golden, 30 to 40 minutes. Cool completely before serving.

strawberry rhubarb crisp bars 5

walnut cinnamon slices

walnut cinnamon slices 5

I was kind of embarrassed by these cookies. Or maybe I was embarrassed for them. They’re so plain. And brown. And not even the deep, rich, tempting brown of chocolate.  More like a pale, flat beige.

walnut cinnamon slices 2

For all that, they’re surprisingly delicious. Well, I wasn’t surprised, because the recipe is from Tartine, and that cookbook is full of home runs. The cookies are so soft and tender, but not too fragile to pile into a plastic container and bring to a wine-tasting party to share with friends.

walnut cinnamon slices 3

They’re a great match for wine, and not one cookie was left by the end of the night. Which is probably for the best, but I admit I was disappointed that I couldn’t have one with coffee the next morning. I guess cookies don’t need to be flashy as long as they’re buttery and sweet, lightly spiced and studded with meaty walnuts.

walnut cinnamon slices 4

Printer Friendly Recipe
Walnut Cinnamon Slices (slightly adapted from Tartine)

Makes about 3 dozen cookies

Dough:
9 ounces (1¾ cups) all-purpose flour
¾ cup (3 ounces) walnuts, coarsely chopped
½ teaspoon ground cinnamon
¼ teaspoon baking soda
11 tablespoons butter, at room temperature
⅔ cup (4.65 ounces) sugar
1 large egg
½ teaspoon salt

Sugar coating:
1 egg yolk
1 tablespoon heavy cream
1 cup (7 ounces) sugar

1. In a medium bowl, mix the flour, walnuts, cinnamon, and baking soda; set aside.

2. In a stand mixer fitted with the paddle attachment, beat together the butter and sugar until it is blended and creamy but not too aerated. In a small measuring cup, whisk together the egg and salt. Slowly pour the egg mixture into the butter mixture, still beating on medium speed. Reduce the speed to low and add the flour mixture, beating until just combined.

3. Working on a large sheet of parchment paper, shape the dough into a rectangular log about 18 inches long with one side 2 inches wide and the other 1 inch wide. Wrap tightly in parchment paper or plastic wrap and refrigerate until firm, about 4 hours.

4. Preheat the oven to 325 degrees. Line a baking sheet with parchment paper or a silicone mat.

5. To make the sugar coating, whisk the egg yolks and cream together in a small bowl. Spread the sugar on a rimmed baking sheet. Unwrap the dough and brush the log well but sparingly with the egg wash. One at a time, dredge the log in the sugar, coating evenly on all sides. Cut crosswise into ¼ to ⅓-inch slices. Arrange the rectangles on the prepared baking sheet.

6. Bake until the edges are golden but the centers remain pale, 7-10 minutes. Transfer the cookies to a wire rack and let cool.

walnut cinnamon slices 6

pumpkin chocolate chip bars

pumpkin chocolate chip bars 4

I try to bring something for my coworkers to snack on once a week. Sometimes I feel guilty for ruining people’s diets, but mostly people seem to appreciate it, and, honestly, I don’t do it for them. I do it so I get to do some baking without doing lots of eating.

pumpkin chocolate chip bars 1

Although squeezing baking into a weeknight isn’t always so easy. By the time we get home, work out, make and eat dinner, and maybe fold some laundry, there isn’t a lot of leftover time. I usually end up staying up later those nights, not to mention making us late for work the next morning while I garnish or cut into squares or whatever each particular dessert requires.

pumpkin chocolate chip bars 2

Recipes like this one make it easy.  It’s mixed like a basic cookie dough, butter then sugar then eggs, half a can of pumpkin, stir in a bag of chocolate chips. There are no individual cookies to scoop, no fillings or toppings, just spread the batter in a pan and bake. And, most importantly, the bars that come out of the oven are soft and tender, pumpkiny and chocolately, and perfectly sized for someone to grab a quick square with their morning coffee.

pumpkin chocolate chip bars 3

Printer Friendly Recipe
Pumpkin Chocolate Chip Bars (adapted from Martha Stewart via Sparks from the Kitchen)

2 cups (9.6 ounces) all-purpose flour
1 tablespoon pumpkin pie spice
1 teaspoon baking soda
1 cup (2 sticks) unsalted butter, room temperature
¾ teaspoon salt
1¼ cups (8.75 ounces) sugar
1 large egg
2 teaspoons vanilla extract
1 cup canned pumpkin puree
1 package (12 ounces) semisweet chocolate chips

1. Heat oven to 350 degrees. Spray a 9-by-13-inch baking pan with cooking spray. In a medium-sized bowl, combine the flour, spices, and baking soda.

2. Place the butter in the bowl of a stand mixer fitted with the paddle attachment (or a large mixing bowl if you’re using a hand-held mixer). Beat the butter on medium-low speed until it’s smooth, then add the salt and sugar. Continue beating on medium-low until the mixture is light and fluffy, about 2 minutes, scraping the sides of the bowl as needed. With the mixer running, add the egg, then the vanilla. Beat in the pumpkin until blended. Reduce the mixer speed to low and gradually add the flour mixture, mixing just until evenly combined. Stir in the chocolate chips.

3. Spread the batter evenly in the prepared pan. Bake until a toothpick inserted into the center of the pan comes out dry, 35 to 40 minutes. Transfer to a wire rack to cool completely before serving.

pumpkin chocolate chip bars 5

salted brown butter rice crispy treats

browned butter rice crispy treats 7

Dave and I threw a couple Friday afternoon happy hour parties a while ago. The idea was that they would be really casual – just come over, hang out a bit, and then go on with your weekend. Dave joked that he was kicking everyone out after two hours.

browned butter rice crispy treats 2

It worked out perfectly. Everyone we invited showed up and they really did leave after two hours, so we had the kitchen cleaned and were sitting down to relax with the last of the sangria by 8pm. I don’t know what everyone else did afterward, but…well, our friends are in their 30s and 40s, probably nothing exciting.

browned butter rice crispy treats 3

We planned the first get-together on Thursday and it was happening Friday right after work, so this didn’t leave me much prep time. Everything I made was simple – bread with cheeses, salami, and sun-dried tomato jam, olives and marinated artichokes, popcorn with truffle salt, cayenne-spiced brittled peanuts, and these rice crispy treats. Thursday after work, Dave pretty much followed after me and cleaned up as I cooked.

browned butter rice crispy treats 4

We came home from work on Friday, spent fifteen minutes setting out food and sangria, two hours chatting and eating with our friends, then fifteen minutes cleaning while congratulating ourselves on a party well thrown. People kept telling me that these were the best rice krispy treats they’d ever had, and I managed not to tell them that while a big pinch of salt and nutty browned butter helps, the real secret is almost three times the butter as the traditional recipe. A clean kitchen by 8pm and not telling your guests how much butter is in the food? That’s entertaining success.

browned butter rice crispy treats 5

Printer Friendly Recipe
Salted Browned Butter Rice Crispy Treats (adapted from Deb Perelman’s Smitten Kitchen Cookbook)

8 tablespoons (1 stick) unsalted butter (wrapper reserved)
¼ teaspoon table salt
1 (10-ounce) bag miniature marshmallows
6 cups puffed-rice cereal (about half of a 12-ounce box)

1. Butter (or coat with nonstick spray) a 9-by-13-inch baking dish.

2. In a large pot over medium-low heat, cook the butter until it melts, then turns brown and smells nutty, stirring frequently. Remove from the heat; stir in the salt, then the marshmallows, stirring constantly until the mixture is smooth. Fold in the cereal.

3. Transfer the mixture to the prepared pan. Use the reserved butter wrapper to press the mixture into the pan. Cool completely. When cool, invert the mixture onto a cutting board and cut into 24 squares. Serve.

browned butter rice crispy treats 6

caramel apple cheesecake bars

apple cheesecake bars 9

Fall in upstate New York, where I went to graduate school, was amazing. Even my drive through town to work was gorgeous, passing hillsides of brightly colored trees. I lived a couple blocks away from a cider mill, and Dave and I made a point to go there every year for cider, doughnuts, and squash so oddly shaped they looked deformed. It was my favorite place to buy apples too; some, like Empire and Cortland, even named for the area.

apple cheesecake bars 5

The only problem was that fall came too soon, at least for this lover of summer. It seemed like it had hardly warmed up after the long freezing winter before it started getting chilly again. For this reason, I had a strict rule of no fall-inspired foods until October – no pumpkin, no candy corn, no apples.

apple cheesecake bars 6

It’s kind of the opposite here in southern New Mexico. I’m tired of being hot and welcome the chill we’re getting in the mornings and evenings. I’m not quite ready for pumpkin – things need to cool off a bit more, so I probably will wait until October. But apples are just right.

apple cheesecake bars 3

These apples are piled on top of a cookie crust and a cheesecake layer, then topped with streusel and caramel. I saw the recipe on a blog and was aghast at how rich it was until I traced it back to its original source, Paula Deen. This is my first time making one of her recipes, but my understanding it that it’s par for the course.

apple cheesecake bars 2

In this case, it definitely works. I’ll add another apple next time, because the apples were pretty balanced with the other components, and I want them to stand out more. But having those other components come forward is not a bad thing, because each one was so good. Somehow, the combination of everything didn’t make these overpoweringly sweet or unpleasantly rich.  Really, these were a perfect fall treat.

apple cheesecake bars 8

Printer Friendly Recipe
Caramel Apple Cheesecake Bars with Streusel (adapted from the Food Network via Closet Cooking; caramel sauce from Smitten Kitchen)

There are a lot of steps, but none of them are hard.

If you like to line your pans with a double layer of aluminum foil for bar cookies for easy removal, this recipe is a good candidate for that. I prefer not to, and the first bar I removed crumbled. The remainder were easy enough to get clean slices of with a spatula.

Streusel:
1 cup (7 ounces) firmly packed light brown sugar
1 cup (4.8 ounces) all-purpose flour
½ teaspoon cinnamon
⅛ teaspoon salt
8 tablespoons (1 stick) butter, room temperature
½ cup quick cooking oats

Apples:
4 Granny Smith apples, peeled, cored and finely chopped
¼ cup (1.75 ounces) sugar
½ teaspoon ground cinnamon
½ teaspoon lemon juice
pinch salt

Cookie base:
2 cups (9.6 ounces) all-purpose flour
½ cup (3.5 ounces) firmly packed brown sugar
¼ teaspoon salt
16 tablespoons (2 sticks) butter, room temperature

Cream cheese layer:
2 (8-ounce) packages cream cheese, room temperature
pinch salt
½ cup (3.5 ounces) sugar
2 large eggs
1 teaspoon vanilla extract

Caramel sauce:
½ cup (3.5 ounces) granulated sugar
¼ cup water
1 tablespoon corn syrup
3 tablespoons unsalted butter, cubes
⅛-¼ teaspoon salt
1 teaspoon lemon juice
⅓ cup heavy cream

1. Adjust a rack to the middle position and heat the oven to 350 degrees. Spray a 9-by-13-inch pan generously with cooking spray.

2. For the streusel: Add the sugar, flour, cinnamon, and salt in the bowl of a food processor fitted with the blade; pulse to combine. Add the butter and process until the mixture is crumbly. Add the oats and pulse just to combine. Transfer to a bowl and chill. Do not wash the processor bowl.

3. For the apples: In a medium bowl, mix everything. Set aside.

4. For the cookie base: Add the flour, sugar, and salt to the food processor bowl; pulse to combine. Add the butter and process until the mixture is crumbly. Press into the bottom of the prepared pan. Bake until lightly browned around the edges, about 15 minutes.

5. For the cream cheese layer: While the cookie base is baking, beat the cream cheese and salt with a mixer on medium-low speed, until softened. Add the sugar and continue mixing until the mixture is smooth. Add the eggs, one a time, mixing just until combined. Mix in the vanilla extract.

6. Pour the cream cheese mixture over the warm crust. Spread the apples over the cream cheese batter, then top with the streusel, breaking it until ¼- to ½-inch chunks. Bake until the top is browned and the cream cheese filling is set, about 30 minutes. Transfer to a wire rack and cool completely.

7. For the caramel sauce: Add the sugar, water, and corn syrup to a 2-quart saucepan. Cover and heat over medium-high heat until simmering, then remove the cover and let simmer until the mixture is honey-colored, swirling the pan occasionally at first and more often as the sugar browns. Add the butter, which will foam violently, and stir to combine. Stir in ⅛ teaspoon salt, lemon juice, and heavy cream. Once the mixture cools slightly, taste and add more salt if necessary. Let the sauce cool to room temperature before topping the bars. (Caramel can be made up to a week in advance.)

apple cheesecake bars 7