skillet turkey meatballs with lemony rice

lemon turkey meatballs 5

Maybe we’re getting the hang of things. I’m still depending heavily on my freezer meals, but I can count on being able to cook a few nights per week. Last weekend, I even made salmon cakes, broiled asparagus with shallot-lemon vinaigrette, and biscuits for dinner one night. I prepped it all ahead of time, and then when we put the baby down to sleep, I finished cooking everything, plated it, poured the wine – and the baby woke up. Something else I’m getting the hang of: feeding myself while feeding the baby.

lemon turkey meatballs 3

I made this back when she was just three weeks old, when we definitely did not have the hang of things. But I got ahead of the game by making the meatballs (a double batch, with extra to freeze) in the afternoon. The dish is easy enough that it wasn’t much trouble to finish it up when the baby was sleeping that evening.

lemon turkey meatballs 2

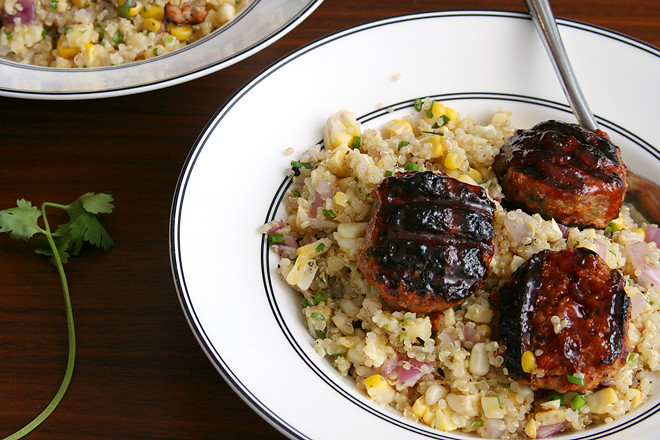
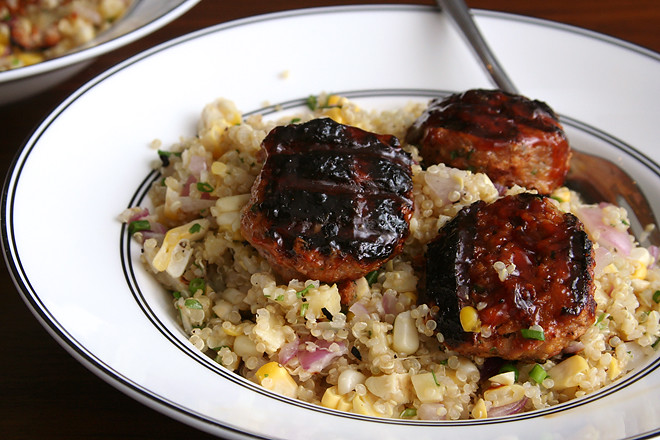
And then she woke up while it was cooking, and I fed her, and since I wasn’t proficient at feeding myself while feeding the baby then, I ate my meatballs and rice lukewarm. Fortunately, this is a meal that tastes just fine at room temperature – lemony and light, but substantial enough to last through a night of baby-feeding. However, it was even better when I made it again a few weeks later and got to eat it hot.

lemon turkey meatballs 4

Skillet Turkey Meatballs with Lemony Rice (adapted from Cook’s Country via Elly Says Opa)

Serves 4

½ cup panko bread crumbs
1 large egg
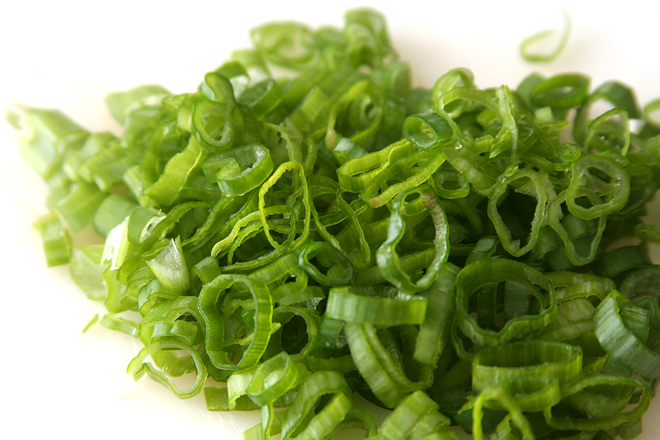
6 scallions, white and green parts separated, divided
¼ cup freshly chopped parsley, divided
½ teaspoon dried oregano
salt and pepper
1 tablespoon grated lemon zest, divided
1 pound ground turkey
2 tablespoons olive oil
1 cup white rice
3 cloves garlic, minced
2¼ cups chicken broth
2 tablespoons lemon juice
½ cup (1 ounce) grated parmesan cheese
lemon wedges for serving

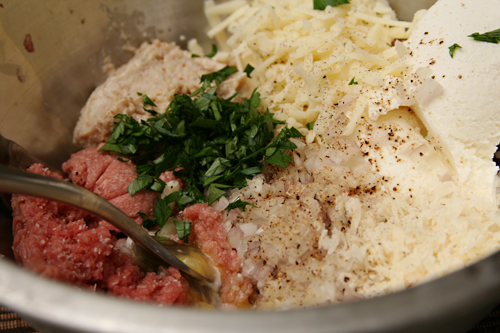
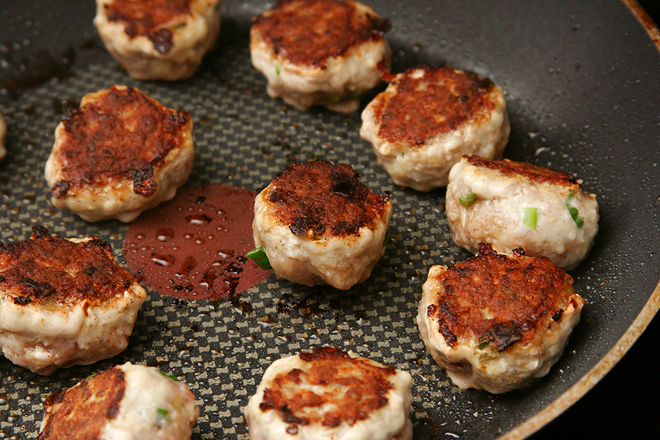
1. In a large mixing bowl, combine the panko and egg. Set aside, stirring occasionally, until the panko is moistened, about 15 minutes. Add 2 tablespoons of the scallion greens, 3 tablespoons parsley, the oregano, 1 teaspoon salt, ½ teaspoon pepper, and 1½ teaspoons lemon zest; stir to combine. Add the turkey; mix thoroughly. Form the mixture into balls approximately 1-inch in diameter; you should have about 24 meatballs.

2. In a 12-inch nonstick skillet over medium-high heat, heat the oil until it flows like water when the pan is tilted. Arrange the meatballs in the pan with space between them. Cook without stirring until the bottom sides are brown, about 2 minutes. Flip and brown the opposite side. Transfer the browned meatballs to a plate.

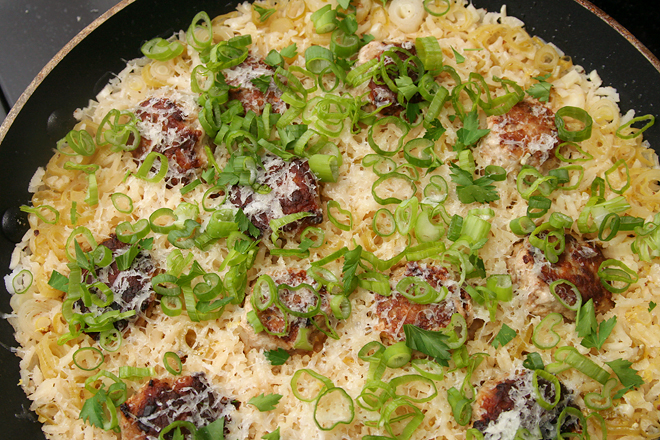
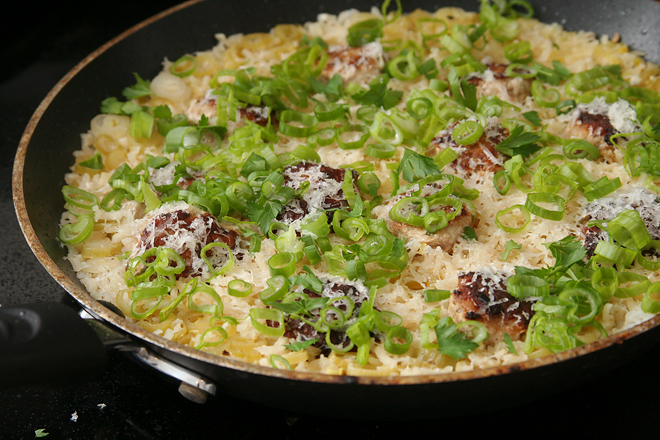
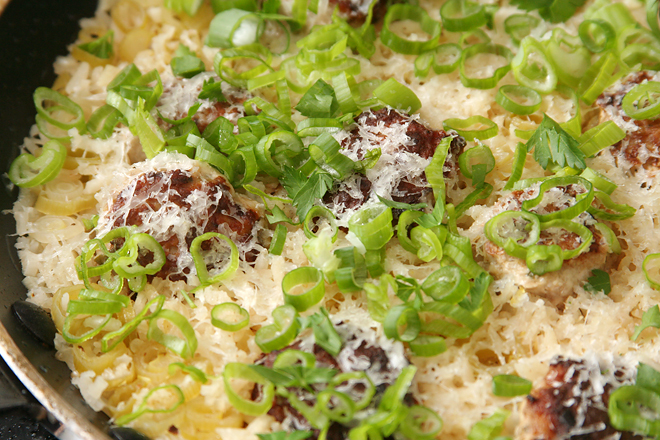
3. Leaving the remaining fat in the skillet, add the rice. Cook, stirring constantly, until the grains are translucent at the edges, 1-2 minutes. Add the garlic and scallion whites and cook, stirring constantly, until fragrant, about 30 seconds. Add the chicken broth, lemon juice, and 1½ teaspoons lemon zest; stir to combine, then arrange the meatballs in the rice. Bring to a simmer, then reduce the heat to low, cover, and cook until the rice is tender and the meatballs are cooked through, about 20 minutes. Remove from the heat and let set, covered, for an additional 5 minutes. Uncover and top with the parmesan cheese, remaining scallion greens, and remaining parsley; serve, with additional lemon wedges.

lemon turkey meatballs 6

barbecue turkey meatballs with cheddar-corn quinoa

bbq meatballs quinoa 6

This recipe might work better cooked inside, but it includes corn and barbecue sauce – that means summer, and summer means grilling. Meatballs, unfortunately, are tricky on the grill. You’d think putting them on skewers would work fine, but they tend to slide right off. You could, instead, grill barbecue turkey burgers to serve over quinoa, but then you’re just eating bunless burgers, and that doesn’t sound nearly as delicious as meatballs.

bbq meatballs quinoa 2

So I’ve compromised on something a little bigger and a lot flatter than a meatball, but smaller than anything you’d put on a bun. The best name I can come up for these is, unfortunately, “patties”, which doesn’t sound nearly as tasty as meatballs. But it’s the same tasty ingredients; in this case, scallions, cilantro, and mustard add some interest to the meat mixture. The best part is the barbecue sauce slathered over the patties at the end of grilling.

bbq meatballs quinoa 4

The quinoa has plenty going on with smoky grilled corn and chunks of cheddar cheese, but the flavors don’t compete with the meatballs. The whole thing goes together really well, and it ends up feeling like a treat despite how healthy it is. It’s become one of my favorite summer meals.

bbq meatballs quinoa 7

Printer Friendly Recipe
Barbecue Turkey Meatballs with Cheddar-Corn Quinoa (adapted a bit from Pink Parsley)

Serves 4

I’m keeping ‘meatballs’ in the title because it sounds a lot more delicious than ‘patties’. We’ll just say these are flat meatballs.

Shredding cheese is faster, but I like to dice little cubes so I get bites of intense cheesiness.

I’ve been using this barbecue sauce, which has a strong molasses flavor. I’m not sure I’d like it for everything, but it’s great with this meal.

I was using part of an onion I’d already cut a chunk out of, so rings weren’t possible. Skewering works too, it’s just a little more work.

Meatballs:
¼ cup panko bread crumbs
1 large egg yolk
1 pound ground turkey
1 scallion, minced
1 tablespoon minced fresh cilantro
1 teaspoon dry mustard
¾ teaspoon salt
¼ cup barbecue sauce

Quinoa:
1 cup quinoa, rinsed and drained
1½ cups water
½ teaspoon salt
2 ears corn, shucked and rinsed
½ medium red onion, sliced into thin rings
1 tablespoon apple cider vinegar
3 tablespoons chopped fresh cilantro
1 scallion, sliced
1 cup (4 ounces) cubed or shredded sharp cheddar cheese
1 tablespoon olive oil
black pepper

1. Prepare a medium-hot grill. In a medium saucepan, combine the quinoa, water, and salt. Bring to a boil over high heat, then reduce the heat to low, cover, and simmer for 15 minutes. Remove the pot from the heat and let the quinoa sit for 10 additional minutes, still covered.

2. In a large bowl, combine the panko and egg yolk. Set aside for about 5 minutes, then stir to form a paste. Add the turkey, scallion, cilantro, mustard, and salt; mix to combine. Form into 12 small patties.

3. Place the corn directly over the coals and grill for about 10 minutes, turning occasionally, until tender and caramelized in places. Grill the onions until browned and tender. Grill the turkey patties until browned and cooked through, about 4 minutes per side. Generously brush the top of the patties with barbecue sauce, flip the patties, and brush the second side with the remaining barbecue sauce. Let cook for one additional minute.

4. Transfer the quinoa to a large bowl and stir in the apple cider vinegar, then the cilantro, scallion, cheese, olive oil, and black pepper. Cut the corn off the cob and add it to the bowl with the quinoa. Dice the grilled onions and stir them into the quinoa. Serve the turkey patties over the quinoa.

bbq meatballs quinoa 5

sweet potato mezzalune with sausage ricotta filling

sweet potato mezzalune 8

Last year, I got all excited about turchetta and couldn’t wait to get started cooking it as part of a big turkey feast. And then I waited, and waited, and waited, until I had time to spend two days cooking an extravagant meal (not required, I realize, but I love doing it). It was January before I could dedicate the time, plus round up some friends to help us eat all the food I insist on making.

sweet potato mezzalune 2

The wait wasn’t bad though, because it gave me time to peruse untold numbers of recipes to find just the right ones for my fusion of Italian food and Thanksgiving food. That was my favorite part. I had a lot of fun cooking too. The meal itself…well…of the thirteen recipes I made, I’ve chosen to share just four with you (although the rustic dinner rolls were really good too). The turchetta and wine-braised turkey legs were overcooked, the pumpkin panna cotta separated, the green bean pasticcio wasn’t beany enough.

sweet potato mezzalune 4

Or maybe the main meal just didn’t seem as good because I’d already filled up on the mezzalune I served as an appetizer. Mezzalune are like ravioli, but wrapped in gnocchi dough instead of pasta dough. Gnocchi dough, it turns out, is easier to work with than fresh pasta; it’s sticky, but on a well-floured surface, it stretches easily and doesn’t break.

sweet potato mezzalune 6

I made turkey sausage with the turkey tenderloins that don’t get used in the turchetta, but if you don’t feel the need to go overboard on everything, feel free to just buy some sausage, turkey or otherwise. (I also made these with homemade venison sausage for Game Night.) The mezzalune can be formed and boiled ahead of time, so when it’s time to eat, you just need to add them to a skillet with some butter and push them around a bit until they’re nice and crisp and brown. And then don’t spoil your dinner by filling up on them. Or, even better, make these your dinner so you can eat as many as you want.

sweet potato mezzalune 11

Printer Friendly Recipe
Sweet Potato Mezzalune with Turkey Sausage Ricotta Filling (mezzalune inspiration from John Besh; gnocchi from Gourmet via epicurious; filling from Lidia Bastianich)

Makes about 50 appetizer-sized dumplings

Dough:
1¼ pounds russet potatoes
1 (¾-pound) sweet potato
1 large egg
1 teaspoon salt
½ teaspoon pepper
½ teaspoon grated nutmeg
1½ to 2 cups (7.2 to 9.6 ounces) all-purpose flour, plus more for dusting
⅓ cup (0.67 ounce) grated parmesan cheese

Filling:
12 ounces turkey sausage
1 cup ricotta
¼ cup (½ ounce) grated parmesan
¼ cup minced parsley

4 tablespoons butter
additional minced parsley for garnish

1. Heat the oven to 400°F with rack in middle. Pierce the russet and sweet potatoes in several places with a fork. Arrange on a rimmed baking sheet and bake, turning once, until no resistance is met when pierced with a fork or skewer. Cool the potatoes slightly, then peel and force through a ricer or the fine holes of a food mill into a large bowl. Spread the potatoes over the surface and up the sides of the bowl to allow steam to evaporate. Cool potatoes completely, stirring once or twice to release more steam.

2. Push the potatoes to the sides of the bowl, forming a well in the center. In the well, beat together the egg, salt, pepper, and nutmeg. Stir the egg mixture into the potatoes. Add 1½ cups of flour and ⅓ cup parmesan to the potatoes, kneading to evenly incorporate. Add additional flour as necessary, until the mixture forms a smooth but slightly sticky dough.

3. In a large mixing bowl, combine the sausage, ricotta, ¼ cup parmesan, and parsley.

4. Divide the dough in half. On a well-floured surface, roll half of the dough to 1/16- to ⅛-inch thickness (a millimeter or two), flouring the top of and below the dough as necessary. Use a 2½-inch round cutter to cut as many circles as possible. Scoop a scant 1 tablespoon of filling into the center of each round. Working one a time, pick up a round, gently pull two opposite sides of the circle, then fold the stretched ends of the dough over the filling, pinching the edges to seal. Transfer to a floured tray or baking sheet. Repeat with the remaining cut rounds. Before re-rolling the scraps, roll, cut, fill, and seal the other half of the dough. Re-roll the scraps as necessary to use up the remaining filling.

5. Bring a large pot of salted water to a boil. Reduce the heat to medium-high, add one-quarter of the mezzalune, and cook until they begin to float, about 2 minutes. Transfer the mezzalune to a tray or damp dishtowel. Repeat with the remaining mezzalune. At this point, the mezzalune can be covered and chilled for several hours before finishing.

6. In a large nonstick skillet over medium-high heat, melt 2 tablespoons of the butter. Transfer half of the mezzalune to the skillet. Cook, flipping occasionally, until browned and crisp on both sides, about 5 minutes. Repeat with the remaining mezzalune. Serve immediately, topping with the remaining parsley.

sweet potato mezzalune 10

turkey porchetta

turkey porchetta 8

I have made this twice in the last year. Once, it was one of the most complicated things I’d done in the kitchen. The other, it was quite simple.

turkey porchetta 1

The first time was part of a big turkey dinner I cooked in January, as I’ve gotten into the tradition of hosting the last several years. Starting with this recipe, the menu had an Italian focus – mashed potatoes with fontina, Brussels sprouts with pancetta, cranberries with grappa. And porchetta, a Italian dish of spiced pork belly (which I have never actually had).

turkey porchetta 2

The turkey porchetta recipe uses just the breast, so Kenji also developed recipes for turkey thighs (braised in red wine, although mine mostly roasted on top of red wine and kind of dried out) and turkey sausage (which I stuffed into mezzalune – ravioli-type dumplings made from gnocchi dough; my favorite item of the meal). This meant breaking down the whole turkey into its parts, removing the legs and wings, carefully removing the skin without ripping it, then cutting off the breasts in whole pieces. One thing you should know about me is that I am terrible at breaking down chickens – and this was the same process but a lot bigger.

turkey porchetta 3

After breaking down the turkey, butterflying the breasts, seasoning the meat, rolling it, tying it, letting it rest overnight, then browning it and roasting it, I got distracted by stuffing my face with turkey sausage mezzalune and accidentally overcooked the turchetta. A friend who grew up eating real porchetta in northern Michigan, however, loved it and said it tasted just like what he was used to.

turkey porchetta 4

Still, I wanted to get it right. Months later, I tried again – this time starting with a boneless turkey breast. You can imagine that without breaking a whole turkey down into its parts, this was remarkably easier. It wrapped up into a thicker roll, plus I monitored its cooking time more carefully, and this time, it was everything I could have asked for. (You’d think I could have taken some new and improved pictures when I didn’t have guests over and ten other dishes to finish, but you’d be wrong.) The skin is browned and crisp, the meat is juicy and salty and spiced. When you don’t overcook it, turchetta deserves to be the star of a holiday meal – and if you start with a turkey breast, it’s not any harder roasting a turkey.

turkey porchetta 6

Printer Friendly Recipe
Turkey Porchetta (not significantly adapted from J. Kenji Lopez-Alt’s The Food Lab at Serious Eats)

Kosher salt and freshly ground black pepper, plus ½ tablespoon whole black peppercorns
¼ cup fresh sage leaves
4 medium cloves garlic
½ tablespoon whole fennel seeds
½ teaspoon red pepper flakes
1 whole bone-in, skin-on turkey breast (about 4 to 5 pounds), patted dry
2 tablespoons canola oil
1 quart low sodium homemade or store-bought chicken or turkey stock

1. Combine 2 teaspoons kosher salt, whole black peppercorns, sage leaves, garlic, fennel seed, and red pepper flakes in the bowl of a food processor. Process until a rough paste is formed, scraping down sides as necessary, about 30 seconds.

2. Carefully remove the skin from the turkey breast and lay it flat. Using your hands and a boning knife, carefully remove the breast meat from the carcass. Set aside the tenderloins for another use.

3. Lay one breast half on top of the turkey skin and butterfly the thicker end by cutting through it horizontally, leaving the last ½-inch intact, then folding out the flap. Repeat with the other breast half.

4. Make a series of parallel slashes at 1-inch intervals in the turkey meat, cutting about ½-inch into the meat. Repeat with a second series of slashes perpendicular to the first. Rub the spice/herb mixture into the meat, making sure to get it into all of the cracks.

5. Carefully roll the turkey meat into a tight cylinder, using the skin to completely enclose it. Tie the roast tightly with butcher’s twine at 1-inch intervals, as well as once lengthwise. Transfer the roast to a wire rack set in a rimmed baking sheet, cover loosely with plastic wrap, and refrigerate at least 6 hours and up to 2 days.

6. When ready to cook, adjust an oven rack to center position and preheat the oven to 275°F. Season exterior of turkey lightly with salt and pepper. Heat remaining tablespoon canola oil in a large cast iron or stainless steel skillet over high heat until shimmering. Add the turkey and cook, turning occasionally, until well-browned on all sides, about 8 minutes total. Transfer the turkey to a wire rack set in a rimmed baking sheet and transfer to the oven. Roast until the thickest part of the turkey registers 145 to 150°F on an instant-read thermometer, about 2 hours. Remove from the oven, transfer to a cutting board, and let rest for 10 minutes. Snip off the twine using poultry shears. Carve and serve.

turkey porchetta 7

white wine gravy

white wine gravy 8

Here’s why this gravy is so good:

First, homemade turkey stock. I know, I go overboard, and while you aren’t wrong, keep in mind that this is not a difficult step. You throw turkey wings – they’re not expensive – in the oven, caramelize vegetables in a stockpot, and then mix the two with water and leave it alone for a few hours while it simmers away. Oh, and deglaze the roasting pan the turkey wings were in. That’s where the good stuff is.

white wine gravy 1

Second, a medium-dark roux. You aren’t just cooking the raw flavor out of the flour here, you want the flour itself to contribute a nutty flavor. It loses some of its thickening power when you do this, but you didn’t want gloppy gravy anyway, did you?

white wine gravy 2

Third, wine. You might be doing this already, but if not, what the heck? Deglaze that roasting pan after your turkey roasts with wine. If you want flavor, and why wouldn’t you, water isn’t enough.

white wine gravy 3

The first time I made gravy like this, I poured it over everything on the plate, and that’s the thing about gravy – it affects the turkey, the stuffing, and the potatoes. That’s half the Thanksgiving plate, which means that gravy shouldn’t be an afterthought. This gravy was so good I ate the leftovers with a spoon. The method isn’t so different from any other gravy, so why not follow these simple tricks for such a payoff?

white wine gravy 6

One year ago: Prosciutto-Wrapped Neufchatel-Stuffed Jalapenos
Two years ago: Pumpkin Scones
Three years ago: Gratin Dauphinois (Potatoes au Gratin)

Printer Friendly Recipe
White Wine Gravy (adapted from Emeril and Cook’s Illustrated)

4 cups Golden Turkey Stock (recipe below)
4 tablespoons unsalted butter
¼ cup all-purpose flour
1 cup dry white wine
Salt and freshly ground black pepper

1. In a small saucepan, bring the turkey broth to a simmer. Reduce the heat to low; cover to keep warm.

2. In a large heavy saucepan, melt the butter over medium-high heat. Stir in the flour and cook, whisking constantly, until the flour just starts to smell nutty and become caramel-colored, 6-8 minutes. Add the broth and bring to a simmer, whisking often. Turn off the heat and cover.

3. After the turkey has roasted, strain the pan juices through a fine-mesh strainer into a glass-measuring cup; skim or pour off the fat from the strained liquid. Discard the solids in the strainer.

4. Place the roasting pan on 2 stovetop burners over medium heat; add the wine and defatted pan juices to the pan, bring to a simmer, and scrape to loosen any brown bits from the bottom of the pan.

5. Add the liquids from the deglazed roasting pan to the broth mixture. Bring to a simmer over medium-high heat, then reduce the heat to low and simmer for 10 minutes, whisking occasionally. Adjust the seasonings with salt and pepper if necessary.

white wine gravy 4

Golden Turkey Stock (from Bon Appétit via epicurious)

Makes about 7 cups

If you’re roasting a salted or brined turkey, don’t add salt to the broth, because the gravy might end up too salty.

4½ pounds turkey wings, cut in half
1 large onion, chopped coarse
1 large carrot, chopped coarse
1 large celery stalk, chopped coarse
6 fresh Italian parsley sprigs
1 bay leaf
½ teaspoon dried thyme
¼ teaspoon whole black peppercorns

1. Heat the oven to 400 degrees. Arrange the turkey wings in a large roasting pan; roast until deep brown, turning once, about 2 hours total.

2. Transfer the wings to a large bowl. Spoon about 3 tablespoons of the turkey fat from the roasting pan into a large pot (reserve roasting pan). Add the onion, carrot, and celery to the pot. Sauté over medium-high heat until the vegetables are golden, about 20 minutes.

3. Meanwhile, add 2 cups of water to the roasting pan; place the pan over 2 burners and bring to a boil, scraping up the browned bits. Add the liquid from the roasting pan to the pot with the sautéed vegetables. Add the turkey wings, herbs, and enough cold water to cover the wings by 1 inch.

4. Bring the water to a boil. Reduce the heat to medium-low; simmer uncovered until the stock is very flavorful and reduced to 7½ to 8 cups, about 2½ hours. Strain the stock into a large bowl. Cool 1 hour, then refrigerate until cold, about 3 hours. (Can be made 3 days ahead. Cover and keep chilled. Can also be made and frozen 2 weeks ahead.) Spoon off the fat from the surface before using.

white wine gravy 7

salted herbed roast turkey

salt roast turkey 5

I don’t like brining turkey. The first time I tried it, I disinfected a cooler, carefully monitored the ice quantity throughout the soaking period, then disinfected the cooler again after removing the turkey. The second time, I stuck the turkey and brine in a stockpot, but couldn’t quite fit the lid on the pot, plus there was no way I could fit that in my fridge, so I stuck it outside overnight and hoped it was cold enough out there to prevent my turkey from turning into bacteria food. Brining turkey sucks.

salt roast turkey 3

Salting turkey isn’t a picnic, but it’s a heck of a lot more straightforward than brining. Just mix up some salt and herbs and sprinkle it inside the turkey’s cavities, over the skin, and under the skin. The salt draws moisture out of the turkey at first, where the liquid mixes with the salt and then flows back into the turkey, now with flavor. While you’re not actually adding moisture like you are with brining, you’re adding flavor and helping the turkey hold onto its natural moisture. And you don’t have to disinfect a cooler or buy a separate fridge.

salt roast turkey 4

And, more importantly, this was the best turkey I’ve ever eaten. It wasn’t bloated like brined turkey can be, but it was juicy throughout. It also had crisper skin than brined birds do. You can’t argue with a method that is not only easier, but produces even better results.

salt roast turkey 6

Two years ago: Buttermilk Scones
Three year ago: Brown Sugar Apple Cheesecake

Printer Friendly Recipe
Salted Roast Turkey with Herbs (adapted from Bon Appétit via epicurious and from Cook’s Illustrated’s Roast Salted Turkey)

Cook’s Illustrated explains that there are two main brands of kosher salt; Morton’s is denser than Diamond. Use the larger amount of salt called for in the recipe if you’re using Diamond Crystal; if you’re using Morton’s, use only 4 tablespoons of salt.

Don’t salt a kosher or self-basting turkey (like a frozen Butterball)!  Those are already salted and will end up way too salty if you add any additional salt.

8-12 servings

Herbed Salt:
6 tablespoons coarse kosher salt (4 tablespoons if finer-grained kosher salt)
1 tablespoon fresh rosemary, minced
1 tablespoon fresh sage, minced
1 tablespoon fresh thyme leaves
3 small bay leaves, coarsely torn
1 teaspoon black peppercorns, crushed
1 teaspoon finely grated lemon peel

Turkey:
1 14- to 16-pound turkey (neck, heart, and gizzard removed)
1 large onion, coarsely chopped
1 large celery stalk, coarsely chopped
1 whole lemon, coarsely chopped
1 tablespoon fresh rosemary
1 tablespoon fresh sage
1 tablespoon fresh thyme
½ cup (1 stick) unsalted butter, at room temperature
2 cups (or more) unsalted chicken broth or Golden Turkey Stock

1. For the herbed salt: Combine the salt, herbs, and pepper. (Can be made 1 week ahead; cover and refrigerate.) Stir in the lemon peel just before using.

2. For the turkey: Rinse the turkey inside and out (do not pat dry). Pull any fat pads from the main cavity and the neck cavity. Rub about half of the salt mixture over the outside of the turkey. Rub half of the remaining salt mixture in the cavities. Use your fingers to loosen the skin over the breasts and thighs. Rub the last portion of herbed salt under the skin. Transfer the turkey to a large bowl or plate, cover tightly, and refrigerate at least 24 hours or up to 48 hours.

3. Adjust an oven rack to the lowest position; heat the oven to 425 degrees. Rinse the turkey inside and out; pat very dry. Combine the chopped onion, celery, lemon, and herbs; divide the onion mixture between the main and neck cavities. Fold the neck skin under and secure with a skewer. Use kitchen twine to loosely tie the legs together. Place the turkey, breast-side down, on a roasting rack set in a large roasting pan. Spread the butter all over the turkey. Pour two cups of stock or broth into the bottom of the roasting pan.

4. Roast the turkey for 45 minutes. Remove the turkey from the oven; lower the oven temperature to 325 degrees. Using wads of paper towels, turn the turkey breast-side up. Continue to roast until the thickest part of the thigh registers 165 to 170 degrees, 1½ to 2 hours longer.

5. Transfer the turkey, still on the roasting rack, to a rimmed baking sheet. Tent loosely with foil and let rest 30 to 45 minutes before carving and serving.

turkey ricotta meatloaf

turkey ricotta meatloaf 6

Of all the food we ate in Italy, probably the most interesting dishes were made by friends in their home, not ordered in a restaurant. One night, after a first course of spaghetti with tomato sauce, they served thin slices of pork loin (or possibly veal) with a sauce made from canned tuna (which I later found is a traditional Piedmontese dish called vitella tonnato). The next night, we ate trofie al pesto, which Wikipedia claims is the “most symbolic of Genoese meals”, fitting, considering that we were indeed in Genoa.

turkey ricotta meatloaf 1

But it was the main course that night that really impressed me. It was a sort of loaf, which I know doesn’t sound appetizing, but it was wrapped in pancetta, which does sound appetizing. It was light colored and didn’t have the coarse texture of most American meatloaves. I asked about the recipe several days later, but our friend didn’t know what his wife had put into it other than turkey and ricotta.

turkey ricotta meatloaf 3

Searches for turkey ricotta meatloaf didn’t turn up anything that looked similar. The closest I found was a beef meatloaf with ricotta, so I started there, changing the ground beef to ground turkey, skipping the chunks of mozzarella (but keeping some shredded, to increase tenderness), and eliminating the tomato sauce to more closely replicate the one I’d had in Italy.

turkey ricotta meatloaf 4

This meatloaf was not very similar to my friend’s meatloaf. But it was very good regardless, and other than cooking it in a smaller pan to concentrate instead of burn the juices, I wouldn’t do anything differently. Except maybe eat it with friends in Genoa while overlooking the Mediterranean, but that goes without saying.

turkey ricotta meatloaf 8

One year ago: Red Kidney Bean Curry (We had this for dinner twice last week.)
Two years ago: Roasted Butternut Squash Salad with Cider Vinaigrette
Three years ago: Mulled Cider

Printer Friendly Format
Turkey Ricotta Meatloaf (adapted from Lidia Bastianich’s Cooking from the Heart of Italy)

Serves 8

½ cup milk
1 cup stale bread cubes, crusts removed (from 2 slices sandwich bread)
2 pounds ground turkey
2 large eggs
10 ounces ricotta
4 ounces (1 cup) mozzarella, shredded
2 shallots, grated
1 ounce (½ cup) grated parmesan cheese
¼ cup minced parsley
pinch nutmeg
½ teaspoon salt
¼ teaspoon black pepper
8 ounces pancetta, thinly sliced

1. Adjust an oven rack to the middle position; heat the oven to 375 degrees.

2. In a large bowl, mix the milk and bread; set aside for 10 minutes, stirring occasionally. When the bread is saturated with milk, use a fork to mash the mixture until it’s smooth. Add the turkey, eggs, ricotta, mozzarella, shallots, parmesan, parsley, nutmeg, salt and pepper to the bowl with the bread. Use your hands to mix the ingredients until evenly combined.

3. In a 9 by 13-inch pan, shape the meat mixture into a cylindrical loaf shape about 12 inches long. Drape the pancetta slices over the loaf, tucking the slices under the bottom. Cover the pan with aluminum foil.

4. Bake, covered, for 30 minutes. Remove the foil; bake for an additional 45 minutes, until an instant-read thermometer reads at least 170 degrees when inserted into the middle of the loaf. Let the meatloaf rest 10 minutes before slicing and serving with the accompanying juices in the pan.

turkey ricotta meatloaf 7

classic burritos

This is not my most gourmet meal. It’s mostly fancy Taco Bell. It kind of looks like dog food. It’s delicious and easy and kinda healthy. I like it.

It’s at least fancier than we made it when I was a kid. Back then, we (usually my brother) browned some ground beef, dumped in a packet of burrito seasoning and some water, and stirred in a can of refried beans. Then we glopped it on tortillas with fixin’s and were happy.

Then my brother started getting creative. He would add green chile to the mix or use shredded chicken instead of ground beef. I don’t like change. I just want my fancy Taco Bell.

What I have changed is to get rid of the sodium and preservative-filled spice packet and the pasty canned refried beans for some good stuff – browned onions, fresh garlic, spices that I already have anyway, and pinto beans I mush up myself. Plus I use ground turkey instead of ground beef, because it tastes the same once it’s mixed in with everything else, and it’s a little healthier. Same goes for Greek yogurt instead of sour cream.

Sure, it’s just a regular old burrito, and it costs 79 cents at a fast food chain. But if you make it yourself, you can use high quality ingredients – lettuce that is actually crisp, cheese that has flavor, spices that are fresh – and it isn’t much harder than going through the drive-thru.

One year ago: Bran Muffins
Two years ago: Spinach Artichoke and Red Pepper Strata

Printer Friendly Recipe
Classic Burritos

4-6 servings

The filling also reheats really well, so I usually make enough for more than one meal and have an easy leftover night a few days later.

These are my favorite fillings for these very basic burritos. Obviously you can go wild here with whatever you like – salsa, hot sauce, green chile, guacamole…

Filling:
1 tablespoon vegetable oil
1 onion, diced
2 cloves garlic, minced
2 teaspoons ground cumin
2 teaspoons chile powder
1 teaspoon coriander
1 teaspoon dried oregano
¼ teaspoon black pepper
¼ teaspoon cayenne
1 pound ground turkey (or other ground meat of your choice)
1 teaspoon salt
1 (15-ounce) can pinto beans, rinsed and drained
1 cup water

Toppings:
flour tortillas
green leaf lettuce, sliced
tomatoes, diced
cheddar cheese, shredded
black olives, chopped
sour cream (or Greek yogurt)

Heat the oil in a large nonstick skillet over medium heat. Add the onion and sauté, stirring occasionally, until just browned around the edges, about 8 minutes. Add the spices and garlic and cook, stirring constantly, for about a minute, until fragrant. Add the meat and salt and cook, stirring occasionally to break up large chunks, until no longer pink. Clear a space in the middle of the pan and add the beans to it; use a potato masher to break up the beans slightly. Stir in the water and simmer over medium heat until the liquid mostly evaporates. Serve the filling with toppings of your choice.

turkey burgers

Working full-time sure is…time-consuming, isn’t it? I haven’t figured out yet what has to give. (First choice – chores!) Cooking, blogging, photography, gardening, exercising…sleeping. It’s hard to balance everything. It’s possible that I should cut down on meals that require grinding your own meat, huh?

Well, I would consider that, except that these burgers were so perfect. I made beef burgers a week later (also with home-ground meat – stop the insanity!), and I enjoyed the turkey burgers so much more. And I love beef, so it wasn’t a prejudice.

But once you add good buns and your various toppings, the turkey burgers don’t taste significantly different from beef burgers. These have about half the fat of good beef burgers, so that’s another advantage, although what I mostly care about is that I thought their texture was smoother and more cohesive, and their taste was at least as good.

Grinding your own meat isn’t as hard as it might sound, and you almost definitely have the equipment. All you have to do is cut your meat into chunks, freeze it until it’s firm, and process it in the food processor. Then you mix in a few tasty additions, sear them up in a pan and enjoy a perfect burger. Make some extra to freeze, just in case Future You has a rough day at work and needs an easy meal.

One year ago: Croissants (Tartine)
Two years ago: Franks and Beans

Printer Friendly Recipe
Turkey Burgers (not really adapted from Cooks Illustrated)

Cooks Illustrated recommends 6 ounce burgers; I prefer mine significantly smaller. If you do too, don’t forget to reduce the cooking time.

2 pounds skin-on, bone-in turkey thighs or 1½ pounds skinless, boneless thighs
½ teaspoon salt
½ teaspoon black pepper
2 teaspoons Worcestershire sauce
2 teaspoons Dijon mustard
1 tablespoon vegetable or canola oil

1. If using skin-on, bone-in turkey thighs, remove the meat from from the skin and bones. Cut the thighs into 1-inch chunks and arrange in a single layer on a baking sheet. Freeze until somewhat firm, about 30 minutes.

2. Working in 3 batches, place the semifrozen turkey chunks in a food processor fitted with the steel blade; pulse until the largest pieces are no bigger than 1/8-inch, twelve to fourteen 1-second pulses.

3. Transfer the ground meat to a medium bowl. Stir in the salt, pepper, Worcestershire sauce, and mustard until blended and divide the meat into 4 portions. Lightly toss one portion from hand to hand to form a ball, then lightly flatten the ball with your fingertips into a 1-inch-thick patty. Repeat with the remaining portions.

4. Heat a large, heavy skillet (preferably cast iron or stainless steel with an aluminum core) over medium heat until very hot, 4 to 5 minutes. Swirl the oil in the pan to coat the bottom. Add the burgers and cook over medium heat without moving them until the bottom of each is dark brown and crusted, about 5 minutes. Turn the burgers over; continue to cook until the bottom is light brown but not yet crusted, 4 to 5 minutes longer. Reduce the heat to low, position the cover slightly ajar on the pan to allow steam to escape, and continue to cook 5 to 6 minutes longer, or until the center is completely opaque yet still juicy or an instant-read thermometer inserted from the side of the burger into the center registers 160 degrees. Remove from the pan and serve immediately. (Alternatively, grill the burgers over a medium-low fire (you can hold your hand about 5 inches above the grill surface for 5 seconds) until dark spotty brown on the bottom, 7 to 9 minutes. Turn the burgers over; continue grilling 7 to 9 minutes longer.)