Pesto is super simple, right? Just dump some ingredients into the food processor, and thirty seconds later, you have pesto. And while that’s true, with a few extra simple steps, you can ensure that your pesto will live up to its maximum potential every single time.

Traditionally, pesto was made in a mortar and pestle, which smashes the ingredients into each other instead of cutting them like the food processor does. It sounds horribly tedious. You don’t want to do that.
However, it is important to do more than slice basil with the food processor blade. Consider that when you want to smell an herb, what do you do? You rub it between your fingers, not tear it in half, because bruising the leaves is what produces flavor. So to maximize the flavor of your basil, you need to bruise the leaves before cutting them.
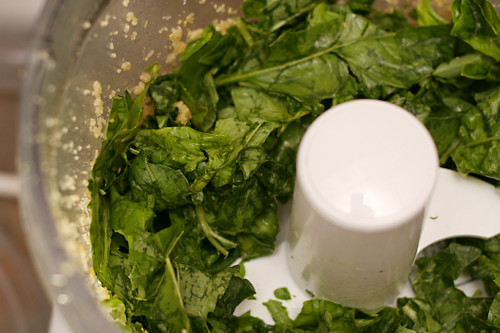
You can do this with almost no extra effort using a trick I picked up from Jamie Oliver – just put the basil in the food processor, but with the plastic dough blade instead of the knife blade. It takes only a few seconds longer and produces just one more small utensil to clean, but it makes a big difference in flavor. Before I started using this trick, sometimes my pesto would taste grassy, but now it always tastes basil-y.
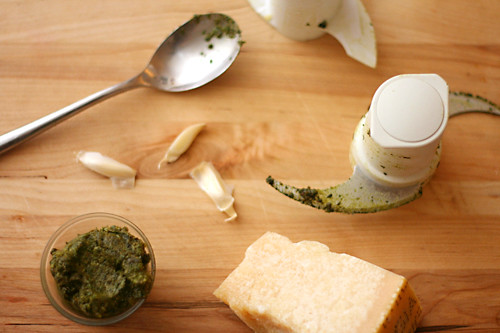
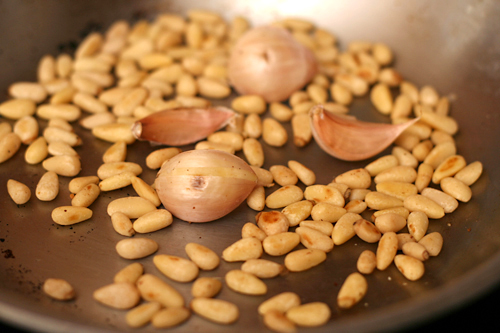
You probably also know that toasting nuts brings out their flavor, and it isn’t hard to do on the stovetop. I also like to toast the garlic, because I am not a fan of the tongue-stinging sharpness of raw garlic. Toasting the unpeeled cloves in a dry skillet tames garlic’s bite with very little effort. And that’s it – you’ve maximized the potential of every ingredient in pesto, ensuring dependably outstanding pesto, and it only took an extra minute or two.

One year ago: Yogurt-Marinated Lamb Kebabs
Two years ago: Tortellini Soup with Carrots, Peas, and Leeks
Three years ago: Summer Rolls
Printer Friendly Recipe
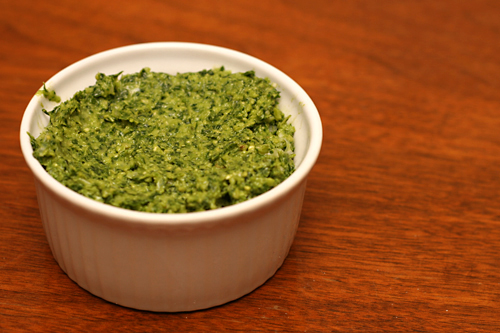
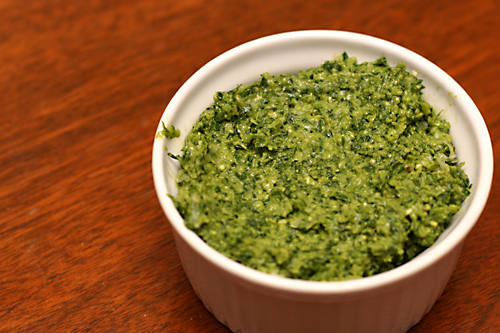
Pesto
2 ounces pine nuts
2 cloves garlic, unpeeled
Salt
1 large bunch (6 ounces) basil leaves, washed and dried
1-3 tablespoons extra virgin olive oil
½ ounce (¼ cup) freshly grated parmesan
1. Heat a small empty not-nonstick skillet over medium heat for several minutes. Add the pine nuts and cook, stirring constantly, for about a minute, until they’re golden brown and fragrant. Pour the nuts into a food processor bowl fitted with the knife attachment. Add the garlic to the skillet and toast, without stirring, for about 1 minute. When the first side is dark brown, turn the garlic cloves onto another flat side and continue toasting for another minute. Peel the garlic and transfer it to the food processor with the pine nuts.
2. Add ¼ teaspoon salt to the garlic and pine nuts. Process until the nuts and garlic are finely ground, 10-15 seconds. Replace the knife attachment with the plastic dough blade. Add the basil to the food processor and pulse until the basil is bruised and fragrant, about ten 1-second pulses. Remove the dough blade from the bowl and return the knife attachment. Process until basil is finely chopped, a few seconds.
3. With the machine running, slowly pour the oil into the feed tube. Scrape the sides of the bowl; process until evenly mixed. Stir in the parmesan. Serve, refrigerate for a few days, or freeze for months.