There are more practical things I could be doing with my time, but none of them are as fun as baking cookies. This is why I have three types of Christmas cookie dough and a Christmas cake in my freezer. Plus I’ll be 8 months pregnant at Christmas, and I never know when my body is going to cry uncle and let me know that I can’t keep up my normal level of activity indefinitely.
I have five more holiday treats planned (plus decorating that cake in the freezer), which seemed ambitious until I talked to someone who makes at least twenty types of cookies every December. Still, the only way I can get it all done and still enjoy my life is by spacing it out, and I have so many plans this year that my holiday baking spilled over into November. This is not a hardship, as I’m not sad about having more excuses to play with butter and sugar, even if it does mean using red and green food coloring before Thanksgiving.
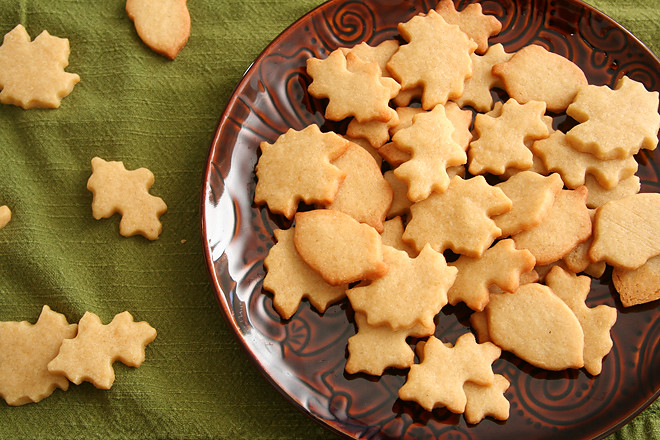
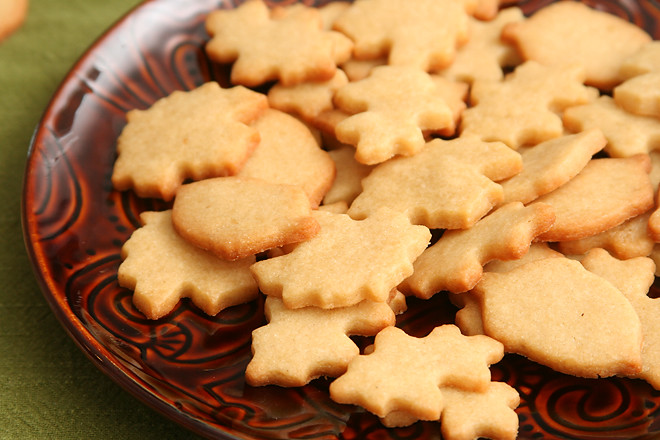
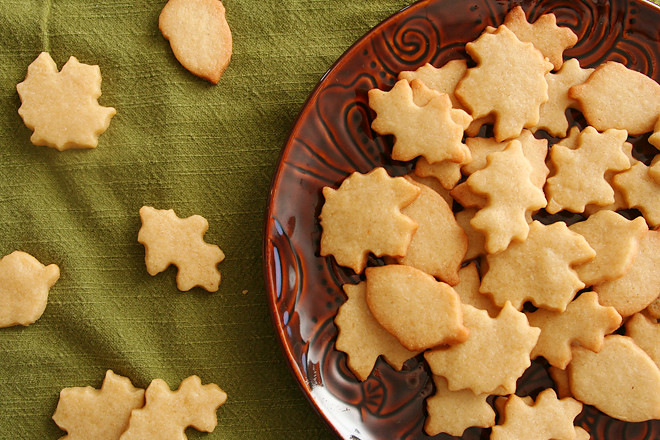
With no food coloring here, these cookies work for either holiday. They’re simple but not plain, as the maple flavor really is evident. Cutting them into fall leaves makes them seem more appropriate for Thanksgiving, but they’re going in my Christmas care packages anyway – along with at least five other treats.
Printer Friendly Recipe
Nutmeg Maple Cookies (adapted from Gourmet via Smitten Kitchen)
Yield depends on size of cutters used; I made at least a hundred 1-inch cookies (which took forever)
I can’t find Grade B maple syrup where I live, but I do have maple sugar in the pantry, so I substituted 2 tablespoons of that for an equal amount of granulated sugar. The original recipe suggests adding a few drops of maple extract, if you’re more likely to have that around than maple sugar. I also considered starting with a couple extra tablespoons of Grade A maple syrup and simmering it down to ½ cup; if you do this, be sure to let it cool to room temperature before adding it to the dough.
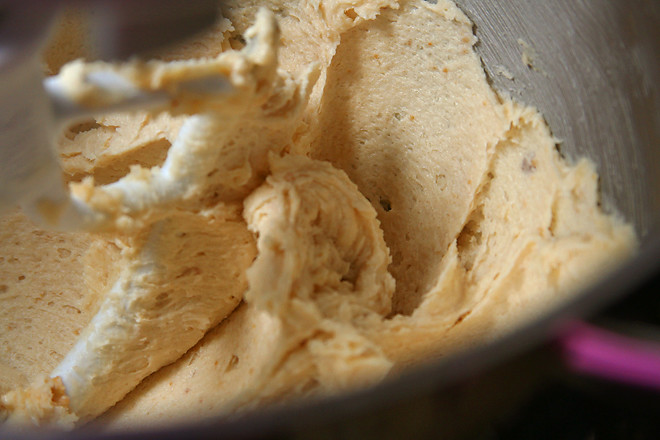
I substituted some brown sugar for white sugar and added vanilla to the original recipe, because I thought both would help bring out the maple flavor.
I know it’s annoying to chill the dough and then have to wait for it to soften up again after chilling, but it’s so soft at room temperature that there’s no way you’d be able to transfer the cut shapes to a baking sheet. You could, however, roll it out immediately after mixing (you’d need a pretty big area) and refrigerate it until it hardens enough to cut and transfer, which would only take 15 minutes or so. I often do this with the scraps.
I tried baking the cookies for 8 minutes and for 10 minutes. The cookies baked for 8 minutes were just a bit chewy. The cookies baked for 10 minutes were crunchy, which isn’t usually my preference but was nice here. If you want your cookies softer, increase the brown sugar to ½ cup and decrease the granulated sugar to ½ cup and bake for 8-10 minutes, until the tops looks dry but the edges aren’t browned.
3 cups (14.4 ounces) all-purpose flour
½ teaspoon freshly grated nutmeg or ¼ teaspoon ground nutmeg
2 sticks (16 tablespoons) unsalted butter, at room temperature
1 teaspoon table salt
¾ cup (5.25 ounces) granulated sugar
¼ cup (1.75 ounces) light brown sugar
1 large egg yolk
½ cup Grade B maple syrup
½ teaspoon vanilla extract
1. In a small bowl, combine the flour and nutmeg. Place the butter in the bowl of a stand mixer fitted with the paddle attachment (or a large mixing bowl if you’re using a hand-held mixer) and beat on medium-low speed until it’s smooth. Add the salt and both sugars and continue beating on medium-low until the mixture is light and fluffy, about 2 minutes, scraping the sides of the bowl as needed. Add the egg yolk and mix until fully incorporated, then, with the mixer running, gradually add the maple syrup and vanilla extract. Reduce the mixer speed to low and gradually add the flour mixture, mixing just until evenly combined. Wrap the dough in plastic wrap and chill for 2 hours or up to two days.
2. Adjust a rack to the middle position and heat the oven to 350 degrees. Line two baking sheets with parchment paper or silicone mats.
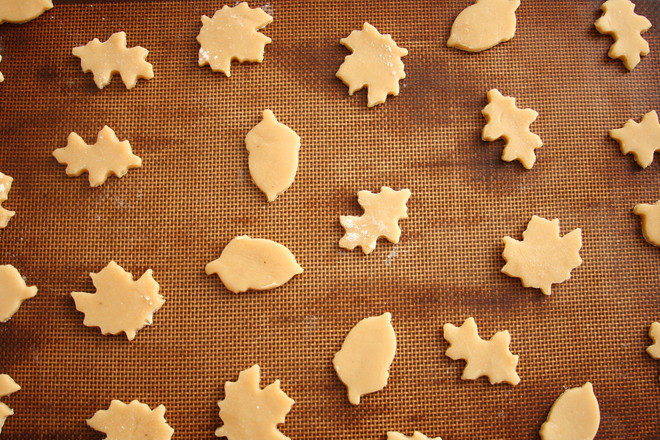
3. If chilled for longer than 2 hours, let the dough sit at room temperature until it’s just soft enough to roll out. On a lightly floured surface, roll the dough to a thickness of ⅛-inch. Use floured cookie cutters to cut shapes; transfer the shapes to the prepared pans. Re-roll and cut shapes from the scraps, using as little flour as possible.
4. Bake the cookies until the just golden around the edges, 10 to 12 minutes. Let the cookies cool on the pan for about 2 minutes, then transfer to a wire rack cool completely.


I would love to know all the cookies you have picked out. Happy Thanksgiving and cooking!
I make about 7 varieties of cookies every year for Christmas gift-giving. They are baked in one weekend and then packaged and gifted within 1-2 days of baking. The number of cookies runs in the low hundreds–let’s say 400 or so in total. (I work in a hospital and gift boxes of these to the wards). I used to make the dough and bake them all the same weekend which caused a great deal of stress for me and my husband.
Several years ago, I discovered the stress-saving technique of making the dough ahead of time and then FREEZING the dough. I DO NOT FREEZE baked cookies as the texture is not right and the cookies are much drier when thawed. I even portion the dough and freeze them in their “ready to bake” shapes and just pour them into a Ziploc bag. When ready to bake and gift, I just heat up the oven and start baking my pre-portioned dough balls or cut shapes. I can’t even begin to tell you what a time-saver this is–I baked 4 different cookies (at least 200 cookies) in less than 2 hours. It also helps to have 2 ovens. Hope this proves useful!