four vanilla frostings

opener.jpg

A week ago, I published a post on chocolate cupcakes and vanilla frosting. It’s already become my most popular post, because my site comes up when people search for vanilla frosting recipes. The problem is that I didn’t love the frosting I made to go with those cupcakes. I decided to do a more thorough test of frostings to help out the random internet searcher.

Oh, also, it’s my nephew’s 0th birthday. He was born on Monday. Isn’t he just the cutest little cuddly thing? I haven’t seen him in person yet, but when I do, he’d better be prepared to get some major squeezing. (And today is that cuddly little guy’s brother’s birthday, as well as my brother’s birthday.)

bryce.jpg 0th.jpg

Right, and I apparently need lots of justification to make some more cake.

A few notes on my methods. These frostings topped Cooks Illustrated’s Old-Fashioned Chocolate Layer Cake. CI has two recipes with this title – this is the one published in April 2006. It is, quite frankly, better than the one published in The New Best Recipe.

Also, I made the smallest practical amount of each frosting. This was ¼ of the recipe for everything except the Fluffy Icing, which I made half of.

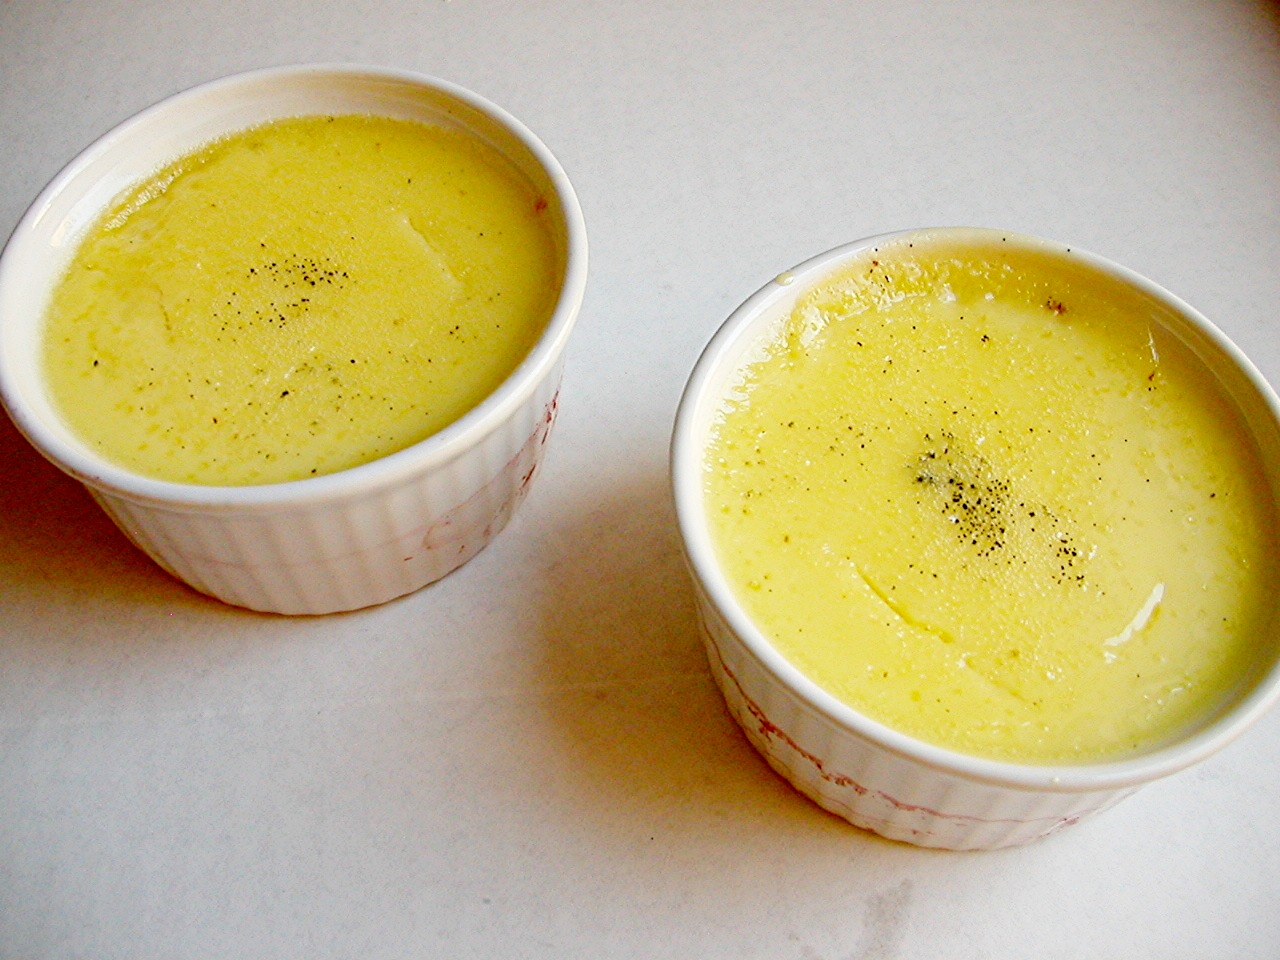
The first frosting (blue) is Easy Vanilla Buttercream. This appears to be the most common vanilla frosting. It’s also called decorator’s icing, and it’s what I ate as a kid, because my mom decorated fancy cakes for us on our birthdays. You simply mix powdered (confectioner’s) sugar and butter together, with a bit of vanilla extract for flavor and a little milk or cream (you could easily use soy milk if necessary) to achieve the right consistency. This was my favorite of these four frostings, even though I know that I pooh poohed as too simple last week. It was Dave’s second favorite.

The second frosting (yellow-orange) is a Vanilla Buttercream from epicurious. For this buttercream, egg whites are whipped in a bowl while sugar is heated on the stove. When the sugar is hot and the egg whites are frothy, the hot sugar is drizzled into the egg whites with the mixer beating continuously, and then butter is slowly added. I had a bit of stress with this recipe because it provides a temperature for the sugar to be heated to without giving any visual clues, and I don’t have a candy thermometer. A quick check on the internet gave me some useful information, so I waited until a drop of the liquid sugar formed a ball that could be squeezed before beginning to add the sugar into the egg whites. A few of the reviewers on epicurious recommended using only ¾ of the butter. I like this idea because I like a sweeter and less buttery frosting, but the buttercream looked curdled until I added just about all of the butter. In the end, though, it was pretty good. It was Dave’s favorite and my second favorite of these four recipes.

The next frosting (green) is Cooks Illustrated’s Classic Buttercream. In this recipe, whole eggs, sugar, and vanilla are heated in a double boiler, then whipped until airy, when softened butter is slowly added. It was my least favorite and Dave’s second to least favorite. It had significantly less flavor than the other three frostings, to the point where I wonder if I forgot to add the vanilla. (I’m almost positive I didn’t forget.)

The last frosting (pink) is Cooks Illustrated’s Fluffy Icing. This is a seven-minute frosting. Egg whites, sugar, water, vanilla extract and cornstarch are heated in a double boiler, then whipped to stiff peaks. Mine refused to form stiff peaks, even after whipping for well beyond the recipe’s suggested times. I thought it was okay, although I liked the Easy Buttercream and epicurious’s recipe better. It didn’t necessarily go with the chocolate cupcakes, but I think it would be great with the lemon cake that CI originally published it to accompany. Dave didn’t like it at all, but I’ve had my eye on that lemon cake for a while, so he’ll have to try it again when I make that. And hey – no fat in this recipe!

To conclude, my preference, from most to least favorite, is Easy, epicurious, Fluffy, Classic. Dave’s are epicurious, Easy, Classic, Fluffy. I think the secret to making the Easy Vanilla Buttercream great is to whip it – whip it good. It becomes lighter and fluffier and easier to work with if it’s beat at high speed for several minutes. It had the strongest flavor, tasting somewhat tangy, and didn’t feel as buttery as the other two buttercreams.

Like I said before, I do think that the Fluffy Icing has its place, but its place isn’t topping chocolate cake. The Cooks Illustrated Classic Buttercream was lacking flavor, and both Magnolia’s Bakery and epicurious’s buttercreams were buttery and sweet. I’d probably choose Magnolia’s recipe over this epicurious one because Magnolia’s seems a bit stabler, and there’s no messing around with raw egg.

Easy Vanilla Buttercream (from Cooks Illustrated April 2007)

The buttercream frosting can be made ahead and refrigerated; if refrigerated, however, it must stand at room temperature to soften before use. If using a hand-held mixer, increase mixing times significantly (at least 50 percent). This recipe can be doubled to make enough for a two-layer cake.

Makes 3 cups

20 tablespoons (2½ sticks) unsalted butter, softened
2½ cups Confectioners’ sugar (10 ounces)
1/8 tablespoons table salt
2 teaspoons vanilla extract
2 tablespoons heavy cream

In standing mixer fitted with whisk attachment, beat butter at medium-high speed until smooth, about 20 seconds. Add confectioners’ sugar and salt; beat at medium-low speed until most of the sugar is moistened, about 45 seconds. Scrape down bowl and beat at medium speed until mixture is fully combined, about 15 seconds; scrape bowl, add vanilla and heavy cream, and beat at medium speed until incorporated, about 10 seconds, then increase speed to medium-high and beat until light and fluffy, about 4 minutes, scraping down bowl once or twice.

Vanilla Buttercream (from epicurious.com and Gourmet January 2004)

Makes about 6 cups.

4 large egg whites at room temperature for 30 minutes
Rounded ¼ teaspoon salt
2/3 cup water
1 1/3 cups plus 2 tablespoons sugar
4 sticks (2 cups) unsalted butter, cut into tablespoon pieces and softened
2 teaspoons vanilla

Combine whites and salt in a very large bowl. Stir together water and 1 1/3 cups sugar in a 3- to 4-quart heavy saucepan until sugar is dissolved, then bring to a boil over moderate heat, without stirring, brushing any sugar crystals down side of pan with a pastry brush dipped in water.

When syrup reaches a boil, start beating egg whites with an electric mixer at medium-high speed until frothy, then gradually add remaining 2 tablespoons sugar and beat at medium speed until whites just hold soft peaks. (Do not beat again until sugar syrup is ready.)

Meanwhile, put thermometer into sugar syrup and continue boiling until syrup registers 238 to 242°F. Immediately remove from heat and, with mixer at high speed, slowly pour hot syrup in a thin stream down side of bowl into whites, beating constantly. Beat, scraping down side of bowl with a rubber spatula, until meringue is cool to the touch, about 10 minutes in a standing mixer or 15 with a handheld. (It is important that meringue is properly cooled before proceeding.)

With mixer at medium speed, gradually add butter 1 piece at a time, beating well after each addition until incorporated. (Buttercream will look soupy after some butter is added if meringue is still warm. If so, briefly chill bottom of bowl in a large bowl filled with ice water for a few seconds before continuing to beat in remaining butter.) Continue beating until buttercream is smooth. (Mixture may look curdled before all of butter is added but will come back together by the time beating is finished.) Add vanilla and beat 1 minute more.

Classic Vanilla Buttercream Frosting (from Cooks Illustrated March 2000)

The whole eggs, whipped until airy, give this buttercream a light, satiny-smooth texture that melts on the tongue.

Makes about 4 cups

4 large eggs
1 cup granulated sugar
2 teaspoons vanilla extract
pinch table salt
1 pound unsalted butter (4 sticks), softened, each stick cut into quarters

1. Combine eggs, sugar, vanilla, and salt in bowl of standing mixer; place bowl over pan of simmering water. Whisking gently but constantly, heat mixture until thin and foamy and registers 160 degrees on instant-read thermometer.

2. Beat egg mixture on medium-high speed with whisk attachment until light, airy, and cooled to room temperature, about 5 minutes. Reduce speed to medium and add butter, one piece at a time. (After adding half the butter, buttercream may look curdled; it will smooth with additional butter.) Once all butter is added, increase speed to high and beat 1 minute until light, fluffy, and thoroughly combined. (Can be covered and refrigerated up to 5 days.)

Fluffy Vanilla Icing (from Cooks Illustrated March 2007)

3 cups, enough to frost one 4-layer cake

2 large egg whites
1 cup granulated sugar (7 ounces)
¼ cup water plus 1 tablespoon
1 teaspoon vanilla extract
1 tablespoon corn syrup

Combine all ingredients in bowl of standing mixer or large heatproof bowl and set over medium saucepan filled with 1 inch of barely simmering water (do not let bottom of bowl touch water). Cook, stirring constantly, until sugar is dissolved and mixture registers 160 degrees on instant-read thermometer, 5 to 10 minutes. Remove bowl from heat and transfer mixture to standing mixer fitted with whisk attachment. Beat on medium speed until soft peaks form, about 5 minutes. Increase speed to medium-high and continue to beat until mixture has cooled to room temperature and stiff peaks form, 5 minutes longer.

closer.jpg

olive oil bread

8.jpg

My plan for this loaf of bread was to have it and the rest of dinner ready before Dave got home from work on a Friday evening. The kitchen would be clean, a bottle of wine would be open, garlic would be roasted. We’d sit down together, drink the wine, spread roasted garlic on fresh bread while the rest of dinner was on hold until we were good and ready. Doesn’t that sound nice?

It didn’t work out that way. I was still rolling out pasta for the lasagna and because I was behind on cooking, I was way behind on cleaning. It was almost an hour after Dave got home before the lasagna was built and I could take a break to enjoy this bread and drink some wine. We spread roasted garlic on it (the bread, not the wine – ew), and when we ran out of garlic, we dipped it in green extra virgin olive oil.

Eventually I got the lasagna in the oven, but ignored the mess in the kitchen. When the lasagna was done baking, it was apparent that something had gone very wrong with it. In my hurry to finish cooking, I had taken some shortcuts. I skipped a step that Marcella Hazan specifically calls “something of a nuisance, but necessary.” All too true. The lasagna was sort of a disaster actually, but that was fine, because I was happy to fill up on bread.

The bread is based on two recipes – the method comes from Peter Reinhart’s recipe for Italian Bread in The Bread Baker’s Apprentice. This is a great book if you’re pretty serious about baking bread at home. Reinhart is all about forcing the maximum flavor out of each ingredient, which I love. The addition of olive oil stems from a recipe for Mantovana Olive Oil Bread in Ultimate Bread, by Eric Treuille and Ursula Ferrigno. This book is great for the less-serious home bread baker. The pictures throughout the book are wonderful and the recipes are varied and interesting, but I think you’ll have more consistent results following Reinhart’s methods.

The olive oil bread was delicious, although I would have preferred an even stronger olive oil flavor. I admit that I got a little scared by the amount of olive oil Treuille and Ferrigno call for and went easy on it. Also, I used regular olive oil, when I meant to use extra virgin. In short, it was really good – but there’s a potential for it could be even better. That just gives me an excuse to try it again soon.

Mantovana Olive Oil Bread (adapted from Peter Reinhart’s The Bread Baker’s Apprentice and Eric Treuille and Ursula Ferrigno’s Ultimate Bread)

Makes one 1-pound loaf

1 recipe biga (recipe follows)
4½ ounces (1 cup) unbleached bread flour
1¼ ounce (¼ cup) whole wheat flour
1 teaspoon salt
½ teaspoon instant yeast
½ teaspoon barley malt syrup (optional)
¼ cup water
¼ cup olive oil

1. Remove the biga from the refrigerator 1 hour before making the dough. Cut it into about 10 small pieces with a pastry scraper or serrated knife. Cover with a towel or plastic wrap and let sit for 1 hour to take off the chill.

12.jpg

2. Stir together the flour, salt, sugar, and yeast in a 4-quart bowl (or in the bowl of an electric mixer). Add the biga pieces, olive oil, barley malt, and water, and stir together (or mix on low speed with the paddle attachment) until a ball forms, adjusting the water or flour according to need. The dough should be slightly sticky and soft, but not batterlike or very sticky. If the dough feels tough and stiff, add more water to soften (it is better to have the dough too soft than too stiff at this point).

3. Sprinkle flour on the counter, transfer the dough to the counter, and begin kneading (or mixing on medium speed with the dough hook). Knead (or mix) for about 10 minutes, adding flour as needed, until the dough is tacky, but not sticky, and supple. The dough should pass the windowpane test (see below) and register 77 to 81 degrees. Lightly oil a large bowl and transfer the dough to the bowl, rolling it to coat it with the oil. Cover the bowl with plastic wrap.

To perform the windowpane test, cut off a small piece of dough from the larger batch and gently stretch, pull, and turn it to see if it will hold a paper-thin, translucent membrane. If it falls apart before it makes this windowpane, continue mixing for another minute or two and test again.

22.jpg

4. Ferment at room temperature for approximately 2 hours, or until the dough doubles in size.

31.jpg

5. Gently pat the dough into a rough rectangle. Without degassing the piece of dough, fold the bottom third of dough, letter style, up to the center and press to seal, creasing surface tension on the outer edge. Fold the remaining dough over the top and use the edge of your hand to seal the seam closed and to increase the surface tension all over. Lightly dust with a sprinkle of flour, cover with a towel or plastic wrap, and let rest for 5 minutes. Then complete the shaping, extending the loaves to about 12 inches in length. Line a sheet pan with baking parchment and dust with semolina flour or cornmeal. Place the loaves on the pan and lightly mist with spray oil. Cover loosely with plastic wrap.

41.jpg

6. Proof at room temperature for about 1 hour, or until the loaves have grown to about 1½ times their original size.

7. Place an empty heavy-duty sheet pan or cast-iron frying pan on either the top shelf of the oven or the oven flour. Preheat the oven to 500 degrees. Have hot water standing by. Score the bread with 2 parallel, diagonal slashes or 1 long slash.

5.jpg

8. Transfer the dough on the parchment paper to a peel or the back of a sheet pan. Transfer the dough to the baking stone (or bake on the sheet pan). Pour 1 cup hot water into the steam pan and close the door. After 30 seconds, spray the walls of the oven with water and close the door. Repeat once more after another 30 seconds. After the final spray, lower the oven setting to 450 degrees and bake until done, rotating 180 degrees, if necessary, for even baking. It should take about 20 minutes. The loaf should be golden brown and register at least 200 degrees at the center.

9. Transfer the loaves to a cooling rack and cool for at least 1 hour before slicing or serving.

6.jpg

Biga

Biga will keep in the refrigerator for up to 3 days, or in the freezer for about 3 months. You can use it as soon as it ferments, but I prefer to give it an overnight retarding to bring out more flavor.

5½ ounces (1¼ cups) unbleached bread flour
¼ teaspoon instant yeast
7 tablespoons to ½ cup water, at room temperature

1. Stir together the flour and yeast in a 4-quart bowl (or in the bowl of an electric mixer). Add 7 tablespoons of the water, stirring until everything comes together and makes a coarse ball (or mix on low speed for 1 minute with the paddle attachment). Adjust the flour or water, according to need, so that the dough is neither too sticky nor too stiff. (It is better to err on the sticky side, as you can adjust easier during kneading. It is harder to add water once the dough firms up.)

2. Sprinkle some flour on the counter and transfer the dough to the counter. Knead for 4 to 6 minutes (or mix on medium speed with the dough hook for 4 minutes), or until the dough is soft and pliable, tacky but not sticky. The internal temperature should be 77 to 81 degrees.

3. Lightly oil a bowl and transfer the dough to the bowl, rolling it around to coat it with oil. Cover the bowl with plastic wrap and ferment at room temperature for 2 to 4 hours, or until it nearly doubles in size.

4. Remove the dough from the bowl, knead it lightly to degas, and return it to the bowl, covering the bowl with plastic wrap. Place the bowl in the refrigerator overnight. You can keep this in the refrigerator for up to 3 days, or freeze it in an airtight plastic bag for up to 3 months.

four soups

1-copy.jpg

I have backlog of soups to be blogged, so I’m going to throw them all into one soupfest entry.

First up is lentil soup, which I was excited about because I found the fancy French lentils, but it seems like I’m cursed to never quite have all the right ingredients for this soup. The first time I made it, I was entrenched in step 3, after the vegetables are softened and the lentils are darkened, adding the wine, and running out of wine. Eh. I played around with some other acidic ingredients, and ended up with a delicious but teensy bit vinegary soup. This time it was chicken broth that I ran out of. Chicken broth! I never run out of chicken broth! I carefully monitor my Better Than Bouillon supply because I loooove Better Than Bouillon. Bummer. I substituted some vegetable (not better than) bouillon. Still a damn good soup. And healthy! The only non-healthy item in the whole thing is a few slices of bacon. That’s nothing.

4-copy.jpg

Next up is white chicken chili. This is the second time I’ve made this recipe, and I seem to remember liking it more the first time. It was far from bad this time – look at all that flavory goodness, how could it be bad?

2-copy.jpg

I just didn’t feel excited about it. Maybe it would have been as simple as adding salt. Another possibility is that adding 50% more beans than the recipe called for made the soup a little bland. I will make it again, but it’s on trial.

5-copy.jpg

Poor cream of mushroom soup. It’s been relegated to nothing more than an ingredient in bad casseroles, so when I saw a recipe for the real deal, I did a double take. People actually eat mushroom soup? Unheard of! Dave and I are both big mushroom fans, so I was excited about this soup. Unfortunately, it just didn’t deliver. It wasn’t bad, it was just so dominated by pureed mushrooms. It was a little intense, even for mushroom lovers like us. Maybe because I used all cremini mushrooms instead of the button mushrooms that the recipe calls for? Whatever, next time I’ll be trying this highly recommended recipe.

6-copy.jpg

And finally, we have my favorite of these four soups. I served this hot and sour soup with the potstickers, which we’re a little crazy about, so this soup had a tough job standing up to that. But it holds it’s own, oh yes. I loved the moo shu I made a few weeks ago, and this has most of the same ingredients, but in soup form. I also really like when tofu is used in recipes where it’s actually the original ingredient, instead of covering for some maligned but more flavorful meat. Mmm, and black vinegar. This is good stuff. And I’m all about the texture that the cornstarch gives the soup. It doesn’t thicken it to a paste, it just provides a little body. The soup has so many strong and contrasting flavors, I just love it. And, it’s healthy! In fact, it’s so light, that I don’t know if I can recommend serving it as a meal on its own. I made the full recipe, we ate it with potstickers for two meals, and then we snacked on it throughout the week. I wasn’t complaining about having hot and sour soup around all week!

So there you have it – a January’s worth of soups. Yum!

Hearty Lentil Soup (from Cooks Illustrated)

Lentils du Puy, sometimes called French green lentils, are our first choice for this recipe, but brown, black, or regular green lentils are fine, too. Note that cooking times will vary depending on the type of lentils used. Lentils lose flavor with age, and because most packaged lentils do not have expiration dates, try to buy them from a store that specializes in natural foods and grains. Before use, rinse and then carefully sort through the lentils to remove small stones and pebbles. The soup can be made in advance. After adding the vinegar in step 2, cool the soup to room temperature and refrigerate it in an airtight container for up to 2 days. To serve, heat it over medium-low until hot, then stir in the parsley.

Makes about 2 quarts, serving 4 to 6

3 slices bacon (about 3 ounces), cut into ¼-inch pieces
1 large onion, chopped fine (about 1½ cups)
2 medium carrots, peeled and chopped medium (about 1 cup)
3 medium cloves garlic, minced or pressed through garlic press (about 1 tablespoon)
1 can (14½ ounces) diced tomatoes, drained
1 bay leaf
1 teaspoon minced fresh thyme leaves
1 cup lentils (7 ounces), rinsed and picked over
1 teaspoon table salt
ground black pepper
½ cup dry white wine
4½ cups low-sodium chicken broth
1½ cups water
1½ teaspoons balsamic vinegar
3 tablespoons minced fresh parsley leaves

1. Fry bacon in large stockpot or Dutch oven over medium-high heat, stirring occasionally, until fat is rendered and bacon is crisp, 3 to 4 minutes. Add onion and carrots; cook, stirring occasionally, until vegetables begin to soften, about 2 minutes. Add garlic and cook until fragrant, about 30 seconds. Stir in tomatoes, bay leaf, and thyme; cook until fragrant, about 30 seconds. Stir in lentils, salt, and pepper to taste; cover, reduce heat to medium-low, and cook until vegetables are softened and lentils have darkened, 8 to 10 minutes. Uncover, increase heat to high, add wine, and bring to simmer. Add chicken broth and water; bring to boil, cover partially, and reduce heat to low. Simmer until lentils are tender but still hold their shape, 30 to 35 minutes; discard bay leaf.

2. Puree 3 cups soup in blender until smooth, then return to pot; stir in vinegar and heat soup over medium-low until hot, about 5 minutes. Stir in 2 tablespoons parsley and serve, garnishing each bowl with some of remaining parsley.

White Chicken Chili (from Cooks Illustrated)

Adjust the heat in this dish by adding the minced ribs and seeds from the jalapeño as directed in step 6. If Anaheim chiles cannot be found, add an additional poblano and jalapeño to the chili. This dish can also be successfully made by substituting chicken thighs for the chicken breasts. If using thighs, increase the cooking time in step 4 to about 40 minutes. Serve chili with sour cream, tortilla chips, and lime wedges.

Serves 6 to 8

3 pounds bone-in, skin-on chicken breast halves, trimmed of excess fat and skin
Table salt and ground black pepper
1 tablespoon vegetable oil
3 medium jalapeño chiles
3 poblano chiles (medium), stemmed, seeded, and cut into large pieces
3 Anaheim chile peppers (medium), stemmed, seeded, and cut into large pieces
2 medium onions, cut into large pieces (2 cups)
6 medium cloves garlic, minced or pressed through garlic press (about 2 tablespoons)
1 tablespoon ground cumin
1½ teaspoons ground coriander
2 (14.5-ounce) cans cannellini beans, drained and rinsed
3 cups low-sodium chicken broth
3 tablespoons fresh lime juice (from 2 to 3 limes)
¼ cup minced fresh cilantro leaves
4 scallions, white and light green parts sliced thin
1. Season chicken liberally with salt and pepper. Heat oil in large Dutch oven over medium-high heat until just smoking. Add chicken, skin side down, and cook without moving until skin is golden brown, about 4 minutes. Using tongs, turn chicken and lightly brown on other side, about 2 minutes. Transfer chicken to plate; remove and discard skin.

2. While chicken is browning, remove and discard ribs and seeds from 2 jalapeños; mince flesh. In food processor, process half of poblano chiles, Anaheim chiles, and onions until consistency of chunky salsa, ten to twelve 1-second pulses, scraping down sides of workbowl halfway through. Transfer mixture to medium bowl. Repeat with remaining poblano chiles, Anaheim chiles, and onions; combine with first batch (do not wash food processor blade or workbowl).

3. Pour off all but 1 tablespoon fat from Dutch oven (adding additional vegetable oil if necessary) and reduce heat to medium. Add minced jalapeños, chile-onion mixture, garlic, cumin, coriander, and ¼ teaspoon salt. Cover and cook, stirring occasionally, until vegetables soften, about 10 minutes. Remove pot from heat.

4. Transfer 1 cup cooked vegetable mixture to now-empty food processor workbowl. Add 1 cup beans and 1 cup broth and process until smooth, about 20 seconds. Add vegetable-bean mixture, remaining 2 cups broth, and chicken breasts to Dutch oven and bring to boil over medium-high heat. Reduce heat to medium-low and simmer, covered, stirring occasionally, until chicken registers 160 degrees (175 degrees if using thighs) on instant-read thermometer, 15 to 20 minutes (40 minutes if using thighs).

5. Using tongs, transfer chicken to large plate. Stir in remaining beans and continue to simmer, uncovered, until beans are heated through and chili has thickened slightly, about 10 minutes.

6. Mince remaining jalapeño, reserving and mincing ribs and seeds (see note above), and set aside. When cool enough to handle, shred chicken into bite-sized pieces, discarding bones. Stir shredded chicken, lime juice, cilantro, scallions, and remaining minced jalapeño (with seeds if desired) into chili and return to simmer. Adjust seasonings with salt and pepper and serve.

Per Serving:
Cal 370; Fat 6 g; Sat fat 1 g; Chol 115 mg; Carb 25 g; Protein 52 g; Fiber 7 g; Sodium 710 mg

Creamy Mushroom Soup (from Cooks Illustrated)

To make sure that the soup has a fine, velvety texture, puree it hot off the stove, but do not fill the blender jar more than halfway, as the hot liquid may cause the lid to pop off the jar.

Makes 8 cups, serving 6 to 8

6 tablespoons unsalted butter
6 large shallots, minced (about 3/4 cup)
2 small cloves garlic, minced (about 1 1/2 teaspoons)
½ teaspoon ground nutmeg, freshly grated
2 pounds white button mushrooms, wiped clean and sliced 1/4 inch thick
3½ cups chicken stock or canned low-sodium chicken broth
4 cups hot water
½ ounce dried porcini mushrooms, rinsed well
1/3 cup dry sherry or Madeira
1 cup heavy cream
2 teaspoons lemon juice from 1 lemon
Table salt and ground black pepper

Sauteed Wild Mushroom Garnish (optional)
2 tablespoons unsalted butter
8 ounces shiitake mushrooms or chanterelle, oyster, or cremini mushrooms, stems
trimmed and discarded, mushrooms wiped clean and sliced thin
Table salt and ground black pepper

1. Melt butter in large, heavy-bottomed Dutch oven over medium-low heat; when foaming subsides, add shallots and saute, stirring frequently, until softened, about 4 minutes. Stir in garlic and nutmeg; cook until fragrant, about 1 minute longer. Increase heat to medium; add sliced mushrooms and stir to coat with butter. Cook, stirring occasionally, until mushrooms release liquid, about 7 minutes. Reduce heat to medium-low, cover pot, and cook, stirring occasionally, until softened and mushrooms have released all liquid, about 20 minutes. Add chicken stock, water, and porcini mushrooms; cover and bring to simmer, then reduce heat to low and simmer until mushrooms are fully tender, about 20 minutes longer.

2. Pour soup into a large bowl. Rinse and dry Dutch oven. Puree soup in batches in blender until smooth, filling blender jar only halfway for each batch. Return soup to Dutch oven; stir in Madeira and cream and bring to simmer over low heat. Add lemon juice, season to taste with salt and pepper, and serve with sauteed mushroom garnish, if desired. (Can be cooled to room temperature and refrigerated up to 4 days.) If making ahead, add cream at serving time.

3. For the Sauteed Wild Mushroom Garnish (optional): Heat butter in medium skillet over low heat; when foam subsides, add mushrooms and sprinkle with salt and pepper. Cover and cook, stirring occasionally, until mushrooms release their liquid, about 10 minutes for shiitakes and chanterelles, about 5 minutes for oysters, and about 9 minutes for cremini. Uncover and continue to cook, stirring occasionally, until liquid released by mushrooms has evaporated and mushrooms are browned, about 2 minutes for shiitakes, about 3 minutes for chanterelles, and about 2 minutes for oysters and cremini. Sprinkle a portion of mushrooms over individual bowls of soup and serve.

Hot and Sour Soup (from Cooks Illustrated)

To make slicing the pork chop easier, freeze it for 15 minutes. We prefer the distinctive flavor of Chinese black vinegar; look for it in Asian supermarkets. If you can’t find it, a combination of red wine vinegar and balsamic vinegar approximates its flavor. This soup is very spicy. For a less spicy soup, omit the chili oil altogether or add only 1 teaspoon.

Serves 6 to 8 as an appetizer

7 ounces extra-firm tofu, drained
4 tablespoons soy sauce
1 teaspoon toasted sesame oil
3 tablespoons cornstarch, plus an additional 1 1/2 teaspoons
1 boneless, center-cut, pork loin chop (1/2 inch thick, about 6 ounces), trimmed of fat and cut into 1 inch by 1/8-inch matchsticks
3 tablespoons cold water, plus 1 additional teaspoon
1 large egg
6 cups low-sodium chicken broth
1 cup bamboo shoots (from one 5-ounce can), sliced lengthwise into 1/8-inch-thick strips
4 ounces fresh shiitake mushrooms, stems removed, caps sliced 1/4 inch thick (about 1 cup)
5 tablespoons black Chinese vinegar or 1 tablespoon red wine vinegar plus 1 tablespoon balsamic vinegar (see note above)
2 teaspoons chili oil (see note above)
1 teaspoon ground white pepper
3 medium scallions, sliced thin

1. Place tofu in pie plate and set heavy plate on top. Weight with 2 heavy cans; let stand at least 15 minutes (tofu should release about ½ cup liquid). Whisk 1 tablespoon soy sauce, sesame oil, and 1 teaspoon cornstarch in medium bowl; toss pork with marinade and set aside for at least 10 minutes (but no more than 30 minutes).

2. Combine 3 tablespoons cornstarch with 3 tablespoons water in small bowl and mix thoroughly; set aside, leaving spoon in bowl. Mix remaining ½ teaspoon cornstarch with remaining 1 teaspoon water in small bowl; add egg and beat with fork until combined. Set aside.

3. Bring broth to boil in large saucepan set over medium-high heat. Reduce heat to medium-low; add bamboo shoots and mushrooms and simmer until mushrooms are just tender, about 5 minutes. While broth simmers, dice tofu into ½-inch cubes. Add tofu and pork, including marinade, to soup, stirring to separate any pieces of pork that stick together. Continue to simmer until pork is no longer pink, about 2 minutes.

4. Stir cornstarch mixture to recombine. Add to soup and increase heat to medium-high; cook, stirring occasionally, until soup thickens and turns translucent, about 1 minute. Stir in vinegar, chili oil, pepper, and remaining 3 tablespoons soy sauce; turn off heat.

5. Without stirring soup, use soupspoon to slowly drizzle very thin streams of egg mixture into pot in circular motion. Let soup sit 1 minute, then return saucepan to medium-high heat. Bring soup to gentle boil, then immediately remove from heat. Gently stir soup once to evenly distribute egg; ladle into bowls and top with scallions.

Per Serving:
Cal 120; Fat 5 g; Sat fat 1 g; Chol 12 mg; Carb 12 g; Protein 8 g; Fiber 1 g; Sodium 1110 mg

two dips

11.jpg

This post comes too late. Two days ago, everyone was planning their snacks for the Superbowl. Today, we’re recovering from overeating, overdrinking, and how did the Giants beat the Patriots? But I think these dishes have their place on any day. Now that I’ve tried them myself and can attest to their success, I offer them to you.

First, a dip for crudite that is healthy and tasty. I am not one to sacrifice flavor to make low-fat dishes; I’d rather eat less of great food than more of subpar food. But if I can get great flavor and good nutrition in one dish, I won’t complain. Most dips use mayonnaise and sour cream as a base – two foods that are almost pure fat. This dip uses pureed cottage cheese as a base, plain yogurt for acidity, and a (relatively) small amount of mayonnaise for tartness. The star of the show is sundried tomatoes, with garlic singing backup. It was a really great dip – I was surprised that we ate that whole plate of vegetables.

21.jpg

The other dip I have to offer is a chemical-free queso. My favorite queso recipe used to be 8 ounces of Velveeta + 1 can of condensed cream of mushroom soup + 1 can of Ro-tel tomatoes. However, I am now adverse to processed foods. Why eat “cheese product” when I can eat cheese? So I set out to make queso reminiscent of my favorite recipe, but without the processed ingredients. It was easy cheesy. (Heehee.) Same taste, real food. Gotta love that.

If you want to add interest to your vegetables, or enjoy chips with spicy melted cheese goodness, but don’t want to compromise your health, you have two new options.

Sun-dried Tomato Dip (adapted from epicurious)

Makes about 2 cups

4 garlic cloves, unpeeled
¼ teaspoon salt
12 oil-packed sun-dried tomatoes, drained
1 cup cottage cheese
1/3 cup plain yogurt
¼ cup mayonnaise

Place garlic in dry skillet over medium heat. Cook, stirring occasionally, until spotty golden brown. Remove peels and discard. Mince garlic in food processor with salt. Add tomatoes and process until chopped. Add cottage cheese and process until smooth. Add remaining ingredients and process to blend. Season with salt. (Can be made 1 day ahead. Chill.)

Serve with vegetables.

Queso

Makes about 2 cups

The jalapeno could be added with the tomatoes, or with the butter. I wasn’t sure how spicy the dip would be without it, so I waited until the end to add it.

Cheddar adds flavor but can be grainy when melted. Monterey jack cheese melts smoothly.

1 tablespoon butter
1½ tablespoon flour
1 cup milk
1 (10-ounce) can Ro-tel diced tomatoes and green chiles, undrained
2 ounces cheddar cheese, shredded
2 ounces Monterey jack cheese, shredded
¼ teaspoon salt
1 jalapeno, minced

Melt butter over medium heat. Once it foams, whisk in flour. Whisk constantly for 1 minute, then gradually whisk in milk. Bring mixture to boil over medium heat, stirring occasionally. Once boiling, reduce heat to medium and simmer for 5 minutes, stirring occasionally. Stir in tomatoes and chiles and bring to a simmer. Add remaining ingredients. Stir until cheese melts. Serve with tortilla chips.

chocolate cupcakes and vanilla frosting

1.jpg

My all-time favorite dessert is chocolate cake with vanilla frosting. I know, how blasé. I love the tender, rich cake and the contrasting fresh taste of vanilla in the icing. And of course, everything tastes better in mini, hence the cupcakes.

And this cake recipe, it’s It. It’s the last chocolate cake recipe I’ll ever need. Well, right, I’m interested in this one as well. Out of thousands of recipes on epicurious, it’s the most popular, so I’d be silly not to check it out. But until then, when I want something that I’ve already checked out, that I already know is chocolate cake perfection, I’ll turn to this recipe.

2.jpg

I’m having more difficulty finding an icing that I love. I’ve used the simple powdered sugar-butter-vanilla-milk frosting for most of my life, and I like it, I do. But I think I want something more from a frosting. Something fluffier and tasting a little less of powdered sugar. I’ve tried a few swiss meringue buttercream recipes and haven’t had much luck. It’s very possible that I’m doing something wrong, but the mouthfeel of the swiss meringue buttercreams that I’ve tried is all off – too much like butter, not enough like icing.

I found the recipe I used this time from the famous Magnolia Bakery, and the method wasn’t something that I had experience with. It’s unusual (to me at least) in that flour and milk are first stirred over medium heat until the mixture thickens, and then once this cools, it’s mixed into a whipped butter-sugar mixture. It was…weird. Not very flavorful, although I did like the texture. I’m also put off by this step: “Cover and refrigerate for 15 minutes (no less and no longer – set a timer!).” I was only making about one fifth of the recipe, and without any information on what was actually supposed to happen at 15 minutes, I didn’t know when I was supposed to use the frosting. Also, the dictatorial “no less and no longer” seems silly – won’t the temperature of the refrigerator, as well as the temperature that the frosting was made at, affect the rate of cooling in the fridge?

It looks like I’m still on the search for my ideal vanilla frosting. But at least I have one excellent chocolate cake to use as a base, and another chocolate cake just waiting to be tested. If you have a favorite vanilla icing, please let me know!

Update: A week later, I tested four more vanilla icings. To see my evaluation and the recipes, click here.

3.jpg

Old-Fashioned Chocolate Layer Cake (from Cooks Illustrated)

Serves 10 to 12

To make cupcakes instead of a layer cake, divide batter between 24 muffin pan cups. Bake until skewer inserted into center of cupcakes comes out clean, 18-20 minutes. I only bake one pan at a time. (Because I only have one pan. Also, I only made half the recipe.)

12 tablespoons unsalted butter (1½ sticks), very soft, plus extra for greasing pans
1¾ cups unbleached all-purpose flour (8¾ ounces), plus extra for dusting pans
4 ounces unsweetened chocolate, coarsely chopped
¼ cup Dutch-processed cocoa (¾ ounce)
½ cup hot water
1¾ cups sugar (12¼ ounces)
1½ teaspoons baking soda
1 teaspoon table salt
1 cup buttermilk
2 teaspoons vanilla extract
4 large eggs
2 large egg yolks

1. FOR THE CAKE: Adjust oven rack to middle position; heat oven to 350 degrees. Grease two 9-inch-round by 2-inch-high cake pans with softened butter; dust pans with flour and knock out excess. Combine chocolate, cocoa powder, and hot water in medium heatproof bowl; set bowl over saucepan containing 1 inch of simmering water and stir with rubber spatula until chocolate is melted, about 2 minutes. Add ½ cup sugar to chocolate mixture and stir until thick and glossy, 1 to 2 minutes. Remove bowl from heat and set aside to cool.

2. Whisk flour, baking soda, and salt in medium bowl. Combine buttermilk and vanilla in small bowl. In bowl of standing mixer fitted with whisk attachment, whisk eggs and yolks on medium-low speed until combined, about 10 seconds. Add remaining 1¼ cups sugar, increase speed to high, and whisk until fluffy and lightened in color, 2 to 3 minutes. Replace whisk with paddle attachment. Add cooled chocolate mixture to egg/sugar mixture and mix on medium speed until thoroughly incorporated, 30 to 45 seconds, pausing to scrape down sides of bowl with rubber spatula as needed. Add softened butter one tablespoon at a time, mixing about 10 seconds after each addition. Add about one-third of flour mixture followed by half of buttermilk mixture, mixing until incorporated after each addition (about 15 seconds). Repeat using half of remaining flour mixture and all of remaining buttermilk mixture (batter may appear separated). Scrape down sides of bowl and add remaining flour mixture; mix at medium-low speed until batter is thoroughly combined, about 15 seconds. Remove bowl from mixer and fold batter once or twice with rubber spatula to incorporate any remaining flour. Divide batter evenly between prepared cake pans; smooth batter to edges of pan with spatula.

3. Bake cakes until toothpick inserted into center comes out with a few crumbs attached, 25 to 30 minutes. Cool cakes in pans 15 minutes, then invert onto wire rack. Cool cakes to room temperature before frosting, 45 to 60 minutes.

4. TO MAKE FROSTING: Melt chocolate in heatproof bowl set over saucepan containing 1 inch of barely simmering water, stirring occasionally until smooth. Remove from heat and set aside. Meanwhile, heat butter in small saucepan over medium-low heat until melted. Increase heat to medium; add sugar, corn syrup, vanilla, and salt and stir with heatproof rubber spatula until sugar is dissolved, 4 to 5 minutes. Add melted chocolate, butter mixture, and cream to clean bowl of standing mixer and stir to thoroughly combine.

5. Place mixer bowl over ice bath and stir mixture constantly with rubber spatula until frosting is thick and just beginning to harden against sides of bowl, 1 to 2 minutes (frosting should be 70 degrees). Place bowl on standing mixer fitted with paddle attachment and beat on medium-high speed until frosting is light and fluffy, 1 to 2 minutes. Stir with rubber spatula until completely smooth.

Creamy Vanilla Frosting (from epicurious, where it was reprinted with permission from More From Magnolia: Recipes From The World-Famous Bakery and Magnolia’s Home Kitchen, by Allysa Torey)

Makes enough for one 3-layer 9-inch cake

6 tablespoons all-purpose flour
2 cups milk
2 cups (4 sticks) unsalted butter, softened
2 cups sugar
2 teaspoons vanilla extract

In a medium-size saucepan, whisk the flour into the milk until smooth. Place over medium heat and, stirring constantly, cook until the mixture becomes very thick and begins to bubble, 10-15 minutes. Cover with waxed paper placed directly on the surface and cool to room temperature, about 30 minutes.

In a large bowl, on the medium high speed of an electric mixer, beat the butter for 3 minutes, until smooth and creamy. Gradually add the sugar, beating continuously for 3 minutes until fluffy. Add the vanilla and beat well.

Add the cooled milk mixture, and continue to beat on the medium high speed for 5 minutes, until very smooth and noticeably whiter in color. Cover and refrigerate for 15 minutes (no less and no longer – set a timer!). Use immediately.

4.jpg

potstickers

11.jpg


I am not good at timing my cooking. I had grand plans for these potstickers to be part of an all day sporadic eating event during the NFL championship games. We’d eat potstickers in the first game, hot and sour soup at the beginning of the second game, and dessert sometime later. But my timing is so bad that I ended up sitting down with a plate full of potstickers right during halftime of the first game. Boring!

My plan got another wrench thrown in it after our first plate of potstickers, when we looked at each other and both said “we want more!” It’s always like that when I make potstickers – neither of us can ever get enough!

Another thing that’s great about potstickers is that they adapt to your schedule. You can make the filling and then forget about it until you’re ready, even if it isn’t until the next day. You can fill the potstickers and then forget about them for months! This time, I filled enough for our first serving, and then filled some more when we decided that we absolutely had to have more. I left the rest of the filling in the fridge overnight, formed more dumplings the next afternoon, and steamed them when we wanted to eat dinner. I was planning on freezing some for later, but it was clear early on that that wasn’t happening.

3.jpg

And you know what else? They’re actually healthy. Look at those ingredients – 3 cups minced cabbage, scallions, egg whites. Two tablespoons of oil in the whole thing, and to be honest, you won’t need that much with a good nonstick pan. I bet I only used a few teaspoons. So we can eat all we want!

2.jpg

Pork and Cabbage Dumplings – Wor Tip (from Cooks Illustrated)

We prefer to use gyoza wrappers. You can substitute wonton wrappers, but the cooking time in step 4 will be reduced from 10 minutes to 5 or 6 minutes and note that the yield will increase to 40 potstickers (see chart below Step 4 for more information). These dumplings, also known as potstickers, are best served hot from the skillet; we recommend that you serve the first batch immediately, then cook the second batch. To freeze, place filled, uncooked dumplings in the freezer in a single layer on a plate until frozen, then transfer to a storage bag. There’s no need to thaw frozen dumplings; just proceed with the recipe.

Makes 24 dumplings, 6 first course servings

Filling
3 cups minced napa cabbage leaves (about ½ medium head)
¾ teaspoon table salt
¾ pound ground pork
4 minced scallions (about 6 tablespoons)
2 egg whites, lightly beaten
4 teaspoons soy sauce
1½ teaspoons minced or grated fresh ginger
1 medium garlic clove, minced or pressed through a garlic press (about 1 teaspoon)
1/8 teaspoon ground black pepper

Dumplings
24 round gyoza wrappers (see note)
2 tablespoons vegetable oil
1 cup water, plus extra for brushing
1. For the filling: Toss cabbage with the salt in colander set over a bowl and let stand until cabbage begins to wilt, about 20 minutes. Press the cabbage gently with rubber spatula to squeeze out any excess moisture, the transfer to a medium bowl. Add the remaining filling ingredients and mix thoroughly to combine. Cover with plastic wrap and refrigerate until mixture is cold, at least 30 minutes or up to 24 hours.

2. For the dumplings: Working with 4 wrappers at a time (keep the remaining wrappers covered with plastic wrap), follow the photos below to fill, seal, and shape the dumplings using a generous 1 teaspoon of the chilled filling per dumpling. Transfer the dumplings to a baking sheet and repeat with the remaining wrappers and filling; you should have about 24 dumplings. (The dumplings can be wrapped tightly with plastic wrap and refrigerated for up to 1 day, or frozen for up to 1 month. Once frozen, the dumplings can be transferred to a zipper-lock bag to save space in the freezer; do not thaw before cooking.)

3. Line a large plate with a double layer of paper towels; set aside. Brush 1 tablespoon of the oil over the bottom of a 12-inch nonstick skillet and arrange half of the dumplings in the skillet, with a flat side facing down (overlapping just slightly if necessary). Place the skillet over medium-high heat and cook the dumplings, without moving, until golden brown on the bottom, about 5 minutes.

4. Reduce the heat to low, add ½ cup of the water, and cover immediately. Continue to cook, covered, until most of the water is absorbed and the wrappers are slightly translucent, about 10 minutes. Uncover the skillet, increase the heat to medium-high, and continue to cook, without stirring, until the dumpling bottoms are well browned and crisp, 3 to 4 minutes more. Slide the dumplings onto the paper towel-lined plate, browned side facing down, and let drain briefly. Transfer the dumplings to a serving platter and serve with scallion dipping sauce (see related recipe). Let the skillet cool until just warm, then wipe it clean with a wad of paper towels and repeat step 3 with the remaining dumplings, oil, and water.

Choosing the Right Wrap
Tasters preferred the slightly chewy texture of gyoza-style wrappers to thinner wonton wrappers, but both styles produced terrific potstickers. Although we developed our recipe using round wrappers, square or rectangular wrappers can be used as well. Here’s how to adjust filling amount and steaming time. Because the smaller wrappers yield more dumplings, you’ll need to cook them in multiple batches.

Instructions for different size wrappers:
Round gyoza (3¾ inches diameter), fill with 1 rounded tablespoon, steam for 10 minutes
Round wonton (3¾ inches diameter), fill with 1 rounded tablespoon, steam for 6 minutes
Square wonton (3 3/8 inches square), fill with 2 rounded teaspoons, steam for 6 minutes
Rectangular wonton (3¼ inches by 2¾ inches), fill with 1 rounded teaspoon, steam for 5 minutes

Scallion Dipping Sauce

The sauce can be refrigerated overnight.

Makes ¾ cup

¼ cup soy sauce
2 tablespoons rice vinegar
2 tablespoons mirin
2 tablespoons water
1 teaspoon chili oil (optional)
½ teaspoon toasted sesame oil
1 medium scallion , white and green parts, minced

Combine all ingredients in bowl and serve.

because i’ve always been your biggest flan (creme caramel/flan)

1.jpg

Flan, crème caramel, whatever. Turns out, there’s only the teeniest of differences. I was struggling to think of a dessert that fit a precise set of requirements – compatibility with the red wine we’d be drinking that night, not chocolate, and most importantly, not requiring any trips to the store. I really thought I’d hit on the perfect idea with flan, and it had even been on my list of things I’m all too eager to cook for some time now. But I kept hitting a snag, in that most of the recipes on epicurious called for sweetened condensed milk, and I didn’t have any.

Finally, I hit upon one that I had all the ingredients for. And I noticed something – the only significant difference between this recipe and Cooks Illustrated’s recipe for crème caramel is the fat content of the dairy. The flan recipe uses almost twice as much whipping cream as milk, whereas the crème caramel recipe uses an equal amount of light cream and milk. This was perfect for me, because I had made the crème caramel before and found the custard to be a little too light for my tastes. Furthermore, I had heavy cream on hand.

Well, I sort of had heavy cream. What I actually had was not one, but two expired cartons of cream, neither of which was the ultra-pasteurized stuff that lasts forever. Eww. But I was determined to make this, and I decided that one of the cartons was passable. I didn’t tell Dave about the questionable dairy in the custard, as I don’t think he’d have been pleased.

Oh, this dessert turned out really well. Much better than the previous time I’d made the crème caramel, when I believe I had overcooked the caramel. This time I fussed over it determinedly, swirling and watching, and even getting a container of honey out so I could judge just when the caramel became the “honey-caramel color” that the recipe instructed. It was perfect. I did have a little adventure with divvying up the caramel among only 3 ramekins instead of the four I was supposed to use, then hurriedly trying to scoop quickly hardening caramel into the 4th ramekin.

copy-of-2.jpg

After that, everything went pretty smoothly. This really isn’t a hard dessert to make, although the water bath is a bit of a pain. The blood-colored streaks on the ramekins are stains from the maroon towel I used to keep the ramekins stable in the water bath. Don’t they look so appetizing? Oh, and the stab wounds are from my tests to check if the custard was done cooking. Next time I need to be careful not to puncture the caramel. Between the bloody ramekins and the knife marks, I bet these just look so tempting, right? But this is actually an easy, fairly cheap, impressive recipe that can be made days in advance, and might therefore be perfect for a dinner party.

copy-of-3.jpg

Classic Crème Caramel (from Cooks Illustrated)

CI note: Though you can make one large creme caramel, we find that custards baked in individual ramekins cook faster, are more evenly textured, and unmold more easily. You can vary the amount of sugar in the custard to suit your taste. Most tasters preferred the full two-thirds cup, but you can reduce that amount to as little as one-half cup to create a greater contrast between the custard and the sweetness of the caramel. Cook the caramel in a pan with a light-colored interior, since a dark surface makes it difficult to judge the color of the syrup. Caramel can leave a real mess in a pan, but it is easy to clean. Simply boil lots of water in the pan for 5 to 10 minutes to loosen the hardened caramel.

Crumblycookie changes: I used heavy cream instead of light cream, 2% milk instead of whole milk, ½ of a vanilla bean instead of extract, and vanilla sugar instead of regular sugar.

Serves 8

Caramel
1 cup granulated sugar
1/3 cup water
2 tablespoons corn syrup
¼ teaspoon lemon juice

Custard
1½ cups whole milk
1½ cups light cream
3 large eggs
2 large egg yolks
2/3 cup granulated sugar
1½ teaspoons vanilla extract
Pinch table salt

1. For the caramel: In a medium nonreactive saucepan and without stirring, bring sugar, water, corn syrup, and lemon juice to simmer over medium-high heat, wiping sides of pan with wet cloth to remove any sugar crystals that might cause syrup to turn grainy. Continue to cook until syrup turns from clear to golden, swirling pan gently to ensure even browning, about 8 minutes. Continue to cook, swirling pan gently and constantly, until large, slow bubbles on mixture’s surface turn honey-caramel in color, 4 to 5 minutes longer. Remove pan immediately from heat and, working quickly but carefully (the caramel is over 300 degrees and will burn you if it touches your skin), pour a portion of the caramel into each of 8 ungreased 6-ounce ovenproof ramekins. Allow caramel to cool and harden, about 15 minutes. (Can be covered with plastic wrap and refrigerated for up to 2 days; return to room temperature before adding custard.)

2. For the custard: Adjust oven rack to center position and heat oven to 350 degrees. Heat milk and cream, stirring occasionally, in medium saucepan over medium heat until steam appears and/or an instant-read thermometer held in the liquid registers 160 degrees, 6 to 8 minutes; remove from heat. Meanwhile, gently whisk eggs, yolks, and sugar in large bowl until just combined. Off heat, gently whisk warm milk mixture, salt, and vanilla into eggs until just combined but not at all foamy. Strain mixture through fine mesh sieve into large measuring cup or container with pouring spout; set aside.

3. Bring 2 quarts water to boil in kettle. Meanwhile, fold dish towel to fit bottom of large baking dish or roasting pan and position in pan. Divide reserved custard mixture among ramekins; place filled ramekins on towel in pan (making sure they do not touch) and set pan on oven rack. Fill pan with boiling water to reach halfway up ramekins; cover entire pan loosely with aluminum foil so steam can escape. Bake until a paring knife inserted halfway between center and edge of the custards comes out clean, 35 to 40 minutes. Transfer custards to wire rack; cool to room temperature (Can be covered with plastic wrap and refrigerated up to 2 days.)

4. To unmold, slide a paring knife around entire mold perimeter, pressing knife against side of the dish. Hold serving plate over top of ramekin and invert; set plate on work surface and shake ramekin gently to release custard. Serve immediately.

For one large crème caramel: Follow recipe for Classic Crème Caramel, pouring caramel and custard into 1½-quart straight-sided soufflé dish rather than individual ramekins. Fill roasting pan with boiling water to reach halfway up sides of soufflé dish; increase baking time to 70 to 75 minutes or until an instant-read thermometer inserted in center of custard registers 175 degrees.

The Perfect Flan (from epicurious)

1¾ cups whipping cream
1 cup milk (do not use low-fat or nonfat)
Pinch of salt
½ vanilla bean, split lengthwise

1 cup sugar
1/3 cup water

3 large eggs
2 large yolks
7 tablespoons sugar

Position rack in center of oven and preheat to 350°F. Combine cream, milk and salt in heavy medium saucepan. Scrape seeds from vanilla bean into cream mixture; add bean. Bring to simmer over medium heat. Remove from heat and let steep 30 minutes.

Meanwhile, combine 1 cup sugar and 1/3 cup water in another heavy medium saucepan. Stir over low heat until sugar dissolves. Increase heat to high and cook without stirring until syrup turns deep amber, brushing down sides of pan with wet pastry brush and swirling pan occasionally, about 10 minutes. Quickly pour caramel into six ¾-cup ramekins or custard cups. Using oven mitts as aid, immediately tilt each ramekin to coat sides. Set ramekins into 13x9x2-inch baking pan.

Whisk eggs, egg yolks and 7 tablespoons sugar in medium bowl just until blended. Gradually and gently whisk cream mixture into egg mixture without creating lots of foam. Pour custard through small sieve into prepared ramekins, dividing evenly (mixture will fill ramekins). Pour enough hot water into baking pan to come halfway up sides of ramekins.

Bake until centers of flans are gently set, about 40 minutes. Transfer flans to rack and cool. Chill until cold, about 2 hours. Cover and chill overnight. (Can be made 2 days ahead.)

To serve, run small sharp knife around flan to loosen. Turn over onto plate. Shake gently to release flan. Carefully lift off ramekin allowing caramel syrup to run over flan. Repeat with remaining flans and serve.

copy-of-4.jpg

daring bakers jan 2008: lemon meringue pie

copy-of-dscn2807.jpg

I saw so excited to see that this month’s Daring Baker challenge was lemon meringue pie! Not only do I love lemon, but the one lemon meringue pie I’ve made was several years ago and was only partially successful. It seemed to me like this had to potential to be a fairly difficult challenge – pie crust, lemon curd, meringue. But when Jen of The Canadian Baker revealed this recipe to us, she expressed some concern that it might not be challenging enough for everyone.

She needn’t have worried. As one person after another wrote in to the DB private blog that they had followed the recipe exactly and had lemon meringue soup to show for their efforts, I started to get worried. And it seemed that for every disaster, there was another DBer chiming in that they had followed the recipe exactly and had perfect results. It goes without saying that I was hoping to be in the latter group.

I was not. I, however, cannot claim that I followed the recipe exactly. Because I screwed up.

copy-of-dscn2861.jpg

It was all going swimmingly until I baked the pie at the end. The crust was a bit thicker than I’m used to, and the filling overflowed the crust a bit after I added the meringue, but these are minor qualms. (Ah – I see now that the recipe is developed for a 10-inch pan, and I only have 9-inch pans. That explains it.) The problem arose when I opened the oven to bake the pie and realized that I needed to adjust the racks and add a sheet pan below to catch drips. As I fumbled around with these corrections, I cranked the oven thermometer up to make sure the heater stayed on.

About five minutes after I put the pie in, a smell reminiscent of marshmallows roasting on a campfire reminded me that I hadn’t turned the oven back down. At this point the meringue was a beautiful mix of almost black, tan, and white. Afraid of it turning entirely black, I took the pie out far earlier than the recipe instructed.

And like many DBers, my filling did not set. Is it because I baked the pie at 450 degrees for 5 minutes instead of 375 degrees for 20 minutes? I don’t know. The next day, however, the filling was nice and solid, although the meringue was insufficiently cooked.

copy-of-dscn2868.jpg

I do know that this unsatisfactory pie did not satisfy the desire for lemon meringue pie that I had by now developed. I also knew that I wasn’t taking any chances with the same recipe. Instead, I tried a Cooks Illustrated recipe. Unsurprisingly, it went off without a hitch. Gotta love Cooks Illustrated.

Check to see how the rest of the Daring Bakers pie experiences went!

copy-of-dscn3246.jpg

Lemon Meringue Pie (from Wanda Beaver’s Wanda’s Pie in the Sky)

Makes one 10-inch (25 cm) pie

For the Crust:
¾ cup (180 mL) cold butter; cut into ½-inch (1.2 cm) pieces
2 cups (475 mL) all-purpose flour
¼ cup (60 mL) granulated sugar
¼ tsp (1.2 mL) salt
⅓ cup (80 mL) ice water

For the Filling:
2 cups (475 mL) water
1 cup (240 mL) granulated sugar
½ cup (120 mL) cornstarch

5 egg yolks, beaten
¼ cup (60 mL) butter
¾ cup (180 mL) fresh lemon juice
1 tbsp (15 mL) lemon zest
1 tsp (5 mL) vanilla extract

For the Meringue:
5 egg whites, room temperature
½ tsp (2.5 mL) cream of tartar
¼ tsp (1.2 mL) salt
½ tsp (2.5 mL) vanilla extract
¾ cup (180 mL) granulated sugar

For the Crust: Make sure all ingredients are as cold as possible. Using a food processor or pastry cutter and a large bowl, combine the butter, flour, sugar and salt. Process or cut in until the mixture resembles coarse meal and begins to clump together. Sprinkle with water, let rest 30 seconds and then either process very briefly or cut in with about 15 strokes of the pastry cutter, just until the dough begins to stick together and come away from the sides of the bowl. Turn onto a lightly floured work surface and press together to form a disk. Wrap in plastic and chill for at least 20 minutes.

Allow the dough to warm slightly to room temperature if it is too hard to roll. On a lightly floured board (or countertop) roll the disk to a thickness of ⅛ inch (.3 cm). Cut a circle about 2 inches (5 cm) larger than the pie plate and transfer the pastry into the plate by folding it in half or by rolling it onto the rolling pin. Turn the pastry under, leaving an edge that hangs over the plate about ½ inch (1.2 cm). Flute decoratively. Chill for 30 minutes.

Preheat oven to 350ºF (180ºC). Line the crust with foil and fill with metal pie weights or dried beans. Bake for 20 to 25 minutes. Carefully remove the foil and continue baking for 10 to 15 minutes, until golden. Cool completely before filling.
For the Filling: Bring the water to a boil in a large, heavy saucepan. Remove from the heat and let rest 5 minutes. Whisk the sugar and cornstarch together. Add the mixture gradually to the hot water, whisking until completely incorporated.

Return to the heat and cook over medium heat, whisking constantly until the mixture comes to a boil. The mixture will be very thick. Add about 1 cup (240 mL) of the hot mixture to the beaten egg yolks, whisking until smooth. Whisking vigorously, add the warmed yolks to the pot and continue cooking, stirring constantly, until mixture comes to a boil. Remove from the heat and stir in butter until incorporated. Add the lemon juice, zest and vanilla, stirring until combined. Pour into the prepared crust. Cover with plastic wrap to prevent a skin from forming on the surface, and cool to room temperature.

For the Meringue: Preheat the oven to 375ºF (190ºC). Using an electric mixer beat the egg whites with the cream of tartar, salt and vanilla extract until soft peaks form. Add the sugar gradually, beating until it forms stiff, glossy peaks. Pile onto the cooled pie, bringing the meringue all the way over to the edge of the crust to seal it completely. Bake for 15 to 20 minutes, or until golden. Cool on a rack. Serve within 6 hours to avoid a soggy crust.

The Ultimate Lemon Meringue Pie (from Cooks Illustrated)

Makes one 9-inch pie

Graham Cracker-Coated Pie Shell
1¼ cups unbleached all-purpose flour
½ teaspoon table salt
1 tablespoon granulated sugar
6 tablespoons unsalted butter , chilled and cut into 1/4-inch pieces
4 tablespoons vegetable shortening , chilled
3-4 tablespoons cold water
½ cup graham cracker crumbs

Lemon Filling
1 cup granulated sugar
¼ cup cornstarch
1/8 teaspoon table salt
1½ cups cold water
6 large egg yolks
1 tablespoon lemon zest from 1 lemon
½ cup lemon juice from 2 to 3 lemons
2 tablespoons unsalted butter

Meringue Topping
1 tablespoon cornstarch
¼ teaspoon cream of tartar
½ cup granulated sugar
4 large egg whites
½ teaspoon vanilla extract
1. For the pie shell: Mix flour, salt and sugar in food processor fitted with steel blade. Scatter butter pieces over flour mixture, tossing to coat butter with a little of the flour. Cut butter into flour with five 1 second pulses. Add shortening; continue cutting in until flour is pale yellow and resembles coarse cornmeal with butter bits no larger than a small pea, about four more 1-second pulses. Turn mixture into medium bowl.

2. Sprinkle 3 tablespoons cold water over mixture. Using rubber spatula, fold water into mixture; press down on dough mixture with broad side of spatula until dough sticks together. If dough will not come together, add up to 1 tablespoon more cold water. Shape dough into ball, then flatten into 4-inch-wide disk. Dust lightly with flour, wrap in plastic, and refrigerate for 30 minutes before rolling.

3. Generously sprinkle work area with 2 tablespoons graham cracker crumbs. Place dough on work area. Scatter a few more crumbs over dough. Roll dough from center to edges, turning it into a 9-inch disk, rotating a quarter turn after each stroke and sprinkling additional crumbs underneath and on top as necessary to coat heavily. Flip dough over and continue to roll, but not rotate, to form a 13-inch disk slightly less than 1/8-inch thick.

4. Fold dough into quaarters; place dough point in center of 9-inch Pyrex pie pan. Unfold to cover pan completely, letting excess dough drape over pan lip. To fit dough to pan, lift edge of dough with one hand and press dougn in pan bottom with other hand; repeat process around circumferences of pan to ensure dough fits properly and is not stretched. Trim all around, ½-inch past lip of pan. Tuck ½ inch of overhanging dough under so folded edge is flush with lip of pan; press to seal. Press thumb and index finger about ½-inch apart against outside edge of dough, then use index finger or knuckle of other hand to poke a dent on inside edge of dough through opening created by the other fingers. Repeat to flute around perimeter of pie shell.

5. Refrigerate until firm, about 30 minutes. Use fork to prick shell at ½-inch intervals; press a doubled 12-inch square of aluminum foil into pie shell; prick again and refrigerate at least 30 minutes.

6. Adjust oven rack to lowest position, heat oven to 400 degrees. Bake, checking occasionally for ballooning, until crust is firmly set, about 15 minutes. Reduce oven temperature to 350 degrees, remove foil, and continue to bake until crust is crisp and rich brown in color, about 10 minutes longer.

7. For the filling: Mix sugar, cornstarch, salt, and water in a large, nonreactive saucepan. Bring mixture to simmer over medium heat, whisking occasionally at beginning of the process and more frequently as mixture begins to thicken. When mixture starts to simmer and turn translucent, whisk in egg yolks, two at a time. Whisk in zest, then lemon juice, and finally butter. Bring mixture to a brisk simmer, whisking constantly. Remove from heat, place plastic wrap directly on surface of filling to keep hot and prevent skin from forming.

8. For the meringue: Mix cornstarch with 1/3 cup water in small saucepan; bring to simmer, whisking occasionally at beginning and more frequently as mixture thickens. When mixture starts to simmer and turn translucent, remove from heat. Let cool while beating egg whites.

9. Heat oven to 325 degrees. Mix cream of tartar and sugar together. Beat egg whites and vanilla until frothy. Beat in sugar mixture, 1 tablespoon at a time; until sugar is incorporated and mixture forms soft peaks. Add cornstarch mixture, 1 tablespoon at a time; continue to beat meringue to stiff peaks. Remove plastic from filling and return to very low heat during last minute or so of beating meringue (to ensure filling is hot).

10. Pour filling into pie shell. Using a rubber spatula, immediately distribute meringue evenly around edge then center of pie to keep it from sinking into filling. Make sure meringue attaches to pie crust to prevent shrinking. Use spoon to create peaks all over meringue. Bake pie until meringue is golden brown, about 20 minutes. Transfer to wire rack and cool to room temperature. Serve.

copy-of-dscn3221.jpg

mixing it up (apple pancakes with cinnamon butter)

copy-of-dscn3036.jpg

As much as I love a good, fluffy pancake, sometimes it’s good to mix it up, you know? Especially when there’s somehow all these extra apples laying around. (Who didn’t eat their daily apple this week? I’m blaming Dave.) And I think most of us know where to look when we want to “mix it up” – epicurious.com is a cornucopia of recipes that have been fancied up somehow. So how about apple pancakes with cinnamon butter?

This isn’t the big, puffy German apple pancake that’s basically a Dutch pancake with apple topping. These are more like regular pancakes with apples in them, which is just what I was hoping for. Like any good epicurious reader, I didn’t follow the recipe exactly.

The apples are shredded, and although I’m often too lazy to carry my food processor around my kitchen (I can’t store it on the counter in my tiny kitchen), I hate shredding non-cheese things with my cheese grater because I always ends up with bloody knuckles.

copy-of-dscn3005.jpg

While the batter set for 30 minutes, I put together the cinnamon butter. This sounded innocent enough, until I realized that I was basically making frosting. Gotta love cinnamon frosting on a Saturday morning!

The pancakes were really good, and a nice change from the normal routine. I ended up with quite a bit of extra cinnamon butter, which went wonderfully on the cinnamon muffins I baked the next morning.

copy-of-dscn3067.jpg

Apple Pancakes with Cinnamon Butter (from epicurious.com)

Serves 4

I didn’t have and therefore skipped the orange and lemon peels. I substituted Empire apples for Granny Smith and low-fat milk for whole milk. Just working with what I had.

Cinnamon butter
½ cup (1 stick) unsalted butter, room temperature
½ cup powdered sugar
1 teaspoon ground cinnamon
½ teaspoon grated orange peel

Pancakes
2 teaspoons fresh lemon juice
1 teaspoon grated lemon peel
2 medium Granny Smith apples (scant 1 pound), peeled, halved, cored

1 2/3 cups all purpose flour
2 tablespoons (packed) golden brown sugar
2½ teaspoons baking powder
½ teaspoon salt
¾ cup whole milk
2 large eggs
½ cup (1 stick) unsalted butter, melted, divided

For cinnamon butter:
Using electric mixer, beat all ingredients in small bowl until blended.

For pancakes:
Combine lemon juice and peel in bowl. Coarsely grate apples into bowl, tossing to coat with juice.

Whisk flour, brown sugar, baking powder, and salt in large bowl. Make well in center of dry ingredients. Whisk in milk, eggs, and 1/4 cup melted butter until smooth. Stir in apple mixture. Cover and let batter stand at room temperature at least 30 minutes and up to 1 hour.

Preheat oven to 250°F. Place baking sheet in oven. Heat heavy large nonstick griddle or skillet over medium-high heat 1 minute. Brush griddle with some of remaining 1/4 cup melted butter. For each pancake, drop 1 heaping tablespoon batter onto griddle, spacing pancakes apart. Cook until golden on bottom and bubbles start to form on surface, about 3 minutes. Turn pancakes over. Cook until golden on bottom, about 2 minutes longer. Transfer pancakes to baking sheet in oven to keep warm. Repeat with remaining batter, brushing griddle with butter before each batch of pancakes.

Arrange pancakes on plates. Top each with dollop of cinnamon butter and serve.

copy-of-dscn3032.jpg

can’t deepfry on a wednesday (fish tacos)

copy-of-dscn3262.jpg

For Dave’s birthday, my parents took us out to eat at a brewery. Everyone loved the beer they ordered (except for my 8-month pregnant sister, who had to settle for soda), but I think I was the only one who enjoyed their food. Oh, and I did enjoy my food. Rarely do I finish my entire meal at a restaurant, but my shrimp tacos were too good to waste.

The shrimp was battered and fried, served with the classic shredded cabbage and aioli. I’ve made fish tacos before using a similar method, a beer batter, and they were fantastic. But…today is Wednesday, and deep-frying on a weeknight just seems irresponsible. I don’t generally shy away from fat, and I’d rather eat less of great food, than larger quantities of “reduced-fat” versions, but this time, I was ready to compromise. And after smearing everything with mayonnaise, how low-fat is this anyway?

So, I skipped the batter on the fish, and instead pan-fried it in just a slick of oil. Really, so much of the charm of this meal comes from the cabbage, mayonnaise, lime, and cilantro (not usually one of my favorites, but it has its place) that I didn’t miss the deep-fried goodness at all. In fact, I’ve decided that I’ll never bother deep-frying fish for fish tacos again. This was easier, cleaner, healthier, and just as tasty!

Weeknight Fish Tacos (adapted from my brother’s recipe)
Serves 2

I used large tortillas, because that’s all I had on hand, so this is what the picture shows. However, small tortillas actually work better. Also, I didn’t have red onions, so I used green onions.

Other possible toppings include avocado, green chile, and hot sauce.

I have tried substituting plain yogurt for the sour cream to make this even healthier, and it turned out great.

2 tablespoons lime juice
2 tablespoons extra virgin olive oil, plus 1 tablespoon for oiling pan
¼ cup minced cilantro
¼ teaspoon cumin
2 garlic cloves, minced
½ – 3/4 pound tilapia, or other white fish (halibut, cod, catfish, snapper)
salt
4 ounces (¼ – ½ head) cabbage, finely shredded
½ small red onion, thinly sliced
6-8 small flour tortillas
White sauce (recipe follows)

White sauce:
1½ tablespoon minced cilantro
3 tablespoons mayonnaise
1 tablespoon sour cream
1 tablespoon lime juice

1. Mix lime juice, 2 tablespoons olive oil, cilantro, and cumin in large, flat bowl or pie plate. Add fish and turn to coat. Let marinate 15-30 minutes.

2. Heat remaining 1 tablespoon olive oil in nonstick skillet over medium-high heat until shimmering. Add marinated fish and cook, without moving, for 3 minutes. Using 2 spatulas, flip fish and cook on second side for 2 minutes, or until fish flakes with a fork. Remove fish from pan to plate, season with salt, and let set for 2-3 minutes. Cut into approximately bite-size pieces.

3. To build each taco, spread liberal amount of white sauce on tortilla, then add fish, cabbage, red onion, and whatever garnishes you desire. Serve.

copy-of-dscn3260.jpg