egg sandwiches with goat cheese, scallions, and prosciutto

goat cheese egg sandwiches 3

Egg sandwiches are my favorite breakfast. Yes, I’m making such a bold statement. And it’s generally not something I need much creativity in. A slice of salty ham, some bracingly sharp cheddar, and tender eggs on pretty much any kind of bread is just right for me.

goat cheese egg sandwiches 1

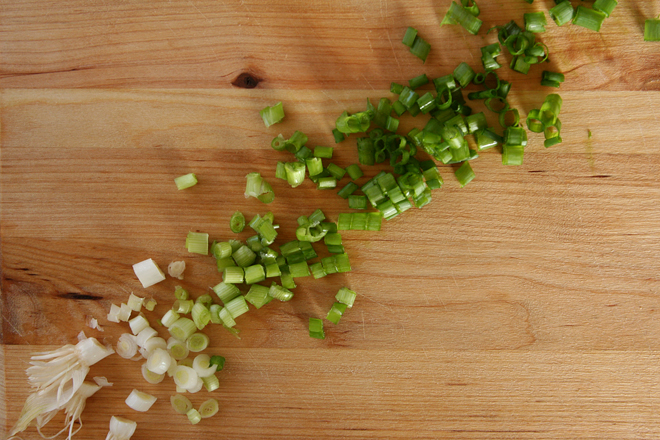
But this weekend I was in the mood for something brighter. Remembering the perfection of the combination of goat cheese, chives, and scrambled eggs in this (handy) scrambled egg tutorial, I mixed up goat cheese with the scallions I had in the fridge. The hint of funk in prosciutto would complement the tangy cheese.

whole wheat flour

And for a sandwich I had such high hopes for, only just the right bread would do; the sweet honey-glazed rolls in the freezer were not the right choice. This meant mixing up two quick pre-doughs the night before I wanted my sandwiches, one whole wheat with salt to soften the whole grains, and the other white bread flour with yeast for complexity of flavor. It meant putting the pre-doughs in the mixer with more salt, yeast, and flour first thing in the morning while I waited for my tea to steep.

goat cheese egg sandwiches 2

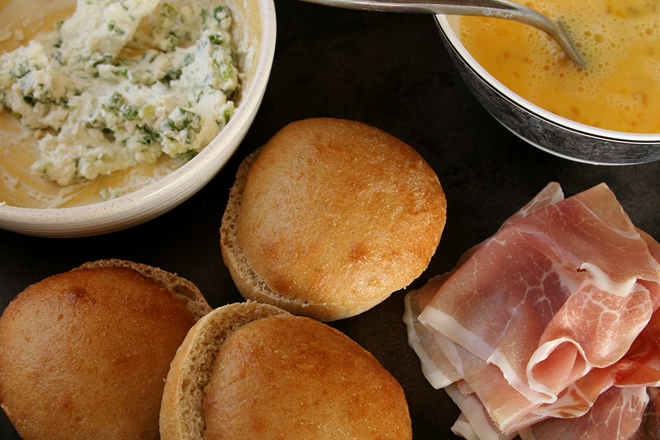
It meant waiting well over two hours for breakfast to be ready while the dough rose (in the turned off oven with the light on and a mug of steaming water) and baked. But it was worth it, oh it was. The rolls were perfect, light and tender but sturdy enough to hold up a thick layer of creamy cheese with slivers of ham and a perfectly cooked layer of egg. The scallions added just the right amount of green flavor to the sandwich. They were even better on the second day in a row that we ate these, when the bread was already made, so breakfast took 15 minutes to make and not two hours.

goat cheese egg sandwiches 4

One year ago: Puffed Poached Pear Tart
Two years ago: Oreo Cheesecake Cookies
Three years ago: Bourbon Pound Cake
Four years ago: Red Velvet Whoopie Pies

Printer Friendly Recipe
Egg Sandwiches with Goat Cheese, Scallions, and Prosciutto

4 medium (about hamburger bun-sized) sandwiches

4 ounces goat cheese, softened
4 scallions, white and green parts, minced
4 eggs
½ teaspoon salt
1 tablespoon milk
2 teaspoons olive oil
4 medium rustic rolls (like ciabatta), halved crosswise
4 ounces sliced prosciutto

1. In a medium bowl, combined the goat cheese and scallions; set aside. In a separate medium bowl, whisk the eggs, salt, and milk until a few large bubbles form.

2. Heat the oil in a 12-inch nonstick skillet over medium heat. Add the egg mixture and lower the heat to medium-low. After about a minute, gently stir the eggs. After about another minute, they should be starting to set; use a large spatula to flip sections of egg so the other side can set as well. Turn off the heat but don’t move the pan. Residual heat from the pan will finish cooking the eggs without drying the out while you build the sandwiches.

3. Spread the cut sides of both halves of each roll with the goat cheese mixture. Top the bottom half with a layer of eggs, then sliced prosciutto. Top with the other half of the roll. Serve immediately.

goat cheese egg sandwiches 5

mussels fra diavolo

mussels fra diavolo 7

Dave took to mussels before I did. They, along with all the other bivalves, weren’t even on my radar when he came home from a dinner with coworkers raving about them. It was one of the first foods he’d tried before I had.

mussels fra diavolo 1

Not long after, we went to a Belgian mussels and beer restaurant, and after that I was hooked. It took me a few bites to get past the slightly boogery texture, but I was sold when I tasted the liquid they were served with. It was buttery and winey and briney, and the housemade ketchup didn’t hold a candle to it as a dip for the crisp French fries served alongside.

mussels fra diavolo 3

We’ve eaten mussels many, many times since then, but this is our favorite way. It’s garlicky and spicy, and the pasta is the perfect vehicle to mix with the sauce the mussels cook in. And the best part? Dave likes it so much, he’s willing to make dinner. This makes me love mussels at least as much as he does.

mussels fra diavolo 5

One year ago: Normandy Apple Tart
Two years ago: Pumpkin Oatmeal Cookies
Three years ago: Herbed Lamb Chops with Pinot Noir Sauce
Four years ago: Truffles (chocolate brand comparison)

Printer Friendly Recipe
Mussels fra Diavolo (adapted from Cook’s Illustrated’s Shrimp fra Diavolo and Gourmet)

Serves 4

4 tablespoons extra-virgin olive oil, divided
12 cloves garlic, minced or pressed through a garlic press (about ¼ cup), divided
1 (28-ounce) can diced tomatoes, drained
1 cup medium-dry white wine, such as Sauvignon Blanc
salt
¾ to 1 teaspoon red pepper flakes
½ teaspoon sugar
1 pound linguine
3 pounds mussels, cleaned and debearded
¼ cup minced fresh parsley

1. Bring a large pot of water to boil.

2. Heat a 5-quart Dutch oven over medium-low heat. Add 3 tablespoons of the oil and 9 cloves of garlic. Cook, stirring frequently, until the garlic is sticky and light golden and begins to foam, about 7-10 minutes. Mix in the tomatoes, wine, 1 teaspoon salt, the red pepper flakes, and sugar. Increase the heat to medium-high and simmer until thickened and fragrant, about 8 minutes.

3. While the sauce is simmering, add 1 tablespoon salt and the linguine to the boiling water and cook according to the package directions until al dente. Drain; return the pasta to the now empty pot and add about ½ cup of the sauce. Toss well to coat.

4. Add the mussels to the remaining sauce and cook, covered, until they just open wide, checking frequently after 3 minutes and transferring to a bowl. Discard any mussels that remain unopened after 6 minutes.

5. Stir the remaining garlic and the parsley into the sauce. Stir in the remaining 1 tablespoon oil. Divide the pasta among warmed serving bowls, topping with the mussels and sauce. Serve immediately.

mussels fra diavolo 6

pizza with ricotta, caramelized onions, and prosciutto

ricotta prosciutto pizza 5

My pizza making goes in phases. I’ll go through long stretches where, every other Friday, I’m arranging turkey pepperoni over green chile-spiked tomato sauce. If I want to get fancy, I’ll add sliced mushrooms.

ricotta prosciutto pizza 2

And then that will turn around, and each pizza for months will be different from last. Rarely do these varied pizzas have tomato sauce and mozzarella; it seems that if I’m choosing anything resembling a traditional pizza, it’s going to be topped with that pepperoni and green chile. In fact, of the last few pizzas I’ve made, this is the only one that even uses predominately Italian ingredients.

ricotta prosciutto pizza 3

But those ingredients make it a safe bet, because you can never go wrong with creamy fresh ricotta, salty prosciutto, and sweet onions. The original recipe made the onions into a marmalade with sugar and balsamic vinegar, but I think caramelized onions are plenty sweet on their own. I chose to add the prosciutto after removing the pizza from the oven, instead of before baking, because I find the baked prosciutto turns into little more than crisp bits of salt. Letting the heat of the pizza soften the bite-sized pieces of ham leaves their meaty flavor. Altogether, it makes for a worthy departure from pepperoni and green chile.

ricotta prosciutto pizza 4

One year ago: Turkey Ricotta Meatloaf
Two years ago: Red Kidney Bean Curry
Three years ago: Brown Rice with Black Beans
Four years ago: Mulled Cider

Printer Friendly Recipe
Pizza with Ricotta, Caramelized Onions, and Prosciutto (adapted from The New York Times via Smitten Kitchen)

1 tablespoon olive oil
1 large onion, halved and sliced
salt
pinch crushed red pepper flakes
2 ounces prosciutto, cut or torn into approximately 1-inch pieces
1 cup ricotta cheese (made from 4 cups milk, if homemade)
1 pound pizza dough, fully risen and at room temperature (⅓ of this recipe)

1. Place a pizza stone on the bottom rack of the oven and heat the oven to 500 degrees.

2. Heat the oil in a medium skillet over medium heat until shimmering; stir in the onions and a pinch of salt, and cook, stirring frequently, until the onions just begin to brown, about 8 minutes. Reduce the heat to medium-low, add the crushed red pepper flakes, and cook, stirring frequently, until the onions have softened and are medium golden brown, about 15 minutes longer.

3. Meanwhile, shape the dough into a ball. Set it aside for 10 to 30 minutes, loosely covered, to allow the gluten to relax.

4. Working on a lightly floured surface or a damp cloth, flatten the dough, then pick it up and gently stretch it out, trying to keep it as circular as possible. Curl your fingers and let the dough hang on your knuckles, moving and rotating the dough so it stretches evenly. If it tears, piece it together. If the dough stretches too much, put it down and gently tug on the thick spots. Transfer the round of dough to a large square of parchment paper; slide the parchment with the dough onto a pizza peel.

5. Spread the ricotta evenly over the dough, then evenly disperse the onions over the ricotta. Slide the pizza with the parchment onto the hot baking stone. Bake for 8-10 minutes, until the crust is browned around the edges. Transfer the pizza to a cooling rack without the parchment. Top with the prosciutto. Let the pizza rest for 5 minutes before serving.

ricotta prosciutto pizza 6

black bean-roasted zucchini-goat cheese enchiladas

zucchini goat cheese enchiladas 7

I had a tough week last week. One day I woke up to little ants crawling all over the kitchen. One afternoon I went to the dentist feeling smug about how often I’ve been flossing and left with an appointment to get three cavities filled. One morning I noticed blisters on my waist that were suspiciously familiar – because they’re exactly like the case of shingles* I had just a few weeks ago. The list goes on from there.

zucchini goat cheese enchiladas 3

I also learned that I definitely do not have time to make enchiladas on a weeknight, even if the sauce is made in advance. Mixing the filling, heating tortillas, rolling and baking is too much to fit in on top of the daily dose of exercise, laundry, and spraying the kitchen with Raid.

zucchini goat cheese enchiladas 5

I guess if all’s well that ends well, you could say I had a great week. After a series of challenging days, nothing could have been more relieving than a night spent sipping wine with friends – even if it’s for a wine appreciation class, we’re all furiously scribbling notes, and technically we’re not supposed to be swallowing the wine. And when I got home from class, a delicious dinner was ready, because I’d skipped a workout the day before to fill and roll and all Dave had to do was transfer the enchiladas to the oven while I was out drinking wine. Maybe last week wasn’t so bad after all.

zucchini goat cheese enchiladas 6

(*Getting shingles isn’t fun, but I’m extremely lucky that I only get mild cases.)

One year ago: Fried Eggs with Garlic Yogurt Sauce
Two years ago: Steak Sandwiches
Three years ago: Pumpkin Cupcakes (comparison of 3 recipes)
Four years ago: Pain Ordinaire

Printer Friendly Recipe
Black Bean-Roasted Zucchini-Goat Cheese Enchiladas (filling adapted from Sprouted Kitchen; sauce from America’s Test Kitchen’s Healthy Family Cookbook via Prevention RD)

I roasted the zucchini on a baking sheet immediately after dicing them, but because zucchini is so wet, I think they would benefit from being sprinkled with about a teaspoon of salt, then allowed to drain for half an hour or so before roasting. If you have one, spinning them dry in a salad spinner would also help them pick up more roasted brown color in the oven. On the other hand, the enchiladas were delicious without this extra step.

Serves 4

Enchiladas:
3 large zucchini, cut into ¼-inch dice
1 small onion, coarsely chopped
1 tablespoon extra virgin olive oil, divided
zest from 1 lemon
1 teaspoon kosher salt
1 (15-ounce) can black beans, rinsed and drained
5 ounces goat cheese, divided
12 corn tortillas

Sauce:
1 teaspoon canola oil
½ small onion, finely chopped
2 cloves garlic, minced
1½ tablespoons chili powder
½ tablespoon ground cumin
1 teaspoon sugar
¼ cup water
1 (8-ounce) can tomato sauce
black pepper, to taste

For serving:
2 avocados, diced
½ cup minced cilantro
lime wedges

1. Heat the oven to 450 degrees. On a large rimmed baking sheet, combine the zucchini, onion, oil, lemon zest, and salt. Roast, stirring occasionally, until the zucchini is softened and maybe slightly browned, about 30 minutes. Transfer to a large bowl; stir in the black beans and 4 ounces of goat cheese. Reduce the oven temperature to 350 degrees.

2. While the zucchini roasts, heat 1 teaspoon of canola oil in a medium saucepan over medium heat. Add the onion and cook until translucent and slightly browned around the edges, stirring occasionally, about 8 minutes. Add the garlic, chili powder, cumin, and sugar; cook, stirring constantly, until fragrant, about 1 minute. Add the water and tomato sauce. Increase the heat to medium-high, bring to a simmer, then reduce the heat to medium-low. Maintain a low simmer until slightly thickened, 5 to 10 minutes, stirring occasionally.

3. To soften the tortillas, brush or spray them with a light layer of oil. Arrange 6 tortillas in a single layer on a baking sheet; transfer to the oven and cook for about 3 minutes; flip the tortillas and continue baking for 2 more minutes, until the tortillas are pliable. Repeat with the remaining tortillas.

4. Spread a thin layer of sauce over the bottom of a 9-by-13-inch baking dish. Divide the filling evenly between the tortillas. Roll the tortillas over the filling, arranging the filled tortillas seam-side down in the baking dish. Cover the rolled tortillas with the remaining enchilada sauce. Sprinkle the remaining 1 ounce of goat cheese over the top of the sauce. Bake uncovered for 25-30 minutes, until the enchiladas are evenly heated. Let set for 5 minutes before serving with chopped avocado, cilantro, and lime.

zucchini goat cheese enchiladas 10

chicken parmesan

chicken parmesan 7

I wasn’t excited about this chicken when I planned it. All I really wanted was the pasta, because I’d just made a big batch of sauce from fresh homegrown (not by me) tomatoes. I only added the chicken for protein.

chicken parmesan 3

Maybe this isn’t saying much, since obviously my expectations were low, but the chicken exceeded my expectations. It exceeded my expectations by being perfect. Seasoned and not a bit dry, with a crisp coating, topped with just enough melty cheese, it almost stole the show from my precious tomato sauce.

chicken parmesan 2

But now that tomato season is over, I can tell you which one I’ll be making again sooner. Chicken this good doesn’t need summer tomatoes to turn it into a great meal.

chicken parmesan 8

One year ago: Flip-Over Cherry Cake (Tuesdays with Dorie)
Two years ago: Whiskey Compound Butter
Three years ago: Goat Cheese, Pesto, and Sun-Dried Tomato Terrine
Four years ago: Lavash Crackers (Daring Bakers)

Printer Friendly Recipe
Chicken Parmesan (rewritten but not changed from Cook’s Illustrated’s The New Best Recipe)

Serves 4

I didn’t use this sauce, although I’m sure it’s good.

I hate pounding meat. My chicken breasts were already pretty thin, so I didn’t bother, but I’m more likely to cut breasts in half to form two flatter cutlets than I am to pound them thinner.

Breaded chicken cutlets:
4 boneless, skinless chicken breasts (5 to 6 ounces each)
¼ cup table salt
Ground black pepper
1½ cup fresh bread crumbs
¾ cup all-purpose flour
2 large eggs
1 tablespoon olive oil, plus more for frying

Tomato sauce:
2 cloves garlic, minced
¼ cup extra virgin olive oil
1 (28-ounce) can crushed tomatoes
½ teaspoon dried basil
½ teaspoon dried oregano
¼ teaspoon sugar
Salt and ground black pepper

To finish:
8 ounces spaghetti or linguine
3 ounces (¾ cup) shredded mozzarella cheese
¼ cup (0.5 ounces) grated Parmesan cheese

1. Pound the chicken breasts to an even ½-inch thickness. In a medium mixing bowl, dissolve the salt in 4 cups of cold water; immerse the chicken in the water and refrigerate for 30 minutes. Drain and pat dry. Set the chicken aside for 10 minutes to allow it to continue drying; season with pepper.

2. For the sauce: Heat the garlic and oil together in a large saucepan over medium-high heat until the garlic starts to sizzle. Stir in the tomatoes, basil, oregano, sugar, a pinch of salt, and 2 grinds of pepper and bring to a simmer. Continue to simmer until the sauce thickens a bit and the flavors meld, 10-12 minutes. Taste the sauce, adjusting the salt if necessary. Cover and keep warm.

3. Bring 3 quarts of water to a boil in a large pot. Adjust an oven rack to the top position and heat the broiler.

4. Meanwhile, transfer the bread crumbs to a shallow bowl. Place the flour in a separate shallow bowl. In a third bowl, beat the eggs with 1 tablespoon of oil. Coat the chicken thoroughly in the flour, shaking off the excess, then dip in the egg mixture. Dip both sides of each chicken cutlets in the bread crumbs, pressing to form an even coating. Transfer the breaded chicken cutlets to a wire rack set over a rimmed baking sheet. Allow the coating to dry for 5 minutes.

5. Add 1 tablespoon of salt and the pasta to the boiling water. Cook according to the package instructions; drain and return to the pot.

6. Meanwhile, heat ¼-inch of olive oil in a 10-inch nonstick skillet over medium-high heat. Transfer two cutlets to the pan and cook, without moving, until golden brown and crisp, about 2½ minutes. Flip the cutlets, reduce the heat to medium, and continue cooking until the second side is thoroughly browned, 2½ to 3 minutes. Transfer the cooked cutlets to a (clean) wire rack. Repeat with the remaining cutlets, using new oil. (Otherwise the breading bits from the first batch of oil will burn.)

7. Top each cutlet with 3 tablespoons of mozzarella and 1 tablespoon of parmesan. Place the baking sheet with the chicken under the broil; cook until the cheeses melt and are spotty brown, about 3 minutes.

8. Spoon 1 tablespoon of sauce over each cutlet. Toss the remaining sauce with the pasta. Serve immediately.

chicken parmesan 6

mediterranean chopped salad

mediterranean chopped salad 4

I made this salad for the first time the very day that I posted about how I hate making salads because it always takes so dang long. (And indeed, tonight I made a salad for dinner that included no less than 16 ingredients.) This salad, however, breaks the pattern.

mediterranean chopped salad 1

It helps that the chickpeas can be dumped out of a can. Sometimes I buy pre-crumbled feta, and that’s one less ingredient that needs chopped. While I don’t love seeding and chopping olives, my handy dandy cherry pitter (that has never been used on cherries) speeds up that process.

mediterranean chopped salad 3

There are still a good handful of ingredients that must be prepped, to be sure, but it is among the quicker dinner salad recipes I make. And it’s such a great combination; chickpeas, olives, feta, and cucumbers are a classic, to be sure, but for good reason. For as good as this tastes and as quick as is to make, it’s one of the best salad values for your time. And that makes it my new favorite.

mediterranean chopped salad 5

One year ago: Cook’s Illustrated’s Ultimate Banana Bread
Two years ago: Cheesecake (comparison of 3 recipes)
Three years ago: Risotto with Swiss Chard
Four years ago: Gazpacho

Printer Friendly Recipe
Mediterranean Chopped Salad (from Cook’s Illustrated)

Serves 4 as a main dish

I have never added the parsley; nothing against it, I just didn’t notice it in the ingredient list. Also, I like my salads on the vinegary side, so I usually cut the olive oil short.

1 medium cucumber, peeled, halved lengthwise, seeded, and cut into ½-inch dice (about 1¼ cups)
1 pint grape tomatoes, quartered (about 1½ cups)
Table salt
3 tablespoons extra virgin olive oil
3 tablespoons red wine vinegar
1 medium garlic clove, minced or pressed through garlic press (about 1 teaspoon)
1 (14-ounce) can chickpeas, drained and rinsed
½ cup chopped pitted kalamata olives
½ small minced red onion (about ¼ cup)
½ cup roughly chopped fresh parsley
1 romaine heart, cut into ½ inch pieces (about 3 cups)
4 ounces feta cheese, crumbled (about 1 cup)
Ground black pepper

1. Combine cucumber, tomatoes, and 1 teaspoon salt in colander set over bowl and let stand 15 minutes.

2. Whisk oil, vinegar, and garlic together in large bowl. Add drained cucumber and tomatoes, chickpeas, olives, onion, and parsley; toss and let stand at room temperature to blend flavors, 5 minutes.

3. Add romaine and feta; toss to combine. Season with salt and pepper and serve.

mediterranean chopped salad 6

tomato mozzarella tart with basil crust

tomato basil tart 5

I planted tomatoes in my garden this year with high hopes and low expectations. Last year I lost all of my precious tomato plants to fusarium wilt, and even though I didn’t do anything to rid the soil of the fungus, I couldn’t resist planting a few tomato plants this year too. They started strong but succumbed to the disease before setting fruit. At that point, I settled in for a tomato-less summer.

tomato basil tart 1

Instead, I’ve had what’s nearly been a landmark year! After describing my tomato woes to a coworker, she started bringing me some tomatoes from her garden. At first it was a trickle, just enough so I could make each of my favorite tomato dishes once. She also bought me a handful of zebra tomatoes while traveling. And then I bought myself a pound or so of tomatoes from our town’s little farmer’s market. And then the bonanza from my coworker – nearly ten pounds of beefsteak, romas, and cherries. This was enough to make all of my favorites again, plus try some new recipes.

tomato basil tart 2

This was first on my list. It has all the ingredients of pizza, but rearranged and with a whole lot of butter added. How can that be bad?

tomato basil tart 3

The basil crust is fragrant, tender but sturdy enough to hold up the toppings. The mozzarella holds the toppings on. And the real star is those thin but deeply flavorful slices of tomatoes. There is nothing I like more than a landmark year for tomatoes. But next year, I’m determined to successfully plant my own – but maybe I’ll still take some off my coworker’s hands.

tomato basil tart 4

One year ago: Fresh Pasta
Two years ago: Pappa al Pomodoro
Three years ago: 100% Whole Wheat Sandwich Bread
Four years ago: Lemon Pancakes with Blueberry Syrup

Printer Friendly Recipe
Tomato Mozzarella Tart with Basil Crust (adapted from Jack Bishop’s The Complete Italian Vegetarian Cookbook via Ezra Pound Cake; crust adapted from Dorie Greenspan’s Sweet Tart Dough)

I used fresh mozzarella (as seen on Annie’s Eats) both times I made this, but when I removed the tart from the oven, I noticed a puddle of liquid skimming across the baked cheese. Once cooked, I don’t think fresh mozzarella seems so different from the firmer type, which isn’t as moist and won’t release liquid onto the surface of the tart, so in the future, I’ll use regular mozzarella instead of fresh. (Fortunately, the crust didn’t seem to get soggy from the extra liquid.)

The original crust recipe was for a flaky pie type of crust, which used ice water. It shrunk when I baked it, plus I wanted something sturdier, so I adapted a traditional tart crust to include basil. This is a tart after all!

Crust:
½ cup loosely packed basil leaves
1 clove garlic, peeled
1¾ cups (8.4 ounces) all-purpose flour
1 tablespoon cornstarch
½ teaspoon salt
8 tablespoons unsalted butter, cold, cut into ½-inch cubes
1 egg, lightly beaten

Tart:
8 ounces mozzarella, sliced
2 medium tomatoes, thinly sliced
salt
black pepper
parmesan
3-4 basil leaves, slivered

1. In a food processor fitted with the metal blade, process the basil and garlic until finely chopped. Add the flour, cornstarch, and salt; pulse to combine. Add the butter; process in 1-second pulses until the largest pieces of butter are the size of peas. Add about half the egg, pulse, then add the remaining egg. Process continuously until the dough forms clumps and curds. The sound of the food processor will change when it gets to this point.

2. Evenly press the dough onto the sides and bottom of a 9-inch tart pan with a removable bottom. Spray a 12-inch square of aluminum foil with cooking spray and press it, sprayed-side down, onto the tart crust. Freeze for at least 30 minutes.

3. Adjust a rack to the middle position and heat the oven to 375 degrees. Remove the tart crust from the freezer and spread pie weights over the bottom. Transfer the tart pan to a baking sheet and bake for 20 minutes. Remove the foil and bake another 5 minutes, until the crust is just starting to brown. Remove from the oven, maintaining the oven temperature.

4. Line the crust evenly with slices of mozzarella, overlapping if necesary. Top the mozzarella with slices of tomatoes (do not overlap the tomatoes). Season with salt and pepper. Grate a generous layer of parmesan cheese over the tomatoes.

5. Bake the tart for 25-30 minutes, until the crust is brown and the cheese is melted and just starting to brown. Transfer to a cooling rack. Evenly distribute the slivered basil over the top of the tart. Let cool 5 minutes before serving.

tomato basil tart 6

grilled shrimp and tomatillo enchilada casserole

shrimp enchiladas 7

I made this at the end of one of those days that felt like I’d spent entirely too much time in the kitchen creating messes and then cleaning them up. The last thing I wanted was yet another project that would lead to yet another load of dishes. I needed to simplify.

shrimp enchiladas 1

And so I did. As long as I was already grilling the tomatillos for the sauce, I went ahead and grilled…everything. The shrimp and onions that were intended to be sautéed on the stove, the tortillas that would have needed steaming (or frying) to roll. And forget rolling – I gave up on rolling tortillas for enchiladas years ago when I got lazy. Now I just create layers of filling and tortillas, like a chile-filled corny lasagna.

shrimp enchiladas 4

I don’t know if it was despite the shortcuts or because of them, but this is one of the favorite meals I’ve made lately. I was surprised that no single ingredient stood out – the dish didn’t taste particularly shrimpy or oniony or cheesy. I thought for a second that this meant I should have added more shrimp (or onions or cheese), but then I realized that it would be hard to improve on what I had. Especially considering that it hardly dirtied more dishes than the baking pan.

shrimp enchiladas 10

One year ago: Sweet Corn Hash
Two years ago: Penne alla Vodka
Three years ago: Pasta with No-Cook Tomato Sauce and Fresh Mozzarella
Four years ago: Country Egg Scramble

Printer Friendly Recipe
Grilled Shrimp and Tomatillo Enchilada Casserole (adapted from Bon Appétit via Confections of a Foodie Bride)

Serves 6

I used 2 ounces of roasted, peeled, and seeded Hatch green chiles in place of the jalapeno.

You could probably skip the scallions if you didn’t want to buy them.

½ teaspoon cumin
½ teaspoon chile powder
1 tablespoon olive oil
20 ounces shrimp, peeled and deveined
1 onion, cut into 1-inch cubes
18 corn tortillas
12 ounces (about 8) tomatillos, husks removed
1 jalapeno
2 cloves garlic, unpeeled
2 scallions
½ lime
¼ cup cilantro leaves
salt
12 ounces queso fresco, crumbled

1. Heat the oven to 350 degrees. Spray a 9-by-13-inch pan with nonstick spray. Prepare a grill with a medium-hot side and a cooler side.

2. In a large bowl, combine the cumin, chile powder, and olive oil. Add the shrimp; toss to coat. Thread the shrimp onto skewers. Thread the cubed onions onto skewers. Spray or lightly brush the onions and the tortillas with oil.

3. Grill the skewered onions over the cooler side of the grill until slightly softened and browned on the edges, about 10 minutes. Carefully place the garlic over the cooler side of the grill; heat until softened, about 4 minutes. (If the grill grates are too wide to hold the garlic cloves, skewer them with the onions.) Grill the tortillas over the hotter side of the grill until they begin to brown, about 30 seconds per side. Grill the shrimp on the hotter side until they begin to brown, 1-2 minutes per side. Grill the jalapeno over the hotter side of the grill until it’s blistered and mostly blackened, about 5 minutes, rotating occasionally; when cool enough to handle, remove the stem and seeds. Grill the lime, cut-side down, over the hotter side of the grill until it begins to brown, 2-3 minutes. Grill the scallions, with the white sides over the hotter side of the grill and the green sides over the cool side, until lightly browned, about 1 minute.

4. Remove the shrimp and onions from the skewers and transfer to the bowl of a food processor; process until coarsely chopped; transfer to a bowl. Add the tomatillos, jalapeno, garlic, scallions, juice from the lime, cilantro, and ½ teaspoon salt to the food processor; process until smooth.

5. Spread a thin layer of the tomatillo sauce over the bottom of the prepared pan. Distribute 6 tortillas evenly over the sauce. Top with one-third of the remaining sauce, then half of the shrimp mixture and one-third of the cheese. Repeat the layering of tortillas, sauce, shrimp, and cheese. Distribute the remaining tortillas over the cheese, then the remaining sauce and remaining cheese.

6. Bake, uncovered, until the cheese is browned and the casserole is bubbling around the edges, 30-40 minutes. Let rest 10 minutes before serving.

shrimp enchiladas 9

quinoa black bean burrito bowls

quinoa burrito bowls 5

I know there’s nothing groundbreaking about this combination. Topping black beans and starch with lettuce, tomatoes, and cheese is always going to be good. Still, it’s worth talking about, just because it’s such a tasty meal, not to mention it has all of my other favorite dinner characteristics – it’s healthy, easy, and flexible.

quinoa burrito bowls 1

When I made this, I prepared the quinoa and black bean mixture over the weekend. The next night, when I knew I’d be getting home late, all I had to do was heat up the base and chop the toppings. Not that the first step takes long on its own, as it’s just sauteing onions with garlic and spices, adding liquid and quinoa to simmer, and stirring in black beans. But it’s nice to have meals that aren’t any worse for being made ahead and reheated.

quinoa burrito bowls 2

I’ve put these same toppings in tortillas with meat and beans, as well as over rice instead of quinoa, and it never fails to turn into a meal I love. Adding the fresh vegetables provides a bright, fresh contrast to the warm spicy beans and carbs. Classic flavors, combined in a slightly new way – it isn’t groundbreaking, but it’s one of my favorite new weeknight meals anyway.

quinoa burrito bowls 3

One year ago: Chocolate Friands
Two years ago: Baked French Toast
Three years ago: Potato Tomato Tart
Four years ago: Banana Nutella Crepes

Printer Friendly Recipe
Quinoa Black Bean Burrito Bowls (adapted from Shiksa in the Kitchen via Prevention RD)

Serves 4

I also added about 4 ounces of Hatch green chiles, roasted, peeled, seeded, and diced, when I stirred in the lime juice.

1 tablespoon olive oil
1 onion, diced
¼ teaspoon salt
2 garlic cloves, minced
2 teaspoons chili powder
1 cup water
1 cup quinoa, rinsed and drained
2 (15-ounce) cans black beans, rinsed and drained
juice of ½ lime
toppings – shredded lettuce, diced tomatoes, cilantro, cheddar cheese or queso fresco, diced avocado, salsa, sour cream or Greek yogurt, black olives

In a medium saucepan over medium heat, heat the oil until it flows like water when the pan is tilted. Add the onion and salt; cook, stirring occasionally, until the onion is just browned at the edges, 6-8 minutes. Add the garlic and chili powder and cook, stirring constantly, until fragrant, about 1 minute. Add the water, quinoa, and black beans; bring to a simmer, then cover the pot and reduce the heat to low. Simmer 15 minutes; without removing the lid, let the quinoa sit off the heat for an additional 10 minutes, until tender. Remove the lid, add the lime juice, and fluff the quinoa with a fork. Serve with your desired toppings.

quinoa burrito bowls 4

paella

paella 8

I will always associate paella with the group of friends I hung out with in graduate school. We all enjoyed good food and good drinks, so whenever we got together, everyone would bring food and wine to share. One of my friends was from Spain, and he made paella at several of these get-togethers. Of course, it was fully authentic, cooked in a paella pan set on a tripod over an open flame. The smoked paprika, saffron, roasted red peppers, and rice came directly from Spain, picked up on his latest trip home to visit his parents. Sitting around the fire in my friends’ backyard, drinking good wine and eating paella is one of my most vivid food memories.

paella 1

I knew that cooking paella in a Dutch oven on the grill wouldn’t be the same, but I was hoping for just a twinge of that taste, that memory. That’s why I insisted on cooking it outside on the grill instead of using the much easier option of the stove and oven. Maybe it would pick up a hint of smokiness from the coals, but it was more than just the flavor I was after, it was that feeling.

paella 2

I got some of each. With the cast iron Dutch oven, the one Dave and I have taken camping for the last ten years, heated over coals on the grill, I got some of the fun of cooking outdoors. Dave sat outside with me with a glass of wine and let me babble on about different rice dishes in cultures around the world.

paella 3

The food was good, but I need some paella practice before it’ll be up to the standards of what I remember. The biggest mistake I made was preventing the formation of a soccarat, a layer of crusty bits on the bottom of the pan, which is one of the best parts of paella. Letting rice stick to the bottom of the pan goes against years of rice-cooking training, and I ended up adding too much liquid, making a wetter, saucier paella. I also think I’ll leave out the tomatoes next time. They were included in a number of the paella recipes I looked at, but it’s not a flavor I associate with paella.

paella 6

Overall, it was a successful meal, in that I had fun making it and it tasted good. But next time, I’ll use the lessons I learned, like not stirring the rice and leaving out the tomato, and my paella will be that much better. However, I doubt it’ll ever taste as good as one cooked over a fire in a paella pan while enjoying the company of good friends.

paella 10

One year ago: Bruschetta with Chickpea Puree
Two years ago: Grilled Potato and Vegetable Salad
Three years ago: Casatiello
Four years ago: Soba Salad with Feta and Peas

Printer Friendly Recipe
Paella (adapted from Cooks Illustrated, Alton Brown, the New York Times, Leite’s Culinaria, and About.com)

Most of my problems came from not following this method, adding more liquid and stirring more often because I was worried about the rice cooking unevenly. However, it should be noted that the recipe given here has not been perfected.

The recipe specifically refers to charcoal grilling methods, but I think it could be easily adapted to a gas grill.

4 cups water
8 ounces shrimp, peeled, shells reserved
1 onion, half sliced, half diced
2 garlic cloves, 1 sliced, 2 minced
1 small bay leaf
1 large thyme sprig
salt and pepper
1 pounds chicken legs and/or thighs, bone-in, skin-on
2 tablespoons olive oil
1 red pepper, diced
½ teaspoon smoked paprika
¼ teaspoon crumbled saffron
1 cup short-grain rice, preferably Bomba
7 ounces canned diced tomatoes with juice
2 tablespoons white wine
½ cup peas

1. In a medium-size pot over medium-high heat, bring the water, shrimp shells, sliced onion, sliced garlic, bay leaf, thyme sprig and 1 teaspoon salt to a boil. Reduce the heat to medium and simmer for about 30 minutes. Strain, discarding the solids. Return the broth to the saucepan, cover, and keep warm over low heat.

2. Combine the shrimp with 2 teaspoons olive oil, the minced garlic, ¼ teaspoon paprika, and a pinch of teaspoon salt. Mix well to coat with seasonings and let marinate at least 15 minutes or up to 1 hour.

3. Light about 2 quarts of charcoal briquettes; once the briquettes are lightly covered with gray ash, spread them over the bottom grate of the grill, then top with another 2 quarts of unlit coals.

4. Heat a 10-inch cast-iron skillet or Dutch oven directly over the coals. Add the shrimp and cook, without moving, until browned and pink on one side, 30 seconds to a minute. Flip the shrimp to brown the second side. Transfer to a plate.

5. Season the chicken generously with salt and ground black pepper. Add 1 tablespoon of olive oil to the hot skillet (or Dutch oven). Add the chicken, skin-side down, and cook with moving until the bottom is deeply browned, 3-4 minutes. Turn each piece of chicken to brown the other side. Transfer the browned chicken to a plate. (Because the chicken is mostly raw and the shrimp is cooked and will only be briefly reheated, don’t put them on the same plate.)

6. Add the diced onion, red pepper, and a pinch of salt to the skillet; sauté, stirring frequently, until softened and lightly browned, 8-10 minutes. Add the saffron and remaining ¼ teaspoon paprika and cook, stirring constantly, until fragrant, about a minute.

7. Add the rice, stirring well to coat with the onion mixture. Add the tomatoes, wine, half of the hot shrimp broth, ½ teaspoon salt, and the browned chicken. Bring to a brisk simmer, stirring once. Simmer, uncovered, until most of the broth has been absorbed, about 10 minutes.

8. Add the remaining broth and cook for an additional 10 minutes. Turn off the heat and arrange the peas and shrimp over the surface of the rice in one layer. Cover the pan with a clean dish cloth. Let the rice rest for 10 minutes before serving.

paella 9