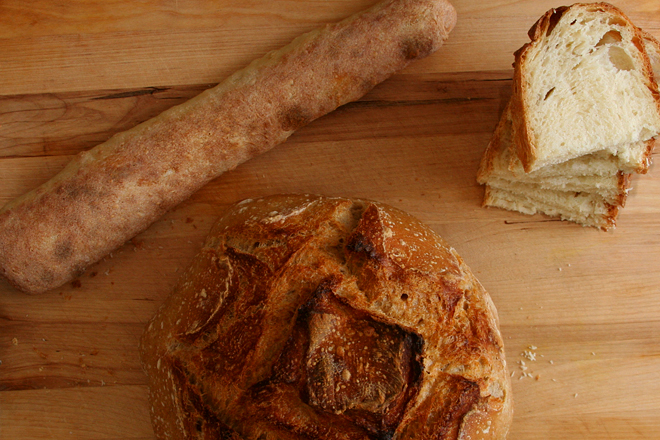
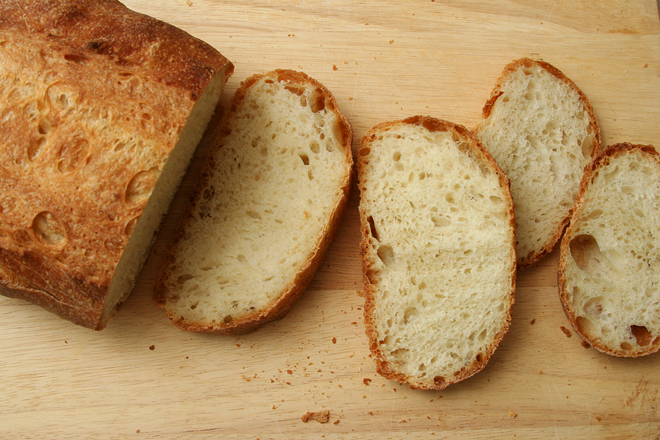
baguette: PR; slices: CI; round loaf: T
I love bread so much. I always have – who doesn’t? – but I’ve been having even more fun with it lately. Besides hot dog and burger buns, my focus has almost exclusively been on rustic breads for the last couple years. If we spend Saturday night at home, I’ll often make a really nice meal, and wine seems like a natural accompaniment (to be honest, often the meal is planned around the wine), and bread and wine are so good together.
CI biga
With all these opportunities to experiment, I started working on this comparison years ago. I slowly narrowed down recipes until I had three that were so good that the comparison would undoubtedly be a reflection of personal taste and not quality of the recipe, thus defeating the purpose of doing a tasting at all. But at least I (and my friends) got to eat a lot of good bread along the way.

CI dough
The recipes that made the cut were Cook’s Illustrated’s Italian Bread recipe (CI), Peter Reinhart’s Pain a l’Ancienne (PR), and Tartine’s Country Bread (T). I’d previously made all three of these recipes many times and loved them all. I’d need to taste them side-by-side to choose a favorite.
CI dough mid-turn
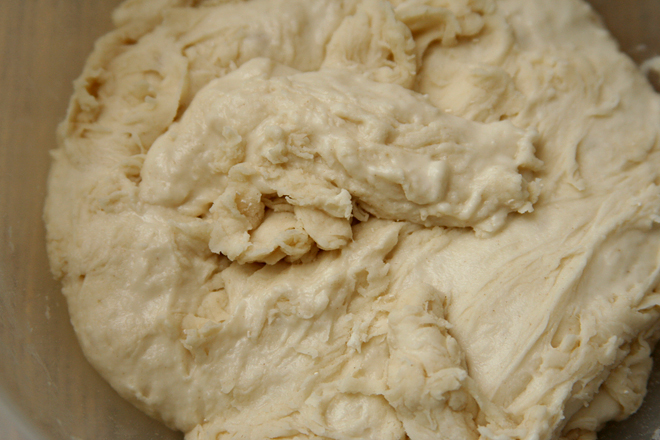
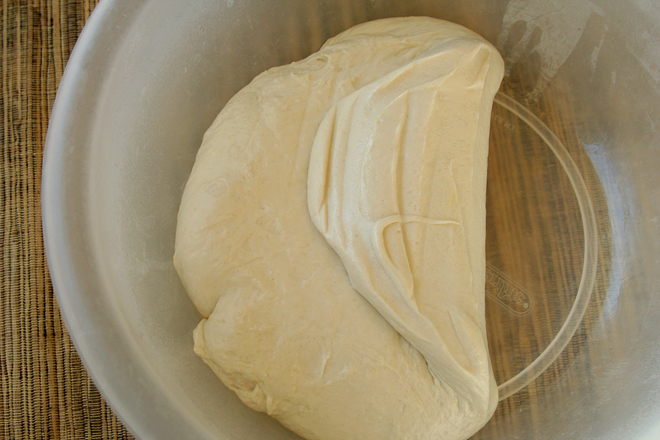
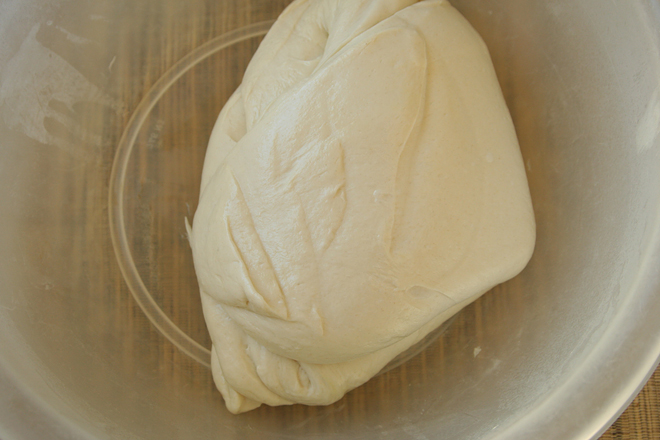
CI – This bread starts with a biga, a mixture of flour, water, and yeast that’s stirred together, left at room temperature for a few hours to ferment, then transferred to the refrigerator overnight. A second mixture of flour, water, and yeast is later mixed and allowed to set for just 20 minutes before the biga and salt is added and the dough is kneaded.
CI dough completed turn
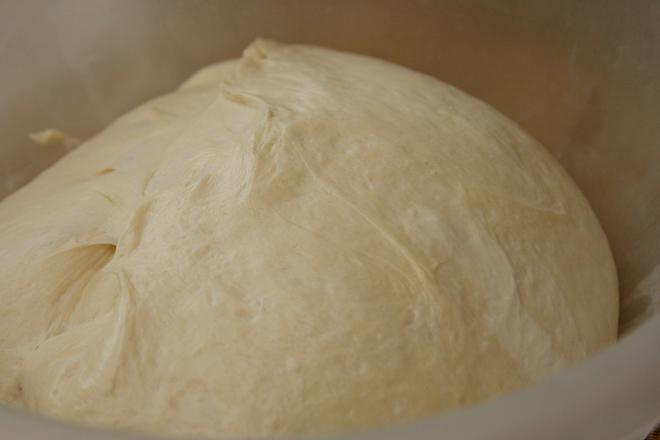
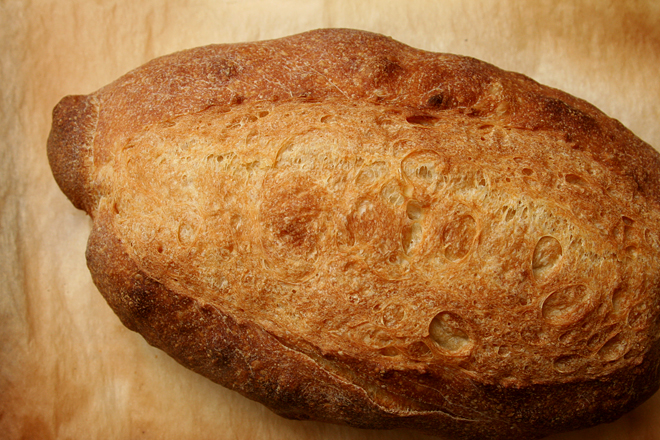
The dough goes through a long rise at room temperature with several “turns” in the middle – basically folding the dough over itself a couple times. It’s supposed to lead to the final loaf rising up and not out, and it’s a trick I like enough that I incorporate it in other bread recipes. After shaping, the dough goes through a second rise and is baked on a stone at 500 degrees for 10 minutes and then 400 degrees. The dough is sprayed with water before baking, but no other steam is added.
CI risen dough
PR – This is the easiest bread in this lineup. Flour, yeast, salt, and ice water are mixed and kneaded, then chilled overnight. The next day, after it warms up and rises a bit, the very sticky dough is cut into smaller portions, which are pulled and pushed into something vaguely baguette-like. These are baked soon after shaping. Reinhart calls for a few shots of water to be sprayed on the sides of the oven, plus a pan of hot water in the oven with the bread to create steam during baking.
CI ready to bake
T – This dough requires a lot of babysitting and a lot of patience, although not necessarily a lot of work. The flour and water are mixed with sourdough starter and allowed to rest for a bit, then salt is mixed in. The dough isn’t kneaded, it’s just turned, as described above, every half an hour or so for about four hours. After being shaped into rounds, it’s chilled overnight in the refrigerator. It’s kept covered in a heavy Dutch oven for the first part of baking to trap steam, then the lid is removed so the crust can brown.
CI
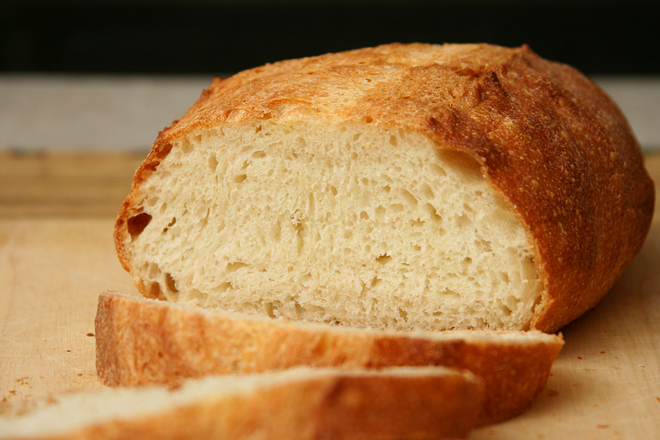
In retrospect, the breads are pretty different. The Italian bread (CI) has an even, relatively tight structure, while the pain a l’ancienne (PR) is open and airy. Tartine’s country bread (T) has a slight but unignorable sourdough flavor.
CI
CI – Described as denser and drier. The chewy crust got compliments. While one friend thought it was sweeter than the other breads, to me, it didn’t have as much flavor. This might be because I eat so many whole grains lately that a bread made with all white flour seems plain.
PR – Tasters thought the bread might be buttery or eggy, despite a lack of both of those ingredients in the recipe. They also thought it was chewy and moist and liked the crust.
T – The sourdough flavor was picked out immediately. It was also described as yeastier and more floury.
CI
With five people comparing the breads, no clear winner emerged. A friend who grew up eating sourdough pancakes preferred Tartine’s country bread. An Italian friend loved CI’s Italian bread, as did a friend who liked the sweeter flavor. PR’s pain a l’ancienne was Dave’s favorite and no one’s least favorite. Those who favored Tartine country bread said CI’s Italian bread was their least favorite and vice versa, although everyone liked all of the breads. I was just happy because I got to eat — and bake — so much bread.
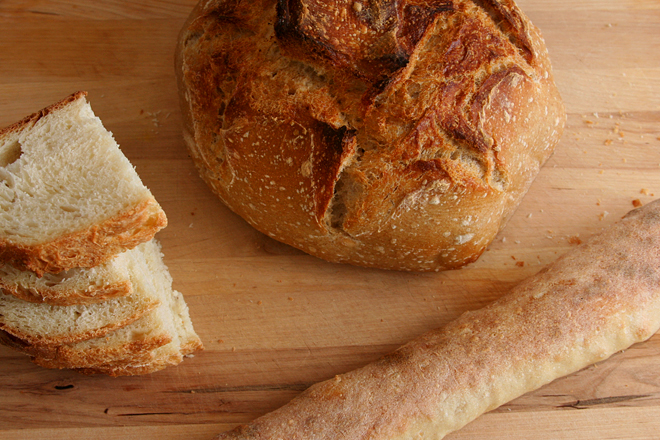
clockwise from top: PR, T, CI
Printer Friendly Recipe
Italian Bread (from Cook’s Illustrated’s The New Best Recipe)
This recipe requires a standing mixer to make the dough, a spray-bottle filled with water for spritzing, a rectangular baking stone, and an instant-read thermometer for gauging doneness. It also requires a bit of patience — the biga, which gives the bread flavor, must be made 11 to 27 hours before the dough is made.
This recipe makes a gigantic loaf of bread. I always divide the dough into two portions and make smaller loaves.
I really didn’t intend for all of the pictures in this post to be of this recipe. Fortunately, there are separate entries dedicated to the other two recipes.
Biga:
11 ounces bread flour (2 cups)
¼ teaspoon instant yeast
8 ounces water (1 cup), room temperature
Dough:
16½ ounces bread flour (3 cups), plus extra for dusting hands and work surface
1 teaspoon instant yeast
10.7 ounces water (1⅓ cups), room temperature
2 teaspoons table salt
1. For the biga: Combine flour, yeast, and water in bowl of standing mixer fitted with dough hook. Knead on lowest speed (stir on KitchenAid) until it forms a shaggy dough, 2 to 3 minutes. Transfer biga to medium bowl, cover tightly with plastic wrap, and let stand at room temperature until beginning to bubble and rise, about 3 hours. Refrigerate biga at least 8 hours or up to 24 hours.
2. For the dough: Remove biga from refrigerator and let stand at room temperature while making dough. Combine flour, yeast, and water in bowl of standing mixer fitted with dough hook; knead on lowest speed until rough dough is formed, about 3 minutes. Turn mixer off and, without removing dough hook or bowl from mixer, cover bowl loosely with plastic wrap; let dough rest 20 minutes.
3. Remove plastic wrap, add biga and salt to bowl, and continue to knead on lowest speed until ingredients are incorporated and dough is formed (dough should clear sides of bowl but stick to very bottom), about 4 minutes. Increase mixer speed to low (speed 2 on KitchenAid) and continue to knead until dough forms a more cohesive ball, about 1 minute. Transfer dough to large bowl (at least 3 times dough’s size) and cover tightly with plastic wrap. Let dough rise in cool, draft-free spot away from direct sunlight, until slightly risen and puffy, about 1 hour.
4. Remove plastic wrap and turn the dough by sliding a plastic bench scraper under one side of the dough; gently lift and fold one third of the dough toward the center. Fold the opposite side of the dough toward the center. Finally, fold the dough in half, perpendicular to first folds. Dough shape should be a rough square. Replace plastic wrap; let dough rise 1 hour. Turn dough again, replace plastic wrap, and let dough rise 1 hour longer.
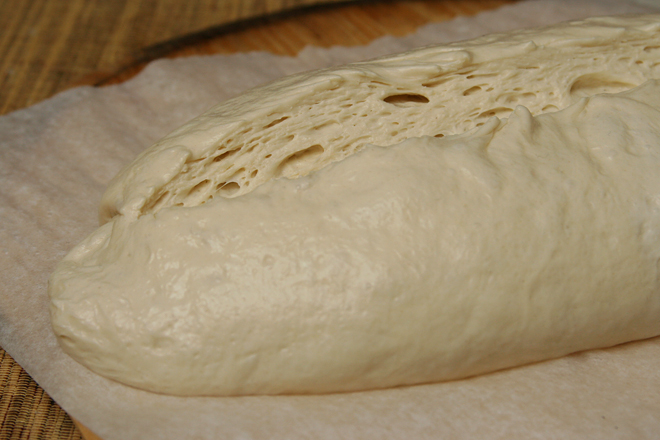
5. To shape the dough: Dust work surface liberally with flour. Gently scrape and invert dough out of bowl onto work surface (side of dough that was against bowl should now be facing up). Dust dough and hands liberally with flour and, using minimal pressure, push dough into rough 8- to 10-inch square. Fold the top left corner diagonally to the middle; repeat step 2 with top right corner. Gently roll dough from top to bottom until it forms a rough log. Roll the dough into its seam, and, sliding hands underneath each end, transfer the dough to parchment paper. Gently shape dough into 16-inch football shape by tucking bottom edges underneath. Dust loaf liberally with flour and cover loosely with plastic wrap; let loaf rise until doubled in size, about 1 hour. Meanwhile, adjust oven rack to lower-middle position, place baking stone on rack, and heat oven to 500 degrees.
6. To bake: Using a lame, single-edged razor blade, or sharp chef’s knife, cut slit ½ inch deep lengthwise along top of loaf, starting and stopping about 1½ inches from ends; spray loaf lightly with water. Slide parchment sheet with loaf onto baker’s peel or upside-down baking sheet, then slide parchment with loaf onto hot baking stone in oven. Bake 10 minutes, then reduce oven temperature to 400 degrees and quickly spin loaf around using edges of parchment; continue to bake until deep golden brown and instant-read thermometer inserted into center of loaf registers 210 degrees, about 35 minutes longer. Transfer to wire rack, discard parchment, and cool loaf to room temperature, about 2 hours.


Wow, excellent review! I always love your comparison posts, but this one really gives us the opportunity to choose which bread would be best for which circumstance. I absolutely love it and thank you so much!
What an informative post especially since you love to bake bread and do a lot of it. I make bread once in a while. I am the lone ranger at my house, so a loaf is waaaaaaaaaay too much. But anyway a tried and true tested recipe is worth its weight in gold for those of us who fall into my category.
Thanks for this post – I’m excited about trying out the PR recipe.
I would love to make the cooks illustrated recipe. Any chance you can explain how to turn the dough? Your directions omit that part. Thanks!
Can’t wait to try! Just as a heads up, your links to pain a l’ancienne and the Tartine recipe are switched (pain a l’ancienne takes you to the Tartine recipe and vice versa).
Janet – Thank you! Someone else told me that earlier, and I forgot to fix it. Got it this time!
Sharon – Sorry about that. I added detail to the directions about turning the dough, and I linked to some pictures in the headnote. I hope that helps.