croissants 2 (martha stewart)

Copy of IMG_5667

Hey, remember, uh, a long time ago? When I said I was going to do a series on croissants? Whatever happened to that anyway? I certainly didn’t stop making croissants. I just stopped talking about it. I suck!

Copy of IMG_5609

Part of the problem was that these, the second batch of croissants I made, were just so bad. And it was all my fault. Well, mostly my fault; really I blame the yeast.

Copy of IMG_5618

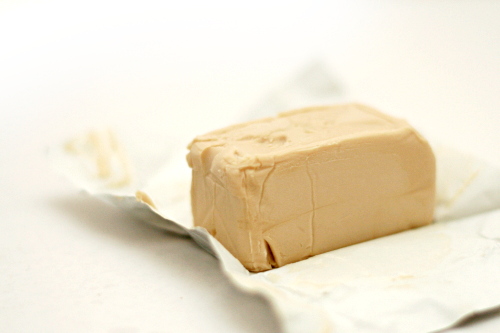
This is one of the only recipes I’ve made that calls for fresh yeast. I know you can substitute instant yeast, but my grocery store sells the fresh stuff, and I was curious to try it.

Copy of IMG_5648

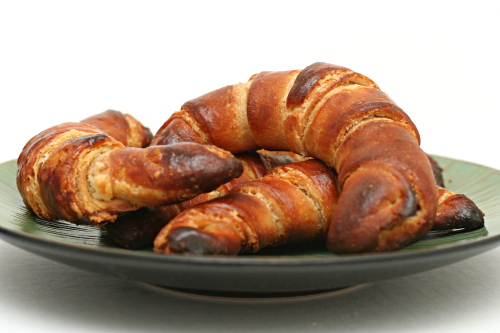
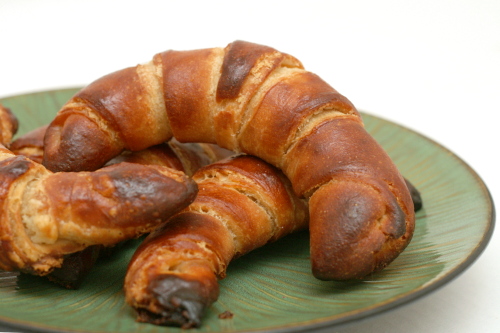
It ended up being probably the worst bread I’ve ever made. Maybe my fresh yeast wasn’t so fresh? Clearly something went very, very wrong. These croissants were dense dense dense, without any trace of flakiness.  My only other attempt at bread made with fresh yeast was a failure as well.

Copy of IMG_5654

Definitely not a success, and it’s hard to fairly judge the recipe when so much of what went wrong was my fault. Still, I learned things: 1) No more fresh yeast for me. 2) I like Martha’s method for shaping the crescents, where she stretches the wider part of the triangle a bit so that the center of each croissant isn’t so thick. 3) And the obvious: if the rolls don’t look like they’ve risen, they probably haven’t, and it might be best not to bake them yet, even if it’s already been over twice as long as the recipe recommends.

Copy of IMG_5659

I should really try this recipe again using the type of yeast I’m more familiar with, because I’m sure this attempt didn’t do it justice. When I do, I’ll be sure to update with a continuation of my experiments with croissants. And this time I’ll try not to wait six months.

Copy of IMG_5668

One year ago: Asian Peanut Dip

Printer Friendly Recipe
Croissants (from Martha Stewart’s Baking Handbook)

Makes 2 dozen

If using dry yeast instead of fresh, heat the milk to about 100ºF, then stir in the yeast to dissolve. Let stand until foamy, about five minutes, and proceed with the recipe. The dough can be made ahead through all of the turns and frozen for up to three months; before using, defrost the dough in the refrigerator for twenty-four hours. After baking, croissants are best eaten within six hours.

2 cups cold milk
2 tablespoons honey
1½ pounds (about 4 ½ cups) bread flour, plus more for dusting
4 ounces (1 scant cup) unbleached pastry flour
½ cup sugar
1½ ounces fresh yeast, crumbled
1 tablespoon plus 1½ teaspoons salt
1¼ pounds (5 sticks) unsalted butter, cold
1 large egg, lightly beaten

1. Make the dough package: Pour the milk and honey into a 1-quart liquid measuring cup, and stir to combine; set aside. In the bowl of an electric mixer fitted with the dough hook, stir together 1 pound 6 ounces (about 4¼ cups) bread flour, the pastry flour, sugar, yeast, and salt; stir to combine. Add milk mixture, and mix on low speed until the dough just comes together, 2 to 3 minutes.

2. Turn out dough onto a lightly floured work surface; gently knead to form a smooth ball, about 45 seconds. Wrap in plastic and refrigerate at least 1 hour or overnight.

3. Make the butter package: Lay the butter sticks side by side on a piece of plastic wrap, and sprinkle with the remaining 2 ounces (about ¼ cup) flour. Pound with a rolling pin until flour is incorporated, and roll into an 8-inch square. Wrap tightly and refrigerate for at least 1 hour or overnight.

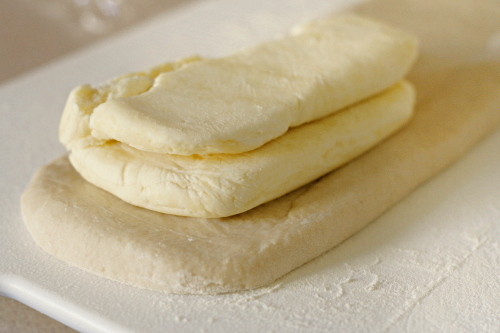
4. Remove dough package from the refrigerator; place on a lightly floured work surface. Roll out to a 16-by-10-inch rectangle, about ½ inch thick, with a short side facing you. Remove butter package from the refrigerator; place on the bottom half of the dough; fold the top half of the dough over the butter, and pinch the edges to seal.

5. Roll out the dough to a 20-by-10 rectangle about ½ inch thick, with a short side facing you; keep the corners as square as possible. Remove any excess flour with a dry pastry brush. Starting at the far end, fold the rectangle in thirds, as you would a business letter. This completes the first of three turns. Wrap in plastic and refrigerate for 1 hour.

6. Repeat rolling and folding as above two more times, starting with the flap opening on the right, as if it were a book, and refrigerate at least 1 hour between turns. To help you remember how many turns have been completed, mark the dough after each: Make one mark for the first turn, two for the second, and three for the third. After the third, wrap dough in plastic, and refrigerate 6 to 8 hours, or overnight.

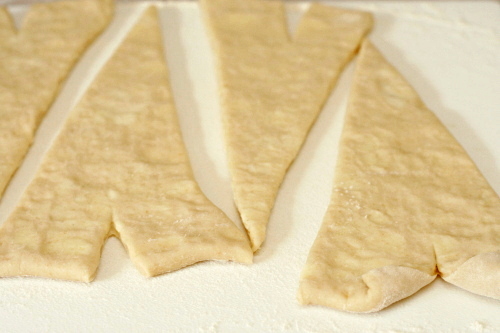
7. Turn out chilled dough onto a lightly floured work surface. Roll out the dough to a 30-by-16-inch rectangle. (If the dough becomes too elastic, cover with plastic wrap, and let rest in the refrigerator for 10 minutes.) Using a pizza wheel or pastry cutter, cut the dough in half lengthwise to form two 30-by-8-inch rectangles. Stack one piece of dough on top of the other, lining up the edges. Using the pizza wheel, cut dough into triangles, each with a 4-inch base (you will have scraps of dough at both ends). Cut a 1-inch slit in the center of the base of each triangle. Place triangles in a single layer on a clean work surface.

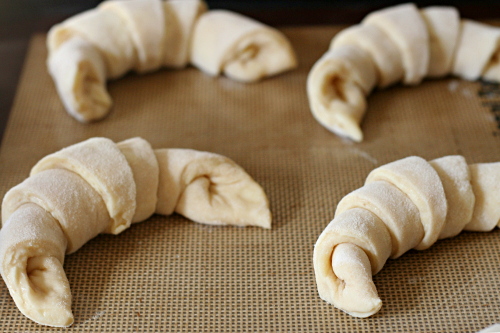
8. To shape croissants, stretch the two lower points of each triangle to enlarge the slit slightly. Fold the inner corners formed by the slit toward the outer sides of the triangles, and press down to seal. Using your fingertips, roll the base of each triangle up and away from you, stretching the dough slightly outward as you roll; the tip should be tucked under the croissant. Pull the two ends toward you to form a crescent. Transfer the crescents to two parchment-lined baking sheets, 2 inches apart (12 on each sheet). Cover loosely with plastic wrap, and let rise in a warm place until very spongy and doubled in bulk, 45 to 60 minutes.

9. Preheat the oven to 400ºF, with the racks in the upper and lower thirds. Lightly brush crescents with the beaten egg. Bake, rotating sheets halfway through, until the croissants are puffed and golden brown, about 20 to 25 minutes. Transfer sheets to a wire rack to cool. Serve warm or at room temperature.
Copy of IMG_5664

glazed lemon cookies

Copy of IMG_8114

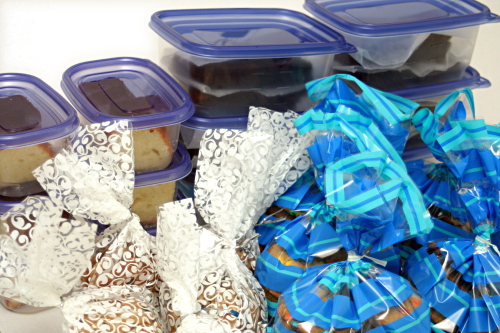
Earlier in the summer, I got it in my head that I could bake all I wanted as long as I just sent the treats away. Brilliant! All the swirling butter and sugar in the mixer without any of the calories! I don’t have a PhD for nothing, people.

Copy of IMG_8082

So I put out a note on Facebook – essentially “Hey! Who wants treats!” – got a whole bunch of responses, and spent the next day baking.

Copy of IMG_8089

The weakness in my strategy was that it’s almost never the actual baked dessert that I overeat. It’s the dough, always the dough.

Copy of IMG_8108

Plus, I know everyone jokes about “Oh, I have to eat one, right? Just to make sure they’re good? <wink wink>.” The thing is, you do have to eat one to make sure they’re good! What if you forgot the salt and doubled the baking powder or, I don’t know, some other easily overlooked lame-brained maneuver? And you send out eight packages, all over the country, to friends and family you haven’t seen in ages, all filled with lackluster messed up “treats”?

Copy of IMG_8112

Anyway, so after spending all day shopping, baking, packaging, eating lots of dough and (at least) one of each treat, I decided I should make myself go for a run.

Copy of IMG_8113

Uh, it wasn’t the best run ever. It was one of those runs where puking doesn’t seem too far off. Weird that sugar and butter aren’t very good fuel for exercise. Bummer.

Copy of IMG_7879

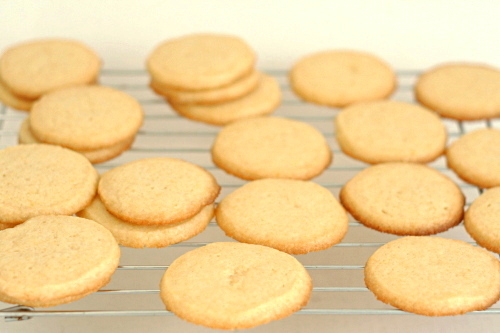
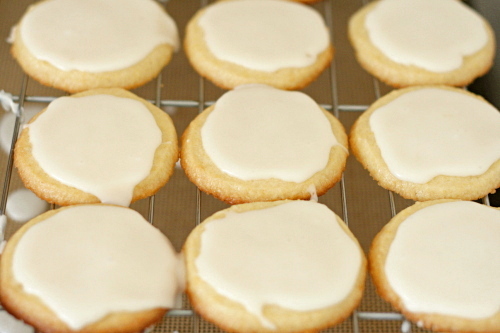
So I’ve mostly given up on the “I’ll just send everything away!” idea. Which is a shame, because now it’s going to be that much harder to find a reason to make these perfect lemon cookies. Sweet but tangy, super soft and tender, topped with a flavorful powdered sugar glaze that dries on top and snaps just a bit when you bite through it, these are cookies that I can’t resist in dough or baked form.

Copy of IMG_8115

One year ago: Wheatmeal Shortbread Cookies

Printer Friendly Recipe
Glazed Lemon Cookies (from Cooks Illustrated)

Cookies:
¾ cup (5.25 ounces) granulated sugar
2 tablespoons grated zest plus 2 tablespoons juice from 2 lemons
1¾ cup (8.75 ounces) unbleached all-purpose flour
¼ teaspoon baking powder
¼ teaspoon salt
12 tablespoons (1½ sticks) cold unsalted butter, cut into ½-inch cubes
1 large egg yolk
½ teaspoon vanilla extract

Glaze:
1 tablespoon cream cheese, softened
2 tablespoons juice from 1 lemon
1½ cups (6 ounces) confectioners’ sugar

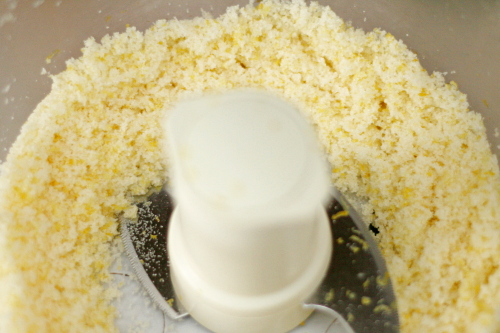
1. For the cookies: In a food processor, process the granulated sugar and lemon zest until the sugar looks damp and the zest is thoroughly incorporated, about 30 seconds. Add the flour, baking powder, and salt; pulse to combine, about ten 1-second pulses. Scatter the butter pieces over the dry ingredients; pulse until the mixture resembles fine cornmeal, about fifteen 1-second pulses. In a measuring cup or small bowl, beat together the lemon juice, egg yolk, and vanilla with a fork to combine. With the machine running, add the juice mixture in a slow, steady stream (the process should take about 10 seconds); continue processing until the dough begins to form a ball, 10 to 15 seconds longer.

2. Turn the dough and any dry bits onto a clean work surface; working quickly, gently knead to ensure that no dry bits remain and the dough is homogeneous. Roll the dough into a cylinder approximately 10 inches long and 2 inches in diameter. Center the dough on a piece of parchment. Fold the paper over the dough. Grasp one end of the parchment. With the other hand, use a bench scraper to firmly press the parchment against the dough to form a uniform cylinder. Roll the parchment and twist the ends together to form a tight seal. Chill the dough until firm and cold, about 45 minutes in the freezer or 2 hours in the refrigerator. (The dough will keep in the refrigerator for up to 3 days or in the freezer for up to 2 weeks.)

3. Meanwhile, adjust the oven racks to the upper- and lower-middle positions; heat the oven to 375 degrees.

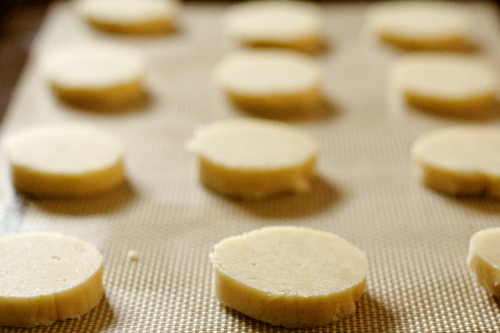
4. Line 2 large baking sheets with parchment paper or spray them with nonstick cooking spray. Remove the dough log from its wrapper and, using a sharp chef’s knife, slice the dough into rounds 3/8 inch thick; place the rounds on the prepared baking sheets, spacing them about 1 inch apart. Bake until the centers of the cookies just begin to color and the edges are golden brown, 14 to 16 minutes, rotating the baking sheets front to back and top to bottom halfway through the baking time. Cool the cookies on the baking sheets about 5 minutes; using a wide metal spatula, transfer the cookies to a wire rack and cool to room temperature before glazing.

5. For the glaze: Whisk the cream cheese and lemon juice in a medium nonreactive bowl until no lumps remain. Add the confectioners’ sugar and whisk until smooth.

6. To glaze the cookies: When the cookies have cooled, spoon a scant teaspoon of glaze onto each cookie and spread evenly with the back of the spoon. Let the cookies stand on a wire rack until the glaze is set and dry, about 1 hour. The cookies are best eaten the day they are glazed.

Copy of IMG_7881

pumpkin scones

Copy of IMG_0444

Oh, did you want to see something besides scones? I’m sorry, it turns out that the ol’ crumblycookie has become all scones, all the time.

Copy of IMG_0295

No, just kidding. This is the last scone recipe. I just wanted to get through them in one fell swoop, which is what’s kind of fun about NaBloPoMo.

Copy of IMG_0305

Like most of us, I love pumpkin. The thing is though, that you can’t just add pumpkin into whatever your favorite baking recipe is, because it changes the texture quite a bit. It adds a moist, cakey…I want to say gummy texture, but that sounds negative, and it isn’t necessarily a bad thing. But it also isn’t what you want in scones.

Copy of IMG_0307

So even though I have two great basic scone recipes, I didn’t even consider just adding pumpkin into one of them and seeing what happens. (Although now I’m curious.) So I had to start my search for recipes from scratch, and I settled on this Joy of Baking recipe because the picture shows tall scones with flaky layers.

Copy of IMG_0312

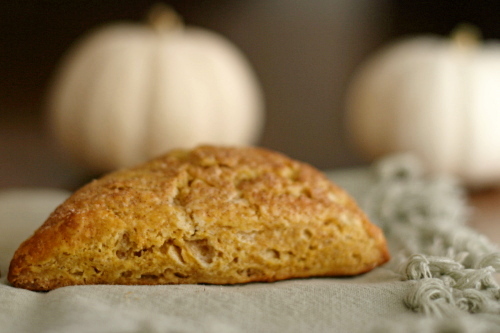
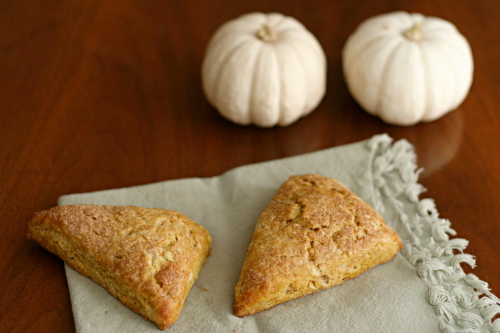
And I nailed it! I can’t imagine a better pumpkin scone. This has everything I want in a scone – the texture walks the line between tender and flaky, it’s sweet but not too much, and the pumpkin and spices are noticeable but not overwhelming. Yet another perfect scone recipe.

One year ago: Gratin Dauphinois

Copy of IMG_0452

Printer Friendly Recipe
Pumpkin Scones
(adapted just a bit from Joy of Baking)

Makes 8 scones

I left out the nuts and raisins, just because I wanted a smooth texture this time. And instead of using the egg wash and turbinado sugar for sprinkling, I brushed the scones with milk and sprinkled them with a mixture of about 1 tablespoon granulated sugar and ½ teaspoon cinnamon. It gave the scones a really nice thin crisp layer after baking.

I’ve also tweaked the order in which the ingredients are added to the dough, because I’m full of myself and I think I know better than the professionals. Or something.

2 cups (260 grams) all purpose flour
½ teaspoons ground ginger
½ teaspoons ground cinnamon
1 teaspoon baking powder
¼ teaspoon baking soda
¼ teaspoon salt
½ cup (113 grams) cold unsalted butter, cut into pieces
⅓ cup (50 grams) raisins
¼ cup (30 grams) toasted and chopped pecans (optional)
⅓ – ½ cup buttermilk
⅓ cup (72 grams) light or dark brown sugar
½ cup fresh or canned pumpkin puree (not pumpkin pie mix)
1 teaspoon pure vanilla extract

Egg Wash:
1 large egg
1 tablespoon milk or cream
Turbinado sugar for sprinkling the tops of the scones (optional)

1. Preheat oven to 400ºF (200ºC) and place rack in middle of oven. Line a baking sheet with parchment paper.

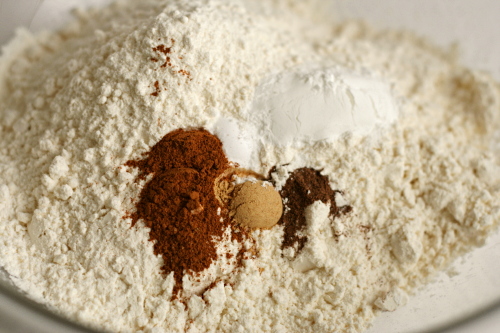
2. In a large bowl, whisk together the flour, spices, baking powder, baking soda and salt. Cut the butter into small pieces and blend into the flour mixture with a pastry blender or two knives. The mixture should look like coarse crumbs. Stir in the raisins and pecans, if using. In a separate bowl, mix together the buttermilk, sugar, pumpkin puree and vanilla, and then add the buttermilk mixture to the flour mixture. Mix just until the dough comes together. Do not overmix the dough.
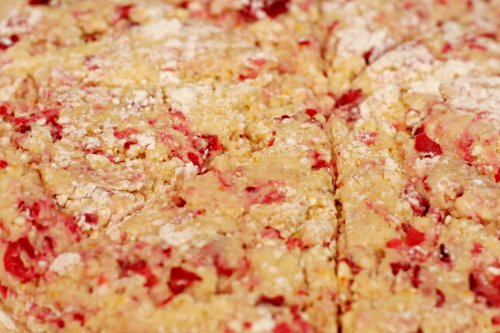
3. Transfer to a lightly floured surface and knead dough gently four or five times and then pat the dough into a circle that is about 7 inches (18 cm) round and about 1½ inches (3.75 cm) thick. Cut this circle in half, then cut each half into 4 pie-shaped wedges (triangles). Place the scones on the baking sheet. Brush the tops of the scones with the egg wash and sprinkle a little Turbinado sugar on top, if desired.

4. Place the baking sheet inside another baking sheet to prevent the bottoms of the scones from over browning. Bake for about 20 minutes or until golden brown and a toothpick inserted in the middle comes out clean. Transfer to a wire rack to cool.

Copy of IMG_0447

buttermilk scones

Copy of IMG_0247

Having a great, seemingly perfect recipe for something isn’t enough to stop me from trying new recipes. There’s always something to learn, you know? Even though one of the first biscotti recipes I ever made is still the best, I’ve made many many more recipes and I’ve learned some little biscotti tricks along the way. But I still haven’t found a better biscotti recipe.

Copy of IMG_8357

The cranberry scones were one of the first scone recipes I ever made, and certainly the first to knock my socks off. Of course, cranberries aren’t in season year-round anyway, but I successfully adapted the recipe for rhubarb, and I’m sure I could have used most other fruits.

Copy of IMG_8374

But instead, I kept trying new recipes, including this one. And this time…well, I won’t say this recipe is better, but it is definitely as good. Aargh, don’t tell me I need to do a scone comparison!

Copy of IMG_8383

I suppose it’s okay to have two perfect scone recipes, right? And one probably isn’t better than the other anyway. One thing I’ve found from recipe comparisons is that once you have great dependable recipes, it all comes down to personal preference.

Copy of IMG_8385

Well, my personal preference is for whatever gets me a delicious treat on a Saturday morning. This certainly qualifies. And so does this.

Copy of IMG_9868

One year ago: Brown Sugar Apple Cheesecake

Printer Friendly Recipe
Buttermilk Scones (adapted just slightly from Tartine, by Elisabeth Pruett and Chad Robertson)

The measurements are weird because this is half of the recipe in Tartine’s cookbook. But geez, who needs 5 cups of flour worth of scones? I’ve also made them slightly smaller – 8 scones for this half-recipe instead of 6, because 6 would have been huge. (Each scone would have 3 tablespoons of butter in it!)

Zante currants are just standard dried currants.

I skip the melted butter and just use milk on top of the unbaked scones.

6 tablespoons zante currants (1.75 ounces) or 3 ounces fresh berries
2¼ cups + 2 tablespoons (12 ounces) all-purpose flour
1½ teaspoon baking powder
¼ + 1/8 teaspoon baking soda
¼ cup (1.75 ounces) granulated sugar
½ teaspoon + 1/8 teaspoon salt
9 tablespoons butter, very cold
¾ cup buttermilk
½ teaspoon lemon zest
3 tablespoons unsalted butter, melted
large crystal sugar or granulated sugar for sprinkling

1. Preheat the oven to 400 degrees. Line a baking sheet with parchment paper or a silicone baking mat.

2. To make the dough, first combine the currants with warm water to cover in a small bowl and set aside for about 10 minutes until the currants are plumped. Drain well. If you’re using berries instead of currants, put them in the freezer.

3. While the currants are plumping (or the berries are freezing), whisk the flour, baking powder, and baking soda in a large mixing bowl if making by hand, or into the large bowl of a stand mixer fitted with the paddle attachment. Add the sugar and salt and stir to mix with a rubber spatula. Cut the butter into ½-inch cubes and scatter the cubes over the dry ingredients. If you are using a mixer, pulse on and off so that you don’t break down the butter too much. You want to end up with a coarse mixture with pea-sized lumps of butter visible.

4. Add the buttermilk all at once along with the lemon zest and currants. (If you’re using berries, don’t add them yet.) Mix gently with a rubber spatula by hand or on low speed if using the mixer. Add the berries and continue to mix just until you have a dough that holds together. Be careful not to mash the berries into the dough, or you will color it with their juice. If the mixture seems dry, add a little more buttermilk. You still want to see some of the butter pieces at this point, which will add to the flakiness of the scones once they are baked.

5. Dust your work surface with flour, and turn the dough out onto it. Using your hands, pat the dough into a rectangle about 9 inches long, 5 inches wide, and 1½ inches thick. Brush the top with the melted butter and sprinkle with the sugar. Using a chef’s knife, cut the dough into 8 triangles. Transfer the triangles to the prepared baking sheet.

6. Bake the scones until the tops are lightly browned, 25 to 30 minutes. Remove from the oven and serve immediately.

Copy of IMG_9863

cranberry orange scones

Copy of IMG_1625

This recipe changed the whole shape of my last year. Before making these great scones, I’d spend a large part of both weekend mornings cooking, usually something sweet one day and something savory the other. It made for a nice breakfast category here, but it wasn’t the best way to relax on the weekend.

Copy of IMG_1123

Not anymore. I still often cook something one morning, but on the other, it’s all about scones. I make the dough early in the week and freeze it, then on a lazy weekend morning, I just have to bake them, make coffee (or, more often, wait for Dave to), and sit down to flip through a cookbook. It’s become one of my favorite times of the week.

Copy of IMG_1126

These pictures? They’re from when I made the scones last winter, but it was way past cranberry season, so I’ve been holding onto this blog entry for months and months.

Copy of IMG_1137

It’s time. Cranberries are showing up in stores, and there is no better way to enjoy them. These are so tender, have just the right sweetness, and make for a stress-free weekend breakfast, even with guests. Even after a year of making scones, these are still one of my favorites.

Copy of IMG_1631

One year ago: Warm Chickpea and Butternut Squash Salad

Printer Friendly Recipe
Cranberry Orange Scones (adapted from Gourmet via Smitten Kitchen)

The recipe originally calls for (Meyer) lemon zest, but orange – or tangerine, which I’ve also used – is such a great partner for cranberry that I couldn’t resist using it instead. I also like increasing the cranberries a bit (already reflected in the recipe).

I’ve baked this recipe at high altitude (at least 5000 feet) with good results. They weren’t quite as pretty, but the taste and texture weren’t affected.

I always flash-freeze scones, then bake them straight from the freezer, adding a couple extra minutes to the baking time.

Makes 8 scones

1½ tablespoons freshly grated orange zest
2½ cups (12 ounces) all-purpose flour
½ cup (3.5 ounces) sugar plus 3 tablespoons
1 tablespoon baking powder
½ teaspoon salt
¾ stick (6 tablespoons) cold unsalted butter, cut into bits
1½ cups fresh cranberries, chopped coarse (I usually do this in the food processor)
1 large egg
1 large egg yolk
1 cup heavy cream

1. Adjust an oven rack to the middle position and heat the oven to 400°F. Line a large baking sheet with parchment paper or a silicone baking mat.

2. In a small bowl, toss together fresh cranberries and 3 tablespoons sugar. In another small bowl, lightly beat the egg and yolk, then stir in cream.

3. In a food processor, pulse the flour, ½ cup sugar, baking powder, salt, and zest until combined. Add the butter and process until the mixture resembles coarse meal. Transfer to a large bowl. (You can also just smoosh the butter into the dry ingredients with your fingers instead of using a food processor.) Stir the cranberries into the flour mixture. Then gently fold the egg mixture into the flour until just combined.
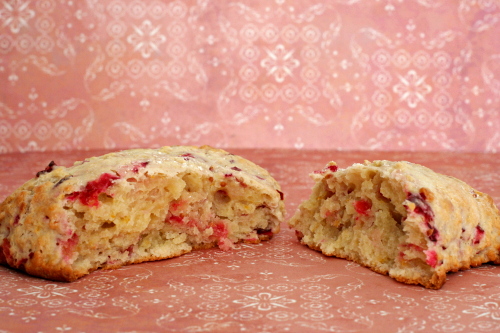
4. On a well-floured surface with floured hands, pat the dough into a 1-inch-thick round (about 8 inches in diameter). With a 2-inch round cutter or the rim of a glass dipped in flour, cut out as many rounds as possible, rerolling the scraps as necessary. (Or cut the circle into wedges, which is my standard method.) Arrange the scones about 1 inch apart on the prepared baking sheet and bake 15 to 20 minutes, or until pale golden. Cool about 10 minutes, then serve.

Copy of IMG_1626

sandwich rolls

Copy of IMG_4632

Allright, so. NaBloPoMo. National Blog Posting Month, or in my case, Clean Out the Crazy-Full Pending Folder Month. I remember it being pretty tough last year, and it’s looking like it’s going to be even more challenging this year, because we finally (!!!) got a move date, and it’s the first week of December. That means November will include not just travel for Thanksgiving, but flying across the country to look for houses, and packing packing packing!

Copy of Copy of IMG_4568

Keeping with NaBloPoMo tradition, I’m starting with the oldest recipe in my Pending folder – from six months ago, yeesh. Please don’t take the delay as a sign of its quality! Truthfully, I’m just lazy and it’s a time-consuming entry.

Copy of Copy of IMG_4605

I’ve been battling with finding or developing the perfect sandwich roll recipe for years, and I finally nailed it. My grocery store makes great sandwich rolls – fluffy and with a soft crust so your filling doesn’t squoosh out the other end when you try to bite into your sandwich. The problems with these rolls are twofold: First, they’re completely white bread, and I always like at least a little whole wheat flour in my bread. Second, they’re a bit too big for grilled cheese with tomato soup. And I suppose there’s a third problem: Our grocery store isn’t moving to New Mexico with us. So sad.

Copy of IMG_4620

My initial attempts to make sandwich rolls tended to be either too dense, with a crust too tough, or misshapen. I had difficulty getting round rolls without deflating the risen dough. Or the dough didn’t have enough structure so the rolls turned into pancakes as they expanded instead of balls.

Copy of IMG_4622

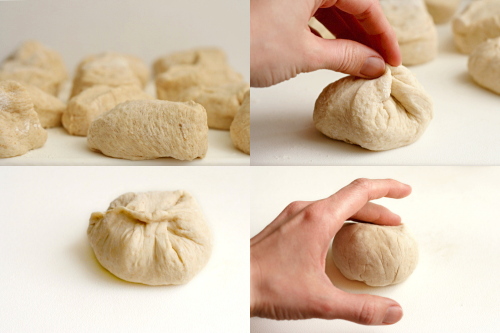
I believe I’ve solved all of those problems with this recipe. A slow overnight cold rise improves flavor, and then two turns of the rising dough gives it plenty of strength, so that when it rises, it rises up and not out. To shape the rolls into even circles, I pulled the edges around and pinched them together to increase the surface tension of the doughballs. This is a bit risky, because you have to be gentle and just tug at the very edges of the dough without deflating the dough. Then just roll it around a bit to even out the edges.

Copy of IMG_4629

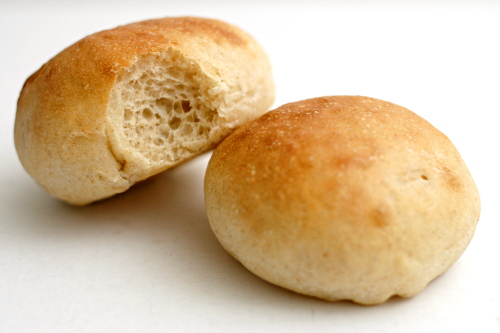
Perfect! Light and fluffy, tall, with a soft crust, and completely adaptable with regards to size and degree of whole wheatiness. And I figured it out just in time – before moving far, far away from my trusty favorite grocery store and their wonderful sandwich rolls.

Copy of IMG_4636

One year ago: Mushroom Phyllo Triangles and Crawfish Phyllo Triangles

Printer Friendly Recipe
Sandwich Rolls

Makes 12

Feel free to substitute whole wheat flour for some of the unbleached flour. If you use 1 cup whole wheat and 3 cups white flour, you’ll hardly notice a difference in flavor, texture, or rising time. At 2 cups whole wheat flour and 2 cups white flour, the difference will be more significant but the rolls will still be excellent. If you want to use even more whole wheat flour, I would adapt 100% whole wheat sandwich bread into rolls.

If it works better for your schedule, go ahead and skip the overnight chill.

4 cups (19.2 ounces) unbleached all-purpose flour, plus
2 teaspoons instant yeast
2 tablespoons granulated sugar
1 teaspoon salt
1½ cups water
2 tablespoons olive oil
2 tablespoons milk for brushing the rolls

1. Stand mixer: Mix the flour, yeast, sugar, and salt in the bowl of a stand mixer fitted with the dough hook. With the mixer on low speed, gradually add the water and oil. Continue mixing on medium-low until the dough is elastic and supple, about 8 minutes. You may need to add a little more flour or water to get the correct consistency – soft but not really sticky. Transfer the dough to an oiled bowl and cover with plastic wrap. Refrigerate overnight.

By hand: Mix the flour, yeast, sugar, and salt in a large bowl. Make a well in the middle of the dry ingredients and pour in the water and oil. Stir the mixture until the dough comes together. Transfer it to a floured board or countertop and knead, incorporating as little flour as possible, for about 10 minutes, until the dough is elastic and supple. You may need to add a little more flour or water to get the correct consistency – soft but not really sticky. Transfer the dough to an oiled bowl and cover with plastic wrap. Refrigerate overnight.

2. Remove the dough from the refrigerator and let it warm and rise at room temperature until it’s double the original volume, 2-4 hours (depending on the temperature of the ingredients you started with and the room temperature).

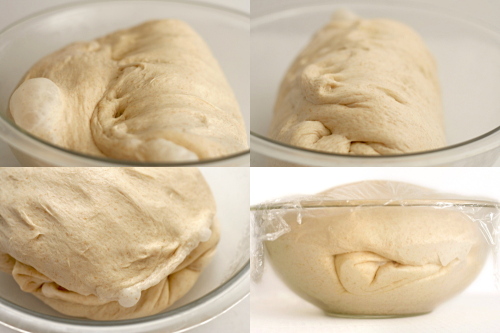
3. Give the dough one turn, by folding it into thirds like a sheet of paper going into an envelope, than in half the other direction (as shown in the photos above). Allow the dough to rise again, which should take about an hour. Give it another turn, then let it rise again, which will probably take less than an hour.

4. Once the dough has doubled in size for the third time, cut it into 12 pieces. Very gently pull the edges of each dough ball around to one side and pinch them together, as shown in the photos above. Roll the dough between the palm of your hand and a board, lightly floured if necessary. Place the formed rolls, pinched side down, on 2 baking pans lined with parchment paper or silicone baking mats.

5. Adjust an oven rack to the middle position and preheat the oven to 400ºC. Let the rolls rise until puffy and about one and a half times their original size, 30-45 minutes. Brush them with milk and bake for 12 minutes, until golden brown and an instant thermometer inserted into the center of one measures 185-200ºC. (I suggest baking just one pan of rolls at a time. An extra 15 minutes of rising won’t ruin your rolls.) Let cool until room temperature before serving, about 45 minutes.

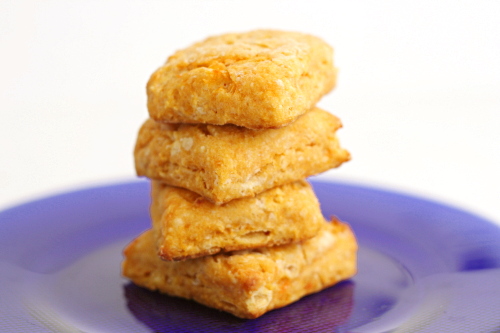
sweet potato biscuits

Copy of IMG_0056

I love that not just one, but two of this month’s Tuesdays with Dorie recipes are non-desserts. I haven’t baked a TWD dessert in weeks! I’ve gone almost a month with choosing all of my own desserts!

Copy of IMG_0028

I don’t mean to complain; obviously I like being part of the group, or, well, I wouldn’t be. It’s just that I’m only baking for me and Dave, so if a dessert recipe makes 12 servings, that’s all we get for the week. That’s why I have a calculator in the kitchen and many many small oddly shaped pans. Fractions are my friend if I want to bake more than once per week.

Copy of IMG_0030

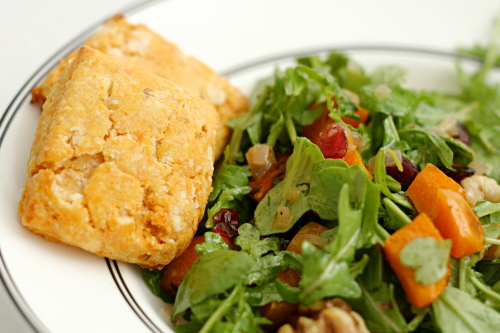
Getting to serve a TWD recipe with dinner is a rare treat. These sweet potato biscuits were a nice complement to the roasted butternut squash salad I made a few weeks ago.

Copy of IMG_0035

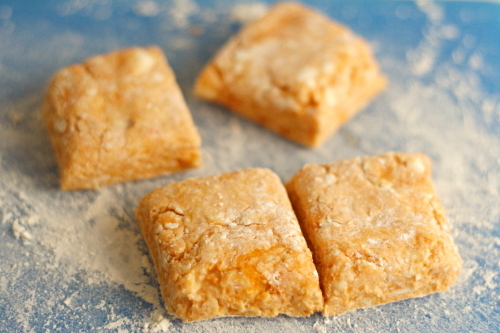
These biscuits are made the standard biscuit way – cut cold butter into flour+flavoring+leavening, then moisten the mixture, in this case with mashed sweet potatoes. It quickly became apparent that my sweet potatoes (bought fresh, then cooked and mashed) weren’t going to be able to turn the dry ingredients into biscuit dough, so I added some buttermilk, which helped.

Copy of IMG_0036

Except that something seems to have gone wrong, because my biscuits didn’t rise hardly at all. I liked the flavor quite a bit, but the texture was oh-so-dense. Still, this is the first sweet potato biscuit I’ve tried, and I quite like the idea. I’ll need to play with some more recipes.

Copy of IMG_0068

Erin chose this recipe for TWD, and she has it posted.

One year ago: Pumpkin Muffins

Copy of IMG_0058

bran muffins

Copy of IMG_7107

Everything I eat is evaluated based on its ratio of nutrition to flavor. That sounds tedious but it isn’t. It’s really just answering one simple question that I think most of us ask before we dig in: Is it worth it?

Copy of IMG_7017

For example, macaroni and cheese: very indulgent, but also very delicious. Definitely worth it, at least once in a while.

Copy of IMG_7022

Raw carrots? Very healthy, but, eh, not my favorite thing to eat. I tend to ignore them unless there’s nothing else. But add some hummus, and you’ve increased the flavor significantly without decreasing the nutrition drastically, and hey, I’ll eat that.

Copy of IMG_7100

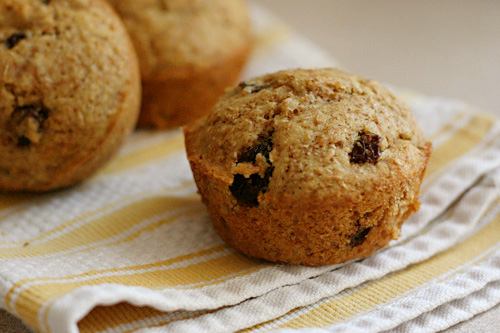
Sometimes I forget that something can be both ridiculously good for you and ridiculously good. And something like these muffins comes along, perfect in every way, both taste and health, and I’m oh-so-pleasantly reminded. Nutrition to flavor ratio? Off the charts.

Copy of IMG_7104

One year ago: Pain Ordinaire

Printer Friendly Recipe
Moist Bran Muffins
(from the King Arthur Flour’s Whole Grain Baking)

Makes about 18

Note that this is a two-day process, as the dough needs to set overnight before baking. Fortunately, at that point it can actually wait in the refrigerator for several days.

I’ve used both raisins and dried cranberries in these, and both are good. Of course most any dried fruit would work. I’ve also used clementine juice instead of orange juice, and that worked just fine.

¾ cup boiling water
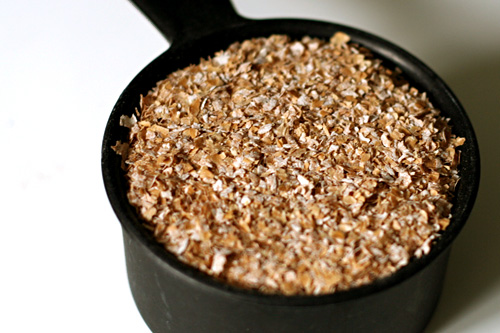
1¼ cups unprocessed wheat bran, divided
¾ cup dried fruit, chopped if large raisins
¾ cup packed light or dark brown sugar
¼ cup vegetable oil
2½ cups whole wheat flour, traditional or white whole wheat
1 teaspoon baking soda
½ teaspoon baking powder
1 teaspoon salt
1 large egg
¾ cup buttermilk
½ cup orange juice

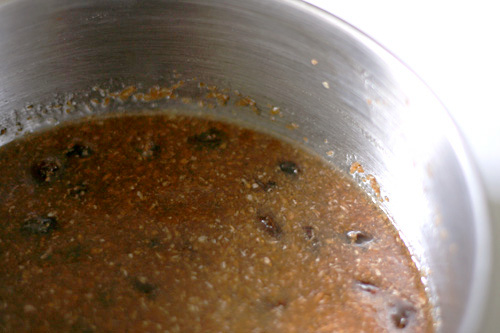
1. Pour boiling water over ¾ cup of the bran cereal in a small mixing bowl. Add the raisins, brown sugar and oil. While the bran mixture cools, blend together the flour, baking soda, baking powder, and salt in a large mixing bowl.

2. Beat the egg with the buttermilk and orange juice in a large measuring cup. Add this mixture to the dry ingredients. Stir in remaining ½ cup bran cereal, and then the bran-raisin mixture. Cover the bowl and refrigerate overnight.
3. The next day, preheat the oven to 375 degrees. Lightly grease a muffin tin. Fill each cup two-thirds full. Bake the muffin until a tester comes out clean, about 23 to 26 minutes.

4. Remove from oven and allow to cool in pan for 5 minutes, then turn out onto a rack to finish cooling, or serve warm.

Copy of IMG_7111

pumpkin cupcake comparison

Copy of IMG_9772

You know what’s totally unfair, considering that I’m in general more interested in food than Dave? He has a more sensitive palate than me. What the hell?
I made these cupcakes when he wasn’t around, and I had to do three separate “tastings” (eating all three in one sitting, unfrosted) over a couple of days before I could really narrow down my opinion. Dave came home, ate one of each, and described them almost exactly as I would have. Gah!
My primary goal for the pumpkin cupcakes was for them to be pumpkin cupcakes, not pumpkin muffins with frosting. I originally thought I’d make this recipe from Smitten Kitchen, but then I found two other recipes, one from the newest issue of Bon Appetit which everyone is raving about, and one from Martha Stewart, and of course I’m incapable of making a decision, so: comparison time!

batter combo
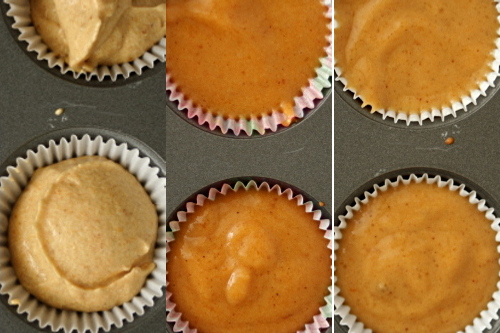
left to right: david leite, martha stewart, bon appetit

Method:
Bon Appetit: This recipe got demerit points from the start for calling for self-rising flour and pumpkin pie spice, both of which I had to look up conversions for. (And I was surprised to find that there apparently is no straight substitution for self-rising flour.) Plus it called for the brown sugar to be mixed with the dry ingredients – clumps!  The mixing method is a simple wet ingredients-dry ingredients-combine process, which…sounds like a muffin. It was the only recipe that used oil instead of butter, and it included sour cream.

Martha Stewart: This was also mixed similar to muffins are, with the pumpkin added after the wet and dry ingredients are combined.

David Leite (via Smitten Kitchen): This recipe was the most promising from the beginning, because it’s actually mixed using the cake method, where butter and sugar are creamed, the eggs are mixed in, then the dry ingredients and liquid (buttermilk in this case) are alternately added.

Copy of IMG_9566
left to right: david leite, martha stewart, bon appetit

Results:
Bon Appetit: They were very dense; I could always identify these cupcakes just by the weight of them. The tangy flavor of the sour cream was definitely noticeable, which I thought masked the flavor of the pumpkin. This was both Dave and my least favorite.

Martha Stewart: These were good – light and moist, with a nice pumpkin flavor. The tops were sticky, but that doesn’t matter after they’re frosted. I was impressed with these until I tried the David Leite cupcakes, and then these seemed too muffiny.

David Leite: Perfect. So light, with just the right amount of resiliency. (It’s hard to describe this trait of cakes, but I like when they’re a little springy.) The pumpkin flavor was nicely balanced. They were just really good cupcakes, pumpkin flavored.

Copy of IMG_9573
left to right: david leite, martha stewart, bon appetit

For once, a comparison post where the results are clear! Even my dumb palate can tell the difference between these three cakes. David Leite’s recipe is certainly the way to go, unless you’re in a big hurry or hate to bake or something, in which case nobody is going to complain about Martha Stewart’s recipe.

Copy of IMG_9771

Printer Friendly Recipe
Pumpkin Cupcakes
(adapted from David Leite via Smitten Kitchen)

18 cupcakes

1 stick unsalted butter, room temperature, plus more for greasing pans
1 cup firmly packed dark-brown sugar
⅓ cup granulated sugar
2 cups cake flour
2 teaspoons baking powder
1 teaspoon baking soda
1 teaspoon ground cinnamon
1 teaspoon ground ginger
½ teaspoon ground nutmeg
⅛ teaspoon ground cloves
½ teaspoon salt
¼ teaspoon freshly ground black pepper
2 large eggs
½ cup buttermilk mixed with 1 teaspoon vanilla
1¼ cups canned solid-pack pumpkin

1. Preheat the oven to 350° (175°C). Line a cupcake pan with 18 liners.

2. In a stand mixer, beat the butter and sugars on medium speed until fluffy, about 5 minutes. Meanwhile, sift the flour, baking powder, baking soda, cinnamon, ginger, nutmeg, cloves, salt, and pepper into a medium bowl.

3. Add the eggs 1 at a time to the mixer, scraping down the sides after each addition. Alternate adding the flour and milk mixtures, beginning and ending with the flour. Beat in the pumpkin until smooth. Divide the batter equally between the cups. (They’ll be about ¾ full.) Rap the filled pans once on the counter to release any air bubbles. Bake the cakes until a toothpick inserted into the center comes out clean, about 20 to 25 minutes. Cool the cupcakes on racks completely.

Printer Friendly Recipe
Pumpkin Cupcakes
(from Martha Stewart)

Makes 18

2 cups all-purpose flour
1 teaspoon baking soda
1 teaspoon baking powder
1 teaspoon coarse salt
1 teaspoon ground cinnamon
1 teaspoon ground ginger
¼ teaspoon freshly grated nutmeg
¼ teaspoon ground allspice
1 cup packed light-brown sugar
1 cup granulated sugar
1 cup (2 sticks) unsalted butter, melted and cooled
4 large eggs, lightly beaten
1 can (15 ounces) pumpkin puree

1. Preheat oven to 350 degrees. Line cupcake pans with paper liners; set aside. In a medium bowl, whisk together flour, baking soda, baking powder, salt, cinnamon, ginger, nutmeg, and allspice; set aside.

2. In a large bowl, whisk together, brown sugar, granulated sugar, butter, and eggs. Add dry ingredients, and whisk until smooth. Whisk in pumpkin puree.

3. Divide batter evenly among liners, filling each about halfway. Bake until tops spring back when touched, and a cake tester inserted in the center comes out clean, 20 to 25 minutes, rotating pans once if needed. Transfer to a wire rack; let cool completely.

Printer Friendly Recipe
Mini Pumpkin Cupcakes
(adapted from Bon Appétit October 2009)

24 mini-cupcakes

The original recipe called for self-rising flour and pumpkin pie spice, but in the absence of both of those, I had to make substitutions.

½ cup cake flour
½ cup all-purpose flour
¼ teaspoon salt
1½ teaspoon baking powder
⅔ cup (packed) golden brown sugar
½ teaspoon cinnamon
¼ teaspoon ground ginger
⅛ teaspoon allspice
⅛ teaspoon nutmeg
2 teaspoons pumpkin pie spice
1 large egg
½ cup canned pure pumpkin
⅓ cup vegetable oil
⅓ cup sour cream
1½ teaspoons vanilla extract

Preheat oven to 350°F. Line 24 mini muffin cups with 1¾ x 1-inch paper liners. Mix flour, golden brown sugar, and pumpkin pie spice in large bowl. Whisk egg, canned pure pumpkin, vegetable oil, sour cream, and vanilla extract in medium bowl. Add mixture to dry ingredients; stir to fully combine. Spoon batter into paper liners (batter will almost fill liners). Bake cupcakes until tester inserted into center comes out clean, about 16 minutes. Remove cupcakes from pan and let cool completely on rack.

Copy of IMG_9773

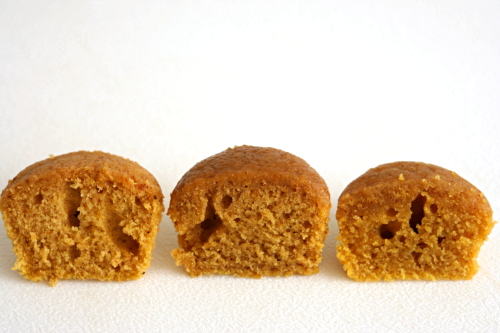
cottage cheese pufflets

Copy of IMG_9500

I often write blog entries in my head while I cook. While I was rolling out the dough and forming these pufflets, I was planning to tell you that I do not recommend this recipe. That it was my least favorite Dorie Greenspan recipe so far. That the dough was impossible to work with. (I was also thinking: God [bleep] damn it, this stuff [bleep] sucks, give me a [bleep] break.)

Copy of IMG_9480

In other words, the dough was really sticky. It’s a mixture of pureed cottage cheese, butter, flour, and just a bit of sugar. It wasn’t very sweet, and honestly, just didn’t taste all that great as dough.

Copy of IMG_9484

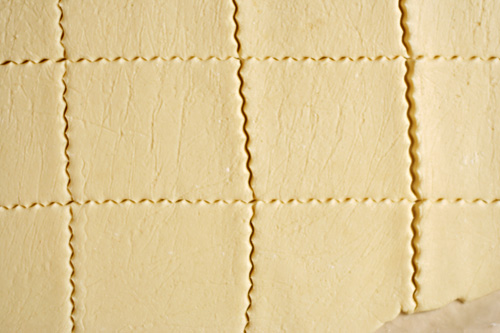
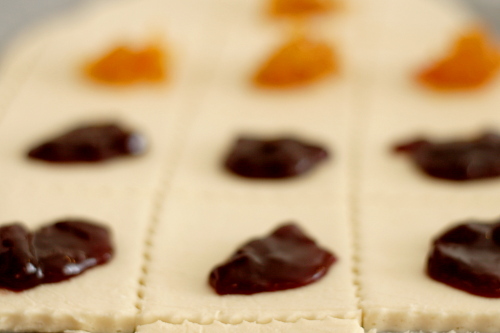
After the dough is chilled, it’s rolled out, cut into squares, filled with jam, folded to enclose the jam, and baked. And this is where I was getting so frustrated, because the dough was so. darn. sticky. The whole thing was turning into a mess, so I baked the few I’d formed and threw the rest back in the fridge to worry about later.

Copy of IMG_9489

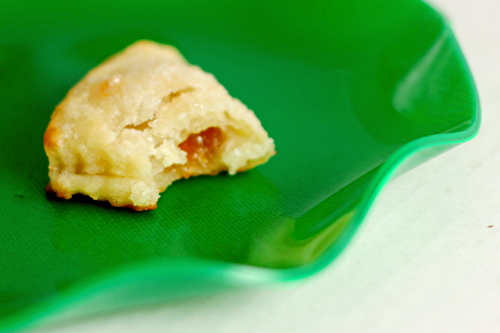
But then when I ate one, I changed my tune entirely! They’re so good! The crust does puff up and get really light, and it’s a good thing it isn’t too sweet, because of course the jam provides plenty of sweetness.

Copy of IMG_9493

The resulting treats are just too good to give up on this recipe because of the sticky dough. I think the best advice is just to leave yourself plenty of time while working with the dough to refrigerate it as soon as it gets sticky. Dorie doesn’t recommend a chilling time between rolling the dough flat and forming the pastries, but I really think it’s best to add one, probably about an hour long. With that in mind, I think these will be a lot easier to work with.

Copy of IMG_9504

Jacque has the recipe posted for Tuesdays with Dorie. I didn’t make any changes, but I did find that marmalade (the same ginger zucchini marmalade I used on the brioche tart) didn’t leak nearly as much as the raspberry jam I also used.

One year ago: Pan-Seared Steak with Red Wine Pan Sauce

Copy of IMG_9501