Archives for November 2009

soft and sexy grits

Copy of IMG_0732

The hardest part of blogging for me is the writing. The cooking I do naturally and the photography, even if it frustrates me sometimes, I’m always confident that I can do at least passably. But sitting down and trying to come up with something creative to say is a challenge for me more often than not.

Copy of IMG_0719

And that’s why posting every day for a month, although difficult, is a valuable exercise for me. It’s like drilling. Anything I want to master, I have to repeat over and over again. It’s that way for dancing, music, even math. NaBloPoMo is just drilling for bloggers.

Copy of IMG_0721

There is an entry or two in the last month that I’m not perfectly happy with, that I would have spent more time on if I hadn’t had to publish something that day. I’m not proud of that entry, but I am proud of the entire month of entries – for finishing it without what I thought was a significant loss of quality. I’m a better blogger for it, and hopefully a better writer.

Copy of IMG_0728

Something else I like about blogging every day is that it’s easier to complete little series of posts – the three scone recipes in a row, some New Mexican food, and now this fantastic accompaniment to yesterday’s equally fantastic lamb.

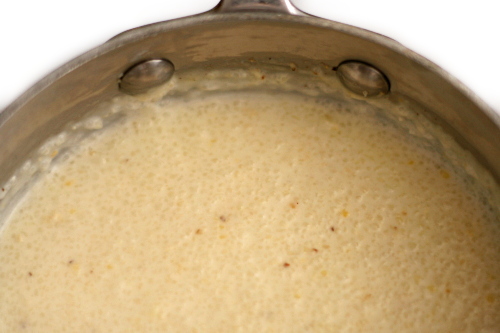
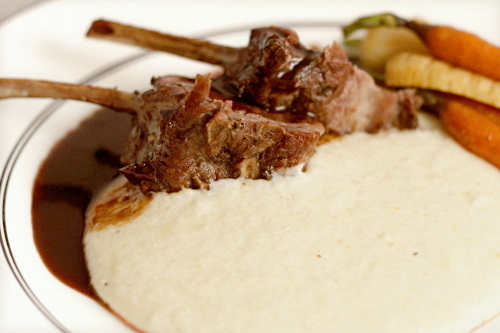
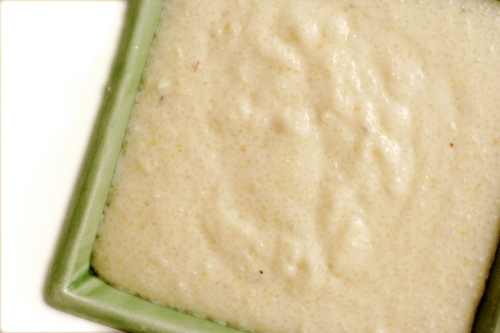
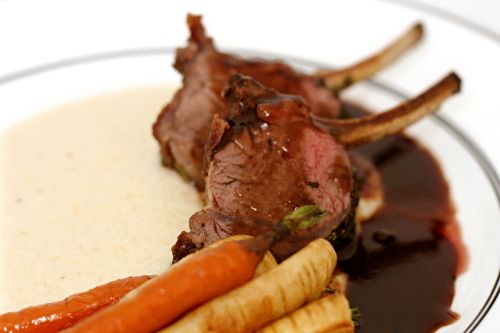
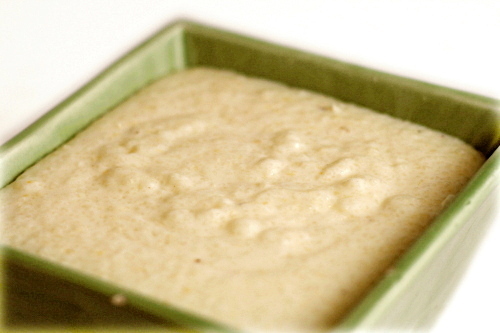
These grits themselves are lovely and rich. But that soft texture and basic flavor means they lend themselves perfectly to soaking up a heady sauce like the lamb’s red wine sauce. The lamb was the star of the show, but it needed these grits singing backup to really shine.

Copy of IMG_0738

One year ago: Chocolate Truffles
Two years ago: Crockpot Rice and Beans

Printer Friendly Recipe
Soft and Sexy Grits (from Cooks Illustrated’s Restaurant Favorites at Home)

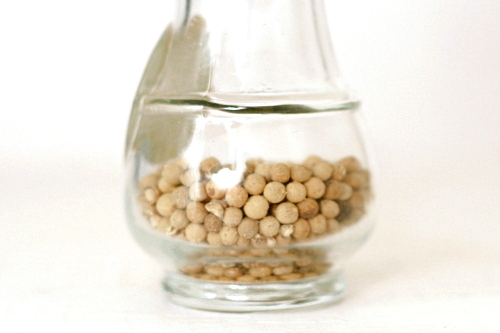
Because ground pepper loses its flavor so fast and I don’t use white pepper enough to have a dedicated pepper mill for it, I buy it in a container that has its own built-in grinder.

2 tablespoons butter
2 garlic cloves, minced or pressed through a garlic press
4 cups low-sodium chicken broth
2 cups whole milk
2 cups heavy cream
2 cups quick grits
hot pepper sauce, such as Tabasco
Salt and ground white pepper

1. Melt the butter in a large saucepan over medium heat. Add the garlic and cook until softened and fragrant, about 30 seconds. Increase the heat to medium-high, add the broth, milk, and cream, and bring just to a boil.

2. Reduce the heat to low and, stirring constantly with a wooden spoon, slowly add the grits. Simmer, stirring occasionally, until the grits are smooth and creamy, 8 to 10 minutes. Season with Tabasco and salt and pepper to taste. Serve immediately, or cover the pan to keep the grits warm and serve within 15 minutes. (You should not need to add any more liquid.)
Copy of IMG_0737

herbed lamb chops with pinot noir sauce

Copy of IMG_0741

I don’t even know how to describe to you how awesome this lamb was. I think Dave and I spent the whole meal exclaiming over it. We’d sat down to eat, thinking, sure, dinner, yum, should be good. We each poured ourselves a glass of the wine that was leftover from making the sauce, we were actually going to eat at the table, we had some music playing. It was nice.

Copy of Copy of IMG_0675

And then we started eating and realized that this meal wasn’t “nice.” This meal was amazing. We decided that the wine wasn’t rich enough to compliment the food and opened a different bottle. We ate seconds. We drank more wine. We started dancing in the living room. It wasn’t just the meal that went from nice to amazing when we started eating; it was the entire night.

Copy of Copy of IMG_0709

In retrospect, duh. If you’re making lamb broth from scratch for the base of the wine sauce that you’re serving over rack of lamb, it better knock some socks off. It did.

Copy of IMG_0724

One year ago: Caramel Cake

Printer Friendly Recipe
Herbed Lamb Chops with Pinot Noir Sauce (from Bon Appétit through epicurious.com)

Serves 8

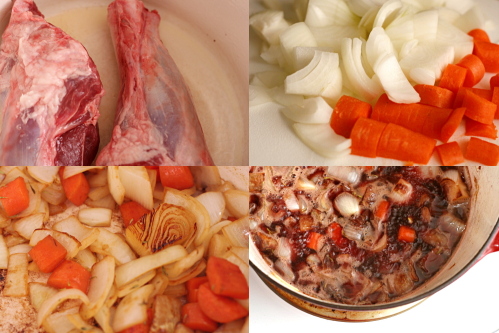
I couldn’t find any of the lamb parts suggested for the sauce and used shank instead, which isn’t the same thing at all, but worked nonetheless.

Sauce:
1 tablespoon vegetable oil
3 pounds lamb neck stew meat or lamb riblets
1 pound onions, coarsely chopped
1 large carrot, chopped
4 large garlic cloves, chopped
1 tablespoon herbes de Provence
4⅓ cups Pinot Noir or other dry red wine
3 cups low-salt chicken broth
1 tablespoon butter, room temperature
2 teaspoons all-purpose flour

Lamb:
1 cup finely chopped fresh Italian parsley
¼ cup finely chopped fresh thyme
¼ cup finely chopped fresh rosemary
¼ cup finely chopped fresh sage
1 tablespoon ground black pepper
5 tablespoons olive oil, divided
3 1½-pound well-trimmed 8-rib racks of lamb, preferably frenched

1. For the sauce: Heat the oil in a heavy large pot over medium-high heat. Add the lamb and sauté until deep brown, turning occasionally, about 18 minutes. Using tongs, transfer the lamb to a bowl. Add the onions, carrot, garlic, and herbes de Provence to the pot. Sauté until the vegetables are deep brown, about 8 minutes. Add the wine and broth to the pot; return the lamb and any accumulated juices to the pot. Bring to a boil, reduce the heat to medium-low, and simmer uncovered 1½ hours. Strain into a large bowl, pressing on the solids in the strainer to release all of the stock. Spoon off any fat from the surface of the stock; return the stock to the same large pot. Simmer until reduced to 1⅓ cups, about 15 minutes.

3. Mix the butter and flour in a small bowl to a smooth paste. Whisk the paste into the stock. Simmer the sauce until it’s slightly thickened and smooth, whisking constantly, about 1 minute longer. Season with salt and pepper. (Can be prepared 1 day ahead. Transfer to a small saucepan, cover, and chill. Rewarm before using.)
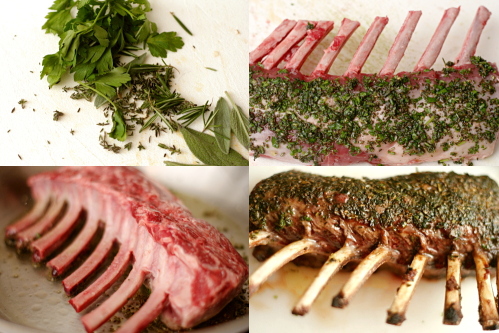
4. For the lamb: Stir the fresh herbs and pepper in a medium bowl to blend. Add 2 tablespoons oil and mix until the herbs stick together. Sprinkle the lamb racks with salt. Firmly press ⅓ of herb mixture over the rounded side of each rack to cover. (Can be prepared 1 day ahead. Place on large rimmed baking sheet. Cover; chill.)
5. Preheat the oven to 350°F. Heat 3 tablespoons oil in a large nonstick skillet over medium-high heat. Add 1 lamb rack to the skillet, herbed side down. Sauté until browned, about 4 minutes. Turn the rack over and sauté until browned, about 3 minutes more. Place the rack, herbed side up, on a rimmed baking sheet. Repeat, fitting the remaining racks on the same sheet.

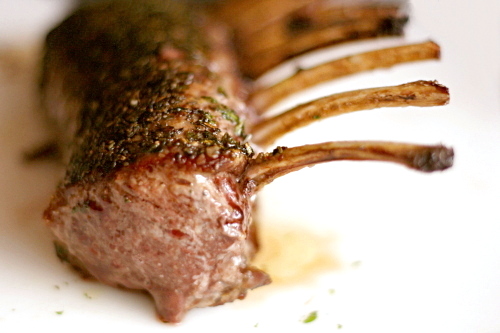
6. Roast the lamb until a thermometer inserted into the center registers 135°F for medium-rare, about 25 minutes. Let the lamb rest on the sheet for 15 to 20 minutes. Cut the lamb between the bones into individual chops. Arrange 3 chops on each plate. Drizzle with sauce and serve.

Copy of IMG_0687

This would make a great main dish for a nice dinner party, not only because it’s so good, but because so much of the recipe can be completed in advance. I suggest serving the lamb over Soft and Sexy Grits with roasted root vegetables on the side. A rich red wine like cabernet sauvignon is a great accompaniment to the lamb; we found that the pinot noir used in the sauce simply couldn’t stand up to the powerful flavors.

green tea crème brûlée

Copy of IMG_8543

Dave’s attitude toward restaurants has changed dramatically over the past few months, and I love it. He used to think of eating out as simply a way to get food with minimal effort; the faster he could get in and out, the better. I remember impatiently waiting for our orders to be taken, for the meal to arrive, and for the server to bring the bill.

Copy of IMG_8513

Fortunately, after some fancy work-related dinners, he decided that eating at restaurants can be about more than filling a void. It’s about the whole experience – trying new foods, enjoying the company of your friends, choosing the right drink to compliment your meal. These days when we go out to eat, we take our time, starting with appetizers and ending with dessert and coffee.

Copy of IMG_8517

After enjoying green tea crème brûlée at the end of a fancy schmancy Thai meal (which I sadly did not get to share), he kept talking about it later. It’s rare for a dessert to make such an impression on Dave. But crème brûlée is so simple to make at home, it almost seems like a waste to order it in a restaurant.

Copy of IMG_8534

From his description, the restaurant’s version arrived in something similar to a tiny trough – a long, narrow oval. Dave specifically requested a similarly shaped dish when I made it at home, as he is full of obnoxiousness. Round ramekins it is!

Copy of IMG_8536

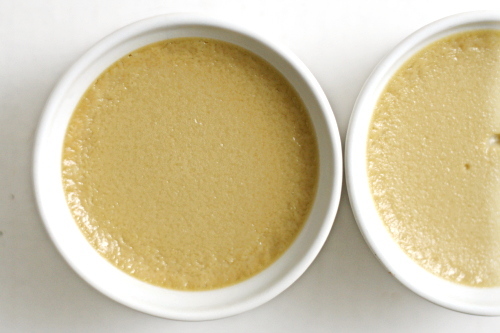
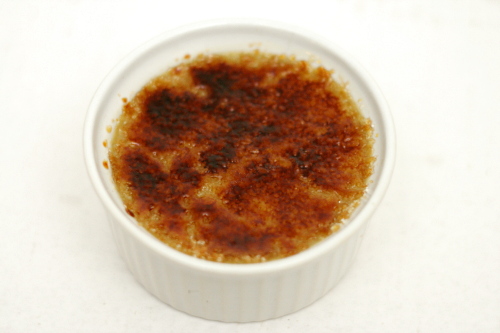
But fun dishes is just about the only advantage restaurants have over home cooks when it comes to crème brûlée, which is not hard to make and requires no odd ingredients. Smooth and creamy, with just enough green tea flavor, topped with a crackling layer of caramelized sugar, I can see why Dave thought this was worth ordering out, but I’m glad we can enjoy it at home whenever we want.

Copy of IMG_8540

One year ago: Country-Style Sourdough Bread

Printer Friendly Recipe
Green Tea Crème Brûlée

Makes 4

1¼ cups heavy cream
¼ cup whole milk
⅓ cup + 2 teaspoons granulated sugar
pinch table salt
3 green tea bags (or 1 tablespoon loose tea)
4 large egg yolks
1 teaspoon vanilla extract
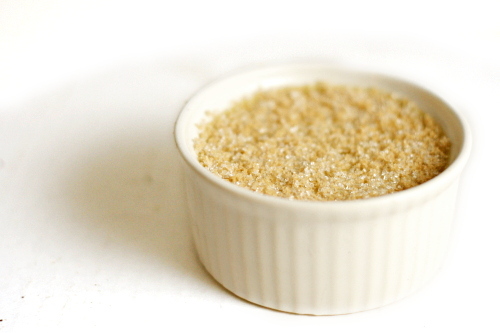
2 teaspoons brown sugar

1. Adjust an oven rack to the lower-middle position and heat the oven to 300ºF.

2. Combine ½ cup cream and the milk, ⅓ cup sugar, and the salt in a medium saucepan; submerge the tea bags in the liquid; bring the mixture to a boil over medium heat, stirring occasionally to ensure that the sugar dissolves. Take the pan off of the heat and let the mixture steep for 15 minutes to infuse the flavors.

3. Meanwhile, place a kitchen towel in the bottom of a large baking dish or roasting pan and arrange flour 4- to 5-ounce ramekins (or shallow fluted dishes) on the towel. Bring a kettle or large saucepan of water to a boil over high heat.

4. After the cream has steeped, remove the tea bags or strain the loose tea; stir in the remaining ¾ cup cream to cool down the mixture. Whisk the yolks in a large bowl until they’re broken up and combined. Whisk about half of the cream mixture into the yolks until they’re loosened and combined; repeat with the remaining cream and the extract; whisk until the mixture is evenly colored and thoroughly combined. Strain through a fine-mesh strainer into a 2-quart measuring cup or pitcher (or clean medium bowl); discard the solids in the strainer. Evenly divide the mixture among the ramekins.

5. Carefully place the baking dish with the ramekins on an oven rack; pour boiling water into the dish, taking care not to splash water into the ramekins, until the water reaches two-thirds height of the ramekins. Bake until the centers of the custards are just barely set and are no longer sloshy, and a digital instant-read thermometer inserted in the center of one ramekin registers 170 to 175 degrees, 30 to 35 minutes (25 to 30 minutes for shallow fluted dishes). Begin checking the temperature about 5 minutes before the recommended time.

6. Transfer the ramekins to a wire rack; cool to room temperature, about 2 hours. Set the ramekins on a rimmed baking sheet, cover tightly with plastic wrap, and refrigerate until cold, at least 4 hours or up to 4 days.

7. Uncover the ramekins; if condensation has collected on the custards, place a paper towel on the surface to soak up moisture. Mix the 2 teaspoons granulated sugar with the brown sugar. Sprinkle each ramekin with about 1 teaspoon of the sugar mixture; tilt and tap the ramekins for even coverage. Ignite torch and caramelize sugar. Refrigerate the ramekins, uncovered, to re-chill, 30 to 45 minutes (but no longer); serve.

traditional pizza

Copy of IMG_0966

When it comes to cooking, I definitely have weaknesses. I’ve never cooked a perfect roast chicken. I can’t cook a steak with any sort of precision in doneness; if it’s somewhere between ‘moo’ and black, I consider it a success. And grilling? I’ve really never done it. Clearly there are holes in my culinary knowledge.

But pizza? Pizza, I know.

Copy of IMG_7570

I make pizza almost every week. I’ve tried all sorts of crusts, sauces, cheeses, and toppings. I’ve taken notes. And now, finally, I can make my perfect pizza. I’m not saying that my favorite will be your favorite; but it might give you somewhere to start and something new to try.

Copy of IMG_4671

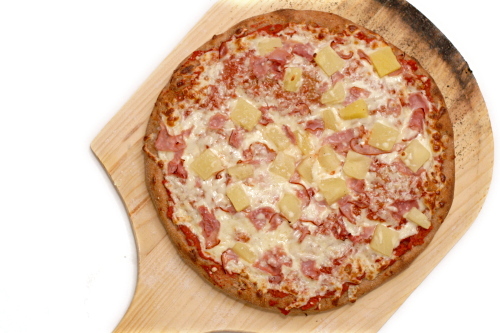
Toppings – I’m going to attack this from top to bottom, which has the advantage of progressing from the simplest decisions to the more complicated. I’m going to focus on traditional pizza – tomato sauce, Italian cheeses, toppings. Most any topping will work here. Use whatever toppings you want in whatever quantities you prefer. I vary it quite a bit, with my favorite combinations being ham and mushroom, as well as ham and pineapple.

Copy of IMG_3544

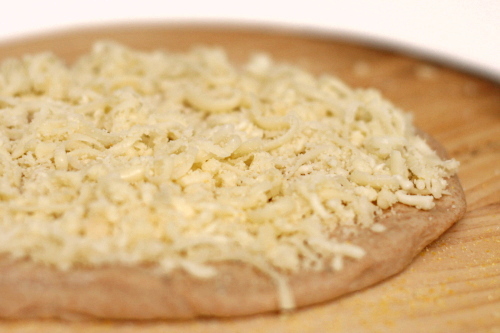
Cheeses – I like a ratio of 5 parts mozzarella to 1 part parmesan. If you have other cheeses around, cheddar or gouda or fontina, it can be fun to replace a portion of the mozzarella with those. I actually prefer part-skim mozzarella on pizza; it seems to melt more smoothly and it tastes just as good as whole milk cheese.

Copy of IMG_3676

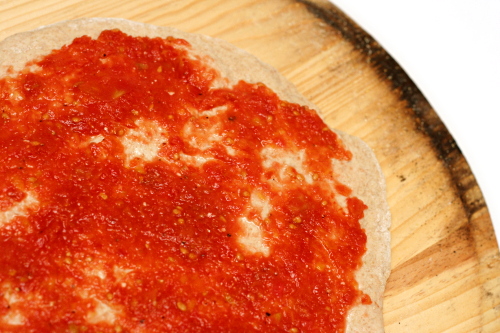
Sauce – My sauce is very (very very) simple, but you have to trust me that it’s just right. All I do is puree a drained can of diced tomatoes, strain them until they’re thick, then stir in salt and pepper. It’s easier than cooking a sauce, and I love the fresh flavor. It does complicate the addition of garlic and spices, but I get around that by adding the garlic as a topping and the herbs to the crust. (I don’t like raw garlic, so I toast the whole unpeeled cloves on the hot pizza stone for a few minutes.)

Copy of IMG_3554

Crust – I want a crust that is light and tender and flavorful, but, even more importantly, easy to work with. No one wants to fight with their pizza dough. This crust started with Cooks Illustrated’s popular pizza dough recipe, and then I started substituting white wine for a portion of the water, and after I made Peter Reinhart’s pizza dough, I became more committed to a cold overnight rise.

Copy of IMG_3550

Another important aspect of pizza crust is how you work with it. Be gentle with your dough. I need to stress that you really don’t want to use a rolling pin. Pull and stretch the dough. Pick it up, hanging the edges on your knuckles, and let gravity do the work. If it’s tearing or thinning unevenly, put it back down and just pull at the thicker parts. If it’s fighting you, walk away for five minutes to let it relax. (I use this technique when I fight with Dave too – ha!)

Copy of IMG_8407

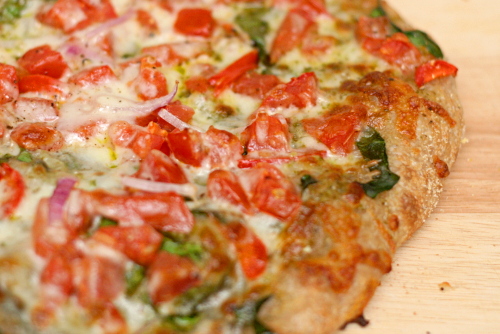
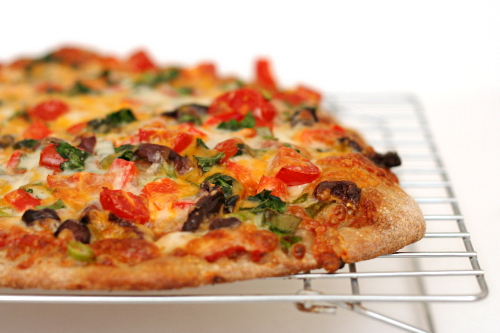
I’m sorry to be so braggy, but this pizza really is just great. Most of it comes down to the crust, which is thin, crisp, and light. I love the sauce too, because it tastes exactly like what it is – tomatoes. The combination of cheeses provides just the right amount of richness and flavor. I start out nearly every weekend by making this pizza, and I can’t think of a better way.

Copy of IMG_5293

Update 3/16/10: I’ve successfully used this method to make this pizza crust whole wheat.  I made the pre-dough out of 11 ounces whole wheat flour, ¾ teaspoon salt, and 1 cup water .  After letting that sit overnight, I mixed it with the rest of the ingredients – 2 tablespoons olive oil, ½ teaspoon dried oregano, 11 ounces white bread flour, 1 teaspoon salt, 2 teaspoons instant yeast, 1 teaspoon granulated sugar, ¼ cup white wine, and ½ cup water.

Printer Friendly Recipe
Traditional Pizza

You can substitute up to 7 ounces (about 1½ cups) of whole wheat flour for the white bread flour, but expect longer rising times and a more stubborn dough. But if you’re patient during shaping, your crust will be just as light and crisp as dough made completely with white flour.

Dough:
2 tablespoons olive oil
½ teaspoon dried oregano
22 ounces (4 cups) bread flour
1¾ teaspoons salt
1 teaspoon sugar
2 teaspoons instant yeast
1/4 cup white wine
1½ cups water
cornmeal for dusting

Sauce:
1 (28-ounce) can diced tomatoes, drained
salt and pepper

Assembly:
3 cloves garlic, unpeeled
10 ounces (2½ cups) part-skim mozzarella, shredded
2 ounces (1 cup) parmesan, grated
toppings of your choice

1. For the dough: Heat the oil and oregano in a small saucepan until fragrant. Mix in the water and wine.

2. In the bowl of a stand mixer fitted with the dough hook, mix the flour, salt, sugar, and yeast. With the mixer on low speed, pour in the liquid mixture. Continue mixing on medium-low speed until the dough comes together, and then knead on medium-low speed for 8 minutes, until the dough is smooth and elastic. Add more flour or water as necessary to form a dough that is sticky but does not cling to the sides of the bowl. When the mixer is running on medium-low speed, the dough should not stick to the bottom of the bowl.

3. Spray a large bowl with nonstick spray. Rub your hands on the sprayed bowl to coat them with oil, then quickly form the dough into a ball. Place the ball of dough in the bowl and cover with plastic wrap.

4. Either set the dough aside to rise at room temperature, which will take 1½ to 2 hours, or refrigerate it until the next day. If it’s chilled overnight, it will take about 5 hours at room temperature to warm and finish rising. You can also reduce the yeast to ½ teaspoon and let the dough rise on the counter for about 8 hours after it has been chilled overnight.

5. For the sauce: Pulse the tomatoes in a food processor 10-12 times, until they’re pureed. Transfer them to a fine-mesh strainer set over a large bowl and let them drain, stirring occasionally for at least 10 minutes. (You can get away with less time if you actively stir and press the tomatoes through the strainer; if you wait longer, you can stir less.) Then discard the liquid in the bowl, transfer the tomatoes from the strainer to the now-empty bowl, and stir in a pinch of pepper and 1/8 teaspoon of salt.

6. Place a pizza stone on the bottom rack of the oven and preheat the oven to 500ºF. Place the garlic on the hot pizza stone for 3-4 minutes or until fragrant.

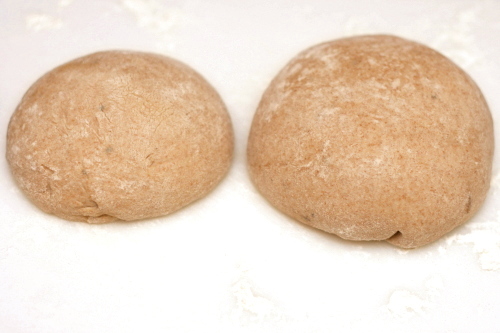
7. Divide the dough and shape each portion into a ball. You have a few options of how to divide it. It makes enough dough for three 12-inch pizzas. However, I always cut it in half and freeze half. Then I divide the remaining dough into two more parts, one twice the size of the other. I make the larger one into pizza and the smaller into cheese bread (no sauce or toppings). Let the balls of dough relax for 10-30 minutes.

8. Using tongs, remove the garlic from the oven and let it cool for a few minutes. Mince.

9. Work with one ball of dough at a time on a lightly floured surface. Flatten the dough, then pick it up and gently stretch it out, trying to keep it as circular as possible. Curl your fingers and let the dough hang on your knuckles, moving and rotating the dough so it stretches evenly. If it tears, just piece it together. If the dough stretches too much, put it down and gently tug on the thick spots.

10. Dust a pizza peel lightly with cornmeal and transfer the round of dough to the peel. Rearrange the dough to something reasonably circular; stab it several times with a fork. Add 1/3 of each of the garlic, sauce, and cheese, followed by toppings of your preference, then transfer the pizza to a hot pizza stone. Bake for 8-10 minutes, until the cheese is bubbling and the crust is spotty brown. Let the pizza cool on the peel for about 5 minutes before slicing and serving. Repeat with the remaining ingredients.

Copy of Copy of IMG_0960

slice and bake brown sugar cookies

Copy of IMG_1207

It’s Thanksgiving! And that means it’s officially Christmastime!

Right?

Oh, it means something about giving thanks? Hmm. That’s cool too.

Copy of Copy of IMG_1129

Still, once the feast is over, it’s all about Christmas. I used to try to hold off thinking about, hearing, and seeing anything Christmas-related until Thanksgiving, but you can imagine how successful that strategy was. These days, I’m more in the ‘if you can’t beat ‘em, join ‘em’ mindset. I didn’t play carols or put up my tree, but I did smile over cute decorations.

Copy of IMG_1153

What better way to kick off the Christmas season than cookies? One of my favorite Christmas cookies, in fact, and I think I finally figured out exactly why I like them so much.

Copy of Copy of IMG_1198

The dough is pretty typical for cookies, with butter, sugar, salt, eggs, vanilla, flour, and leavening. But, it uses twice as much brown sugar as white sugar, which…you guys! It’s chocolate chip cookie dough, without the chocolate! Nothing against chocolate, but that’s pretty much my perfect cookie.

Copy of IMG_1192

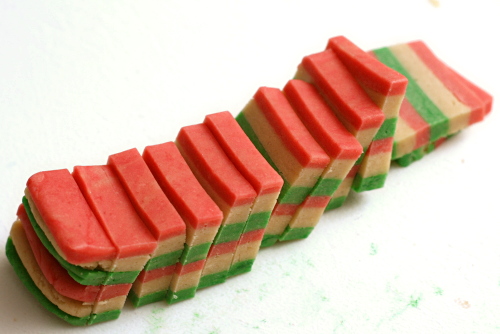
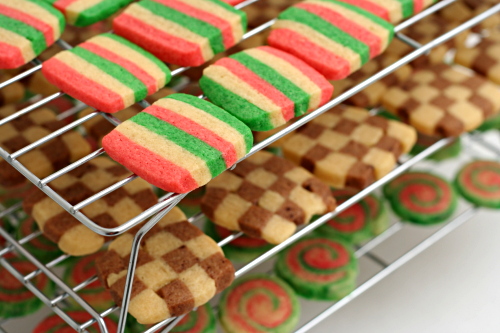
Plus, they’re so pretty. It takes a bit of effort to get them into the different shapes, but once they’re formed, you just throw the logs of dough in the freezer, then bake however many you want whenever you want.

Copy of IMG_1190

These cookies are delicious, they’re not hard to make, they look impressive, and their timing is completely flexible. In other words, they’re perfect. There can be no better way to shift into the Christmas season.

Copy of IMG_1208

One year ago: Multigrain Pancakes

Printer Friendly Recipe
Slice and Bake Brown Sugar Cookies

Makes about 8 dozen

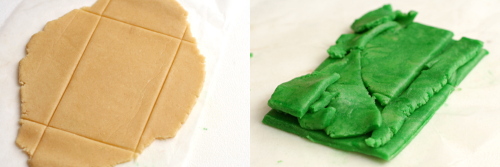
The only slightly difficult part of this recipe is rolling out the dough to an exact size. The best method I found was to initially roll it out to about twice the desired size, then trim the edges to a shape 1 inch smaller in each direction than you eventually want. Place the trimmings on the cut rectangle, cover with wax paper, and roll out to your final desired size (see photos above).

Update 12/22/2011: I like these cookies even better with a ½ cup less flour (3½ cups total).  The dough is stickier, and there’s no way you’d be able to roll it out to the right size, but I’ve decided that simply pressing it to the right size is easier anyway.

4 cups (19.2 ounces) unbleached flour
1 teaspoon baking powder
¼ teaspoon baking soda
2 eggs, preferably room temperature
2 teaspoons vanilla extract
20 tablespoons (2½ sticks) butter, room temperature
1 teaspoon salt
1 cup (7 ounces) firmly packed light brown sugar
½ cup (3½ ounces) granulated sugar
½ ounce unsweetened chocolate, finely chopped

1. In a medium-sized bowl, combine the flour, baking powder, and baking soda. Break the eggs into a small measuring cup, whisk them lightly, and mix in the vanilla.

2. Place the butter in the bowl of a stand mixer fitted with the paddle attachment (or a large mixing bowl if you’re using a hand-held mixer). Beat the butter on medium-low speed until it’s smooth, then add the salt and both sugars. Continue beating on medium-low until the mixture is light and fluffy, about 2 minutes, scraping the sides of the bowl as needed. With the mixer running, gradually add the egg mixture. Once the eggs have been added, scrape the sides of the bowl once, then continue mixing on medium speed for about 1 minute. Reduce the mixer speed to low and gradually add the flour mixture, mixing just until evenly combined. Divide the dough into three equal portions.

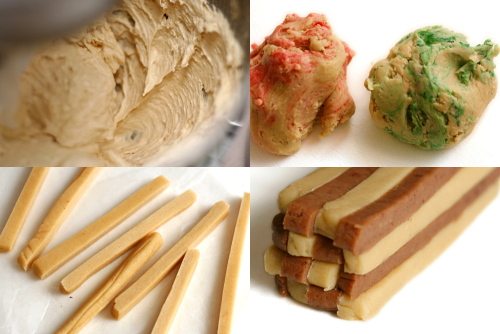
3. For the striped cookies: Divide the first portion of dough into three more equally sized parts. Color one third red, another green, and leave the last one white. Between sheets of wax paper, roll each portion out to a 3-by-9-inch rectangle. Freeze the rectangles for about 10 minutes, until they’re firm enough to cut and stack. Cut each rectangle in half lengthwise to form two 1½-by-9-inch rectangles. Stack the rectangles of dough, alternating colors, to form a block of dough with stripes. Trim the edges if desired. Wrap in wax paper and freeze for at least four hours, or up to 4 weeks.

4. For the checkerboard cookies: Place the chocolate in a microwave-safe bowl and microwave on half power for about 30 seconds. Stir, then repeat the heating and stirring until fully melted, being careful not to burn the chocolate. Divide one portion of dough into two equally sized parts. Mix the chocolate into one half and leave the other plain. Roll each portion into a 9-by-3-inch rectangle. Freeze the rectangles for about 10 minutes, until they’re firm enough to cut and stack. Cut each rectangle into eight 9-by-3/8-inch strips. On a sheet of wax paper, lay four strips next to each other, alternating colors. Press the strips together gently to remove any gaps. Lay another four strips on top of the first layer, alternating colors between layers. Repeat twice more, until there are four layers of four strips each. Trim the edges if desired. Wrap in wax paper and freeze for at least four hours, or up to 4 weeks.

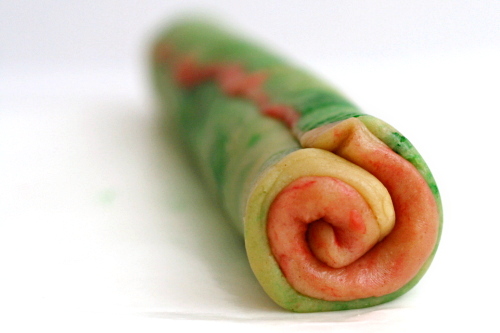
5. For the spiral cookies: Divide the last portion of dough into two equally sized parts. Color one half red and the other green. Between sheets of waxed paper, roll each portion of dough into an 8-by-8-inch square. Without chilling the dough, stack the squares, then tightly roll them together to form a spiral. Wrap the dough in wax paper and freeze for at least fours hours, or up to 4 weeks.

6. When ready to bake, adjust an oven rack to the middle position and heat the oven to 350ºF. Line a baking pan with parchment paper or a silicone mat. Slice the frozen logs into cookies about 1/8-inch thick. Lay the cookies on the prepared pan, about ½-inch apart. Bake for 7-10 minutes, just until the tops no longer look wet. Let the cookies cool on the pan for about 2 minutes, then transfer them to wire racks. Serve at room temperature. Stored in an airtight container, the cookies will be good for at least a week.

Copy of IMG_1220

bacon-wrapped scallops with port reduction

Copy of IMG_0154

I don’t consider myself a picky eater, but I’m been having some problems with shellfish lately. And I hate that it’s a textural issue, because then I know it’s all in my head. With scallops, I think to myself that if it’s so soft, it must be undercooked, right? And then I spend the whole meal worrying about it.

Copy of IMG_0105

Which, geez, people eat scallops raw, I think I can handle them medium-rare, you know? Plus overcooked scallops are terrible, so it’s better to err on the side of less cooked.

Copy of IMG_0132

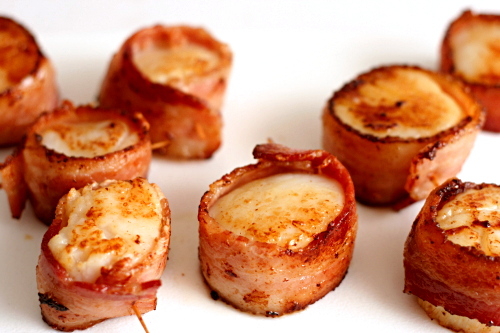
But while I sat and squirmed while I ate my scallops, trying not to think about whether they could have used a few more minutes on the stove, Dave gushed over them. Dave loves scallops. And bacon.

Copy of IMG_0146

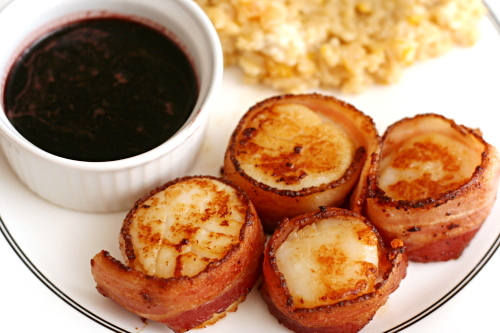
Fortunately, the flavors really are fantastic. The subtle sweetness of the scallops goes nicely with the salty bacon, and the rich port sauce is a perfect accompaniment. The sauce is intense, so I liked to dip just the smallest corner of a scallop into it. Mmm. Especially tasty on the crispy browned bites. Because those are the only ones that I trust are cooked enough.

Copy of IMG_0149

One year ago: Roasted Brussels Sprouts

Printer Friendly Recipe
Bacon-Wrapped Scallops with Port Reduction (adapted from Gourmet, but really epicurious)

8 first-course servings or 4 main-course servings

I had a lot of random extra bacon scraps, because the scallops were too big for half a piece of bacon to wrap around each and too small for a full piece.

You see how some of my bacon strips are taller than the scallops? You don’t want that. Trim the edges of the bacon if you need to, because otherwise the scallop doesn’t sit against the pan evenly and it doesn’t get as nicely browned.

The scallops can be wrapped in bacon 4 hours ahead and chilled, covered. Sauté just before serving. The port reduction can be made 1 day ahead and chilled, covered. Reheat before serving.

Port reduction:
2 cups ruby port
½ cup granulated sugar
1½ teaspoons whole black peppercorns
1 sprig rosemary

Scallops:
16 thin slices (about 16 ounces) bacon
16 sea scallops (about 1 pound), tough side muscle discarded if attached
1 tablespoon extra-virgin olive oil
2 tablespoons unsalted butter

1. For port reduction: Bring port, sugar, peppercorns, and rosemary to a simmer in a 2-quart saucepan over moderately low heat, stirring until sugar is dissolved. Remove from heat, then carefully ignite port with a kitchen match, letting flames die down (this will take a few minutes). Simmer over moderately low heat until sauce is thickened and reduced to about ½ cup, about 30 minutes.

2. For scallops: Heat a 12-inch heavy skillet over moderate heat, then cook the bacon until some fat has rendered and the edges of the bacon start to brown, about 1½ minutes per side. Transfer the bacon to paper towels to drain.

3. Pat the scallops dry and season them with salt and pepper. When the bacon is cool enough to handle, wrap a piece of bacon around each scallop and pierce scallop with a toothpick to secure.

4. Heat the oil and butter in a clean skillet over moderately high heat until hot but not smoking. Sauté the scallops, turning them once, until the bacon is browned and the scallops are opaque, about 5 minutes total. Transfer to a plate and serve with port reduction for dipping.

all-in-one holiday bundt cake

Copy of IMG_0911

When I did my bake-and-send extravaganza last summer, I unintentionally left a few key people out. Namely, our moms, both mine and Dave’s. Oops.

Copy of IMG_0871

I did, however, send a box of cookies to my mother-in-law’s sister. Who, of course, called my mother-in-law, mentioned the cookies, and then…I was in trouble. Well, not in trouble, because my mother-in-law is too nice for that, but not not in trouble either.

Copy of IMG_0884

So I finally made up for it recently by sending a box of fall-themed treats – molasses cookies, pumpkin biscotti, and this cake. Phew. No longer in the daughter-in-law doghouse.

Copy of IMG_0906

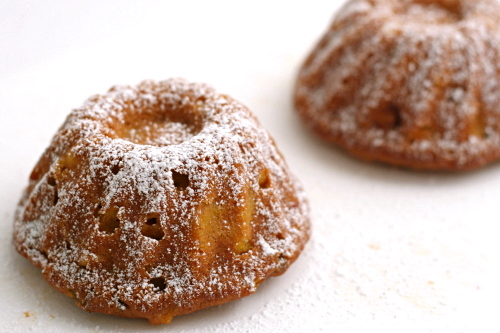
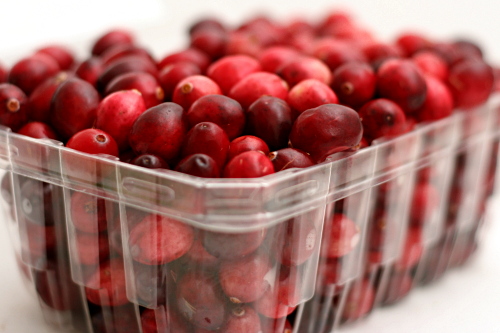
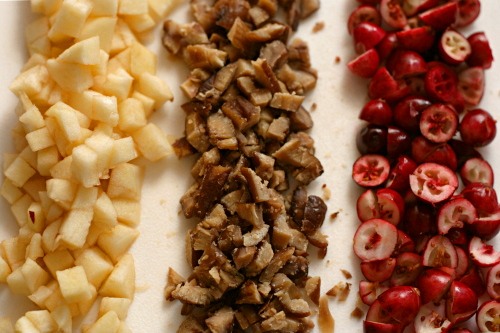
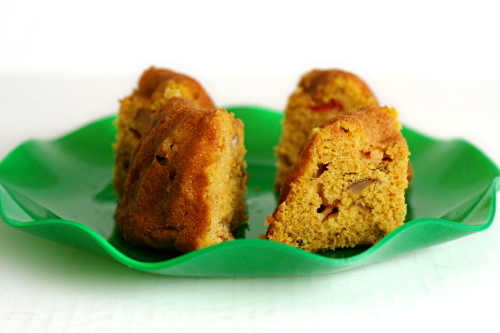
This is not a simple cake – we’re talking pumpkin, cranberries, apples, nuts, spices. I thought it smelled a lot like apple cake, but when I was eating it, the flavor of the cranberries stood out the most. It was a good cake – tasty and moist. I enjoyed it, and I hope my mother-in-law did too.

Now perhaps I should consider sending her a thank you note for the birthday present she sent me in August?

Copy of IMG_0934

Britin chose this cake for Tuesdays with Dorie, and she will have the recipe posted.  I substituted chestnuts for the pecans.

One year ago: Thanksgiving Twofer Pie

Copy of IMG_0908

chicken empanadas

Copy of IMG_1318

Dave got yelled at over these empanadas. I’m not much of a yeller normally; I’m more of a silent treatment and glower type of person. But there was no time for that; action needed to be taken immediately.

Copy of IMG_9781

It’s all because I made the filling a couple of days before I planned to form and bake the empanadas. The filling isn’t the most simple thing to make. There’s all kinds of chopping, browning, simmering, and meat shredding. And I was a little short on chicken, so I didn’t end up with as much filling as I’d hoped.

Copy of IMG_9780

That night, Dave needed to heat something up for himself for dinner, so I told him there was some extra brown rice with black beans in the fridge. I walked away for a few minutes, and when I came back, he had dumped my precious empanada filling onto a plate, microwaved it, and was scooping it up with a fork.

Copy of IMG_9973

Hey, guess what there is none of in this filling? 1) Brown rice. 2) Black beans.

“Damn!” he exclaimed. “This is good!”  That’s when I yelled, because I just needed him to stop eating it right away.

And then he was so apologetic and I felt like a jerk. He kept saying, “It really was tasty!” as if that was supposed to make me feel better about it.  Yes. I know it’s tasty.  I spent some good time making sure it was.

Copy of IMG_9987

And what can you do to make something so delicious even better? Wrap it in pastry and bake it until it’s browned and flaky and crisp. Oh wow, these are good. And apparently that’s true whether they’re wrapped in pastry and baked or just dumped onto a plate and microwaved.

Copy of IMG_1331

One year ago: Comparison of 2 chocolate cake recipes
Two years ago: Cream cheese chocolate chip cookies (and my very first blog entry)

Printer Friendly Recipe
Chicken Empanadas (adapted from Smitten Kitchen and epicurious)

Makes about 18 empanadas

I didn’t actually measure anything in the filling. I had to leave the olives out because Dave hates them.

As I formed each empanada, I put it in the freezer while I worked with the rest. That way the dough didn’t get too soft and it baked up flaky.

After forming the empanadas, I baked about half of them immediately. I froze the rest for a couple of months, then baked them straight from the freezer. They were perfect.

Dough:
4½ cups (21.6 ounces) unbleached all-purpose flour
3 teaspoons salt
16 tablespoons (2 sticks) cold unsalted butter, cut into ½-inch cubes
2 large eggs
⅔ cup ice water
2 tablespoons distilled white vinegar

Filling:
3 whole chicken legs, including thighs (2 to 2¼ pounds total)
1 teaspoon salt
¼ teaspoon black pepper
1 tablespoon extra-virgin olive oil
2 large onions, halved lengthwise, diced
2 large garlic cloves, minced
2 Turkish bay leaves or 1 California
⅓ cup (1½ ounces) finely diced Spanish chorizo
½ teaspoon Spanish smoked paprika (not hot)
¼ cup chopped pitted green olives
¼ cup golden raisins
½ cup dry white wine
½ cup reduced-sodium chicken broth

Egg wash:
1 egg
water
salt

1. For the dough: Mix the flour and salt in a large bowl; blend in the butter with your fingertips or a pastry blender until the mixture resembles coarse meal with some roughly pea-sized butter lumps. Beat together the egg, water, and vinegar in a small bowl. Add it to the flour mixture, stirring until just incorporated. The mixture will look shaggy. Turn out the mixture onto a lightly floured surface and gather it together, kneading gently with heel of your hand once or twice, just enough to bring the dough together. Form the dough into two flat rectangles and chill them, each wrapped in plastic wrap, at least 1 hour or overnight.

2. For the filling: Pat the chicken dry and season it with salt and pepper. Heat 1 tablespoon oil in a 12-inch heavy skillet over medium-high heat until hot but not smoking, then add the chicken, skin-side down. Cook it without moving for about 3 minutes, until dark golden brown, then turn it and continue cooking for another 3 minutes. Remove the chicken from the pan and set it aside.

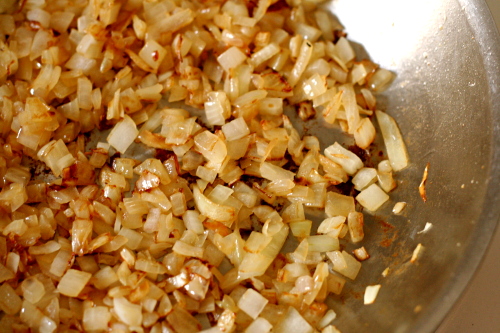
3. Add the onions, garlic, and bay leaves to the skillet and sauté, stirring frequently, until the onions are softened, 4 to 5 minutes. Add the chorizo and paprika and cook, stirring, for 1 minute. Add the olives, raisins, wine, and broth and bring the mixture to a boil, stirring and scraping up any brown bits. Return the chicken to the skillet along with any juices accumulated on the plate, then reduce the heat to medium-low and simmer, covered, turning the chicken once, until the chicken is tender, 25 to 30 minutes total.

4. Transfer the chicken to a clean plate. The sauce remaining in the skillet should be the consistency of heavy cream; if it isn’t, briskly simmer until it’s slightly thickened, about 5 minutes. When the chicken is cool enough to handle, discard the skin and bones and coarsely chop the meat. Stir the chicken back into the sauce. Discard the bay leaves and season the filling with salt and pepper. Let the filling cool for 30 minutes, uncovered.

5. To form and bake the empanadas: Adjust an oven rack to the middle position and preheat the oven to 400°F. Line a baking pan with a parchment paper or a silicone mat. Divide the dough into 24 equal pieces and from each into a disc. Keeping remaining pieces covered, roll out 1 piece on a lightly floured surface with a lightly floured rolling pin into a 5-inch round (about 1/8 inch thick).

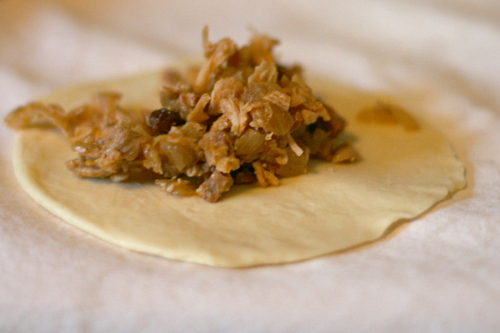
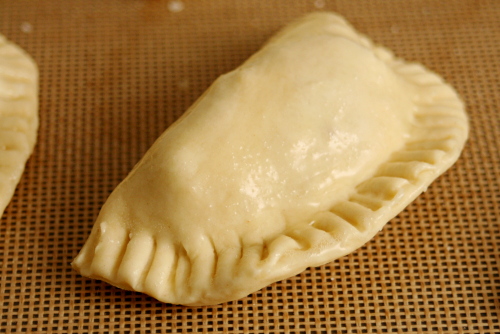
6. Spoon about 2 tablespoons filling onto the center of each round of dough and fold the dough in half, enclosing the filling. Press the edges together to seal, then crimp decoratively with your fingers or the tines of a fork. Transfer the empanada to the prepared pan. Repeat with the remaining dough. You might have extra dough.

7. Beat the egg with 1 tablespoon of water and a pinch of salt. Brush the empanadas with the egg wash, then bake one sheet at a time until the empanadas are golden brown, about 25 minutes. Transfer them to a cooling rack and let them cool for at least 10 minutes. Serve warm.

Copy of IMG_1320

pumpkin yeast bread

Copy of IMG_0748

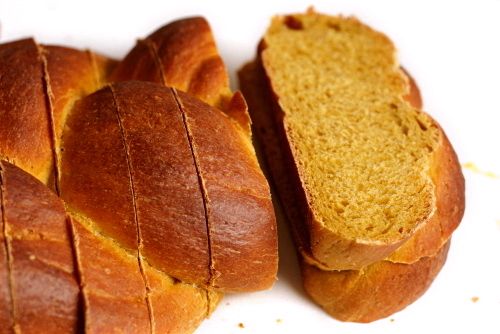
Let’s see, so far this year, I’ve made pumpkin pie, muffins, tea cake, oatmeal, pancakes, cheesecake, cupcakes, risotto, soup, ravioli, scones, chili, and biscotti. Wow, when you put it that way, it’s a little embarrassing. Clearly I can’t leave any categories out, and so – pumpkin yeast bread.

Copy of IMG_0651

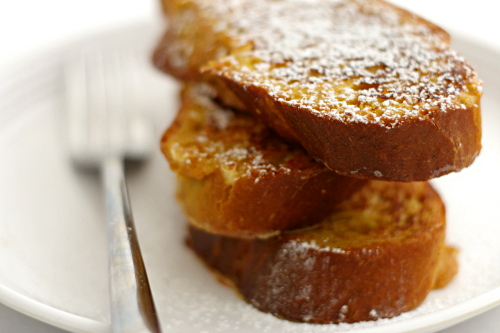
Truth be told, my mind jumped immediately to French toast when I saw this recipe. Tender pumpkin-tinged bread, sliced thick and dipped in fall-spiced custard, fried in butter until golden, topped with a dusting of powdered sugar. Oh yeah.

Copy of IMG_0661

That’s exactly what I got, and it was even better than I’d hoped. Perfect French toast, and I’m also thinking this bread will be fantastic just toasted and topped with butter. Ooh, or with pumpkin butter! Or made into bread pudding! Or heck, just eaten plain, still warm from the oven. I love pumpkin.

Copy of IMG_1312

One year ago: European-Style Hearth Bread

Printer Friendly Recipe
Pumpkin Yeast Bread (from King Arthur Flour via Sugarcrafter)

Makes 2 small loaves

It seems like I had to add quite a bit of flour to this to give it the right consistency. It shouldn’t really be sticky, so don’t be afraid to add more flour if necessary.

4½ cups bread flour
1 tablespoon instant yeast
1 teaspoon cinnamon
1 teaspoon ground ginger
¼ teaspoon ground cloves (optional)
⅓ cup sugar
1½ teaspoons salt
2 eggs
1¾ cups pumpkin
4 tablespoons (½ stick) butter, melted and cooled

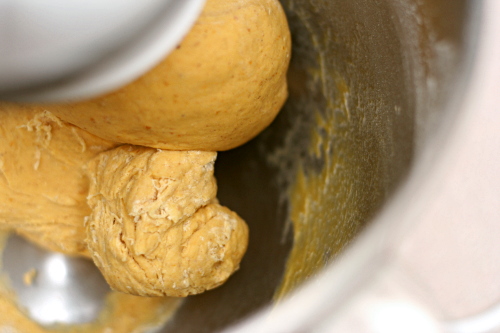
1. Stand mixer: Mix the flour, yeast, spices, sugar, and salt in the bowl of a stand mixer fitted with the dough hook. In a large measuring cup, lightly beat the eggs and whisk in the pumpkin and butter. With the mixer on low speed, gradually add the liquid ingredients. Continue mixing on medium-low until the dough is elastic and supple, about 8 minutes. You may need to add a little more flour or water to get the correct consistency – soft but not sticky.

By hand: Mix the flour, yeast, sugar, and salt in a large bowl. In a large measuring cup, lightly beat the eggs and whisk in the pumpkin and butter. Make a well in the middle of the dry ingredients and pour in the liquid ingredients. Stir the mixture until the dough comes together. Transfer it to a floured board or countertop and knead, incorporating as little flour as possible, for about 10 minutes, until the dough is elastic and supple. You may need to add a little more flour or water to get the correct consistency – soft but not sticky.

2. Transfer the dough to an oiled bowl and cover with plastic wrap or a damp dishtowel. Set the dough aside to rise until it has doubled in volume, about 1½ hours.

3. Turn the dough out onto a lightly floured board. Using a serrated knife, cut the dough in half, then cut each half into three equally sized pieces. Roll each piece into a 10-inch rope.

4. Working with three ropes at a time, place them on a lightly greased or parchment-lined baking sheet. Braid them together, pinching the ends together and tucking them under the loaf. Repeat with the remaining logs. Set the braids aside, covered with lightly greased plastic wrap or a damp dish towel, to rise for 1 hour; they should look puffy, though not necessarily doubled in bulk.

5. Adjust a rack to the middle position and heat the oven to 375°F. Bake the loaves for 20 to 25 minutes, until lightly browned and an instant read thermometer inserted into the center reads 185-195°F. Remove the braids from oven and allow them to cool on a wire rack. Serve them warm or at room temperature.

Copy of IMG_0765

mashed potatoes with root vegetables

Copy of IMG_8247

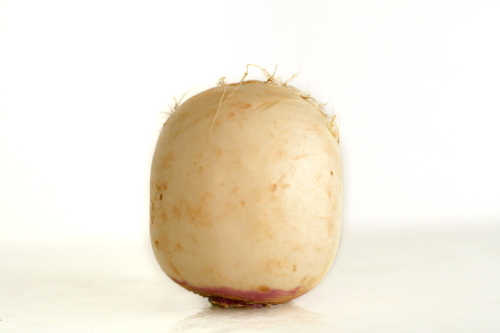
Isn’t that turnip the cutest little thing? Like an old crazed bald man, with just a few errant hairs.

Copy of IMG_8259

In truth, when I was planning this dish, I had to call a friend to give me some root vegetable knowledge. Which is the one that looks like a white carrot? (A parsnip, it turns out.) Which one should I try first? She recommended turnips, and thus dictated my first ever turnip purchase.

Copy of IMG_8262

Of course I took the wussy way out and mixed them with potatoes. Still, I enjoyed the extra dimension of flavor they provided – kind of licoricey and fennel-like. Now I’m looking forward to introducing myself to other root vegetables with this recipe – celery root in particular sounds interesting.

Copy of IMG_8280

One year ago: Chanterelle Salad with Speck and Poached Eggs

Printer Friendly Recipe
Mashed Potatoes and Root Vegetables (from Cooks Illustrated)

4 tablespoons unsalted butter
8 ounces carrots, parsnips, turnips, or celery root; carrots or parsnips cut into ¼-inch-thick half-moons; turnips or celery root cut into ½-inch dice (about 1½ inch cups)
1½ pounds Yukon Gold potatoes, peeled, quartered lengthwise, and cut crosswise into ¼-inch-thick slices; rinsed well in 3 to 4 changes of cold water and drained well
⅓ cup low-sodium chicken broth
table salt
¾ cup half-and-half, warmed
3 tablespoons minced fresh chives
ground black pepper

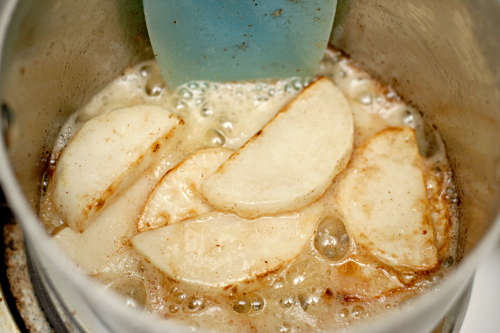
1. Melt butter in large saucepan over medium heat. When foaming subsides, add root vegetables and cook, stirring occasionally, until butter is browned and vegetables are dark brown and caramelized, 10 to 12 minutes. (If after 4 minutes, vegetables have not started to brown, increase heat to medium-high.)

2. Add potatoes, broth, and ¾ teaspoon salt and stir to combine. Cook, covered, over low heat (broth should simmer gently; do not boil), stirring occasionally, until potatoes fall apart easily when poked with a fork and liquid has been absorbed, 25 to 30 minutes. (If liquid does not gently simmer after a few minutes, increase heat to medium-low.) Remove pan from heat; remove lid and allow steam to escape for 2 minutes.

3. Gently mash potatoes and root vegetables in saucepan with potato masher (do not mash vigorously). Gently fold in warm half-and-half and chives. Season with salt and pepper to taste; serve immediately.

Copy of IMG_8289