Archives for November 2009

cranberry nut dessert

Copy of IMG_1245

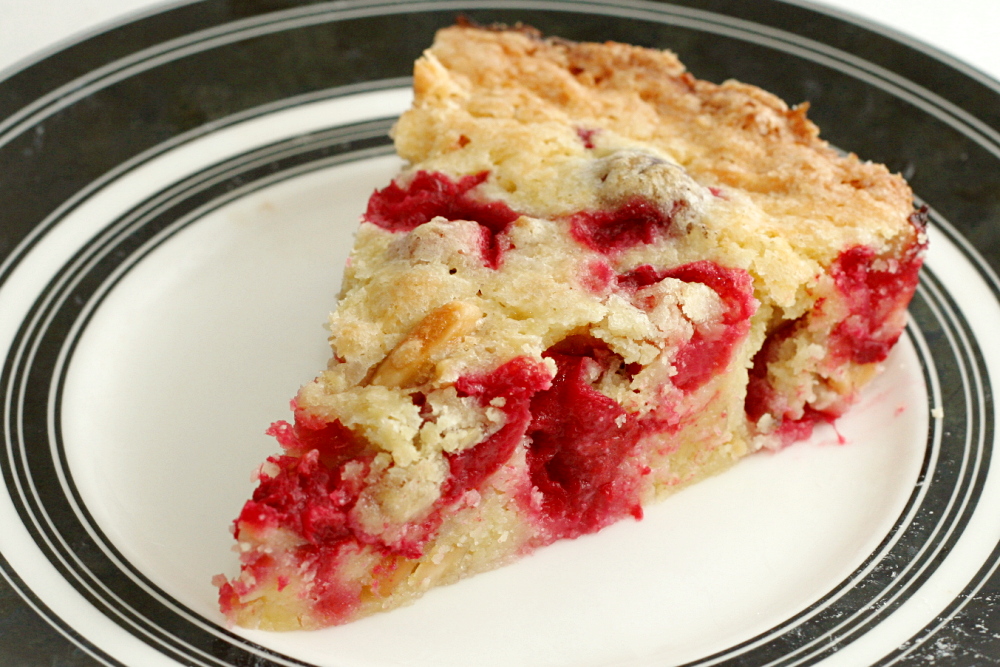
Sometimes I’m too full of myself for my own good. When I saw this on Jen’s site, I noted that she called it ‘cranberry dessert.’ But, in my hubris, I figured, what the hell, it looks like a cake. I’ll call it a cake and serve it as a cake.

Copy of IMG_1202

In retrospect, though, the vague title ‘dessert’ is probably more appropriate. Or maybe cranberry clafoutis? Except with more butter. Cobbler doesn’t quite work because the breading isn’t biscuits.

Copy of IMG_1205

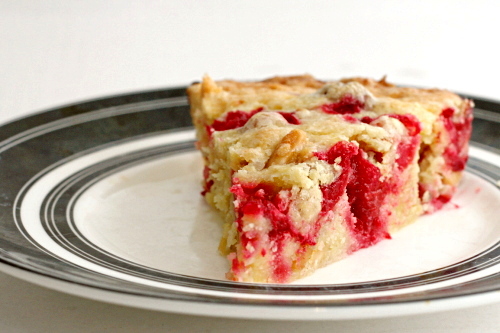
Even looking at the photos now, it looks like a cake. The recipe is mixed like a quick bread, so that’s cake-like.

Copy of IMG_1206

But somehow, when I was eating it, it seemed more like a fruit dessert, maybe because the ratio of fruit to batter is so high. It was fantastic on its own, but it did cry out for a scoop of vanilla ice cream. Next time I won’t deny it.

Copy of IMG_1210

One year ago: Lime Meltaways

Printer Friendly Recipe
Cranberry Nut Dessert (rewritten from Use Real Butter)

Most nuts would work here, but I used lightly toasted almonds and it seemed like a perfect match.

1 cup (4.8 ounces) all-purpose flour
1 cup (7 ounces) granulated sugar
¼ teaspoon salt
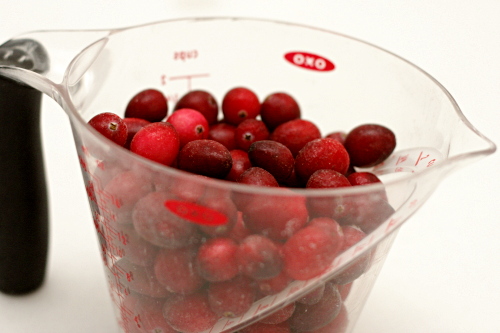
2 cups fresh or frozen cranberries
½ cup chopped nuts
2 eggs
8 tablespoons (1 stick) butter, melted and cooled
½ teaspoon almond extract

1. Adjust a rack to the middle position and heat the oven to 350ºF. Spray a pie pan with spray oil.

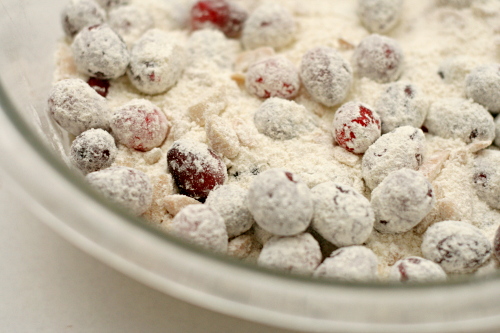
2. In a large bowl, combine the flour, sugar, salt, cranberries, and nuts. In another bowl, whisk the eggs until broken up, then whisk in the butter and almond extract. Pour the liquid ingredients into the dry ingredients and stir until just combined.

3. Spread the batter in the prepared pan; bake for 40 minutes or a until toothpick inserted near the center of the pan comes out clean or with a few crumbs hanging onto it. Let the dessert cool for at least 15 minutes before serving. Serve with ice cream or whipped cream, if desired.
Copy of IMG_1248

sopaipillas

Copy of IMG_5080

Moving to a small remote town in the middle of a desert, there are definitely things I’m going to miss.  Other a big grocery store, that is.  Sushi restaurants, for one, and long fall and spring seasons, and skylines, and squirrels and deer in my backyard, and, well, green things.

Copy of IMG_5057

On the other hand, there are things I’m really looking forward to.  Skies that go on forever, shockingly colorful sunsets, lizards and antelope, cacti, two national parks within 50 miles, mountains.  And New Mexican food.  Green chile, red chile, rice and beans, sopaipillas.

Copy of IMG_5059

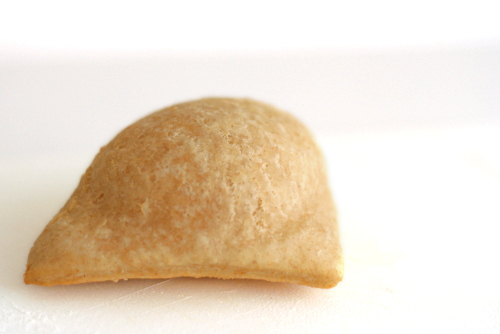
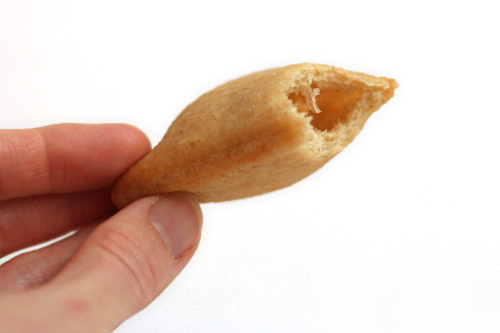
Sopaipillas are maybe the New Mexican equivalent of donuts.  Dough, enriched with lard and leavened with either yeast or baking powder, is rolled flat and fried.  It puffs like a pita in the oil, forming a pocket that’s pretty much designed to be filled with honey.  Or carne adovada, if you’re thinking dinner.

Copy of IMG_5068

A basket of these is served with any meal in a restaurant serving New Mexican food.  Or if it isn’t, it’s cause for complaint about how cheap the restaurant is to charge, even a dollar, for something that by all rights should be included for free with a meal.

Copy of IMG_5074

Everyone has their own tricks for eating their sopaipillas with honey.  Bite a corner off and squirt honey inside?  Drizzle the honey over the top?  My favorite way, for maximum coverage with minimum stickiness, is to form a pool of honey on my plate and dip each bite.

There may not be sushi in Carlsbad, NM, but by god, there’ll be sopaipillas that I don’t have to fry myself.

Copy of IMG_5078

One year ago: Comparison of 4 chocolate chip cookie recipes

Printer Friendly Recipe
Sopaipillas (adapted from Simply Simpatico, by the Junior League of Albuquerque)

Makes about 2 large dozen sopaipillas

4 cups (19.2 ounces) all-purpose flour, plus more if necessary
1 cup whole wheat flour
2¼ teaspoons (1 package) instant yeast
2 tablespoons sugar
1½ teaspoons salt
1½ cups milk, warmed to 100ºF
¼ cup water
3 tablespoons lard or shortening, melted
vegetable or canola oil for frying

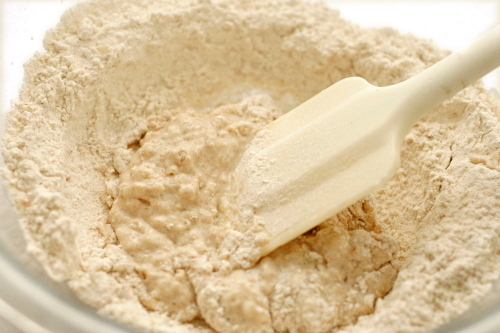
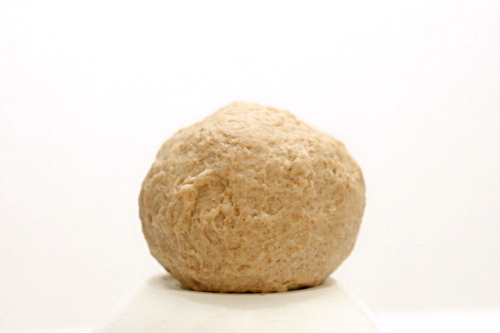
1. Stand mixer: Mix the flours, yeast, sugar, and salt in the bowl of a stand mixer fitted with the dough hook. With the mixer on low speed, gradually add the milk, water, and lard.  Continue mixing on medium-low until the dough is elastic and supple, about 8 minutes. You may need to add a little more flour or water to get the correct consistency – smooth but not sticky. Transfer the dough to an oiled bowl and cover with plastic wrap. (You can refrigerate the dough overnight at this point.)

By hand: Mix the flours, yeast, sugar, and salt in a large bowl. Make a well in the middle of the dry ingredients and pour in the milk, water, and lard. Stir the mixture until the dough comes together. Transfer it to a floured board or countertop and knead, incorporating as little flour as possible, for about 10 minutes, until the dough is elastic and supple. You may need to add a little more flour or water to get the correct consistency – smooth but not sticky. Transfer the dough to an oiled bowl and cover with plastic wrap.

2. Let the dough rise until it’s doubled in size, about 1 hour. Knead it lightly to expel air.

3. When the dough is almost ready, heat 2 inches of vegetable oil in a large Dutch oven to 350ºF.

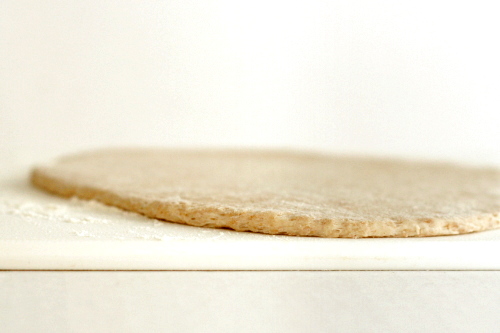
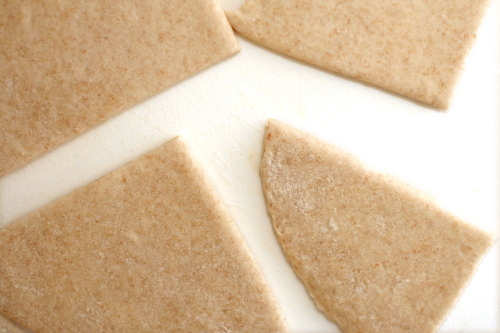
4. On a lightly floured surface, roll out the dough, in portions if necessary, until it’s just under 1/8-inch thick.  Using a pizza cutter, cut the dough into squares or rectangles of whatever size you want – a few inches per side is standard.

5. Place the squares of dough on lightly floured pans and lightly cover.  The cut sopaipillas can stay at room temperature for up to 5 minutes; otherwise, refrigerate them until you’re ready to fry them.

6. Carefully drop two or three sopaipillas into the hot oil.  When the rolls begin to puff, gently push them into the hot oil several times to help them puff more evenly.  Turn several times; fry until pale gold on both sides, 1-2 minutes.  Drain on paper towels.  Serve immediately.

Copy of IMG_5084

carne adovada

Copy of IMG_5067

A carne adovada comparison post is a very bad idea because:

1. I don’t love cooking with meat, with the constant hand-washing and being careful not to contaminate cooked meat tools with raw meat tools.

Copy of IMG_7465

2. My limited counter space makes working with large roasts difficult.

3. The oven was on for four hours – in July.

Copy of IMG_7470

4. One of the recipes includes the warning “Don’t breathe the fumes!”

5. Another warning, this time from my sister: “My coworker said to be careful because red chile can give some people the runs if they aren’t used to eating it.”

Copy of IMG_4864

6. Carne adovada is red. Deep, dark red, and yes, of course it stains.

7. Who, outside of New Mexico, has even heard of carne adovada?

Copy of IMG_7487

Oh, and then, the outcome?

8. Dave thought all three recipes tasted the same anyway.

Copy of IMG_4879

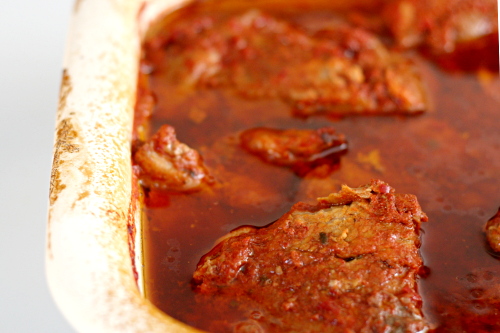
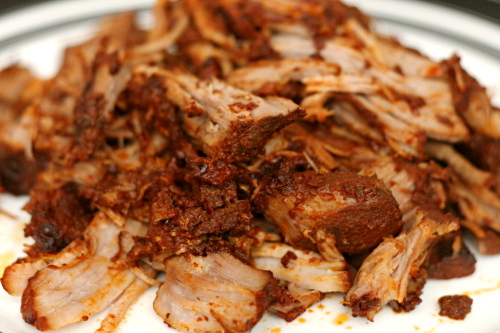
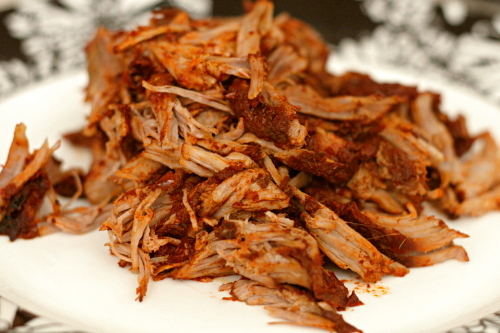
Carne adovada is pork marinated in red chile sauce, then slow roasted. It isn’t something that I’ve eaten a lot of; my dad made it once when I was young and it was crazy ridiculously painfully spicy, and I’ve pretty much been scared of it since. Of course now I realize that the level of spiciness will vary with the heat of the chiles.

Copy of IMG_4881

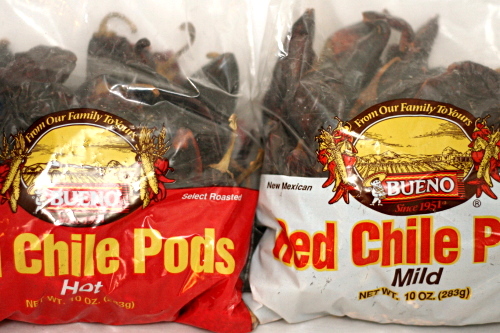
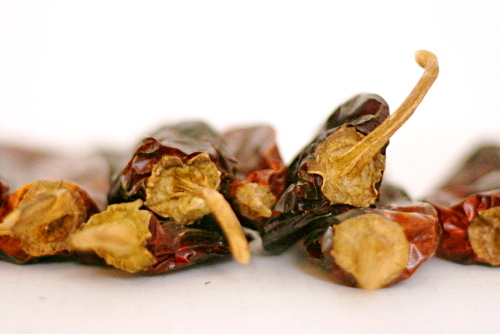
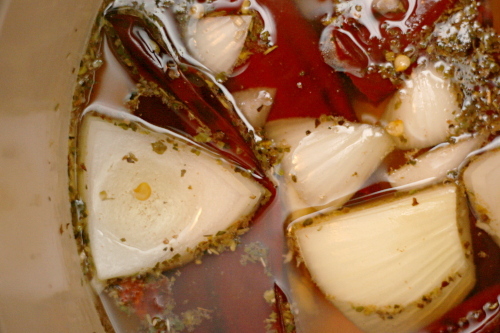
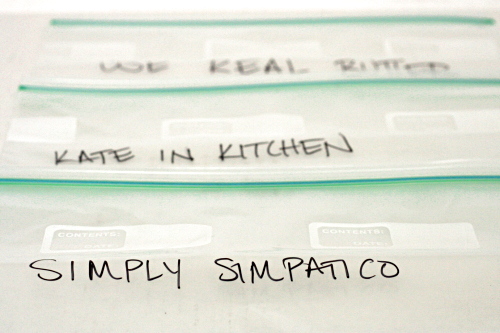
Unable, as usual, to decide on a recipe, I decided to compare a few. The meat in all recipes is marinated and cooked using the same method and cooking time; the difference is in the red chile sauce. At its most simple, the red chiles are soaked in hot water to rehydrate them, then blended with onions, garlic, and salt. Jen’s method is only slightly more complicated, with the added step of toasting the dried chiles before soaking them.

Copy of IMG_4871

Kate’s recipe is a little more complicated – and uses far, far more red chiles. It’s similar but significantly more fussy, with a soak followed by a simmer instead of just a soak, and then the blended ingredients need to be pushed through a sieve, a step I find tedious in most recipes that call for it.

Copy of IMG_7463

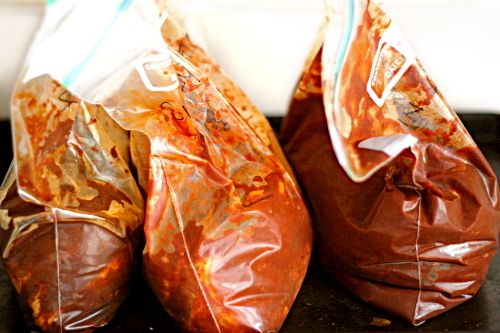
I let the meat marinate for about 24 hours, but if you can swing longer, up to 2 full days, I really think that’s the way to go. The more red chile flavor, the better.

Copy of IMG_7505

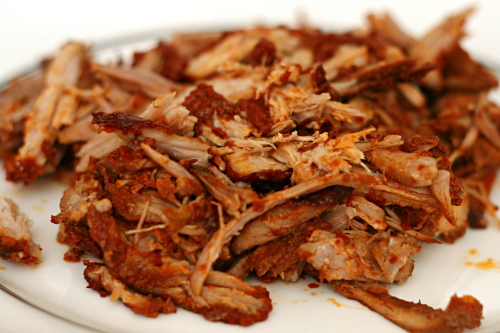
After finding enough properly-sized baking pans, jigsawing the pans into the oven, roasting the meat for hours, letting it cool slightly, and shredding all three pans of meat while trying to keep straight which was which so I could identify the photos, Dave and I decided that they were very, very similar.

Copy of IMG_7514

Dave would say identical. I would say that they’re oh-so-slightly different, but equally good. Kate’s recipe, which used so much more chiles, was spiciest. The recipe that did not require toasting the chiles tasted lighter and fresher, while the recipe with toasted chiles had a deeper flavor.

Copy of IMG_7523

My favorite was probably the simplest recipe; I liked that fresh flavor. Plus, if they all taste essentially the same, I might as well make the easiest, right? I guess a comparison was necessary, just so I know that, in this case, simple works just fine.

Copy of IMG_4929

Update: I thought I should add that neither of us had any, ah, digestive issues after eating the red chile, despite the concerns of my sister and her coworker.

One year ago: Baked Eggs with Spinach and Mushrooms

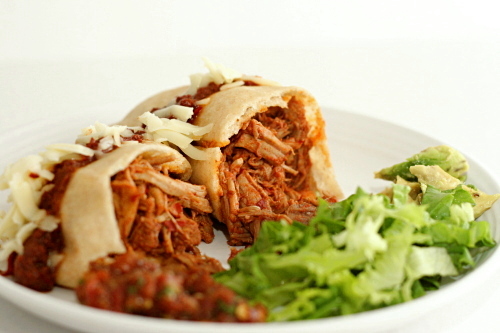
Serving suggestions: Burritos, stuffed sopaipillas (shown in the top photo), quesadillas, tacos, breakfast burritos.  You can also add potatoes to the mixture before cooking, and then serve the potatoes and meat as a main dish with beans and rice as sides.

Printer Friendly Recipe
Carne Adovada
(adapted from Simply Simpatico, by the Junior League of Albuquerque)

16-18 dried red chile pods
hot water
3 cloves garlic
2 teaspoons salt
1 tablespoon dried oregano
4 pounds pork shoulder, trimmed of thick layer of fat and sliced ½-inch thick

1. Remove stems and seeds from the chile pods. Place the pods in a large bowl or pot and pour in enough hot water to cover them. Soak for 1 hour. Strain, reserving the soaking liquid.

2. Place the chiles, garlic, and salt in a blender and add enough soaking liquid to just cover. Making sure there’s about two inches of headspace, blend until the skins disappear and the mixture is smooth, 2-3 minutes. Pour the sauce over meat, cover tightly, and marinate in the refrigerator for 24-28 hours.

3. Adjust a rack to the middle position and heat the oven to 350ºF. Place the meat and chile sauce marinade in a baking pan and cover tightly with foil. Bake the carne adovada until the meat is falling apart tender, about 4 hours. (You can also cook the carne adovada in a crockpot on low heat for 7-9 hours.) When the meat is done, shred it or cut it into 1-inch pieces. Serve.

Copy of IMG_7527

Printer Friendly Recipe
Carne Adovado
(adapted from Jen at Use Real Butter, who adapted it from Sante Fe Recipe)

16 dried red chile pods
1 tablespoon salt
4 cloves garlic
2 teaspoons oregano
5 pounds pork shoulder, trimmed of thick layer of fat and sliced ½-inch thick

1. Adjust an oven rack to the middle position and heat the oven to 325ºF. Remove the stems from the chile pods; place the pods in a pan and bake for 5-10 minutes, stirring occasionally, until the chiles are lightly roasted. Leave the oven door open, and don’t breathe the fumes! Shake the seeds out of the pods and discard them.

2. Place the chiles in a medium bowl and cover them with boiling water. Let them sit for 30 minutes. Drain the water, reserving about 2 cups. Place the chiles in a food processor or blender; add the salt, garlic, and oregano. Cover the mixture with the reserved chile water, and blend or process for 2 minutes or until the skins disappear.

3. Pour the sauce over meat, cover tightly, and marinate in the refrigerator for 24-28 hours.

4. Adjust a rack to the middle position and heat the oven to 350ºF. Place the meat and chile sauce marinade in a baking pan and cover tightly with foil. Bake the carne adovada until the meat is falling apart tender, about 4 hours. (You can also cook the carne adovada in a crockpot on low heat for 7-9 hours.) When the meat is done, shred it or cut it into 1-inch pieces. Serve.

Copy of IMG_7526

Printer Friendly Recipe
Carne Adovada
(adapted from Kate in the Kitchen , who adapted it from Sante Fe Hot and Spicy Recipes)

12 ounces dried red chile peppers
1 large onion, chopped
8 cloves fresh garlic, smashed with skins removed
2 teaspoons dried oregano
2 teaspoons ground cumin
2 teaspoon kosher salt
3-4 pounds pork shoulder, trimmed of thick layer of fat and sliced ½-inch thick
4 teaspoons red pepper flakes
2 sticks cinnamon

1. De-stem and de-seed chile peppers; place in a large stock pot and cover with hot water. Soak for 30 minutes. Add the remaining ingredients to the pot; bring to a boil. Reduce the heat to low and simmer for 30 minutes.

2. Strain, reserving liquid. Allow to cool slightly, then process solids in batches in a food processor using reserve liquid for proper consistency. Strain through a wire sieve, pressing on the solids to extract the liquids.

3. Pour the sauce over meat, add the cinnamon and red pepper flakes, cover tightly, and marinate in the refrigerator for 24-28 hours.

4. Adjust a rack to the middle position and heat the oven to 350ºF. Remove the cinnamon stick. Place the meat and chile sauce marinade in a baking pan and cover tightly with foil. Bake the carne adovada until the meat is falling apart tender, about 4 hours. (You can also cook the carne adovada in a crockpot on low heat for 7-9 hours.) When the meat is done, shred it or cut it into 1-inch pieces. Serve.

Copy of IMG_7524

sugar-topped molasses spice cookies

Copy of IMG_0865

A story:

I was trying to decide where to go to graduate school, visiting schools and meeting with potential advisors. One of those advisors had me over for dinner at his house with his family. His wife said she’d recently made molasses taffy, and I blurted out, “It doesn’t taste like molasses, right? That would be disgusting!” Yes, she said, clearly taken aback, it tastes like molasses.

Copy of IMG_0850

Oh, god, it still makes me cringe. Shut up, Bridget.

It’s not my fault! I didn’t know much about molasses back then, and in fact had only recently bought my first jar – of blackstrap molasses, because I didn’t know there were different types. No wonder I thought all molasses tasted bad.

Now I know better. Molasses = gingerbread = good.

Copy of IMG_0853

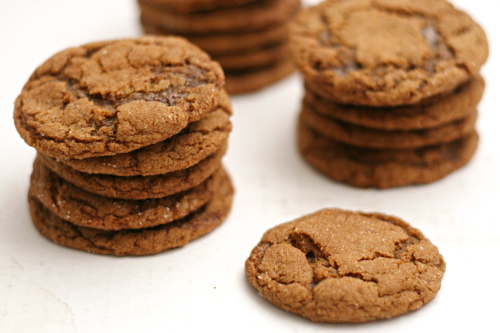
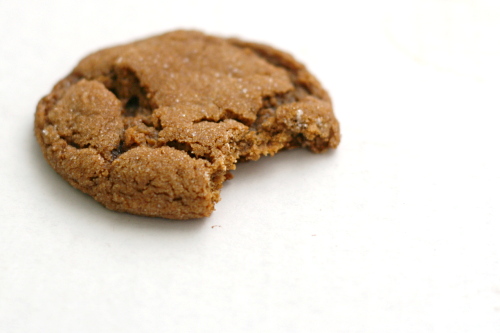
These cookies are even more molassey than gingerbread, which I don’t mind at all these days. And you know what? I ate a piece of that molasses taffy, way back when, and it wasn’t all bad either. I must have come up with something appropriately polite to say, because four years later, that advisor gave me a degree.

Copy of IMG_0870

Pamela has the recipe posted for Tuesdays with Dorie. I liked the texture and shape of the cookies better when they were baked at 375ºF for 8-10 minutes instead of 350ºF for 12-14 minutes.

One year ago: Rice Pudding

Copy of IMG_0868

vegetarian lasagna

Copy of IMG_0495

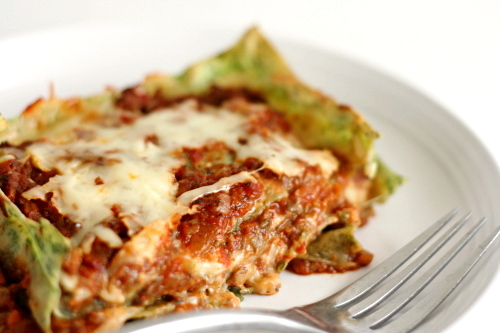
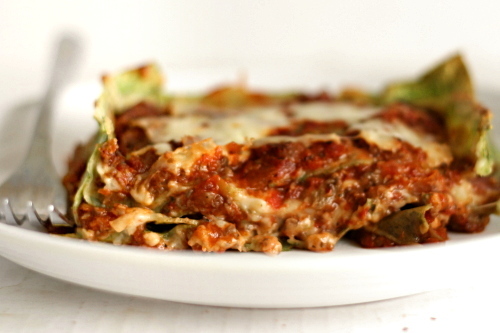
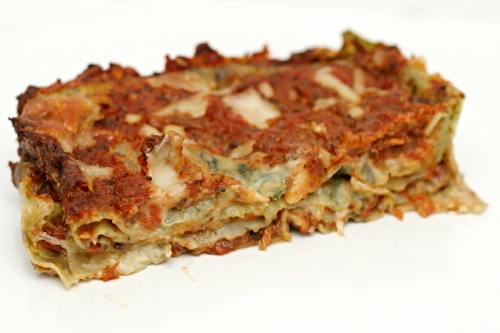
This is, for me, perfect lasagna. You can’t go wrong with most combinations of pasta + sauce + cheese, but this one has just the right balance of light and rich, cheese and tomatoes, pasta and sauce, vegetables and…well, not meat, because there is none.

Copy of IMG_0470

But don’t worry, it isn’t vegetable lasagna. It’s vegetarian lasagna. It’s a fine line.

It isn’t that I don’t like meat in my lasagna; I just don’t know that it’s really necessary for me. On the other hand, I definitely do not like large chunks of vegetables in my lasagna – no layers of eggplant or zucchini or peppers.

Copy of IMG_0478

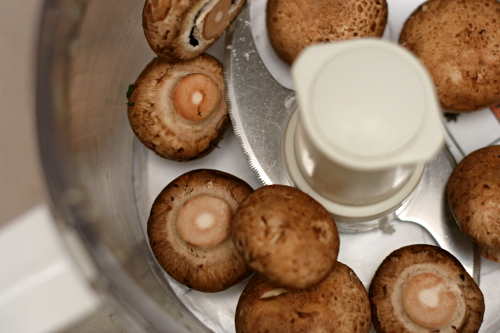
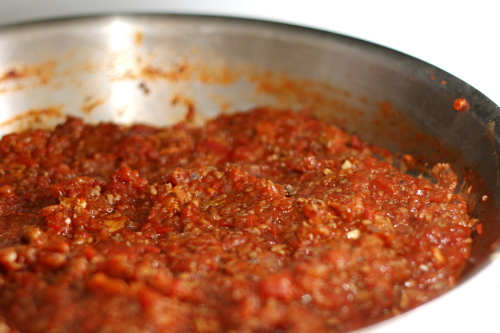
What I’ve done here is use minced mushrooms to mimic the texture and somewhat even the flavor of ground meat in the tomato sauce. The sauce has so much flavor that you’ll never miss the meat. Other than that, it’s a pretty traditional lasagna. I’ve replaced the ricotta with béchamel sauce, just because I like it that way.

Copy of IMG_0484

It’s also, as far as lasagna goes, not terribly indulgent. I use 2% milk in the béchamel and skim mozzarella, although you can certainly use something richer if you prefer. I like to make my own spinach pasta, because if you can add a bag of spinach to the lasagna without it affecting the final flavor or texture, why not? And with mushrooms replacing meat, plus plenty of homemade tomato sauce, there is certainly no shortage of vegetables.

Copy of IMG_0492

It’s just…perfect. Perfectly flavored, a perfect balance of richness. It’s full of vegetables, but they’re not overbearing. It’s a lot of work, yes, but I usually have fun making lasagna. And for a big pan of what is, for me, perfect lasagna? It’s absolutely worth it.

One year ago: Stuffed Sandwich Rolls

Copy of IMG_0496

Printer Friendly Recipe
Vegetarian Lasagna

Serves 8

The recipe looks more complicated than it needs to because of the homemade pasta. You can save yourself a lot of time (skip steps 1 through 4) by buying fresh pasta sheets instead of making and rolling out the spinach pasta. Or you can use a box of no-boil lasagna noodles, soaking them in hot water for 5 minutes before layering the lasagna.

Utilize your food processor! For the parmesan, mozzarella, fresh mushrooms, onion, and tomatoes (in that order).

You can make the whole lasagna ahead of time and refrigerate it overnight. Or you can freeze the whole lasagna. Let it defrost in the refrigerator overnight. To bake the lasagna straight from the refrigerator, just place it in the cold oven, then turn the oven onto 375ºF to bake the lasagna. The lasagna will warm up as the oven heats.

You can also make the pasta dough and both sauces a day in advance and then assemble the layers right before baking.

If you keep fresh basil around, definitely mince up a few leaves and add them to the cooked tomato sauce. You may also want to sprinkle some on top of the lasagna when it comes out of the oven.

Spinach pasta:
5 ounces baby spinach, washed
1 egg
¾ cup all-purpose flour, plus (a lot) more for dusting

Tomato sauce:
½ ounce dried porcini mushrooms, rinsed
2 tablespoons olive oil
1 large onion, chopped fine (reserve ½ cup of the onions for the béchamel)
4 cloves garlic, minced
16 ounces mushrooms, minced
¼ cup wine (optional; red or white is fine)
1 (28-ounce) can diced tomatoes, drained and pureed
1 (14-ounce) can diced tomatoes, drained and pureed
¾ teaspoon salt
¼ teaspoon pepper

Béchamel:
3 tablespoons unsalted butter
½ cup finely diced onions
3 garlic cloves, minced
3 tablespoons all-purpose flour
2½ cups milk
1 bay leaf
pinch nutmeg
¼ teaspoon salt
⅛ teaspoon pepper
½ cup grated parmesan cheese (1 ounce)

Assembly:
nonstick spray
8 ounces (2 cups) shredded mozzarella cheese

1. For the pasta: Place the spinach in a 12-inch skillet and add a few tablespoons of water (or if the spinach is wet from being washed, just add the wet spinach to the skillet). Turn the heat to high until the water boils, then reduce the heat and stir the spinach until it just wilts, about 1 minute. Remove the spinach from the pan (don’t wash the skillet) and place it on a clean dishtowel. Pat and squeeze the spinach until it’s very dry, then finely mince it.

2. Add the flour to a wide bowl or pie plate, then make a well in the center of the flour. Lightly beat the egg, then add it to the well with the chopped spinach. Stir the flour, egg, and spinach together until thoroughly mixed, then started kneading. Knead, adding flour as necessary to keep the dough from being sticky, until the dough is smooth and elastic, about 5 minutes. Don’t be concerned if you need to add quite a bit of extra flour; the dough should be malleable but not at all sticky.

3. Divide the dough into 3 balls. Work with one ball of dough at a time and leave the others covered with a damp dishtowel (you can use the same one you used for drying the spinach). Flatten the dough slightly, then roll it through the widest setting on a pasta roller. Fold it in thirds like a piece of paper going into an envelope, then roll it through the pasta roller again, feeding it with one of the open sides first. If at any point the dough is sticky, brush it with flour. Repeat the folding into thirds and rolling a few times. Without folding, run the pasta through the widest setting once more. Adjust the pasta roller to the next-thinner setting and roll the dough through the machine. Continue to gradually thin the dough until the third-to-last setting. Brush it with flour if the dough starts to stick at all. If the strip of dough becomes too long to handle, cut it into two shorter strips and work with each strip separately. Repeat the rolling, folding, and thinning with the remaining balls of dough, laying the sheets of pasta on dishtowels.

4. Bring a large pot of water to a boil, then add 1 tablespoon salt and reduce the heat until the water is at a lively simmer instead of a vigorous boil. Cut the strips of dough into 8-inch lengths. One by one, dip each rectangle of dough in the water, leave it for about 10 seconds, then remove it and rinse it under running water. Lay the strips of dough on dishtowels.

5. For the tomato sauce: Place the dried porcini in a small saucepan and add just enough water to cover. Bring the water to a boil over high heat, then turn the burner off.

6. Heat the olive oil over medium heat in the same large skillet the spinach was cooked in. Add the onions and a pinch of salt and sauté, stirring occasionally, until the onions just brown around the edges, about 8 minutes. Add the garlic and mushrooms and continue cooking and occasionally stirring until the mushrooms start to brown. First they’ll release a bunch of liquid, but then that will evaporate and they’ll brown. Once they do, pour in the wine and cook, scraping the bottom of the pan, until the wine almost completely evaporates, then add the tomatoes, salt and pepper. Bring to a simmer. Carefully lift the porcini from their soaking liquid with a fork; mince them and add them to the sauce. Simmer the sauce over medium heat until thick, about 15 minutes.

7. For the béchamel: Heat the butter in a medium saucepan over medium heat. When the foaming subsides, add the onions and garlic and sauté, stirring occasionally, until the onion is softened. Add the flour and stir continuously for 1 minute. Stirring constantly, gradually pour in the milk and reserved porcini liquid (pouring carefully so as to leave any grit behind in the small saucepan). Increase the heat to medium-high and bring the mixture to a light boil, stirring very frequently. Once the sauce starts to bubble, lower the heat to medium-low and let it simmer for 10 minutes, stirring in occasionally. Stir in the nutmeg, salt, pepper, and parmesan.

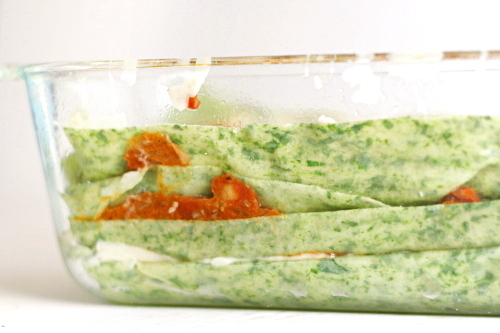
8. Assembly: Adjust an oven rack to the middle position and heat the oven to 375ºF. Spray a 9-by-13-inch pan with nonstick spray. Spread a thin layer of tomato sauce on the bottom of the pan, then add a layer of noodles. Spread ¼ of the béchamel on the noodles, followed by ¼ of the cheese, and ¼ of the tomato sauce. Repeat the layering (noodles, béchamel, cheese, tomato sauce) twice more, then finish by adding a layer of noodles, then the last of the béchamel, the last of the tomato sauce, and the last of the mozzarella.

9. Spray a large sheet of aluminum foil with nonstick spray, then use it to cover the lasagna. Bake, covered, for 30 minutes, then remove the foil and continue to bake for another 15 minutes, until the lasagna is bubbling around the edges. Remove the pan from the oven and let the lasagna set for 10 minutes before cutting and serving.

Copy of IMG_0901

apple tart

Copy of IMG_1073

I cheated.

I baked.

Copy of IMG_1040

I said I wouldn’t, until Thanksgiving. I considered baking cookies to send to a friend for his birthday, figuring if it wasn’t for myself, it’s allowed, right? I considered making scones to use up some cranberries, figuring that if it wasn’t dessert, it’s allowed, right?

Copy of IMG_1050

And then I baked a dessert, for myself.

But hear me out, okay? I was never holding myself back from baking dough that I’d previously mixed up and frozen – I have three batches of cookie dough in the freezer and baking up one or two cookies each night was always part of the plan.

Copy of IMG_1047

Well, I had tart dough in the freezer too. And if frozen cookie dough is allowed, frozen tart dough is also allowed, right? And come on, I added a bunch of apples to it, so the whole thing is downright healthy. Or something.

Copy of IMG_1048

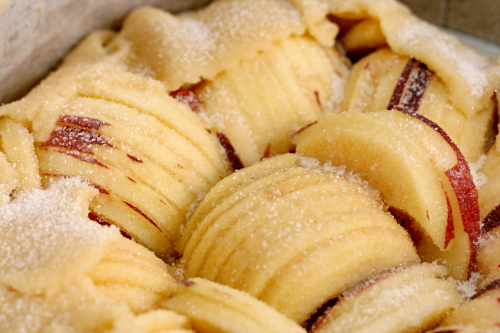
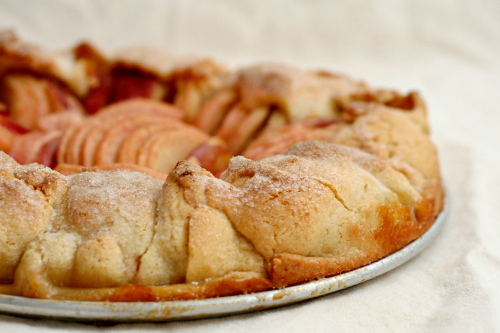
Anyway, it’s a pretty cool recipe. It’s simple, but I love how it eeks out all of the flavor possible from the apples. Tart dough, rolled out quite a bit larger than the 9-inch pan it’s placed in, is filled with slices of apples. The extra dough is folded over the apples, like a galette contained by the tart pan’s rim. The unbaked tart is brushed with butter and sprinkled with sugar. Simple.

Copy of IMG_1054

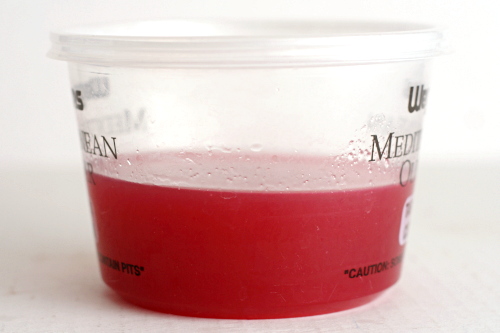
Then, in a interesting and creative move, the apple peels and cores are simmered with water and sugar until the liquid is reduced to a syrup, which is brushed on the baked tart right before serving. What a great way to maximize the flavor of the apples! (I did end up with way, way too much syrup, which I boiled down even further and then used as a topping for apple-cinnamon pancakes the next morning.)

Copy of IMG_1066

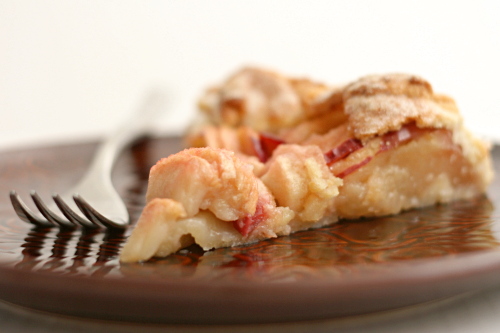
Of course it was good. The apples softened and intensified in the oven, and the crust provided a crisp sweet contrast to the apples. It’s also highly adaptable – I followed the recipe almost exactly, but next time I’ll add a light sprinkle of salt on top of the apples and few drops of lemon juice to the syrup. I’ll consider using a pie crust instead of tart crust as well, because I love that flakiness. If you can’t imagine an apple dessert without cinnamon, add some! But if you want to appreciate apples at their most basic and delicious, absolutely follow the recipe exactly. You can’t go wrong.

Copy of IMG_1084

One year ago: Basic Mashed Potatoes

Printer Friendly Recipe
Alice Waters’s Apple Tart (via Smitten Kitchen)

I didn’t use this tart dough recipe, because I already had some I needed to use up. I needed 6 apples to reach 2 pounds, but for my tart, that was about 1 apple too many to fit. Deb mentioned that she only used 3 tablespoons of sugar sprinkled over the tart right before baking, and I followed her advice. I suggest placing the tart pan (I used a springform pan) on a baking sheet, because mine leaked sugary apple juices.

Dough:
1 cup unbleached all-purpose flour
½ teaspoon sugar
⅛ teaspoon salt
6 tablespoons (¾ stick) unsalted butter, just softened, cut into ½-inch cubes
3½ tablespoons chilled water

Filling:
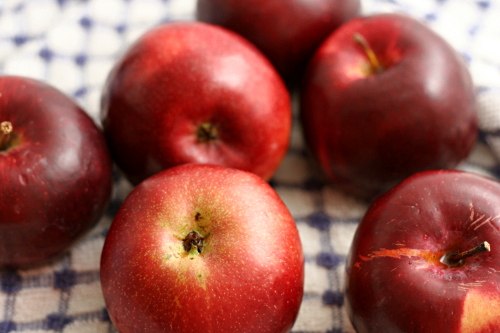
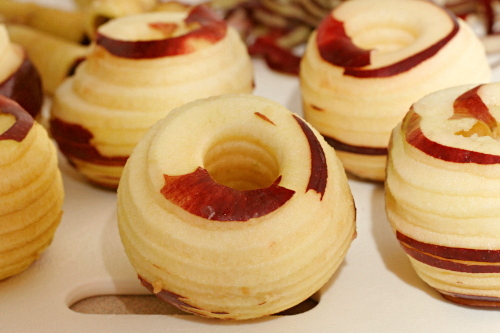
2 pounds apples (Golden Delicious or another tart, firm variety), peeled, cored (save peels and cores), and sliced
2 tablespoons unsalted butter, melted
5 tablespoons sugar

Glaze:
½ cup sugar

1. Mix flour, sugar, and salt in a large bowl; add 2 tablespoons of the butter. Blend in a mixer until dough resembles coarse cornmeal. Add remaining butter; mix until biggest pieces look like large peas.

2. Dribble in water, stir, then dribble in more, until dough just holds together. Toss with hands, letting it fall through fingers, until it’s ropy with some dry patches. If dry patches predominate, add another tablespoon water. Keep tossing until you can roll dough into a ball. Flatten into a 4-inch-thick disk; refrigerate. After at least 30 minutes, remove; let soften so it’s malleable but still cold. Smooth cracks at edges. On a lightly floured surface, roll into a 14-inch circle about 1/8 inch thick. Dust excess flour from both sides with a dry pastry brush.

3. Place dough in a lightly greased 9-inch round tart pan, or simply on a parchment-lined baking sheet if you wish to go free-form, or galette-style with it. Heat oven to 400ºF. (If you have a pizza stone, place it in the center of the rack.)

4. Overlap apples on dough in a ring 2 inches from edge if going galette-style, or up to the sides if using the tart pan. Continue inward until you reach the center. Fold any dough hanging over pan back onto itself; crimp edges at 1-inch intervals.

5. Brush melted butter over apples and onto dough edge. Sprinkle 2 tablespoons sugar over dough edge and the other 3 tablespoons over apples.

6. Bake in center of oven until apples are soft, with browned edges, and crust has caramelized to a dark golden brown (about 45 minutes), making sure to rotate tart every 15 minutes.

7. Make glaze: Put reserved peels and cores in a large saucepan, along with sugar. Pour in just enough water to cover; simmer for 25 minutes. Strain syrup through cheesecloth.

8. Remove tart from oven, and slide off parchment onto cooling rack. Let cool at least 15 minutes.

9. Brush glaze over tart, slice, and serve.

Copy of IMG_1068

african pineapple peanut stew

Copy of IMG_0562

I sort of hate when I find great recipes from blogs that come from a cookbook I already own. I guess it makes sense – now it isn’t just words on a page because someone (in this case, a number of people) is actually recommending it. But man, I sure wish that I could be the person to pick out the oddball recipe from the cookbook and spread the word about how great it is! You can tell I’m not one of those people who finds good stuff at thrift shops, can’t you?

Copy of IMG_0555

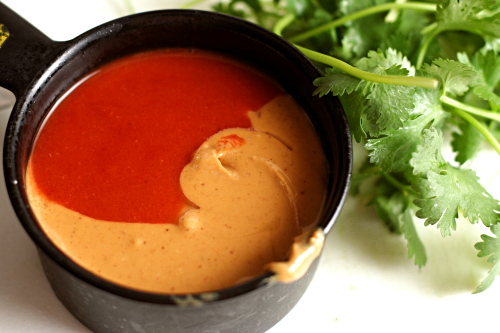
But can you really blame me; I mean, come on, pineapple, peanut butter, onions, and kale? Who would have expected that to come together into something delicious?

Copy of IMG_0546

It did though. No one of the flavors dominated; it wasn’t like I took a bite of stew and thought, “mm, pineappley.” Everything was in balance, coming together to create a meal that was earthy and comforting. I was surprised by how tasty it was, and I’m surprised that I’m already thinking that it would be the perfect way to use up the rest of the jar of peanut butter before we move. Who knew I’d ever crave pineapple stew?

Copy of IMG_0553

One year ago: Pumpkin Ravioli

Printer Friendly Recipe
African Pineapple Peanut Stew
(adapted from Moosewood Restaurant Cooks at Home)

4 servings

I used natural peanut butter, which worked great. Also, I only had Frank’s hot sauce, which isn’t as spicy as some, and I would have loved a little more heat. I think a pinch of cayenne added with the garlic would be great too.

1 tablespoon vegetable oil
1 small onion, diced
salt
2 garlic cloves, minced
1 bunch kale or Swiss chard, large stems discarded, leaves chopped coarse
1 (20-ounce) can crushed pineapple, undrained
½ cup peanut butter
1 tablespoon Tabasco or other hot pepper sauce
½ cup chopped fresh cilantro
¼ cup peanuts, chopped
1 scallion, sliced

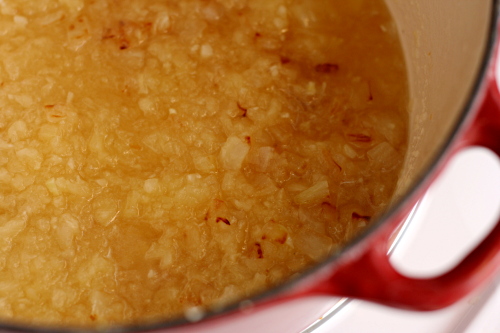
1. Heat the oil in a 5-quart Dutch oven over medium heat. Add the onion and a pinch of salt and sauté, stirring occasionally, until just browned at the edges, about 8 minutes. Add the garlic and cook, stirring constantly, until fragrant, about 30 seconds.

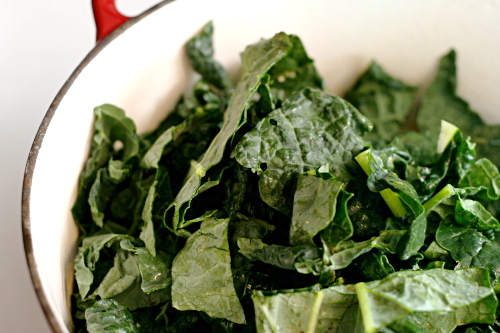
2. Add pineapple to the pot and bring to a simmer; add the greens, cover, and simmer for about 5 minutes, stirring occasionally, until just tender. Stir in the peanut butter and hot sauce and simmer for another 5 minutes, until the flavors are blended. Stir in the cilantro just before serving and add salt if necessary. Serve over rice or couscous, garnishing each serving with the peanuts and scallions.

Copy of IMG_0564

pumpkin biscotti

Copy of IMG_0891

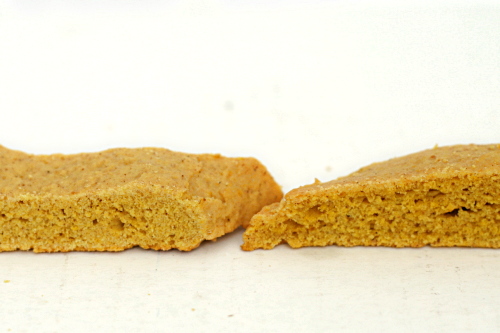
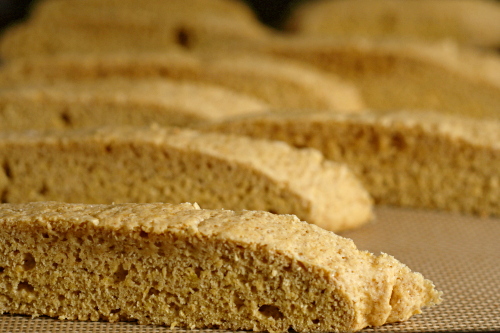
My less-baking-until-Thanksgiving goal is getting annoying. The deal was that for most of November, I would only bake biscotti for Dave, 100% whole wheat bread, and any recipes that were required for my blog. Well, I finished baking November’s Tuesdays with Dorie recipes last week, and my freezer is stocked with whole wheat bagels, pizza dough, and baguettes.

Copy of IMG_0514

So I’ve made a lot of biscotti for Dave this month. It’s been my way to cheat. I’ve been making half batches, not only because that way I get to make more again sooner, but I was a little uncertain about this recipe.

Copy of IMG_0510

The original version didn’t have any butter in it. I’ve made biscotti without fat before, and they were some of the worst biscotti I’ve had. The texture was not crunchy or crisp, but nearly crystalline. In this case, I guess I was hoping that the pumpkin would somehow make up for the lack of fat.

Copy of IMG_0520

It didn’t, and the first batch of these biscotti weren’t great. I added a few tablespoons of butter to the second batch (less than half of what a regular cookie recipe has), and the texture was what Dave and I prefer in our biscotti – crunchy but not teeth-breakingly so. But there was some metallic background taste that Dave and I couldn’t identify, which made our tongues tingle unpleasantly after a bite.

Copy of IMG_0847
right – half the baking powder

What in the world was that? My guess was that there was too much baking powder, but the amount I used seemed on par with other biscotti recipes. So I tried one more time, this time making two half-batches of dough, one with half the amount of baking powder, one with the same amount.

Copy of IMG_0527

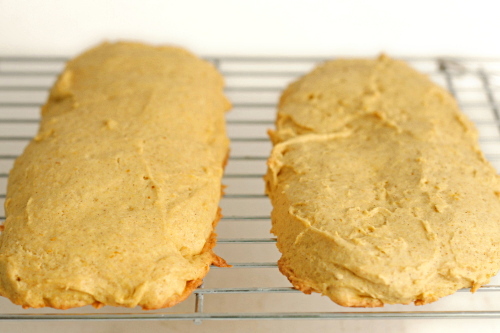
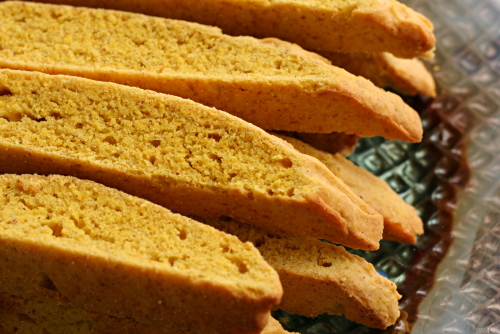
Well, I don’t know what was wrong with that second batch. Maybe I accidentally doubled the baking powder, because when I divided the amount in half, the biscotti didn’t rise correctly. It tasted good and the texture was fine, but it didn’t dome in the middle to make pretty shapes. The half-batch with the full amount of baking powder was perfect – crunchy, smooth and domed, and no metallic taste.

Copy of IMG_0889
left – half the baking powder

Which means I have no more excuses to experiment. I have half a carton of cranberries in my fridge, and I’m just about out of scones stored in my freezer, so I’m itching to make cranberry scones. And I have a friend with a birthday soon, and I want to send treats. But that’s breaking the rules, I suppose. Two more weeks until I get to bake again.

It’s cheating to let myself bake as long as it isn’t desserts for myself, right? Right?

Copy of IMG_0528
the first, butterless batch

One year ago: Bourbon Pumpkin Cheesecake

Printer Friendly Recipe
Pumpkin Biscotti
(adapted from Simply Recipes)

2½ cups (12 ounces) all-purpose flour
1 cup (7 ounces) granulated sugar
1 teaspoon baking powder
1 teaspoon cinnamon
½ teaspoon nutmeg
pinch ginger
pinch cloves
½ teaspoon salt
2 eggs
6 tablespoons butter, melted
½ cup pumpkin purée
1 teaspoon vanilla extract

1. Preheat oven to 350°F. Sift together the flour, salt, sugar, baking powder, and spices into a large bowl.

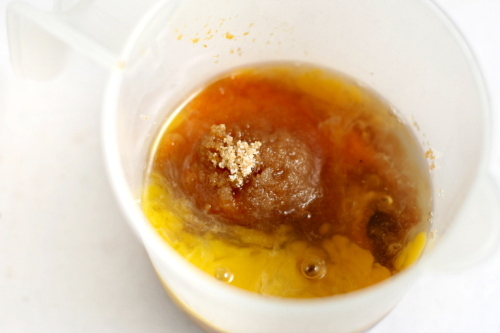
2. In another bowl, whisk together the eggs, melted butter, pumpkin purée, and vanilla extract. Pour the pumpkin mixture into the flour mixture. Give it a rough stir to generally incorporate the ingredients, the dough will be crumbly.

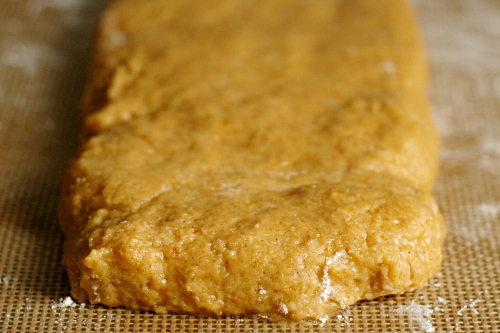
3. Flour your hands and a clean kitchen surface and lightly knead the dough. Lightly grease a baking sheet or line it with parchment paper. Form the dough into a large log, roughly about 15-20 inches by 6-7 inches. The loaves should be relatively flat, only about ½ inch high. Bake for 22-30 minutes at 350ºF, until the center is firm to the touch. (Feel free to also form two smaller logs for cute two-bite biscotti; just cut the baking time to 18-24 minutes.)

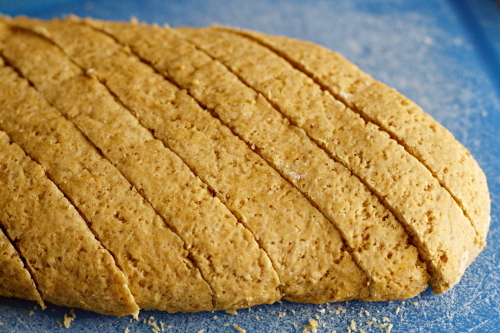
4. Let biscotti cool for 15 minutes and then using a serrated knife cut into 1 inch wide pieces. Turn the oven to 300ºF and bake for an additional 15-20 minutes. Cool completely.

Copy of IMG_0894

croissants 2 (martha stewart)

Copy of IMG_5667

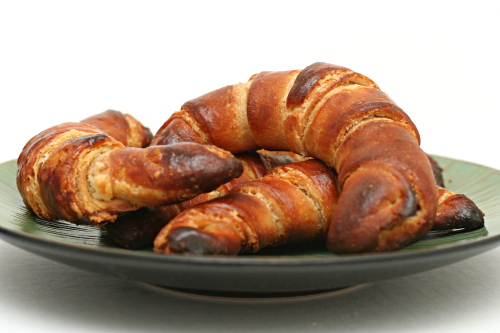
Hey, remember, uh, a long time ago? When I said I was going to do a series on croissants? Whatever happened to that anyway? I certainly didn’t stop making croissants. I just stopped talking about it. I suck!

Copy of IMG_5609

Part of the problem was that these, the second batch of croissants I made, were just so bad. And it was all my fault. Well, mostly my fault; really I blame the yeast.

Copy of IMG_5618

This is one of the only recipes I’ve made that calls for fresh yeast. I know you can substitute instant yeast, but my grocery store sells the fresh stuff, and I was curious to try it.

Copy of IMG_5648

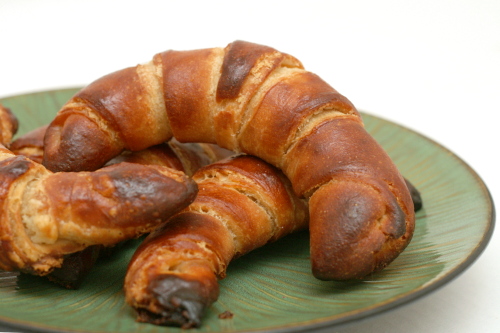
It ended up being probably the worst bread I’ve ever made. Maybe my fresh yeast wasn’t so fresh? Clearly something went very, very wrong. These croissants were dense dense dense, without any trace of flakiness.  My only other attempt at bread made with fresh yeast was a failure as well.

Copy of IMG_5654

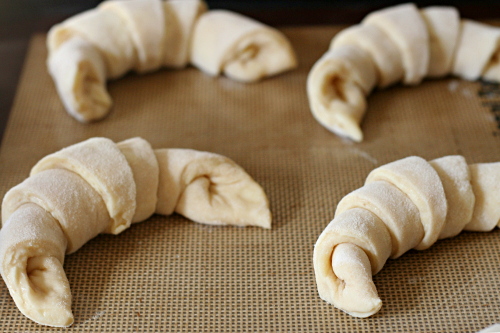
Definitely not a success, and it’s hard to fairly judge the recipe when so much of what went wrong was my fault. Still, I learned things: 1) No more fresh yeast for me. 2) I like Martha’s method for shaping the crescents, where she stretches the wider part of the triangle a bit so that the center of each croissant isn’t so thick. 3) And the obvious: if the rolls don’t look like they’ve risen, they probably haven’t, and it might be best not to bake them yet, even if it’s already been over twice as long as the recipe recommends.

Copy of IMG_5659

I should really try this recipe again using the type of yeast I’m more familiar with, because I’m sure this attempt didn’t do it justice. When I do, I’ll be sure to update with a continuation of my experiments with croissants. And this time I’ll try not to wait six months.

Copy of IMG_5668

One year ago: Asian Peanut Dip

Printer Friendly Recipe
Croissants (from Martha Stewart’s Baking Handbook)

Makes 2 dozen

If using dry yeast instead of fresh, heat the milk to about 100ºF, then stir in the yeast to dissolve. Let stand until foamy, about five minutes, and proceed with the recipe. The dough can be made ahead through all of the turns and frozen for up to three months; before using, defrost the dough in the refrigerator for twenty-four hours. After baking, croissants are best eaten within six hours.

2 cups cold milk
2 tablespoons honey
1½ pounds (about 4 ½ cups) bread flour, plus more for dusting
4 ounces (1 scant cup) unbleached pastry flour
½ cup sugar
1½ ounces fresh yeast, crumbled
1 tablespoon plus 1½ teaspoons salt
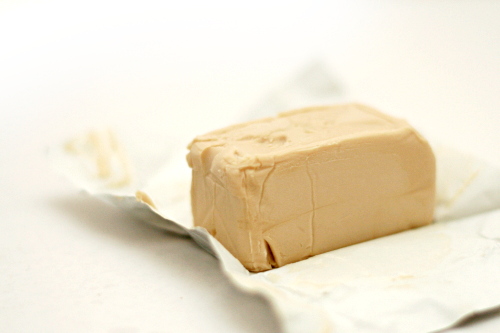
1¼ pounds (5 sticks) unsalted butter, cold
1 large egg, lightly beaten

1. Make the dough package: Pour the milk and honey into a 1-quart liquid measuring cup, and stir to combine; set aside. In the bowl of an electric mixer fitted with the dough hook, stir together 1 pound 6 ounces (about 4¼ cups) bread flour, the pastry flour, sugar, yeast, and salt; stir to combine. Add milk mixture, and mix on low speed until the dough just comes together, 2 to 3 minutes.

2. Turn out dough onto a lightly floured work surface; gently knead to form a smooth ball, about 45 seconds. Wrap in plastic and refrigerate at least 1 hour or overnight.

3. Make the butter package: Lay the butter sticks side by side on a piece of plastic wrap, and sprinkle with the remaining 2 ounces (about ¼ cup) flour. Pound with a rolling pin until flour is incorporated, and roll into an 8-inch square. Wrap tightly and refrigerate for at least 1 hour or overnight.

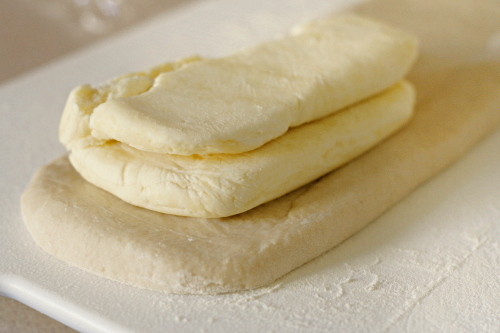
4. Remove dough package from the refrigerator; place on a lightly floured work surface. Roll out to a 16-by-10-inch rectangle, about ½ inch thick, with a short side facing you. Remove butter package from the refrigerator; place on the bottom half of the dough; fold the top half of the dough over the butter, and pinch the edges to seal.

5. Roll out the dough to a 20-by-10 rectangle about ½ inch thick, with a short side facing you; keep the corners as square as possible. Remove any excess flour with a dry pastry brush. Starting at the far end, fold the rectangle in thirds, as you would a business letter. This completes the first of three turns. Wrap in plastic and refrigerate for 1 hour.

6. Repeat rolling and folding as above two more times, starting with the flap opening on the right, as if it were a book, and refrigerate at least 1 hour between turns. To help you remember how many turns have been completed, mark the dough after each: Make one mark for the first turn, two for the second, and three for the third. After the third, wrap dough in plastic, and refrigerate 6 to 8 hours, or overnight.

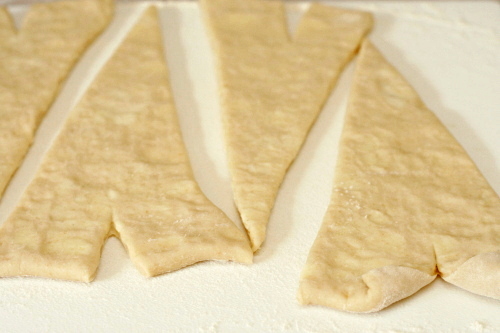
7. Turn out chilled dough onto a lightly floured work surface. Roll out the dough to a 30-by-16-inch rectangle. (If the dough becomes too elastic, cover with plastic wrap, and let rest in the refrigerator for 10 minutes.) Using a pizza wheel or pastry cutter, cut the dough in half lengthwise to form two 30-by-8-inch rectangles. Stack one piece of dough on top of the other, lining up the edges. Using the pizza wheel, cut dough into triangles, each with a 4-inch base (you will have scraps of dough at both ends). Cut a 1-inch slit in the center of the base of each triangle. Place triangles in a single layer on a clean work surface.

8. To shape croissants, stretch the two lower points of each triangle to enlarge the slit slightly. Fold the inner corners formed by the slit toward the outer sides of the triangles, and press down to seal. Using your fingertips, roll the base of each triangle up and away from you, stretching the dough slightly outward as you roll; the tip should be tucked under the croissant. Pull the two ends toward you to form a crescent. Transfer the crescents to two parchment-lined baking sheets, 2 inches apart (12 on each sheet). Cover loosely with plastic wrap, and let rise in a warm place until very spongy and doubled in bulk, 45 to 60 minutes.

9. Preheat the oven to 400ºF, with the racks in the upper and lower thirds. Lightly brush crescents with the beaten egg. Bake, rotating sheets halfway through, until the croissants are puffed and golden brown, about 20 to 25 minutes. Transfer sheets to a wire rack to cool. Serve warm or at room temperature.

Copy of IMG_5664

wheat berries with caramelized onions, feta, and lentils

Copy of IMG_0628

I’m really looking forward to moving to New Mexico. There’s absolutely nothing wrong with Philadelphia; any unhappiness I had here was my own deal and not a result of the location. But I am excited about having a fresh start somewhere.

Copy of IMG_0597

I am a little concerned about the grocery store situation. I have been majorly spoiled the last few years by always living near a Wegman’s. If you’re not familiar, suffice to say that it’s a great store, with a huge selection and high quality. When a recipe says that an ingredient can be found in “any well-stocked grocery store”, I’ve never had to worry about how I’d get a hold of it.

Copy of IMG_0613

The town we’re moving to, though, is small and isolated. It has just one grocery store. My initial explorations during our visit there over the summer indicated that it isn’t terrible but it isn’t great. I should be able to find, say, goat cheese, but only one type.

Copy of IMG_0606

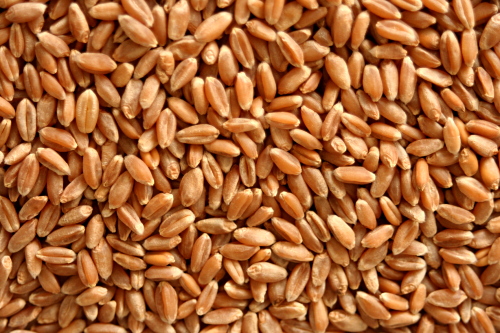
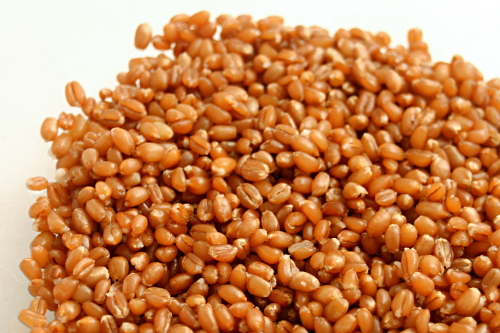
So I’ve been trying to take advantage of the wide selection of my current store while I can, by buying random unusual ingredients that I’m pretty sure I won’t be able to find after the move. My plan was actually to buy farro, but I guess even Wegman’s has its limits because they didn’t have it. I almost went with quinoa, since it’s familiar and safe, but I managed to talk myself into trying wheat berries instead.

Copy of IMG_0618

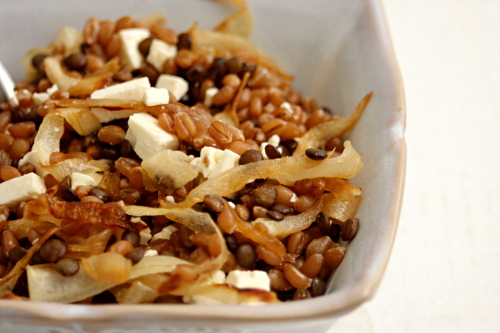
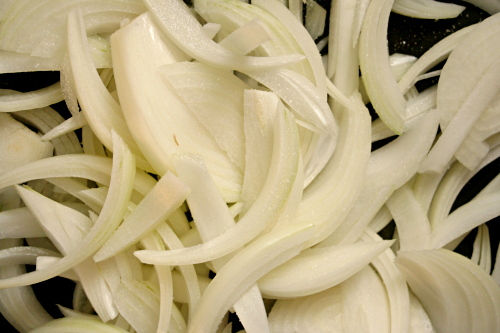
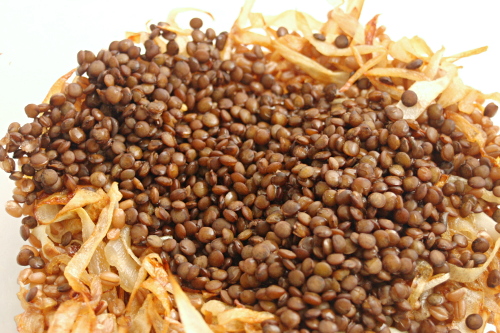
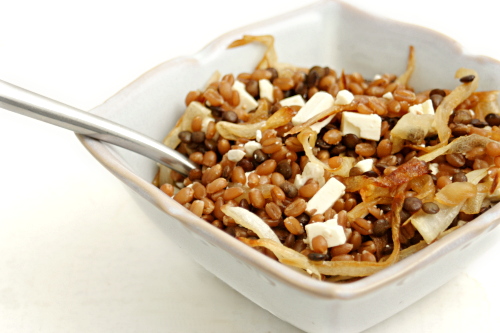
Well, I don’t know about farro, but wheat berries are certainly delicious. They’re nutty, and the texture was chewy, not unpleasantly crunchy or mushy. The sweet caramelized onions were a great compliment, and then the salty feta was perfect on top of all of that. The whole thing was just so good, and I couldn’t believe how healthy it was to boot. I sure hope I can find wheat berries and feta after we move because I want to be making this meal a lot!

Copy of IMG_0621

One year ago: Bacon-Wrapped Pork Tenderloin Medallions

Printer Friendly Recipe
Wheat Berries with Caramelized Onions, Lentils, and Feta (adapted a bit from Orangette; wheat berry cooking method from Deborah Madison’s Vegetarian Cooking for Everyone)

2-3 servings

You might not need a recipe here, because you’re just combining grains and lentils with caramelized onions and feta. If you already have favorite ways to cook grains, lentils, and onions, you should absolutely feel free to use those. In case you don’t, I’ll provide my preferred methods here.

You can probably skip the lentils if you don’t want to deal with an extra ingredient. Also, I haven’t tried it myself, but I don’t see why you couldn’t just add them to the wheat berries at the point when the wheat has 25 minutes of cooking left. Just make sure there’s enough water in the pot.  (Update 6/14/11: You can definitely cook the lentils in the same pot as the wheat berries. I’ve also used farro in this recipe now, which is convenient because it cooks in the same amount of time as lentils.)

I think you could use almost any grain here, as long as you adjust the cooking time. Quinoa would definitely be good (and would make this meal gluten-free).

¾ cup wheat berries
salt
2 onions, sliced
1 tablespoon olive oil
½ cup lentils, preferably lentils de puy, picked over and rinsed
4 ounces feta cheese, crumbled
hot sauce (optional)
lemon wedges (optional)

1. Soak the wheat berries in water for at least an hour and up to overnight. Put them in a pot with enough water to cover by a few inches. Bring to a boil, then lower the heat, cover the pot, and simmer until they’re tender, 1 to 2 hours. Add ½ teaspoon salt once they’ve started to soften.

2. Heat the oil in a large nonstick skillet over medium-high heat. Add the onions and ¼ teaspoon salt, reduce the heat to medium, and cook, stirring somewhat frequently, until they just start to brown, about 8 minutes. Reduce to heat to medium-low and continue to cook and stir until the onions are evenly golden brown, about 20 minutes longer.

3. Put the lentils into a small saucepan. Add 3 cups of cold water and ¼ teaspoon salt. Bring to a boil over medium-high heat, then reduce the heat and simmer until tender but not falling apart, about 20 to 25 minutes. Drain.

4. Combine the wheat berries, caramelized onions, lentils, and feta. Adjust the seasonings if necessary and serve with either hot sauce or lemon wedges, if desired.
Copy of IMG_0625