Archives for November 2009

cran-apple crisps

Copy of IMG_0939

It seems to me that there are bakers and there are cooks. There’s overlap, for sure, but most of us seem to be more on one side than the other. I like to cook, and I get a lot of enjoyment from it – sautéing onions, stirring pasta, pouring a bottle of beer into chili. But baking calls to me more.

Copy of IMG_0921

I wonder why? People often say that the most important difference between baking and cooking is the precision required in baking, but I don’t think that’s why I love baking. I don’t like measuring that much. Is it because of my sweet tooth? Maybe, but lately, I crave the baking more than the eating anyway.

Copy of IMG_0919

I think it’s just that baking is more sciencey. It always fascinates me that butter and sugar and flour turn into something totally different. When you cook, the ingredients usually don’t change form much from the beginning to the end. Onions in soup are still distinctly onions, chicken is still chicken, tomatoes are still tomatoes. In baking, the ingredients are transformed.

Copy of IMG_0922

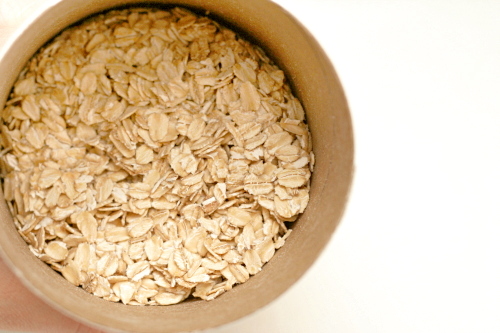
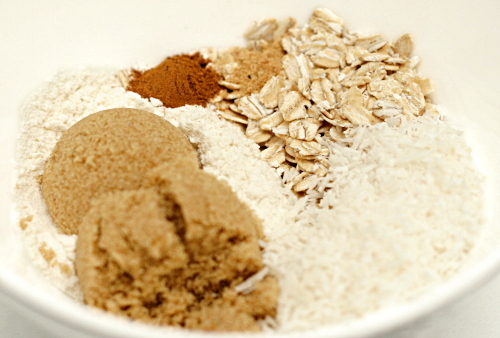
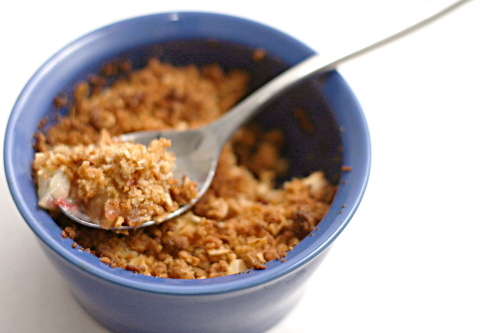
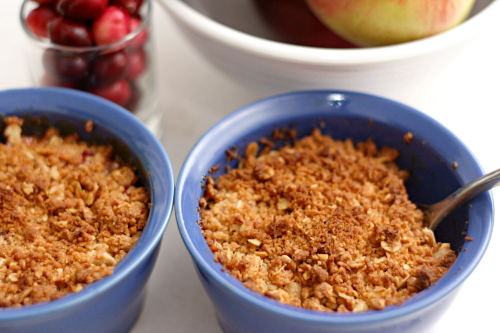
Crisps, though, are more like cooking. The fruit maintains its character, and the crisp topping, although it contains some flour and butter, still has some distinct elements, like oatmeal and often nuts. Perhaps that’s why I rarely make crisps, despite how easy and delicious they are.

Copy of IMG_0928

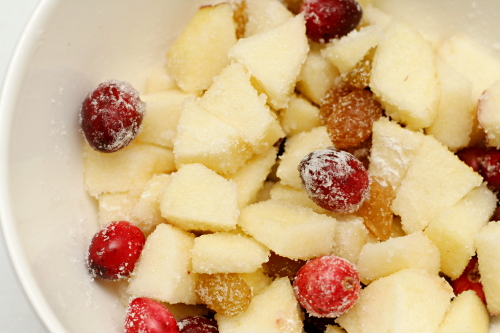
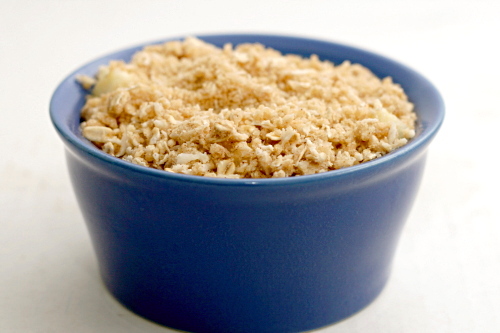
That also means that crisps are exactly what they sound like. You don’t need to worry about it being dry or dense or tough. It’s apple and cranberries. They’re topped with something buttery and crispy. It tastes just how it sounds like it tastes – damn good.

Copy of IMG_0953

Em chose these crisps for Tuesdays with Dorie, and she has the recipe posted.

One year ago: Kugelhopf

Copy of IMG_0951

glazed lemon cookies

Copy of IMG_8114

Earlier in the summer, I got it in my head that I could bake all I wanted as long as I just sent the treats away. Brilliant! All the swirling butter and sugar in the mixer without any of the calories! I don’t have a PhD for nothing, people.

Copy of IMG_8082

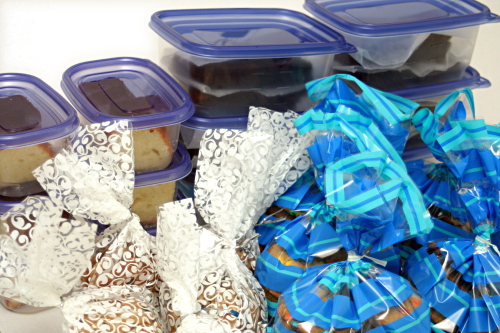
So I put out a note on Facebook – essentially “Hey! Who wants treats!” – got a whole bunch of responses, and spent the next day baking.

Copy of IMG_8089

The weakness in my strategy was that it’s almost never the actual baked dessert that I overeat. It’s the dough, always the dough.

Copy of IMG_8108

Plus, I know everyone jokes about “Oh, I have to eat one, right? Just to make sure they’re good? <wink wink>.” The thing is, you do have to eat one to make sure they’re good! What if you forgot the salt and doubled the baking powder or, I don’t know, some other easily overlooked lame-brained maneuver? And you send out eight packages, all over the country, to friends and family you haven’t seen in ages, all filled with lackluster messed up “treats”?

Copy of IMG_8112

Anyway, so after spending all day shopping, baking, packaging, eating lots of dough and (at least) one of each treat, I decided I should make myself go for a run.

Copy of IMG_8113

Uh, it wasn’t the best run ever. It was one of those runs where puking doesn’t seem too far off. Weird that sugar and butter aren’t very good fuel for exercise. Bummer.

Copy of IMG_7879

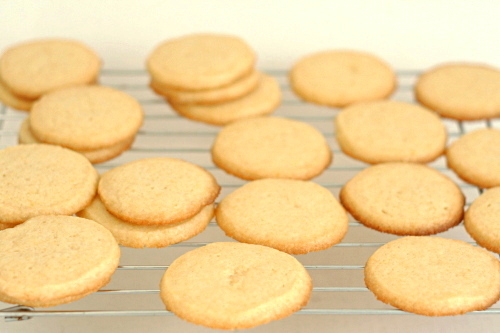
So I’ve mostly given up on the “I’ll just send everything away!” idea. Which is a shame, because now it’s going to be that much harder to find a reason to make these perfect lemon cookies. Sweet but tangy, super soft and tender, topped with a flavorful powdered sugar glaze that dries on top and snaps just a bit when you bite through it, these are cookies that I can’t resist in dough or baked form.

Copy of IMG_8115

One year ago: Wheatmeal Shortbread Cookies

Printer Friendly Recipe
Glazed Lemon Cookies (from Cooks Illustrated)

Cookies:
¾ cup (5.25 ounces) granulated sugar
2 tablespoons grated zest plus 2 tablespoons juice from 2 lemons
1¾ cup (8.75 ounces) unbleached all-purpose flour
¼ teaspoon baking powder
¼ teaspoon salt
12 tablespoons (1½ sticks) cold unsalted butter, cut into ½-inch cubes
1 large egg yolk
½ teaspoon vanilla extract

Glaze:
1 tablespoon cream cheese, softened
2 tablespoons juice from 1 lemon
1½ cups (6 ounces) confectioners’ sugar

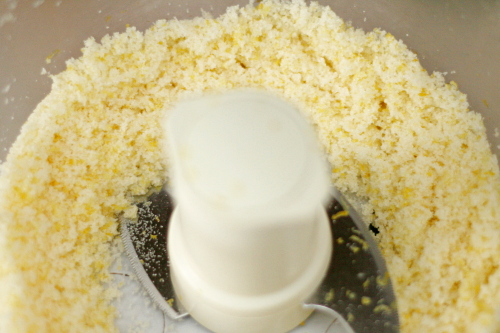
1. For the cookies: In a food processor, process the granulated sugar and lemon zest until the sugar looks damp and the zest is thoroughly incorporated, about 30 seconds. Add the flour, baking powder, and salt; pulse to combine, about ten 1-second pulses. Scatter the butter pieces over the dry ingredients; pulse until the mixture resembles fine cornmeal, about fifteen 1-second pulses. In a measuring cup or small bowl, beat together the lemon juice, egg yolk, and vanilla with a fork to combine. With the machine running, add the juice mixture in a slow, steady stream (the process should take about 10 seconds); continue processing until the dough begins to form a ball, 10 to 15 seconds longer.

2. Turn the dough and any dry bits onto a clean work surface; working quickly, gently knead to ensure that no dry bits remain and the dough is homogeneous. Roll the dough into a cylinder approximately 10 inches long and 2 inches in diameter. Center the dough on a piece of parchment. Fold the paper over the dough. Grasp one end of the parchment. With the other hand, use a bench scraper to firmly press the parchment against the dough to form a uniform cylinder. Roll the parchment and twist the ends together to form a tight seal. Chill the dough until firm and cold, about 45 minutes in the freezer or 2 hours in the refrigerator. (The dough will keep in the refrigerator for up to 3 days or in the freezer for up to 2 weeks.)

3. Meanwhile, adjust the oven racks to the upper- and lower-middle positions; heat the oven to 375 degrees.

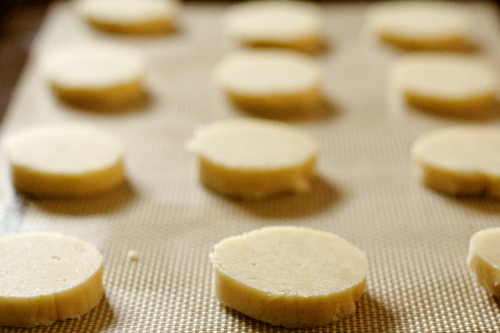
4. Line 2 large baking sheets with parchment paper or spray them with nonstick cooking spray. Remove the dough log from its wrapper and, using a sharp chef’s knife, slice the dough into rounds 3/8 inch thick; place the rounds on the prepared baking sheets, spacing them about 1 inch apart. Bake until the centers of the cookies just begin to color and the edges are golden brown, 14 to 16 minutes, rotating the baking sheets front to back and top to bottom halfway through the baking time. Cool the cookies on the baking sheets about 5 minutes; using a wide metal spatula, transfer the cookies to a wire rack and cool to room temperature before glazing.

5. For the glaze: Whisk the cream cheese and lemon juice in a medium nonreactive bowl until no lumps remain. Add the confectioners’ sugar and whisk until smooth.

6. To glaze the cookies: When the cookies have cooled, spoon a scant teaspoon of glaze onto each cookie and spread evenly with the back of the spoon. Let the cookies stand on a wire rack until the glaze is set and dry, about 1 hour. The cookies are best eaten the day they are glazed.

Copy of IMG_7881

buffalo chicken pizza

Copy of IMG_0390

I’m not experienced in the ways of the buffalo wing. I generally find them…well, let’s just say that the ratio of meat to gross animal parts isn’t high enough for my liking, what with the skin and bones and weird tendony whatever bits. The sauce is good though!

IMG_0365

A quick internet search indicated that there are several directions you can go with buffalo chicken pizza. Options for the pizza’s sauce include regular tomato sauce, blue cheese (or ranch) dressing, buffalo sauce, and skipping a sauce altogether. Some recipes use mozzarella and some skip it or use cheddar. I didn’t know what to do. I’ve never even eaten buffalo chicken pizza before.

Copy of IMG_0368

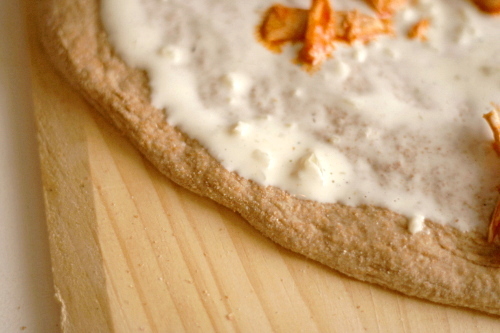
I eventually decided to use ranch dressing as the sauce, but I made my own and kept it pretty light. I just mixed up a bit of buttermilk (or plain yogurt) with mayonnaise and added some basic seasonings. It added a welcome tartness, plus the soothing dairy balances the spicy chicken.

Copy of IMG_0377

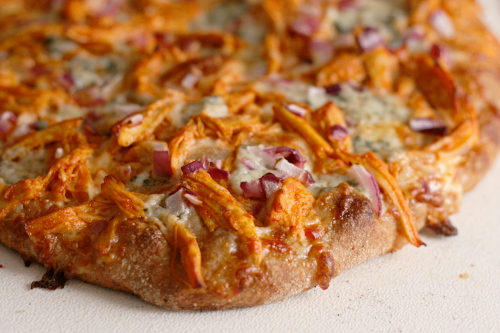
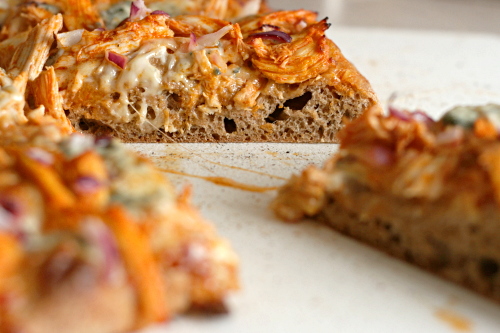
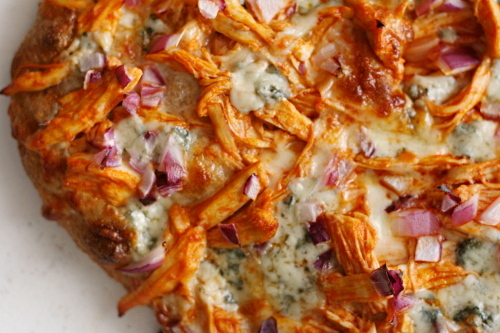
On top of the sauce, I layered the buffalo sauce-coated shredded chicken, a skimpy amount of mozzarella, enough blue cheese to taste without it being overpowering, and some red onions, which caramelized in the oven and contributed sweetness.

Copy of IMG_0384

This is most definitely the best buffalo chicken pizza I’ve ever had! And I’m pretty sure that isn’t just because it’s the only one I’ve had. Everything is in such a nice balance – the spice heat, sweet onions, tangy dressing, stinky blue cheese. And you know what’s thankfully missing? Bones and skin and weird tendony whatever bits. Score!

Copy of IMG_0394

One year ago: Gallitos (Costa Rican Breakfast Tacos)

Printer Friendly Recipe
Buffalo Chicken Pizza

Serves 3-4

You can really make the shredded chicken however you want. If you just want to poach a boneless skinless chicken breast, that’s probably easier, and if you have leftover rotisserie chicken or something, that will work too. This is just how I like it. Also feel free to skip the brining; I don’t think it makes a huge difference here since there are so many other flavors, but it was easy and I had time, so I did it.

If you’d like more spice, stir some hot sauce (hotter than Frank’s, like Tabasco) or a small pinch of cayenne into the buffalo sauce.

1 large bone-in skin-on chicken breast (about 12 ounces)
salt
1 teaspoon oil
1 tablespoon butter
¼ cup Frank’s hot sauce
½ teaspoon packed brown sugar
1 teaspoon apple cider vinegar
1 tablespoon buttermilk or plain yogurt
1 tablespoon mayonnaise
pinch of sugar
pinch of garlic powder
2 ounces (½ cup) mozzarella, shredded
1 ounce (¼ cup) blue cheese, crumbled
¼ cup red onion or scallions, diced very fine
12-16 ounces pizza dough (one third of a recipe calling for about 4 cups of flour), stretched out to 9-12 inches

1. For the chicken: Stir 2 tablespoons salt into 2 cups cold water until it dissolves. Add the chicken; refrigerate for 30 minutes, then remove the chicken from the brine and pat it dry. Adjust an oven rack to the middle-low position and heat the oven to 450ºF. Heat a small oven-safe skillet over medium-high heat. Add the oil and swirl to coat the bottom of the pan; place the chicken breast in the pan skin-side down. Cook without moving until well-browned, about 5 minutes. Turn the chicken over and move the pan to the oven. Roast until an instant-read thermometer inserted into the thickest part of the chicken measures 160ºF or the juices run clear when small cut is made in the chicken. Remove the pan from the oven and set aside. When the chicken has cooled enough to handle, remove and discard the skin (or eat it, because it’s crisp and delicious!) and shred the meat with your fingers or two forks. (If you’ve used good chicken, brined it, and pan-roasted it like this, I dare you not to resist stealing bites of the shredded chicken. It’s delicious.) Increase the oven temperature to 500ºF.

2. For the buffalo sauce: Melt the butter in a small saucepan. Add the brown sugar, hot sauce, and vinegar. Mix the sauce with the shredded chicken.

3. For the white sauce: In a small bowl, stir together the buttermilk or yogurt, mayonnaise, sugar, garlic powder, and a pinch each of salt and pepper.

4. Assemble the pizza: Place the pizza dough on a wooden paddle that’s been liberally coated with cornmeal. (Or use parchment paper instead of the cornmeal, or the back of a baking sheet instead of the paddle.) Spread the white sauce evenly on the pizza dough; top with the chicken, then the cheeses, and finally the onions.

5. Bake the pizza for 8-10 minutes, until the cheese is melted and bubbling and the crust is browned. Let the pizza rest about 5 minutes before cutting and serving.

Copy of IMG_0389

pumpkin scones

Copy of IMG_0444

Oh, did you want to see something besides scones? I’m sorry, it turns out that the ol’ crumblycookie has become all scones, all the time.

Copy of IMG_0295

No, just kidding. This is the last scone recipe. I just wanted to get through them in one fell swoop, which is what’s kind of fun about NaBloPoMo.

Copy of IMG_0305

Like most of us, I love pumpkin. The thing is though, that you can’t just add pumpkin into whatever your favorite baking recipe is, because it changes the texture quite a bit. It adds a moist, cakey…I want to say gummy texture, but that sounds negative, and it isn’t necessarily a bad thing. But it also isn’t what you want in scones.

Copy of IMG_0307

So even though I have two great basic scone recipes, I didn’t even consider just adding pumpkin into one of them and seeing what happens. (Although now I’m curious.) So I had to start my search for recipes from scratch, and I settled on this Joy of Baking recipe because the picture shows tall scones with flaky layers.

Copy of IMG_0312

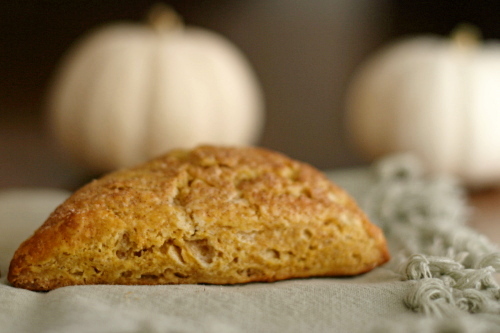
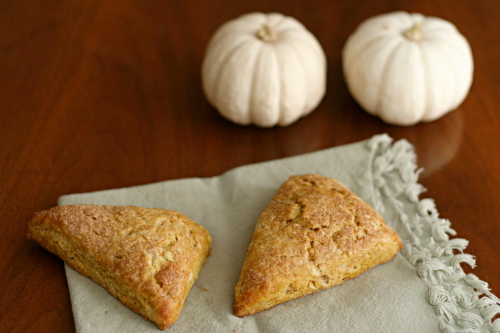
And I nailed it! I can’t imagine a better pumpkin scone. This has everything I want in a scone – the texture walks the line between tender and flaky, it’s sweet but not too much, and the pumpkin and spices are noticeable but not overwhelming. Yet another perfect scone recipe.

One year ago: Gratin Dauphinois

Copy of IMG_0452

Printer Friendly Recipe
Pumpkin Scones
(adapted just a bit from Joy of Baking)

Makes 8 scones

I left out the nuts and raisins, just because I wanted a smooth texture this time. And instead of using the egg wash and turbinado sugar for sprinkling, I brushed the scones with milk and sprinkled them with a mixture of about 1 tablespoon granulated sugar and ½ teaspoon cinnamon. It gave the scones a really nice thin crisp layer after baking.

I’ve also tweaked the order in which the ingredients are added to the dough, because I’m full of myself and I think I know better than the professionals. Or something.

2 cups (260 grams) all purpose flour
½ teaspoons ground ginger
½ teaspoons ground cinnamon
1 teaspoon baking powder
¼ teaspoon baking soda
¼ teaspoon salt
½ cup (113 grams) cold unsalted butter, cut into pieces
⅓ cup (50 grams) raisins
¼ cup (30 grams) toasted and chopped pecans (optional)
⅓ – ½ cup buttermilk
⅓ cup (72 grams) light or dark brown sugar
½ cup fresh or canned pumpkin puree (not pumpkin pie mix)
1 teaspoon pure vanilla extract

Egg Wash:
1 large egg
1 tablespoon milk or cream
Turbinado sugar for sprinkling the tops of the scones (optional)

1. Preheat oven to 400ºF (200ºC) and place rack in middle of oven. Line a baking sheet with parchment paper.

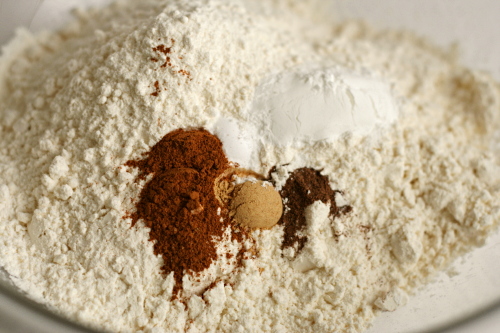
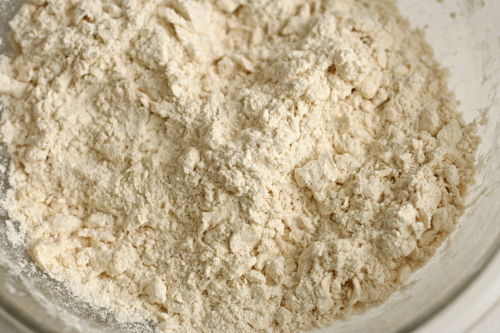
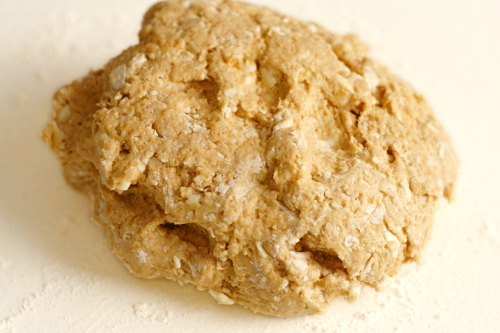
2. In a large bowl, whisk together the flour, spices, baking powder, baking soda and salt. Cut the butter into small pieces and blend into the flour mixture with a pastry blender or two knives. The mixture should look like coarse crumbs. Stir in the raisins and pecans, if using. In a separate bowl, mix together the buttermilk, sugar, pumpkin puree and vanilla, and then add the buttermilk mixture to the flour mixture. Mix just until the dough comes together. Do not overmix the dough.

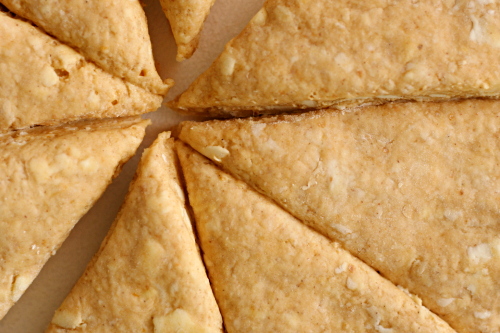
3. Transfer to a lightly floured surface and knead dough gently four or five times and then pat the dough into a circle that is about 7 inches (18 cm) round and about 1½ inches (3.75 cm) thick. Cut this circle in half, then cut each half into 4 pie-shaped wedges (triangles). Place the scones on the baking sheet. Brush the tops of the scones with the egg wash and sprinkle a little Turbinado sugar on top, if desired.

4. Place the baking sheet inside another baking sheet to prevent the bottoms of the scones from over browning. Bake for about 20 minutes or until golden brown and a toothpick inserted in the middle comes out clean. Transfer to a wire rack to cool.

Copy of IMG_0447

buttermilk scones

Copy of IMG_0247

Having a great, seemingly perfect recipe for something isn’t enough to stop me from trying new recipes. There’s always something to learn, you know? Even though one of the first biscotti recipes I ever made is still the best, I’ve made many many more recipes and I’ve learned some little biscotti tricks along the way. But I still haven’t found a better biscotti recipe.

Copy of IMG_8357

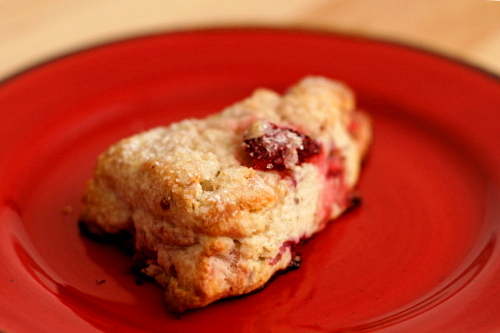
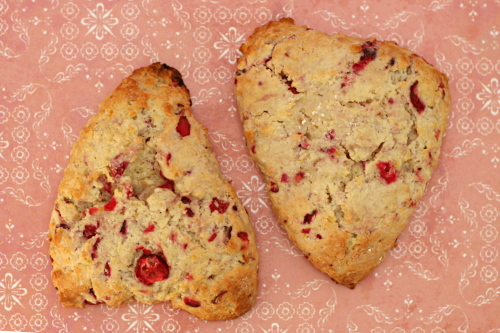
The cranberry scones were one of the first scone recipes I ever made, and certainly the first to knock my socks off. Of course, cranberries aren’t in season year-round anyway, but I successfully adapted the recipe for rhubarb, and I’m sure I could have used most other fruits.

Copy of IMG_8374

But instead, I kept trying new recipes, including this one. And this time…well, I won’t say this recipe is better, but it is definitely as good. Aargh, don’t tell me I need to do a scone comparison!

Copy of IMG_8383

I suppose it’s okay to have two perfect scone recipes, right? And one probably isn’t better than the other anyway. One thing I’ve found from recipe comparisons is that once you have great dependable recipes, it all comes down to personal preference.

Copy of IMG_8385

Well, my personal preference is for whatever gets me a delicious treat on a Saturday morning. This certainly qualifies. And so does this.

Copy of IMG_9868

One year ago: Brown Sugar Apple Cheesecake

Printer Friendly Recipe
Buttermilk Scones (adapted just slightly from Tartine, by Elisabeth Pruett and Chad Robertson)

The measurements are weird because this is half of the recipe in Tartine’s cookbook. But geez, who needs 5 cups of flour worth of scones? I’ve also made them slightly smaller – 8 scones for this half-recipe instead of 6, because 6 would have been huge. (Each scone would have 3 tablespoons of butter in it!)

Zante currants are just standard dried currants.

I skip the melted butter and just use milk on top of the unbaked scones.

6 tablespoons zante currants (1.75 ounces) or 3 ounces fresh berries
2¼ cups + 2 tablespoons (12 ounces) all-purpose flour
1½ teaspoon baking powder
¼ + 1/8 teaspoon baking soda
¼ cup (1.75 ounces) granulated sugar
½ teaspoon + 1/8 teaspoon salt
9 tablespoons butter, very cold
¾ cup buttermilk
½ teaspoon lemon zest
3 tablespoons unsalted butter, melted
large crystal sugar or granulated sugar for sprinkling

1. Preheat the oven to 400 degrees. Line a baking sheet with parchment paper or a silicone baking mat.

2. To make the dough, first combine the currants with warm water to cover in a small bowl and set aside for about 10 minutes until the currants are plumped. Drain well. If you’re using berries instead of currants, put them in the freezer.

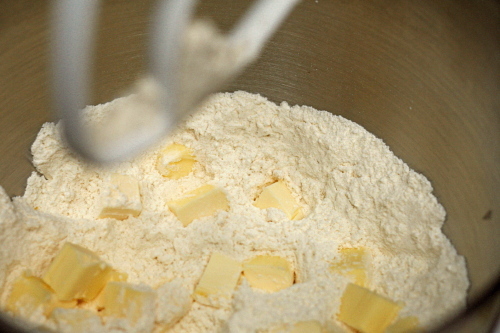
3. While the currants are plumping (or the berries are freezing), whisk the flour, baking powder, and baking soda in a large mixing bowl if making by hand, or into the large bowl of a stand mixer fitted with the paddle attachment. Add the sugar and salt and stir to mix with a rubber spatula. Cut the butter into ½-inch cubes and scatter the cubes over the dry ingredients. If you are using a mixer, pulse on and off so that you don’t break down the butter too much. You want to end up with a coarse mixture with pea-sized lumps of butter visible.

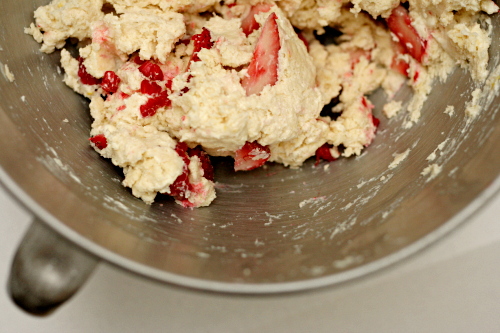
4. Add the buttermilk all at once along with the lemon zest and currants. (If you’re using berries, don’t add them yet.) Mix gently with a rubber spatula by hand or on low speed if using the mixer. Add the berries and continue to mix just until you have a dough that holds together. Be careful not to mash the berries into the dough, or you will color it with their juice. If the mixture seems dry, add a little more buttermilk. You still want to see some of the butter pieces at this point, which will add to the flakiness of the scones once they are baked.

5. Dust your work surface with flour, and turn the dough out onto it. Using your hands, pat the dough into a rectangle about 9 inches long, 5 inches wide, and 1½ inches thick. Brush the top with the melted butter and sprinkle with the sugar. Using a chef’s knife, cut the dough into 8 triangles. Transfer the triangles to the prepared baking sheet.

6. Bake the scones until the tops are lightly browned, 25 to 30 minutes. Remove from the oven and serve immediately.

Copy of IMG_9863

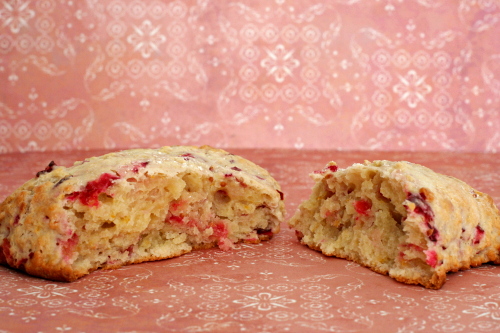
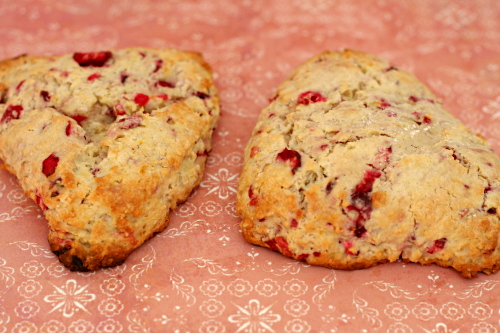
cranberry orange scones

Copy of IMG_1625

This recipe changed the whole shape of my last year. Before making these great scones, I’d spend a large part of both weekend mornings cooking, usually something sweet one day and something savory the other. It made for a nice breakfast category here, but it wasn’t the best way to relax on the weekend.

Copy of IMG_1123

Not anymore. I still often cook something one morning, but on the other, it’s all about scones. I make the dough early in the week and freeze it, then on a lazy weekend morning, I just have to bake them, make coffee (or, more often, wait for Dave to), and sit down to flip through a cookbook. It’s become one of my favorite times of the week.

Copy of IMG_1126

These pictures? They’re from when I made the scones last winter, but it was way past cranberry season, so I’ve been holding onto this blog entry for months and months.

Copy of IMG_1137

It’s time. Cranberries are showing up in stores, and there is no better way to enjoy them. These are so tender, have just the right sweetness, and make for a stress-free weekend breakfast, even with guests. Even after a year of making scones, these are still one of my favorites.

Copy of IMG_1631

One year ago: Warm Chickpea and Butternut Squash Salad

Printer Friendly Recipe
Cranberry Orange Scones (adapted from Gourmet via Smitten Kitchen)

The recipe originally calls for (Meyer) lemon zest, but orange – or tangerine, which I’ve also used – is such a great partner for cranberry that I couldn’t resist using it instead. I also like increasing the cranberries a bit (already reflected in the recipe).

I’ve baked this recipe at high altitude (at least 5000 feet) with good results. They weren’t quite as pretty, but the taste and texture weren’t affected.

I always flash-freeze scones, then bake them straight from the freezer, adding a couple extra minutes to the baking time.

Makes 8 scones

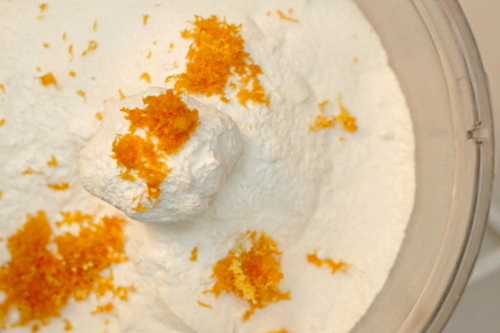
1½ tablespoons freshly grated orange zest
2½ cups (12 ounces) all-purpose flour
½ cup (3.5 ounces) sugar plus 3 tablespoons
1 tablespoon baking powder
½ teaspoon salt
¾ stick (6 tablespoons) cold unsalted butter, cut into bits
1½ cups fresh cranberries, chopped coarse (I usually do this in the food processor)
1 large egg
1 large egg yolk
1 cup heavy cream

1. Adjust an oven rack to the middle position and heat the oven to 400°F. Line a large baking sheet with parchment paper or a silicone baking mat.

2. In a small bowl, toss together fresh cranberries and 3 tablespoons sugar. In another small bowl, lightly beat the egg and yolk, then stir in cream.

3. In a food processor, pulse the flour, ½ cup sugar, baking powder, salt, and zest until combined. Add the butter and process until the mixture resembles coarse meal. Transfer to a large bowl. (You can also just smoosh the butter into the dry ingredients with your fingers instead of using a food processor.) Stir the cranberries into the flour mixture. Then gently fold the egg mixture into the flour until just combined.

4. On a well-floured surface with floured hands, pat the dough into a 1-inch-thick round (about 8 inches in diameter). With a 2-inch round cutter or the rim of a glass dipped in flour, cut out as many rounds as possible, rerolling the scraps as necessary. (Or cut the circle into wedges, which is my standard method.) Arrange the scones about 1 inch apart on the prepared baking sheet and bake 15 to 20 minutes, or until pale golden. Cool about 10 minutes, then serve.

Copy of IMG_1626

pumpkin and mushroom soup

Copy of IMG_0331

Cooking déjà vu: When you start to make a recipe and then think, “Wait a minute…this seems familiar…have I made this before?!” Generally not a great sign because if you don’t remember it, perhaps it wasn’t worth remembering.

Copy of IMG_1266

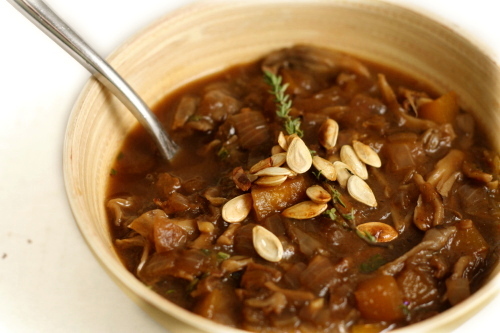
I actually found pictures of this soup from last year, when I’d apparently made it and decided it wasn’t worth sharing. But I didn’t understand how a recipe like this could be anything but good – mushrooms and squash seem like a great match that can only get better with the addition of fall herbs and spices.

Copy of IMG_0315

I don’t think I did too much differently this time – cooked the vegetables longer until they were nice and browned maybe, and this time I stirred in some pureed pumpkin at the end, whereas before I’d just used diced squash at the beginning.

Copy of IMG_0318

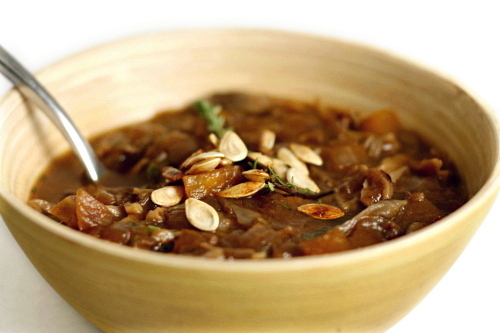
The pureed squash made a huge difference in texture, thickening the soup so much it resembled stew. It was so hearty and delicious, and you’d never guess that there’s no meat in it, especially with that deep brown color. I was right to try this recipe again, because the woodsy mushrooms and the earthy squash are an unbeatable combination.

Copy of IMG_0328

One year ago: Sugar Cookies (for decorating)

Printer Friendly Recipe
Pumpkin and Mushroom Soup (adapted quite a bit from Moosewood Restaurant Cooks at Home)

Serves 4

I kind of feel like this should be called “Squash and Mushroom Soup” because it seems like other types of squash are used more in savory recipes than pumpkin is. You can really use any type of squash you want, as long as it has a similar texture. The same goes for the fresh mushrooms – I used maitake, but cremini, shiitake, button, whatever, they all work.

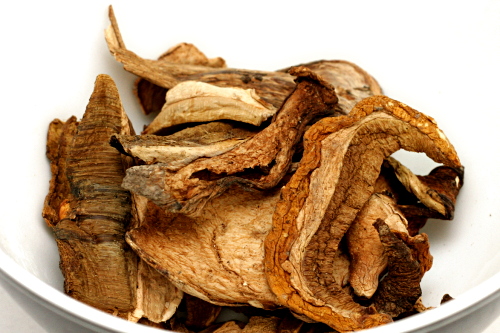
½ ounce dried porcini mushrooms, rinsed
water
2 tablespoons olive oil
1 medium onion, diced
salt and ground black pepper
1 small pie pumpkin, peeled and diced
12 ounces mushrooms, cut into bite-sized pieces
2 cloves garlic, minced
1/2 teaspoon thyme leaves
1 teaspoon sage leaves, minced
pinch nutmeg
¼ cup Marsala or dry sherry
2 cups chicken or vegetable broth
½ cup cooked pureed pumpkin (like the stuff from a can)

1. Place the dried mushrooms in a small saucepan and add enough water to cover. Bring to a boil over medium-high heat, then immediately turn off the heat. Set aside.

2. Heat the oil in a large saucepan or Dutch oven (not nonstick) over medium heat. Add the onions and a pinch of salt and cook, stirring occasionally, until just beginning to brown at the edges, about 8 minutes. Add the squash, mushrooms, ½ teaspoon salt and ¼ teaspoon ground black pepper and continue cooking and occasionally stirring until the mushrooms release their liquid, it evaporates, and the vegetables brown, about 15 minutes.

3. Meanwhile, use a fork to lift the rehydrated porcini mushrooms from the liquid and finely chop them. Save the liquid.

4. Add the porcini, garlic, herbs, and nutmeg and cook, stirring constantly, until fragrant, about 30 seconds. Pour in the wine and cook until it nearly evaporates, scraping the bottom of the pan to release the browned bits.

5. Add the broth, pumpkin, and mushroom soaking liquid (either strain it through a coffee filter or just be careful to leave the grit behind with a bit of liquid) and bring the soup to a simmer over medium heat. Adjust the seasonings and serve.

Copy of IMG_0335

chocolate caramel chestnut cake

Copy of IMG_0807a

My dessert rich-o-meter has chocolate chip cookies right near the middle, with cheesecake at one end and, I don’t know, maybe angel food cake on the other. Although I almost never eat angel food cake. Regular layer cakes tend to be slightly on the less rich side of cookies, until you add frosting of course, and then I figure it’s about the same. So if you disregard the less-rich-than-cookies side of the richometer (pronounced with the stress on the second syllable, for maximum obnoxiousness), that means desserts just span from cookies – pretty darn bad for you – to cheesecake – just about 100% fat.

Copy of IMG_0789

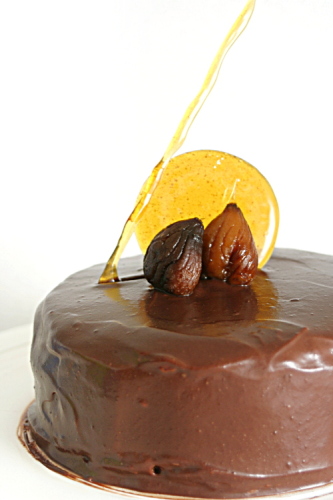
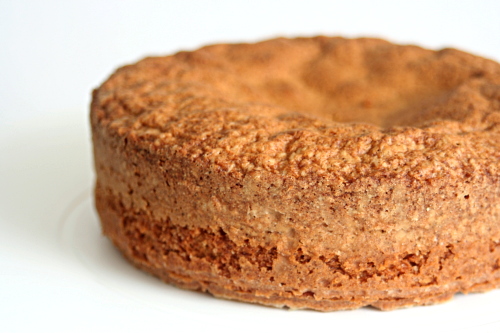
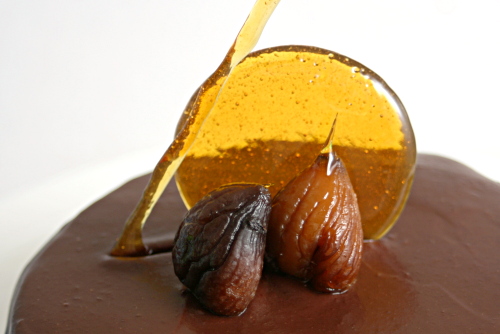
The last few Tuesdays with Dorie recipes have definitely been on the cheesecake end of the spectrum. (Of course, nothing is as bad as the lemon cream tart and peanut butter torte, which are off the charts!) At first I thought this cake was similar to a basic cake, but then it has this chocolate-butter filling, and a chocolate-cream glaze, and two sticks of butter in the cake itself. Whoa doggie.

Copy of IMG_0793

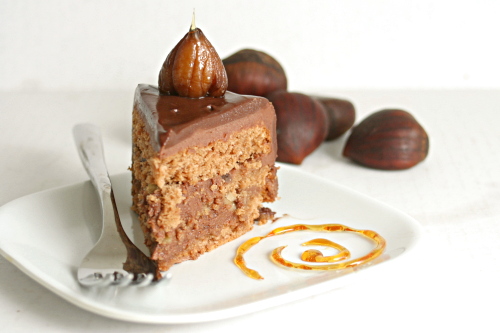
So we have leetle leetle servings, one quarter of the size Dorie recommends. This isn’t my favorite type of cake – I tend to like more classic flavors and textures – but it’s certainly good, with the earthy chestnuts and bittersweet chocolate. Dorie expounds on the virtues of the ganache filling, made by melting chocolate with hot caramel instead of hot cream, and I agree that it lends some extra complexity to the cake.

Copy of IMG_0814

Katya has the full recipe posted. I substituted Nutella for the chestnut cream and decreased the butter in the cake by 2 tablespoons. I also found that refrigerating the ganache filling overnight seemed unnecessary, turning the spreadable mixture into a hard-as-butter (which it mostly is) chunk. I had to wait an hour or so to let it warm up before I could use it on the cake.

One year ago: Rugelach, one of my favorite Dorie Greenspan recipes ever

Copy of IMG_0800

pork chops loco moco

Copy of IMG_9853

I feel a little guilty when Dave and I spend most of the weekend sleeping in, watching football, reading books, and, in my case, cooking. We are booooring.

Copy of IMG_9835

But then I figure that someday, if everything goes as planned, we’ll have kids and then we won’t be able to spend all weekend being lazy. I don’t think I’ll be cooking from Cooks Illustrated’s Restaurant Favorites at Home very often when we have kids, which is a shame, because it’s a fun cookbook and I haven’t used it as much as I should. I better take advantage while I can.

Copy of IMG_9837

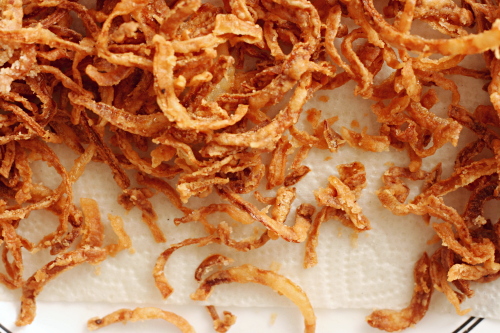
Although really, this meal didn’t take nearly as long to prepare as I thought it would based on the length of the recipe. It’s true that there are five parts – rice, pork chops, scrambled eggs, mushroom gravy, and fried onions. Fortunately, the rice, meat and eggs are as simple as they could get, and the sauce is pretty quick as well. That means that only the onions take some time.

Copy of IMG_9846

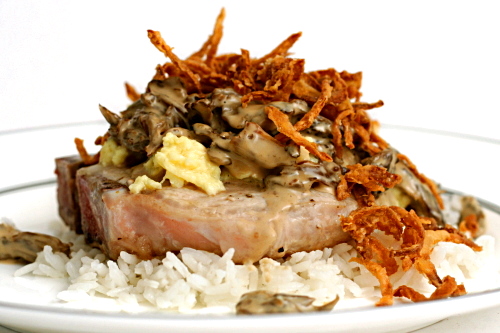
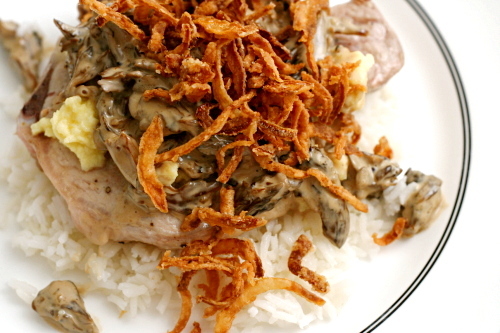
Loco moco is a Hawaiian dish that, as its most basic, is rice, a hamburger patty, gravy, and a fried egg. For their cookbook, Cooks Illustrated adapted the recipe from Sam Choy’s, who replace the hamburger with a pork chop, the fried egg with scrambled, and the brown gravy with a mushroom cream sauce, in addition to adding the fried onions.

Copy of IMG_9841

Hoo boy, I like this kind of meal anyway, where a bunch of different stuff all meshes together, but this in particular was fantastic. So many textures – the meat, the rice, soft eggs, crunchy onions. So many flavors – nutty white rice, sweet fried onions, savory pork, all coated in a rich mushroom sauce. Even if it had taken most of a day to make, which it didn’t, it would have been worth it. Especially since I would have just been lounging around in my pajamas anyway.

Copy of IMG_9854

One year ago: Pumpkin Pancakes

Printer Friendly Recipe
Pork Chops with Rice, Eggs, Onions, and Gravy
(from Cooks Illustrated’s Restaurant Favorites at Home)

This is the recipe straight from the cookbook. However, next time I plan to use a boneless pork chop. I think it will brown better in the pan, plus it was a little hard to see where the bone was versus the meat once the pork was covered in sauce and other goodies.

Also, I think it makes more sense to cook the pork chop before the eggs. And, in step 3, I don’t see why you’d want to dirty an extra dish by transferring the sauce to a measuring cup; just cover the pan you cooked it in. Finally, the recipe calls for both the eggs and the pork chops to be cooked on high heat, but I’ve had better luck with medium-high heat for both.

Fried Onions:
3 cups vegetable oil
½ cup all-purpose flour
1 teaspoon salt
½ tablespoon ground black pepper
1 small yellow onion, halved and sliced thin

Rice:
2 teaspoons vegetable oil
1 cup long-grain white rice
½ teaspoon salt

Sauce:
1 teaspoon cornstarch
1 tablespoon vegetable oil
4 ounces fresh shiitake mushrooms, stemmed and sliced thin
1 cup heavy cream
2 teaspoons soy sauce
1 teaspoon oyster sauce
salt and ground black pepper

Eggs:
4 large eggs
¼ cup whole milk
pinch ground black pepper
1 tablespoon unsalted butter

Pork chops:
1 tablespoon vegetable oil
4 thin bone-in center-cut loin pork chops, about ½ inch thick
salt and ground black pepper

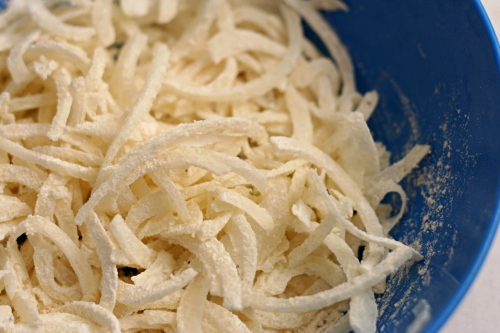
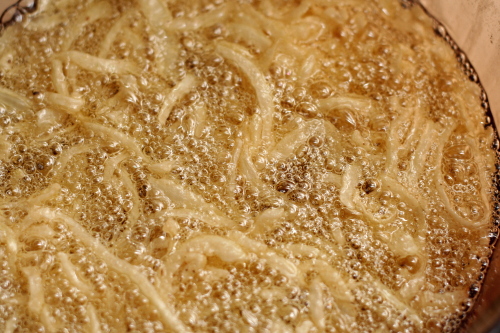
1. For the fried onions: Heat the vegetable oil in a Dutch oven over medium-high heat until it reached 350 degrees. (Use an instant-read thermometer that registers high temperatures or clip a candy/deep-fat thermometer onto the side of the pan before turning on the heat.) Meanwhile, mix the flour, salt, and pepper together in a large bowl. Add the onion to the flour mixture and toss thoroughly to coat. Transfer the floured onion to a large strainer (or colander) set over another bowl (or the sink) and shake vigorously to remove the excess flour. Add the onion to the oil and fry until golden brown, 2 to 2½ minutes, adjusting the heat as necessary to maintain the cooking temperature. Remove the onion from the oil using a spider or slotted spoon, tapping the handle several times on the rim of the pot to drain any excess oil, then transfer to a large plate lined with several layers of paper towels. Set aside.

2. For the rice: Heat the vegetable oil in a small saucepan over medium heat until shimmering. Add the rice and cook, stirring constantly, until transparent, 2 to 3 minutes. Add 1½ cups water and the salt. Bring to a boil, swirling the pan to blend the ingredients. Reduce the heat to low, cover tightly, and cook until the liquid is absorbed, about 15 minutes. Remove from the heat and cover the pan with a clean dish towel and then the lid. Let the rice stand, covered, to finish cooking, about 15 minutes longer. Fluff with a fork and set aside.

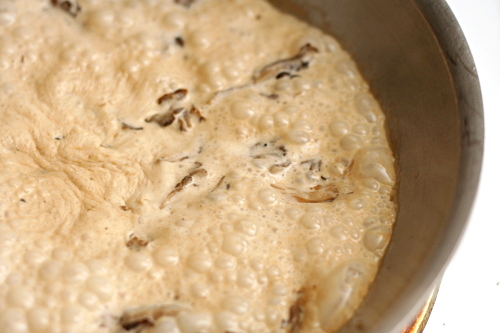
3. For the sauce: Mix the cornstarch and 1 teaspoon water together in a small bowl and set aside. Heat the vegetable oil in a large saucepan over medium-high heat until shimmering. Stir in the shiitakes, cover, and reduce the heat to low. Cook until the mushrooms release their moisture and begin to brown, about 5 minutes. Stir in the cream, soy sauce, and oyster sauce, increase the heat to medium-high, and bring to a boil. Whisk in the cornstarch mixture and return to a boil, whisking constantly. Cook, whisking constantly, until the sauce is slightly thickened, about 30 seconds. Remove the sauce from the heat and season with salt and pepper to taste. Transfer the sauce to a liquid measuring cup, cover tightly with plastic wrap, and set aside.

4. For the eggs: Crack the eggs into a medium bowl and add the milk, salt and pepper. Beat with a fork until the streaks are gone and the color is pure yellow; stop beating while the bubbles are still large. Melt the butter in a 12-inch nonstick skillet over high heat until foaming, swirling it around and up the sides of the pan. Before the form completely subsides, pour in the beaten eggs. Using a heatproof spatula, push the eggs from one side of the pan to the other, slowly but deliberately lifting and folding the eggs as they form curds, until the eggs are nicely clumped into a single mound but remain shiny and set, about 2 minutes. Transfer to a medium bowl and cover to keep warm.

5. For the pork chops: Wipe the nonstick skillet clean with a wad of paper towels. Add the vegetable oil and heat over high heat until smoking. Season the pork chops generously with salt and pepper. Lay the pork chops in a single layer in the skillet and cook until golden brown, 2 to 3 minutes. Turn and cook on the second side until lightly brown and cooked through, 1 to 2 minutes longer.

6. To serve: Divide the rice among 4 individual plates. Lay a pork chop on top of the rice and top with equal portions of scrambled eggs. Pour about 3 tablespoons of the sauce over the egg and pork on each plate, and sprinkle with the fried onions. Serve immediately.

sandwich rolls

Copy of IMG_4632

Allright, so. NaBloPoMo. National Blog Posting Month, or in my case, Clean Out the Crazy-Full Pending Folder Month. I remember it being pretty tough last year, and it’s looking like it’s going to be even more challenging this year, because we finally (!!!) got a move date, and it’s the first week of December. That means November will include not just travel for Thanksgiving, but flying across the country to look for houses, and packing packing packing!

Copy of Copy of IMG_4568

Keeping with NaBloPoMo tradition, I’m starting with the oldest recipe in my Pending folder – from six months ago, yeesh. Please don’t take the delay as a sign of its quality! Truthfully, I’m just lazy and it’s a time-consuming entry.

Copy of Copy of IMG_4605

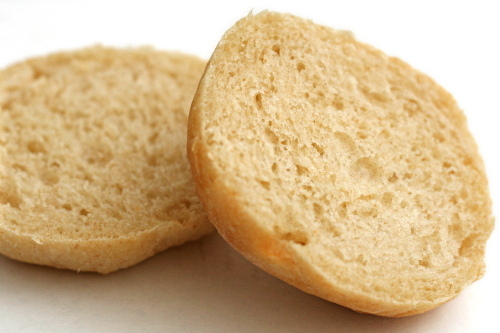
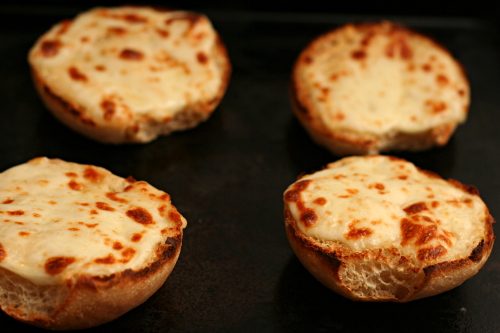
I’ve been battling with finding or developing the perfect sandwich roll recipe for years, and I finally nailed it. My grocery store makes great sandwich rolls – fluffy and with a soft crust so your filling doesn’t squoosh out the other end when you try to bite into your sandwich. The problems with these rolls are twofold: First, they’re completely white bread, and I always like at least a little whole wheat flour in my bread. Second, they’re a bit too big for grilled cheese with tomato soup. And I suppose there’s a third problem: Our grocery store isn’t moving to New Mexico with us. So sad.

Copy of IMG_4620

My initial attempts to make sandwich rolls tended to be either too dense, with a crust too tough, or misshapen. I had difficulty getting round rolls without deflating the risen dough. Or the dough didn’t have enough structure so the rolls turned into pancakes as they expanded instead of balls.

Copy of IMG_4622

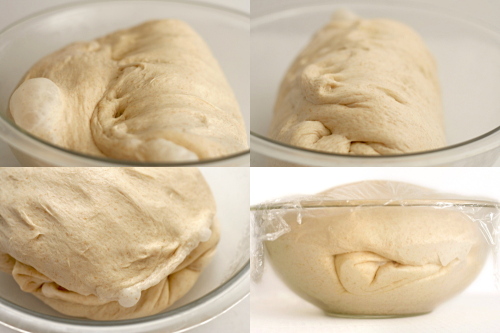
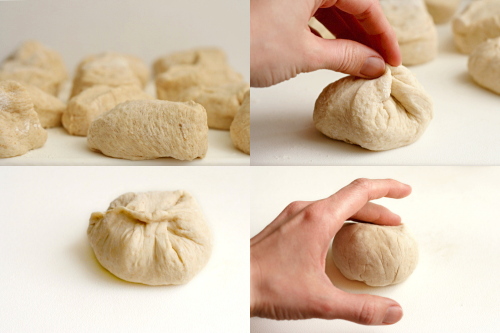
I believe I’ve solved all of those problems with this recipe. A slow overnight cold rise improves flavor, and then two turns of the rising dough gives it plenty of strength, so that when it rises, it rises up and not out. To shape the rolls into even circles, I pulled the edges around and pinched them together to increase the surface tension of the doughballs. This is a bit risky, because you have to be gentle and just tug at the very edges of the dough without deflating the dough. Then just roll it around a bit to even out the edges.

Copy of IMG_4629

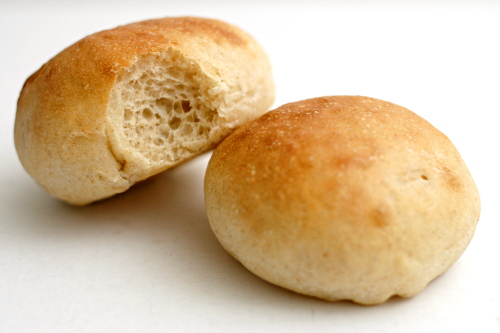
Perfect! Light and fluffy, tall, with a soft crust, and completely adaptable with regards to size and degree of whole wheatiness. And I figured it out just in time – before moving far, far away from my trusty favorite grocery store and their wonderful sandwich rolls.

Copy of IMG_4636

One year ago: Mushroom Phyllo Triangles and Crawfish Phyllo Triangles

Printer Friendly Recipe
Sandwich Rolls

Makes 12

Feel free to substitute whole wheat flour for some of the unbleached flour. If you use 1 cup whole wheat and 3 cups white flour, you’ll hardly notice a difference in flavor, texture, or rising time. At 2 cups whole wheat flour and 2 cups white flour, the difference will be more significant but the rolls will still be excellent. If you want to use even more whole wheat flour, I would adapt 100% whole wheat sandwich bread into rolls.

If it works better for your schedule, go ahead and skip the overnight chill.

4 cups (19.2 ounces) unbleached all-purpose flour, plus
2 teaspoons instant yeast
2 tablespoons granulated sugar
1 teaspoon salt
1½ cups water
2 tablespoons olive oil
2 tablespoons milk for brushing the rolls

1. Stand mixer: Mix the flour, yeast, sugar, and salt in the bowl of a stand mixer fitted with the dough hook. With the mixer on low speed, gradually add the water and oil. Continue mixing on medium-low until the dough is elastic and supple, about 8 minutes. You may need to add a little more flour or water to get the correct consistency – soft but not really sticky. Transfer the dough to an oiled bowl and cover with plastic wrap. Refrigerate overnight.

By hand: Mix the flour, yeast, sugar, and salt in a large bowl. Make a well in the middle of the dry ingredients and pour in the water and oil. Stir the mixture until the dough comes together. Transfer it to a floured board or countertop and knead, incorporating as little flour as possible, for about 10 minutes, until the dough is elastic and supple. You may need to add a little more flour or water to get the correct consistency – soft but not really sticky. Transfer the dough to an oiled bowl and cover with plastic wrap. Refrigerate overnight.

2. Remove the dough from the refrigerator and let it warm and rise at room temperature until it’s double the original volume, 2-4 hours (depending on the temperature of the ingredients you started with and the room temperature).

3. Give the dough one turn, by folding it into thirds like a sheet of paper going into an envelope, than in half the other direction (as shown in the photos above). Allow the dough to rise again, which should take about an hour. Give it another turn, then let it rise again, which will probably take less than an hour.

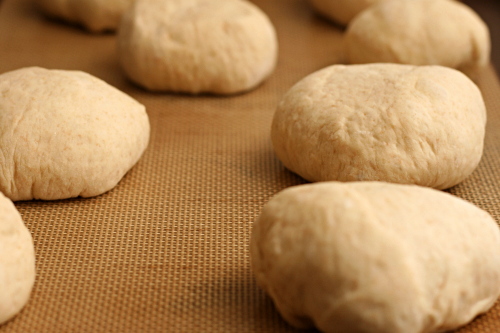
4. Once the dough has doubled in size for the third time, cut it into 12 pieces. Very gently pull the edges of each dough ball around to one side and pinch them together, as shown in the photos above. Roll the dough between the palm of your hand and a board, lightly floured if necessary. Place the formed rolls, pinched side down, on 2 baking pans lined with parchment paper or silicone baking mats.

5. Adjust an oven rack to the middle position and preheat the oven to 400ºC. Let the rolls rise until puffy and about one and a half times their original size, 30-45 minutes. Brush them with milk and bake for 12 minutes, until golden brown and an instant thermometer inserted into the center of one measures 185-200ºC. (I suggest baking just one pan of rolls at a time. An extra 15 minutes of rising won’t ruin your rolls.) Let cool until room temperature before serving, about 45 minutes.