Archives for March 2012

homemade mustard

mustard 7

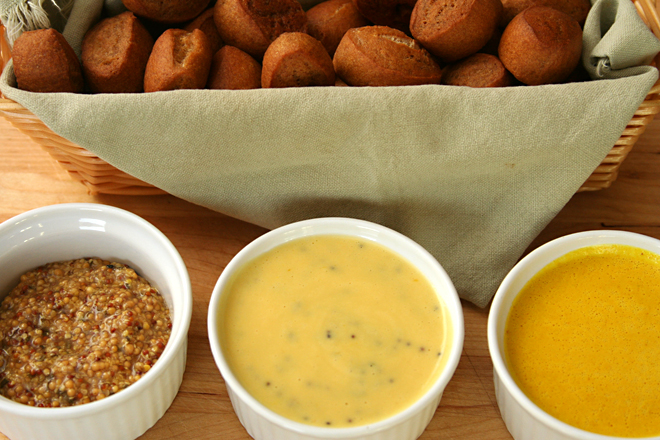
My sister got me hooked on fancy mustard by buying me a jar of champagne mustard for Christmas a couple years ago. I had had no idea that mustard could taste so good. It was tangy, a little spicy, maybe just a bit sweet. We slathered it on bread, no other toppings necessary. It’s still the best mustard I’ve ever tasted, despite a newfound appreciation for the variety and quality that was possible in mustards. Right now I have four mustards in my fridge – a whole grain version, a smooth French Dijon (this one is sharp!), red chile mustard, and a generic Dijon I use for cooking.

mustard 1

But then my sister took my mustard fixation one step further when she started mixing up her own mustards. While I’d always had some vague idea of the relationship between prepared mustard and the mustard powder I add to my roux for mac and cheese, it had never occurred to me to take it to the next step and make homemade mustard. But the types she was making, flavored with herbs, cognac, or beer, sounded too good to pass up.

mustard 3

The article she led me to had six mustard recipes, and never one to be able to make a decision, I opted to make three of them. Mustard is easy enough that this was reasonable – to make, although it was far too much mustard for us to eat. All of the recipes required several days of soaking mustard powder or seeds in vinegar, but then one just needed to be blended and the other two were cooked briefly over a double boiler.

mustard 2

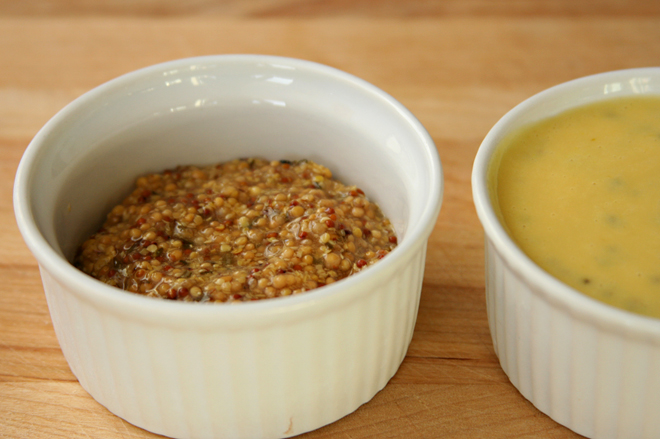
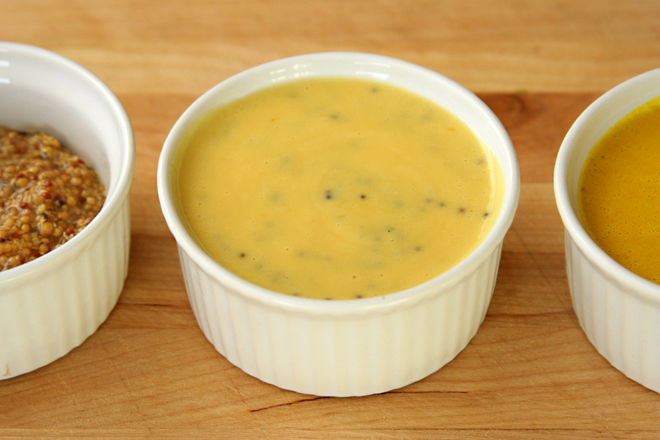
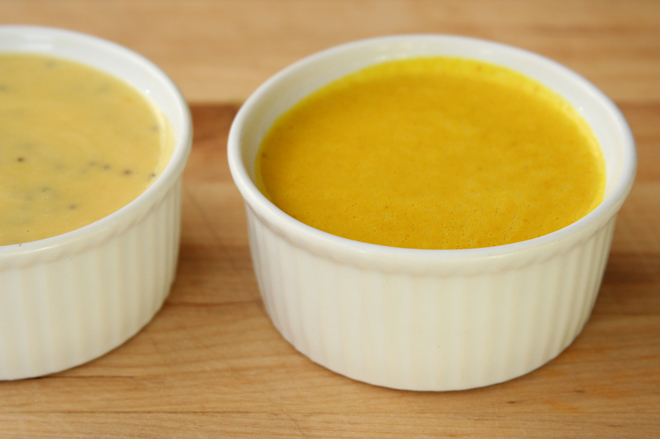
The thing about making condiments (or anything, really) from scratch is that they really need to be better than a storebought version to justify the effort.  On that note, the rosemary thyme mustard was by far my favorite. Not only was the texture just right – thick with fun mustardy bits when you pop the seeds in your mouth – but this was a flavor you don’t often see for sale.  The other two mustards I made, which both required an egg and a trip over the double boiler, ended up too thin, but I still loved the sweet flavor of the agave version. The bright yellow beer mustard certainly wasn’t bad, but it had a lot more bite than the others.  And if I thought I was fixated on mustards before, that was nothing to how I am now that I know I can make any flavor I want.

mustard 5

One year ago: Scampi fra Diavolo
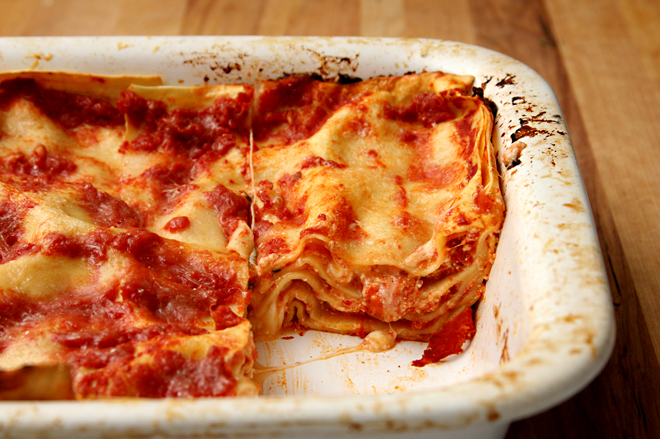
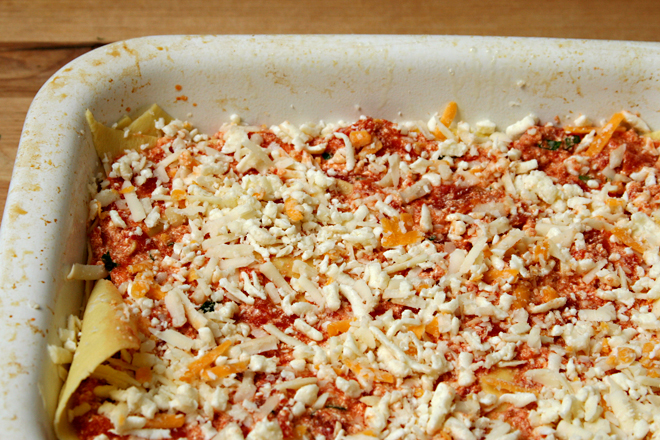
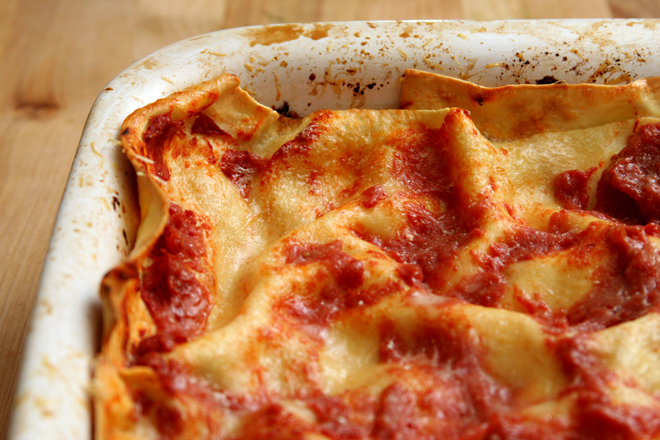
Two years ago: Chicken Mushroom Spinach Lasagna
Three years ago: Lemon Poppy Seed Waffles
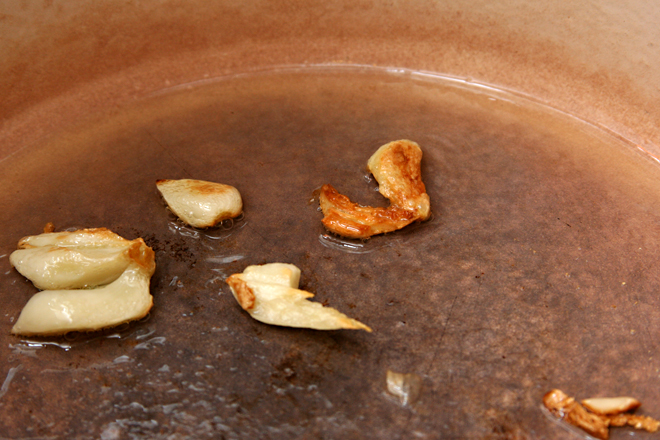
Four years ago: Whole Wheat Pasta with Greens, Beans, Tomatoes, and Garlic Chips

Printer Friendly Recipe
Rosemary Thyme Mustard (from Sunset magazine)

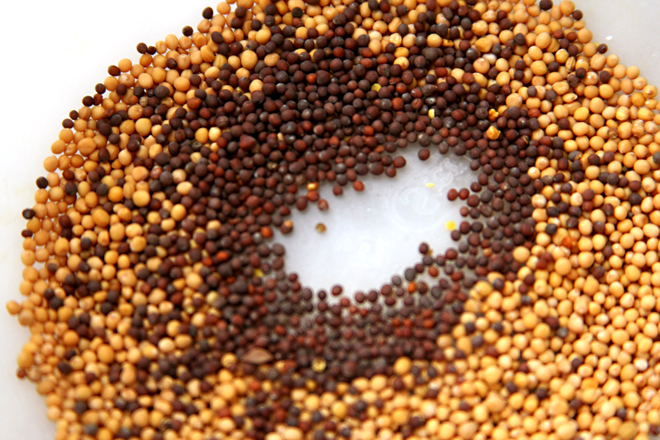
3 tablespoons yellow mustard seeds
1 tablespoon brown mustard seeds
3 teaspoons minced fresh thyme, divided
2 teaspoons minced fresh rosemary
⅓ cup apple cider vinegar
1 teaspoon light brown sugar
¾ teaspoon salt

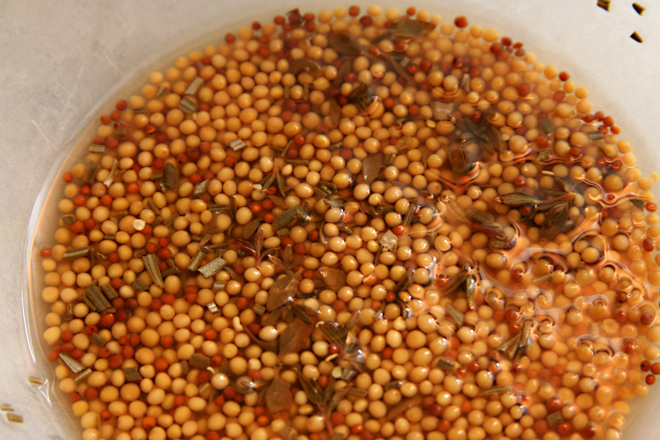
1. Stir together the mustard seeds, 2 teaspoons thyme, the rosemary, ⅓ cup water, and the vinegar in a bowl until seeds are submerged. Let sit at room temperature, covered, 2 to 3 days.

2. Put the mustard mixture in a blender along with the brown sugar and salt and blend until mixture is thick but still coarse-textured. Stir in the remaining 1 teaspoon thyme. (Can be made 2 weeks in advance. Cover and refrigerate.)

Printer Friendly Recipe
Seeded Agave Nectar Mustard (from Sunset magazine)

¼ cup Colman’s dry mustard
½ cup white wine vinegar
¼ cup agave nectar
2 teaspoons canola oil
2 tablespoons black or brown mustard seeds
1 large egg
1 teaspoon salt
2½ teaspoons cornstarch

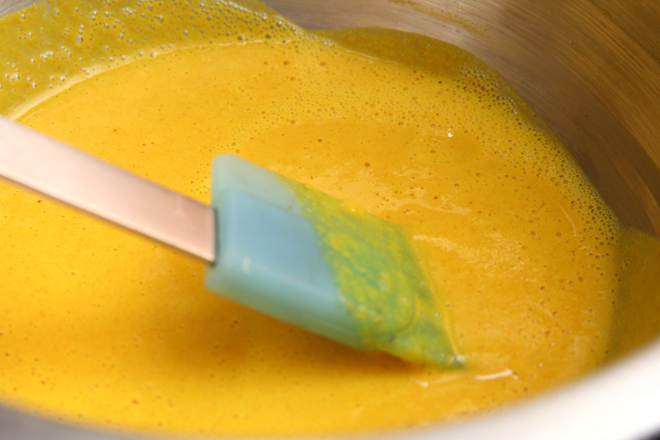
1. Stir together the dry mustard, vinegar, 2 tablespoons water, and agave nectar in a medium metal bowl until smooth. Chill, covered, overnight.

2. Put the oil and mustard seeds in a small frying pan and heat over medium heat, covered. As soon as the mustard seeds start to pop, about 3 minutes, remove from the heat. Let cool.

3. Bring a medium saucepan filled with 1 inch of water to a simmer. To the mustard-vinegar mixture, add the toasted mustard seeds in oil, the egg, salt, and cornstarch and whisk to blend. Set the bowl over the simmering water and cook, whisking constantly, until the mustard thickens, 3 minutes. (Can be made 2 weeks in advance. Cover and refrigerate.)

mustard 4

Printer Friendly Recipe
Ballpark Beer Mustard (from Sunset magazine)

¼ cup Colman’s dry mustard
½ cup light-bodied beer
1 teaspoon turmeric
1 egg
1¼ teaspoons salt
1 teaspoon cornstarch
½ teaspoon lemon juice
½ teaspoon sugar

1. Whisk together the dry mustard, beer, 2 tablespoons water, and turmeric in a medium metal bowl until smooth. Chill, covered, overnight.

2. Bring a medium saucepan filled with 1 inch water to a simmer. To the bowl of the mustard mixture, add the egg, salt, cornstarch, lemon juice, and sugar; whisk to blend. Set the bowl over the simmering water and cook, whisking constantly, until the mustard just thickens, 4 to 6 minutes. (Can be made 2 weeks in advance. Cover and refrigerate.)

mustard 6

Sadly, I had to punt on the mozzarella I had originally hoped to make this month, because I haven’t figured out where I can get milk that isn’t ultrapasteurized.

whole wheat chocolate chip cookies

whole wheat chocolate chip cookies 4

I was never a big fan of roast turkey, so when I was a kid, my favorite part of Thanksgiving was that it was the only time of year my mom bought white sandwich bread, because she liked it better for the stuffing. White bread! What a treat!  It’s been a slow adjustment, spanning close to ten years, but these days, largely due to Peter Reinhart’s trick and Tartine’s country bread, I actually prefer bread with a hearty portion of whole wheat flour. The flavor is deeper, more complex. I’m disappointed when a restaurant serves only pasty white bread.

whole wheat chocolate chip cookies 1

Cookies, in my experience, are a different matter. But my experience is only for substituting whole wheat flour in a recipe designed for white flour. Starting with a recipe designed for whole wheat flour is bound to give me better results. The only ingredient called for in this recipe that isn’t in the Tollhouse chocolate chip cookie recipe, besides whole wheat flour of course, is baking powder, substituted for the baking soda in most chocolate chip cookie recipes. Other differences are more flour and sugar for the same amount of butter and eggs in the Tollhouse recipe and less chocolate.

whole wheat chocolate chip cookies 2

I was a little worried that the dough, my favorite part about baking chocolate chip cookies, wouldn’t be as tasty as dough made with white flour, but it definitely passed inspection. The cookies themselves were also irresistible. Obviously the whole wheat flour doesn’t make the cookies healthy – that isn’t the point. These cookies are just as loaded with butter and sugar as any other cookie, and the whole grains are just for flavor. For me, though, the flavor was perhaps a little stronger than I might prefer. Plus, the texture was more bread-like than tender. I still loved the cookies, but now I want to find a way to tone down the whole wheatiness and get the texture I want. Should I replace half of the flour in this recipe with white bread flour? Should I start with my favorite regular chocolate chip cookie recipe and substitute whole wheat flour for some of the white? I can’t wait to start experimenting.

whole wheat chocolate chip cookies 3

One year ago: Comparison of 3 Chocolate Mousse recipes
Two years ago: Brown Soda Bread
Three years ago: Deli-Style Rye Bread
Four years ago: Chocolate Cream Pie

Printer Friendly Recipe
Whole Wheat Chocolate Chip Cookies (adapted from Kim Boyle’s Good to the Grain)

The original recipe is designed to start with cold butter, perhaps so the dough doesn’t get too warm and spread too much in the oven. However, because I have found that an overnight rest is good for both cookie dough and whole wheat doughs, I knew I would be chilling the dough before baking it and started with the softened butter that I’m used to. I also increased the chocolate and used chips instead of chopping my own.

3 cups whole wheat flour
1½ teaspoons baking powder
1 teaspoon baking soda
16 tablespoons (2 sticks) unsalted butter, softened
1½ teaspoons salt
1 cup (7 ounces) dark brown sugar
1 cup (7 ounces) sugar
2 eggs
2 teaspoons pure vanilla extract
8 ounces bittersweet chocolate, roughly chopped into ¼- and ½-inch pieces

1. In a small bowl, combine the flour and baking powder. In the bowl of a stand mixer fitted with the paddle attachment (or a hand mixer, or a spoon or whatever), beat the butter and salt until creamy. Add the sugars and beat on medium speed until fluffy. Add the eggs, one a time, mixing for one minute after each addition. Add the vanilla. Reduce the mixer speed to low and add the flour miture, mixing just until almost combined. Add the chocolate and pulse the mixer on low speed until the chips are dispersed and the flour is incorporated. Press a sheet of plastic wrap right against the dough; refrigerate overnight or up to 3 days.

2. Adjust an oven rack to the middle position. Heat the oven to 350 degrees. Line a baking sheet with parchment paper or a silicone baking mat.

3. Drop rounded tablespoons of dough onto the lined baking pan, spaced an inch or two apart. Bake the cookies for 7-10 minutes, until slightly browned around the edges and just set in the middle. Cool the cookies for at least 2 minutes on the sheet before transferring to a rack to finish cooling. (If they still seem fragile after 2 minutes of cooling, you can just leave them on the sheet to cool completely.)

whole wheat chocolate chip cookies 5

double coconut muffins

coconut muffins 7

A friend of mine recently became, as she calls it, a “part-time vegan”, which I take to mean that she avoids eggs and dairy when she’s in charge of what she eats but will eat them if someone else prepares food for her. This started me on search for vegan cookie recipes. Most of what I found called for Earth Balance, but all I could find in my town was a whipped version for spreading, which I didn’t think would take well to baking. Instead, I bought coconut oil.

coconut muffins 1

And then I got busy with other baking projects and set that one aside. That’s where it still sits – “aside.” But unlike my plans to make vegan cookies, the coconut oil is no longer forgotten. And maybe this is a better introduction to a new ingredient – using it with similar flavors.

coconut muffins 3

In these muffins, the coconut oil is combined with shredded coconut to make an intensely, but not overwhelmingly, coconut muffin. In fact, I found that the tanginess of the Greek yogurt was at least an equal player. It was a nice combination with the tropical coconut.

coconut muffins 5

The texture was spot on as well – tender and moist, like the best muffins are. I suppose that makes sense, since these are slightly higher in fat than many muffins. But it’s vegan fat, and that has to be better than butter. I still have half a cup of coconut oil in the fridge, and while I probably should make my friend some cookies, I’m tempted just to make more muffins.

coconut muffins 9

One year ago: Citrus Sunshine Currant Muffins
Two years ago: Honey Ginger Pork Tenderloin
Three years ago: French Yogurt Cake
Four years ago: Lemon Poppy Seed Muffins

Printer Friendly Recipe
Double Coconut Muffins (rewritten but not changed from Smitten Kitchen)

Makes 10 muffins

8 tablespoons (½ cup; 4 ounces) virgin coconut oil
¾ cup (3.6 ounces) all-purpose flour
½ cup (2.4 ounces) whole wheat flour
¾ cup (3.25 ounces) sweetened shredded coconut, divided
1½ teaspoons baking powder
¼ teaspoon table salt
1 cup (8 ounces) Greek-style yogurt, room temperature
⅓ cup (2.33 grams) granulated sugar
1 large egg
1 teaspoon vanilla extract

1. Preheat the oven to 375°F. Spray 10 muffin cups with nonstick spray or line them with paper liners. In a small saucepan, warm the coconut oil just until it melts; don’t heat it until it’s hot.

2. In a medium bowl, whisk together the flours, baking powder, ½ cup shredded coconut, and salt. In a separate bowl, whisk together the egg, sugar, coconut oil, yogurt, and vanilla. Add the coconut oil mixture to the flour mixture and stir until just combined.

3. Divide the batter among the 10 prepared muffin cups. Top each muffin with about a teaspoon of the remaining shredded coconut. Bake until a toothpick inserted into the center of a muffin comes out clean, about 20 minutes. Transfer the muffins to a cooling rack; cool 5 minutes, then remove them from the pan. Serve warm.

coconut muffins 8

poached salmon pasta salad

poached salmon pasta salad 7

It’s a recipe that doesn’t require butter and flour! These have been few and far between around this joint lately (and an unscheduled break didn’t help matters), or at least it would seem that way if your only window into my kitchen was through this blog. We’ve actually been eating dinners that are just as healthy as always (in other words, very healthy on the weekdays, decidedly less so on weekends), but while I was going through my excessive baking phase for a few weeks, I stuck to meals that were familiar and easy, so cooking dinner would minimize the time I had to spend apart from butter and sugar.

poached salmon pasta salad 3

Now that I’ve settled down and slowly stepped away from the mixer, I’m more willing to try new recipes after work. This one was a nice way to get out of the salmon rut I’ve been in. I know I can’t go wrong with pasta and a yogurt-based sauce. This one also has several other ingredients I love, like capers, mustard, and red onion. Since there was no cooking fat in the recipe, I indulged a bit and stirred in some mayonnaise to the sauce in addition to the Greek yogurt.

poached salmon pasta salad 4

I keep trying to serve things in romaine leaves, and it keeps turning out to be a mess. But there are worse things than tangy bites of salmon and pasta falling out of their lettuce cups. There’s no butter or sugar and I didn’t get to use the mixer, but it’ll do.

poached salmon pasta salad 5

One year ago: Lentil Goat Cheese Burgers
Two years ago: Soft Chocolate and Berry Tart
Three years ago: Chicken Artichoke Pesto Calzones
Four years ago: Sushi Rolls

Printer Friendly Recipe
Poached Salmon Pasta Salad (adapted from An Edible Mosaic via Prevention RD and from Cooks Illustrated’s Poached Salmon recipe)

Serves 6

2 lemons, 1 sliced ¼-inch thick, 1 juiced
3 tablespoons chopped fresh parsley leaves, stems reserved
1 small shallot, minced (about 2 tablespoons)
½ cup dry white wine
½ cup water
4 (8-ounce) salmon fillets, about 1½ inches at the thickest part
Salt
12 ounces dry pasta
½ red onion, minced
1 tablespoon capers
2 teaspoons mustard
1 cup plain Greek yogurt
2 tablespoons mayonnaise

1. Arrange the lemon slices in a single layer across the bottom of a 12-inch skillet. Scatter the parsley stems and minced shallots evenly over the lemon slices; add the water and wine. Place the salmon fillets in the skillet, skin side down on top of the lemon slices; set the pan over high heat and bring the liquid to a simmer. Reduce the heat to medium-low, cover, and cook until the sides of the salmon are opaque but the center of the thickest part is still translucent, 11 to 16 minutes. Remove the pan from the heat and carefully transfer the salmon to a cutting board. When cooled, remove the skin and cut the salmon into bite-sized chunks.

2. Meanwhile, bring a large pot of water to rolling boil over high heat. Add 1 tablespoon of salt and the pasta; cook according to the package instructions. Drain.

3. Combine 2 tablespoons lemon juice, ½ teaspoon salt, the mustard, parsley leaves, capers, yogurt, and mayonnaise in a large bowl. Fold in the pasta and salmon. Serve immediately or chill for several hours.

poached salmon pasta salad 6

guinness chocolate cupcakes with irish cream buttercream

guinness chocolate baileys 8

Despite my penchant for baking, I’ve only very rarely baked by request. So when a coworker asked me to help plan for another coworker’s bridal shower, mentioning while studiously avoiding eye contact that one thing they needed someone to do was prepare dessert, I jumped at the excuse to bake, but then I got nervous.

guinness chocolate baileys 1

It’s one thing to bring extra crumbly rice krispy treats to set out in the office kitchen, where nearly anything sweet is appreciated during a long work day, but the standards are significantly higher for someone’s bridal shower. Complicating matters was the timing, because the party was scheduled for after work on a Thursday, so I would need to do everything during weekday evenings. (I know you can freeze cupcakes, but I haven’t tried it myself and wasn’t ready to experiment.)

guinness chocolate baileys 4

Neither the bride nor the host had any suggestions, so I decided that cocktail-inspired cupcakes would be fun for a bridal shower. I wanted a chocolate option and a fruit option and settled on Guinness cupcakes with whiskey ganache and Bailey’s buttercream (based on the controversially titled Irish Car Bomb drink, in which a shot of whiskey and Bailey’s is added to Guinness, and the whole mess has to be chugged before it curdles) and margarita cupcakes – lime cupcakes brushed with tequila and triple sec and topped with tequila lime swiss meringue buttercream.

guinness chocolate baileys 6

A couple days in advance, I mixed up the Bailey’s buttercream and attempted the whiskey ganache. Unfortunately, I learned that if the cream is too hot when you mix it with the finely chopped chocolate to make ganache, the mixture will curdle. I went home at lunch the next day to try to save my curdled ganache, but it remained curdled. (It’s in my freezer now. Does anyone have any suggestions on what I can do with broken ganache? Some sort of cake with chocolate and cream maybe?) Wednesday evening, I still needed to bake both batches of cupcakes, make the swiss meringue buttercream, remake the ganache, brush the margarita cupcakes with alcohol, fill the chocolate cupcakes, and frost both. Thursday I would go home at lunch and apply garnishes.

guinness chocolate baileys 7

One problem I consistently have with cupcakes is the wrappers pulling away from the cake, and I’ve finally figured out that this is a result of moisture building up, probably in large part from the frosting, while the cupcakes are stored tightly overnight. I only loosely covered these overnight, because loose wrappers would not do for the party, and only a few wrappers separated just slightly.

guinness chocolate baileys 5

Surprisingly, everything went off without a hitch, and I wasn’t even up all night on Wednesday. Even the hardest part of preparing cupcakes, getting them to your destination without mussing them, went smoothly. My first attempt at baking for an event was a definite success that gave me more confidence to do it again – which is good, because I had agreed to make dessert for the rehearsal dinner just a week later.

guinness chocolate baileys 9

One year ago: Baked Reuben Dip
Two years ago: Masa Pancakes with Chipotle Salsa and Poached Eggs
Three years ago: Spinach Bread
Four years ago: Almost No-Knead Bread

Printer Friendly Recipe
Guinness Chocolate Cupcakes with Bailey’s Buttercream (slightly adapted from Smitten Kitchen)

Makes 24

For the cupcakes:
1 cup stout (such as Guinness)
16 tablespoons (2 sticks) unsalted butter
¾ cup unsweetened cocoa powder (preferably Dutch-process)
2 cups all-purpose flour
2 cups sugar
1½ teaspoons baking soda
¾ teaspoon salt
2 large eggs
⅓ cup sour cream

For the filling:
8 ounces bittersweet chocolate, finely chopped
⅓ cup heavy cream
2 tablespoons butter, room temperature
1 to 2 teaspoons Irish whiskey (optional)

For the frosting:
4 cups (16 ounces) confections sugar
8 ounces (1 stick) unsalted butter, at room temperature
6 to 8 tablespoons Irish cream (or milk or heavy cream)

1. Make the cupcakes: Adjust a rack to the middle position and heat the oven to 350°F. Line 24 muffin wells with liners. In a medium saucepan over medium heat, bring 1 cup stout and 16 tablespoons of butter to a simmer. Add the cocoa powder; whisk until the mixture is smooth. Cool slightly.

2. Whisk the flour, sugar, baking soda, and ¾ teaspoon salt in a large bowl. With a stand mixer fitted with the paddle attachment (or in a large bowl with a handheld mixer), beat the eggs and sour cream to blend. Add the stout mixture to the egg mixture and beat just to combine. Add the flour mixture and beat briefly on slow speed. Using a rubber spatula, fold the batter until completely combined.

3. Divide the batter among the cupcake liners, filling them about ⅔ full. Bake until a toothpick inserted into the center of a cupcake comes out clean, rotating the pan once front to back if your oven bakes unevenly, 18-22 minutes. Cool cupcakes on a rack completely.

4. Make the filling: Place the chocolate in a heatproof bowl. Heat the cream until just simmering and pour it over the chocolate. Let it sit for one minute and then stir until smooth. (If this has not sufficiently melted the chocolate, you can return it to a double-boiler to gently melt what remains. 20 seconds in the microwave, watching carefully, will also work.) Add the butter and whiskey (if using) and stir until combined.

5. Fill the cupcakes: Let the ganache cool until thick but still soft enough to be piped, about an hour. Meanwhile, using a 1-inch round cookie cutter, an apple corer, or a paring knife, cut the centers out of the cooled cupcakes about ⅔ to the bottom. Fill the holes with the ganache, using either a piping bag or a spoon.

6. Make the frosting: With a stand mixer fitted with the whisk attachment (or in a large bowl using a handheld mixer), whip the butter very light and fluffy, 2-3 minutes. Reduce the heat to low and gradually add the powdered sugar, then the Irish cream. Frost the cupcakes with the Bailey’s buttercream; serve.

guinness chocolate baileys 10

raspberry ricotta scones

raspberry ricotta scones 7

I’ve largely gotten out of my scone phase from a few years ago. Back then, I was making a new scone recipe almost once a month. One batch of scones, frozen before baking, would last a couple weekends, which made for some wonderfully relaxed weekend mornings, with nothing to do but turn the oven on, transfer the frozen scones to a baking sheet, and boil water for the French press. Twenty minutes later, I’d sit down with a scone, a mug, and a food magazine.

raspberry ricotta scones 2

The problem with this scenario is that there’s very little nutrition in a scone. I’m not against a little butter for breakfast, but as we’ve become more active lately, we require breakfasts that fill us up and provide energy. I don’t want to imagine Dave on one of his weekly racquetball marathons with nothing but butter, flour, and sugar for fuel.

raspberry ricotta scones 3

On quiet mornings when we don’t have a busy day ahead though, scones hit the spot. And this one is even better, because it does have some extra health benefits from protein-rich ricotta and fiber-rich whole grains. Moreover, this is one of the best scones I’ve ever made.

raspberry ricotta scones 4

I’ve admittedly become more and more enamored with whole grains and the nutty depth of flavor they add to baked goods, and this was a perfect example of how a portion of whole wheat flour isn’t a sacrifice to be made for health reasons, but an improvement in flavor. I think this recipe has me headed toward another scone phase.

raspberry ricotta scones 5

One year ago: Corniest Corn Muffins
Two years ago: How to adapt any bread to be whole wheat
Three years ago: Lemon Cup Custard
Four years ago: Spaghetti and Meatballs

Printer Friendly Recipe
Raspberry Ricotta Scones (slightly adapted from Smitten Kitchen)

Makes 9

Baked scones are best fresh out the oven. If you want to make these in advance, form and cut the scones, then transfer the unbaked scones to a ziploc bag to freeze. There’s no need to defrost before baking, but you will need to add a few extra minutes to the baking time.

I used whole wheat pastry flour, which I prefer in quick breads. But if you only have regular whole wheat flour, I’m sure it will be fine.

¾ cup (6.5 ounces) whole milk ricotta
⅓ cup heavy cream
1 cup (4.8 ounces) whole wheat flour
1 cup (4.8 ounces) all-purpose flour
1 tablespoon baking powder
¼ cup (1.75 ounces) granulated sugar
½ teaspoon table salt
6 tablespoons (¾ stick) cold unsalted butter, cubed
1 cup (4.75 ounces) raspberries, fresh or frozen

1. Adjust a rack to the middle position and heat the oven to 425 degrees. Line a baking sheet with parchment paper or a silicone mat. In a large measuring cup, combine the ricotta and heavy cream.

2. Combine the flours, baking powder, sugar, and salt in the food processor. Add the butter and pulse until the butter is cut into pea-sized pieces. Add the raspberries and pulse a few times to break them down. Add the ricotta mixture; pulse just until the dough is evenly moistened but still looks crumbly.

3. Transfer the dough to a work surface and pat into a ball. Knead the dough a few times, then pat it out into a 7-inch square that is about 1-inch thick. Cut the dough into 9 squares.

4. Transfer the scones to the prepared baking sheet. Bake until golden brown around the bottom edges, 16-20 minutes. Transfer the scones to a wire rack and cool about 10 minutes before serving.

raspberry ricotta scones 8

parmesan bacon shortbread

bacon parmesan crackers 9

There’s a fine art to choosing a dish to bring to a potluck. If people are milling around, there’s a definite advantage to a handheld, plate-optional snack. On the other hand, if it’s mostly sit-down, dips and spreads don’t work well because people have to guess at the right ratio of dip to dipper to scoop onto their plate, not to mention the issue of whether to put the dip next to the dippers, taking up valuable plate space, or on top, risking getting dip on your fingers while you try to eat the dippers.

bacon parmesan crackers 2

Last year, I brought goat cheese, sundried tomato, pesto terrine with a thinly sliced baguette to the company potluck. It did not go over well. For one thing, it’s a dip and the potluck turned out to be a sit-down kind of deal. For another, a few of my coworkers were unfamiliar with and unwilling to try goat cheese. (Their loss!)

bacon parmesan crackers 10

This year I went to the other end of the spectrum and chose easily grabbable finger food. I included bacon to guarantee there would be no complaints about scary new ingredients. It seems to have worked; these got a lot more love than last year’s goat cheese spread. And no wonder, with so many salty rich ingredients encased in a tender cookie. I can’t think of many situations in which these little treats wouldn’t work perfectly.

bacon parmesan crackers 4

One year ago: Roasted Tomato Soup
Two years ago: Orange Berry Muffins
Three years ago: Thumbprints for Us Big Guys
Four years ago: Cooks Illustrated’s Classic Pound Cake

Printer Friendly Recipe
Bacon Parmesan Shortbread (adapted from The New York Times via Use Real Butter)

Makes about 18 cookies (more if you cut them thinner)

I used pancetta instead of bacon, which complimented the parmesan nicely.

The original recipe titles these crackers and shows a picture of thin and flaky squares. These must have been rolled paper thin before baking. However, the recipe instructs the dough to be rolled out (or cut, the way I did it) ½-inch thick. I compromised and went with ¼-inch thick, which gave a texture more like shortbread than crackers. I’m sure they’re good both ways, but if you do roll them thinner, you’ll need to adjust the cooking time.

1 cup (4.8 ounces) all-purpose flour
½ teaspoon salt
½ cup (1 ounce) finely grated fresh Parmesan cheese
4 tablespoons (½ stick) unsalted butter
¼ cup cream or half-and-half, more as needed
4 ounces (about 4 slices) bacon, cooked and crumbled

1. Put the flour, salt, cheese and butter in the bowl of a food processor. Pulse until the flour and butter are combined. Add about ¼ cup cream or half-and-half and let machine run for a bit; continue to add liquid a teaspoon at a time, until the mixture holds together but is not sticky. Add the bacon and pulse a few times to incorporate.

2. Transfer the dough to a large square of parchment or wax paper. Shape the dough into a long rectangle with a 1-inch square cross-section. Wrap tightly in the paper and freeze for at least 3 hours.

3. Heat the oven to 400 degrees. Line a baking sheet with parchment paper or a silicone mat.

4. Slice the dough ¼-inch thick, arranging the cookies ½-inch apart on the baking sheet. Bake until lightly browned, about 10 minutes. Cool on a rack; serve warm or at room temperature or store in a tin for a few days.

bacon parmesan crackers 3

sugar cookies – star wars characters

star wars cookies 1

I recently overheard people talking about a dessert I’d baked, and they said something to effect that probably anyone could do something like that with the right equipment. I mostly agree with them; there are no sneaky tricks up my sleeve. I followed a recipe, with a few tweaks to get the flavors I wanted and with the experience to know what pitfalls I might encounter. (Not that that ever stops me from finding new mistakes to make.)

star wars cookies 6

But they are wrong in one important aspect, and that is that what sets some bakers apart is a high capacity for tedium. Sugar cookies decorated with royal icing are the best example. The whole process takes forever.

star wars cookies 2 vader

I prefer to divide the work up between four different days, mixing up the dough on one, rolling the dough and cutting shapes on another, then the big day of baking, outlining, and flooding, and finally adding the details after the flooded icing has dried. This time, I only had a few days between receiving these Star Wars cutters as a gift and having dinner with a couple of young Star Wars fans.

star wars cookies 5 stormtrooper

I’ve used royal icing a handful of times previously, but so intermittently that I wasn’t learning from my mistakes. I have found that it’s imperative that I draw a map of my plan for each shape – first the outline color, then the flooding, then each layer of detail. Maybe more experienced decorators don’t need this, but for a newbie like me, it makes the process less intimidating. (Each photo set shows essentially what my hand-drawings do, as far as the steps to decorate each cookie.)

star wars cookies 4 yoda

This was probably my most successful attempt at royal icing – and the most time-consuming, because there was a lot of detail in these designs. I did learn a few things along the way, and I can only hope that it will make me better at this in the future. Still, I suspect that this is one of those baking endeavors that will always require a generous tolerance for tedium – and that, for better or worse, is something I have.

star wars cookies 3 yoda

One year ago: Cream Cheese Pound Cake
Two years ago: Roll-out Sugar Cookies (comparison of 4 recipes) (coincidence, I swear!)
Three years ago: Roasted Kale
Four years ago: Rice Pudding

I used the first recipe listed in my sugar cookie comparison.  I’m not confident enough in my royal icing skills to offer any sort of tutorial. At this stage, I’m still referencing Annie’s tutorial for instructions.

star wars cookies 8

tomato and four cheese lasagne

four cheese lasagna 5

Lasagna recipes are like chocolate chip cookie recipes for me – I already have several that I love, but I can’t resist a new one. I have no loyalties about béchamel versus ricotta, meaty versus vegetarian, seafood or chicken. I love them all, and I’m a sucker for a new version.

four cheese lasagna 1

A recent article in Fine Cooking, which prompted me to subscribe to the magazine, showcased three recipes – the braised beef and porcini one Josie posted, a butternut squash and goat cheese lasagna I can’t wait to make, and this classic tomato and cheese lasagna. Boring, maybe, but I can never get enough of the basic combination of pasta, cheese, and tomatoes.

four cheese lasagna 3

I always like to make my own lasagna noodles, because I’m all about creating more work for myself. (Also it’s fun.) But this time I went a step further and made my own ricotta. Combined with a lightly spiced tomato sauce and three other favorite Italian cheeses, this lasagna is in the running for my favorite – if I could ever choose a favorite lasagna.

four cheese lasagna 4

One year ago: Shrimp Canapes a la Suede
Two years ago: Mediterranean Pepper Salad
Three years ago: Chocolate Whiskey Cake
Four years ago: Banana Walnut Pancakes

Printer Friendly Recipe
Four Cheese and Tomato Lasagne (slightly adapted from Fine Cooking)

8 servings

To chop the tomatoes, just stick kitchen shears in the can and snip away. Canned tomatoes that are already diced won’t break down into the sauce like whole tomatoes will.

If you make your own ricotta, you’ll need to start with 8 cups of milk (and/or cream).

To boil and rinse the pasta, follow the instructions in this recipe through step 4.

2 tablespoons olive oil
4 medium cloves garlic, smashed and peeled
¼ teaspoon crushed red pepper flakes
2 (28-ounce) cans whole plum tomatoes, chopped (see note)
kosher salt
6 large basil leaves, torn by hand into ½-inch pieces
2 cups (15 ounces) whole-milk ricotta
2½ cups (10 ounces) grated fresh mozzarella
2 cups (8 ounces) grated fontina
1¾ cups (3.5 ounces) finely grated Parmigiano-Reggiano
1½ recipes fresh pasta, boiled and rinsed (see note)

1.Heat the oil, garlic, and red pepper flakes in a 4- to 5-quart pot over medium heat. Cook until the garlic is golden-brown, about 3 minutes. Discard the garlic. Add the tomatoes and 2 teaspoons salt; simmer gently, uncovered, adjusting the heat as needed, until the tomatoes begin to break down, about 45 minutes. Stir in the basil; season to taste with salt if necessary.

2.Position a rack in the center of the oven and heat the oven to 350°F. Set aside 1¼ cups of the sauce and mix the remaining sauce with the ricotta in a medium bowl. Mix the mozzarella, fontina, and 1 cup (2 ounces) of the Parmigiano in another medium bowl.

3. Spread ½ cup of the reserved tomato sauce on the bottom of a 9×13-inch baking dish. Cover the sauce with a slightly overlapping layer of cooked noodles, cutting them as needed to fill any gaps. Evenly spread 1½ cups of the ricotta mixture over the noodles. Sprinkle 1 rounded cup of the grated cheese evenly over the ricotta. Add another layer of noodles, and repeat the layers as instructed above, to make a total of 4 ricotta-and-cheese layers and 5 pasta layers. Spread the remaining ¾ cup plain sauce evenly over the top noodle layer. Sprinkle with the remaining ¾ cup of Parmigiano-Reggiano.

4. Cover the baking dish with foil and bake for 40 minutes. Remove the foil and bake until the top is browned and bubbly, 15 to 20 minutes. Let cool for at least 10 minutes before serving.

four cheese lasagna 6

pear almond danishes and lemon ricotta danishes

danish 14

I went through a baking drought early this year that lasted a few weeks, maybe a month. I couldn’t explain it, but I just wasn’t interested in baking for the first time in years. I was kind of worried – how long would this last? When would my drive to bake come back?

danish 1

Oh it’s back. It crept back in, but it’s in full force now. The last few weeks, in particular, I’ve taken on some ambitious projects. It started with these danishes, made for a brunch potluck that was in the evening after work. The very next day, I stayed up until midnight flooding sugar cookies with royal icing. A week after that, I made two batches of fancy cupcakes for a bridal shower. I breathed a sigh of relief when that was over, but mixed up another batch of sugar cookie dough just one day later. I’ll decorate those sugar cookies this week, plus make a double batch of tiramisu for my friend’s rehearsal dinner on Friday.

danish 5

Baking projects that are for an event in the evening after work are particularly complicated, especially if the event is toward the end of the week instead of shortly after the weekend. It requires careful balancing of chilling time, lunch hours, and evening schedules. Of course it’s worth it when you’re sitting around with your friends, drinking bellinis and eating eggs Benedict and buttery, flaky danishes on Thursday evening after work. Not just worth it, but so enjoyable that I did it again a week later with cupcakes, and a week after that I’m sure it will be something else. My baking obsession is back.

danish 12

One year ago: Chocolate Pots de Creme
Two years ago: Toasted Coconut Custard Tart
Three years ago: Lemon Cream Cheese Bars
Four years ago: Raspberry Bars

Printer Friendly Recipe
Danishes (adapted from Martha Stewart’s Baking Handbook)

I made 18 danishes from this batch of dough, and they were about 3-inches on a side after baking. Bigger danishes are probably easier to work with; many of mine unfolded when the dough expanded during baking, particularly the square shape with the corners folding in.

½ cup warm milk
2 teaspoons instant yeast
10 ounces (about 2 cups) all-purpose flour
3 tablespoons sugar
1 teaspoon table salt
2 sticks butter, room temperature
1 large egg
1 batch of filling (recipes follow)
egg wash (1 egg mixed with ⅛ teaspoon salt and 1 teaspoon water)

1. In a small measuring cup, stir the yeast into the milk. In the bowl of a stand mixer fitted with the paddle attachment, combine the flour, sugar, and salt. Add 2 tablespoons of butter; mix until evenly combined. Pour in the yeast and milk; mix until the dough starts to look shaggy. Switch to the dough hook; add the egg and knead until the dough just starts to look smooth, 2-3 minutes. Wrap the dough in plastic wrap and refrigerate for at least 2 hours or overnight.

2. On a lightly floured surface, roll the dough out to a 12-inch by 8-inch rectangle, about ¼ inch thick. Distribute the softened butter over two-thirds of the dough, leaving a short end free of butter. Fold the non-buttered third over the middle, then fold the last third over the middle, like folding a letter. Pinch the edges to seal. Roll the dough out to a 12-by-8-inch rectangle again, then fold it in thirds again. Rewrap the dough in plastic wrap; chill 1 hour.

danish 3
(see here for an explanation of the creases on the dough)

3. After the dough has chilled, roll it out and fold it in thirds twice more, then chill another hour, and roll and fold twice more. Wrap tightly and refrigerate for at least four hours or overnight. (This is a good point to freeze the dough too; thaw in the refrigerator overnight.)

4. Roll the dough out to a 12-by-18-inch rectangle about ⅛-inch thick. If the dough becomes too elastic and springs back, cover it and place it in the refrigerator for at least ten minutes, then try rolling again. Be patient; the rolling and chilling could take up to an hour. Cut 12 to 18 squares (see note).

5. For pinwheels: Cut from each corner halfway to the center of each square. Dab about ¼ teaspoon of filling into the center of each square, then fold every other corner toward the center, pressing to seal. Top with one (for smaller danishes) to two (for the larger size) tablespoons of filling.

danish 8

For squares with folded corners: Spoon one (for smaller danishes) to two (for the larger size) tablespoons of filling into the center of each square. Fold each corner to the middle of the dough; press to seal.

danish 9

6. Transfer the danishes to a baking sheet lined with parchment paper or a silicone mat. Cover and either chill overnight or set aside to rise. Heat the oven to 400 degrees. When the danish dough is about doubled in height and is starting to look puffy, brush the danishes with the egg wash. Bake one baking sheet at a time until the danishes are golden brown, 20-25 minutes. Transfer the pan to a wire rack; let the danishes cool on the pan for a few minutes before transferring them to cooling racks to cool to room temperature. Serve within a day.

danish 10

Cheese Danish Filling

Makes enough for 1 batch of danishes

1 cup ricotta cheese
6 tablespoons (2.6 ounces) sugar
⅛ teaspoon salt
1 tablespoon lemon zest
1 large egg
2 teaspoons vanilla
2 tablespoons unsalted butter, melted and cooled

Combine all ingredients. Chill.

danish 11

Pear Almond Danish Filling (rewritten from Martha Stewart’s Baking Handbook)

Makes enough for 1 batch of danishes

⅔ cup slivered almonds, toasted and cooled completely
2 tablespoons flour
½ cup (3.5 ounces) sugar, plus 1 tablespoon
¼ teaspoon salt
2 tablespoons butter
1 large egg
2 pears, peeled, cored, diced finely
¼ cup lemon juice

1. In a food processor, grind the almonds, flour, ½ cup sugar, and salt; add the butter and egg; chill.

2. Heat the pears, lemon juice, and 1 tablespoon sugar in a medium nonstick skillet over medium heat, stirring occasionally, until the pears caramelize, 8-10 minutes. Chill.

danish 15