Archives for May 2013

kentucky butter cake

kentucky butter cake 7

I’ve told you before that my coworkers go crazy for pound cake. They’re always appreciative of treats that I bring in – I work with good people – but pound cake disappears the fastest.

kentucky butter cake 1

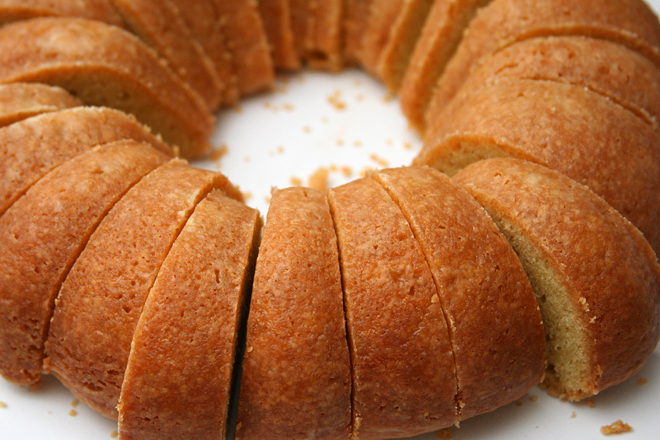
Even pound cake gone wrong. The first time I made this, I messed it up, and not in a minor way. I forgot to add not just the baking powder, but the buttermilk. Basically, instead of making a cake, I made a giant ring-shaped cookie.
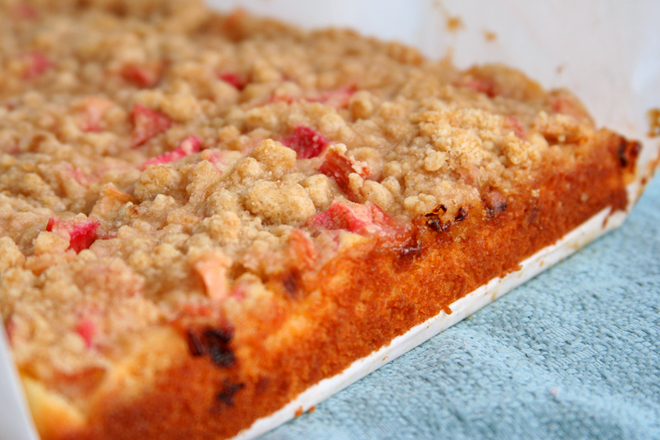
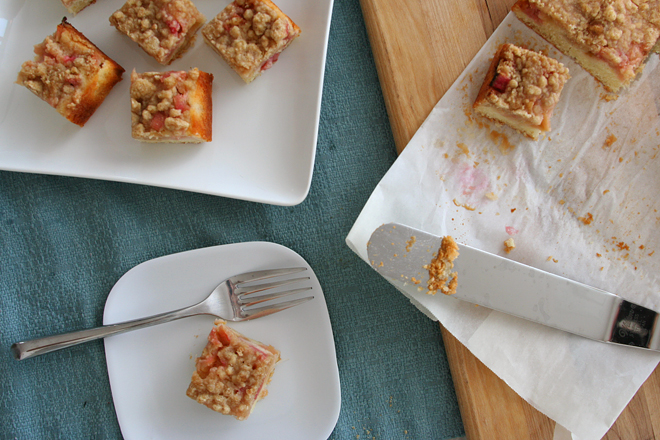
kentucky butter cake 3
first attempt

It was still pretty good, so I brought it in to share at work anyway. You wouldn’t believe the number of people who came by claiming it was the best thing I’ve ever baked – in three years of almost weekly treats! I’m glad it was so popular, because I didn’t feel bad making it again a few days later, this time with all the ingredients.

kentucky butter cake 4

Most people said it was better with the buttermilk, lighter and more tender. A few didn’t notice the difference. One stalwart fan said that while both were good, the first version was better. So there you have it – you really can’t go wrong with this cake, even when you do actually go wrong.

kentucky butter cake 8

One year ago: Meyer Lemon Semifreddo
Two years ago: Strawberry Cream Cake
Three years ago: Strawberry Chocolate Ice Cream Pie
Four years ago: Strawberry Lemon Sorbet
Five years ago: Franks and Beans

Printer Friendly Recipe
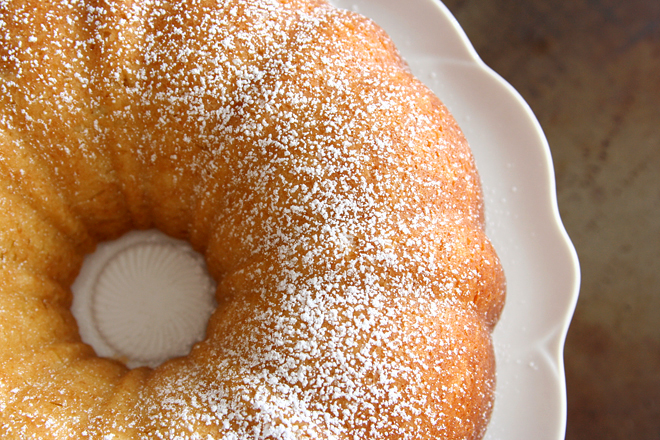
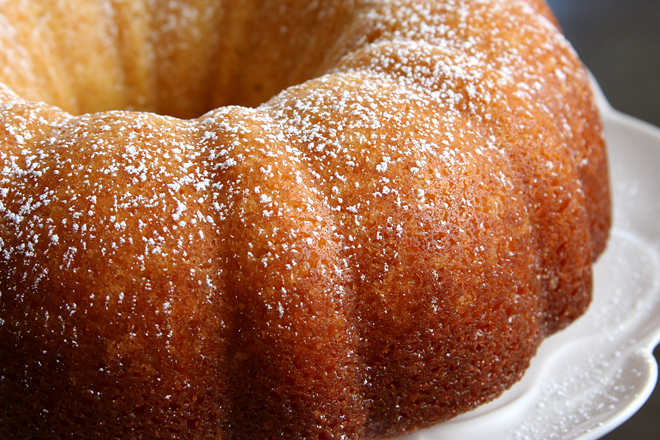
Kentucky Butter Cake (adapted from allrecipes via Beantown Baker)

Makes one 9-inch Bundt cake

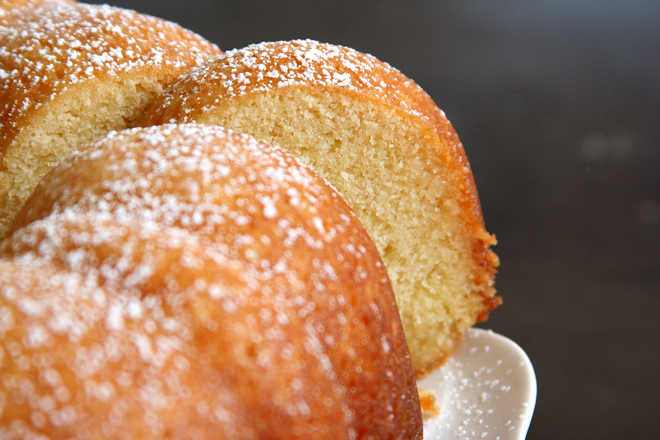
I do have some uncertainty with the glazing method. The recipe instructions are to pour all of the glaze onto the cake while it’s still in the pan, so you’re essentially saturating the bottom of the cake. The cake is left in the pan until it cools completely, which presumably gives the glaze (which is now more of a soaking liquid than a glaze) a chance to soak into the cake. I did this the second time I baked the cake, wanting to follow the directions exactly.

The first time, I poured only about half of the glaze onto the cake before unmolding it and pouring the remaining glaze down the sides. I liked this method better, because the glaze formed a delicious hard crust on the cake (although a lot of it dripped right off the cake too). However, it’s possible that it only worked this way on the firmer more cookie-like cake, and would simply soak into the top of the cake when it’s made correctly. It’s good either way.

For the cake:
3 cups (14.4 ounces) unbleached flour
1 teaspoon baking powder
½ teaspoon baking soda
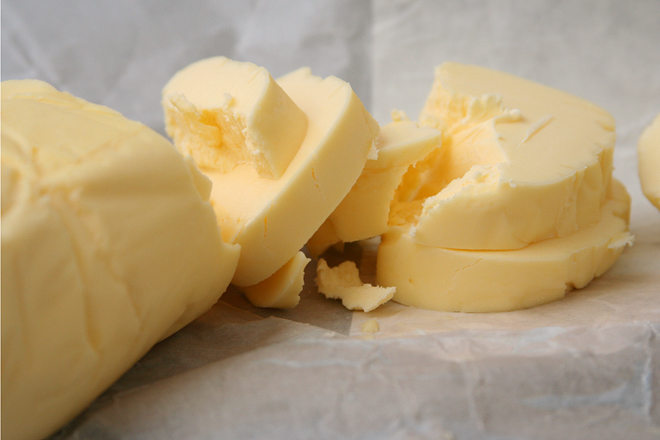
16 tablespoons (2 sticks) unsalted butter, softened
1½ cups (10.5 ounces) granulated sugar
1 teaspoon table salt
4 eggs, room temperature
2 teaspoons vanilla
1 cup buttermilk

For the glaze:
5 tablespoons unsalted butter
½ cup (3.5 ounces) granulated sugar
⅛ teaspoon table salt
2 tablespoons water
2 teaspoons vanilla extract

1. Heat the oven to 325 degrees. Grease and flour a Bundt pan or spray with baking spray. In a medium bowl, combine the flour, baking powder, and baking soda.

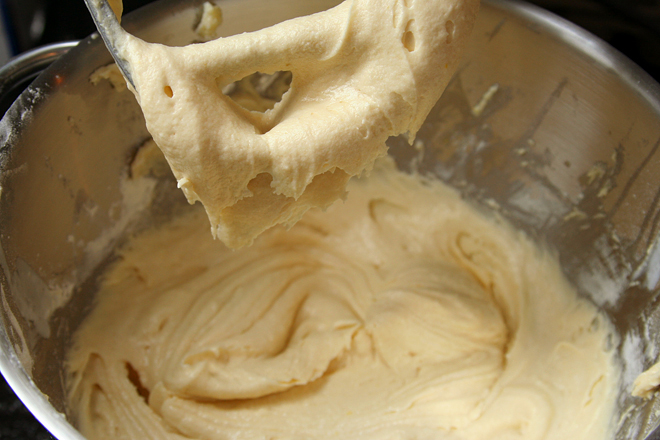
2. Place the butter and salt in the bowl of an electric mixer fitted with the paddle attachment. Beat on medium-high speed for 3 minutes, until light and creamy in color. Gradually add the sugar to the butter mixture. Mix in the eggs one at a time, until incorporated, then add the vanilla. With the mixer on low speed, add one-third of the flour mixture, followed immediately by half of the buttermilk, mixing just until incorporated. Repeat with another third of the flour and the rest of the buttermilk, then the last of the flour. Scrape down the sides of the bowl and mix for 15 seconds longer.

3. Transfer the batter to the prepared baking pan, smoothing the top. Bake for 50-60 minutes, or until a toothpick inserted in the center comes out clean. Transfer to a wire rack to cool.

4. Shortly before the cake is removed from the oven, combine the butter, sugar, salt, and water in a small saucepan over medium heat, stirring until the butter melts. Remove from the heat and stir in the vanilla.

5. Pour about half of the glaze mixture over the cooling cake. After the cake has been cooling for at least 10 minutes, invert it onto the wire rack, removing the pan. Place a baking sheet below the cooling rack to catch drips, then spoon the remaining glaze over the top of the glaze. Cool completely before serving.

kentucky butter cake 5

beef barbacoa

barbacoa 8

I am going through a taco phase, and it might have started out with these. Well, mostly I just really like tacos, because who doesn’t, but things have ramped up in recent weeks. We’ve had all sorts of tasty fillings recently, but it’s hard to beat barbacoa.

barbacoa 2

Barbacoa has so many satisfying flavors – it’s a little sweet, a little sour with a squeeze of lime juice, plenty meaty of course. It definitely has a spicy kick. It’s coated in a rich layer of sauce that delivers loads of flavor, with nothing left behind in the pot.

barbacoa 3

It only gets better with toppings. Avocado is arguably my favorite part of most tacos (not these; the barbacoa wins by a mile), and queso fresco is the perfect salty fresh compliment to the rich meat. Those two and a wedge of lime are my only requirements, but pickled onions and a smattering of cilantro are nice too.

barbacoa 4

This isn’t a hard recipe, although it’s far from fast. The long ingredient list looks worse than it is. There’s a lot of spices, chiles, and condiments, but nothing other than an onion and some garlic require a cutting board. Not even the beef needs to be sliced or cut into cubes. What I thought was going to be a significant project took me about half an hour.

barbacoa 6

Of course, you don’t actually get to eat until almost 5 hours layer, after the beef has become tender and rich and the broth has been reduced down to a sauce. It’s getting warm out and you might not want to leave your oven on for four hours while the beef cooks, but the result is worth some air-conditioning. Plus, it reheats great, maybe even better than it was the first day. I have to admit that I haven’t really been in a taco phase, just a barbacoa phase. I’ve got one more batch stored in the freezer, and I can’t wait.

barbacoa 9

One year ago: California Roll Burgers
Two years ago: Basic Coleslaw
Three years ago: Quinoa Tabbouleh
Four years ago: Fresh Strawberry Scones
Five years ago: Ricotta Spinach and Tofu Ravioli

Printer Friendly Recipe
Beef Barbacoa
(very slightly adapted from The Food Lab on Serious Eats)

About 6 servings

I think the crockpot is a definite possibility here, but it’ll take you a lot longer to reduce the liquid to a sauce after the cooking time.  You’ll still need to brown the oxtails and onions beforehand, because that adds tons of flavor.  That’s an easy tradeoff to save 4 hours of oven use when the weather’s warm!

If you can’t find these exact types of chiles, any combination of mild, fruity and bright-tasting chiles will do, such as guajillo or Colorado.  I used a New Mexico, an ancho, and an arbol chile.  I couldn’t find oxtails either, so I used beef ribs.

1 whole dried New Mexico, costeño, or choricero chili, seeds and stem removed
1 whole chile ancho or pasilla, seeds and stem removed
1 whole chile negro, seeds and stem removed
4 cups low-sodium chicken stock, divided
3 tablespoons vegetable or canola oil, divided
1 pound oxtails
1 small onion, diced
6 medium cloves garlic, peeled and smashed
2 teaspoons ground cumin
½ teaspoon ground cloves
2 teaspoons dried oregano
4 chipotle chiles packed in adobo, chopped, with 2 tablespoons adobo sauce
¼ cup apple cider vinegar
2 teaspoons fish sauce
1 whole chuck roast (about 4 pounds)
Kosher salt and freshly ground black pepper
2 whole bay leaves
Kosher salt
Warm corn tortillas, avocados, queso fresco, pickled onions, cilantro, salsa, limes, and other condiments for serving

1. Adjust an oven rack to the lower-middle position and preheat the oven to 275 degrees. Place the dried chiles in the bottom of a large Dutch oven and heat over high heat. Cook, turning the chiles with tongs occasionally, until fragrant and toasted, about 3 minutes. Transfer the chiles to a small saucepan and cover with 2 cups of chicken broth. Bring to a boil over high heat, reduce to a simmer, and cook until chiles are completely tender, about 15 minutes. Set aside.

2. Meanwhile, heat 1 tablespoon of oil in the now-empty Dutch oven over high heat until shimmering. Cook the oxtails until they’re well-browned on all sides, about 8 minutes total. Remove the oxtails and set aside. Reduce the heat to medium.

3. Add the remaining two tablespoons oil and heat along with the onions and garlic, and cook, stirring frequently, until deep brown and just starting to burn, about 10 minutes. Add the cumin, cloves, and oregano, and cook, stirring constantly until fragrant, about 30 seconds. Add the chipotle chiles, vinegar, and remaining chicken broth. Scrape up the browned bits from the bottom of the pan, simmer until reduced by about half, then transfer the entire contents to the jar of a blender.

4. Add the soaked chiles and their liquid to the blender along with the fish sauce. Start the blender on low (be careful of blowups!) and slowly increase the speed to high. Puree until smooth, about 1 minute. Set aside.

5. Place the beef roast in the Dutch oven. Add the browned oxtails, 2 teaspoons salt, 1 teaspoon black pepper, the bay leaves, and the sauce. Bring to a boil over high heat. Place the lid on the pot, slightly cracked, then transfer to the oven. Cook, turning the beef occasionally, until completely tender and a cake tester or metal skewer inserted into the meat shows little to no resistance, about 4 hours. Discard the bay leaves and oxtails (meat from oxtails can be eaten if desired). Transfer the chuck to a large plate. Return the Dutch oven to the stovetop, and cook, stirring frequently, over medium-high heat until the liquid is reduced to about 1½ cups, about 5 minutes.

6. Beef can be shredded and served immediately or transferred to a sealed container along with the liquid and refrigerate up to five days. When ready to serve, shred into large chunks with your fingers or two forks. Return the beef to a pot along with the sauce. Bring to a simmer and cook, gently stirring and folding until the beef is hot, tender, and coated in sauce. Season to taste with salt. Serve immediately, piling the beef into warm corn tortillas with onions, queso fresco, avocados, cilantro, salsa, limes, or other condiments as desired.

barbacoa 10

rhubarb snack cake

rhubarb cake 5

I never got around to telling you about my New Awesome Recipe Database back when it was new. It’s still awesome. But now that it’s well over a year old and has over 1500 recipes entered into it, it definitely isn’t new.

rhubarb cake 2

I love it. I built it myself, something I’d wanted to do for at least a decade. I remember getting Microsoft Access for Dummies from the library shortly after I moved out of my parents’ house for graduate school. But without anything to really push me or anyone around to help me, the project never got off the ground. It wasn’t until I had to use databases at work that it finally clicked.

rhubarb cake 3

I seem to have a bit of a natural aptitude for them, probably because I love organizing things and playing with data. There were a couple online recipe databases I could have downloaded and built upon, but they didn’t have all of the categories and features that I was looking for, so I made my own database from scratch. And almost a year and a half later, I still absolutely love it.

rhubarb cake 8

One of the ways it’s so useful is that when the grocery store carries relatively fresh-looking rhubarb, I snatch it up whether I have a plan for it or not. And then I can go to my Not-New Awesome Recipe Database and do a search of all the recipes I’ve saved over the last few years that include rhubarb.  Narrowing down to the one that only includes ingredients I already have and can be made after work takes no time at all.  The only problem, other than the tedium of entering recipes (my goal is 6 per weekday), is that searching for recipes is so easy and fun with my database that I hardly use my beautiful and inspiring cookbook collection anymore.  Until someday, when I enter those recipes into my Awesome Recipe database, and then I’ll have the best of both worlds.

rhubarb cake 7

One year ago: Shrimp Ricotta Ravioli
Two years ago: Barbecued Pulled Pork
Three years ago: Cream Cheese Spritz
Four years ago: Orange-Oatmeal-Currant Cookies
Five years ago: Snickery Squares

Printer Friendly Recipe
Rhubarb Snack Cake (adapted from Smitten Kitchen)

Makes about 24 servings

Crumb:
1 cup (4.8 ounces) all-purpose flour
¼ cup (1.75 ounces) light brown sugar
⅛ teaspoon table salt
¼ teaspoon ground cinnamon
4 tablespoons unsalted butter, melted

Cake:
1¼ pounds rhubarb, trimmed and cut into ½-inch lengths
1 tablespoon lemon juice
1⅓ cup (9.65 ounces) granulated sugar, divided
8 ounces (1 stick) unsalted butter, softened
½ teaspoon finely grated lemon zest
2 large eggs
1⅓ cups (6.4 ounces) all-purpose flour
1 teaspoon baking powder
¾ teaspoon table salt
¼ teaspoon ground ginger
⅓ cup (2.75 ounces) sour cream

1. To make the crumb mixture: In a small bowl, whisk the flour, brown sugar, salt, and cinnamon together, then stir in the melted butter. Set aside.

2. Heat the oven to 350 degrees. Spray the bottom and sides of a 9-by-13-inch baking pan with nonstick cooking spray, then line the bottom with parchment paper, extending the lengths up two opposite sides of the pan to form a sling. In a medium bowl, stir together rhubarb, lemon juice and ⅔ cup (4.67 ounces) sugar; set aside.

3. For the cake: In the bowl of a stand mixer fitted with the paddle attachment (or in a medium-sized mixing bowl with a hand-held mixer), beat the butter, remaining ⅔ cup (4.67 ounces) sugar, and the lemon zest until light and fluffy. Add the eggs, one at a time, scraping down the sides after each addition. In a small bowl, whisk together the flour, baking powder, salt and ground ginger. Add one-third of this mixture to the batter, mixing until just combined. Continue beating, adding half of the sour cream, half of the remaining flour mixture, the remaining sour cream, and then the remaining flour mixture, mixing between each addition until just combined.

4. Spread the batter in the prepared pan. Pour the rhubarb mixture over the batter, spreading it into an even layer. Scatter the crumbs evenly over the rhubarb layer.

5. Bake the cake for 50 to 60 minutes, or until a tester comes out free of the cake batter. It will be golden on top. Cool completely in the pan on a rack. To serve, use the parchment sling to remove the cake from the pan; cut into 2-inch squares.

rhubarb cake 6

braised potatoes

braised potatoes 5

I don’t live in a world (okay, a town) where there are duck fat fries. People are always raving about them – except for the few who claim they’re not all that – but my opportunities to try duck fat anything have been limited. So I do what I usually do when I can’t find a restaurant to serve me something I want to try: I make it myself.

duck fat potatoes 3

Not that I set out to cook with duck fat; mostly I just stumbled onto a container of it at Whole Foods on my last visit to see my parents in Albuquerque. Also I didn’t exactly make fries, but close enough.

braised potatoes 1

On my first attempt to discover what makes potatoes cooked in duck fat so popular, I simply melted a half-inch or so of the fat in a nonstick pan, added the potatoes cut-side down, and let them cook until they were tender inside and nicely browned on the flat edges. They were just fine, but I didn’t see what the fuss was about.

braised potatoes 2

I was planning to give it another try one evening – after all, I had a container of duck fat with no other plans for it – when, a few hours before dinner, I read about Cook’s Illustrated’s braised new potato recipe in their latest issue. In this technique, the potatoes are cooked in a mixture of water, seasonings, and fat (the original recipe uses butter). The water tenderizes the potatoes, and when it evaporates, the potatoes brown in the fat.

braised potatoes 3

These are now a contender for my favorite potatoes ever. I still haven’t tried it with butter, which I’m sure is delicious, but the duck fat makes the kitchen smell like the best of Thanksgiving.  The inside of the potatoes are soft and creamy, and the flat edge is crisp and browned.  I see what all the fuss is about now.

braised potatoes 4

One year ago: California Roll Burgers
Two years ago: Lemon Bar (comparison of 3 recipes)
Three years ago: Grilled Artichokes
Four years ago: Fresh Strawberry Scones
Five years ago: Asparagus and Arugula Salad with Cannellini Beans and Balsamic Vinegar

Printer Friendly Recipe
Braised Red Potatoes with Lemon (from Cooks Illustrated)

Did I mention that they’re almost entirely hands-off?

1½ pounds small red potatoes, unpeeled, halved
2 cups water
3 tablespoons unsalted butter
3 garlic cloves, peeled
3 sprigs fresh thyme
¾ teaspoon salt
1 teaspoon lemon juice
¼ teaspoon pepper
2 tablespoons minced fresh chives

1. Arrange the potatoes in a single layer, cut-side down, in a 12-inch nonstick skillet. Add the water, butter, garlic, thyme, and salt and bring to a simmer over medium-high heat. Reduce the heat to medium, cover, and simmer until potatoes are just tender, about 15 minutes.

2. Remove the lid and use a slotted spoon to transfer the garlic to a cutting board; discard the thyme. Increase the heat to medium-high and vigorously simmer, swirling pan occasionally, until the water evaporates and the butter starts to sizzle, 15-20 minutes. When it’s cool enough to handle, mince the garlic to a paste.  Transfer the paste to a bowl and stir in the lemon juice and pepper.

3. Continue to cook the potatoes, swirling the pan frequently, until the butter browns and the cut sides of the potatoes turn spotty brown, 4 to 6 minutes longer. Off the heat, add the garlic mixture and chives and toss to thoroughly coat. Serve immediately.

braised potatoes 7

carrot cake pancakes

carrot cake pancakes 5

I’ve mentioned before that carrot cake isn’t really my thing. Vegetables, I believe, do not belong in cake. On the other hand, I’ve enjoyed carrot cake-inspired cookies and muffins, so pancakes seemed acceptable.

carrot cake pancakes 1

The problem with this recipe then, isn’t that it contains carrots, it’s that they have to be finely shredded. The shredding disc on your food processor isn’t fine enough; the shreds are too big to soften in the five minutes or so the pancakes cook. So I diligently shredded the carrots by hand. It was slow and tedious, and if this was required every time I had to make this recipe, it would be a dealbreaker.

carrot cake pancakes 2

And that would be a shame, because there aren’t many opportunities to have cream cheese frosting for breakfast, and those opportunities should be maximized. Also, my dad loves carrot cake, so I’d love to make these for him – without spending half an hour shredding enough carrots to make pancakes for the whole family.

carrot cake pancakes 3

The key is back to the food processor. It’s true that the shreds made from the disc will be too big for pancakes, but all those shreds require is a couple pulses with the regular blade attachment to chop them down to size. (I suspect processing the carrots directly with the blade would create an uneven combination of mush and chunks.) And with that, cream cheese frosting for breakfast is back on the menu.

carrot cake pancakes 7

One year ago: Pizza with Lamb Meatballs, Caramelized Onions, and Parsley
Two years ago: Strawberry Cheesecake
Three years ago: Corned Beef Hash
Four years ago: Orange Oatmeal Currant Cookies
Five years ago: Double (or Triple) Chocolate Cookies

Printer Friendly Recipe
Carrot Cake Pancakes (slightly adapted from the Joy the Baker Cookbook via Smitten Kitchen)

Makes about 12 to 16 4-inch pancakes

Jokes about cream cheese frosting for breakfast aside, these aren’t much of an indulgence. There is no fat in the pancakes themselves beyond what’s used to cook them, and there’s cream cheese but not butter in the topping. The sugar in the topping is fairly restrained, with plenty of milk to keep it loose and sauce-like. And, of course, each serving contains about one small carrot.

Pancakes:
1 cup (4.8 ounces) all-purpose flour
1 teaspoon baking powder
½ teaspoon baking soda
½ teaspoon table salt
½ teaspoon ground cinnamon
½ teaspoon freshly grated nutmeg
⅛ teaspoon ground ginger
1 large egg
2 tablespoons packed brown sugar
1 cup buttermilk
1 teaspoon vanilla extract
2 cups finely grated carrots (from about ¾ pound bundle whole carrots)
oil

Cream cheese topping:
4 ounces cream cheese, at room temperature
¼ cup (about 1 ounce) powdered sugar
4 tablespoons milk
½ teaspoon pure vanilla extract

1. In a large mixing bowl, stir together the flour, baking powder, baking soda, salt, and spices. In a separate mixing bowl, whisk the egg until thoroughly combined, then add the sugar, buttermilk, and vanilla. Stir the carrots into the wet ingredients, then add the wet ingredients to the dry ingredients. Whisk gently until the batter is mostly mixed but still contains small lumps of flour. Let the batter rest while the pan heats, about 5 minutes.

2. Heat a 12-inch non-stick skillet or a griddle over medium heat. Add about a teaspoon of oil and spread it over the bottom of the pan. Spoon 2 tablespoons of pancake batter onto the hot griddle. When the pancakes are golden brown, after about 2-3 minutes, flip to cook the other side another 2-3 minutes. Keep warm in oven heated to 200 degrees.

3. To make the cream cheese topping: In a small bowl, beat or whisk the cream cheese until fluffy and smooth. Add the powdered sugar, milk, and vanilla; mix until smooth.

carrot cake pancakes 6