lemon pancakes with blueberry syrup

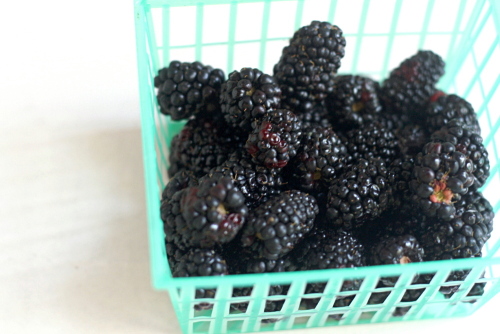
I haven’t made plain pancakes in a very long time. I guess, to me, it’s like eating bread – sure it’s good plain, but it’s so much better with Stuff. For pancakes, that Stuff mostly involves fruit. You could make lemon pancakes and put the blueberries right in them, but why not do something different with those blueberries and make a syrup out of them?

This is another Emeril breakfast recipe, and this one, I made more complicated instead of simplifying it. Emeril’s blueberry syrup is just a combination of blueberries and corn syrup, which I think sounds too one-dimensionally sweet. I have a recipe for blueberry syrup that I’ve been making for a long time that I’m really happy with, so I made that one instead, even though it involves a few more ingredients.

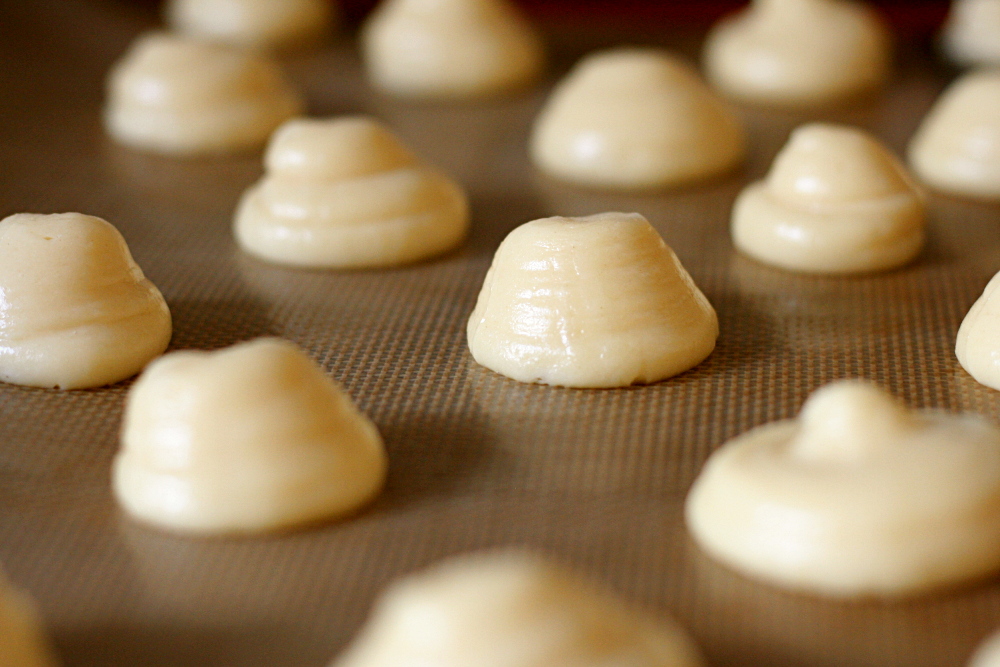
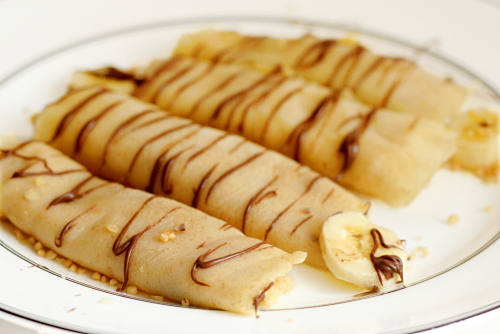
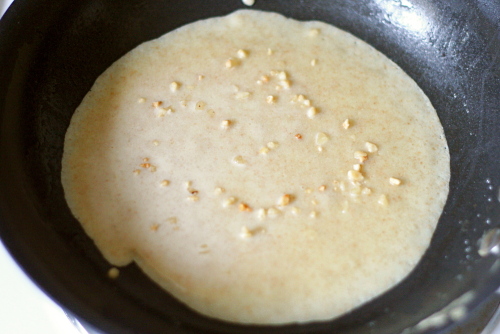
You can see that my pancakes came out a little thin. I’ve been experimenting with Saco powdered buttermilk, since I don’t generally keep liquid buttermilk around. The recipe uses the same ratio of flour to milk that most pancake recipes do, so I don’t think the pancakes are thin because there’s too much liquid. I think the powdered buttermilk reconstituted with water as per the instructions on the container create a thinner liquid than regular buttermilk.

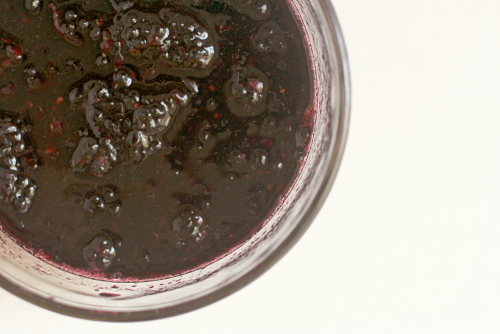
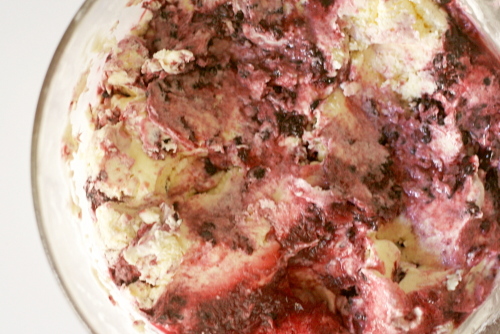
But I don’t mind thin pancakes, and you really can’t go wrong with a lemon-blueberry combination. The syrup is great – the sweetness is balanced by a spritz of lemon juice and pinch of salt, so the flavor of the blueberries can shine.

Lemon Pancakes with Blueberry Syrup (adapted from Emeril Live)

Serves 3-4

Pancakes:
1 cup all-purpose flour
2 tablespoons sugar
1 teaspoon baking powder
½ teaspoon baking soda
¼ salt
1 cup buttermilk
1 large egg
2 tablespoons butter, melted
2 tablespoons fresh lemon zest, finely chopped
½ stick (4 tablespoons) butter, cut into 10 equal slices

Blueberry Syrup:
1 cup sugar
½ cup water
pinch salt
1 tablespoon cornstarch
2 tablespoons water
1 cup blueberries
½ teaspoon lemon juice
1 tablespoon butter

For the pancakes:
In a small mixing bowl, sift the flour, sugar, baking powder, baking soda and salt. In a medium mixing bowl, whisk the buttermilk, egg, and butter until fully incorporated. Add the sifted ingredients to the milk mixture and whisk until it is slightly smooth, but still has some lumps. Fold in the lemon zest and allow the batter to sit for a couple of minutes. Lightly grease a griddle over medium heat. Cooking in batches, pour ¼ cup of the batter onto the hot griddle for each pancake. Cook for about 2 to 3 minutes or until the batter bubbles and is golden brown, flip over and continue to cook until golden brown. Repeat the above process with the remaining batter. Stack the pancakes on each serving plate. Place a pat of butter between each layer. Drizzle the pancakes with the syrup and garnish with the confectioners’ sugar.

For the syrup:
Bring ½ cup water, sugar, and salt to a boil in a small saucepan. In a small bowl, mix 2 tablespoons water and cornstarch until cornstarch dissolves. Add cornstarch mixture to sugar mixture and stir to blend. Stir in blueberries and boil over medium heat until berries start to pop and syrup turns blue, 5-6 minutes. Remove from heat and add lemon juice and butter.

chocolate whopper malted drops (twd)

The Whopper cookies that Rachel chose for TWD are such a fun idea, and I think you’d be hard-pressed to find a recipe like this from any other source. With cocoa and malted milk powder in the dough and chopped Whoppers and chocolate chips as mix-ins, this recipe is pure Dorie.

It became clear to me right off the bat that chopping something as small and perfectly spherical as Whoppers would drive me to distraction. So instead, I dumped them in the food processor. It was risky, because food processors are far better at pulverizing than chopping, but it seemed worth it.

I was a little worried by the texture of the cookies right after they came out of the oven, because they seemed gummy. Had my partially powdered Whoppers ruined an entire batch of cookies? Fortunately, they improved greatly once they cooled, becoming pleasantly chewy and rich.

I compared batches baked right after the dough was made and baked the next day. Dave and I agreed that the batch chilled overnight was oh-so-slightly chewier with a more even texture, but that the difference was so subtle that the wait wasn’t worth it.

I thought it was a fun cookie – definitely a different idea, and a good one. Dave said they were nice, but not thrilling. Damned by faint praise.

Rachel has the recipe in her blog.

crawfish, roasted tomato, and farmers cheese pizza

I make pizza probably every other week, always on the weekend. About half of the time I make a traditional pizza with tomato sauce and mozzarella cheese. The other half varies – in the past few months, I’ve made shrimp scampi pizza, caramelized onion and Gruyere pizza, and spinach ricotta pizza. When I tell Dave that we’re having pizza for dinner, he always asks hopefully, “Normal pizza?”

Not this time. I’ve had crawfish tails in my freezer for months. I used a portion of the package for a recipe which I will, eventually, blog about, but I had no plans for the remainder. Cooks Illustrated’s recipe for pizza with shrimp, farmers cheese, and roasted tomatoes seemed like a great place to use some of that crawfish in place of the shrimp. Something about that combination of ingredients seemed very American to me.

I really only used CI’s recipe as a basic guide. Their recipe is developed to grill the pizza, which I wouldn’t be doing. Since I wasn’t sure if the crust recipe they provided was specially designed for grilling, I opted to use my favorite regular pizza dough recipe, tweaked to incorporate the seasonings CI uses in their recipe.  I substituted crawfish for the shrimp and used far less than they call for, and I used Deb’s recipe for slow-roasted tomatoes instead of CI’s method for roasting tomatoes

Overall, it was the same basic ingredients CI called for, but combined a little differently. It was my first time using farmers cheese, and I really liked it. The slow-roasted tomatoes, oh my gosh. I made about twice as many as I needed for the pizza, and I ate the others plain. I was greedy and barely shared with Dave.

The only step I wasn’t quite sure how to adapt was the actual grilling of the pizza to baking them on a hot pizza stone. Since all of the toppings were already cooked, I didn’t want to risk overcooking them by putting them into a 500 degree over for 8 minutes. I ended up simply putting the untopped dough in the oven for a few minutes, then taking it out, adding the toppings, and putting it back in until the crust was spotty browned like I like it. It wasn’t the perfect solution – I should have poked the dough with a fork before putting it on the hot stone, because it puffed up like a pita.

Dave and I both really liked the pizza. I should have used more cheese, but when is that not the case? (The recipe below is adjusted for the amount of cheese I wish I would have used.)  Dave thinks shrimp would have been better than crawfish, but I don’t really agree. The only problem I had was that there was that the toppings, especially the crawfish, kept falling off the pizza. More cheese might have acted like glue to hold the toppings on as well. Overall, this was my favorite of the non-traditional pizzas I’ve made recently, and a great way to use up some of that tasty crawfish.

Crawfish, Roasted Tomato, and Farmers Cheese Pizza (substantially adapted from Cooks Illustrated; Roasted Tomatoes from Smitten Kitchen)

Serves 6 as a main course

Garlic-Herb Pizza Crust:
2 tablespoons virgin olive oil
1 tablespoon minced garlic
½ teaspoon herbes de Provence
1 teaspoon ground black pepper
1¾ cups water divided, warm
2¼ teaspoons instant yeast (1 envelope)
4 cups bread flour
1½ teaspoons table salt

Roasted Tomatoes
24 cherry tomatoes (small), halved lengthwise
1 tablespoon virgin olive oil
Table salt and ground black pepper

Crawfish or (Shrimp)
1 pound crawfish tails or medium-sized shrimp
1½ tablespoons olive oil, plus additional for drizzling
½ teaspoon hot chili powder
⅛ teaspoon cayenne pepper
Table salt and ground black pepper

Toppings
12 ounces farmers cheese, crumbled
⅔ cup packed cilantro leaves, minced
⅔ cup packed fresh parsley, minced

1. For the crust: Heat olive oil in a small skillet; add next 3 ingredients and cook over low heat until garlic softens, about 5 minutes. Cool.

2. Mix flour, yeast, and salt in a food processor. Add water and herb oil to yeast mixture. With machine on, gradually pour liquid into dry ingredients; process until a rough ball forms. If dough is too sticky or dry, add flour or water, 1 tablespoon at a time. Let dough rest for 5 minutes, then continue to process until dough is smooth, about 35 seconds.

3. Knead dough by hand a few seconds to form smooth, round ball; place in a lightly oiled bowl, cover with a damp cloth and let rise until dough doubles in size, about 2 hours.

4. For the roasted tomatoes: Preheat oven to 225°F. Halve each tomato crosswise and arrange on a parchment-lined baking sheet. Drizzle with olive oil, just enough to make the tomatoes glisten. Sprinkle with salt and pepper. Bake the tomatoes in the oven for about three hours. You want the tomatoes to be shriveled and dry, but with a little juice left inside. (The tomatoes can be set aside at room temperature up to 6 hours ahead.)

5. Place a pizza stone on the lowest oven rack and heat oven to 500 degrees. Punch dough down and divide into 3 equal pieces. Roll each portion to form a smooth, round ball. Place the balls on a lightly floured surface, cover with a damp cloth, and let rest 10-30 minutes.

6. For the crawfish/shrimp: Heat a medium-sized skillet over high heat. Toss crawfish with 1½ tablespoons oil, chili powder, cayenne, and salt and pepper. Cook crawfish in hot skillet, stirring occasionally, for 3-4 minutes, until the tails curl. (Shrimp may need an additional 2-3 minutes, depending on their size; cook until opaque.)

7. Stretch and press a ball of dough until it reaches a diameter of 9-11 inches. If the dough is very resistant to being stretched, let it rest 5 minutes and then try again.

8. Brush the circle of dough with olive oil, then stab it with a fork 10-12 times. Transfer the dough to a pizza peel dusted with cornmeal. Slide the dough onto the heated stone. Bake until the crust edges begin to brown, 5-8 minutes. Remove the pizza from the oven, add ⅓ of all toppings, and return to hot stone until crust is crisp and browned, 3-4 minutes. Cut into wedges and serve immediately. Repeat steps 7 and 8 with remaining dough and toppings.

sausage and red pepper hash

Hey, look at that, more eggs on stuff. I made this because I wanted hash, but something different from corned beef hash. I just love the idea of egg yolk dripping into browned crispy potatoes and salty breakfast meat and flavorful sautéed vegetables. Sausage and peppers sounded like a great base to go with potatoes and eggs.

Looking now at the recipe I think I was using, I apparently simplified it quite a bit. That’s the thing about making an Emeril recipe in the morning – chances are it’s going to get simplified. First I replaced chicken and apple sausage with standard breakfast sausage, and then I eliminated all of the spices and herbs that Emeril calls for, assuming that there would be enough seasoning in the sausage.

What I ended up doing was following my standard hash method of browning the meat, then cooking the vegetables in the rendered fat, then adding parboiled potatoes and cooking until they brown. Then I break eggs over the mixture and cover the pan, cooking until the whites are set and, if all goes well, the yolks are warm and viscous but not solid.

You really can’t go wrong with these ingredients combined in that method. The onions are a little caramelized, the peppers are soft, the potatoes are crispy, the sausage is peppery – everything is at its best, and then it’s taken one step further with a perfectly cooked egg on top.

Sausage and Red Pepper Hash (substantially adapted from Emeril and from Cooks Illustrated)

The potatoes can be parboiled the night before and refrigerated.

2 pounds russet potatoes, peeled and cut into ½ -inch dice
Salt
1 medium onion, diced
1 red pepper, diced
1 pound breakfast sausage
4 large eggs
Ground black pepper

1. Bring the potatoes, 5 cups water, and ½ teaspoon salt to a boil in a medium saucepan over medium-high heat. Once the water boils, cook for 4 minutes, drain, and set aside.

2. Place the sausage in a 12-inch nonstick skillet over medium-high heat and cook until the fat is partially rendered, about 2 minutes. Add the onion and pepper and cook, stirring occasionally, until the onion has softened and browned, about the edges, abut 8 minutes. Mix in the potatoes and lightly pack the mixture into the pan with a spatula. Reduce the heat to medium. Cook, undisturbed, for 4 minutes, then, with a spatula, invert the hash, a portion at a time, and fold the browned bits back into the hash. Lightly pack the hash into the pan. Repeat the process every minute or two, until the potatoes are thoroughly cooked, about 8 minutes longer.

3. Make 4 indentations (each measuring about 2 inches across) equally spaced on the surface of the hash. Crack 1 egg into each indentation and season the egg with salt and pepper to taste. Reduce the heat to medium-low, cover the pan, and cook until the eggs are just set, about 6 minutes. Cut the hash into 4 wedges, making sure each has an egg, and serve immediately.


chunky peanut butter and oatmeal chocolate chipsters

I didn’t realize how picky I was about cookies until they started getting chosen for TWD recipes. First the all-too-nutritious granola grabbers, and now Stefany chooses oatmeal cookies. I’m not sure why I have a prejudice against oatmeal cookies, but I suspect it’s the raisins. I don’t hate raisins, but I don’t want them where chocolate chips should be.

But, these cookies do have chocolate chips instead of raisins. And they have peanut butter, which is never a bad thing.

What do you know, these were great! I’m think I’m over my oatmeal prejudice – there was absolutely nothing unpleasant about the oatmeal in these cookies. I also loved how the peanut butter flavor was noticeable but not overpowering.

Ever since the NY Times article about chocolate chip cookies, I’ve been experimenting with chilling cookie dough overnight before I bake it. This recipe especially lent itself to a comparison in resting-before-baking times because Dorie encourages the baker to chill the dough for 2 hours before baking. I expected ugly flat cookies from those that were baked immediately, but I was surprised to see that they baked up perfectly. Dave and I actually didn’t notice a significant difference between the cookies baked immediately and those chilled for 2 hours. In contrast, the cookies from the dough that was chilled overnight were more evenly chewy. I preferred the chewier cookies, but Dave didn’t agree with me. We don’t remember any noticeable difference in flavor.

Whether baked immediately or from chilled dough, these offer fun variety from my routine of more traditional cookies. The recipe is provided on Stefany’s site.

eclairs (daring bakers)

I was happy about Tony and Meeta’s choice of Chocolate Eclairs for this month’s Daring Baker recipe because I actually have some experience making éclairs, but I haven’t found a recipe that’s convinced me to use it faithfully. And because I’m somewhat confident in my éclair-making ability, I was comfortable tweaking the recipe.

When I was in college, there was a dessert shop nearby that made the best mini-cream puffs. My friends and I went there at least once per week, and sometimes I would bypass all of the beautiful and tempting cakes and pies so that I could have just a pile of little cream puffs. But usually I would get a wonderful slice of chocolate layer cake with a cream puff on the side. I could never resist those cream puffs. Those mini-cream puffs are what I strived to recreate with this recipe.

I used the chocolate glaze recipe suggested by Tony and Meeta.  The glaze was very good, although the recipe is perhaps unnecessarily complicated, requiring a chocolate sauce to be made first, which is then used as an ingredient in the chocolate glaze. I’m assuming this is only because Pierre Herme assumes that anyone who owns his book Chocolate Desserts will keep a supply of the chocolate sauce around. It was a good glaze, and I may use it in the future, but I’ll condense the steps to bypass the separate sauce-making process.

I used a raspberry pastry cream filling instead of the chocolate pastry cream that Herme suggests. While I suppose that all’s well that ends well, it’s not a recipe that I would recommend to others. I simply took my favorite vanilla pastry cream recipe and mixed in raspberry puree at the end. Unfortunately, there was too much puree and the pastry cream never set. I tried some other stuff, but ultimately I had to dissolve some gelatin in half-and-half and mix that in to stabilize the cream enough to be piped.

One thing I’ve never liked about regular-sized cream puffs and éclairs is how they have to be cut in half, filled, and stuck back together. I wanted to fill my miniature cream puffs without cutting them open, so I put my pastry cream into a bag with a simple round tip and squeezed pastry cream into the cream puffs through a small hole in the bottom. It wasn’t completely successful – the inside of the cream puffs were often split into two or more large portions, and only one portion got filled with this method. I think I could also squirt pastry cream into the cream puff from a hole in the top, which will then be covered with glaze.

These were the best cream puffs I’ve ever made. I do want to tweak the dough recipe, and obviously the pastry cream was kind of a bust, but they were the perfect size and so easy to eat. Every time I’ve made éclairs I’ve gotten better at it, and I hope next time it’ll be just perfect.

Pierre Hermé’s Chocolate Éclairs (adapted from Chocolate Desserts by Pierre Hermé, except for the pastry cream, which is adapted from Cooks Illustrated)

The pastry cream didn’t work out. But I already had the recipe written down and don’t want redo it.

Makes 20-24 eclairs

Cream Puff Dough:
½ cup (125g) whole milk
½ cup (125g) water
1 stick (4 ounces; 115 g) unsalted butter, cut into 8 pieces
¼ teaspoon sugar
¼ teaspoon salt
1 cup (140 g) all-purpose flour
5 large eggs, at room temperature

Raspberry Pastry Cream:
6 ounces raspberries
2 cups half-and-half
½ cup granulated sugar
pinch table salt
5 large egg yolks,
3 tablespoons cornstarch
4 tablespoons unsalted butter (cold), cut into 4 pieces
1½ teaspoons vanilla extract

Chocolate Sauce:
0.9 oz (26 g) bittersweet chocolate, finely chopped
3 tablespoons (50 g) water
5 teaspoons (25 g) crème fraîche or heavy cream
1 tablespoon (14 g) sugar

Chocolate Glaze:
⅓ cup (80 g) heavy cream
3½ ounce (100 g) bittersweet chocolate, finely chopped
4 teaspoon (20 g) unsalted butter, cut into 4 pieces, at room temperature
7 tablespoon (110 g) Chocolate Sauce, warm or at room temperature

For the éclairs:
1. Preheat your oven to 375 degrees F (190 degrees C). Divide the oven into thirds by
positioning the racks in the upper and lower half of the oven. Line two baking sheets with
waxed or parchment paper.

2. In a heavy bottomed medium saucepan, bring the milk, water, butter, sugar and salt to the boil.

3. Once the mixture is at a rolling boil, add all of the flour at once, reduce the heat to medium and start to stir the mixture vigorously with a wooden spoon. The dough comes together very quickly. Do not worry if a slight crust forms at the bottom of the pan, it’s supposed to. You need to carry on stirring for a further 2-3 minutes to dry the dough. After this time the dough will be very soft and smooth.

4. Transfer the dough into a bowl of a mixer fitted with the paddle attachment, or using your hand mixer or if you still have the energy, continue by hand. Add the eggs one at a time, beating after each egg has been added to incorporate it into the dough. You will notice that after you have added the first egg, the dough will separate, once again do not worry. As you keep working the dough, it will come back all together again by the time you have added the third egg. In the end the dough should be thick and shiny and when lifted it should fall back into the bowl in a ribbon. (Once the dough is made you need to shape it immediately. Or, you can pipe the dough and the freeze it. Simply pipe the dough onto parchment-lined baking sheets and slide the sheets into the freezer. Once the dough is completely frozen, transfer the piped shapes into freezer bags. They can be kept in the freezer for up to a month.

5. Fill a large pastry bag fitted with a 2/3-inch (2cm) plain tip nozzle with the warm cream puff dough. Pipe the dough onto the baking sheets in long, 4 to 4½ inches (about 11 cm) chubby fingers. Leave about 2 inches (5 cm) space in between each dough strip to allow them room to puff. The dough should give you enough to pipe 20-24 éclairs.

6. Slide both the baking sheets into the oven and bake for 7 minutes. After the 7 minutes, slip the handle of a wooden spoon into the door to keep it ajar. When the éclairs have been in the oven for a total of 12 minutes, rotate the sheets top to bottom and front to back. Continue baking for a further 8 minutes or until the éclairs are puffed, golden and firm. The total baking time should be approximately 20 minutes. (The éclairs can be kept in a cool, dry place for several hours before filling.)

For the pastry cream:
7. While the éclairs are baking, set a mesh strainer over a medium bowl. Add the raspberries to the strainer and use a spoon to mash them and press them through the strainer to create a seedless raspberry puree.

8. Heat half-and-half, 6 tablespoons sugar, and salt in medium heavy-bottomed saucepan over medium heat until simmering, stirring occasionally to dissolve sugar.

9. Meanwhile, whisk egg yolks in medium bowl until thoroughly combined. Whisk in remaining 2 tablespoons sugar and whisk until sugar has begun to dissolve and mixture is creamy, about 15 seconds. Whisk in cornstarch until combined and mixture is pale yellow and thick, about 30 seconds.

10. When half-and-half mixture reaches full simmer, gradually whisk simmering half-and-half into yolk mixture to temper. Return mixture to saucepan, scraping bowl with rubber spatula; return to simmer over medium heat, whisking constantly, until 3 or 4 bubbles burst on surface and mixture is thickened and glossy, about 30 seconds. Off heat, whisk in butter and vanilla. Strain the pastry cream through a fine-mesh sieve set over a medium bowl. Stir in the raspberry puree. Press plastic wrap directly on surface, and refrigerate until cold and set, at least 3 hours or up to 48 hours.

For the chocolate sauce:
11. Place all the ingredients into a heavy-bottomed saucepan and bring to a boil, making sure to stir constantly. Then reduce the heat to low and continue stirring with a wooden spoon until the sauce thickens.

12. It may take 10-15 minutes for the sauce to thicken, but you will know when it is done when it coats the back of your spoon. (You can make this sauce ahead of time and store it in the refrigerator for two weeks. Reheat the sauce in a microwave oven or a double boiler before using.)

For the chocolate glaze:
13. In a small saucepan, bring the heavy cream to a boil. Remove from the heat and slowly begin to add the chocolate, stirring with a wooden spoon or spatula.

14. Stirring gently, stir in the butter, piece by piece, followed by the chocolate sauce. (If the chocolate glaze is too cool (i.e. not liquid enough) you may heat it briefly in the microwave or over a double boiler.)

For the assembly:
15. Slice the éclairs horizontally, using a serrated knife and a gently sawing motion. Set aside the bottoms and place the tops on a rack over a piece of parchment paper.

16. The glaze should be barely warm to the touch (between 95 – 104 degrees F or 35 – 40 degrees C, as measured on an instant read thermometer). Spread the glaze over the tops of the éclairs using a metal icing spatula. Allow the tops to set and in the meantime fill the bottoms with the pastry cream.

17. Pipe or spoon the pastry cream into the bottoms of the éclairs. Make sure you fill the bottoms with enough cream to mound above the pastry. Place the glazed tops onto the pastry cream and wriggle gently to settle them.

18. The éclairs should be served as soon as they have been filled.

mashed potatoes with kale

This dish reminds me of one of the great things about my husband. As we sat down to eat roast chicken served with kale and mashed potatoes, never once did he ask “um…what’s the green stuff in the potatoes?” or even look sideways at it. And not because he’s being polite, but because he’s so extremely unpicky. And maybe he trusts me to serve him good food? (Or at least warn him with prolific whining if I don’t think the food will be good.)

And why should he worry? Kale has a great savory flavor that it goes perfectly with mashed potatoes, almost like gravy does. Plus there’s a pool of butter on top. You can’t go wrong with a pool of butter.

The recipe comes together relatively easily. The potatoes are peeled, diced and boiled just liked normal mashed potatoes. (Oh, except I’m anal about mashed potatoes, so I actually steam the potatoes instead of boil them. You should try it – they taste amazing, just like potatoes should, even without salt, because they don’t absorb water.) The kale is cooked separately, slowly braised with onion, which is a common cooking method for kale. After mashing, the two are combined, along with some milk that’s been steeped with carrot and bay.

I have to admit, I didn’t taste any evidence of the carrot or bay. Also, while it seems that pooling the butter in the potatoes is traditional for this dish, I think I would prefer it mixed in. For one thing, otherwise it’s like “whoa, that’s a pool of butter”, but also, I like how butter in mashed potatoes keeps them nice and moist. Come to think of it, if you go the pooling method, you should probably use salted butter, or add a pinch of salt to the butter while it’s melting. Then your butter will at least have some flavor, which mine really didn’t.

Still, though, this was great. Dave and I have decided that we both really like kale. I don’t think the original recipe is quite as kale-y as it looks here, because I wasn’t measuring closely, but either way, it tastes great. And what a healthy addition to standard mashed potatoes.

Mashed Potatoes with Kale (Bon Appetit May 1996, but really epicurious.com)

1 cup milk
8 tablespoons (1 stick) butter
1 small carrot, peeled, diced
1 large bay leaf
1 large onion, chopped
1 large bunch kale, rinsed, coarsely chopped (about 8 cups)
4 pounds russet potatoes, peeled, cut into 1-inch pieces

1. Combine milk, 2 tablespoons butter, carrot and bay leaf in medium saucepan; bring to simmer. Remove from heat; let steep while preparing kale and potatoes.

2. Melt 1 tablespoon butter in large Dutch oven over medium heat. Add onion; sauté until light brown, about 8 minutes. Add kale; cover and cook until tender, stirring often, about 25 minutes.

3. Meanwhile, cook potatoes in large pot of boiling salted water until tender, about 25 minutes. Drain well. Return to same pot; mash with hand masher.

4. Add kale mixture to potatoes. Strain in enough milk to produce moist, fluffy potatoes. Season with salt and pepper.

5. Melt 5 tablespoons butter in small saucepan. Mound potatoes in large bowl. Using spoon, make well in top of potatoes. Pour butter into well. Serve hot.

chocolate banded ice cream torte

Oh, I’ve been looking forward to someone picking this recipe for a while. I’m so glad Amy chose it for TWD this week. Alternating layers of rich dark chocolate and creamy tart raspberry ice cream sounds like a winning combination to me.

It was also great timing, because it was chosen shortly after I got The Perfect Scoop, so instead of trying to squeeze in an ice cream recipe between all the TWD and Daring Baker desserts plus my insatiable craving for chocolate chip cookies (dough, actually), I was able to make a David Lebovitz recipe for TWD. The book has so many recipes that I’m interested in trying, but of course I was limited by what would go with the chocolate. I decided that Blackberry Swirl Ice Cream was at least somewhat fun and new, and it was similar but not identical to the raspberry ice cream Dorie suggests.

The torte may look fancy, but the recipe isn’t much work to put together. The chocolate mixture was easy to make, so it was just an issue of waiting around for each layer to freeze solid enough before adding the next layer. I worked on it while I slow-roasted some cherry tomatoes.

One thing I thought was odd about this recipe was that Dorie keeps referring to the chocolate portion as “ganache.” I’ve always thought ganache was just chocolate and cream mixed together, but the recipe included only chocolate, butter, sugar, and eggs – basically brownie batter without the flour. I did some scouting around the internet, and all I came up with was ganache = chocolate + cream. So ganache doesn’t seem like to right word to use, but maybe someone who knows more about pastry can enlighten me.

Dictation aside, I liked the torte even more than I thought I would. Unfortunately, the ice cream didn’t have enough blackberry flavor to stand up to the chocolate. Dave didn’t even know I had used the blackberry ice cream until I told him, after he’d eaten his slice. The only other thing about this torte that I wasn’t really thrilled about was the texture of the chocolate portion. It seemed a little gummy. I wonder if reducing the number of eggs would help? I know some people had problems with their torte being too hard to slice, but my freezer is apparently weak. If the eggs are there to keep the chocolate soft enough to slice, I could stand to lose a few.

Regardless, yum. This is an impressive, easy, and creative dessert. The recipe is posted on Amy’s site.

blackberry swirl ice cream

I recognize, as I think most food bloggers do, that there are copyright issues with what we do. It’s all well and good to put a note saying where we got the recipe, but ultimately, it’s often unlawful to reprint the recipe at all. There are loopholes, of course. Rumor has it that ingredient lists can’t be copyrighted, so if the instructions are rewritten in our own words instead of the original author’s, everything is supposedly okay. But I’m generally too lazy to rewrite the instructions.

Cookbooks authors can respond to the copyright issue however they see fit. They can try to fight each of however many thousands of food bloggers are out there copying recipes, or they can do what I think is wiser – adopt the “if you can’t beat ‘em, join ‘em” mentality. Both David Lebovitz and Dorie Greenspan have clearly chosen to join us. They are both good about leaving comments on other blogs, in addition to keeping up their own blogs. Dorie has supported Tuesdays with Dorie from the beginning, when over a hundred bloggers published her recipes every single week. As well she should – I would not have bought, or even heard of, Dorie’s famous book if not for food blogs.

Neither would I have bought (or heard of) David’s The Perfect Scoop. Food bloggers love David, and while it is nice that he leaves comments on other blogs, what it always has to come down to is the quality of the recipes. David isn’t known as the master of homemade ice cream without reason.

The day before I decided to buy this book, I was saying that as much as I like ice cream, it’s just not as fun for me as baking with flour and butter and the oven. Furthermore, David has so many recipes on his website that I questioned whether I needed an ice cream book at all.

Um, apparently I do. For one thing, The Perfect Scoop is stuffed full of interesting ice cream recipes that I would never have considered trying but now can’t wait to make, including Guinness-Milk Chocolate, Olive Oil, Fresh Fig, Green Apple and Sparkling Cider, and I could go on and on. But the real reason I decided to buy the book can be attributed to a savvy move on David’s part and how cookbook authors can take advantage of having a food blog – he has a recipe for basic vanilla ice cream on his website. I’ve tried it. It is the best vanilla ice cream I’ve made, out of 4-5 recipes by some of my favorite recipe writers. So now not only do I have this book full of interesting recipes, but I have good evidence that the recipes will actually be good.

This blackberry swirl ice cream is a basic vanilla recipe with crushed blackberries swirled in. This certainly isn’t the most original recipe in the book, but I needed something that would go with chocolate for the next TWD recipe. Dave (um, my husband, not Lebovitz this time) loves blackberries and they’re at their peak right now.

It was as good as I expected. Dave and I agree that we might prefer a bit more blackberries stuffed in there, but we’re big fruit people, so that’s no surprise. Other than that, the vanilla portion was creamy, the blackberry portion was balanced between sweet and tart, the ice cream was beautiful, and the directions for the recipe were clear. I’m as excited as ever about this book.

Blackberry Swirl Ice Cream (from David Lebovitz’s The Perfect Scoop)

Ice cream:
1 cup whole milk
⅔ cup (4.6 ounces) sugar
pinch salt
1½ cups heavy cream
5 large egg yolks
½ teaspoon vanilla extract

Blackberry swirl:
1½ cups (5.6 ounces) blackberries, fresh or frozen
3 tablespoons sugar
1 tablespoon vodka
1 teaspoon lemon juice

1. To make the ice cream, warm the milk, sugar, and salt in a medium saucepan. Pour the cream into a large bowl and set a mesh strainer over the top.

2. In a separate medium bowl, whisk together the egg yolks. Slowly pour the warm milk into the egg yolks, whisking constantly, then scrap the warmed egg yolks back into the saucepan.

3. Stir the mixture constantly over medium heat with a heatproof spatula, scraping the bottom as your stir, until the mixture thickens and coats the spatula. Pour the custard through the strainer and stir it into the cream. Add the vanilla and stir until cool over an ice bath. Chill thoroughly in the refrigerator.

4. An hour or so before churning the ice cream, make the blackberry swirl by mash the blackberries together with the sugar, vodka, and lemon juice with a fork (if you using frozen blackberries, let them thaw a bit first) until they’re juicy but with nice-sized chunks of blackberries remaining. Chill until ready to use.

5. Freeze the ice cream custard in your ice cream maker according to the manufacturer’s instructions. As you remove it from the machine, layer it in the container with spoonfuls of the chills blackberry swirl mixture.

banana nutella crepes

I ate Nutella, a chocolate hazelnut spread, for the first time just about a month ago. I’d been hearing great things about it for years, but I never got around to trying it until a friend sent me some. (Along with a jar of Marmite, which is so good.) I can see what all the hype about Nutella is for – this stuff basically tastes like milk chocolate, so of course everyone likes it!

I’ve been putting it on all kinds of things, but mostly I eat it on bananas to break up the monotony of my daily banana. And how much better would bananas and Nutella be if they were wrapped up in a crepe?

Crepes are one of those recipes that seem scarier than they really are. I’m always hearing stories about how the first crepe will have to be thrown out, and they’re so delicate, and all these things, but I’ve never had any problems cooking crepes. Maybe that means I’m doing something wrong, like making them too thick, but since I’m happy with the way they turn out, I see no reason to change anything.

I used Jess’s crepe recipe, as she describes her family as quite the experts in crepe-making. But, I didn’t trust the 100% whole wheat flour idea, so I used half white and half whole wheat. I also had to make them tiny, because I was between medium-sized nonstick pans at the time.

This seems like a great crepe recipe! The bananas and Nutella were really good, and I sprinkled over some hazelnut praline I had leftover from the filbert cake. I’m eager to see what else I can come up with to put in crepes. Sweet variations are almost too easy, and I know sausage and maple syrup are delicious in crepes. What about savory options? I need to do some exploring.

Whole Wheat Crepes (adapted from hogwash)

Jess implores her readers to eat the crepes as soon as they come out of the pan, but I didn’t. I stored them in a 200 degree oven until they were all cooked, so that Dave and I could eat together.

6 servings

2 cups milk (plus more, if needed)
2 large eggs
8 tablespoons unsalted butter, melted, plus more for the pan
1½ tablespoons sugar
½ teaspoon salt
1⅔ cups (8⅓ ounces) whole wheat flour (or a mix of white and whole wheat)

6 bananas, sliced
6 tablespoons Nutella

1. Combine the milk, eggs, melted butter, sugar, salt and 1 cup flour in a blender, and whirl until smooth, scraping down the sides of the glass, if necessary. Add all or most of the remaining flour, a bit at a time, until the batter has roughly the consistency of drinkable yogurt (very thin for pancake batter, but not runny). Let the batter sit at least 30 minutes at room temperature, or overnight in the refrigerator. (Bring the batter back to room temperature before continuing.)

2. Before cooking, thin the batter with a bit more milk, if it seems substantially thicker.

3. Preheat a crepe pan or large nonstick skillet over medium-high heat. When hot, grease with a dollop of butter (using a stick of butter to smear some directly on the skillet works nicely), and add enough batter to coat the skillet in a thin, even layer when you swivel the skillet around in your hand. Cook for a couple minutes, until you see bubbles in the center of the crepe and the bottom side is nicely browned. Flip carefully and cook another couple minutes on the other side. Fill as desired (in this case, with the sliced bananas and Nutella) and serve immediately. Repeat with the remaining batter.