pumpkin pie

pumpkin pie 6

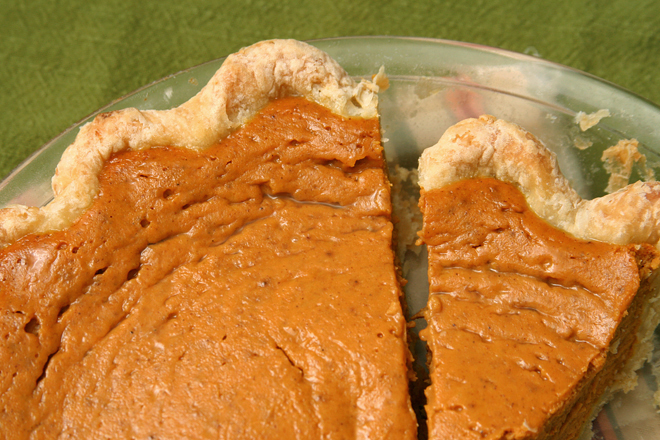
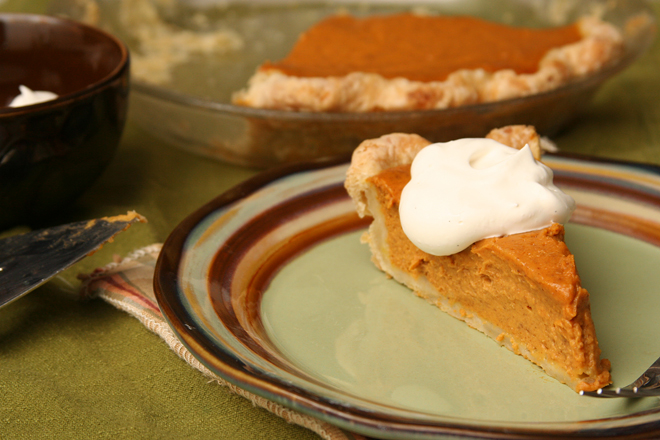
Let me be frank: The recipe on the back of the can of pumpkin makes a perfectly good pumpkin pie. I have no beef with this pie. It’s the one I ate growing up, and I’ll still certainly grab a slice if it’s available. But at some point, it occurred to me that pumpkin pie is a custard pie, and it should be more custardy – smoother, richer, creamier. It still needs to be firm enough to form straight-sided slices, not puddles, but it shouldn’t be solid.

pumpkin pie 1

I blame the evaporated milk. I like evaporated milk in my salmon pesto pasta recipe as a healthier alternative to cream, but we’re talking now about a dessert that’s eaten after one of the most decadent meals of the year. Is this really the time to cut calories? Stick with heavy cream for dessert.

pumpkin pie 2

But there’s another requirement I have for pumpkin pie, and that is that it be easy. If the filling requires steps beyond mixing everything in the blender, I’m not interested. Not because a great dessert isn’t worth some effort, but because I’ve found that for pumpkin pie, extra effort just isn’t necessary. You can make yourself a perfect pumpkin pie – silky and rich, firm enough to form slices but still soft and smooth – with no more effort than it takes to make the recipe on the back of the pumpkin can.

pumpkin pie 4

Printer Friendly Recipe
Pumpkin Pie (adapted from Bon Appetit’s Spiced Pumpkin Pie and Cook’s Illustrated’s Silky Pumpkin Pie)

1 unbaked pie crust, rolled, transferred to pan, chilled (recipe below)
1 (15-ounce) can pumpkin puree
¾ cup (5.25 ounces) granulated sugar
3 large eggs plus 1 large egg yolk
1 teaspoon vanilla extract
½ teaspoon salt
1 teaspoon ground cinnamon
½ teaspoon ground ginger
⅛ teaspoon ground allspice
⅛ teaspoon ground cloves
1 cup heavy cream

1. Adjust a rack to the middle position and heat the oven to 400 degrees.

2. Remove the pie crust from refrigerator; line the crust with foil and fill it with pie weights. Bake on a rimmed baking sheet for 15 minutes. Remove the foil and the weights; bake 5 to 10 more minutes, until the crust is golden brown and crisp. Remove the crust and baking sheet from oven. Retain the oven temperature.

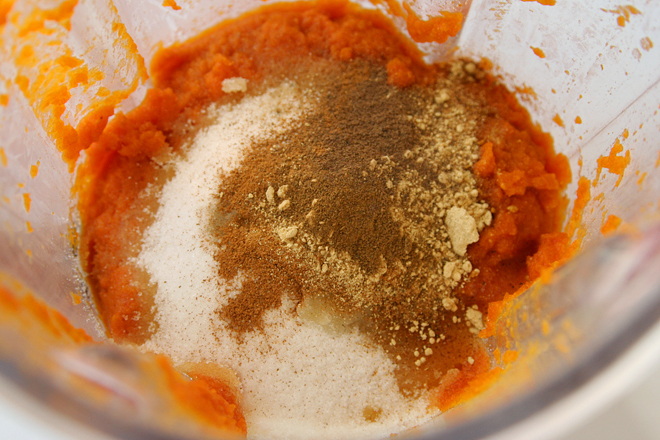
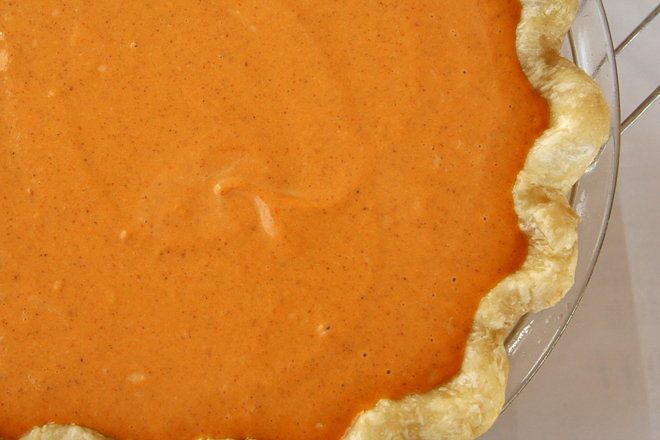
3. Combine all of the ingredients except the cream in the food processor or blender. Add the cream; pulse. Pour the mixture into the crust.

4. Return the pie plate with the baking sheet to the oven and bake the pie for 10 minutes. Reduce the heat to 300 degrees. Continue baking until the edges are set (an instant-read thermometer inserted in the center should register 175 degrees), 20 to 35 minutes longer. Transfer the pie to a wire rack and cool to room temperature, 2 to 3 hours.

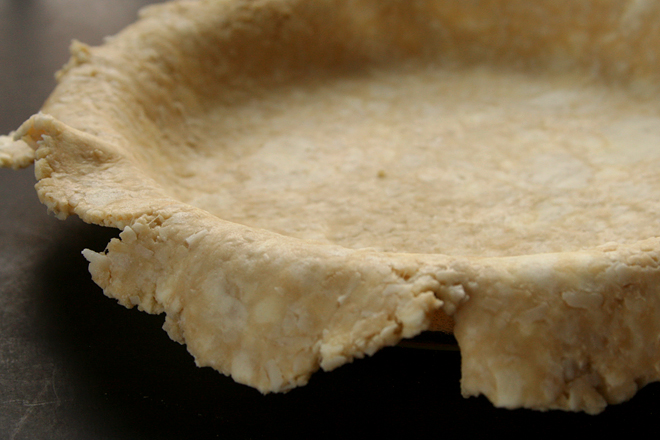
Pie Crust (rewritten from Smitten Kitchen)

1 single-crusted 9-inch pie

1¼ cups (6 ounces) all-purpose flour
½ tablespoon sugar
½ teaspoon table salt
8 tablespoons (1 stick) unsalted butter, very cold
⅓ to ½ cup ice water

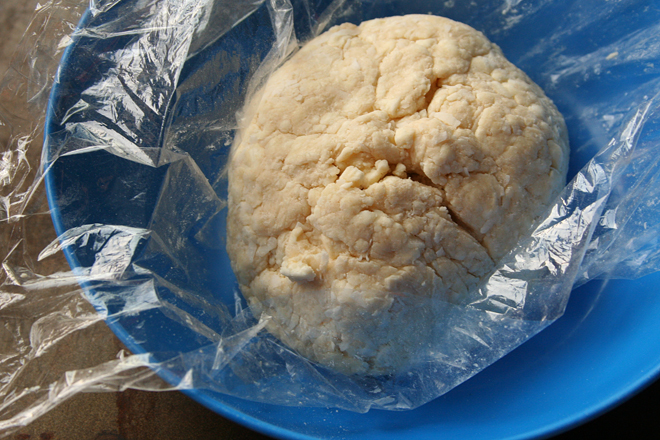
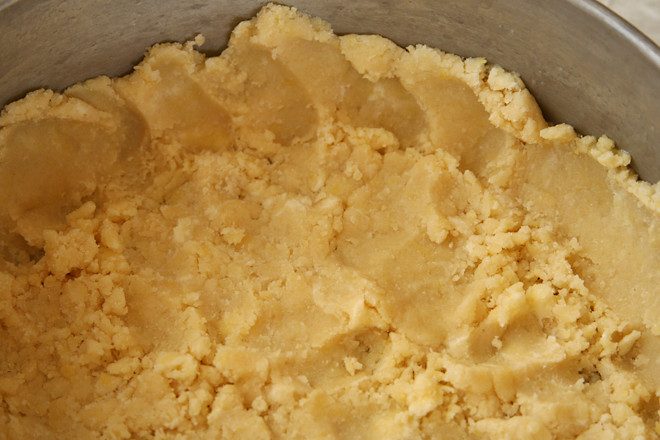
1. Mix the flour, sugar, and salt in a food processor. Cut the butter into ¼-inch cubes; add to the food processor and pulse until the largest pieces are pea-sized. Transfer the mixture to a bowl; stir in the water. Wrap in plastic wrap; chill at least 1 hour or up to 1 day. If chilled longer than an hour, leave the dough at room temperature for at least 30 minutes to soften before rolling.

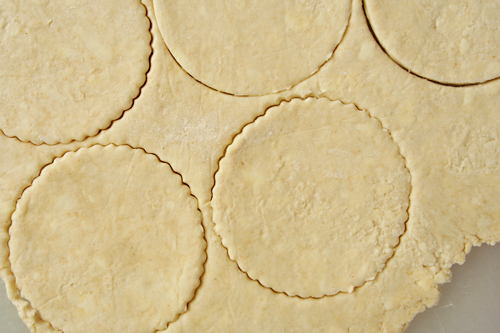
2. Roll out the dough on a generously floured work surface to make a 12-inch circle about ⅛-inch thick. Roll the dough loosely around a rolling pin and unroll into a pie plate, leaving at least a 1-inch overhang all around the pie plate.

3. Working around the circumference, ease the dough into the pans by gently lifting the edge of the dough with one hand while pressing into the plate bottom with other hand. Trim overhang to ½-inch beyond lip of pie plate. Fold overhang under itself; edge should be flush with edge of pie plate. Using thumb and forefinger, flute edge of dough. Refrigerate dough-lined plate until firm, about 15 minutes.

pumpkin pie 3

berry tart with mascarpone cream

mascapone fruit tart 4

In late August, I always start to get a little bit panicked about the end of summer. This, despite the long six months of summer we get in southern New Mexico and despite the months of temperatures reaching nearly 100 degrees. This, despite the breathtaking beauty of upstate New York’s fall, despite the pumpkins and apples, football and fall fairs that I loved when I lived there.

mascapone fruit tart 2

But for me, fall can’t beat summer. I love being not just warm, but hot. The 4th of July is my favorite holiday. Homegrown tomatoes are my favorite food. I love wearing skirts and hate wearing pants.

mascapone fruit tart 1

I love peaches and zucchini and berries. I already made Dave’s favorite pie once this summer, not that it isn’t good enough to have more often. But I was hosting an Italian-ish dinner party so wanted an Italian-ish dessert. This was perfect. A sweet cookie crust, a simple mascarpone-based creamy layer, lots of fresh berries, and none of that gelatinous shellack that fruit tarts often include. The custard layer was similar to pastry cream, but it required just a few minutes of mixing instead of egg-separating, heating, tempering, whisking, straining, and cooling.

mascapone fruit tart 3

It’s been a long, hot summer here. My tomato plants haven’t done well, although I’m grateful for the occasional fruit they do give. But I’m as ready as I ever am to move on to fall. I’m thinking about braising and roasting. But I can’t quite shake that tug of dread to say goodbye to my favorite season, and fresh berries are just part of the reason.

mascapone fruit tart 5

Printer Friendly Recipe
Berry Tart with Mascarpone Cream
(crust rewritten from Dorie Greenspan’s Baking: From my Home to Yours; filling adapted from Gourmet via epicurious)

Crust:
1½ cups all-purpose flour
½ cup (2 ounces) confectioners’ sugar
¼ teaspoon salt
1 stick plus 1 tablespoon (9 tablespoons) very cold (or frozen) unsalted butter, cut into small pieces
1 large egg yolk

Filling:
1 cup (8 ounces) mascarpone cheese
⅓ cup well-chilled heavy cream
¼ cup (1.75 ounces) sugar
1½ cups raspberries
1½ cups blueberries
1½ cups blackberries
2 tablespoons red currant jam or raspberry jelly
2 tablespoons dark berry liqueur such as blueberry, blackberry, or cassis or port

1. For the crust: Put the flour, confectioners’ sugar, and salt in a food processor and pulse to combine. Scatter the butter over the dry ingredients and pulse until the butter is coarsely cut, with some pieces the size of oatmeal flakes and some the size of peas. Stir the yolk with a fork and add it a little at a time, pulsing after each addition. Process in long pulses until the dough forms clumps and curds; the sound of the machine working will change. Scrape the sides of the processor bowl to incorporate any unmixed dry ingredients.

2. Grease a 9-inch fluted tart pan with a removable bottom. Press the dough evenly over the bottom and up the sides of the pan. Freeze the crust for at least 30 minutes before baking.

3. Center a rack in the oven and heat the oven to 375 degrees.

4. Spray a piece of aluminum foil with nonstick spray and fit the foil, oiled side down, tightly against the crust. Put the tart pan on a baking sheet and bake the crust for 25 minutes. Carefully remove the foil. If the crust has puffed, press it down gently with the back of a spoon. Bake for another 8 minutes or so, or until it is firm and golden brown. Transfer the tart pan to a rack and cool the crust to room temperature before filling.

5. For the filling: In a bowl with a whisk or an electric mixer, beat together the mascarpone, cream, and sugar until the mixture holds stiff peaks. Spoon the mixture into the shell, spreading it evenly.

6. In a large bowl, combine the raspberries, blueberries, and blackberries. In a small saucepan, simmer the jam and port, stirring, until reduced to about 3 tablespoons; pour over the berries. With a rubber spatula, gently stir the berries to coat evenly. Mound the berries decoratively on the mascarpone cream. The tart may be assembled 2 hours ahead and chilled; bring to room temperature and remove the sides of the pan before serving.

strawberry poptarts

poptarts 9

I like to keep track of things. This is why I have a website showcasing new recipes. But I also have calendars (printed out and filled in with pencil, old school) logging all the workouts I’ve done for years, a list updated daily of which projects I spend time on at work, and a color-coded Google Calendar that I check and update several times a day.

poptarts 4

This apparently wasn’t enough for me, so I’ve recently started tracking some new things – indulgences. Desserts, alcohol, restaurant meals, snacking on ingredients while making dinner – those are the biggies for me. I set goals for the month, and they are generous, and I don’t get bent out of shape if I miss them (and I always go over on both alcohol and desserts), but having it laid out in front of me in a spreadsheet does help my self-control sometimes. Is munching on this cucumber, even if it’s dipped in dressing, really worth having to log a day of ingredient snacking?

poptarts 3

There are loopholes though. Shortcake, obviously that’s dessert. But scones are breakfast, so I don’t need to record those, even if they do contain just as much butter and sugar as shortcake. Cupcakes, dessert; muffins, breakfast. Poptarts are breakfast, right?

poptarts 6

That might be a stretch, even by my standards. Yes, there is jam involved, but a spoonful of jam is squeezed between two sheets of buttery delicious pie crust. And that’s all there is to it, unless you add icing. But once you add icing, any hope of calling this anything but a treat of the most indulgent manner is lost. It went on the list as dessert, and it was worth every mark on the spreadsheet.

poptarts 10

One year ago: Banh Mi (I absolutely love this recipe)
Two years ago: Taco Pasta Salad
Three years ago: Twice Baked Potato Cups
Four years ago: Banana and Peanut Butter Stuffed French Toast

Printer Friendly Recipe
Strawberry Pop-Tarts (adapted from King Arthur Flour via Smitten Kitchen)

Makes 9 (although I made 10 out of a half recipe)

My dough was too crumbly with just one egg, so I also used part of the egg used for the egg wash.

I used the icing because I wanted my tarts to be as traditional as possible, but, it turns out, royal icing on pie just isn’t that good. It’s pretty, but I don’t recommend it for the best flavor.

I replaced a quarter of the flour with whole wheat pastry flour.

Pastry:
2 cups (8½ ounces) all-purpose flour
1 tablespoon sugar
1 teaspoon salt
2 sticks (16 tablespoons) unsalted butter, diced
1 large egg, lightly beaten
2 tablespoons milk

Filling:
1 tablespoon cornstarch
1 tablespoon water
¾ cup (8 ounces) strawberry jam

Egg wash:
1 large egg
salt

Icing:
½ cup (2 ounces) powdered sugar
1 teaspoon meringue powder
1 tablespoon water

1. For the dough: Combine the flour, sugar, and salt in a food processor. Add the butter and pulse until it is cut into pea-sized pieces. Add the egg and milk and pulse until the dough looks crumbly but stays together when pinched. Turn the dough out onto a work surface or shallow bowl, forming it into a ball and kneading a few times. Divide the dough in half and shape each half into a rectangle, about 3 by 5 inches. Wrap the dough tightly in plastic wrap; chill for at least 30 minutes or up to 2 days.

2. Meanwhile, make the filling: In a small saucepan, stir together the cornstarch and water. Mix in the jam. Bring the mixture to a simmer over medium heat; simmer for 2 minutes. Remove from the heat; cool completely before using.

3. On a lightly floured work surface, roll one portion of the dough to ⅛-inch thick, slightly larger than a 9 by 12-inch rectangle. Repeat with the second piece of dough. Trim each portion of dough into a 9 by 12-inch rectangle. Cut each piece of dough into thirds both lengthwise and crosswise, forming a total of 18 3 by 4-inch rectangles.

4. Beat the additional egg with a pinch of salt and brush it over the entire surface of half of the dough. Place a heaping tablespoon of filling into the center of each egg-brushed rectangle, keeping a bare ½-inch perimeter around the jam. Place a second rectangle of dough on top of the jam, using your fingertips to press firmly around the pocket of filling, sealing the dough well on all sides. Press the tines of a fork all around the edge of the rectangle. Repeat with remaining rectangles of dough to form 9 tarts.

5. Transfer the tarts to a baking sheet lined with parchment paper or a silicone mat. Prick the top of each tart multiple times with a fork to allow steam to escape. Refrigerate the tarts (they don’t need to be covered) for 30 minutes (or freeze for 15 minutes), while you heat your oven to 350 degrees.

6. Bake the tarts for 20 to 25 minutes, until they’re light golden brown. Transfer them to a wire rack to cool for at least 10 minutes before icing.

7. In a small bowl, beat the powdered sugar, meringue powder, and water with a hand mixer until soft peaks form. Dribble over the tarts. Let set at least 20 minutes for the icing to set.

poptarts 8

coconut cream pie (tom douglas)

coconut cream pie 5

My rules of thumb for ordering food in restaurants – get the restaurant’s specialty, if it has one, and don’t get anything I could easily make at home – failed me when I went out for dessert with Brady, Nicole, Joelen, Jessica, and another friend we met at BlogHer Food. (Hillary – get yourself a blog, would you?) I considered the coconut cream pie, but passed it over because I had no idea that it was A Thing at that restaurant. The rhubarb rose sorbet sounded great too, but I went with the lemongrass frozen yogurt. It sounded interesting, but it wasn’t. It tasted like sweetened frozen milk and was nice; not thrilling, but nice.

coconut cream pie 1

The bites I stole of Brady and Joelen’s coconut cream pie, however, were thrilling. Silky custard, mounds of whipped cream, crisp crust. How was something so basic as coconut cream pie knocking my socks off? We were all excited later when we found the recipe online. We could create this perfection ourselves!

coconut cream pie 3

But, the pie I made was not the pie I kept stealing bites from at the restaurant. The crust might have been the same, and the simple whipped cream certainly was, but my pastry cream seemed off. For one thing, I don’t remember shreds of coconut within the pastry cream at the restaurant. For another, I have my doubts about using flour as the thickener in pastry cream instead of cornstarch. I tried it because I was curious, but in the end, I prefer the silkiness of cornstarch compared to the pastiness of flour used in pastry cream.

coconut cream pie 2

The fully assembled pie was a thing of beauty, with its golden crust and mounds of whipped cream. But when I removed a slice, the sloshy unset filling flowed in to fill the gap, so that if it weren’t for the missing rim of crust, you’d never know there was a slice missing. This pie, good as it was, seemed different from the one we had at the restaurant. Or maybe it’s just that nothing can come close to the memory of sharing desserts with five friends in Seattle.

coconut cream pie 9

One year ago: Date Nut Loaf
Two years ago: Dressy Chocolate Cake
Three years ago: Strawberries and Cream Pie
Four years ago: Pigs in a Blanket

Printer Friendly Recipe
Triple Coconut Cream Pie (adapted from Tom Douglas)

Makes one 9-inch pie

Shredded coconut in the crust was an interesting idea that I enjoyed, but for the filling, I prefer this recipe.

Crust:
1 cup plus 2 tablespoons (5.4 ounces) all-purpose flour
½ cup (2.1 ounces) sweetened shredded coconut
2 teaspoons sugar
¼ teaspoon salt
½ cup (1 stick) cold unsalted butter, cut into ½-inch cubes
⅓ cup ice water, or more as needed

Pastry cream:
½ cup heavy cream
1½ cups whole milk
2 cups sweetened shredded coconut
1 vanilla bean, halved lengthwise, seeds scraped out and reserved
¼ teaspoon salt
2 large eggs
½ cup plus 2 tablespoons (4.4 ounces) sugar
3 tablespoons all-purpose flour
¼ cup (½ stick) unsalted butter, softened

Assembly:
2 cups heavy whipping cream, chilled
¼ cup (1.75 ounces) sugar
1 teaspoon pure vanilla extract
2 ounces unsweetened “chip” or large-shred coconut
Chunks of white chocolate (4 to 6 ounces, to make 2 ounces of curls)

1. For the crust: In a food processor, pulse to combine the flour, coconut, sugar, and salt until combined. Add the diced butter; pulse until the butter is broken into pea-sized bits, 6-8 one-second pulses. Stop the machine and pour in about half of the water; pulse twice, then add the remaining water. Pulse 3-4 more times, then test the dough by gently pressing it between your fingers; it should just hold together; if it doesn’t, add a couple teaspoons water and pulse to combine again. Line a wide, shallow bowl with a large sheet of plastic wrap; transfer the dough to lined bowl. Pull the plastic wrap around the dough, then flatten it to a round about 1-inch high. Chill for 30 minutes to an hour before rolling. (The dough can be prepared a day in advance, and stored, wrapped tightly, in the refrigerator.)

2. Unwrap the round of dough and place it on a lightly floured work surface. Dust the dough lightly with flour, then cover with a sheet of plastic wrap. Roll the dough into a 12- to 13-inch circle about ⅛-inch thick, adding more flour if it begins to stick. Transfer the rolled dough onto a 9-inch pie pan. Trim any excess to a 1- to 1½-inch overhang. Turn the dough under along the rim of the pie pan and use your fingers to flute the edge. Cover with plastic wrap and chill the unbaked pie crust at least an hour before baking.

3. Heat the oven to 400°F. Place a sheet of aluminum foil or parchment paper in the pie crust and fill the cavity with dried beans or pie weights. Bake the crust until the edge is just golden, 20 to 25 minutes. Remove the pan from the oven, lift off the foil and weights, and return the crust to the oven. Bake until the bottom of the crust shows golden-brown patches, 10 to 12 minutes more. Transfer the crust to a cooling rack and cool completely before filling.

4. For the pastry cream: In a medium saucepan, combine the heavy cream, milk, coconut, vanilla seeds and pod, and salt. Place the saucepan over medium-high heat and stir the mixture occasionally until it begins to steam and tiny bubbles start to form around the pan’s edges. (But don’t let it come to a boil.) Remove the pan from the heat.

5. In a medium bowl, whisk together the eggs, sugar, and flour until well combined. Whisking continually, slowly add about one-third of the scalded milk into the egg mixture. Pour the warmed egg mixture to the milk and coconut mixture in the saucepan. Place the pan over medium-high heat and whisk until the mixture thickens and begins to bubble. Keep whisking until the pastry cream is very thick, 4 to 5 minutes more. Remove the saucepan from the heat. Add the butter and whisk until it melts. Remove and discard the vanilla pod. Transfer the pastry cream to a bowl, then place it over another bowl filled with ice water. Stir occasionally until it is cool. Place a piece of plastic wrap directly on the surface of the pastry cream to prevent a crust from forming, and refrigerate until cold, about an hour. The cream will thicken as it cools.

6. To finish the pie: Heat the oven to 350°F. Spread the coconut chips over a baking sheet. Bake the chips, stirring once or twice, until lightly browned, 7 to 8 minutes. Meanwhile, use a vegetable peeler to shave about 2 ounces of the white chocolate into curls.

7. Pour the chilled pastry cream over the prebaked pie crust, smoothing the surface with a spatula.
In an electric mixer fitted with whisk attachment, beat the heavy cream with the sugar and vanilla on medium speed. Gradually increase the speed to high, and whip to peaks that are firm enough to hold their shape. Spread the whipped cream over the surface of the pie. Just before serving, decorate the pie with the toasted coconut and white chocolate curls.

coconut cream pie 6

strawberry rhubarb pie

strawberry rhubarb pie 9

My parents have a cabin in the mountains in Colorado, where they have a neighbor who is officially a Mountain Man, with a long scraggly beard, horses running around on his property, and the requisite amount of woman trouble. One day the Mountain Man and I got to talking about pie. He declared that pie is simple – it’s a mixture of fruit, flour, and sugar baked in a crust. I don’t recall whether we discussed his crust recipe, but I have to believe it comes from a vacuum-packed tube.

strawberry rhubarb pie 10

While I can agree that fruit pies are, at their most basic, a mixture of fruit, sugar, and thickener, I would disagree that that makes them simple. In fact, it makes them particularly tricky. First, the best thickener for each fruit varies – is it flour, cornstarch, tapioca, or something impossible to find in the average grocery store? Second, and worse, is that the perfect amount of thickener will vary depending on how ripe the fruit is. Exceptionally juicy peaches will need more thickener (and less sugar) than just barely ripe peaches.

strawberry rhubarb pie 1

I’ve gotten strawberry rhubarb pie wrong at least as often as I’ve gotten it right. Cook’s Illustrated has a recipe for it that starts with sautéing the rhubarb with sugar to get rid of some of the excess liquid. I did make an awesome pie with this recipe, but it resulted in the worst burn I’ve ever had when a chunk of super hot sugar-coated rhubarb landed on my foot. Plus it’s a hassle – who wants to deal with pre-cooking the filling in addition to rolling out dough and chopping filling ingredients?

strawberry rhubarb pie 3

I tried Deb’s recipe last year, which calls for tapioca as the thickener, but didn’t like the bits of gelatinous tapioca mixed with the fruit filling. I thought the answer was grinding the tapioca to a powder with a spice grinder (aka repurposed coffee grinder) until I saw Cook’s Illustrated comment (in The New Best Recipe) that tapioca and rhubarb don’t make a great pair. I happen to have arrowroot powder in the cabinet, so I used that instead.

strawberry rhubarb pie 5

And what I got was a perfect strawberry rhubarb pie. When the first slice was removed, the filling didn’t flow in to fill the void, but it wasn’t dry. It was just sweet enough. I didn’t use flour in the filling, but I still think that even Mountain Man would approve.

strawberry rhubarb pie 6

One year ago: Whole Wheat Almond Bread
Two years ago: Jamaican Jerk Chicken
Three years ago: Strawberry Tartlets
Four years ago: Deep Dark Chocolate Cookies

Printer Friendly Recipe
Strawberry Rhubarb Pie (adapted from Smitten Kitchen)

I used Deb’s recipe for pie crust.

If you can’t find arrowroot powder, use ¼ cup of tapioca, ground in a spice grinder.

Baking the pie on a baking sheet catches any drips; preheating the baking sheet helps the bottom crust become crisp and flaky instead of soggy.

dough for a double-crust pie, rolled into two 13-inch circles and refrigerated
½ cup + 2 tablespoons (4.4 ounces) granulated sugar
¼ cup (1.75 ounces) light brown sugar
¼ cup arrowroot powder
¼ teaspoon salt
24 ounces (about 3½ cups) rhubarb, sliced ½-inch thick
16 ounces (about 3½ cups) strawberries, hulled and sliced if big, halved if small
1 tablespoon lemon juice
1 tablespoon unsalted butter, cut into small pieces
1 egg beaten to blend with ¼ teaspoon salt (for glaze)

1. Place a rimmed baking sheet on the middle rack of the oven; heat the oven to 400 degrees.

2. In a large bowl, mix the sugars, arrowroot powder, and salt. Add the rhubarb, strawberries, and lemon juice; stir to combine well.

3. Line a 9-inch pie plate with one round of dough. Transfer the filling to the lined pan. Scatter pieces of butter over the fruit. Top with the second round of dough, sealing and fluting the edges. Cut 8 slits in the top crust and brush with the egg wash.

4. Transfer the pie to the hot baking sheet. Bake for 20 minutes, then reduce the oven temperature to 350 degrees; bake for an additional 25 to 30 minutes, or until the top crust is golden brown and the filling is bubbly.

5. Transfer the pie to a wire rack and cool at least 4 hours before serving.

strawberry rhubarb pie 8

hidden berry cream cheese torte

berry cream cheese torte 7

I don’t think of myself as much of a shopper. The majority of the clothes I’ve bought over the last year have been thrifted, I rarely buy books or CDs since we moved to a town without a big bookstore, I have no interest in cars beyond dependability and gas mileage, and the only decorations in my office at the place I’ve worked for a year and a half are a bird-shaped mirror that makes me smile every time I see it and three posters on local geology that a coworker was trying to get rid of.

berry cream cheese torte 2

But ingredients are becoming a weakness. I blame living in a small isolated town; because there are so many foods I can’t buy here, when I do have access to a fun new ingredient, I snatch it up. This is why I have a container of truffle salt I’ve only used once and several types of ground and whole mustard seeds which I never got around to using in homemade mustard recipes. It’s probably a good thing Dave rushed me out of the Middle Eastern market we went to for lunch in Albuquerque, so I only had time to buy a container of za’atar and a jar of boysenberry preserves.

berry cream cheese torte 1

I haven’t used the za’atar yet, but the jam was perfect in this light, creamy cheesecake. I added a little more than the recipe called for, and I wished I had used even more. This is one impulse buy I don’t regret one bit.

berry cream cheese torte 4

One year ago: Cardamom Crumb Cake
Two years ago: Cafe Volcano Cookies
Three years ago: Buttery Jam Cookies

Printer Friendly Recipe
Hidden Berry Cream Cheese Torte (from Dorie Greenspan’s Baking: From my Home to Yours)

8 servings

I used 8 ounces of cream cheese, since that’s the normal size of the packages. I also left out the spices.

Crust:
1¾ cups all-purpose flour
½ cup (3.5 ounces) sugar
¼ teaspoon salt
1½ sticks (12 tablespoons) unsalted butter, cut into small pieces and chilled
2 large egg yolks
1 teaspoon pure vanilla extract

Filling:
⅓ cup thick berry or cherry jam
9 ounces cream cheese, at room temperature
8 ounces (1 cup) cottage cheese, at room temperature
¾ cup sugar
¼ teaspoon salt
Pinch of ground cinnamon
Pinch of freshly grated nutmeg
2 large eggs, preferably at room temperature
Confectioners’ sugar, for dusting (optional)

Getting ready: Butter a 9-inch springform pan, dust the inside with flour, and tap out the excess. Place on a baking sheet lined with parchment or a silicone mat.

To make the crust: Put the flour, sugar and salt in a food processor and pulse just to blend. Toss in the pieces of butter and pulse until the mixture resembles coarse meal. Stir the egg yolks and vanilla together with a fork, and, still pulsing the machine, add them and continue to pulse until the dough comes together in clumps and curds—restrain yourself, and don’t allow the dough to form a ball.

Turn the dough out onto a work surface. If you want to roll the dough, gather it into a ball, wrap it in plastic wrap and refrigerate it for about 20 minutes before rolling. (I like to roll this, and all sweet crusts, between sheets of plastic wrap.) Or simply press the dough into the pan. The dough should come about 1½ inches up the sides of the springform. Refrigerate for at least 30 minutes.

Center a rack in the oven and preheat the oven to 375 degrees. Fit a piece of buttered aluminum foil against the crust, covering it completely. Fill the crust lightly with rice, dried beans or pie weights and slide the pan into the oven. Bake the crust for 20 minutes, then carefully remove the foil and weights and bake for another 5 minutes or so—you don’t want the crust to get too brown. Transfer to a rack to cool while you make the filling. Lower the oven temperature to 350 degrees.

To make the filling: Stir the jam and spread it over the bottom of the crust—it’s okay to do this while the crust is still warm.

Put the cream cheese and cottage cheese into the food processor and process, scraping down the sides of the bowl a few times, for 2 minutes, until you’ve got a smooth, satiny mix. Add the sugar, salt and spices and process for another 30 seconds. With the machine running, add the eggs and process, scraping the bowl as needed for a final minute. Pour the filling over the jam.

Bake the cake for 60 to 70 minutes, or until the filling is uniformly puffed and no longer jiggly. Gently transfer the springform pan to a cooling rack and allow the torte to cool to room temperature, during which time the filling will collapse into a thin, elegant layer.

Run a blunt knife between the crust and the sides of the pan, then open and remove the sides of the springform. If the sides of the crust extend above the filling and you don’t like this look, very gently saw off the excess crust using a serrated knife. Chill the torte slightly or thoroughly before serving and dust with confectioner’s sugar.

berry cream cheese torte 5

apple pie cake

apple pie cake 13

Those accursed diamonds. Dorie Greenspan tells a cute story about how her grandmother used to make a similar recipe to this one and cut it into diamonds. Notably however, Dorie did not suggest the diamond shape. She recommends squares.

apple pie cake 2

But I thought the diamonds sounded so elegant and pretty. I considered and then disregarded how fragile the sharp diamond corners would be. I also considered and disregarded the impracticality of cutting a rectangular pan of pie-cake into diamonds. I powered on.

apple pie cake 6

The result was more crumbs than diamonds. I usually consider the fallen crumbs to be a little treat to snack on, but when half of a large pan of pie-cake crumbles as you cut it, that can be dangerous. Once the crumbs started getting really out of control, I shoved them all in a bowl before I could even consider eating them.

apple pie cake 7

Bu not even one coworker mentioned the broken diamonds when they came by to tell me that these might be the best thing I’ve ever brought to share. It didn’t even get mentioned when one coworker announced over the intercom how amazing they were. (I blushed.) I’m actually a little bit glad that I cut them into impractical diamonds, because now I have a bowl full of apple pie-cake crumbs stashed in my freezer.

apple pie cake 10

One year ago: Almost-Fudge Gateau
Two years ago: Sugar-Topped Molasses Spice Cookies
Three years ago: Thanksgiving Twofer Pie

Printer Friendly Recipe
Russian Grandmother’s Apple Pie-Cake (from Dorie Greenspan’s Baking: From my Home to Yours)

As usual with Dorie’s recipes, I bumped up the salt – ¾ teaspoon in the dough and a pinch in the apples. And I completely forgot the raisins.

For The Dough
2 sticks (8 ounces) unsalted butter, at room temperature
1 cup sugar
2 large eggs
1 tablespoon baking powder
½ teaspoon salt
Juice of 1 lemon
3¼ – 3½ cups all-purpose flour

For The Apples
10 medium apples, all one kind or a mix
Squirt of fresh lemon juice
1 cup moist, plump raisins (dark or golden)
¼ cup sugar
1¼ teaspoons ground cinnamon

Sugar, preferably decorating (coarse) sugar, for dusting

To Make The Dough: Working with a stand mixer, preferably fitted with a paddle attachment, or with a hand mixer in a large bowl, beat the butter and sugar together on medium speed until smooth, about 2 minutes. Add the eggs and continue to beat until the mixture is light and fluffy, about 3 minutes more. Reduce the mixer speed to low, add the baking powder and salt and mix just to combine. Add the lemon juice – the dough will probably curdle, but don’t worry about it. Still working on low speed, slowly but steadily add 3¼ cups of the flour, mixing to incorporate it and scraping down the bowl as needed. The dough is meant to be soft, but if you think it looks more like a batter than a dough at this point, add the extra ¼ cup flour. (The dough usually needs the extra flour.) When properly combined, the dough should almost clean the sides of the bowl.

Turn the dough out onto a work surface, gather it into a ball and divide it in half. Shape each half into a rectangle. Wrap the dough in plastic wrap and refrigerate for at least 2 hours, or for up to 3 days. (The dough can be wrapped airtight and frozen for up to 2 months; defrost overnight in the refrigerator.)

To Make The Apples: Peel and core the apples and cut into slices about ¼ inch thick; cut the slices in half crosswise if you want. Toss the slices in a bowl with a little lemon juice – even with the juice, the apples may turn brown, but that’s fine – and add the raisins. Mix the sugar and cinnamon together, sprinkle over the apples and stir to coat evenly. Taste an apple and add more sugar, cinnamon, and/or lemon juice if you like.

Getting Ready to Bake: Center a rack in the oven and preheat the oven to 375 degrees F. Generously butter a 9×13-inch baking pan (Pyrex is good) and place it on a baking sheet lined with parchment or a silicone mat.

Remove the dough from the fridge. If it is too hard to roll and it cracks, either let it sit at room temperature for about 15 minutes or give it a few bashes with your rolling pin to get it moving. Once it’s a little more malleable, you’ve got a few choices. You can roll it on a well-floured work surface or roll it between sheets of plastic wrap or wax paper. You can even press or roll out pieces of the dough and patch them together in the pan – because of the baking powder in the dough, it will puff and self-heal under the oven’s heat. Roll the dough out until it is just a little larger all around than your pan and about ¼ inch thick – you don’t want the dough to be too thin, because you really want to taste it. Transfer the dough to the pan. If the dough comes up the sides of the pan, that’s fine; if it doesn’t that’s fine too.

Give the apples another toss in the bowl, then turn them into the pan and, using your hands, spread them evenly across the bottom.

Roll out the second piece of dough and position it over the apples. Cut the dough so you’ve got a ¼ to ½ inch overhang and tuck the excess into the sides of the pan, as though you were making a bed. (If you don’t have that much overhang, just press what you’ve got against the sides of the pan.)

Brush the top of the dough lightly with water and sprinkle sugar over the dough. Using a small sharp knife, cut 6 to 8 evenly spaced slits in the dough.

Bake for 65 to 80 minutes, or until the dough is a nice golden brown and the juices from the apples are bubbling up through the slits. Transfer the baking pan to a cooling rack and cool to just warm or to room temperature. You’ll be tempted to taste it sooner, but I think the dough needs a little time to rest.

apple pie cake 14

butternut squash pie

squash pie 7

The winter squashes are a multifaceted group. Pumpkin is obviously perfect with sweet flavors and can be used in custards, pies, cakes, quick breads, cookiesthe whole dessert (or breakfast!) spectrum. Pumpkin does take well to savory dishes, but it’s more common that you’ll see butternut squash used in dinner instead – despite their very similar flavor.

squash pie 3

Furthermore, pumpkin in desserts is nearly always pureed. Squash in dinner is often diced, sometimes pureed. This pie, with its diced butternut squash, did not follow the rules.

squash pie 4

My brain had some trouble deciding if this was dessert or dinner, is what I’m saying. The pears and raisins were obviously sweet, but the big chunks of squash had a strong earthy tone. I think with more sugar and smaller chunks of squash, they would blend into the other pie ingredients, and the whole thing would seem more dessert-like. It isn’t bad as it is, but, perhaps, a little confusing.

squash pie 9

Valerie chose this for Tuesdays with Dorie, and she has the recipe posted. Instead of steaming the squash, I roasted all of the filling ingredients except the orange juice in the oven until the squash was softened, mostly because my oven was already on but also to potentially get some delicious caramelization.  Because roasting drove off some liquid, I didn’t feel I needed to add the breadcrumbs to the filling.

Two years ago: Buffalo Chicken Pizza
Three years ago: Gallitos (Costa Rican Breakfast Tacos)

squash pie 6

apple brandy hand pies

apple brandy hand pies 8

Adding ‘brandy’ to the title of this recipe is probably an exaggeration, because I suspect most of the brandy gets left behind in the sugary liquid given off by the apples. Plus, with two teaspoons of brandy in over a dozen hand pies, that’s approximately one drop per pie. On the other hand, how much more fun do apple brandy hand pies sound than apple hand pies? A lot more fun, that’s how much.

apple brandy hand pies 2

And these are fun. To eat, that is; to make, they’re a lot of nitpicky chilling steps. You measure the ingredients and chill them; make the dough and chill it; roll it out and chill it; cut circles and chill them; fill the hand pies and chill them.

apple brandy hand pies 3

It isn’t too bad though; you don’t have to actually do anything during those chilling steps, so it’s really just an issue of starting early. The reward at the end is crust so flaky it’s almost like puff pastry dough, not to mention a sweet and spicy apple filling – whether it’s actually spiked with brandy or not.

apple brandy hand pies 5

One year ago: Coconut Cream Tart/Pie
Two years ago: Sun-Dried Tomato Jam
Three years ago: Peter Reinhart’s Pizza

Printer Friendly Recipe
Apple Brandy Hand Pies (adapted from Smitten Kitchen and from Cooks Illustrated’s apple pie recipe in The New Best Recipe)

Makes about 14 pies

Dough:
1¼ cups (6 ounces) all-purpose flour
¼ teaspoon salt
½ tablespoon sugar
8 tablespoons (1 stick) unsalted butter, cut into pieces
¼ cup Greek yogurt or sour cream
2 teaspoons fresh lemon juice
¼ cup ice water

Filling:
2 large apples, peeled, cored, diced into ¼-inch cubes
1 teaspoon lemon juice
1 teaspoon apple (or regular) brandy
¼ teaspoon lemon zest
¼ cups (1.75 ounces) sugar
2 teaspoons all-purpose flour
⅛ teaspoon salt
½ teaspoon cinnamon
⅛ teaspoon ground nutmeg
⅛ teaspoon ground allspice

1. To make the pastry, in a bowl, combine the flour, sugar and salt. Place the butter in another bowl. Place both bowls in the freezer for 1 hour. Remove the bowls from the freezer and make a well in the center of the flour. Add the butter to the well and, using a pastry blender, cut it in until the mixture resembles coarse meal. Make another well in the center. In a small bowl, whisk together the sour cream, lemon juice and water and add half of this mixture to the well. With your fingertips, mix in the liquid until large lumps form. Remove the large lumps and repeat with the remaining liquid and flour-butter mixture. Pat the lumps into a ball; do not overwork the dough. Cover with plastic wrap and refrigerate for 1 hour. If preparing ahead of time, the dough can be stored at this point for up to one month in the freezer.

2. On a lightly floured work surface, roll out one half of the dough to ⅛-inch thickness. Using a 4-inch-round biscuit cutter, cut seven circles out of the rolled dough. Transfer the circles to a parchment-lined baking sheet, and place in the refrigerator to chill for about 30 minutes.

3. Toss the apples with the lemon juice and zest. In a medium bowl, mix the sugar, flour, salt and spices. Toss the dry ingredients with the apples.

4. Remove the chilled dough from the refrigerator, and let stand at room temperature until just pliable, 2 to 3 minutes. Spoon about 1 tablespoon of filling onto one half of each circle of dough. Quickly brush cold water around the circumference of the dough, and fold it in half so the other side comes down over the filling, creating a semicircle. Seal the hand pie, and make a decorative edge by pressing the edges of the dough together with the back of a fork. Repeat the process with remaining dough and filling. Place the hand pies back on the parchment-lined baking sheet, and return to the refrigerator to chill for another 30 minutes.

5. Heat the oven to 375 degrees. Remove the chilled hand pies from the refrigerator, cut 3 small slits in each and lightly brush with the egg yolk wash. Sprinkle sanding sugar generously over the pies. Bake until the hand pies are golden brown and just slightly cracked, about 20 minutes. Remove the pies from the oven; let cool slightly before serving.

apple brandy hand pies 7

summer berry pie

summer berry pie 5

Dave enjoys and then forgets the vast majority of what I give him to eat. And how not to? I make so many different things that even I’m surprised sometimes when I scan through old unused pictures (two types of cucumber salad? orange-glazed tofu? raspberry muffins? The pictures prove I made these things, but I don’t remember any of it).

summer berry pie 3

But once in a while, I make something that stands out to Dave enough to not only remember it, but request it again and again, even years later. I hadn’t made this pie in two years, but once berries start to come into season, Dave starts asking about it.

summer berry pie 4

Often, fresh fruit pies are associated with the gel-shellacked versions you get in buffet lines. This pie replaces that gel with the barest coating of fruit jelly, which gives the fruit a beautiful shine without adding any flavorless goo. Instead, a layer of fruit puree holds the filling together while intensifying the bright berry flavor. With ripe sweet berries and a dollop of freshly whipped cream, it’s no wonder this dessert is so memorable.

summer berry pie 6

One year ago: Triple Chocolate Espresso Brownies
Two years ago: Strawberries and Cream Pie
Three years ago: Croque Madame

Printer Friendly Recipe
Summer Berry Pie (from Cooks Illustrated)

Serves 8 to 10

Currant jelly is smooth and bright red, so very attractive in this pie. However, I didn’t want to buy it because I don’t use it for anything else. I used raspberry jam, which I probably should have strained but didn’t.

Crust:
5 ounces graham crackers, broken into rough pieces (9-11 full crackers)
2 tablespoons granulated sugar
5 tablespoons unsalted butter, melted and warm

Filling:
2 cups (about 9 ounces) fresh raspberries
2 cups (about 11 ounces) fresh blackberries
2 cups (about 10 ounces) fresh blueberries
½ cup (3½ ounces) granulated sugar
3 tablespoons cornstarch
⅛ teaspoon table salt
1 tablespoon lemon juice
2 tablespoons red currant jelly

Whipped cream:
1 cup heavy cream (cold)
1 tablespoon granulated sugar
1 teaspoon vanilla extract

1. FOR THE CRUST: Adjust an oven rack to the middle position and heat the oven to 325 degrees. In a food processor, process the graham crackers until evenly fine, about 30 seconds. You should have one cup of crumbs. Add the sugar; pulse to combine. Continue to pulse while adding the warm melted butter in a steady stream; pulse until the mixture resembles wet sand. Transfer to a 9-inch glass pie plate; use the bottom of a ramekin or measuring cup to press the crumbs evenly into the bottom and up the sides. Bake the crust until fragrant and beginning to brown, 15 to 18 minutes; transfer to wire rack and cool completely while making the filling.

2. FOR THE FILLING: Combine the berries in a large colander and gently rinse; spread the berries on towel-lined rimmed baking sheet and gently pat dry with additional towels.

3. In a food processor, puree 2½ cups of the mixed berries until smooth and fully pureed, about 1 minute. Strain the puree through a mesh strainer into small nonreactive saucepan, scraping and pressing on seeds to extract as much puree as possible (you should have 1¼ to 1½ cups). Whisk the sugar, cornstarch, and salt in a small bowl to combine, then whisk the mixture into the puree. Bring the puree to a boil over medium heat, stirring constantly with a wooden spoon; when the mixture reaches a boil and is thickened to consistency of pudding, remove from heat, stir in the lemon juice, and set aside to cool slightly.

4. While the puree is cooling, place the remaining berries in a medium bowl. Heat the jelly in a second small saucepan over low heat until fully melted; drizzle the melted jelly over the berries and gently toss them together until the berries are glazed. Pour the slightly cooled puree into the cooled pie shell and smooth the top with a rubber spatula. Distribute the glazed berries evenly over the puree and gently press into the surface. Loosely cover pie with plastic wrap; refrigerate until chilled and the puree has set, about 3 hours (or up to 1 day).

5. FOR THE WHIPPED CREAM: Add the cream, sugar, and vanilla to the chilled bowl of an electric mixer. Beat at low speed until small bubbles form, about 30 seconds. Increase the speed to high and continue beating until the cream is smooth, thick, and nearly doubled in volume, about 20 seconds for soft peaks or about 30 seconds for stiff peaks. If necessary, finish beating by hand to adjust the consistency.

summer berry pie 7