kale caesar salad

kale caesar salad 5

Dave and I have a friend who we affectionately refer to as Crazy Running Guy. He’s training for a marathon right now, which means he’s running upwards of 80 miles per week. He ran the Boston marathon several years ago (thankfully not the year of the bombing) and was deeply disappointed by his time of 2 hours and 40 minutes.

kale caesar salad 1

It’s not unusual for us to invite him over for dinner on Saturday, and he and Dave will hang out at the bar in the kitchen while I cook…and cook…and cook some more. We’ll eat tiny servings of five or even seven different courses. Sometimes I have some prep done ahead of time and get to relax a bit, but other times, I spend almost the whole evening on my feet, except when I’m eating. I’m enjoying myself, and no one else seems disturbed that I’m cooking more than socializing.

kale caesar salad 3

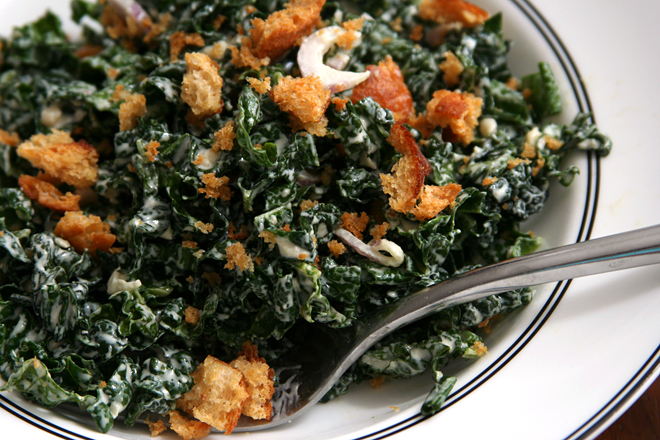
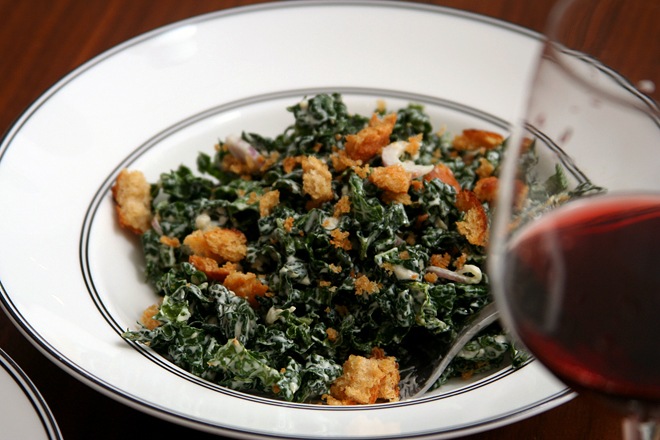
He isn’t much into cooking, but in a strange way, I feel like he gets me. He’s our Crazy Running Friend; I’m his Crazy Cooking Friend. Which, when you think about it, is a good match, right? Fortunately, he isn’t picky and eats almost anything I throw at him. He didn’t seem fazed at all by kale caesar salad. He didn’t get any wine though, due to a tough run planned for the next day. No wine? I definitely prefer being crazy about cooking instead of running.

kale caesar salad 6

Printer Friendly Recipe
Kale Caesar Salad (slightly adapted from The Food Lab)

4 to 6 servings

As always, I substituted Greek yogurt for a portion of the mayonnaise.

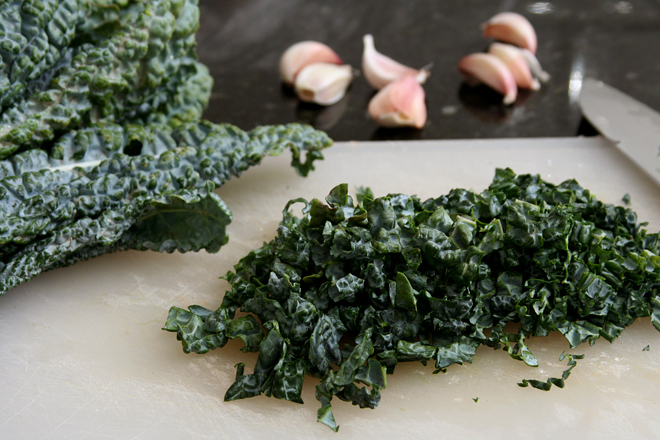
1 pound (about 2 bunches) Tuscan, tough stems removed, leaves roughly chopped (about 4 quarts loosely packed leaves)
4 tablespoons extra-virgin olive oil, divided
5 ounces hearty bread, roughly torn into 1-inch pieces
Kosher salt and freshly ground black pepper
⅔ cup mayonnaise
6 anchovy filets, minced
1 medium clove garlic, minced (about 1 teaspoon)
1½ ounces (about ¾ cup) Parmigiano-Reggiano, finely grated
2 teaspoons Worcestershire sauce
2 tablespoons juice from 1 lemon
1 small white onion or 2 shallots, finely sliced

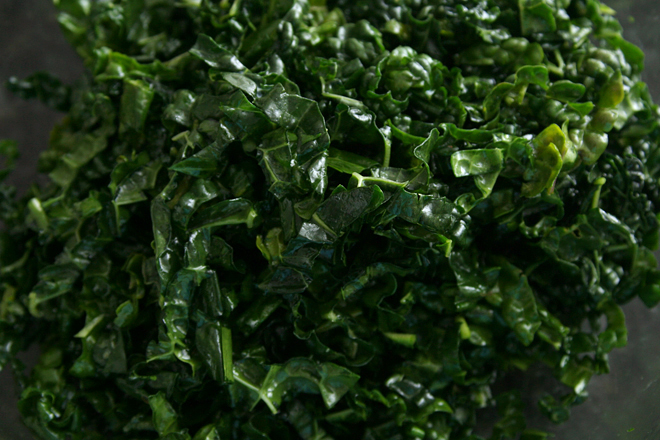
1. Place a rimmed baking sheet on the middle rack of the oven and heat the oven to 400 degrees. In a large bowl, combine the kale and 2 tablespoons of the oil. Use your hands to knead the oil into the kale until the kale is dark green and slightly softened, about 2 minutes.

2. Transfer the bread, 1 tablespoon oil, and salt and pepper to taste to a food processor fitted with the metal blade. Pulse until the largest pieces of bread are about the size of a chickpea. Remove the preheated baking sheet from the oven. Add the remaining one tablespoon of oil to the pan, using a spatula to spread it evenly. Transfer the bread pieces to the pan. Bake until toasted, about 15 minutes, stirring once halfway through the baking time. Let cool slightly.

3. Add the mayonnaise, garlic, anchovies, worcestershire sauce, lemon juice, and parmesan to the empty food processor bowl. Process until smooth.

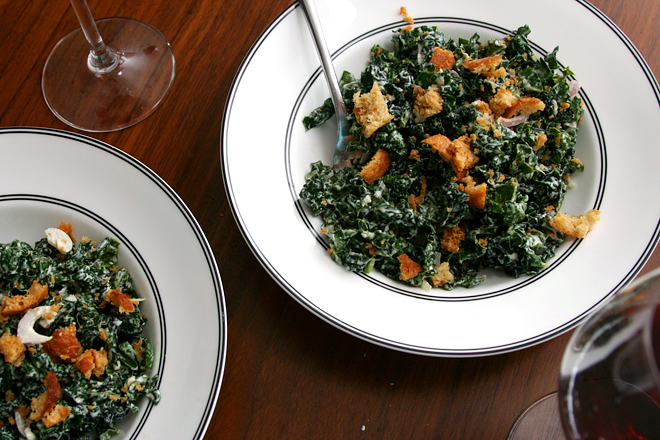
4. Add the onions, dressing, and half the bread pieces to the kale; stir to combine. Serve immediately, topping each serving with the remaining croutons.

kale caesar salad 8

noir bars

noir bars 7

When I made this, I had eight types of chocolate in my pantry, plus cocoa nibs, plus two types of cocoa. I’m a chocolate hoarder.

noir bars 3

A chocolate cookie topped with chocolate cheesecake filling and finished with chocolate ganache will make a dent in that. The cookie base only has a couple ounces of melted chocolate in it, and I considered replacing some of the flour with cocoa, because, if you’re making a chocolate dessert, it should be as chocolatey as possible, right? No. The other pound of chocolate in the pan is quite enough.

noir bars 4

The middle layer may call itself a cheesecake filling, but it’s made from cream cheese, melted chocolate, powdered sugar, and vanilla extract – so it’s really chocolate cream cheese frosting. Okay, so these were rich. But they were also delicious. And after making chocolate frosting the next day, I’m down to six types of chocolate. Time to start stocking up again.

noir bars 6

Printer Friendly Recipe
Noir Bars (slightly adapted from Sugarcrafter)

The only significant change I’ve made to the original recipe is to increase the cream in the ganache topping. I used the original, lower amount, but when the dessert was chilled, it was too solid – each bite squished out the filling instead of cutting through the topping.

I used a mix of 60% cacao chocolate and 80% cacao chocolate in the topping. Unless you like your chocolate really bitter, I recommend sticking to something closer to 60%.

My favorite way to melt chocolate is in a fake double boiler: Put about 1 inch of water in a saucepan and bring it to a simmer over medium-high heat. Reduce the heat to medium and place a small heatproof bowl (preferably stainless steel, but glass will work; it just takes longer in glass) over the saucepan, making sure the bottom of the bowl doesn’t touch the water. Add the chocolate and stir occasionally with a rubber spatula until the chocolate is completely melted, about 5 minutes.

Chocolate cookie base:
1¾ cup (8.4 ounces) all-purpose flour
½ teaspoon baking soda
8 tablespoons (1 stick) unsalted butter, softened
1 cup (7 ounces) granulated sugar
½ teaspoon salt
1 egg
1 teaspoon vanilla
2 ounces semisweet chocolate, chopped (⅓ cup), melted

Chocolate cheesecake filling:
2 (8-ounce) packages cream cheese, softened
8 tablespoons (1 stick) butter, softened
pinch salt
6 ounces (1½ cups) powdered sugar
4 ounces semisweet chocolate, chopped (⅔ cup), melted
1 teaspoon vanilla

Ganache:
12 ounces semisweet chocolate, chopped (2 cups), melted
1 cup heavy whipping cream

1. Adjust a rack to the middle position and heat the oven to 375 degrees. Spray a 9-by-13-inch pan with nonstick spray. In a medium-sized bowl, combine the flour and baking soda.

2. For the cookie base: Place the butter in the bowl of a stand mixer fitted with the paddle attachment (or a large mixing bowl if you’re using a hand-held mixer). Beat the butter on medium-low speed until it’s smooth, then add the sugar and salt. Continue beating on medium speed until the mixture is light and fluffy, about 2 minutes, scraping the sides of the bowl as needed. With the mixer running, add the egg, then the vanilla and melted chocolate. Reduce the mixer speed to low and gradually add the flour mixture, mixing just until evenly combined.

3. Spread the mixture evenly in the prepared pan. Bake until set, 10-12 minutes. Transfer to a cooling rack and allow to cool to room temperature.

4. For the cheesecake filling: Place the cream cheese, butter, and salt in the bowl of a stand mixer fitted with the paddle attachment. Beat on medium-low speed until smooth. Reduce the speed to low and add the powdered sugar. When the sugar is incorporated, increase the speed to medium-high (high on a hand-held mixer) and beat until smooth and lighter, 2-3 minutes. Add the melted chocolate and vanilla. Spread the mixture over the crust. Chill until set, about 2 hours.

5. For the ganache: Stir together the chocolate and cream. Spread over the filling. Chill until set, about 1 hour.

noir bars 9

peach raspberry galette

peach raspberry galette 10

I know this is crazy, but I’ve already started on my New Year’s resolutions for 2015. Resolution-haters are always saying that they don’t need to make resolutions at the new year, because if they see changes they want to make, they just make them, regardless of the date. And I get their point, but I also think that right after the busy, indulgent holiday season when things slow down to a more manageable pace is a great time to think about personal changes. While I am expecting the next four months to be rushed, I was worried I would lose momentum by the new year, so I’m dipping my toe in now.

peach raspberry galette 2

My goals are mostly cooking-related, as usual:

1) Use more cookbooks. It’s not the first time I’ve made this resolution, but I didn’t do a great job before. This time, I’m going to make myself a schedule to stick to, and hopefully that will lead to a routine. Because I love cookbooks so much, but if I don’t use them, I feel guilty for having them.

peach raspberry galette 3

2) Cook a wider variety of cuisines. There is delicious food out there that isn’t Italian, and maybe I should try some of that once in while. I’m particularly interested in Asian food. I’m intimidated by the ingredient availability issue, but if I’m cooking more of it, I should be able to use up ingredients before they get lost in the back of the refrigerator or pantry.

peach raspberry galette 4

3) Read Harold McGee’s On Food and Cooking. Also not the first time I’ve made this resolution. I started it but got bogged down.

4) Bake more pastries. I’ve gotten into a bit of a bar cookie rut, partly because almost everything I bake is brought to work to share, and it’s easier for coworkers to grab a fruit crisp bar than a slice of pie. But after four years of almost weekly treats, my coworkers seem happy with anything I bring in.

peach raspberry galette 5

So far, I’m doing good with my not-New Year resolutions. I’ve been going to bed a little earlier almost every night to read On Food and Cooking. I recently made kung pao tofu, and last night, we had summer rolls for dinner. And I made these galettes from Tartine, perhaps my favorite baking book. Since they’re sort of pastries, so I killed two birds with one stone.

peach raspberry galette 6

My coworkers, as expected, did not mind cutting themselves a slice of galette, transferring it to a plate, and spooning a dollop of whipped cream on top. And I had fun tackling a more ambitious baking project than usual, even on a weeknight. Maybe I need to join the New Year’s resolution haters and create my own not-New Year’s resolution tradition.

peach raspberry galette 7

Printer Friendly Recipe
Raspberry Peach Galette (adapted from Elisabeth Prueitt and Chad Robertson’s Tartine)

Makes two 10-inch galettes, serving about 16

Galettes are often lauded as the lazy man’s pie, with only one crust and no crimping. This recipe belies that description. In order to maximize the flakiness of the crust, the butter is rolled into the flour several times, then the dough is rolled several more times after the water is added. I was pleasantly surprised that this process only took half an hour.

I didn’t use quite enough fruit, mostly because I was too lazy to peel and slice a fifth peach and too cheap to buy a second container of raspberries. However, I am recommending that you use the extra fruit, as my crust to fruit ratio was slightly high, even as delicious as this crust is. Tartine recommends substantially more crust, but the reduced amounts listed here (which are what I used) were perfect for two galettes (or it would be, with a little more fruit than I used).

24 tablespoons (3 sticks) unsalted butter
18 ounces (3¾ cups) unbleached flour
2 teaspoons sugar
1¼ teaspoons salt
¾ cup ice water
4 cups peaches (4-5 large peaches), peeled and pitted, sliced ⅛-inch thick
2 (6-ounce) containers raspberries
¼ to ½ cup (1.75 to 3.5 ounces) sugar, plus more for sprinkling
1 small egg, whisked with a pinch of salt

1. Cut the butter into ½-inch cubes; freeze for 10 minutes. In a medium bowl, mix the flour, sugar, and salt.

2. Transfer the dry ingredients to a pastry cloth or clean work surface; spread out to ⅓-inch thickness. Scatter the butter pieces over the flour, tossing them to coat with flour. Use a rolling pin to flatten the butter pieces into the flour. When the flour/butter mix has been rolled to the edge of your work surface, shape it back together to a ⅓-inch thickness. Repeat the rolling and reshaping three more times, until the mixture resembles large flakes.

3. Form the mixture into a pile and clear a well in the middle of the pile. Pour in the water, then use a bench scraper to mix the dough into the water with a cutting motion. Use a well-floured rolling pin to roll the dough into a rectangle about 10 by 14 inches. Fold it into thirds, then in half the opposite direction. Repeat the rolling and folding three more times. Roll the dough into a 14-inch by 7-inch rectangle. Cut the dough in half to form two 7-by 7-inch squares. Wrap the dough tightly and refrigerate for at least an hour or overnight.

4. Adjust an oven rack to the middle position and heat the oven to 375 degrees. Line two baking sheets with parchment paper or silicone mats. Roll each square of dough into a 14-inch round. Transfer the rounds to the prepared baking sheets; chill 10 minutes.

5. Divide the peaches evenly between the two dough rounds, leaving a 2-inch border. Top with the raspberries, then sprinkle 2-4 tablespoons of sugar (depending on how ripe and sweet your fruit is) over each pile of fruit. Fold the sides of dough over the fruit, pleating as necessary. Brush the dough with the egg wash, then sprinkle with sugar.

6. Bake until the fruit is bubbling and the crust is browned, 45-55 minutes. Remove from the oven and let cool on the pan. Serve warm or at room temperature.

peach raspberry galette 8

summer vegetable gratin

summer vegetable gratin 6

Can I talk about my garden some more? I’m sorry, I’m just really excited about it. I’m finding that I get nearly the same enjoyment from my vegetable garden as I do from cooking lately. I can’t stop myself from wandering between the beds, just looking at the plants; looking for new fruit growing, checking on whether anything is ripening, plucking weeds, crushing stinkbugs.

summer vegetable gratin 1

I’m so proud that I grew half of the vegetables in this dish. Despite my hit or miss success with gardening, the tomatoes, zucchini, thyme, and basil in this dish all came from the backyard (or the basil would have if I’d remembered to use it).

summer vegetable gratin 5

It’s one of those dishes that toes the line between being healthy and feeling indulgent. I brought it to a comfort food-themed potluck where I knew there would be a lot of (really delicious) cheesy baked pasta, hoping that a second helping of vegetable gratin would keep me from a third helping of macaroni and cheese. It didn’t work – I had both a second helping of gratin and a third helping of mac and cheese – but at least only my healthy-ish gratin leftovers came home with me. My favorite part of gardening is the part that involves eating, and this combination of summer vegetables and herbs is exactly why that is.

summer vegetable gratin 10

Printer Friendly Recipe
Summer Vegetable Gratin (from Cook’s Illustrated)

6-8 servings

I didn’t use this much oil. I sprayed the pan with cooking spray instead of using a tablespoon of oil, and then I used less with the garlic, maybe just 1 tablespoon instead of three.

6 tablespoons extra-virgin olive oil
1 pound zucchini, ends trimmed and sliced crosswise into ¼-inch-thick slices
1 pound summer squash (yellow), ends trimmed and sliced crosswise into ¼-inch-thick slices
2 teaspoons table salt
1½ pounds ripe tomatoes (3 to 4 large), sliced ¼-inch thick
2 medium onions, halved lengthwise and sliced thin pole to pole (about 3 cups)
¾ teaspoon ground black pepper
2 medium garlic cloves, minced or pressed through garlic press (about 2 teaspoons)
1 tablespoon minced fresh thyme leaves
1 large slice white sandwich bread, torn into quarters
2 ounces Parmesan cheese, grated (about 1 cup)
2 medium shallots, minced (about ¼ cup)
¼ cup chopped fresh basil leaves

1. Adjust an oven rack to the upper-middle position and heat the oven to 400 degrees. Brush a 13- by 9-inch baking dish with 1 tablespoon oil; set aside.

2. Toss the zucchini and summer squash slices with 1 teaspoon salt in a large bowl; transfer to a colander set over a bowl. Let stand until the zucchini and squash release at least 3 tablespoons of liquid, about 45 minutes. Arrange the slices on a triple layer of paper towels; cover with another triple layer of paper towels. Firmly press each slice to remove as much liquid as possible.

3. Place the tomato slices in a single layer on a double layer of paper towels and sprinkle evenly with ½ teaspoon salt; let stand 30 minutes. Place a second double layer of paper towels on top of the tomatoes and press firmly to dry the tomatoes.

4. Meanwhile, heat 1 tablespoon of oil in a 12-inch nonstick skillet over medium heat until shimmering. Add the onions, remaining ½ teaspoon salt, and ¼ teaspoon pepper; cook, stirring occasionally, until the onions are softened and dark golden brown, 20 to 25 minutes. Set the onions aside.

5. Combine the garlic, 3 tablespoons oil, remaining ½ teaspoon pepper, and thyme in a small bowl. In a large bowl, toss the zucchini and summer squash in half of the oil mixture, then arrange in the greased baking dish. Arrange the caramelized onions in an even layer over the squash. Slightly overlap the tomato slices in a single layer on top of the onions. Spoon the remaining garlic-oil mixture evenly over the tomatoes. Bake until the vegetables are tender and the tomatoes are starting to brown on the edges, 40 to 45 minutes.

6. Meanwhile, process the bread in a food processor until finely ground, about 10 seconds. (You should have about 1 cup crumbs.) Combine the bread crumbs, remaining tablespoon oil, Parmesan, and shallots in a medium bowl. Remove the baking dish from the oven and increase the heat to 450 degrees. Sprinkle the bread-crumb mixture evenly on top of the tomatoes. Bake the gratin until bubbling and the cheese is lightly browned, 5 to 10 minutes. Sprinkle with the basil and let sit at room temperature for 10 minutes before serving.

summer vegetable gratin 8

goat cheese-stuffed mini peppers

goat cheese stuffed peppers 3

I’ve been lucky to have a lot of opportunities for tapas lately. It started, I believe, last year when Dave and I met my brother for a weekend in Los Angeles, and we shared an exceptional tapas meal. Since then, my brother is tapas-crazy.

goat cheese stuffed peppers 1

On our family’s recent trip to the beach, we collaborated to serve nine different tapas to eleven people (in a house with no dishwasher). Two weeks later, Dave and I had the opportunity to go tailgating in the parking lot of an opera house before seeing Carmen; tapas was the obvious choice again. Less than a week after that, a friend hosted a potluck dinner, and the theme she chose was tapas.

goat cheese stuffed peppers 2

These are among some of my favorite of the options at each dinner, with nods also going to gazpacho and anything with bread (obviously). There are so many bread-based snack options that I love offering something different, especially something with vegetables. But the vegetables are filled with cheese, so they can hold their own on a table filled with garlicky shrimp and things-on-bread. With this recipe in my pocket, I’m ready for many more tapas dinners.

goat cheese stuffed peppers 4

Printer Friendly Recipe
Goat Cheese-Stuffed Mini Peppers

Makes 24 appetizers

I don’t take the seeds or veins out of these when I make them. It hasn’t been a problem.

24 miniature sweet peppers
8 ounces soft goat cheese
2 scallions, finely chopped
2 tablespoons lemon juice
Pinch salt
Pinch black pepper

1. Adjust a rack to the middle position and heat the oven to 400 degrees. Cut a 1 to 2-inch slit down the side of each pepper. Arrange the peppers in a single layer on a rimmed baking sheet, cut-side up. Roasted until softened and slightly browned, about 20 minutes. Set aside to cool slightly.

2. Meanwhile, mix the goat cheese, scallions, lemon juice, salt, and pepper. Transfer the mixture to a piping bag with a wide tip or a zip-top bag with a corner cut off. (I tried spooning the filling into the peppers once, and it didn’t work at all. Piping is definitely the way to go.)

3. Squeeze the goat cheese mixture into each pepper, widening the cut in the pepper if necessary. Serve at room temperature (can be made 2 days in advance).

meatball-stuffed zucchini

meatball zucchini 8

I joke about not being good at gardening, but the truth is, it’s no joke. I am not good at it. Every year, at least half of what I plant is a failure. This year, in fact, in one raised bed, it’s exactly half, with two tomato plants and one pepper plant doing quite well, and two tomato plants and one pepper plant not doing much of anything at all.

meatball zucchini 2

This year, I’m having more success with my zucchini plant than ever before. (Keeping with the theme, the beans in the same bed aren’t producing at all.) Maybe the disgusting and destructive squash bugs will move in eventually, but so far, so good. I get about three zucchinis each week, which has been just right for making old favorites like these enchiladas and this pasta, while also providing an opportunity to try a new favorite.

meatball zucchini 3

This has become my go-to zucchini recipe this summer. I like it as a first course, maybe with a pasta dish served afterward, but it would work well as a main dish too. If things keep going well with my zucchini plant – and in my garden, that’s not a guarantee – I might just make this once a week until the season is over.

meatball zucchini 4

Printer Friendly Recipe
Meatball-Stuffed Zucchini (adapted from Domenica Cooks and Cook’s Illustrated)

Makes 4-6 first course servings or 2 main course servings

I’ve used ground lamb for these (which is what the pictures show) because we love it, and I’ve used ground venison because someone gave us a bunch that we need to use up.

1 tablespoon olive oil
2 cloves garlic, minced, divided
1 (14-ounce) can whole tomatoes, chopped with scissors in the can
salt
1 slice white sandwich bread (crusts discarded), torn into small cubes
¼ cup buttermilk or 3 tablespoons plain yogurt thinned with 1 tablespoon milk
2 tablespoons grated Parmesan cheese, plus more for topping
1 tablespoon minced fresh parsley leaves
1 large egg yolk
pinch ground black pepper
½ pound ground beef or lamb
2 large or 3 small zucchini or summer squash, halved lengthwise, seeds scraped out and discarded

1. Heat the oven to 400 degrees. Add the oil and 1 clove of garlic to an 8-by-8-inch (or equivalent size) baking dish; transfer to the oven until the garlic is sizzling, 5-8 minutes. Stir the tomatoes and a pinch of salt into the oil; set aside.

2. In a medium bowl, combine the bread and buttermilk or yogurt and milk; set aside for 10 minutes for the bread to soften. Stir in the cheese, parsley, egg yolk, remaining garlic, ¼ teaspoon salt, and pepper. Using your hands, evenly mix in the ground meat.

3. Divide the meat mixture evenly between the halved and cored zucchini. Arrange the stuffed zucchini in the baking dish. Transfer the dish to the oven and bake until the zucchini is softened and the meat is cooked through, 30-40 minutes. Let rest for 5-10 minutes. To serve, spoon the tomato sauce over the zucchini and top with parmesan cheese.

meatball zucchini 7

quinoa puttanesca

quinoa puttanesca 1

Based on whether it leaves a bunch of half-used ingredients leftover, this may not be the best single-person dinner, but it’s one of my favorite meals for when Dave is out of town anyway. For years, Dave didn’t like anchovies or olives, so those were the things I ate when he traveled. He’s come around to both, but the tradition has stuck, and this has become a treat for myself while he’s gone.

quinoa puttanesca 3

It’s very similar to the pasta version, but I like to think quinoa is a little healthier than pasta. Certainly, quinoa has a stronger, earthier flavor, which required adjustments in the other ingredients. More briny olives, more salty capers, and more bitter parsley were all necessary to stand out next to the quinoa.

quinoa puttanesca 4

Even if it doesn’t fulfill my no-leftover-bits-of-ingredients rule for single-person dinners, it meets the rest of my criteria – easy, healthy, minimal dishes. Fortunately, I like it so much that I’m willing to make it twice in one week while Dave travels, which is the perfect way to use up the half cans of tomatoes and tuna leftover from one serving. That puts this back on the list of great meals for cooking for one.

quinoa puttanesca 2

Printer Friendly Recipe
Quinoa Puttanesca (adapted from Cook’s Illustrated’s Spaghetti Puttanesca)

4 servings

I use the higher amount of anchovies, because I love them, but I understand that not everyone shares that opinion. The tuna is not at all traditional in puttanesca, but it increases the protein of this one-pot dish.

1 tablespoon olive oil
1 teaspoon red pepper flakes
6 cloves garlic, peeled and minced
6-8 anchovies, minced
8 ounces (1⅓ cups) quinoa, rinsed and drained
1 (28-ounce) can whole tomatoes, coarsely diced in the can with scissors
2 (5-ounce) cans solid white tuna in water, drained and flaked into bite-sized pieces (optional)
¼ cup capers, drained
1 cup kalamata olives, finely chopped
¼ cup minced parsley

In the medium saucepan over medium heat, heat the olive oil, red pepper flakes, garlic, and anchovies until sizzling and fragrant, 2-3 minutes. Add the quinoa, tomatoes with their juice, and tuna (if using). Increase the heat to medium-high and bring to a simmer. Once the mixture simmers, cover, reduce the heat to low, and simmer for 15 minutes. Stir once, then replace the cover, remove the pot from the heat, and let set for another 15 minutes. Stir in the capers, olives, and parsley; serve immediately.

blackberry cake with raspberry filling

blackberry cake 9

I require a weekend for my birthday. Not a week, certainly not a month, just two days and one evening to do as many as my favorite things as possible and as few of my least favorite things. So wine and a new novel are in; laundry is most definitely out.

blackberry cake 4

Baking and eating my birthday cake is in, but I was really on top of things this year and did all the steps I don’t like so much beforehand. That includes digging around in the messy, nearly unreachable cabinet for pans, lining the pans, and pureeing and straining the fruit. All that was left to do on my actual birthday was add things to the mixer and nibble on frosting while assembling the cake.

blackberry cake 2

I’d originally made this cake for a friend’s bridal shower, but there were two issues: 1) I only got one piece, and 2) I didn’t save any for Dave. He’s pretty adamant about not being a dessert guy and even less so a cake guy, but our friends had such good things to say about the cake after the party that he was sorry he missed it.

blackberry cake 6

So choosing this year’s birthday cake wasn’t a hard decision. Making the cake wasn’t hard either, since I’d left only my favorite parts of baking for my birthday itself. I made a small cake, but I had just enough to last for my entire birthday weekend. Cake everyday is definitely on the list for an awesome birthday.

blackberry cake 10

Printer Friendly Recipe
Blackberry Cake with Raspberry Filling and Cream Cheese Frosting (cake adapted from Cook’s Illustrated White Cake recipe; filling is just barely adapted from Cook’s Illustrated Raspberry Coulis)

The bride’s wedding colors are Tiffany blue and red, so I originally made a blackberry cake hoping that it would turn out blue, like Elly’s, with raspberry filling as the red. I ended up with a purple cake with pink filling, but no one complained. However, you could mix this up with other berries – blackberries, raspberries, blueberries, or strawberries can be used in both the cake and the filling. Fresh or frozen and thawed berries can be used.

I made a three-layer cake for my birthday, and a four-layer cake for the shower, which I preferred. I love the raspberry filling, so an extra layer of it is very welcome.

For heavy decorations like the roses, increase the frosting recipe by 50% (using 12 tablespoons butter, 12 ounces cream cheese, and 6 cups powdered sugar).

Cake:
¾ cup pureed and strained blackberries (from 8 ounces of blackberries)
⅓ cup milk, at room temperature
1 teaspoon vanilla extract
2¼ (9 ounces) cups cake flour
3 teaspoons baking powder
12 tablespoons unsalted butter, at room temperature
1½ cups (10.5 ounces) sugar
¾ teaspoon salt
4 egg whites, at room temperature

Raspberry Filling:
6 ounces fresh raspberries (or thawed if frozen)
2½ to 3½ tablespoons granulated sugar
pinch table salt
1 teaspoon lemon juice

Cream Cheese Frosting:
8 tablespoons (1 stick) butter, at room temperature
8 ounces cream cheese, at room temperature
pinch salt
2 teaspoons vanilla extract
4 cups powdered sugar

1. For the cake: Heat the oven to 350F. Spray two 8-inch round cake pans with baking spray (or grease and flour the pans). Line with parchment or waxed paper and grease the paper.

2. Using a blender, puree the blackberries. Transfer them to a fine-mesh strainer set over a small bowl; use a spoon or rubber spatula to press the liquid through the strainer, discarding the seeds. Measure ¾ cup of puree. Stir the milk and vanilla extract into the blackberry puree. In a separate small bowl, combine the flour and baking powder.

3. Place the butter, sugar, and salt in the bowl of an electric mixer fitted with the paddle attachment (or a large bowl if using a hand mixer). Beat on medium speed for 2 minutes, until light and fluffy. Add the egg whites one at a time, beating well after each addition. Reduce the mixer speed to low and add one-third of the flour mixture, followed immediately by half of the blackberry mixture, mixing just until incorporated. Repeat with another third of the flour and the rest of the blackberry puree, then the last of the flour. Scrape down the sides of the bowl and mix on medium-low speed for 15 seconds longer.

4. Divide the cake between the prepared pans. Bake for 22 to 28 minutes, or until a cake tester or wooden toothpick inserted into the center comes out clean. Allow the layers to cool in the pans for 5 to 10 minutes. Invert and turn out onto wire racks and peel off the paper liners. Let stand until completely cooled before assembling the cake, at least one hour.

5. For the filling: In a medium saucepan, bring the raspberries, 1 teaspoon water, 2½ tablespoons sugar, and salt to bare simmer over medium heat, stirring occasionally; cook until the sugar is dissolved and the berries are heated through, about 1 minute longer. Transfer the mixture to the blender; puree until smooth, about 20 seconds. Strain through a fine-mesh strainer into a small bowl, pressing and stirring the puree with a rubber spatula to extract as much seedless puree as possible. (there’s no need to wash either the blender or the strainer between the blackberries and the raspberries.) Stir in the lemon juice and additional sugar, if desired. Cover with plastic wrap and refrigerate until cold, at least 1 hour. Stir to recombine before serving. Can be refrigerated in airtight container for up to 4 days.

6. For the frosting: Place the butter, cream cheese, and salt in the (clean) bowl of an electric mixer fitted with the paddle attachment; beat on medium speed until smooth. Switch to the whisk attachment; on low speed, gradually add the powdered sugar, beating until it’s just incorporated. Increase the speed to high and beat for 5 minutes, scraping down the sides of the bowl as necessary.

7. To assemble: To make the cakes easier to handle, wrap each tightly in plastic wrap and chill for at least an hour or up to overnight. Working with one cake at a time, unwrap it and use a serrated bread knife to cut the cakes horizontally in half. If you’re using a cake board, put a small spoonful of frosting in the center of it to glue the cake to the board; if you’re not using a cake board, line the perimeter of your serving dish with strips of wax paper, then put a small spoonful of frosting in the center of the serving dish. Center a layer of cake over the frosting, cut side down. Spread a thin layer of cream cheese frosting over the cake layer. Spoon 3 tablespoons of raspberry filling over the frosting, spreading it to within about an inch of the edge. Center another cake layer over the filling, cut side-down. Repeat the layering of frosting, filling, and cake twice more. Spread a thin layer of frosting evenly over the top and sides of the cake to seal in crumbs. If the layers slide around while you’re spreading the frosting, push wooden skewers from the top to the bottom of the cake in three places to secure the layers. Chill the cake, uncovered, for 30 minutes to 2 hours to set the frosting. Remove the skewers if necessary, then spread the remaining cream cheese frosting evenly over the top and sides of the cake, decorating as desired. Either transfer the cake on the cake board to a serving platter, or carefully remove the strips of wax paper to leave a clean serving platter around the sides of the cake.

blackberry cake 8

cocoa nib peanut butter bites

hippie cookies 4

You can call these Peanut Butter Bites if you want, but for me, they will forever be known as Hippie Cookies. Sweetened with dates? Fat from all-natural peanut butter? Cocoa nibs, of all things?! I kept hearing people talk about cocoa nibs, so I bought some, and it turns out that they’re not even good. They’re like chocolate, but mean. There’s no sugar in them at all, just bitterness, like that time when you were a kid and accidentally ate your mom’s unsweetened baking chocolate.

hippie cookies 2

Still, the cocoa nibs are perfect in these cookies, because it turns out that you don’t need processed sugar to make a very sweet snack; dates are plenty sweet on their own. The bitter cocoa nibs are actually the perfect balance.

hippie cookies 3

I just loved these cookies so much, and not just because I filed them under “snack” instead of “dessert” and therefore enjoyed them without guilt. They’re shockingly good, or maybe it’s just shocking to someone used to adding refined sugar and butter to everything sweet. Who knew hippie cookies would be so delicious?

hippie cookies 6

Printer Friendly Recipe
Cocoa Nib Peanut Butter Bites (adapted from Sprouted Kitchen)

Because these aren’t baked, feel free to taste and add – more salt, more cinnamon, more cocoa nibs – to your taste, as well as more peanut butter to bring the mixture together, if necessary.  The amount of salt you add will also depend on whether you use salted or unsalted peanut butter.  You could also add dark chocolate instead of cocoa nibs, although the cocoa nibs balanced the sweet dates really well.

1 cup almonds
¼-½ teaspoon table salt
1 cup pitted dates
1 teaspoon vanilla extract
¼ teaspoon cinnamon
½ cup natural peanut butter
½ cup cocoa nibs

In the bowl of a food processor, process the nuts and salt until evenly ground; do not, however, process long enough to make almond butter. Add the dates, vanilla, and cinnamon, and process until the dates are minced and evenly dispersed. Add the peanut butter and pulse to combine, then repeat with the cocoa nibs. Form the mixture into 1-inch balls, then flatten gently to about ⅓-inch thick. Cookies can be covered and stored in the refrigerator for up to a week.

hippie cookies 5

pan-seared halibut in white wine sauce with green beans and tomato-scallion relish

halibut green beans 5

I have found the perfect single-person dinner. Not because it’s easy, although that’s nice. Not because it only uses one pan to cook, although I’m not complaining about less dishes to wash. Not because it tastes good, because of course it tastes good or why would I be talking about it?

halibut green beans 0

No, the key for bachelor(ette) meals is that they don’t leave you with half a can of tomatoes or beans, or half a cucumber or pepper, or the vast majority of a roast leftover. If you’re cooking for one, this recipe uses one fish filet, one tomato, one scallion, and a handful of green beans.

halibut green beans 1

Because I have been cooking for one a lot lately, while Dave travels for work, I’ve been making this dish often. The original recipe instructs that the green beans be steamed in a separate pot, but that seemed like a lot of hassle and dishes just for me, so I saute them quickly in a skillet, then add just a bit of water to cook them through. Any remnant green bean bits are scraped up with a glug of wine. I like to transfer the green beans to a pasta bowl and cover them with a big plate while the fish cooks in the same skillet. The fish gets laid over the green beans, the pan is deglazed with wine again, then a simple relish is heated briefly in the pan before it’s time to eat.

halibut green beans 3

I don’t know if fish served over green beans (although you could put yours on the side if that’s more your thing) sounds weird. The relish really brings everything together, since it’s so bright and flavorful, mixing perfectly with both the beans and the fish. It’s an easy, healthy, one-pan, delicious meal that won’t leave you with a bunch of half-used ingredients, and one of my newest favorites.

halibut green beans 6

Printer Friendly Recipe
Pan-Seared Halibut in White Wine Sauce with Haricots Verts and Tomato-Scallion Relish (adapted from Alfred Portale’s The Twelve Seasons Cookbook via epicurious)

4 servings

Regular green beans work just as well as haricots verts in this recipe. I’ve also successfully made it with both halibut and mahi-mahi. The pictures show mahi-mahi.

It’s easy to adapt for one person; just divide all of the ingredients by four and use a small skillet.

2 tablespoons olive oil, divided
16 ounces haricots verts or green beans
Coarse salt and freshly ground pepper to taste
¼ cup water
6 tablespoons white wine, divided
4 halibut or mahi-mahi fillets, each approximately 1 inch thick
2 tablespoons fresh lemon juice
2 tablespoons unsalted butter
4 scallions, finely sliced
2 tablespoons capers, drained
4 small roma tomatoes, diced fine

1. In a large nonstick skillet, heat 2 teaspoons oil over medium to medium-high heat. Add the beans, 1 teaspoon salt, and a pinch of pepper; cook, stirring occasionally, until the beans are spotty brown, 4 minutes. Add the water, cover, and cook until the beans are bright green and still crisp, about 2 minutes. Remove the cover, increase the heat to high, and cook until the water evaporates, 30 to 60 seconds. Divide the beans between four plates or shallow bowls. Add 2 tablespoons of wine to the pan, swirling it around and scraping the pan with a rubber spatula to dissolve any stickiness on the bottom of the skillet. Transfer to liquid to the dishes with the green beans; cover set aside.

2. Season the halibut on both sides with salt and pepper. In the same skillet, heat the remaining 4 teaspoons of oil over medium-high heat. Cook the fish for about 3 minutes, until lightly browned. Flip the fish, reduce the heat to medium, and cook about 4 minutes longer, until the fish is opaque in the center and browned on both sides. Put the fish over the green beans in the bowl; cover again.

3. Remove the pan from the heat and add the remaining 4 tablespoons wine and the lemon juice to the pan. Deglaze the pan by scraping up any browned bits with a rubber spatula. Stir in the butter. Add the scallions, capers, and tomatoes. Season with salt and pepper if necessary, and pour over the fish in the bowls. Serve immediately.

halibut green beans 4