all-grown-up s’mores bars

smores bars 5

I’m going to say something here, and it might shock you: These were too rich, and they were too chocolately. I know, you’re thinking that that isn’t possible because you love rich food. Or you’re thinking that the easy solution is to serve small pieces. But the problem goes beyond that – it’s an issue of balance, of mimicking everything that’s good about a s’more, but in an elegant way that doesn’t require a campfire.

smores bars 1

S’mores are mostly marshmallow, a generous amount of graham cracker, and just a small wedge of chocolate. Any more chocolate and the heat of the marshmallows won’t be able to melt it. It’s a ratio that’s pleased people for generations; we don’t need to change it now.

smores bars 2

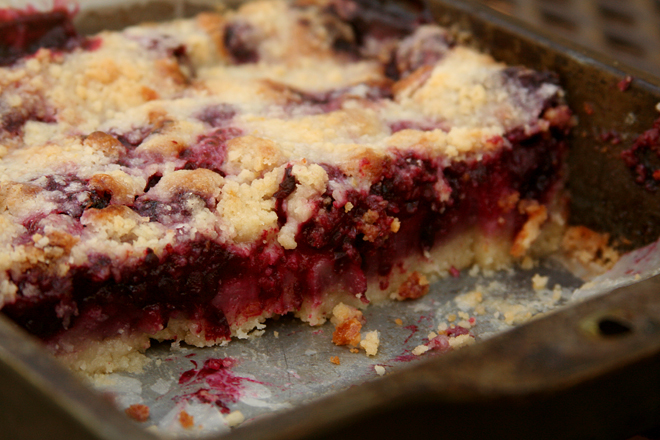
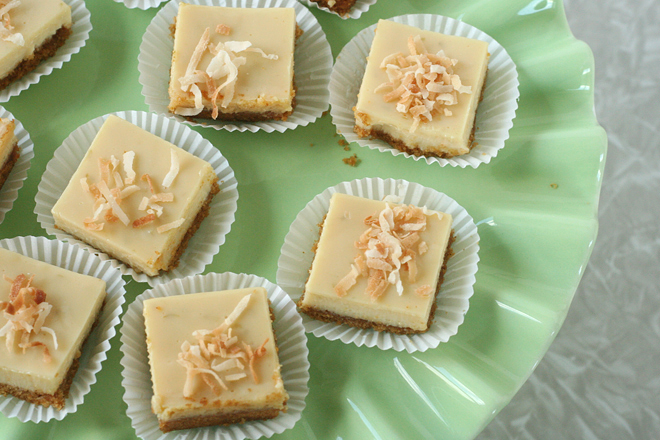
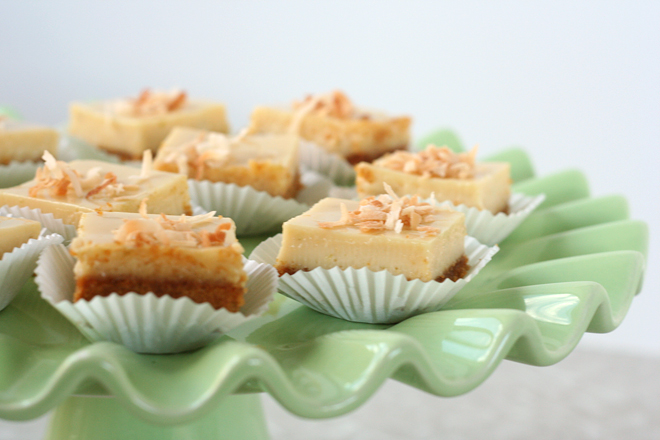
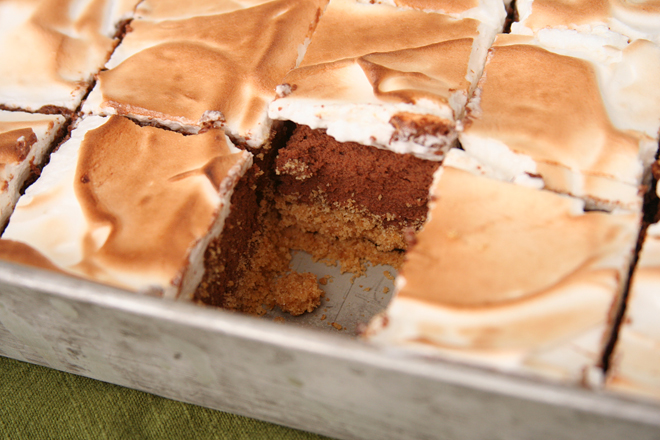
These bars, on the other hand, were reversed: almost all chocolate and a smidgen of marshmallow. Both layers on their own were everything you could hope for, the chocolate mousse airy and smooth with enough bitterness to balance the fluffy toasted marshmallow topping. This wasn’t an issue of quality, just of relative quantities.

smores bars 4

So, for the recipe below, I’ve mixed around the ratios. No, I haven’t tried it myself, but each portion is basically the same recipe as the original, just scaled up (in the case of the marshmallow) or down (the chocolate). With these new proportions, you’ll have a treat to please everyone, with plenty of marshmallow and graham cracker and still more chocolate than you get in a real s’more, but not so much that it’s the only thing you notice. All that with no sticky fingers afterward.

smores bars 6

Printer Friendly Recipe
All-Grown-Up S’mores Bars (adapted from Jill O’Connor’s Sticky, Chewy, Messy, Gooey)

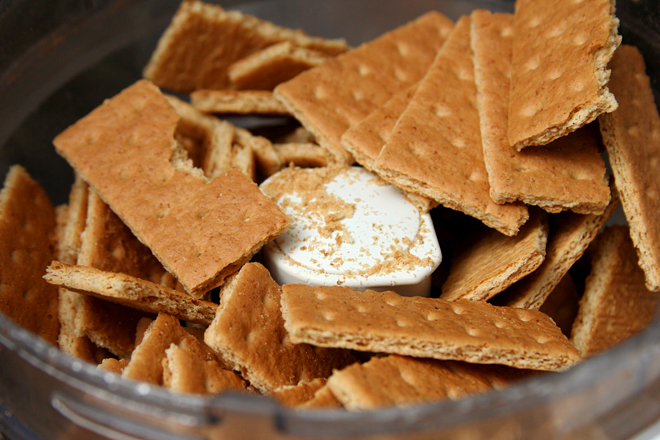
For the graham cracker crust:
3 cups crushed graham cracker crumbs (from about 26 full crackers)
8 tablespoons (1 stick) unsalted butter, melted
1 tablespoon granulated sugar

For the chocolate filling:
6 large egg yolks
1 cup plus 2 tablespoons confectioners’ sugar, sifted
2 tablespoons cognac or brandy
2 tablespoons Kahlua
1 teaspoon pure vanilla extract
⅛ teaspoon salt
12 tablespoons (1½ sticks) unsalted butter
1½ tablespoons Dutch-processed cocoa powder
9 ounces semisweet or bittersweet chocolate, finely chopped
1 cup plus 2 tablespoons heavy cream, whipped to soft peaks

For the Marshmallow Fluff meringue:
5 large egg whites
Pinch of salt
⅛ teaspoon cream of tartar
½ teaspoon pure vanilla extract
1½ cup Marshmallow Fluff

1. Heat the oven to 350 degrees. Spray a 9×13-inch baking pan with oil.

2. To make the crust: Combine the graham cracker crumbs with the melted butter and granulated sugar until well combined. Press into the bottom of the prepared ban. Bake the crust until it starts to brown and become crisp, about 10 minutes. Transfer to a wire rack and let cool completely.

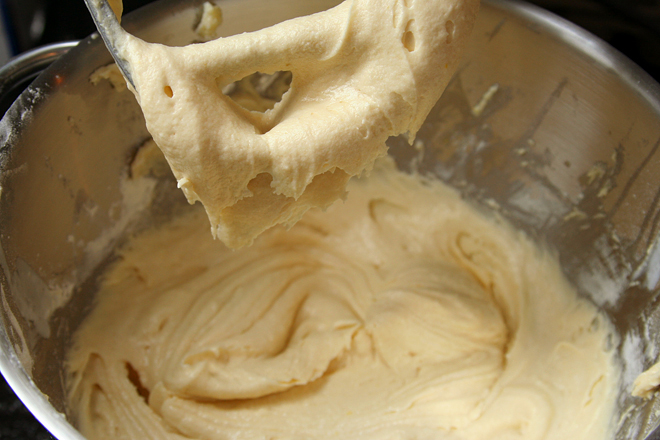
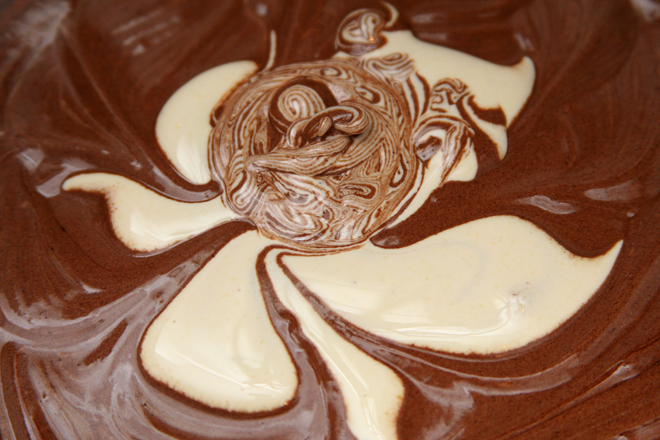
3. To make the filling: Using an electric mixer, beat the egg yolks and confectioners’ sugar together in a large bowl until they are thick and the color of butter. Beat in the cognac, Kahlua, vanilla, and salt.

4. Melt the butter in a medium saucepan over low heat and whisk in the cocoa powder until smooth. Remove the pan from the heat, add the chocolate, and stir until the chocolate is melted and the mixture is smooth. Let cool slightly, then gradually beat into the egg mixture.

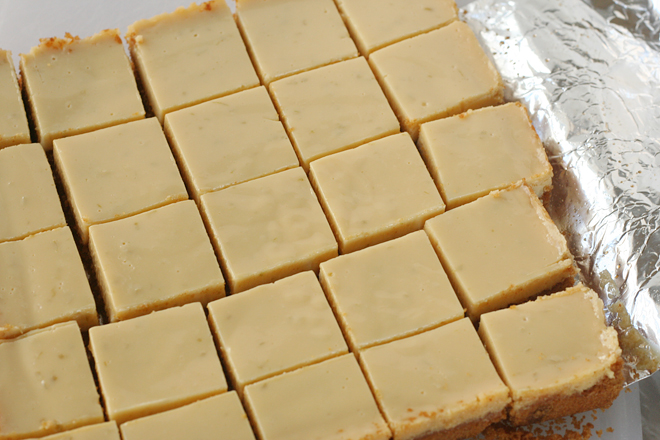
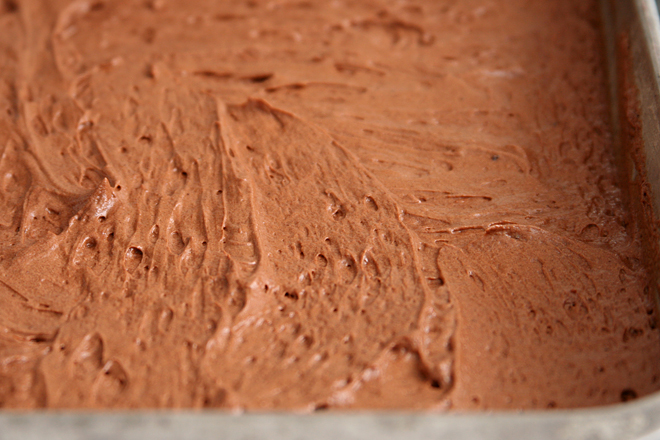
5. Fold the softly beaten heavy cream into the chocolate mixture just until combined. Spoon the chocolate cream over the graham cracker crust, smoothing it evenly with a spatula. Cover the pan with plastic wrap and refrigerate until very firm, at least 4 hours or up to overnight.

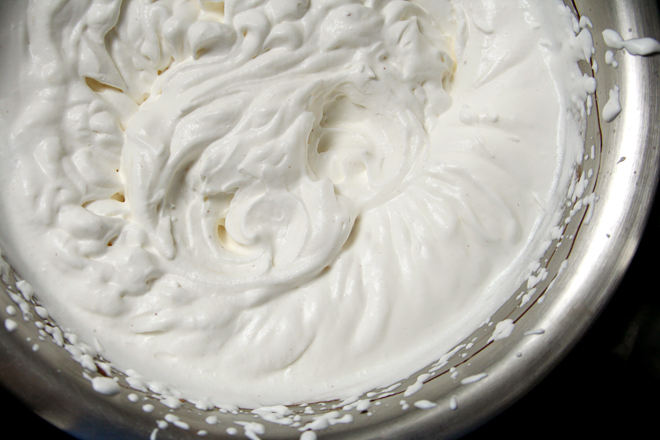
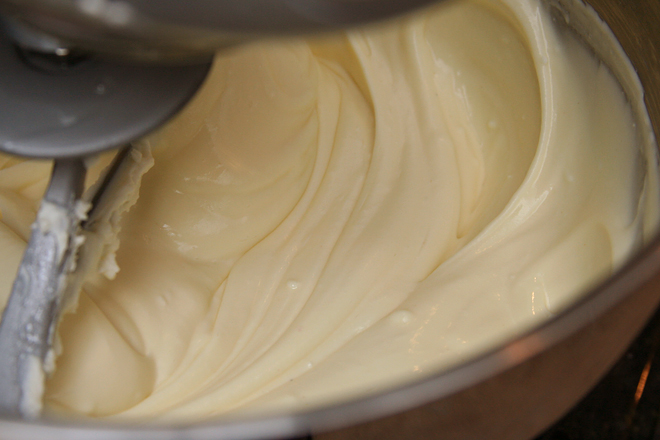
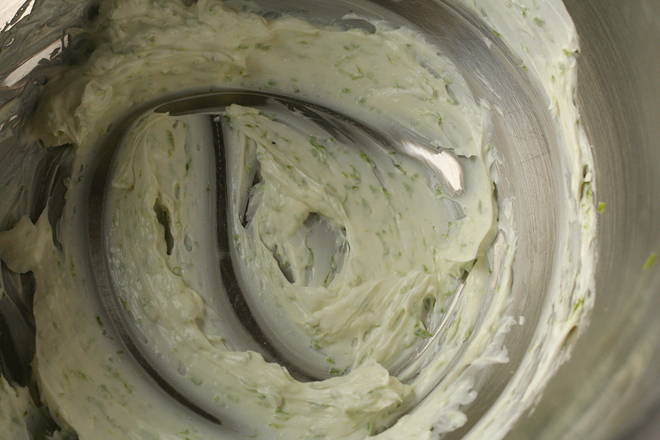
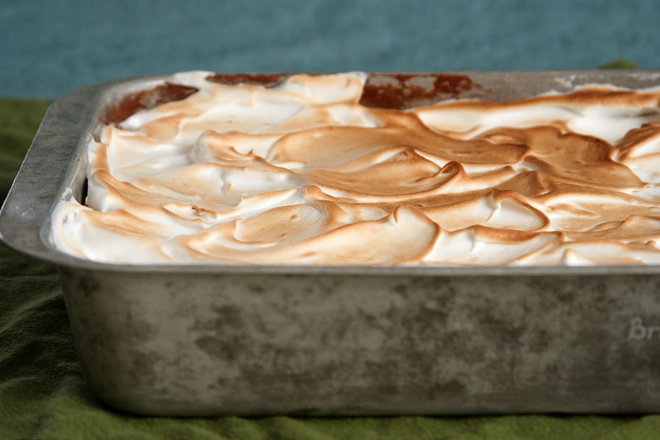
6. When ready to serve, make the meringue: Using an electric mixer set at low speed, beat the egg whites until foamy. Add the salt and cream of tartar and beat at medium speed until soft peaks form. Beat in the vanilla. Add the Marshmallow Fluff to the egg whites a little at a time, beating constantly until stiff peaks form. Spread the meringue on the chocolate layer, using the back of a spoon to create peaks. Toast the meringue using a kitchen torch or the broiler. Cut into squares and serve immediately.

smores bars 3

shitake mushroom and lentil asian tacos

mushroom lentil tacos 4

Vegetarian food, for me, means something quick and easy, healthy, perfect for a weeknight dinner. There’s no fussing with the handwashing of cooking with chicken, no long braising times. Most are one-bowl meals that don’t require side dishes. The exceptions to these rules invariably include lots of cheese, almost certainly pasta, and a long prep time – and are relegated to weekend meals.

mushroom lentil tacos 6

Few and far between are vegetarian meals that are not only healthy and delicious, but also feel special. This is one. First, it’s tacos, and I’m not out of my taco phase. Second, so many fillings and toppings in the tacos satisfy all sorts of flavor and texture desires.

mushroom lentil tacos 1

The mushroom-lentil mixture has plenty of ingredients that kick up the umami sensation that usually comes from meat. The miso and soy sauce in the sauce don’t hurt either, but the sauce is about more than just umami; it’s sweet and herbal and a bit sour from the rice vinegar. There’s crunch from the carrots and the buttery richness of avocados. All of it combines to form a special occasional dish that is perfectly healthy and not just vegetarian, but vegan. It’s a far cry from most of my favorite vegetarian dishes, and I love it.

mushroom lentil tacos 2

Printer Friendly Recipe
Shitake Mushroom and Lentil Asian Tacos (adapted from Sprouted Kitchen)

Serves 4 to 6

I toasted the garlic, while still peeled, in a small not-nonstick skillet over medium-high heat until the papery peel started to brown on a few sides. This softens the bite of raw garlic, making it sweeter and more mellow.

My favorite new way to soften corn tortillas for tacos is to spray both sides of them with oil, then heat them in a 400 degree oven until pliable, about 5 minutes. Even better, add some of the mushroom-lentil mixture to the tortillas at that point and fold the tortilla over the filling; continue baking until the tortilla starts to crisp, another 3-5 minutes.

I grew radish sprouts just for this recipe, but they didn’t sprout in time. Bummer. They made a good garnish for avocado and shrimp-filled tortilla cups the next day though.

Miso herb sauce:
3 garlic cloves, peeled (see note)
2 packed cups basil leaves
1 packed cup cilantro
2 tablespoons white or yellow miso
1 tablespoon honey
1 tablespoon soy sauce
pinch of red pepper flakes
3 tablespoons orange juice
3 tablespoons rice vinegar
2 tablespoons toasted sesame oil

Tacos:
¾ cup brown or green lentils
salt
2 tablespoons olive oil, divided
1 onion, thinly diced
12 ounces shitake mushrooms, stems discarded, sliced
1 tablespoon apple cider vinegar
about 16 corn tortillas, warmed (see note)
2 large or 3 small avocados, peeled and sliced
5 small carrots, peeled and grated
micro greens, for garnish (see note)

1. For the sauce: Place the garlic in the bowl of a food processor fitted with the cutting blade; process until minced. Add the herbs and process until pureed. Add the remaining ingredients and process until the sauce is evenly mixed. Transfer to a serving bowl; set aside.

2. Bring 6 cups of water to a boil in a 2-quart saucepan. Add the lentils and ½ teaspoon of salt. Reduce the heat to maintain a simmer, partially cover, and cook for about 20 minutes, until tender. Drain.

3. In a medium nonstick skillet over medium heat, heat the oil until it flows like water when the pan is tilted. Add the onion and a pinch of salt; cook, stirring often, until the onion is softened and translucent. Add the mushrooms and another pinch of salt and cook, stirring occasionally, until the mushrooms soften and release their liquid. Once the liquid evaporates, add the remaining 1 tablespoon oil, and cook until the mushrooms and onions brown. Stir in the cooked lentils and the cider vinegar.

4. Stuff each tortilla with the mushroom-lentil mixture, carrots, avocado, microgreens, and miso-herb sauce. Serve immediately.

mushroom lentil tacos 5

blackberry pie bars

blackberry pie bars 3

We planned a picnic with my sister and her family recently, and two things were certain: I wanted to make these pie bars, and my sister wanted to make potato salad. So we had the important things figured out. I ended up making pizza wraps (the first time I’d ever made wraps!), and she brought deviled eggs. We both threw some cherries into our picnic baskets, because that’s what you do in the summer.

blackberry pie bars 1

It was a nice hike in the mountains, and a nice lunch, but mostly I just wanted to get to dessert. And that wasn’t the only waiting I had to do, as these took about three times longer to bake than I was expecting. I was mystified at the time, but eventually I figured out the culprit – the blackberries that I most definitely had not gotten around to defrosting before baking.

blackberry pie bars 2

They were certainly worth waiting through the hike (which I enjoyed anyway) and the lunch (same) and the extra oven time (not so much), because they were a perfect casual summer dessert. They had the perfect balance of fruit and buttery dough.  They were the perfect cap to a great picnic in the woods.

blackberry pie bars 8

Printer Friendly Recipe
Blackberry Pie Bars (adapted from Rebecca Rather’s The Pastry Queen via Pink Parsley)

Crust and topping:
3 cups (14.4 ounces) all-purpose flour
1½ cups (10.5 ounces) sugar
½ teaspoon salt
1½ cups (3 sticks) unsalted butter, chilled

Fruit filling:
4 large eggs
2 cups (14 ounces) sugar
1 cup sour cream
¾ cup (3.6 ounces) flour
¼ teaspoon salt
zest of ½ lemon
1 teaspoon almond extract
2 (16-ounce) packages frozen blackberries, thawed and drained

1. Adjust the rack to the middle position and heat the oven to 350 degrees. Spray a 9-by-13-inch baking pan with nonstick spray.

2. To make the crust and topping, combine the flour, sugar, and salt in the bowl of a food processor. Pulse a few times to mix. Cut the butter into ½ inch cubes and add it to the flour mixture. Process until the butter is evenly distributed but the mixture is still crumbly, 30-60 seconds.

3. Reserve 1½ cups of the mixture to use as the topping. Press the remaining mixture into the bottom of the pan, and bake 12-15 minutes. Cool for at least 10 minutes.

4. To make the filling, whisk the eggs in a large bowl, then add the sugar, sour cream, flour, salt, lemon zest, and almond extract. Gently fold in the berries and spoon the mixture over the crust. Sprinkle the remaining flour mixture evenly over the filling, and bake 45 to 55 minutes, until the dough is set and lightly browned on top.

5. Cool at least 1 hour before cutting into bars, or scoop out of the pan to serve cobbler-style.

blackberry pie bars 4

prosciutto lamb burgers

prosciutto lamb burgers 5

The first place Brady, Nicole, and I went to when we met up in Austin for the BlogHer Food conference was Whole Foods. I love wandering around Whole Foods anyway, but this particular store is a special case – it’s a little ridiculous, in fact, how big it is. I went back on Sunday before I left Austin, and there were cops directing traffic in the Whole Foods parking garage, if that gives you an idea of the insanity.

prosciutto lamb burgers 1

Still, on Thursday evening when I was there with my friends, it was a lot more subdued than Sunday afternoon. We spent an hour or so wandering around the store, comparing the selection to our hometown stores and trying every sample in sight. These are the things food bloggers like to do together.

Dave, not so much. Now that he has an interest in cooking fish, he can at least spend a few minutes checking out that selection, but he spends most of the time in fancy grocery stores giving me impatient looks in between playing with his phone. It was a miracle when, on our last visit to Albuquerque to see my family, he went to Whole Foods, Trader Joe’s, a local butcher, and a giant liquor store with me all in one day, with no complaint.  He’d better be careful of the precedent he’s setting.

prosciutto lamb burgers 2

Maybe because he knows that the payoff is really good lamb, one of his favorite foods. I was just a bit concerned about adding so many flavorings to something that tastes great on its own, but I know Elly loves lamb as much as we do, so I put my faith in her. And in fact, the prosciutto complements the lamb nicely, adding its hint of funk to the lamb’s. And this is why I love food shopping so much, gathering riches that will eventually turn into Sunday night burgers, cooked in the backyard on a hot summer night.

prosciutto lamb burgers 3

Printer Friendly Recipe
Prosciutto Lamb Burgers (adapted from Giada DeLaurentiis via Elly Says Opa)

Serves 4

I skipped the parsley and the basil, the parsley because I forgot and the basil because I didn’t have it. Neither were missed. I also used parmesan instead of pecorino, again, simply based on what I had. I made 6 burgers out of this mix instead of 4, just because I like my burgers a bit smaller.

I’ve gotten in the habit of leaving the salt out of the meat mix and sprinkling a generous amount on each side just before cooking, based on this article.

½ cup breadcrumbs
¼ cup freshly chopped parsley
1 large egg, beaten
½ cup (1 ounce) Pecorino Romano
¼ cup chopped sun-dried tomatoes
¾ teaspoon salt
½ teaspoon pepper
1 pound ground lamb
2 tablespoons mayonnaise
2 teaspoons balsamic vinegar
2 teaspoons extra virgin olive oil
4 slices of prosciutto
4 hamburger buns, toasted
fresh basil leaves
fresh tomato slices

1. Lightly mix together the breadcrumbs, parsley, egg, milk, Romano, sun-dried tomatoes, salt, pepper, and lamb. Form the mixture into 4 patties.

2. In a small bowl, mix the mayonnaise, vinegar, and olive oil.

3. Prepare a medium-hot grill. Using a paper towel, grease the grates with vegetable oil. Grill the patties for 5 minutes; flip, add slices of prosciutto to the top of each patty, and continue grilling another 5 minutes.

4. Spread the mayonnaise mixture on both sides of the buns, then place the patties on the bottom of the hamburger buns and top with fresh basil leaves and tomato slices. Serve immediately.

prosciutto lamb burgers 4

goat cheese almond strawberry cheesecake

goat cheese cheesecake 5

Sometimes you just nail it. I remember years ago, when I was barely starting to get into making rustic breads, I baked the best baguettes I’d ever made. I don’t remember what meal I cooked to serve with the bread, but I distinctly remember having leftovers of the main dish while we filled up on bread. Later, despite my best efforts, I was never able to reproduce that bread.

goat cheese cheesecake 1

Let’s hope this cheesecake doesn’t go the way of that bread, because I nailed it again and I definitely want it to be just as good next time. It might sound like an odd idea – how could goat cheese in cheesecake be even better than cream cheese? Honestly, I don’t know; I was trying to use up a big package of goat cheese.

goat cheese cheesecake 2

But, it was better. It was the best cheesecake I’ve ever made. Everyone who ate it raved; some said it was the best thing I’ve baked. Most said they wouldn’t have been able to taste the goat cheese if they hadn’t known it was there, and I agree; it was subtle, just a bit of extra tartness. The almond flavor wasn’t noticeable and even the strawberry was on the subtle side, but I’ll tell you this – there is not one thing I’d change about this, because it was perfection. And it had better be just as good, just as soft and creamy, next time I make it.

goat cheese cheesecake 3

Printer Friendly Recipe
Goat Cheese Almond Strawberry Cheesecake (adapted from Love and Olive Oil)

Crust:
8 ounces vanilla wafers, ground to make 2 cups crumbs
1 ounce (¼ cup) almond meal
pinch salt
5 tablespoons butter, melted

Filling:
2 (8-ounce) packages cream cheese, room temperature
8 ounces goat cheese, room temperature
1 cup (7 ounces) granulated sugar
⅛ teaspoon salt
¼ cup sour cream or Greek yogurt
2 tablespoons all-purpose flour
1 teaspoon vanilla extract
½ teaspoon almond extract
3 eggs, room temperature
6 ounces whole fresh or frozen strawberries, thawed and drained if frozen, pureed

1. For the crust: Heat the oven to 350 degrees. Spray the bottom of a springform pan with nonstick spray. Either grind the cookies with a food processor or place them in a ziptop bag and crush with a rolling pin. Add the almond meal, salt, and butter to the crumbs and stir until evenly mixed. Press the crumbs into an even layer covering the bottom of the prepared pan.

2. Bake the crust for 10 minutes, or until fragrant. Let cool on a wire rack. Reduce the oven temperature to 300 degrees.

3. For the cheesecake: With a mixer fitted with the paddle attachment (or with a hand mixer), beat the cream cheese and goat cheese at medium-low speed until smooth. Add the sugar and salt; continue mixing for about 2 minutes, until the mixture is light and creamy. Add the sour cream and flour, then vanilla and almond extracts, and the eggs one a time, mixing just until each one is incorporated.

4. Pour ¾ of the batter into the cooled crust. Mix the strawberry puree into the remaining batter. Dollop it over the plain batter in the crust and use a butter knife to gently swirl it.

5. Bake for 55 to 65 minutes or until the top is just barely jiggly. Remove the cake from the oven and place on a wire rack; run a thin knife or spatula around the edge to release the cake from the sides of the pan. Let cool completely to room temperature, then cover with plastic wrap and refrigerate overnight before serving.

goat cheese cheesecake 4

asparagus bacon and egg salad

asparagus bacon salad 4

I have a nephew who is so picky that he wouldn’t eat blueberries in the middle of the summer. Blueberries! They might as well be candy that happens to be good for you. He was in elementary school then, but things aren’t much better now that he’s starting high school in the fall. Last winter, he balked at asparagus.

asparagus bacon salad 1

Dave, understanding teenaged boys all too well because he still thinks like one (I dare you to tell him a poop joke), found the trick to making picky adolescents eat asparagus – tell them that their pee will smell like asparagus later. For better or worse, this is a phenomenon I have never noticed myself. My nephew choked down a few spears, but either it wasn’t enough or he isn’t subject to the asparagus pee smell either, because he responded in the negative when we quizzed him the next day.

asparagus bacon salad 2

If you’re less interested in discussing (I accidentally typed “disgusting” first, which probably isn’t a coincidence) the smell of urine at the dinner table, perhaps adding bacon is a better way to make asparagus seem tempting. With eggs added as well, this is more like breakfast than a salad – which is exactly how I like my salads, as a light meal masquerading as a decadent one.  Not being a huge fan of asparagus myself, this might be my favorite way to eat it – and I, personally, find the lack of asparagus pee the next day to be a relief.

asparagus bacon salad 5

Bacon Egg and Asparagus Salad (adapted from Dorie Greenspan’s Around My French Table via A Taste of Home Cooking)

1 tablespoon olive oil
2 bunches (about 2 pounds) asparagus, ends trimmed, cut into 2-inch pieces
kosher salt and ground black pepper
4 ounces (about 4 slices) bacon, diced
6-8 eggs
4 cups spring mix
1 avocado, peeled and diced

Dressing:
½ teaspoon Dijon mustard
1 tablespoon sherry or red wine vinegar
2 tablespoons extra virgin olive oil
¼ teaspoon salt
¼ teaspoon ground black pepper

1. Place a rimmed baking sheet in the oven and heat to 450 degrees. Once hot, spread the oil over the pan and add the asparagus; season with salt and pepper and stir to coat with oil. Return the pan with the asparagus to the oven and cook for about 10 minutes, stirring once halfway through cooking.

2. In a large nonstick skillet over medium heat, cook the bacon until crisp. Use a slotted spoon to transfer the bacon to a paper towel-lined plate. Pour off all about 1 tablespoon of fat from the pan. Crack the eggs into the pan, season with salt and pepper, and add 2 tablespoons of water. Immediately cover the pan and cook for 4 to 6 minutes, until the whites are set and the yolks are soft.

3. Mix all of the dressing ingredients.

4. Combine the spring mix, avocado, bacon, asparagus, and dressing. Top each serving with 1-2 eggs.

asparagus bacon salad 6

key lime bars

lime bars 6

Back in the old days, I made these all the time. Whenever I needed a dessert to go with Mexican food, or I wanted to bring something to a party that was sure to be popular but wasn’t too common, or I just wanted a refreshing treat, this was my go-to. “The old days”, of course, being before I had a blog and joined Tuesdays with Dorie, which started a love affair with recipes that are shiny and new. (But not a love affair that trumps that one I already have with chocolate chip cookies, of course.)

lime bars 2

If not for having made these before, they would be just the type of dessert I love to make – something a little different, but based on familiar flavors that people enjoy. Also there is cream cheese.

lime bars 3

Of course my desire to constantly try new things has led me to so many fun and delicious recipes, but this one makes me a little nostalgic for the old days. It’s easy, it’s handheld, it works for any season – really, it’s such a great dessert. I would make it more often if there weren’t thousands of other great desserts calling my name.

lime bars 5

Printer Friendly Recipe
Key Lime Bars (from Cook’s Illustrated)

Crust:
5 ounces animal crackers (about 1¼ cups crumbs)
3 tablespoons light or dark brown sugar packed
pinch salt
4 tablespoons butter, melted and cooled slightly

Filling:
2 ounces cream cheese, room temperature
1 tablespoon grated lime zest
1 (14-ounce) can sweetened condensed milk
1 large egg yolk
½ cup key lime juice or regular juice (do not use bottled juice)

Garnish (optional):
shredded coconut, toasted until crisp

1. Adjust an oven rack to the middle position and heat the oven to 325 degrees. Cut about a 12-inch length of extra-wide heavy duty foil; fold the cut edges back to form a 7½-inch width. With the folded sides facing down, fit the foil securely into the bottom and up the sides of an 8-inch square baking pan, allowing the excess to overhang the pan sides. Spray the foil with non-stick cooking spray.

2. To make the crust: In the workbowl of a food processor, pulse the animal crackers until they’re broken down, about ten 1-second pulses; then process the crumbs until evenly fine, about 10 seconds. Add the brown sugar and salt; process to combine, ten to twelve 1-second pulses. Drizzle the butter over the crumbs and pulse until the crumbs are evenly moistened with butter, about ten 1-second pulses. Press the crumbs evenly and firmly into the bottom of the prepared pan. Bake until deep golden brown, 18 to 20 minutes. Cool on a wire rack while making the filling. Do not turn off the oven.

3. To make the filling: While the crust cools, in a medium bowl, stir the cream cheese, zest and salt with rubber spatula until softened, creamy, and thoroughly combined. Add the sweetened condensed milk and whisk vigorously until it’s incorporated and no lumps of cream cheese remain; whisk in the egg yolk. Add the lime juice and whisk gently until incorporated (the mixture will thicken slightly).

4. To assemble and bake: Pour the filling into the crust; spread to the corners and smooth the surface with a rubber spatula. Bake until set and the edges begin to pull away slightly from the sides, 15 to 20 minutes. Cool on a wire rack to room temperature, 1 to 1½ hours. Cover with foil and refrigerate until thoroughly chilled, at least 2 hours.

5. Loosen the edges with paring knife and lift the bars from the baking pan using the foil extensions; cut the bars into 16 squares. Sprinkle with toasted coconut if using, and serve. (Leftovers can be refrigerated up to two days; crust will soften slightly. Let stand at room temperature, about 15 minutes before serving.)

lime bars 4

panko-crusted salmon

panko salmon 5

Dave cooks now, and it is awesome for a number of reasons. Supposedly, it gives me a break from cooking, except I tend to use the free time to make cookies, but, that is still awesome. He chooses different sorts of recipes than I do, so it’s fun to have more variety. Mostly, it’s just nice to be in the kitchen together, doing one of my favorite things. And it provides me with plenty of – much needed – practice in only offering advice when it’s requested.

panko salmon 1

So far, Dave is only cooking fish. This is also awesome, because fish is complicated in the desert – finding out how to get it so it’s fresh, which types are sustainable, that sort of stuff. I’m glad he took this on because my method was mostly to stock up on frozen tilapia in Albuquerque or wait for the wild salmon in the summer. Dave, on the other hand, has made friends with the fish lady at the grocery store.

panko salmon 3

The vast majority of the recipes he makes are from Mark Bittman’s Fish cookbook, but I keep an eye out for quick and easy fish recipes to send his way, and this was one of those. While he mixed bread crumbs with lemon zest and herbs, I roasted asparagus, chased Dave around with a camera, and baked a cake. It was, as I might have mentioned, awesome*.

*Even more awesome? Dave wants to write the occasional guest post with some of his favorite fish recipes. Fun! I can’t wait.

panko salmon 4

Printer Friendly Recipe
Panko-Crusted Salmon
(adapted from Ina Garten’s How Easy is That via Annie’s Eats)

4 servings

⅔ cup panko
2 tablespoons finely minced fresh parsley
1 teaspoon lemon zest
½ teaspoon kosher salt
½ teaspoon ground black pepper
3 tablespoons olive oil, divided
4 (6- to 8-ounce) salmon fillets, skin on
2 tablespoons Dijon mustard
lemon wedges, for serving

1. Preheat the oven to 425 degrees. In a small bowl, combine the panko, parsley, lemon zest, salt, and pepper. Add 2 tablespoons of the olive oil and toss with a fork until the crumbs are evenly coated; set aside.

2. Place the salmon fillets skin side down on a work surface. Generously brush the top of each fillet with the mustard, then season with salt and pepper. Press the panko mixture thickly on top of the mustard on each fillet.

3. In a 12-inch oven-safe nonstick skillet, heat the remaining 1 tablespoon of olive oil over medium-high heat. When the oil is hot, add the salmon fillets, skin side down, and sear for 3-4 minutes without turning to brown the skin. (If you don’t want to eat the skin, this step also helps the skin stick to the pan so the fillets can be easily removed without the skin later on.)

4. Transfer the pan to the oven for 5 to 7 minutes, until the salmon is almost cooked through and the panko is browned. Remove from the oven, cover with foil and let rest for 5 to 10 minutes. Serve with lemon wedges.

panko salmon 7
(The asparagus were served over pine nut crema. Very tasty.)

shrimp and avocado ceviche

shrimp ceviche 6

Both times I’ve had barbacoa tacos for dinner, I’ve made this the same day – but not as an appetizer. When dinner is one of your absolute favorite foods, an appetizer just takes up valuable stomach space. But I love this dip almost as much as the barbacoa, and they’re a great match, so we have it for lunch instead.

shrimp ceviche 3

I appreciate that the shrimp are cooked first. Maybe that’s cheating, maybe that makes it something other than ceviche – I don’t care. It means I can have it without worrying about food poisoning, and that’s good enough for me.

shrimp ceviche 4

The cooked shrimp are marinated in lime juice, then mixed with avocados, cucumbers, onions, and cilantro. The dressing is made from more lime juice, olive oil, and, oddly, ketchup. I liked the tomatoey sweetness from the ketchup, but I didn’t like a lot of it – the second time I made this, I cut the ketchup down by half, and next time, I’ll use just half of that.

shrimp ceviche 2

Not that a little extra ketchupiness has stopped this from being my new favorite chip topper – yes, even more so than plain guacamole.  It has the avocado I love, but balanced by all this citrusy crunch.  This for lunch and barbacoa tacos for dinner make for a ridiculously good day of eating.

shrimp ceviche 7

One year ago: Fish Tacos
Two years ago: Tartine Country Bread
Three years ago: Spinach Artichoke Pizza
Four years ago: Tofu Mu Shu
Five years ago: Crockpot Pulled Pork

Printer Friendly Recipe
Shrimp and Avocado Ceviche (adapted from Rick Bayless’s Mexico One Plate at a Time via epicurious)

6 servings

I used 51/60 shrimp for this. The second time, I cut the shrimp in half after peeling so that they’d be about the same size as everything else in the dip – better for getting all sorts of goodies on a single chip.

½ cup plus 2 tablespoons fresh lime juice
1 pound unpeeled small shrimp
½ medium white onion, chopped into ¼ inch pieces
⅓ cup chopped fresh cilantro, plus several sprigs for garnish
2 tablespoons ketchup
2 tablespoons vinegary Mexican bottled hot sauce
1 tablespoon extra virgin olive oil
1 cup diced peeled cucumber or jicama (or a mix)
2 small ripe avocados, peeled, pitted and cubed
salt
Several lime slices for garnish
tortilla chips for serving

1. In a small saucepan, bring 2 cups of salted water to a boil; add 2 tablespoons of the lime juice and the shrimp. Cover the saucepan and let the water return to a boil. Once it boils, immediately remove the pot from the heat and pour off all the liquid. Replace the cover and let the shrimp steam off the heat for 8 minutes. Transfer the shrimp to a large glass or stainless steel bowl to cool completely. Once cook, peel and devein the shrimp. Toss the shrimp with the remaining ½ cup lime juice; cover and refrigerate for about an hour.

2. After the shrimp has marinated, in a small strainer, rinse the diced onion under cold water, then shake off the excess liquid. Add to the shrimp bowl along with the cilantro, ketchup, hot sauce, olive oil, cucumber and/or jicama, avocado, and ¼ teaspoon salt. Cover and refrigerate if not serving immediately.

3. Spoon the ceviche into sundae glasses, martini glasses, or small bowls; garnish with sprigs of cilantro and slices of lime. Serve with tortilla chips.

shrimp ceviche 5

kentucky butter cake

kentucky butter cake 7

I’ve told you before that my coworkers go crazy for pound cake. They’re always appreciative of treats that I bring in – I work with good people – but pound cake disappears the fastest.

kentucky butter cake 1

Even pound cake gone wrong. The first time I made this, I messed it up, and not in a minor way. I forgot to add not just the baking powder, but the buttermilk. Basically, instead of making a cake, I made a giant ring-shaped cookie.

kentucky butter cake 3
first attempt

It was still pretty good, so I brought it in to share at work anyway. You wouldn’t believe the number of people who came by claiming it was the best thing I’ve ever baked – in three years of almost weekly treats! I’m glad it was so popular, because I didn’t feel bad making it again a few days later, this time with all the ingredients.

kentucky butter cake 4

Most people said it was better with the buttermilk, lighter and more tender. A few didn’t notice the difference. One stalwart fan said that while both were good, the first version was better. So there you have it – you really can’t go wrong with this cake, even when you do actually go wrong.

kentucky butter cake 8

One year ago: Meyer Lemon Semifreddo
Two years ago: Strawberry Cream Cake
Three years ago: Strawberry Chocolate Ice Cream Pie
Four years ago: Strawberry Lemon Sorbet
Five years ago: Franks and Beans

Printer Friendly Recipe
Kentucky Butter Cake (adapted from allrecipes via Beantown Baker)

Makes one 9-inch Bundt cake

I do have some uncertainty with the glazing method. The recipe instructions are to pour all of the glaze onto the cake while it’s still in the pan, so you’re essentially saturating the bottom of the cake. The cake is left in the pan until it cools completely, which presumably gives the glaze (which is now more of a soaking liquid than a glaze) a chance to soak into the cake. I did this the second time I baked the cake, wanting to follow the directions exactly.

The first time, I poured only about half of the glaze onto the cake before unmolding it and pouring the remaining glaze down the sides. I liked this method better, because the glaze formed a delicious hard crust on the cake (although a lot of it dripped right off the cake too). However, it’s possible that it only worked this way on the firmer more cookie-like cake, and would simply soak into the top of the cake when it’s made correctly. It’s good either way.

For the cake:
3 cups (14.4 ounces) unbleached flour
1 teaspoon baking powder
½ teaspoon baking soda
16 tablespoons (2 sticks) unsalted butter, softened
1½ cups (10.5 ounces) granulated sugar
1 teaspoon table salt
4 eggs, room temperature
2 teaspoons vanilla
1 cup buttermilk

For the glaze:
5 tablespoons unsalted butter
½ cup (3.5 ounces) granulated sugar
⅛ teaspoon table salt
2 tablespoons water
2 teaspoons vanilla extract

1. Heat the oven to 325 degrees. Grease and flour a Bundt pan or spray with baking spray. In a medium bowl, combine the flour, baking powder, and baking soda.

2. Place the butter and salt in the bowl of an electric mixer fitted with the paddle attachment. Beat on medium-high speed for 3 minutes, until light and creamy in color. Gradually add the sugar to the butter mixture. Mix in the eggs one at a time, until incorporated, then add the vanilla. With the mixer on low speed, add one-third of the flour mixture, followed immediately by half of the buttermilk, mixing just until incorporated. Repeat with another third of the flour and the rest of the buttermilk, then the last of the flour. Scrape down the sides of the bowl and mix for 15 seconds longer.

3. Transfer the batter to the prepared baking pan, smoothing the top. Bake for 50-60 minutes, or until a toothpick inserted in the center comes out clean. Transfer to a wire rack to cool.

4. Shortly before the cake is removed from the oven, combine the butter, sugar, salt, and water in a small saucepan over medium heat, stirring until the butter melts. Remove from the heat and stir in the vanilla.

5. Pour about half of the glaze mixture over the cooling cake. After the cake has been cooling for at least 10 minutes, invert it onto the wire rack, removing the pan. Place a baking sheet below the cooling rack to catch drips, then spoon the remaining glaze over the top of the glaze. Cool completely before serving.

kentucky butter cake 5