Archives for February 2011

sandwich thins

Ah, carbs. They’re the best, aren’t they? They don’t even need to be combined with carb’s best friend, butter, to be a treat. A hunk of airy-crumbed, chewy-crusted bread with a glass of dry red wine is a pleasure all on its own. A few slivers of cheese balance and enhance the flavors of each, but it isn’t necessary. All I need is the carbs.

Remember when the base of the food pyramid was carbs? Those were the good ol’ days. I’ve reversed my own personal food pyramid to be mostly fruits and vegetables, a goodly amount of protein, and a smattering of carbs (on weekdays; all bets are off on Saturday). A giant Kaiser roll, sadly, is more than a smattering.

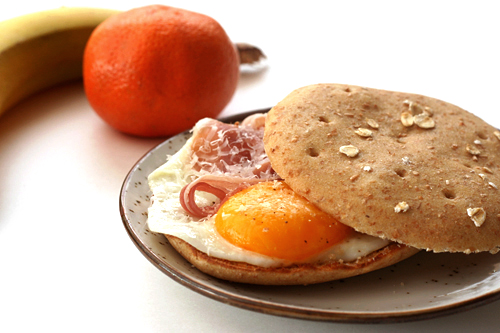
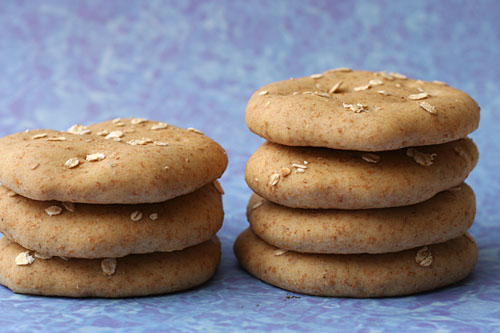
Sandwich thins, however, are the perfect compromise between wanting carbs and not wanting to overdo it. But just because there’s less bread per sandwich doesn’t mean the bread can be less good. You still want it to be soft and tender, but also sturdy, and if it could be all that and still be whole grain, that would be no bad thing.

I hear you can buy these in the store or some such thing, but I’m not acquainted with the bread aisle at the grocery store, and anyway, what’s the fun in that? Buying things that we could spend hours of our busy schedules making from scratch is not what this blog is about.

One year ago: Mediterranean Pepper Salad
Two years ago: Lemon Cream Cheese Bars
Three years ago: Salmon Cakes, Flaky Biscuits, Hashed Brussels Sprouts

Printer Friendly Recipe
Sandwich Thins (adapted from food.com via Confections of a Foodie Bride)

Makes 16

I meant to follow the directions when I made this, but I didn’t actually read them before starting. So I mixed it like a regular bread dough, and it worked just fine.

I doubt wheat bran and vital wheat gluten are crucial to this recipe. If you don’t have vital wheat gluten, just use more white flour (or better yet, substitute bread flour, if you have it, for the all-purpose flour). If you don’t have wheat bran, substitute more whole wheat flour. Bread is forgiving.

1 egg
1¼ cups warm water
2 tablespoons olive oil
2 cups (10 ounces) whole wheat flour
1 cup (4.8 ounces) all-purpose flour
½ cup wheat bran
2 tablespoons vital wheat gluten
2 teaspoons instant yeast
¼ cup (1.75 ounces) sugar
1 teaspoons salt
2 tablespoons rolled oats

1. Stand mixer: In a large measuring cup, lightly beat the egg; whisk in the water and oil. In the bowl of a stand mixer fitted with the dough hook, mix the flours, bran, gluten, yeast, sugar, and salt. With the mixer on low speed, gradually add the liquid ingredients. Continue mixing on medium-low until the dough is elastic and supple, about 8 minutes. You may need to add a little more flour or water to get the correct consistency – soft but not sticky.

By hand: In a large measuring cup, lightly beat the egg; whisk in the water and oil. Mix the flours, bran, gluten, yeast, sugar, and salt in a large bowl. Make a well in the middle of the dry ingredients and pour in the liquid ingredients. Stir the mixture until the dough comes together. Transfer the dough to a floured board or countertop and knead, incorporating as little flour as possible, for about 10 minutes, until the dough is elastic and supple. You may need to add a little more flour or water to get the correct consistency – soft but not sticky.

2. Transfer the dough to an oiled bowl and cover with plastic wrap or a damp dishtowel. Set the dough aside to rise until it has doubled in volume, about 1½ hours.

3. Line 2 baking sheets with parchment paper or silicone mats. Divide the dough into 16 equal portions. Roll each portion into a ball; then flatten it between your palms. Place it on the baking sheet and press down, working the dough into a thin 5-inch round. Brush the tops with water; sprinkle with rolled oats. Cover with damp kitchen towels and let rise until slightly risen, about 45 minutes.

4. Preheat the oven to 350 degrees. Use the blunt end of a wooden skewer to poke 9 holes in each roll. Bake 12-15 minutes, until puffed and dry on top. Cool completely before slicing.
strawberry buttercream

One of my favorite parts of birthdays as a kid was flipping through my mom’s stack of Wilton yearbooks to pick out my cake. I remember cakes shaped like treasure chests, dice (every guest got their own die), telephones, dollar bills, a whole scene with penguins and an igloo and a pond (that was my brother’s cake, two years in a row), so many others.

My mom, of course, used the Wilton buttercream recipe, a simple mixture of powdered sugar and solid fat (butter or shortening), with a bit of vanilla for flavor, milk to loosen it up, and meringue powder to help it set. This is what I knew as frosting as a kid; I loved it then and still do.

To some, it’s too sweet and it’s certainly grainy, and those people often prefer swiss meringue buttercreams, in which butter is mixed into a meringue built from egg whites and sugar. My first experiences with these weren’t great; I felt like I was eating lightly sweetened butter. Dorie Greenspan’s recipe, a lemon version, changed my mind, because it actually tasted like something.
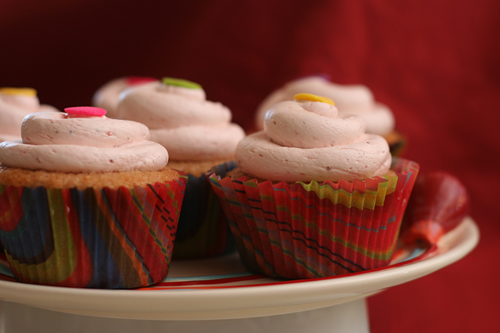
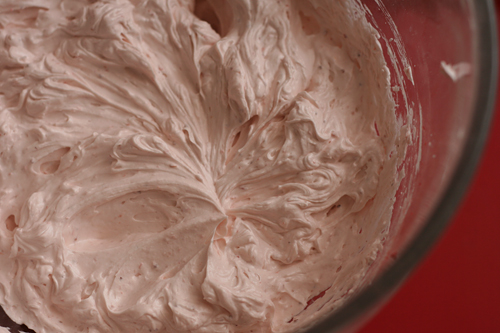
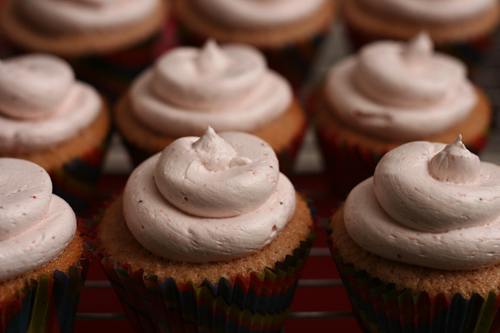
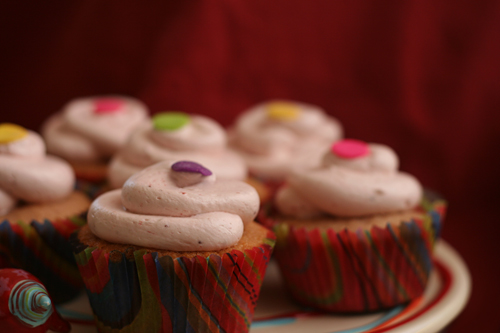
Now I love both types of frosting (is there any horribly fattening food I don’t enjoy, I wonder?), although I always add at least a couple drops of lemon juice into my meringue buttercreams to brighten their taste. But this strawberry version might just take the cake. It’s light and smooth, like all meringue buttercreams, but it has plenty of flavor from all those strawberries. I don’t think anyone will be shaping this frosting into penguins anytime soon, but it might top my next birthday cake anyway.

One year ago: Bacon-Wrapped Goat Cheese and Almond-Stuffed Dates
Two years ago: Beer-Battered Fish
Three years ago: Cream Cheese Brownies

Printer Friendly Recipe
Strawberry Buttercream (adapted from Martha Stewart via Annie’s Eats)

The original recipe calls for fresh strawberries, but I prefer to use frozen strawberries when their texture isn’t important, because they’re available year-round and always picked at the peak of their ripeness.

1 cup strawberry puree (from 8 ounces frozen defrosted strawberries)
4 large egg whites
1¼ cups (8.75 ounces) sugar
Pinch salt
24 tablespoons (3 sticks) unsalted butter, at room temperature

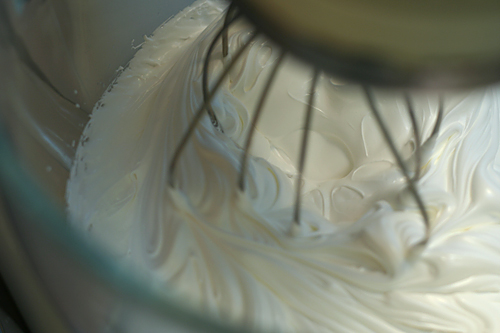
1. Combine the egg whites and sugar in a heatproof mixer bowl set over a pot of simmering water. Whisk until the sugar dissolves and the mixture registers 160 degrees on a candy thermometer.

2. Remove the bowl from heat and attach it to a mixer fitted with the whisk attachment. Beat on medium-high speed until stiff peaks form and the mixture has cooled to room temperature, about 8 minutes. (The bowl should be cool to the touch.)

3. Reduce the speed to medium and add the butter, 2 tablespoons at a time, whisking well after each addition. With the mixer on low, whisk in the strawberry puree, mixing just until incorporated. Use immediately, or cover and refrigerate for up to 3 days. (Bring to room temperature, and beat on low speed until smooth before using.)

This frosting topped Sky High’s Pink Lady Cake.

braised white beans with zucchini, tomatoes, and potatoes

Dave tends to have healthier food preferences than me. It was his suggestion that we eat vegetarian or seafood meals on weekdays and save meat for the weekends. My initial efforts to find a vegetarian cookbook that reflected how I liked to cook was years ago, and the pickings then, unlike now, were slim. Back then, most vegetarian cookbooks seemed to tend toward the gourmet end of the spectrum, with lengthy preparations and rare ingredients.

Jeanne Lemlin’s Vegetarian Classics was exactly what I was looking for. Generally, the dishes are quick, based on common ingredients and cooking techniques, and accessible to non-vegetarians. I liked it so much that I bought it for my sister. She’s a busy working mom with no interest in becoming a vegetarian, but I still thought this was a cookbook she’d get a lot of use of.

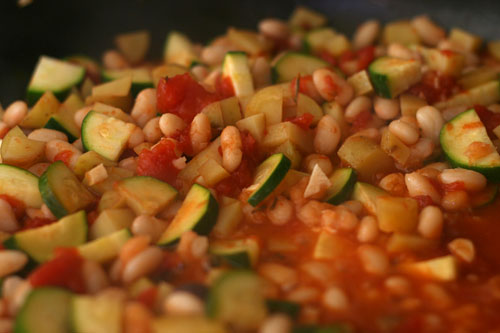
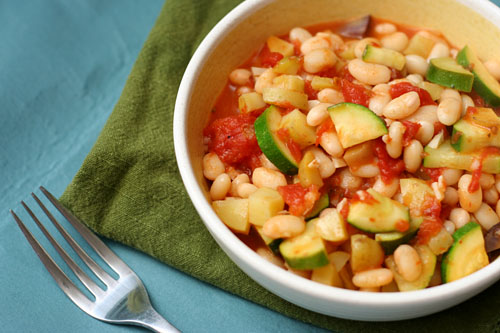
This recipe is one of my favorites from the book. It fulfills that ultimate trifecta – easy, healthy, delicious. It’s the slightest bit spicy from crushed red pepper, the zucchini is just tender, and the beans and potato soak up all of the garlicky tomato juice. And I have Dave to thank; otherwise, I don’t know that I ever would have searched out a vegetarian cookbook.

One year ago: Roasted Garlic Balsamic White Bean Dip
Two years ago: Honey Yogurt Dip
Three years ago: Apple Galette

Printer Friendly Recipe
Braised White Beans with Zucchini, Tomatoes, and Potatoes (adapted from Jeanne Lemlin’s Vegetarian Classics)

Serves 2-3

1 tablespoon extra virgin olive oil
4 garlic cloves, minced
¼ teaspoon crushed red pepper flakes
1 (14-ounce) can diced tomatoes
¼ cup water
¼ teaspoon dried rosemary, crushed
¼ teaspoon salt
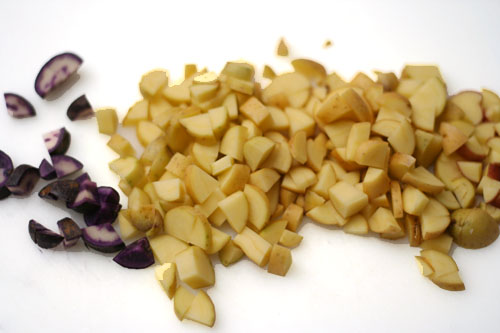
1 medium Yukon gold potato, cut into ¼-inch dice
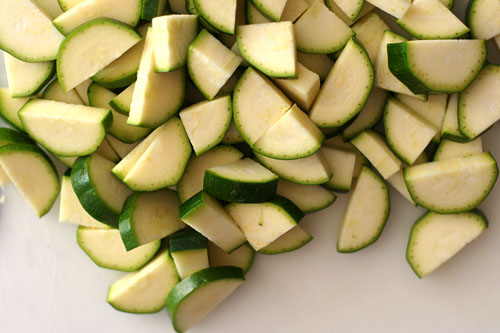
1 zucchini, quartered lengthwise and sliced into ¼-inch slices
1 (14-ounce) can Great Northern beans, rinsed and drained

1. Heat the oil, garlic, and red pepper in a 12-inch nonstick skillet over medium heat. Cook for about 30 seconds after the garlic begins to sizzle. (It should not become at all colored.) Stir in the tomatoes, water, rosemary, salt, and potatoes. Cook, covered, at a lively simmer for 15 minutes, or until the potatoes are almost cooked through.

2. Mix in the zucchini and beans. Cover the pan again and cook, stirring often, 10 minutes more, or until the zucchini and potatoes are tender. At this point check the consistency of the sauce; it should be thick and soupy, not dry or watery. Add a bit of water if the mixture doesn’t have much sauce; cook it uncovered if the juices seem watery. Serve in large pasta bowls, preferably, or on plates.

I have blogged about this recipe before, but I felt that a recipe as good as this one deserved a fresh entry.

toasted almond scones

My parents are visiting this weekend (Hi Mom!), so of course I want to figure out the perfect menu that will taste amazing, fit everyone’s food preferences, reflect how I like to cook, and magically prepare itself while we’re out doing touristy things. Wish me luck!

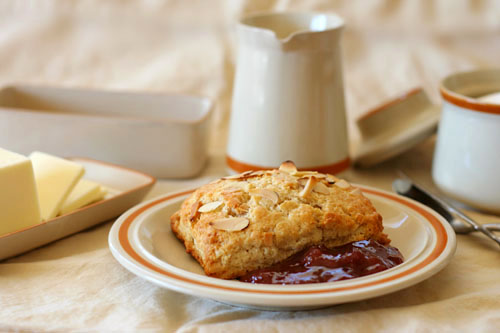
My dinner plans are coming together, but I’ve been stumped at breakfast. Until I remembered that I have almond scones the freezer. Perfect! My mom loves scones and has been eating a lot of almonds lately. I’m sure my dad would rather have bacon (or sausage or ham or really any form of meat) and eggs, but when is it ever about the dad when your parents visit?

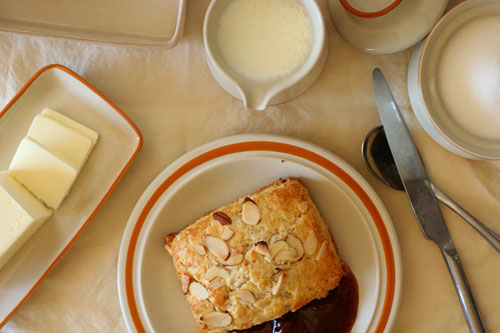
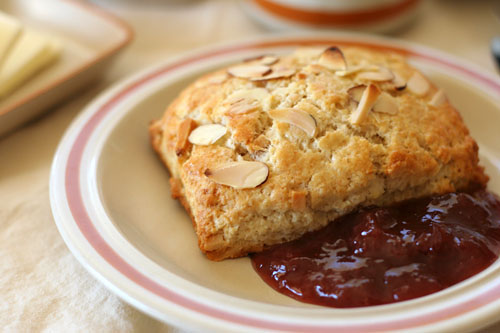
I believe my mom started really enjoying scones while she was visiting New Zealand several years ago. Unlike my retired world-traveling parents, I have never been to New Zealand, but I’m guessing the scones there are less sweet than we usually make them here in the US. If that’s the case, my mom will especially love these lightly sweetened biscuits. For eating plain, I might add a bit more sugar next time, but with a generous smear of jam, these were perfect.

Mike chose this recipe for Tuesdays with Dorie, and he has the recipe posted (as a link to the pdf; don’t miss it!). I doubled the salt.

One year ago: Honey Wheat Cookies
Two years ago: Caramel Crunch Bars

eggplant rollatini

The only thing I can remember cooking for the last several years that turned out so badly that not only did I refuse to eat it, but even Dave did, is grilled eggplant. I don’t remember what went wrong – cook time too long? cook temp too low? too high? salt, don’t salt, cut thicker cut thinner, I don’t know – but the resulting mush of eggplant goo is all too vivid still.

I hadn’t eaten eggplant since. I’ve seen recipes in which every other component sounded like something I would enjoy, but as soon as I spotted that nefarious eggplant in the ingredient list, I scrolled right on past. I knew I’d have to try eggplant again someday. But I wasn’t ready then.

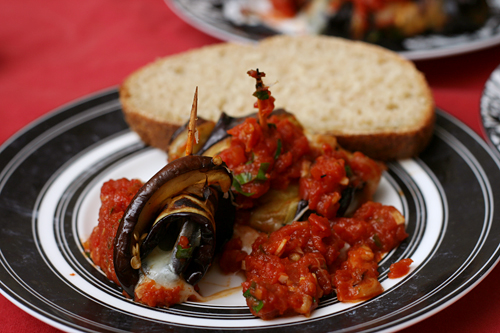
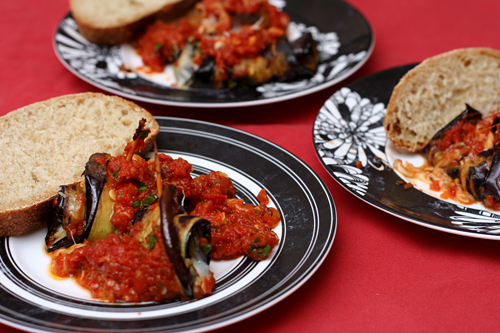
Now I am. Cheese and tomato sauce is never a bad way to ease into an ingredient. Each grilled slice of eggplant is rolled with a slice of cheese, then topped with a quick marinara sauce and heated until the flavors meld and the cheese softens. For me, they were too messy to serve as a hand-held hors d’œuvre, but instead made for a very nice plated first course. That’s right, a recipe with eggplant was very nice. I’m one step closer toward liking eggplant again.

One year ago: Pasta with Baked Ricotta and Sweet Tomato Sauce
Two years ago: Vegetarian Chili
Three years ago: Salmon Pesto Pasta

Printer Friendly Recipe
Eggplant Rollatini (adapted from Cara’s Cravings)

I just stick a pair of kitchen shears into the can of tomatoes and chop away a bit. It’s coarser than a puree, but still just fine for sauce. If you want it smoother, puree the tomatoes in the food processor.

We grilled the eggplant; I haven’t personally tried the roasting technique recommended in the original Gourmet recipe.

4 small Italian eggplants or 2 regular eggplants
Kosher salt
1 tablespoon olive oil
2 garlic cloves, finely chopped
¼ teaspoon dried hot red-pepper flakes
1 (15-ounce) can diced tomatoes, chopped, undrained
½ teaspoon salt
¼ cup coarsely chopped fresh basil
16 thin slices provolone cheese
½ ounce (¼ cup) finely grated parmesan cheese

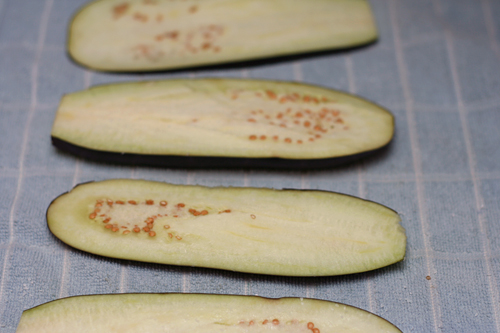
1. Peel 2 opposite long sides of each eggplant. Cut each eggplant lengthwise (to form long skinny ovals) into 1/4-inch slices. Sprinkle both sides of the slices with kosher salt; set aside for 30 minutes. Heat the oven to 425 degrees.

2. Heat the oil in a medium skillet over medium heat until it flows like water when the pan is tilted; add the garlic and red pepper flakes and cook, stirring constantly, until fragrant, about 30 seconds. Add the tomatoes and ½ teaspoon salt; cook, stirring occasionally, until thickened, 8-12 minutes. Remove from heat; stir in the basil.

3. Prepare a grill for direct-heat cooking over moderate heat (or line a large baking sheet with foil and heat the oven to 450 degrees). Brush any remaining salt crystals from the eggplant; pat the slices dry and spray both sides with nonstick spray. Grill the eggplant, turning once, until tender, about 4 minutes total (or bake for 20 minutes, turning once). Transfer to a work surface.

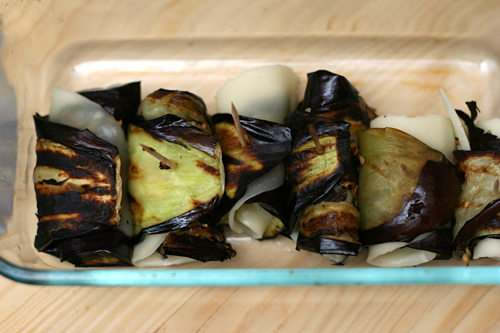
4. Top each slice of eggplant with a slice of cheese; starting at a short end, roll the eggplant and cheese into a spiral and seal with a toothpick. Repeat with the remaining eggplant and cheese. Arrange the eggplant spirals in a shallow baking pan and top with the sauce; bake until the cheese is melted, about 10 minutes.

chocolate frosting comparison

Let me put this right out there: Chocolate frosting isn’t my favorite thing. Chocolate cake, chocolate cookies, chocolate pie, yes. Vanilla frosting, cream cheese frosting, lemon frosting, yes. Chocolate ganache, that richest of chocolate glazes, yes. But frosting, not so much, and so this comparison was by request. And curiosity – is there a chocolate frosting out there for the likes of me?

My theory is that I haven’t found the perfect chocolate frosting because I like chocolate things to be very very chocolately. A hint of chocolately is just a tease. And with frosting, you’re playing a balancing act between squeezing in as much chocolate flavor as possible while maintaining a light, fluffy texture.

I compared Cooks Illustrated’s Creamy Chocolate Frosting (CI), Ina Garten’s Chocolate Frosting associated with her recipe for Beatty’s Chocolate Cake (BC), and Martha Stewart’s Chocolate Frosting (MS). Other than the addition of some sort of chocolate and some sort of sugar, they have little in common. Well, that and butter. Lots and lots of butter.  I used the same bittersweet chocolate for all of the recipes. We tasted the frostings plain.

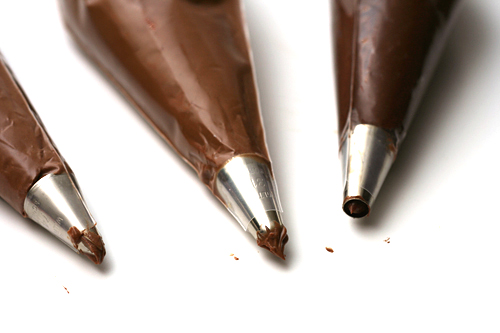
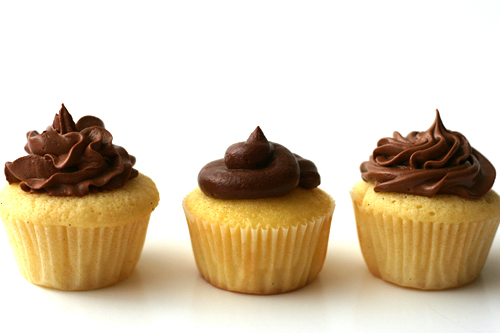
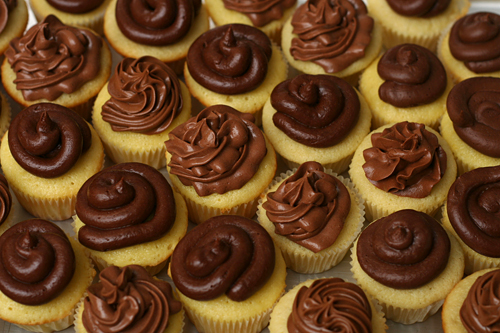
CI (wider star tip) – This recipe is a swiss meringue buttercream, in which warmed egg whites and sugar are beaten together until fluffy, then soft butter is slowly whipped in. Melted bittersweet chocolate and vanilla extract are added at the end. The ratio of chocolate to sugar and butter in this recipe is 1 ounce bittersweet chocolate to 0.4 ounces granulated sugar and 2.0 tablespoons butter.

MS (round star tip) – This recipe is a mixture of butter, cream cheese, powdered sugar, cocoa, sour cream, and bittersweet chocolate. For every 1 ounce of bittersweet chocolate, there is 0.8 ounces powdered sugar and 1.6 tablespoons of dairy fat (from various sources).  Plus 1.5 teaspoons of cocoa powder.  My ratio system doesn’t work so well for this recipe.

BC (finer star tip) – This frosting includes butter, an egg yolk, vanilla, powdered sugar, coffee and bittersweet chocolate. There is 0.8 ounces powdered sugar and 2.7 tablespoons butter for every 1 ounce of bittersweet chocolate.

CI –This frosting was smooth and light with no graininess.  With the least amount of sugar and a high ratio of chocolate to butter, I was expecting this to deliver the rich chocolate flavor I was hoping for, but it tasted as light as it felt.  Maybe all that air from whipping the egg whites to a meringue diluted the flavor?

MS – This frosting was creamy and mousse-like, although a bit grainy. It was by far Dave’s favorite, and it was mine as well.  (The magic word is mousse-like.)

BC – This frosting was thinner and a little grainy. Similar to Ina Garten’s popular brownie recipe, I thought the coffee flavor was overpowering.  It would make a great mocha icing, but for a classic chocolate frosting, the coffee powder should be eliminated or at least reduced to a pinch.
(Cooks Illustrated, Ina Garten/Barefoot Contessa, Martha Stewart)

It comes as no surprise to me that the recipe that includes cream cheese is my favorite. It does surprise me that Dave would feel that way, as he generally isn’t as much of a fan of cream cheese. Perhaps it’s because Martha Stewart’s recipe had the least fat per chocolate in it, although it does have plenty of other goodies in there.  Or perhaps that extra sprinkling of cocoa bumped up the chocolate flavor more than I expected. Whatever the reason, this rich creamy frosting was chocolately enough to overlook the slightly grainy texture.

Already, just hearing about this comparison, new chocolate frosting recipes are being recommended, so this isn’t the end of this story. But at least it’s a beginning.

(Cooks Illustrated, Martha Stewart, Ina Garten/Barefoot Contessa)

One year ago: Jalapeno-Baked Fish with Roasted Tomatoes and Potatoes
Two years ago: Pot Roast
Three years ago: Vanilla Frosting comparison

Printer Friendly Recipe
Chocolate Frosting
(from Martha Stewart via Annie Eats)

14 ounces bittersweet chocolate, finely chopped
9 ounces cream cheese, room temperature
9 tablespoons unsalted butter, room temperature
3 cups (12 ounces) confectioners’ sugar, sifted
6 tablespoons unsweetened Dutch-process cocoa powder
Pinch of salt
1 cup plus 2 tablespoons sour cream

1. Melt the chocolate in a heat-proof bowl set over a pot of simmering water. Set aside to cool until just barely warm.

2. In the bowl of a stand mixer fitted with the paddle attachment, beat the cream cheese and butter on medium-high speed until pale and fluffy, about 3-4 minutes. Gradually mix in the confectioners’ sugar, cocoa powder and salt. Beat in the melted and cooled chocolate and then the sour cream. Continue beating until the mixture is smooth and well blended. Frost cupcakes immediately.

Printer Friendly Recipe
Creamy Chocolate Frosting
(from Cooks Illustrated)

⅓ cup (2⅓ ounces) granulated sugar
2 large egg whites
pinch table salt
12 tablespoons (1½ sticks) unsalted butter, softened and cut into tablespoon pieces
6 ounces bittersweet chocolate, melted and cooled to 85-100 degrees
½ teaspoon vanilla extract

1. Combine the sugar, egg whites, and salt in the bowl of a stand mixer. Set over a small saucepan of simmering water, and, whisking constantly, cook until the mixture is slightly thickened, foamy, and registers 150 degrees on an instant read thermometer, 2-4 minutes.

2. Fit bowl to stand mixer, and with the whisk attachment, beat at medium speed, until mixture is the consistency of shaving cream and slightly cooled, 1-3 minutes. Add butter 1 piece at a time, until smooth and creamy. The frosting may look curdled halfway through, but it will smooth out eventually.

3. Once all the butter has been added, pour in the cooled chocolate and vanilla. Mix until well combined. Increase speed to medium-high and until light and fluffy, another 30 seconds to a minute. Frost cupcakes.

Printer Friendly Recipe
Chocolate Buttercream
(from Ina Garten)

6 ounces good semisweet chocolate (recommended: Callebaut)
½ pound (2 sticks) unsalted butter, at room temperature
1 extra-large egg yolk, at room temperature
1 teaspoon pure vanilla extract
1¼ cups (5 ounces) sifted confectioners’ sugar
1 tablespoon instant coffee powder

1. Chop the chocolate and place it in a heat-proof bowl set over a pan of simmering water. Stir until just melted and set aside until cooled to room temperature.

2. In the bowl of an electric mixer fitted with a paddle attachment, beat the butter on medium-high speed until light yellow and fluffy, about 3 minutes. Add the egg yolk and vanilla and continue beating for 3 minutes. Turn the mixer to low, gradually add the confectioners’ sugar, then beat at medium speed, scraping down the bowl as necessary, until smooth and creamy. Dissolve the coffee powder in 2 teaspoons of the hottest tap water. On low speed, add the chocolate and coffee to the butter mixture and mix until blended. Don’t whip! Spread immediately on the cooled cake.

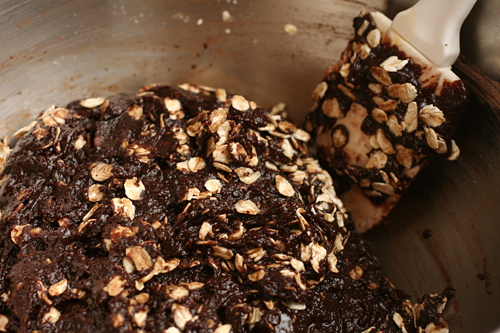
chocolate oatmeal drops

Chocolate cookies, yay! Oatmeal cookies, boo.

No creaming of butter, boo. Brownie mixing method, yay!

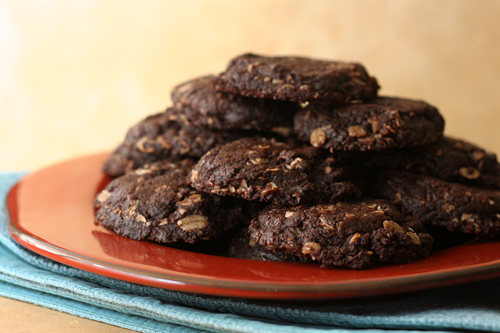
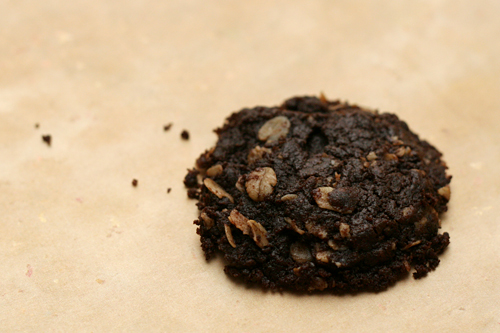
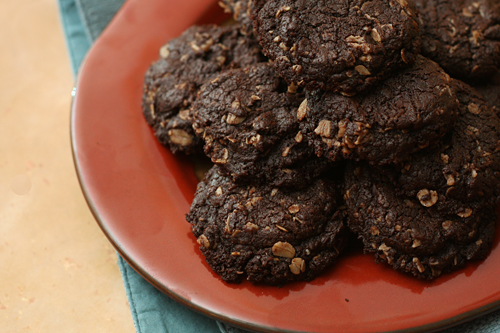
Bit of spreading around the edges, boo. Delicious chewy brownie cookies with bits of oatmeal, yay!

Caroline and Claire chose these cookies for Tuesdays with Dorie, and they have the recipe posted. I increased the salt, replaced the water with vanilla, and left out the cinnamon.

One year ago: Dorie’s Chocolate Chip Cookies
Two years ago: Devil’s Food White-Out Cake

Okay, now my next extry will be a chocolate frosting comparison. Pinky swear.

yellow cake comparison

I was going to wait to post this because now I want to do more yellow cake experiments. But this week I have a couple batches of cookies I want to make, and last week it was bread pudding and chocolate mousse, and next week it’ll be something else. By the time I find an opportunity to make more yellow cake, I’ll have forgotten everything about this batch.

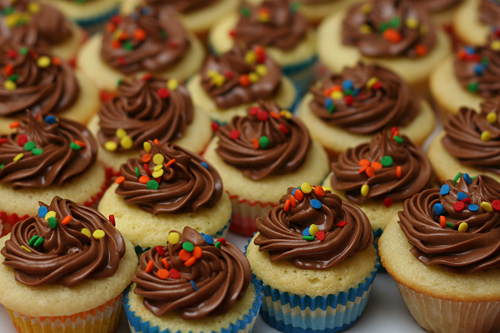
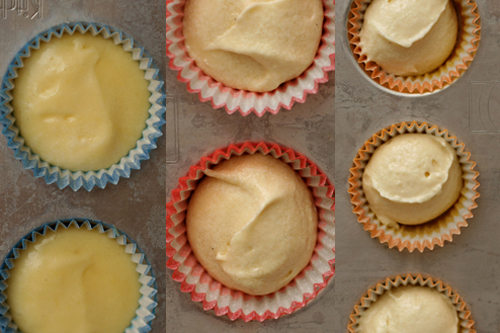
The three recipes I chose for this comparison are Cooks Illustrated’s Fluffy Yellow Cake (CI), Martha Stewart’s Yellow Butter Cake (MS), and Smitten Kitchen’s Best Birthday Cake (SK). Like all yellow cakes, they all include butter, whole eggs (unlike white cake, which only uses the whites), granulated sugar, vanilla, salt, leavener, flour (cake or all-purpose), and dairy (whole milk or buttermilk). I baked them all as mini cupcakes at the same temperature for the same amount of time.  I used the same size scoop to transfer the batter to the muffin cups.

CI (blue wrappers), which uses cake flour and buttermilk, is unique among these recipes in its inclusion of oil and extra egg yolks. It is also mixed like a chiffon cake, in which the dry ingredients and liquid ingredients (including melted butter) are combined, then beaten egg whites are folded in.

MS (red wrappers) uses a mixture of all-purpose flour and cake flour, as well as whole milk instead of buttermilk (it is therefore missing the baking soda the other two recipes require to balance the acidity of the buttermilk). It is mixed using the creaming method, in which the butter and sugar are combined, the eggs are added, then the milk and dry ingredients.

SK (yellow wrappers) also uses cake flour and buttermilk. There are no tricks up this cake’s sleeves. It is also mixed with the creaming method.

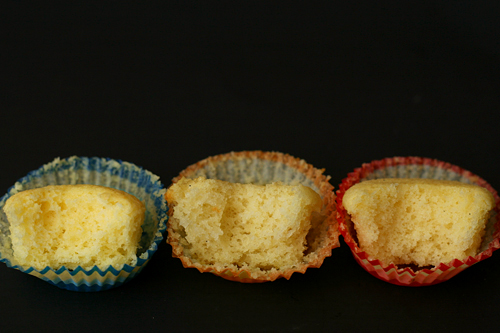
CI (blue) was buttery and moist with a nice sponginess. The top was a little sticky (easily covered up with frosting, but we were testing them plain) and crisp. It was my and Dave’s favorite.

MS (red) was less sticky and fluffier, but it was also less buttery, and, to be honest, a little bland. It has half the salt as the other recipes, so that’s probably the culprit, although it could be the use of whole milk instead of buttermilk.

SK (yellow) had a nice, buttery flavor, but a solid, flat top. For cupcakes, the flat-topped spreading is a deal breaker for me, but I believe it would be fine for a layer cake. And because this cake has over three times more baking soda than CI, I suspect that cutting it in half would solve the spreading problem, which I attribute to overrising.


(sorry I switched the order around in this photo)

So the cake with the best texture (MS) – fluffy, slightly domed, with no stickiness or overly hard tops – had the least impressive flavor. I’m inclined to think that it would be easier to bump up the flavor of that recipe than it would be to adjust the texture of the others. I would also love to try SK as a layer cake and/or with less baking soda. To complicate matters further, a reader recently pointed out another yellow cake comparison with several more recipes I’d like to try.

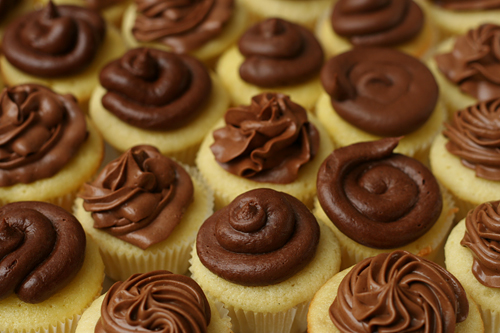
In the meantime, Cooks Illustrated’s Fluffy Yellow Layer Cake has the best balance of these three recipes of full, buttery flavor and a light texture. And once the cakes were smothered with chocolate frosting, I couldn’t tell the difference between them anyway.

(Oh, were you wondering what the best chocolate frosting is? It turns out I compared three chocolate frosting recipes in the same (exhausting) night. I’ll discuss those next.)

One year ago: Oatmeal Pancakes
Two years ago: Red Velvet Cake comparison (odd coincidence)
Three years ago: Potstickers

Printer Friendly Recipe
Fluffy Yellow Layer Cake (from Cooks Illustrated)

Makes two 9-inch round cakes

2½ cups (10 ounces) cake flour, plus extra for dusting pans
1¼ teaspoon baking powder
¼ teaspoon baking soda
¾ teaspoon table salt
1¾ cups (12.25 ounces) sugar
10 tablespoons unsalted butter, melted and cooled slightly
1 cup buttermilk, at room temperature
3 tablespoons vegetable oil
2 teaspoons vanilla extract
6 large egg yolks plus 3 large egg whites, at room temperature

1. Adjust an oven rack to the middle position and heat the oven to 350 degrees. Grease two 9-inch cake pans and line the bottoms with parchment paper. Grease the paper rounds, dust the pans with flour, and knock out the excess. Whisk the flour, baking powder, baking soda, salt and 1½ cups (10.5 ounces) sugar together in a large bowl. In a 4-cup liquid measuring cup or medium bowl, whisk together the melted butter, buttermilk, oil, vanilla, and yolks.

2. In the clean bowl of a stand mixer fitted with the whisk attachment, beat the egg whites at medium-high speed until foamy, about 30 seconds. With the machine running, gradually add the remaining ¼ cup (1.75 ounces) sugar; continue to beat until stiff peaks just form, 30 to 60 seconds (whites should hold peak but mixture should appear moist). Transfer to a bowl and set aside.

3. Add the flour mixture to the now-empty mixing bowl fitted with the whisk attachment. With the mixer running at low speed, gradually pour in the butter mixture and mix until almost incorporated (a few streaks of dry flour will remain), about 15 seconds. Stop mixer and scrape the whisk and sides of the bowl. Return the mixer to medium-low speed and beat until smooth and fully incorporated, 10 to 15 seconds.

4. Using rubber spatula, stir ⅓ of the whites into the batter to lighten, then add the remaining whites and gently fold into the batter until no white streaks remain. Divide the batter evenly between the prepared cake pans. Lightly tap the pans against the counter 2 or 3 times to dislodge any large air bubbles.

5. Bake until the cake layers begin to pull away from sides of pans and a toothpick inserted into the center comes out clean, 20-22 minutes. Cool the cakes in the pans on a wire rack for 10 minutes. Loosen the cakes from the sides of the pan with a small knife, then invert onto a greased wire rack and peel off the parchment. Invert the cakes again and cool completely on rack, about 1½ hours.

Printer Friendly Recipe
Yellow Butter Cake (from Martha Stewart via Annie’s Eats)

Makes two 9-inch round cakes

16 tablespoons (2 sticks) unsalted butter, at room temperature, plus more for greasing pans
1½ cups (7.2 ounces) all-purpose flour, plus more for dusting pans
1½ cups (6 ounces) cake flour
1 tablespoon baking powder
½ teaspoon salt
1¾ cups (12.15) granulated sugar
4 large eggs, room temperature
2 teaspoons vanilla extract
1¼ cups milk, at room temperature

1. Preheat the oven to 350˚ F. Line the bottoms of two 9-inch round cake pans with parchment paper. Butter and flour the edges of the pans, tapping out the excess; set aside. In a medium bowl, combine the all-purpose flour, cake flour, baking powder, and salt; whisk together to blend well and set aside.

2. In the bowl of an electric mixer, combine the butter and sugar. Beat on medium-high speed until light and fluffy, about 4 minutes, scraping down the bowl as needed. Mix in the eggs one at a time, beating well after each addition. Blend in the vanilla. With the mixer on low speed, add in the dry ingredients in three additions, alternating with the milk. Beat each addition just until incorporated.

3. Divide the batter between the prepared baking pans. Bake, rotating the pans halfway through baking, until the cakes are golden and a toothpick inserted in the center comes out clean, 30-35 minutes. Transfer the pans to a wire rack and let cool 20 minutes. Run a knife around the edge of the pans to help remove the cakes. Invert the cakes onto the rack and peel off the parchment. Let the cakes cool completely before frosting. Level the cakes if necessary.

Printer Friendly Recipe
Best Birthday Cake (from Smitten Kitchen)

Makes two 9-inch rounds

4 cups plus 2 tablespoons (16.6 ounces) cake flour
2 teaspoons baking powder
1½ teaspoons baking soda
1 teaspoon salt
16 tablespoons (2 sticks) unsalted butter, softened
2 cups (14 ounces) sugar
2 teaspoons pure vanilla extract
4 large eggs, at room temperature
2 cups buttermilk, well-shaken

1. Preheat oven to 350°F. Butter two 9-inch round cake pans and line with circles of parchment paper, then butter parchment. (Alternately, you can use a cooking spray, either with just butter or butter and flour to speed this process up.)

2. Sift together flour, baking powder, baking soda, and salt in a medium bowl. In a large mixing bowl, beat butter and sugar in a large bowl with an electric mixer at medium speed until pale and fluffy, then beat in vanilla. Add eggs one at a time, beating well and scraping down the bowl after each addition. At low speed, beat in buttermilk until just combined (mixture will look curdled). Add flour mixture in three batches, mixing until each addition is just incorporated.

3. Spread batter evenly in cake pan, then rap pan on counter several times to eliminate air bubbles. Bake until golden and a wooden pick inserted in center of cake comes out clean, 35 to 40 minutes. Cool in pan on a rack 10 minutes, then run a knife around edge of pan. Invert onto rack and discard parchment, then cool completely, about 1 hour.

bourbon bread pudding

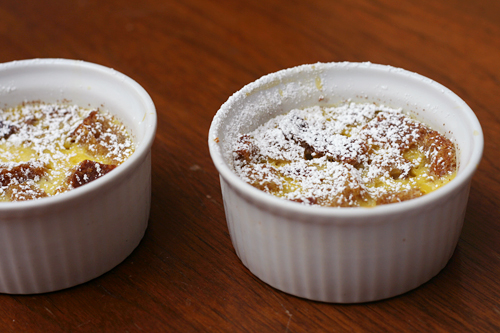
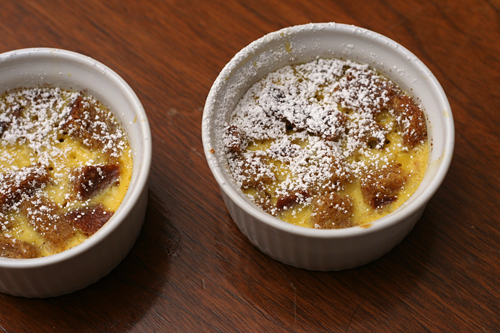
After making alfredo sauce and bourbon bread pudding in the same evening, I realized that they’re both on my cooking bucket list. What else is on it? Pulled pork cooked completely on the grill. Sourdough starter made without commercial yeast. Ricotta. I recently, impractically, added rillettes to the list.

Well, I have made ricotta, once, sort of. I don’t remember the particulars, but I remember that it was a half-baked effort, so it doesn’t count. And neither does this half-baked (not literally) attempt at bourbon bread pudding.

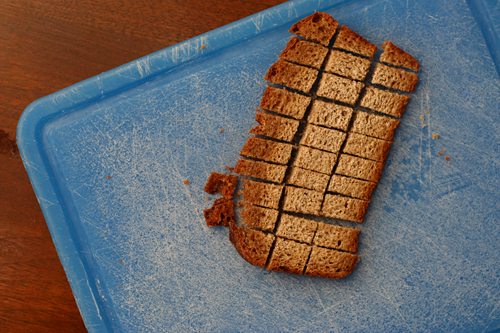
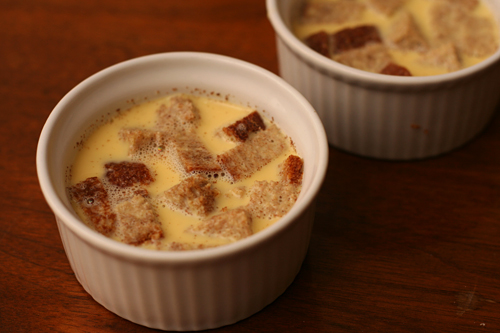
True, there was bourbon, there was bread, and there was pudding, but the bread was leftover from a failed attempt to squeeze the whole bread-baking procedure in after work (before I started just bringing the dough with me to work to shape it and let it rise) and was brick-like in density. Because it hadn’t risen enough, it didn’t have many air holes, and without those holes, the custard has no where to absorb into.

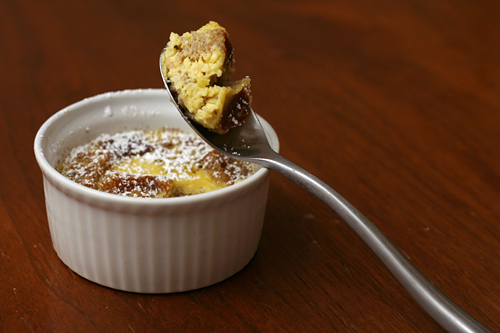
The pudding was still good, but I suspect that it wasn’t quite right. I’m crossing alfredo off, but I think I’ll keep bourbon bread pudding on the list for now. What’s on your cooking bucket list?

Sharon chose this for Tuesdays with Dorie, and she has the recipe posted. I used poorly risen bread, didn’t add any extra egg yolks, and overbaked it. Oh, and I added a pinch of salt of course.

One year ago: Rick Katz’s Brownies for Julia Child
Two years ago: Floating Islands

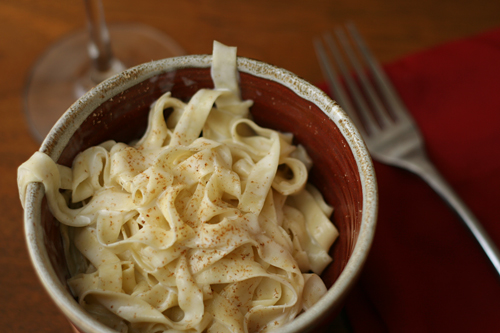
fettuccine alfredo

I am healthy. I am not perfect. But I am thin. I am fit. And I’m tired of holding myself up to an impossible standard.

I eat more fruits, vegetables, and whole grains than anyone I know. I exercise regularly. I don’t drink alcohol on weekdays. My lifestyle now is healthier than has it ever been.

And yet it is not enough. Not enough to feel confident in a bathing suit, not enough to lose this bit of pudge around my belly, maybe not enough to balance my slowing metabolism.

I’ve spent most of my life convinced I should exercise harder or more intensely, I should eat as healthy on weekends as I do on weekdays, I shouldn’t eat until I’m overfull. I should be perfect, or at least perfecter than I am now.

It will never happen. It isn’t worth it to me. I won’t give up baking or the batter-eating that accompanies it, I won’t give up sharing a bottle of champagne with Dave on Sunday afternoons, I won’t give up the too many hobbies that keep me from longer workouts, I won’t give up eating sushi rolls until I nearly burst, I won’t give up pasta, I won’t give up butter, I won’t give up cream.

Instead, I will give up bikinis. I will give up pants that don’t quite fit. I will give up guilt. I will not eat differently than I do now, but I will stop believing I should.

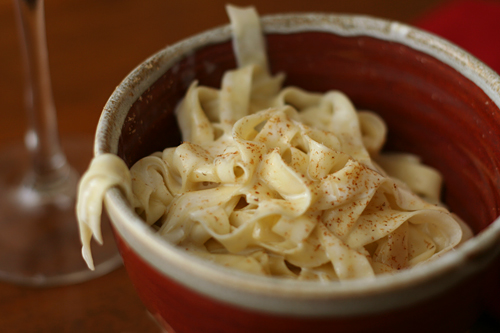
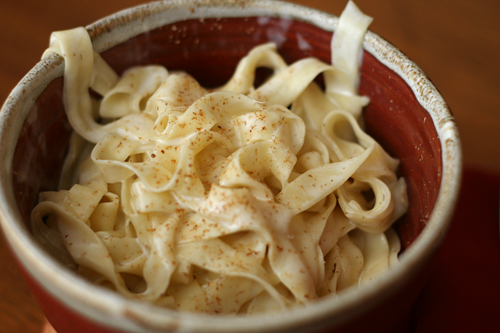
I am healthy. I am thin. I am fit. And I can eat pasta coated in cream and still be all of those things. I will never give up pasta and cream, but I will give up feeling bad about myself for eating it.

One year ago: Oatmeal Raisin Muffins
Two years ago: Crispy Bagel Roll
Three years ago: Fish Tacos

Printer Friendly Recipe
Fettuccine Alfredo
(from Cooks Illustrated’s The New Best Recipe)

6 appetizer servings

I’ve reproduced Cooks Illustrated’s recipe exactly below. But, in step 1, I found I needed to heat the cream-butter mixture over higher heat (medium-low to medium) for the cream to simmer.

To heat the bowls, either put them in a warm oven for a few minutes or ladle some of the hot pasta water into the bowls; leave the water in the bowl while you mix the pasta and sauce.

1⅔ cups heavy cream, preferably not ultrapasteurized
5 tablespoons unsalted butter
Salt
1 recipe fresh egg pasta, cut into fettuccine (below)
2 ounces (1 cup) parmesan cheese, freshly grated
Ground black pepper
Pinch freshly grated nutmeg

1. Bring 4 quarters water to a rolling boil in a large pot.

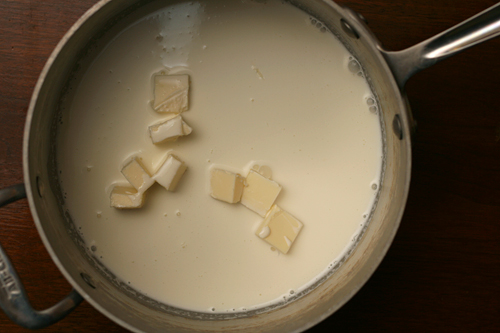
2. Combine 1⅓ cups of the cream and the butter in a sauté pan large enough to accommodate the cooked pasta. Heat over low heat until the butter is melted and the cream comes to a bare simmer. Turn off the heat and set aside.

3. When the water comes to a boil, add 1 tablespoon salt and the pasta to the boiling water and stir to separate the noodles. Cook until almost al dente. Drain the pasta and add it to the sauté pan. Add the remaining ⅓ cup cream, the parmesan, ½ teaspoon salt, pepper to taste, and the nutmeg. Cook over very low heat until the sauce is slightly thickened, 1 to 2 minutes. Serve the fettuccine immediately in heated pasta bowls.

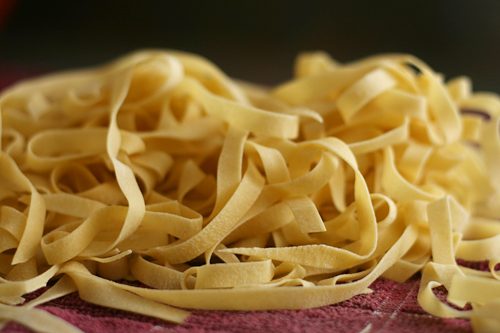
Fresh Egg Pasta (adapted from Cooks Illustrated)

You can mix this in the food processor, but for me, it’s easier to mix two ingredients by hand than it is to wash the food processor (even in the dishwasher).

You can also use store-bought pasta dough instead of making your own. You’ll need a pound for the amount of sauce in the alfredo recipe.

2 cups (10 ounces) all-purpose flour
3 eggs

1. Measure out the flour into a large bowl. Make a well in the center and add the eggs. Use a fork to break up the eggs slightly. Use a rubber spatula to mix the eggs into the flour until the dough is smooth. If it’s sticky, knead in more flour. If it’s too dry to mix in all the flour, knead in water ½ teaspoon at a time until the dough comes together.

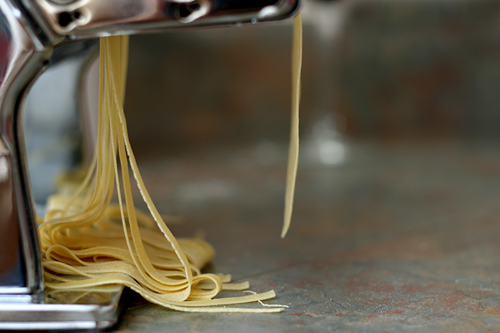
2. Divide the dough into 6 portions. Spread dry kitchen towels under the pasta roller and over the counter. Set the pasta machine at its widest opening. Working with one portion of dough at a time and keeping the others covered, roll the dough through the pasta roller. Fold it in thirds like a letter and roll it through the wide setting again. Repeat four more times, adding flour as needed to prevent the dough from sticking to the machine.