strawberry cream cake

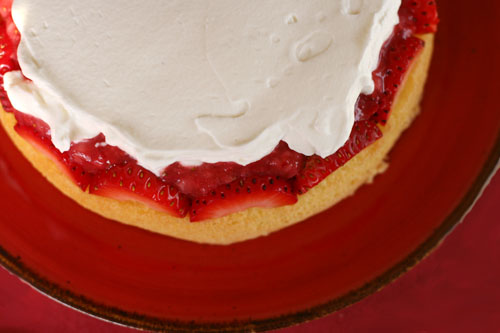
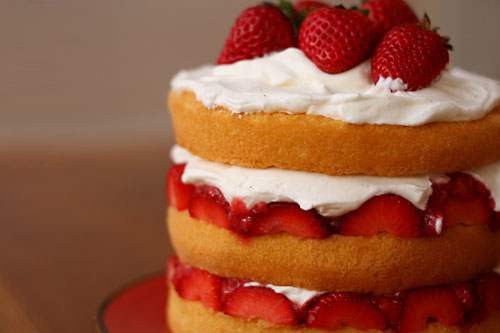
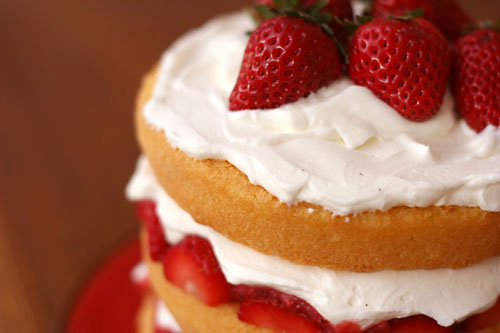
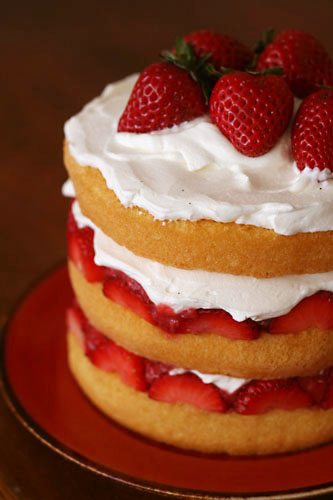
Strawberries, cream cheese, and cake – is there any better combination? Strawberry shortcake is the iconic strawberries and cream dessert, and for good reason, but for me, this cake is a step above. Mostly because of the cream cheese, but I’m also partial to soft and tender cake over a craggy biscuit. And you can’t beat the wow factor of a beautiful layer cake with the innards exposed. Cake innards are my favorite.

Of course there’s a price to pay for alternating layers of sunny cake, swirled cream, and ruby strawberries, and that is in fussiness. And who doesn’t love fussiness? Not I.

Because this is a Cooks Illustrated recipe, there are a handful of tricks that make it work. The cream cheese stabilizes and thickens the whipped cream, not to mention it tastes so darn good. Half of the strawberries are halved for maximum visual impact, and the remainder is macerated to remove liquid. The extracted juice, full of strawberry flavor and not to be wasted, is cooked down to a syrup that won’t make your cake soggy.

Three parts that must be separately prepared and then alternately layered to make a tall, striped, impressive dessert.  A dessert which, when sliced, will collapse into a jumble of fruit, cream, and cake that shows a remarkable resemblance to strawberry shortcake.  But it was worth the trouble of all that layering, because fussing is fun, right?


One year ago: Cream Cheese Spritz
Two years ago: Strawberry Lemon Sorbet
Three years ago: Ricotta Spinach Tofu Ravioli

Printer Friendly Recipe
Strawberry Cream Cake (from Cook’s Illustrated)

12 servings

I hate splitting cakes. I baked my cake batter in three separate cake pans instead of one pan which would later need to be split.

I made a half recipe in 6-inch pans.  6-inch round pans are slightly smaller than half of a 9-inch pan, so my layers are taller than the original recipe will result in.

Cake:
1¼ cups (5 ounces) cake flour
1½ teaspoons baking powder
¼ teaspoon table salt
1 cup (7 ounces) sugar
5 large eggs (2 whole and 3 separated), room temperature
6 tablespoons unsalted butter, melted and cooled slightly
2 tablespoons water
2 teaspoons vanilla extract

Strawberry Filling:
2 pounds fresh strawberries (medium or large, about 2 quarts), washed, dried, and stemmed
4–6 tablespoons sugar
2 tablespoons Kirsch
Pinch table salt

Whipped Cream:
8 ounces cream cheese, room temperature
½ cup (3½ ounces) sugar
1 teaspoon vanilla extract
⅛ teaspoon table salt
2 cups heavy cream

1. FOR THE CAKE: Adjust an oven rack to the lower-middle position and heat the oven to 325 degrees. Grease and flour a round 9 by 2-inch cake pan or 9-inch springform pan and line with parchment paper. Whisk flour, baking powder, salt, and all but 3 tablespoons sugar in a mixing bowl. Whisk in 2 whole eggs and 3 yolks (reserving whites), butter, water, and vanilla; whisk until smooth.

2. In a clean bowl of a standing mixer fitted with the whisk attachment, beat the remaining 3 egg whites at medium-low speed until frothy, 1 to 2 minutes. With the machine running, gradually add the remaining 3 tablespoons sugar, increase the speed to medium-high, and beat until soft peaks form, 60 to 90 seconds. Stir one-third of the whites into the batter to lighten; add the remaining whites and gently fold into the batter until no white streaks remain. Pour the batter into a prepared pan and bake until a toothpick or wooden skewer inserted into the center of the cake comes out clean, 30 to 40 minutes. Cool in the pan 10 minutes, then invert the cake onto a greased wire rack; peel off and discard the parchment. Invert the cake again; cool completely, about 2 hours.

3. FOR THE STRAWBERRY FILLING: Halve 24 of the best-looking berries and reserve. Quarter the remaining berries; toss with 4 to 6 tablespoons sugar (depending on the sweetness of the berries) in a medium bowl and let sit 1 hour, stirring occasionally. Strain the juices from the berries and reserve (you should have about ½ cup). In the workbowl of a food processor fitted with the metal blade, give the macerated berries five 1-second pulses (you should have about 1½ cups). In a small saucepan over medium-high heat, simmer the reserved juices and Kirsch until the mixture is syrupy and reduced to about 3 tablespoons, 3 to 5 minutes. Pour the reduced syrup over the macerated berries, add a pinch of salt, and toss to combine. Set aside until the cake is cooled.

4. FOR THE WHIPPED CREAM: When the cake has cooled, place the cream cheese, sugar, vanilla, and salt in the bowl of a standing mixer fitted with the whisk attachment. Whisk at medium-high speed until light and fluffy, 1 to 2 minutes, scraping down the bowl with a rubber spatula as needed. Reduce the speed to low and add heavy cream in a slow, steady stream; when it’s almost fully combined, increase the speed to medium-high and beat until the mixture holds stiff peaks, 2 to 2½ minutes more, scraping the bowl as needed (you should have about 4½ cups).

5. TO ASSEMBLE THE CAKE: Using a large serrated knife, slice the cake into three even layers. Place the bottom layer on a cardboard round or cake plate and arrange a ring of 20 strawberry halves, cut sides down and stem ends facing out, around the perimeter of the cake layer. Pour one half of the pureed berry mixture (about ¾ cup) in the center, then spread to cover any exposed cake. Gently spread about one-third of the whipped cream (about 1½ cups) over the berry layer, leaving a ½-inch border from the edge. Place the middle cake layer on top and press down gently (the whipped cream layer should become flush with cake edge). Repeat with 20 additional strawberry halves, the remaining berry mixture, and half of the remaining whipped cream; gently press the last cake layer on top. Spread the remaining whipped cream over the top; decorate with the remaining cut strawberries. Serve, or chill for up to 4 hours.
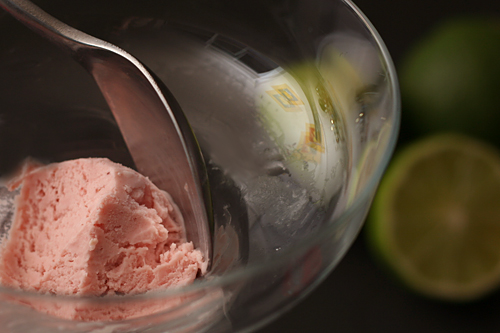
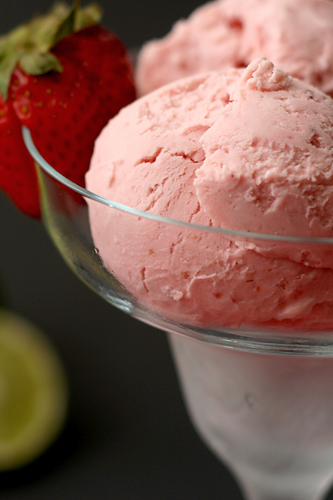
strawberry daiquiri ice cream

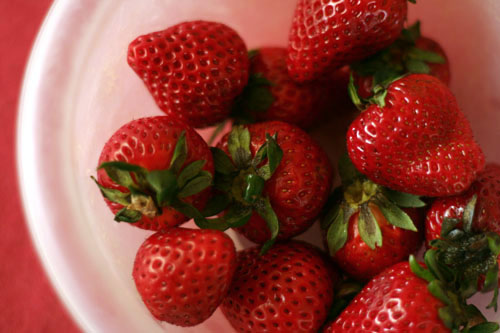
When it comes to alcohol, I pretty much like it all. Red wine, white wine, dark beers, light beers, vodka cocktails, straight whiskey. It’s all good. I don’t drink foo-foo drinks often, only because they’re too much work to mix up at home and too low on alcohol to pay for in a bar. But that doesn’t mean I have anything against the combination of fruit and liquor.

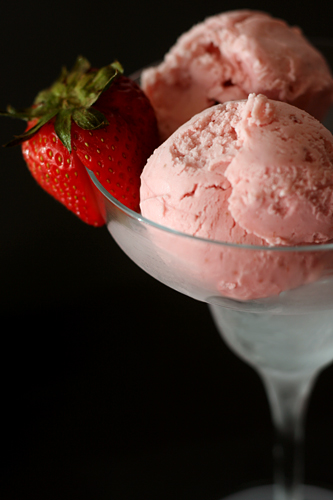
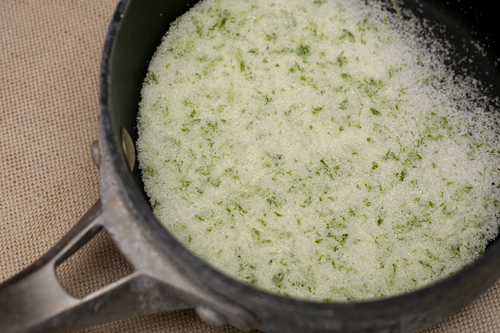
Still, doesn’t it seem like fruit puree, citrus, alcohol, and the cream that’s inevitably served, whipped, on top, would be an even better combination churned into ice cream?  The same combination of strawberries and lime, but smoother, richer, and, okay, less alcoholic.

I wish it had occurred to me earlier – like before we ate all the ice cream – to pour rum over the ice cream. Rum float!  Or to mix so much rum into the base that the ice cream doesn’t freeze completely.  Rum slushy!  Or I suppose we could keep this recipe as a dessert and not a cocktail.  If I must.

One year ago: Artichoke Ravioli
Three years ago: Blueberry Poppy Seed Brunch Cake

Printer Friendly Recipe
Strawberry Daiquiri Ice Cream (adapted from David Lebovitz’s Raspberry Ice Cream recipe in The Perfect Scoop)

Makes about 1 quart

Mine wasn’t as limey as I would have liked, so I’ve doubled both the zest and the juice from what I used. I don’t believe the extra juice will be detrimental to the smoothness of the ice cream. You could also let the half-and-half mixture steep with the zest for up to an hour before reheating it and mixing it with the yolks.

When strawberries are pureed, I often prefer to use frozen berries that have been defrosted. Because they are picked at their peak and immediately frozen, they are often of higher quality than fresh strawberries. Furthermore, they make a smoother puree.

To make this more kid-friendly, feel free to use only half the rum.  Don’t leave it all out, as it helps keep the ice cream softer.

1 cup (7 ounces) sugar, separated
Zest from 2 limes
Pinch salt
1½ cups half-and-half
1½ cups heavy cream
4 yolks
1½ cups (6 ounces) strawberry puree
¼ cup lime juice (2 limes)
2 tablespoons rum

1. In a medium saucepan, rub the lime zest into ½ cup (3.5 ounces) of the sugar until fragrant. Add the half-and-half and heat the mixture over medium-high heat until it simmers. Meanwhile, pour the cream into a large bowl; set a fine-mesh strainer over the bowl.

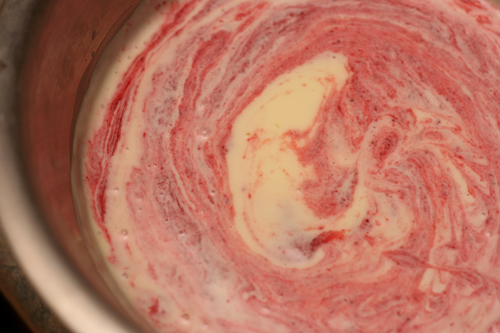
2. In a separate medium bowl, beat the egg yolks with the remaining ½ cup (3.5 ounces) sugar. When the half-and-half simmers, very slowly pour it into the beaten egg yolks, whisking constantly. Pour the mixture back into the pot and bring just to a simmer over medium heat, still whisking constantly. Pour through the strainer into the bowl with the cream; stir to combine. Mix in the strawberry puree, lime juice, and rum. Chill until cold, at least 4 hours or up to overnight.

3. Freeze the ice cream custard in your ice cream maker according to the manufacturer’s instructions. Once frozen to the consistency of soft serve ice cream, transfer the ice cream to a chilled bowl and freeze until firm.


scampi fra diavolo

I remember last semester, when I was teaching in the evenings, I had all these plans for what I wanted to do once the semester ended. I was going to organize my recipes and study photoshop and learn Italian and basically rule the world. Instead, I’ve been cooking.

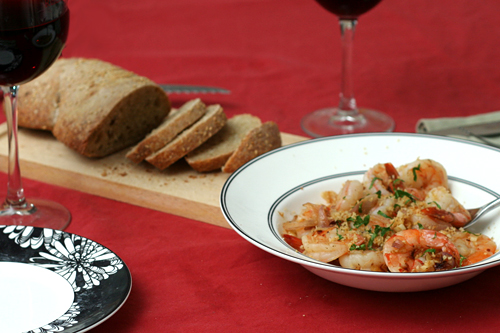
So if you’re in my little town on a Saturday night, the best meal in town is at my house. There’ll be appetizers, there’ll be wine, there’ll be some sort of meaty main course, there’ll be a dessert you have no room for but can’t resist anyway. There’ll probably be bread. In between courses, there’ll be live music courtesy of Dave. You’re all invited! Just keep in mind that I live hundreds of miles from a major airport. Plus Dave thinks you’re all secretly rapists. Okay, I take it back, you’re not invited.

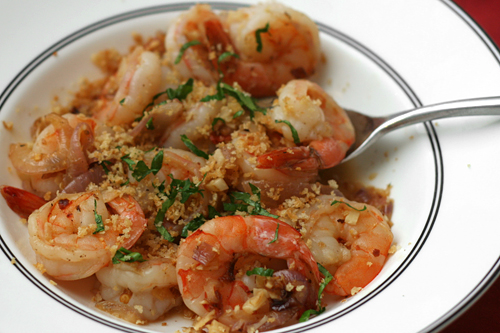
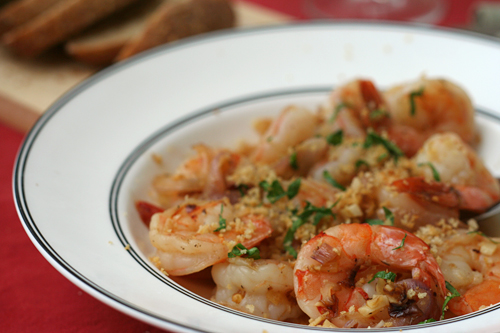
Which is too bad, because you’ll be missing out on some good food, the best of which I believe was this shrimp. A cross between the bright flavors of shrimp scampi and the heat of shrimp fra diavolo (“shrimp of the devil”), this fresh spicy dish was the perfect opening to a evening of cooking and eating. Around these parts, that’s just an average Saturday night.

One year ago: Whole Wheat Brioche
Three years ago: Almost No-Knead Bread

Scampi fra Diavolo (tweaked from Bon Appétit via epicurious)

3 tablespoons butter, divided
⅓ cup panko (Japanese breadcrumbs)
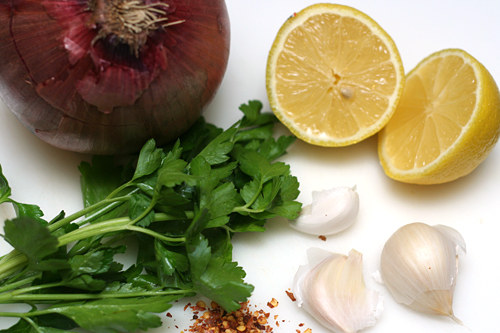
½ cup chopped fresh Italian parsley, divided
1¼ pounds uncooked large shrimp, peeled, deveined, tails left intact
2 tablespoons olive oil
1½ cups thinly sliced red onion
5 garlic cloves, minced
½ teaspoon dried crushed red pepper
⅔ cup dry white wine (preferably Sauvignon Blanc)
Lemon wedges

1. Melt 1 tablespoon butter in a medium nonstick skillet over medium-high heat. Add the panko and stir until it’s golden and crisp, about 2 minutes. Transfer to a small bowl; mix in 2 tablespoons of parsley. Wipe out skillet.

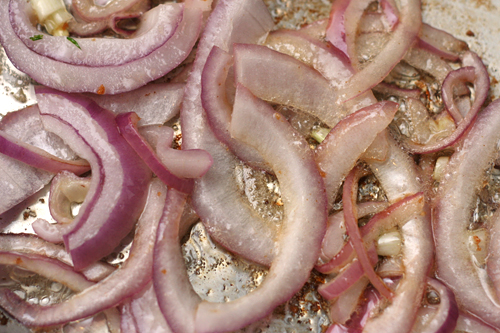
2. Sprinkle the shrimp with salt and pepper. Melt the remaining 2 tablespoons of butter with the olive oil in the same skillet over medium-high heat. Add the red onion and sauté until it’s beginning to soften, about 3 minutes. Stir in the garlic and crushed red pepper and sauté 1 minute. Add the shrimp and sauté until barely opaque in center, about 1 minute per side. Add the white wine and simmer until the liquid is slightly thickened and reduced, 2 to 3 minutes. Season to taste with salt and pepper. Stir in the remaining parsley. Transfer to a shallow bowl. Top with the sautéed panko and serve with lemon wedges.

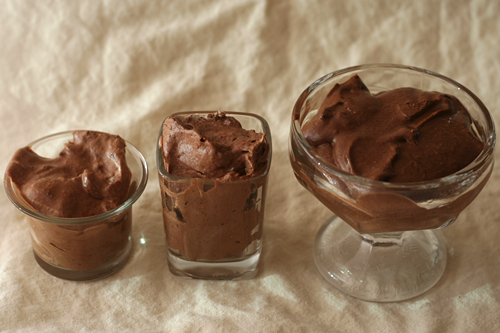
chocolate mousse comparison

I realized something potentially important with this comparison. When Dave and I and whoever else participate in comparisons, we just dive in and start throwing out adjectives. That’s never been a problem before, but this time, Dave and I had some confusion over what we each wanted in a mousse. Perhaps my tasters and I should clarify beforehand what we’re looking for. I know I wanted an exceptionally chocolately flavor and an exceptionally light texture. I don’t think Dave knew what he wanted…or even what chocolate mousse is supposed to be.

I compared David Lebovitz’s recipe from A Sweet Life in Paris (DL), Cooks Illustrated’s Premium Chocolate Mousse recipe from 2006 (CI Premium), and Cooks Illustrated’s older Chocolate Mousse recipe (found in The New Best Recipe) (CI). It drives me crazy when Cooks Illustrated publishes multiple recipes for the same thing without referencing the previous recipe. I’m always left wondering which is the better version. What better way to find out than to make them both?

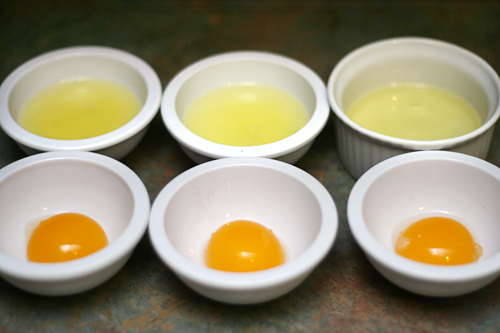
DL – This recipe is simple: chocolate melted with water, egg yolks added, beaten egg whites folded in. I haven’t read A Sweet Life and couldn’t find this recipe on David’s blog, but according to Annie, he explains in his book that this is the most traditional version of chocolate mousse.

CI Premium – This recipe is designed specifically for fancy schmancy chocolate. (I was using Valrhona.) The recipe contains the chocolate, water, and eggs called for in Lebovitz’s recipe, but spices things up with cocoa (balanced by the addition of sugar), brandy, and espresso powder. Folding in whipped cream lightens the mixture.

CI – Unlike the other two recipes, this one contains butter and no water. In addition to the requisite chocolate and eggs, it includes coffee (or alcohol), vanilla, sugar and whipped cream.

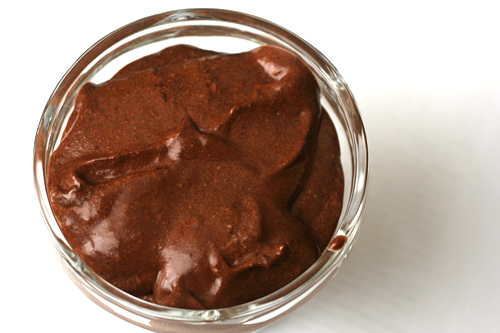
DL – Lightened by only beaten egg whites and not whipped cream, this was the heaviest mousse of the three. It was thicker, grainy, and more solid, with a cocoa-like flavor (despite containing no cocoa) and a bitter aftertaste. For Dave, it was too much – too rich and too dense.  For me, it just wasn’t as light as I want my mousse.

CI Premium – This was softer and sweeter than the other mousses. Dave thought it was the most balanced.

CI – This was light and airy and chocolately, and for me, perfect in every way. I love its bittersweetness, I love the meringue bubbles that pop in my mouth, I love how it’s firm but light.

The confusion came when Dave said that none of them were as good as my standard recipe – but I hadn’t made chocolate mousse in nearly four years, and CI’s recipe from The New Best Recipe was what I used then. Furthermore, Dave’s favorite of the three was CI’s Premium recipe, because it was “puddinglike”. But a mousse shouldn’t be puddinglike (and I confess it probably hadn’t chilled long enough).

It looks like for this comparison, there is only one opinion that matters, and that is mine, of course. Good thing Cooks Illustrated’s Chocolate Mousse was so clearly the winner. Well, I was the winner too, because I got to eat three delicious chocolate mousses – and one perfect mousse – in one sitting.


left to right: CI Premium, CI, DL

One year ago: Chicken Mushroom Spinach Lasagna
Two years ago: Pecan Sour Cream Biscuits
Three years ago: Spaghetti and Meatballs

Printer Friendly Recipe
Chocolate Mousse
(from Cooks Illustrated’s The New Best Recipe)

6 ounces bittersweet or semisweet chocolate, chopped coarse
4 tablespoons (½ stick) unsalted butter
Pinch salt
1 teaspoon vanilla extract
2 tablespoons strong coffee or 4 teaspoons brandy, orange-flavored liqueur, or light rum
4 large eggs, separated
2 tablespoons sugar
½ cup chilled heavy cream, plus more for serving

1. Melt the chocolate in a medium bowl set over a large saucepan of barely simmering water or in an uncovered Pyrex measuring cup microwaved at 50 percent power for 3 minutes, stirring once at the 2-minute mark. Whisk the butter into the melted chocolate, 1 tablespoon at a time. Stir in the salt, vanilla, and coffee until completely incorporated. Whisk in the yolks, one at a time, making sure that each is fully incorporated before adding the next; set the mixture aside.

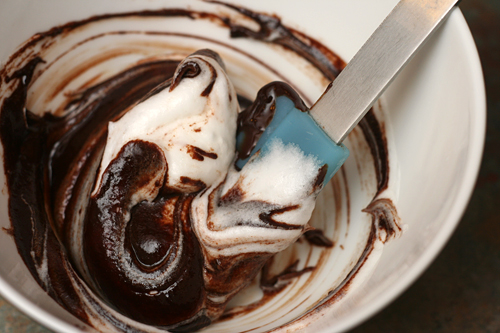
2. Stir the egg whites in a clean mixing bowl set over a saucepan of hot water until slightly warm, 1 to 2 minutes; remove the bowl from the saucepan. Beat with an electric mixer set at medium speed until soft peaks form. Raise the mixer speed to high and slowly add the sugar; beat to soft peaks. Whisk a quarter of the beaten whites into the chocolate mixture to lighten it, then gently fold in the remaining whites.

3. Whip the cream to soft peaks. Gently fold the whipped cream into the mousse. Spoon portions of the mousse into 6 or 8 individual serving dishes or goblets. Cover and refrigerate to allow the flavors to blend, at least 2 hours. (The mousse may be covered and refrigerated for up to 24 hours.) Serve with additional whipped cream.
Printer Friendly Recipe
Dark Chocolate Mousse
(from Cooks Illustrated)

8 ounces bittersweet chocolate, 62 to 70 percent cacao, chopped fine
3 tablespoons granulated sugar
2 tablespoons cocoa powder, preferably Dutch-processed
1 teaspoon instant espresso powder
7 tablespoons water
1 tablespoon brandy
3 large eggs, separated
⅛ teaspoon table salt
1 cup heavy cream, plus 2 more tablespoons (chilled)

1. Melt the chocolate, 2 tablespoons sugar, cocoa powder, espresso powder, water, and brandy in a medium heatproof bowl set over a saucepan filled with 1 inch of barely simmering water, stirring frequently until smooth. Remove from the heat.

2. Whisk the egg yolks, 1½ teaspoons sugar, and salt in a medium bowl until the mixture lightens in color and thickens slightly, about 30 seconds. Pour the melted chocolate into the egg mixture and whisk until thoroughly combined. Let cool until slightly warmer than room temperature, 3 to 5 minutes.

3. In the clean bowl of a standing mixer fitted with the whisk attachment, beat the egg whites at medium-low speed until frothy, 1 to 2 minutes. Add the remaining 1½ teaspoons sugar, increase the mixer speed to medium-high, and beat until soft peaks form when the whisk is lifted, about 1 minute. Detach the whisk and bowl from the mixer and whisk the last few strokes by hand, making sure to scrape any unbeaten whites from the bottom of the bowl. Using the whisk, stir about one-quarter of the beaten egg whites into the chocolate mixture to lighten it; gently fold in the remaining egg whites with a rubber spatula until a few white streaks remain.

4. Whip the heavy cream at medium speed until it begins to thicken, about 30 seconds. Increase the speed to high and whip until soft peaks form when the whisk is lifted, about 15 seconds longer. Using a rubber spatula, gently fold the whipped cream into the mousse until no white streaks remain. Spoon the mousse into 6 to 8 individual serving dishes or goblets. Cover with plastic wrap and refrigerate until set and firm, at least 2 hours. (The mousse may be covered and refrigerated for up to 24 hours.)
Printer Friendly Recipe
Chocolate Mousse
(from David Lebovitz via Annie’s Eats)

I just got David Lebovitz’s The Sweet Life in Paris, which contains this original recipe, in the mail. I’ve copied the recipe in his words. I also noticed that he calls for 2 tablespoons brandy or coffee, which I didn’t use.

7 ounces bittersweet or semisweet chocolate, finely chopped
3 tablespoons water
4 large eggs, at room temperature, separated
Pinch of coarse salt

1. In a medium-sized bowl set over a pan of barely simmering water, begin melting the chocolate with the water, making sure not to let it get too hot. Take the bowl off the heat when the chocolate is almost completely melted, then stir gently until smooth. Set aside.

2. In a clean, dry bowl, whip the egg whites with the salt until they form stiff peaks when you lift the whip. They should still be smooth and creamy, not grainy.

3. Stir the egg yolks into the chocolate, then fold one-third of the whites into the chocolate to lighten it up.

4. Fold the remaining egg whites into the chocolate just until there are no visible streaks of whites. Cover the bowl with plastic wrap and chill for at least 3 hours. (You can also divide the mousse into individual custard cups, ramekins, or goblets before serving.)
 

roasted tomato soup

When I was a kid, my friend Katie and I played a game in which we had a restaurant. We wrote up a menu and would let our parents order food from it, and then we’d bring them what they ordered. In other words, our parents paid for their food twice – once at the grocery store, and then a second time to Katie and I after we heated it up in the microwave for them.

Among other delicacies, our menu included nachos (Cheez Whiz and chips) and tomato soup. Tomato soup was probably our specialty. At Katie’s house, the Campbell’s concentrate was mixed with milk, but at my house, we added water. Katie and I were nothing if not accommodating to our customers’ preferences.

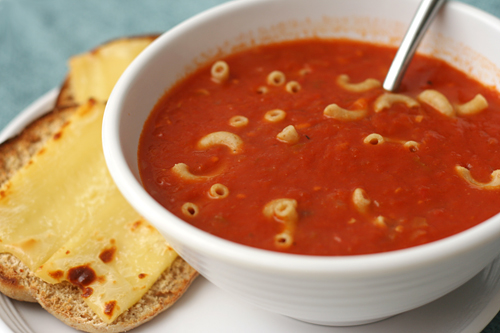
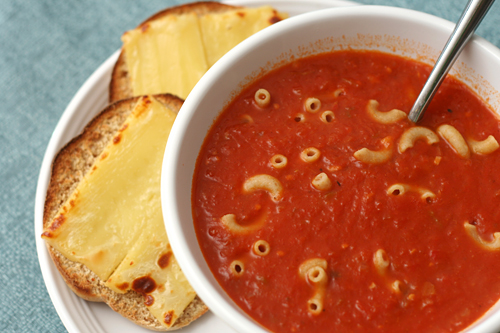
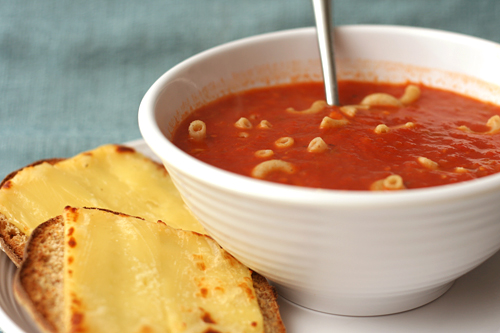
This tomato soup is not that tomato soup. It’s brighter, fresher, but still deeply flavored from the roasted tomatoes. The shallots make it just a little sweet, and a pinch of allspice adds warmth. This soup, topped with whole wheat macaroni noodles and served alongside cheese toast, is my favorite meal. It’s even worth ordering in a real restaurant.

One year ago: Masa Pancakes with Chipotle Salsa and Poached Eggs (I’m about halfway through that same bag of masa harina.)
Two years ago: Spinach Bread
Three years ago: Raspberry Bars

Printer Friendly Recipe
Roasted Tomato Soup (adapted from Cooks Illustrated)

6 servings

This recipe is messier without an immersion blender, but I made it that way for years. Use a large slotted spoon to transfer the solids to the blender with a cup or two of liquid and blend to puree. Pour the pureed mixture back into the liquid; stir in the brandy. You can blend everything instead of just the solids, but the soup will turn orange instead of red.

Feel free to add in a few tablespoons of cream (or pureed cottage cheese for a healthier alternative) at the end if you’re like Katie’s family and prefer your tomato soup creamy.

2 (28-ounce) cans whole tomatoes in juice
1½ tablespoons brown sugar
2 tablespoons butter
4 shallots, chopped
1 tablespoon tomato paste
⅛ teaspoon allspice
1¾ cup low-sodium chicken broth
¼ cup brandy

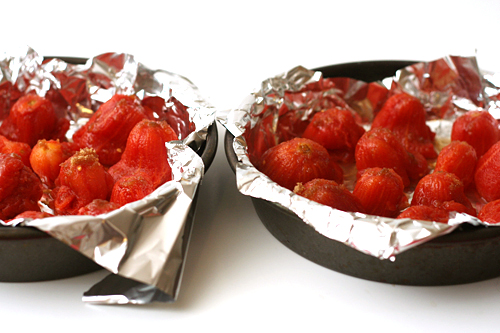
1. Adjust an oven rack to the upper middle position and heat the oven to 450 degrees. Line the bottom and sides of two 8- or 9-inch round pans with aluminum foil. Use a slotted spoon to remove the tomatoes, one by one, from their juice. Open the tomato on the side opposite the stem. Holding the tomato loosely in a fist, gently squeeze the tomato to remove most of its juice. Place the tomato stem-side up on one of the prepared pans. Repeat with the remaining tomatoes. Sprinkle the tomatoes with the brown sugar.  Roast the tomatoes until they are dry and lightly browned, about 45 minutes. Reserve the tomato juice.

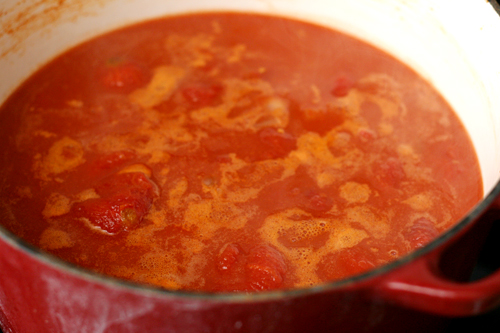
2. Melt the butter in a large saucepan over medium-low heat. Add the shallots, tomato paste, and allspice to the pot; stir, then cover the pot and cook, stirring occasionally, until the shallots are soft, about 10 minutes. Add the chicken broth, reserved tomato juice, and roasted tomatoes. Bring to a simmer over medium-high heat, then reduce the heat to low, cover, and simmer 15 minutes. Use an immersion blender to puree the soup. Stir in the brandy and serve.

This recipe is in one of my earliest blog entries, but I have simplified and healthified (but not de-tastified) the soup since then, so I thought it was worth posting an updated version.

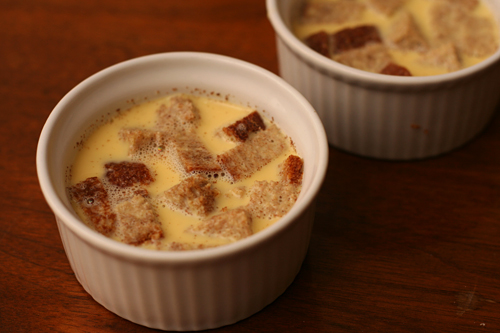
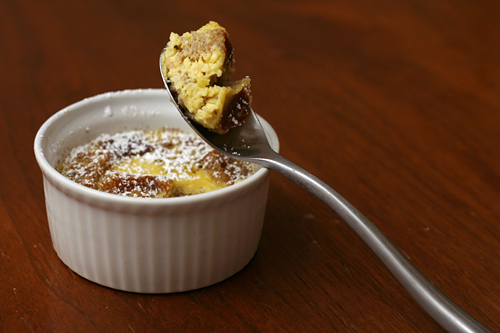
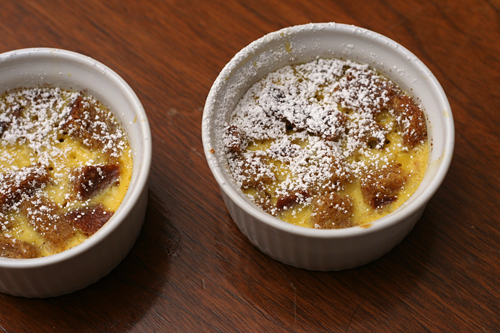
bourbon bread pudding

After making alfredo sauce and bourbon bread pudding in the same evening, I realized that they’re both on my cooking bucket list. What else is on it? Pulled pork cooked completely on the grill. Sourdough starter made without commercial yeast. Ricotta. I recently, impractically, added rillettes to the list.

Well, I have made ricotta, once, sort of. I don’t remember the particulars, but I remember that it was a half-baked effort, so it doesn’t count. And neither does this half-baked (not literally) attempt at bourbon bread pudding.

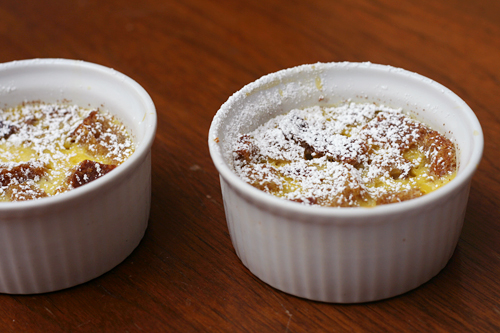
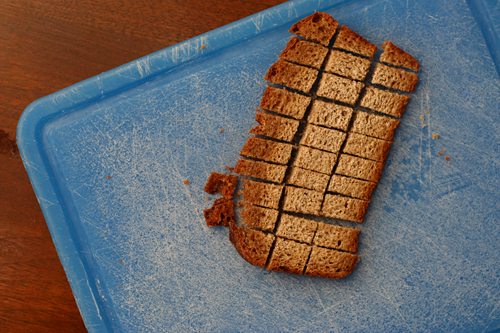
True, there was bourbon, there was bread, and there was pudding, but the bread was leftover from a failed attempt to squeeze the whole bread-baking procedure in after work (before I started just bringing the dough with me to work to shape it and let it rise) and was brick-like in density. Because it hadn’t risen enough, it didn’t have many air holes, and without those holes, the custard has no where to absorb into.

The pudding was still good, but I suspect that it wasn’t quite right. I’m crossing alfredo off, but I think I’ll keep bourbon bread pudding on the list for now. What’s on your cooking bucket list?

Sharon chose this for Tuesdays with Dorie, and she has the recipe posted. I used poorly risen bread, didn’t add any extra egg yolks, and overbaked it. Oh, and I added a pinch of salt of course.

One year ago: Rick Katz’s Brownies for Julia Child
Two years ago: Floating Islands

almond biscotti

When faced with three bowls of Bolognese and a spoon, Dave declared them all good. “Different, but good.” Which is better? “I don’t know. They’re all good.” Carne adovada? “They all taste the same.” Sugar cookies? “They need frosting.”

I can’t really complain about having someone to cook for who appreciates everything I make (unless it has olives), but feedback isn’t Dave’s strongpoint. He used to tell me that he could only give a good opinion if he was served similar dishes side-by-side, which started this whole thing, but not even that always works.

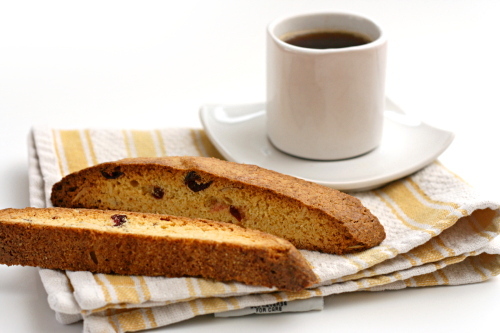
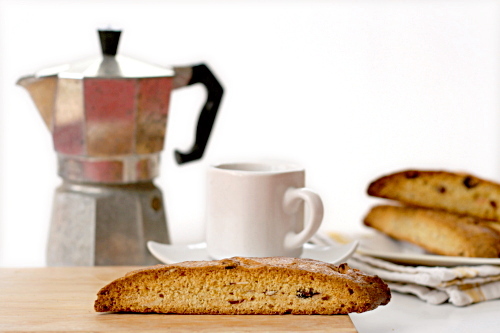
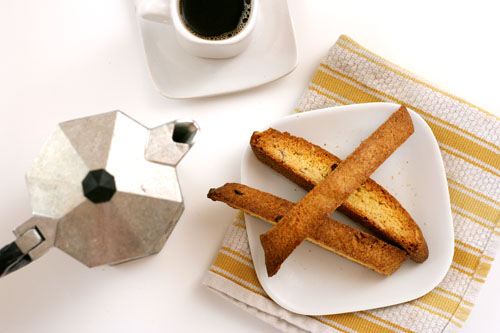
Unless it concerns almond biscotti. I have made at least four almond biscotti recipes, over the course of well over a year, and Dave has unequivocally identified his favorite. It was the first I tried, and nothing else has ever lived up. He loves these because they’re just crunchy enough to dip into his coffee without getting soggy, but not so crisp that they’re a challenge to bite into.

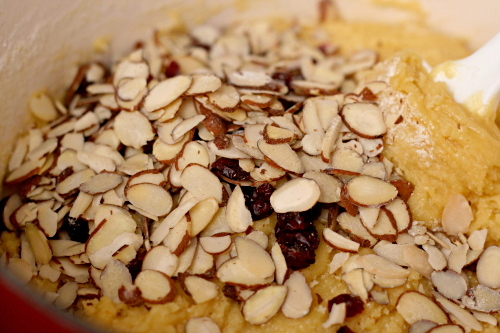
I like them because the recipe is simple to mix up and is easily adaptable. Usually I use slivered blanched almonds, but if I need to use up sliced almonds, those work just fine as well. If I’m in the mood for variety, I can add different nuts and dried fruit, although if I do, Dave will be disappointed. Pure, unadulterated almond biscotti is one of Dave’s favorites, up there with banana cream pie and salmon pesto pasta. At least this recipe is.

One year ago: Tartine’s Banana Cream Pie
Two years ago: Crispy Baked Chicken Strips
Three years ago: Mu Shu Pancakes

Printer Friendly Recipe
Almond Biscotti (adapted from Bon Appetit via Smitten Kitchen)

There’s no need to toast the nuts before mixing the dough; they’ll brown in the oven.

You’ll only use a bit of the egg white, plus I dislike using only one part of an egg. Instead, I steal just a bit of egg white from one of the eggs that gets mixed into the dough to use for the egg wash instead of using a separate egg white.

1 large egg white
3¼ cups (15.6 ounces) all-purpose flour
1 tablespoon baking powder
3 large eggs
10 tablespoons (1¼ sticks) unsalted butter, melted
1/3 teaspoon salt
1½ cups (10.5 ounces) sugar
1 tablespoon vanilla extract
1 tablespoon Grand Marnier or orange liqueur
1 tablespoon orange zest
1 cup slivered or sliced almonds

1. Heat the oven to 350 degrees. Line a large baking sheet with parchment paper or a silicone mat. Whisk the single egg white until frothy. In a medium bowl or large measuring cup, mix the flour and baking powder.

2. In a large pot over medium-low heat, heat the butter just until melted. Remove the pot from the heat; stir in the sugar and salt. Stir in the eggs, one at time; add the extract, liqueur, and zest. Slowly mix in the flour mixture, then the almonds.

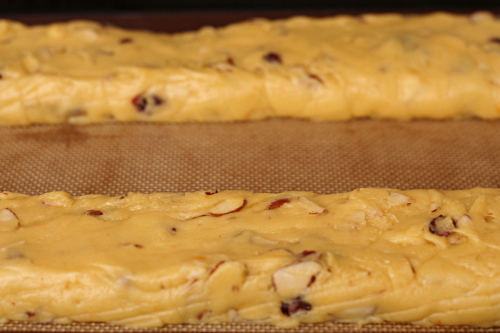
3. Divide the dough in half. On the prepared baking sheet, shape each half into a log 2-inches across and ¾-inch high. Brush with the egg white. Bake for 30 minutes, until puffed and golden.

4. Carefully transfer the logs to a cooling rack (I use two large spatulas for this); cool for 30 minutes.

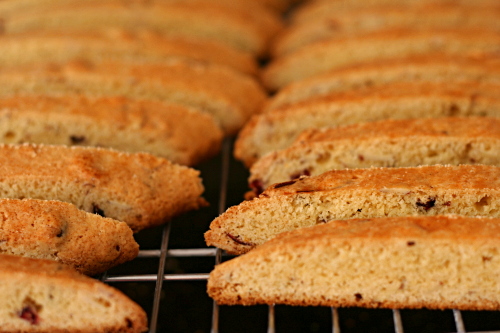
5. Slice each log on the diagonal into ½-inch thick cookies. Lay half of the cookies cut side down on the baking sheet. Bake 11 minutes; remove the pan from the oven and, using tongs, turn each cookie over onto its other cut side. Bake 7 minutes, until the edges are browned. Transfer to a cooling rack. Repeat with the remaining cookies.

I have blogged about this recipe before. At the time, I could only tell you that they were good. Now I can tell you that they are the best.

beef short ribs braised in tomato sauce

When my sister visits with her young kids, I like to make a dish on the first night that’s particularly kid-friendly. While they aren’t picky eaters, they love pizza and spaghetti and hot dogs as much as any other kid. But if I’m cooking, the food has to be Bridget-friendly too. In other words, it has to be fun to cook.

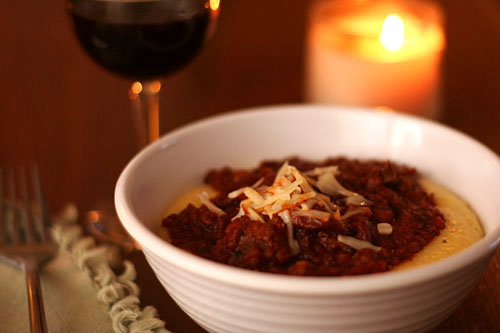
I’ve wanted to perfect a recipe like this for a long time. I had in mind something that wasn’t just tomato sauce with meat added. I wanted the meat to shine, and I wanted the sauce itself to taste distinctly meaty.

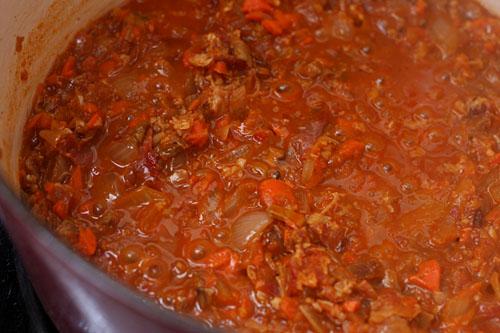
To get the intensity I was hoping for, I pulled out every umami trick I know. Beef, obviously, and all the tomatoes don’t hurt. Dried porcini mushrooms, tomato paste (added with the aromatics and browned slightly), and pancetta added layers of meaty flavor.

This is my favorite type of recipe to make. Ingredients are added incrementally, food gets browned and delicious, and all the while, I get to stir and inhale the aroma, stir and inhale. It gets better after the sauce has simmered for hours, and then it becomes stir and taste, stir and taste. Even better is enjoying the meal with pasta, freshly baked bread, salad, a bottle of red wine, and two rambunctious kids and their parents.

One year ago: Lighter Chicken and Dumplings
Two years ago: Chopped Salad
Three years ago: Banana Cream Pie

Printer Friendly Recipe
Beef Short Ribs Braised in Tomato Sauce

½ ounce dried porcini mushrooms
1 teaspoon olive oil
4 (3-4 pounds total) beef short ribs
salt
3 ounces pancetta, diced
1 onion, diced small
1 carrot, diced small
3 garlic cloves, minced
2 tablespoons tomato paste
½ teaspoon oregano
½ cup wine (red or white, just something that isn’t too sweet or oaky)
2 (28-ounce) cans whole tomatoes with their juice

1. Rinse the mushrooms to remove any dirt clinging to them. Cover them with ½ cup water in a small microwave-safe bowl. Cover the bowl with plastic wrap, poke a few holes in the plastic wrap, and microwave on high power for 30 seconds. Let stand until the mushrooms are softened, about 5 minutes. Use a fork to lift the mushrooms from the liquid; mince the mushrooms, reserving the liquid.

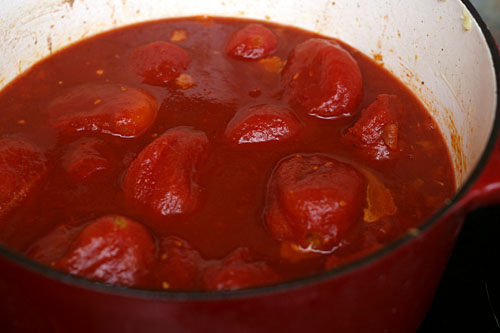
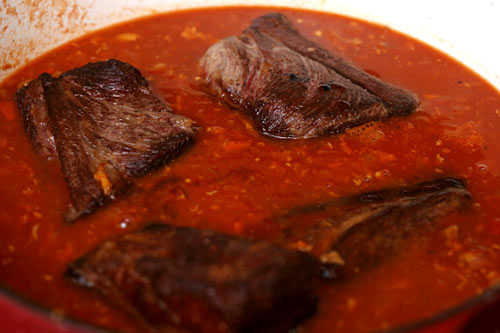
2. Season the beef ribs with salt. Meanwhile, in a 5-quart Dutch oven, heat the olive oil over medium-high heat until it flows like water when the pot is tilted. Add the beef ribs and cook, for 2-3 minutes per side, until richly browned on all sides. Remove the ribs from the pot. Lower the heat to medium and add the pancetta to the pot. Cook, stirring occasionally, until the fat is rendered and the pancetta is crisp. Use a slotted spoon to transfer the pancetta to the plate with the short ribs. Drain all but 1 tablespoon fat from the pot. Add the onions and carrots; cook, stirring occasionally, until softened and lightly browned on the edges, 6-8 minutes. Stir in the garlic, tomato paste, mushrooms, and oregano; cook, stirring constantly, until fragrant, about 30 seconds. Pour in the wine; scrape up the browned bits on the bottom of the pot. Stir in the tomatoes, beef ribs, pancetta, mushroom soaking liquid (being careful to leave any dirt behind) and 1 teaspoon salt; bring to a simmer over medium-high heat, then reduce the heat to low, cover the pot, and cook, stirring occasionally, for 2 hours. After 2 hours, remove the cover, increase the heat to medium-low, and simmer for another hour, until the beef is tender.
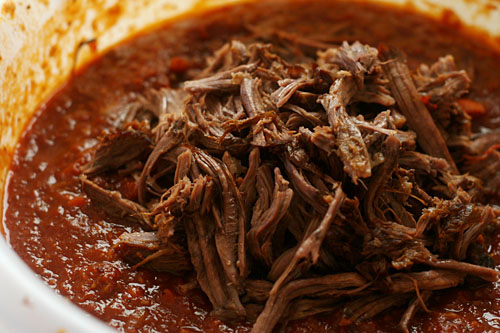
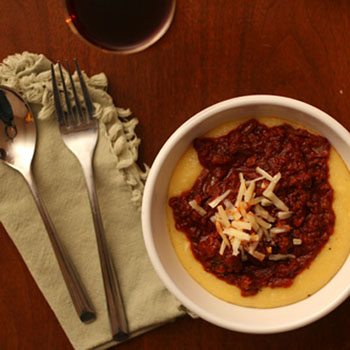
3. Transfer the ribs to a plate; shred the meat. Meanwhile, if the sauce is too thin, increase the heat to medium-high and simmer until it reaches the desired thickness. Stir the meat back into the sauce. Taste for seasoning, adding salt if necessary, and serve over pasta or polenta.
gingerbread cake

I’m very aware when putting up Christmas decorations that they’re going to need to be taken back down soon enough. I keep my decorations minimal. A 2-foot tree I bought in college, one string of lights, some pretty candles. When we get back from visiting our families a week after Christmas and start dreading the return to work on Monday, it’ll only take a few minutes to pack up the holidays until next year. I won’t make treats for that.

But I did make treats for decorating. It hardly seems worth it, since it took us longer to dig the box of Christmas stuff out of the garage than it did to spread the cheer around the living room, but everything is more fun with food. Gingerbread is the perfect accompaniment to Pandora’s Holiday Jazz station and the ceramic trees my Grandma gave me ten years ago.

I’ve never had a bad gingerbread, but this one – dense and spicy and moist – is just perfect for December. Maybe I will make another batch when we put the decorations away…

One year ago: Brussels Sprouts Braised in Cream
Two years ago: Candied Orange Peel

Printer Friendly Recipe
Gingerbread (from Claudia Fleming via Smitten Kitchen)

Please note that this cake is better if made a day in advance. After removing it from the pan, let it cool completely, then wrap it tightly in plastic wrap.

Cooks Illustrated recently published a recipe for gingerbread that’s very similar to this, except they stir the batter a bit more to give it more structure, to avoid the sinking that’s evident in the photo above.

1 cup oatmeal stout or Guinness Stout
1 cup dark molasses (not blackstrap)
½ teaspoon baking soda
2 cups (9.6 ounces) all-purpose flour
1½ teaspoons baking powder
2 tablespoons ground ginger
1 teaspoon ground cinnamon
¼ teaspoon ground cloves
¼ teaspoon freshly grated nutmeg
Pinch of ground cardamom
3 large eggs
1 cup (7 ounces) packed dark brown sugar
1 cup (7 ounces) granulated sugar
¾ cup vegetable oil
confectioners sugar for dusting
lightly sweetened whipped cream for serving (optional)

1. Preheat oven to 350°F. Generously butter a bundt pan and dust with flour, knocking out excess.

2. Bring the stout and molasses to a boil in a 2-quart saucepan and remove from heat. Whisk in baking soda; cool to room temperature.

3. Sift together the flour, baking powder, and spices in a large bowl. Whisk together the eggs and sugars in a separate bowl. Whisk the oil, then the molasses into the egg mixture. Add the egg mixture to the flour mixture; whisk until combined.

4. Pour the batter into the prepared pan and rap the pan sharply on counter to eliminate air bubbles. Bake in the middle of the oven until a tester comes out with just a few moist crumbs adhering, about 50 minutes. Cool cake in pan on a rack 5 minutes. Turn out onto rack and cool completely.

5. Serve cake, dusted with confectioners sugar, with whipped cream, if desired.

R.I.P. This cake stand, which I broke 30 seconds after taking these pictures.

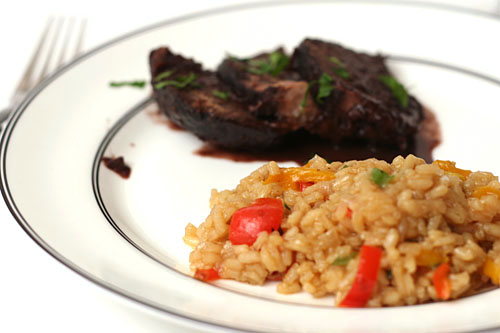
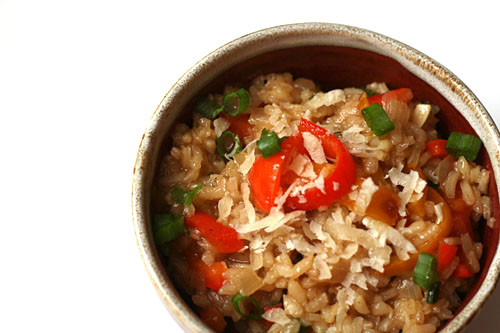
red pepper risotto

This was one of the first recipes I ever made from the Food Network. Back before I had cable, I’d heard of a lot of the chefs, but I hadn’t seen any of their shows myself. Once when I was traveling, the hotel had cable, and I was transfixed.

I still remember the first shows I saw. Alton Brown, making tomato sauce; Rachael Ray, making crab salad served on endive leaves; and Emeril, making bagna cauda, red pepper risotto, beef in Barolo, and chocolate chestnut mousse. As soon as I got home, I invited a group of friends over for dinner and made the entire menu from Emeril’s episode. I even wrote reviews on the site later, the only I’ve ever written.

It was the first risotto I’d ever made and is still my go-to risotto recipe. It’s actually a very standard risotto – sweat onions, toast Arborio, evaporate wine, gradually add broth, stir in parmesan. I’ve tried other methods, but this one is my favorite. It’s perfectly adaptable too – I’ve added peas and leafy greens, but I still think the peppers are the best addition, especially if the risotto is being used to soak up delicious beef in Barolo juices.

One year ago: Steak au Poivre
Two years ago: Sausage Apple Hash

Printer Friendly Format
Risotto with Sweet Peppers (adapted slightly from Emeril)

6 cups chicken stock
1 tablespoon olive oil
1½ medium red bell peppers, seeded and diced
1½ medium yellow bell peppers, seeded and diced
2 tablespoons butter
½ onion, finely chopped
1 clove garlic, minced
1½ cups arborio or carnaroli rice
½ cup dry white wine
2 sprigs fresh thyme
4 scallions, green parts only, thinly sliced
1 teaspoon salt
½ teaspoon fresh cracked white pepper
1 cup grated Parmigiano-Reggiano

1. In a small saucepan, bring the stock to a simmer. Remove from the heat and cover to keep warm.

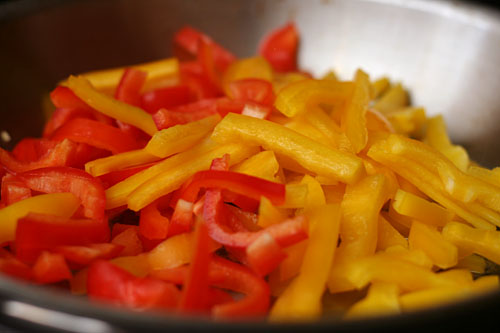
2. In a large skillet, heat the oil over medium-high heat. Add the peppers and cook, stirring frequently, until cooked through but still slightly crunchy, about 5 minutes. Remove from the heat and set aside.

3. In a large heavy saucepan, heat the butter over medium-high heat. Add the onions and cook, stirring, for 2 minutes. Add the garlic and cook until fragrant, about 30 seconds. Add the rice and cook, stirring constantly, until opaque, 2 minutes. Add the wine and cook, stirring until the rice nearly completely absorbs all the liquid, about 1 minute.

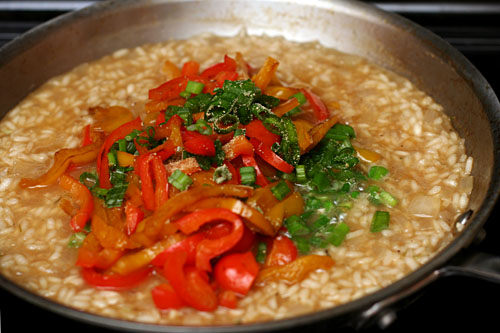
4. Reduce the heat to medium and stir in the thyme. Add 1½ cups of the hot stock, and cook, stirring frequently. Cook the risotto, adding more stock 1 cup at a time as it is absorbed, about 20 minutes total cooking time. Stir in the green onions and cooked bell peppers after 15 minutes cooking time. Season the risotto with 1 teaspoon of salt and white pepper. The rice should be slightly al dente.

5. Remove from the heat. Discard the thyme sprigs. Add the cheese, and stir well to mix. Adjust the seasoning, to taste, with salt and pepper. Serve immediately.