Archives for June 2010

roasted red pepper pasta salad with peas and beans

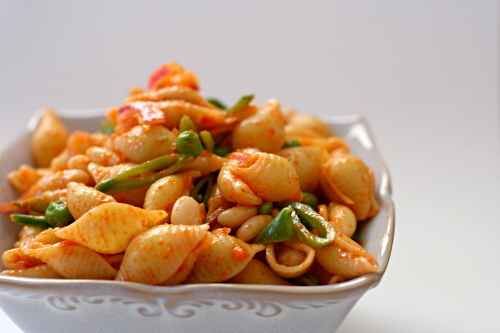
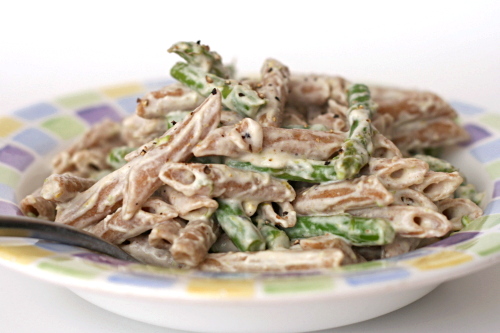
I had my doubts about this salad the whole time I was shopping for it, making it, testing it for seasoning, and serving it. But now, weeks later, my doubts are gone and I want some more. Except with better peas.

Most of the doubts came from an unsuccessful shopping trip for ingredients. Sometimes I complain after shopping at my regular grocery store, but in truth, I usually get by just fine with what I can find there. However, it is a 7-minute drive from my house. Walmart, while not my favorite place on earth, is a 2-minute drive. I tried to cut corners, and I paid the price. Walmart didn’t have whole wheat pasta, any sort of fresh pea or bean, frozen petite peas (which are sweeter and less starchy than regular peas), or shallots.

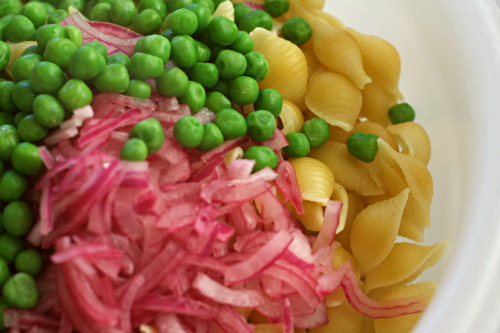
So, yes, frozen petite peas would be better than the larger starchy ones, and fresh peas are so fun, and I would love some sort of fresh beans, and yellow beans would add a nice contrasting color. But one change I was forced to make, skipping the shallots, actually worked out better I think, with some lightly pickled red onions adding tartness to the salad instead.

And even at its simplest, this salad is unique and interesting, with smoky sweet roasted red pepper dressing coating pasta, creamy white beans, and crisp vegetables. Plus I learned a valuable lesson about driving that extra five minutes to the regular grocery store, and how it’s worth every second.

One year ago: Sourdough Bagels
Two years ago: Danish Braids

Printer Friendly Recipe
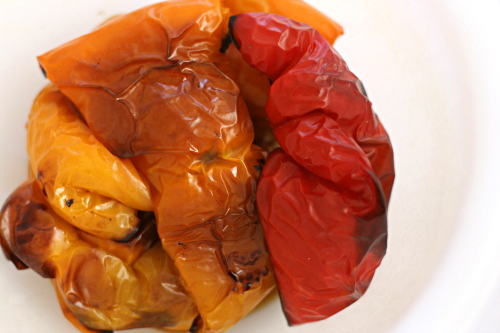
Roasted Red Pepper Pasta Salad with Peas and Beans (adapted from Smitten Kitchen)

Deb based this salad on one she had in a restaurant, which also included yellow string beans, fava beans, fresh cranberry beans, among other wonderful bean types that simply aren’t available in small desert towns. I would have loved any or all of those, but the salad was wonderful at its most simple as well.

1 pound small pasta
salt
¼ red onion, very thinly sliced
1 tablespoon red wine vinegar
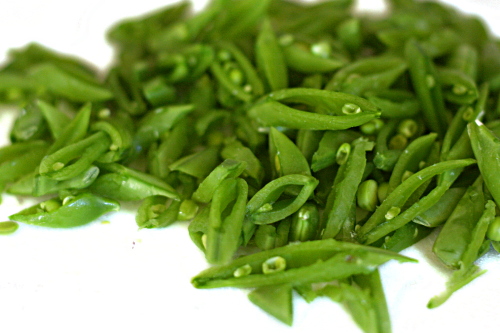
4 ounces snow pea pods, ends trimmed, cut on an extreme diagonal
1 cup peas (from about 8 ounces with their shells, if you can find fresh)
1 (15-ounce) can great northern (or navy) beans, drained and rinsed
¾ to 1 cup Roasted Red Pepper Vinaigrette (recipe below)

1. Bring a large pot of water to a boil; add the pasta and 1 tablespoon salt and cook according to the package instructions. One minute before the pasta is done, add the peas. Drain the pasta and peas together.

2. Meanwhile, combine the onion, vinegar, and a pinch of salt in a large bowl; set aside for 10 minutes. When the pasta has cooled, add the remaining ingredients and stir thoroughly. Taste and add more salt if necessary, which it probably will be.

Roasted Red Pepper Vinaigrette

Makes about one cup of dressing

1 red bell pepper, roasted, skinned and seeded or the equivalent from a jar, drained
2 tablespoons extra virgin olive oil
2 tablespoons red wine vinegar, plus up to 1 tablespoon more
½ teaspoon salt
freshly ground black pepper

Combine all of the ingredients in a blender or food processor; process until smooth. Taste and add more salt, pepper, or vinegar if necessary.

rum-drenched vanilla cake

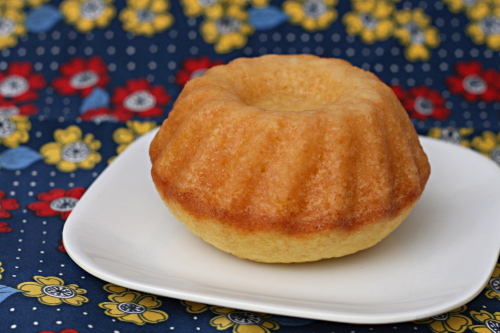
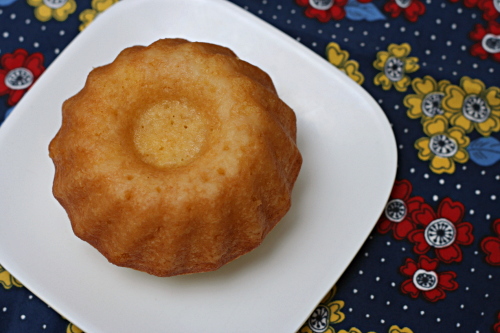
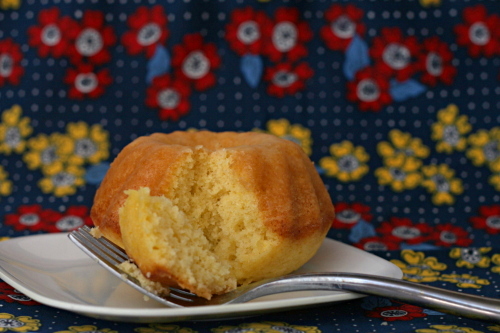
Someone brought a rum bundt cake into work last week, and oh my god, was it good. Tender, extremely moist, and intensely rummy, I could hardly resist grabbing one wedge after another. My officemate, who apparently has far better self-control than I, cut herself a piece and set it aside until the end of the day, six or seven hours later. She regretted the wait as soon as she bit into it and realized that, by then, the rest of the cake was gone. Clearly we needed to get the recipe.

It turns out that the recipe is a doctored cake mix, which just proves that of all the types of prepared, processed foods, cake mix is probably the best at imitating, and in some cases perhaps surpassing, the completely homemade version. And although I can hardly believe this cake I had could be improved upon, and I don’t think the chemicals in one boxed cake mix recipe is going to knock me dead, I’m still too stubborn to use a boxed mix.

A web search yielded nothing but that same recipe, cake mix and oil and rum, over and over. I started thinking of what cake recipe of mine I’d adapt to imitate the recipe I was finding, resigning myself to doing some experimenting.

It took me five days to make the connection that I was searching for a from-scratch rum cake, and I was planning to make rum-drenched vanilla cakes over the weekend. I’m not so smart.

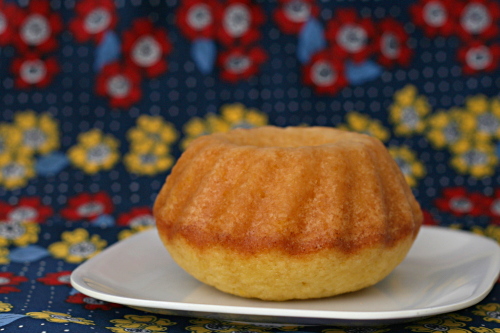
My first impression was that Dorie’s cakes weren’t as moist or tender, although they were fluffy and light with plenty of rum flavor.  Two days later, the cake had ripened, and its texture was very similar to the one I’d eaten at work.  In the future, I might replace the melted butter in the cake with oil, which I think makes cakes moister, but other than that, I think I have my from-scratch rum bundt cake recipe, and I didn’t even have to experiment.

Wendy chose these cakes for Tuesdays with Dorie, and she has the recipe posted. I doubled the salt.

One year ago: Comparison of three white cake recipes
Two years ago: Apple Cheddar Scones

triple chocolate espresso brownies

The best part about having a full-time job is having people to offload desserts to. No, I’m kidding, the best part is the money. No! It’s the feeling of self-worth I get from changing out of my pajamas before noon. Or it’s the belief that I’m making a difference in the world. The knowledge that I’m a contributing member of society. I don’t know, one of those.

Of course I carefully plan out every treat I bring in to share. Most importantly, it has to look enticing. Half-eaten leftovers obviously won’t do. It also needs to be easy to grab; no one wants to deal with forks and plates, they just want to grab a quick snack when they come in to refresh their coffee. I also want to provide a good variety – chocolate one week, fruit or vanilla the next; cupcakes one week, cookies the next. Finally, I like to (overthink things) make something new and interesting: instead of chocolate chip cookies, cream cheese chocolate chip cookies; instead of white cupcakes, margarita cupcakes; instead of brownies, espresso brownies.

People always thank me for bringing in treats, because they are polite and nice, and I always thank them for providing me an opportunity to do something I love. They also mention that I’m ruining their diets, but I figure it’s theirs or mine, and a girl’s gotta do what a girl’s gotta do.

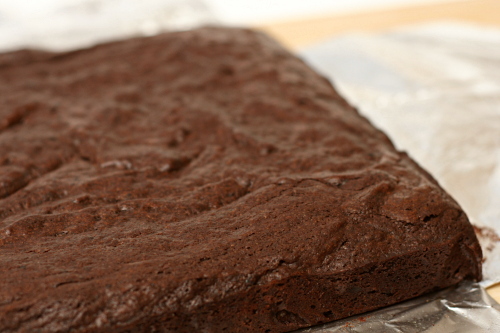
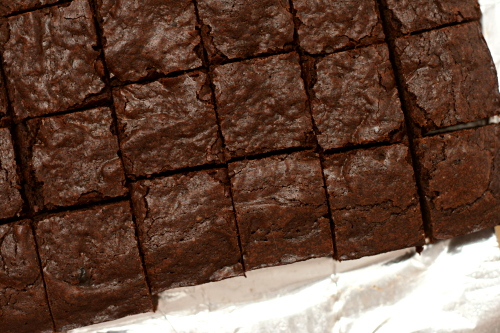
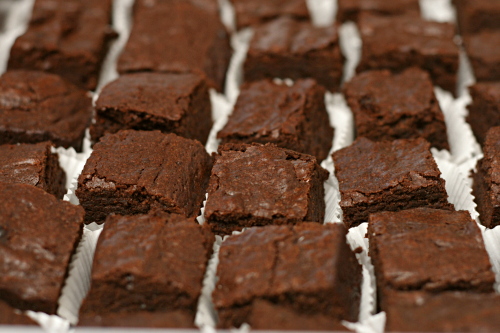
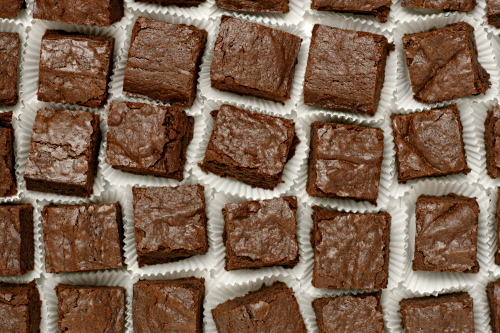
My favorite brownie recipe is a little lighter, cakey-er, and moister than these, but I love this rich fudgy texture with the bitter espresso overtones. Plus they’re perfect to cut into tiny squares, which, once displayed in little crimped cups, satisfy all of the requirements for a treat to bring to work.

Two years ago: Yeasted Waffles

Printer Friendly Recipe
Triple-Chocolate Espresso Brownies
(from Cooks Illustrated)

Either Dutch-processed or natural cocoa works well in this recipe.

5 ounces semisweet chocolate or bittersweet chocolate, chopped
2 ounces unsweetened chocolate, chopped
8 tablespoons (1 stick) unsalted butter, cut into quarters
3 tablespoons cocoa powder
1½ tablespoons instant espresso powder or coffee powder
3 large eggs
1¼ cups (8.75 ounces) granulated sugar
2 teaspoons vanilla extract
½ teaspoon table salt
1 cup (5 ounces) unbleached all-purpose flour

1. Adjust an oven rack to the lower-middle position and heat the oven to 350 degrees. Spray an 8-inch square baking pan with nonstick vegetable cooking spray. Fold two 12-inch pieces of foil lengthwise so that they measure 7 inches wide. Fit one sheet in the bottom of the greased pan, pushing it into corners and up the sides of the pan; overhang will help in the removal of the baked brownies. Fit the second sheet in the pan in the same manner, perpendicular to the first sheet. Spray the foil with nonstick cooking spray.

2. In a medium heatproof bowl set over a pan of almost-simmering water, melt the chocolates and butter, stirring occasionally until the mixture is smooth. Whisk in the cocoa and espresso until smooth. Set aside to cool slightly.

3. Whisk together the eggs, sugar, vanilla, and salt in a medium bowl until combined, about 15 seconds. Whisk the warm chocolate mixture into the egg mixture; then stir in the flour with a wooden spoon until just combined. Pour the mixture into the prepared pan, spread into corners, and level the surface with a rubber spatula. Bake until slightly puffed and a toothpick inserted in the center comes out with a small amount of sticky crumbs clinging to it, 35 to 40 minutes. Cool on a wire rack to room temperature, about 2 hours, then remove the brownies from the pan using the foil overhang. Cut into squares and serve. (Do not cut brownies until ready to serve; brownies can be wrapped in plastic and refrigerated up to 5 days.)

pasta with asparagus and goat cheese

I feel like I used to have this room (my life), and it had some stuff in it; mostly stuff I liked (cooking, reading, teaching, gardening), although of course there were things I didn’t (cleaning). My main problem was that it was too empty. There was too much space, and I could never get it arranged in any pleasing way. It made me frustrated and unhappy, and I took less enjoyment even from the things I did like.

Then I added this huge, I don’t know, piece of furniture or some other room-dominating thing (a full-time job). And now the room is too full. I like it more overall, I just don’t know where to put everything. Some things I’m willing to give up (hours mindlessly spent searching the internet), but the rest I’m trying to rearrange. Where does exercise go? What about blogging? Keeping in touch with friends, spending quality time with my husband, learning new things? I know there’s room for them all, I just have to find out how to make it work.

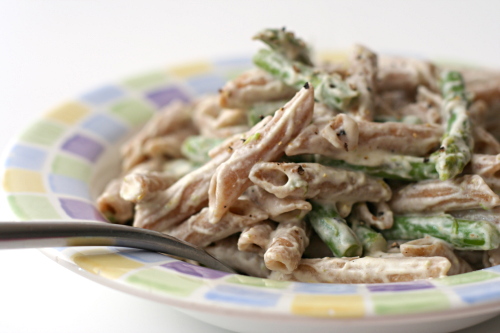
I’m not going to stop cooking, obviously. But I will change the way I cook most nights of the week, keeping things simple. This dish, with only a handful of ingredients and one ingredient to chop, is a perfect example of how easy meals can still be tasty meals. This meal definitely fits into my crowded new room, and it leaves me plenty of space for exercise, a full day of work, a long chat with a friend, and even a batch of brownies. A life too full is certainly better than a life too empty.

Two years ago: Kung Pao Shrimp

Printer Friendly Recipe
Asparagus, Goat Cheese and Lemon Pasta
(adapted from Smitten Kitchen)

Serves 6

16 ounces pasta
salt and pepper
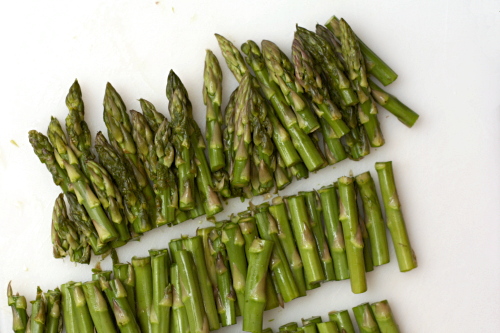
2 pounds slender asparagus spears, trimmed, cut into 1- to 1½-inch pieces
2 tablespoons extra virgin olive oil
1 lemon
8 ounces soft goat cheese

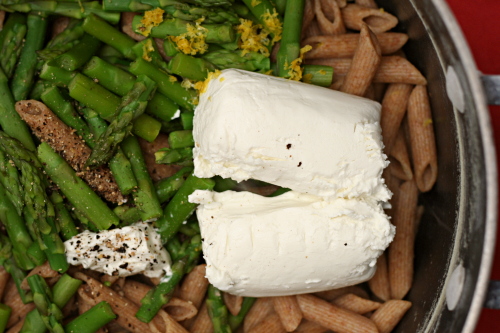
1. Bring at least 6 quarts of water to a rolling boil over high heat. Add the pasta and 1 tablespoon of salt and cook the pasta until it is almost tender, about 2 minutes short of the package instructions. Add the asparagus and cook until it is crisp-tender, about 2 minutes. Reserving 1 cup of the pasta cooking water, drain the pasta and asparagus.

2. Return the pasta and asparagus to the pot and add the oil, zest from the whole lemon, juice from ½ the lemon, goat cheese, a generous grinding of pepper, and ½ cup pasta cooking water; stir until the goat cheese melts. Taste and add salt (you’ll probably need some), freshly ground black pepper, and more lemon juice if necessary. If the sauce becomes thick and sticky, stir in more pasta cooking water.

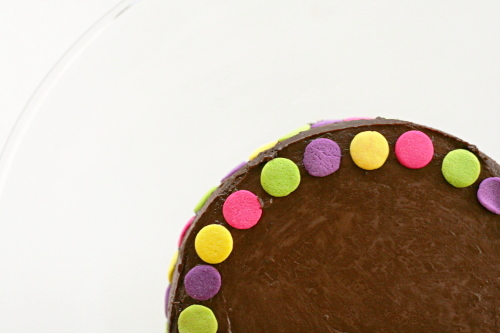
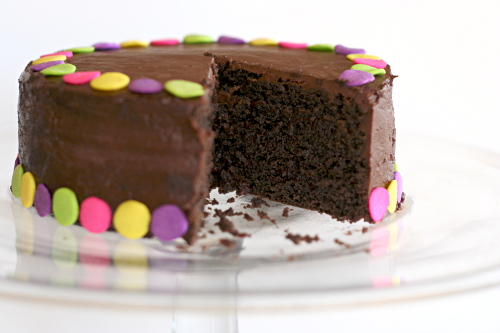
dressy chocolate cake

Most of us probably had the same first experience with plain yogurt. You think it’s going to be yogurt, but not quite so vanilla-ey! And then, ew, wtf, this tastes like sour cream. Force down a few bites; toss in trash. That was the end of my plain yogurt experience for several years.

And then I made an important connection – it tastes like sour cream, but it’s good for you! And now I use it everywhere – in sauce for fish tacos, on baked potatoes, on pancakes with jam, and now, in chocolate frosting. I held my breath waiting to see if it would curdle or if it would mix with melted chocolate to form a smooth icing, and I am pleased that it worked wonderfully. What a simple but luscious frosting recipe.

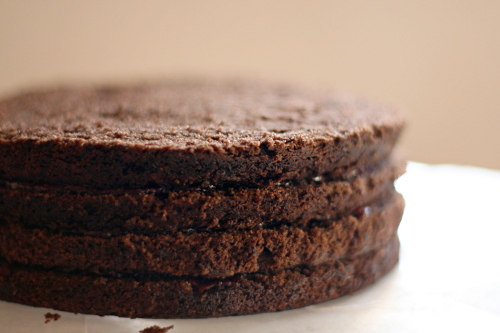
Low-fat Greek yogurt (my grocery store just started carrying Fage!) might not have been quite as good a replacement for sour cream in the cake itself. Fat in cake leads to moistness, and my cake seemed just a tad dry. A little cherry jam and chocolate yogurt frosting fixed that right up, and I’ve hardly been able to step away from this cake since, shaving dainty slivers off here and there throughout the day, hoping Dave doesn’t notice that half of the cake has disappeared.  But it’s okay, because I used yogurt, and not sour cream.
Amy chose this cake for Tuesdays with Dorie, and she has the recipe posted. Besides the yogurt substitutions discussed above, I doubled the salt in the cake.

One year ago: Mixed Berry Cobbler
Two years ago: Coconut Roasted Pineapple Dacquoise

rice and peas

Side dishes aren’t my strong suit. I often find myself googling dorky things like “what to serve with Jamaican jerk chicken?” Rice and peas kept coming up, and I kept bypassing it. Who wants green peas mixed with plain white rice?

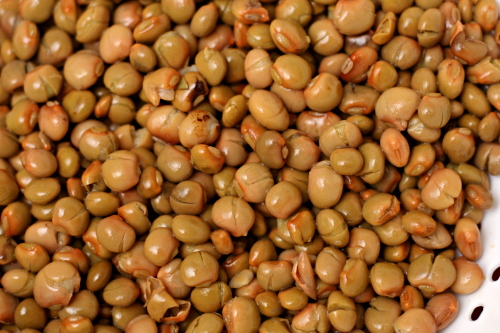
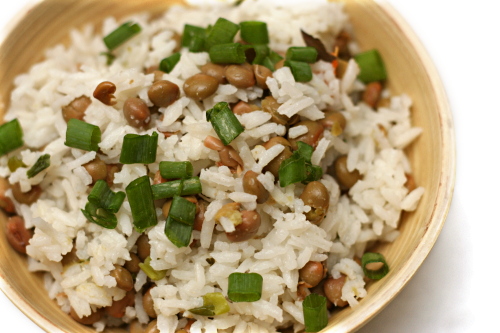
It turns out, of course, that rice and peas is nothing of the sort. Peas, in the Jamaican way, are beans. I was fortunate enough to find pigeon peas at my store (another reason to stop complaining about my grocery store), but red beans work too.

Rice and peas, then, is rice and beans cooked in coconut milk with thyme, green onions, and a spicy chile. The chile isn’t minced and eaten; it’s left whole and removed after cooking, so it adds just a hint of heat, which really does make this the perfect side dish for spicy jerk chicken. Thanks, Google!

Two years ago: Croque Madame

Printer Friendly Recipe
Rice and Peas

1 tablespoon vegetable oil
1 cup long-grained white rice
1 clove garlic, minced
½ cup coconut milk
1 cup water
½ teaspoon salt
½ teaspoon dried thyme
1 (15-ounce) can pigeon peas (or red beans), drained and rinsed
1 habanero chile, whole
2 green onions, chopped, plus extra for garnish

1. In a medium heavy-bottomed saucepan, heat the oil over medium heat until shimmering. Add the garlic and rice; cook, stirring constantly, until the rice is translucent at the edges and the garlic is fragrant, about 1 minute. Add the remaining ingredients. Stir once, increase the heat to medium-high, and bring to a simmer. Once the mixture simmers, reduce the heat to the lowest heat.

2. Cook for 15 minutes, then, without removing the lid or moving the pot, turn off the heat and let the rice sit for another 15 minutes. Remove the chile pepper, fluff the rice with a fork, and serve, topping with additional green onions.

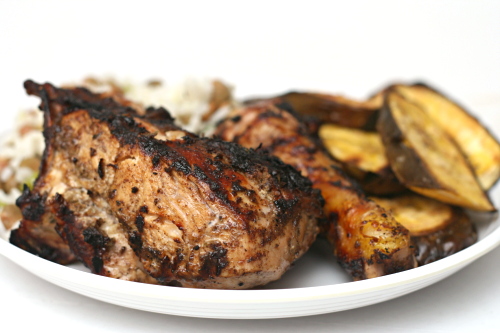
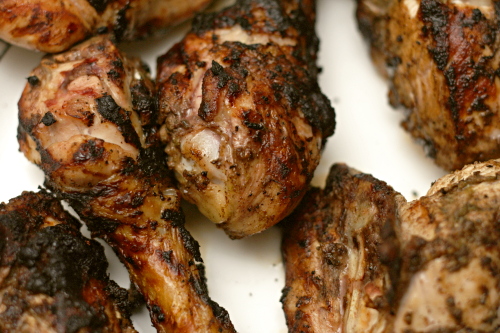
jamaican jerk chicken

Sometimes (most times) I get cranky after going to the grocery store here. It isn’t a bad little store, but it just doesn’t have the selection I had in Philadelphia. I’m spoiled. I miss good seafood and more cheese options than I know what to do with and organic produce and looseleaf tea.

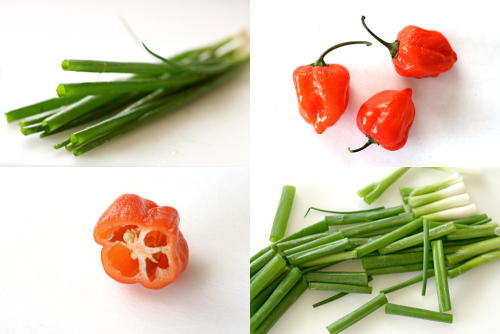
One thing I do have available now, in my southern New Mexican town, is good tortillas, half an aisle dedicated to salsa, dependably perfect avocados, and a selection of fresh chiles. (Okay, so here’s another reason why I get cranky at the grocery store. They were out of Scotch Bonnets, and I had to go to Walmart, and I hate going to multiple stores, and I hate Walmart. Stop being out of stuff, grocery store.)

Not that jerk sauce has many chiles in it – when you’re talking about Scotch bonnets, you’ll only be needing a couple, even if they are tiny. They pack a powerful heat punch, and when combined with all sorts of other flavorful ingredients – rum, malt vinegar, onions, garlic thyme fall spices sugar pepper – they make one heck of a flavorful sauce.

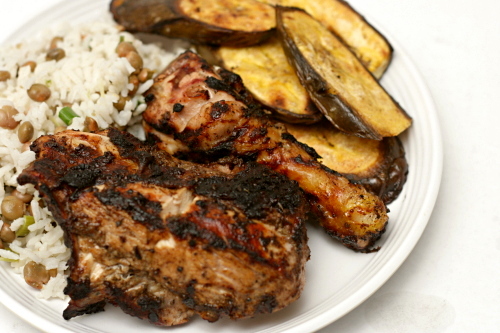
The combination of ingredients was new for me, so I was excited. And I think that’s something I need to keep in mind when I get frustrated about how I don’t have the variety of food choices I used to – that even if I can’t find some ingredients and I can’t make some dishes as a result, there are still an infinite amount of great meals I can make by mixing up the food I can find in different ways. Jerk chicken is a perfect example of a dish that uses readily available ingredients to make something that is not only restaurant-quality good, but is interesting and fun as well.

One year ago: Mushroom Salad
Two years ago: Pigs in a Blanket

Printer Friendly Recipe
Jamaican Jerk Chicken (from Bon Apetit, but really epicurious)

8 servings

3 tablespoons dark rum
2 tablespoons water
½ cup malt vinegar
10 green onions, chopped
4 garlic cloves, peeled, chopped
2 tablespoons dried thyme
2 Scotch bonnet chiles or habanero chiles with seeds, chopped
2 tablespoons vegetable oil
4 teaspoons ground allspice
4 teaspoons ground ginger
4 teaspoons ground cinnamon
2 teaspoons ground nutmeg
2 teaspoons salt
2 teaspoons ground black pepper
2 teaspoons dark brown sugar
1 cup ketchup
3 tablespoons soy sauce
about 6 pounds bone-in, skin-on chicken parts
½ cup fresh lime juice

1. Boil rum and 2 tablespoons water in a small saucepan for 3 minutes.

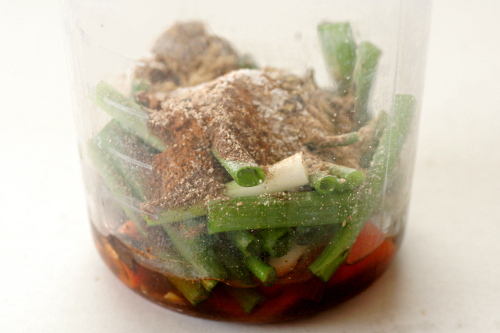
2. Transfer the rum mixture to a blender; add the vinegar, green onions, garlic, thyme, chiles, oil, spices, salt, pepper, and sugar; blend until almost smooth. Transfer 2 tablespoons of the jerk seasoning to a small bowl; mix in the ketchup and soy sauce to make the sauce. (Jerk seasoning and sauce can be made 1 day ahead; cover separately and refrigerate.)

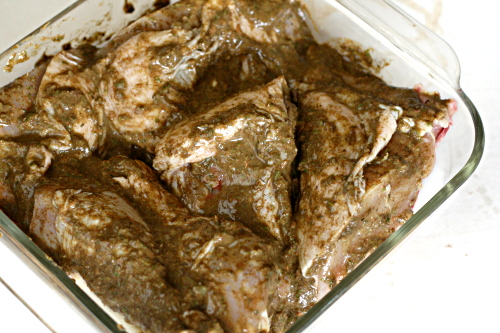
3. Arrange the chicken in a large roasting pan or baking dish. Pour the lime juice over the chicken; turn to coat. Spoon the jerk seasoning over the chicken and rub it into the chicken. Cover and refrigerate for at least 4 hours, turning occasionally. (Can be prepared 1 day ahead. Keep refrigerated.)

4. Prepare a two-level grill (more coals on one side than the other). Remove the chicken from the jerk seasoning marinade; sprinkle with salt and pepper. Place the chicken, skin side down, on the hot side of the grill; grill for about 2 minutes, until seared. Move the chicken to the cooler side of the grill and continue to cook, turning occasionally, for about 15 minutes, until the breasts measure 160 degrees on an instant read thermometer and the legs and thighs read 165 degrees. Serve with the jerk sauce.

I was excited to find plantains when I made this, so maybe I should stop complaining about my grocery store. I sliced and grilled them, unpeeled. They were fantastic dipped in the jerk sauce – kind of like dipping French fries in ketchup, only more…more everything.  More good.

raisin swirl bread

Dave has recently encountered an enviable problem. After starting to exercise a few months ago for the first time in years, he started losing weight too fast.

Losing weight. Too fast.

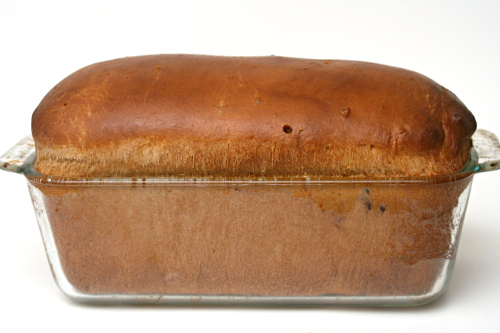
So now we’re trying to come up with ways to get him more healthy calories that don’t create much more work. Hard-boiled eggs, peanut butter, protein shakes, and bread. Making a loaf of bread every couple of weeks for him to eat at work does require more effort, but it isn’t work, because I like making bread.

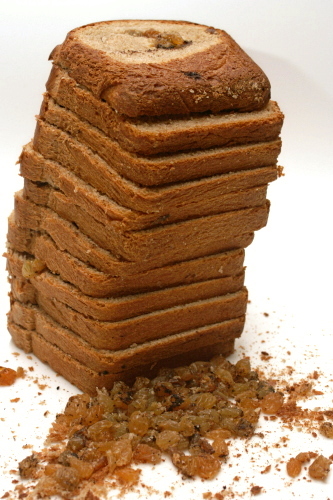
I haven’t bought bread since moving to New Mexico last winter, and I haven’t made pure white bread since discovering I could adapt any recipe to be at least partially whole wheat with no detriment to flavor or texture. It worked just as well with this bread as it has in the past, giving me a light, tender loaf of bread made a little more special with a spiral of raisins and sugar and cocoa. Not that I got to eat more than a slice, since most of this loaf went to He Who is Super Annoying Because He Gets to Eat Twice as Much Food as Me.

Susan chose this bread for Tuesdays with Dorie, and she has the recipe posted. I mixed 2 cups (9.6 ounces) of whole wheat flour with ¾ cup of the milk and ½ teaspoon of the salt and let it sit overnight before combining it with the rest of the ingredients. And for whatever reason, 1 cup of raisins was way too much for me and they all fell out when I cut into the bread. But no one else had this problem, so apparently I’m just a weirdo. Still, next time, ½ cup of raisins.

One year ago: Honey Peach Ice Cream
Two years ago: Cappuccino Cream Puff Rings

croissants 3 (martha stewart)

I worked in a lab for years, but I never absolutely loved it. You’d think I would have, considering that I basically mixed up ingredients and baked them, but I guess without that crucial eating-the-batter – sorry, of course I mean that eating-the-result step, it just wasn’t as fun.

Plus I could never get the hang of keeping good records in the lab. My notebook seemed to be both unorganized and lacking crucial information. I took detailed notes on the amount and type of ingredients used and the baking temperature and time, but whenever I needed to look up details of the result, I was left with a few marginally descriptive words.

In the kitchen, it’s the opposite. The result, now that’s memorable, especially in this case – slightly sweet, intensely flaky, dark golden brown, impossible to resist, always leaving me wanting another.

The path to that result isn’t as memorable, particularly in the amount of instant dry yeast I used. Probably I should have written that down somewhere. I’m going to hypothesize – remember, hypothesizing is not the same thing as guessing! It’s an educated guess, which is to say, don’t skip out on this recipe just because the fresh yeast called for in the original recipe is dumb and I’m bad at note-taking, because the chances are very good that my estimate of the amount of yeast I used isn’t too terribly terrible, and anyway, it’s yeast and yeast always does its job eventually.

Anyway. I’m going to hypothesize that I used about one packet of yeast. Please accept my apologies for not taking thirty seconds to write it down. This must be why I now have an office job instead of a lab job.

One year ago: Anadama Bread
Two years ago: Baba Ghanoush and Falafel

Printer Friendly Recipe
Croissants (adapted from Martha Stewart’s Baking Handbook)

Makes 12

1 cup cold milk
1 tablespoon honey
14 ounces (about 3 cups) all-purpose flour
¼ cup (1.75 ounces) sugar
2¼ teaspoons salt
2¼ teaspoons (1 packet) instant yeast
20 tablespoons (2½ sticks) unsalted butter, cold
1 large egg, lightly beaten with a pinch of salt and a dribble of water or milk

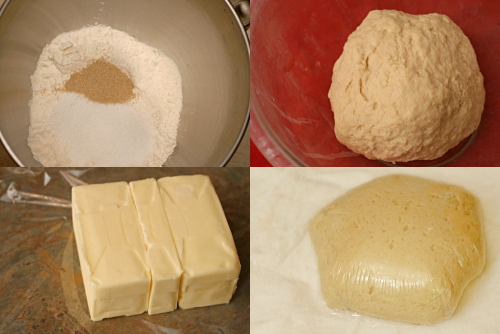
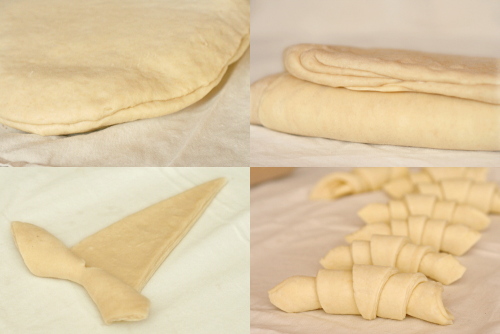
1. Make the dough package: Pour the milk and honey into a 2-cup liquid measuring cup, and stir to combine; set aside. In the bowl of an electric mixer fitted with the dough hook, stir together 12 ounces (about 2¾ cups) of the flour, the sugar, yeast, and salt; stir to combine. Add the milk mixture and mix on low speed until the dough just comes together, 2 to 3 minutes.

2. Turn out the dough onto a lightly floured work surface; gently knead to form a smooth ball, about 45 seconds. Wrap in plastic and refrigerate at least 1 hour or overnight.

3. Make the butter package: Lay the butter sticks side by side on a piece of plastic wrap, and sprinkle with the remaining 1 ounce (about 2 tablespoons) flour. Pound with a rolling pin until the flour is incorporated; roll into a 4- by 3-inch rectangle. Wrap tightly and refrigerate for at least 1 hour or overnight.

4. Remove the dough package from the refrigerator; place on a lightly floured work surface. Roll out to an 8-by-10-inch rectangle, about ½ inch thick, with a short side facing you. Remove the butter package from the refrigerator; place on the bottom half of the dough; fold the top half of the dough over the butter, and pinch the edges to seal.

5. Roll out the dough to a 10-by-10-inch square about ½ inch thick; keep the corners as square as possible. Remove any excess flour with a dry pastry brush. Starting at the far end, fold the square in thirds, as you would a business letter. This completes the first of three turns. Wrap in plastic and refrigerate for 1 hour.

6. Repeat rolling and folding as above two more times, starting with the flap opening on the right, as if it were a book, and refrigerate at least 1 hour between turns. To help you remember how many turns have been completed, mark the dough after each: Make one mark for the first turn, two for the second, and three for the third. After the third, wrap the dough in plastic, and refrigerate 6 to 8 hours, or overnight.

7. Turn out the chilled dough onto a lightly floured work surface. Roll out the dough to a 30-by-8-inch rectangle. (If the dough becomes too elastic, cover with plastic wrap, and let rest in the refrigerator for 10 minutes.) Using a pizza wheel, cut the dough into triangles, each with a 4-inch base (you will have scraps of dough at both ends). Cut a 1-inch slit in the center of the base of each triangle. Place triangles in a single layer on a clean work surface.

8. To shape the croissants, stretch the two lower points of each triangle to enlarge the slit slightly. Fold the inner corners formed by the slit toward the outer sides of the triangles, and press down to seal. Using your fingertips, roll the base of each triangle up and away from you, stretching the dough slightly outward as you roll; the tip should be tucked under the croissant. Pull the two ends toward you to form a crescent. Transfer the crescents to a parchment-lined baking sheets, 2 inches apart. Cover loosely with plastic wrap, and let rise in a warm place until very spongy and doubled in bulk, 45 to 60 minutes.

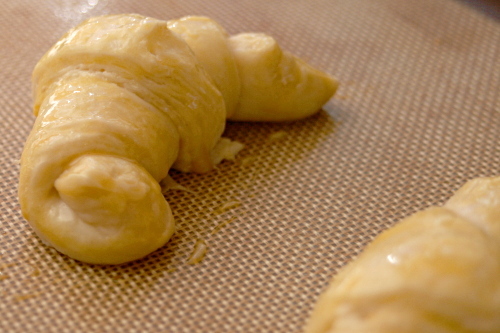
9. Preheat the oven to 400ºF, with a rack in the middle position. Lightly brush the crescents with the beaten egg. Bake until the croissants are puffed and golden brown, about 15 to 20 minutes. Transfer the sheet to a wire rack to cool. Serve warm or at room temperature.

tender shortcakes

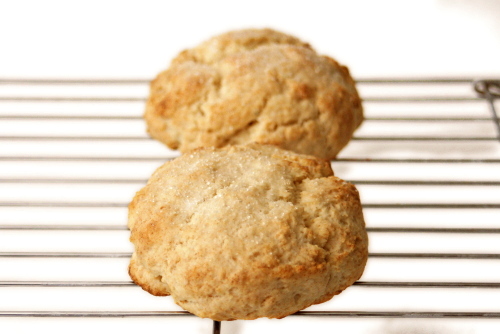
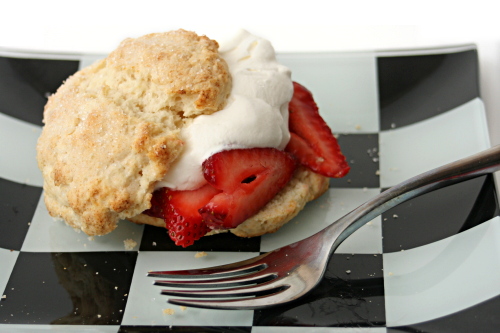
Dave and I ate dessert first this weekend, but not in the fun-loving, live life to its fullest, carefree kind of way. More in the ‘it’s too hot outside to grill dinner until the sun goes down’ kind of way. 110 degrees, people. I told you I live in the desert.

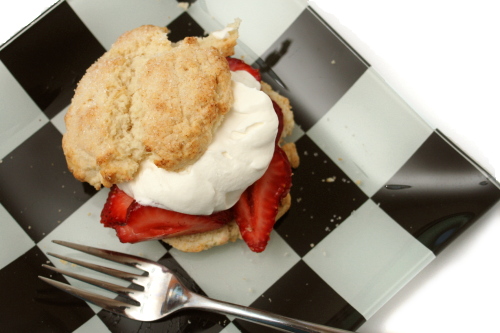
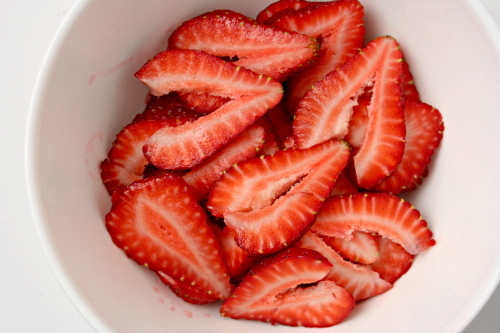
But whatever, I got to eat strawberry shortcake for dinner, so I’m not complaining. With a tender biscuit, sweet berries, and silky whipped cream, what is there to complain about? Especially since we have air conditioning. Otherwise I have a feeling I’d be doing a lot of complaining, shortcakes for dinner or not.

Cathy chose this recipe for Tuesdays with Dorie, and she has it posted. I used cake flour for half of the flour and doubled the salt.

One year ago: Parisian Strawberry Tartlets
Two years ago: Strawberry Tart

I see a pattern here…