Archives for December 2010

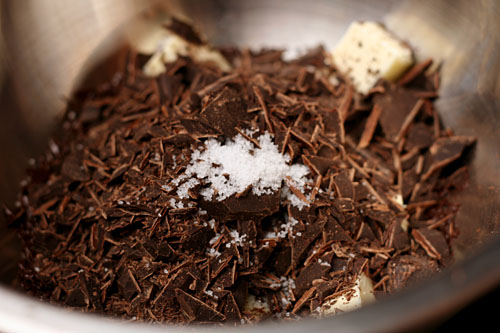
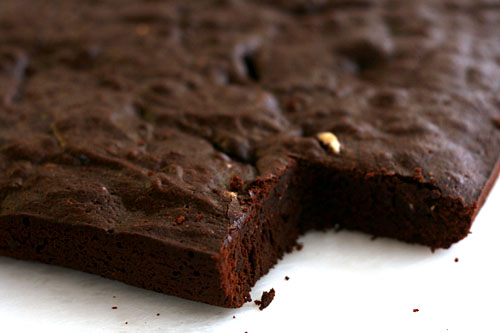
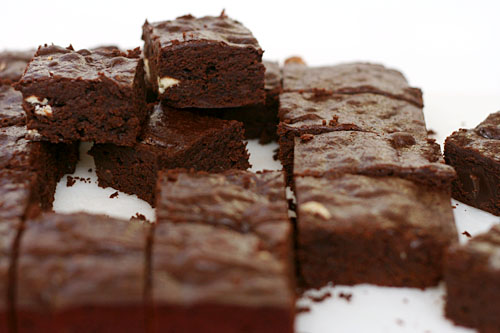
quintuple chocolate brownies

Back when we lived in a city with stores and restaurants and all of that, we used to go to the bookstore every Saturday afternoon to browse and drink fancy coffee. From there we’d head over to the huge grocery store for a sushi snack and whatever ingredients I’d forgotten on my main grocery trip. The whole outing – low-key but full of treats – was one of my favorite parts of the week.

These days, we adapt that routine for our trips up to Albuquerque, where we seem to end up once every couple of months to visit my family. We take a portion of a day to head to the bookstore, and then while Dave sits and reads a book, I go next door to Whole Foods to stock up on coffee, loose-leaf tea, chocolate, and cheese. The coffee, tea, and chocolate keep well, but we eat a lot of cheese in the week after those trips.

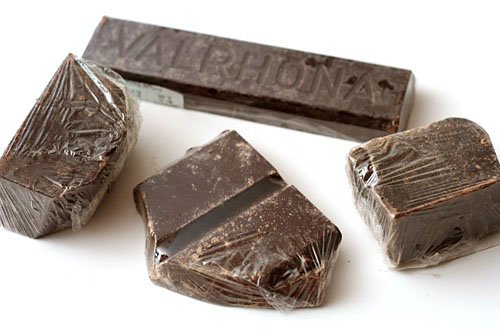
That’s why it isn’t unusual for me to have five different types of chocolate lying around. It is unusual that one of those will be milk or white chocolate, which is how these ended up being quadruple chocolate brownies instead of quintuple. Similarly, it’s how the tiny bit of white chocolate that was all I had got added as chunks instead of melted as a glaze.

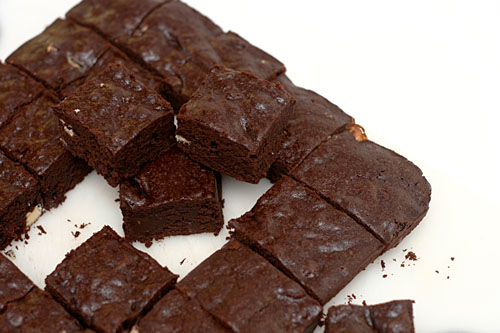
Whether quintuple or quadruple, these are some of the best brownies I’ve ever had. They certainly weren’t cakey, and yet they weren’t really chewy either. They were melt-in-your-mouth tender, and with four types of chocolate, you know they had great flavor.

One year ago: Low and Lush Chocolate Cheesecake
Two years ago: Tall and Creamy Cheesecake

Printer Friendly Recipe
Quintuple Chocolate Brownies (from Dorie Greenspan’s Baking: From My Home to Yours)

I skipped the nuts and glaze and stirred the white chocolate chunks into the batter.

For the Brownies:
½ cup all-purpose flour
¼ cup unsweetened cocoa powder
½ teaspoon salt
1 stick (8 tablespoons) unsalted butter, cut into 8 pieces
3 ounces unsweetened chocolate, coarsely chopped
3 ounces bittersweet or semisweet chocolate, coarsely chopped
2 tablespoons strong coffee
1 cup sugar
3 large eggs
1 teaspoon pure vanilla
6 ounces premium-quality milk chocolate, chopped into chips, or 1 cup store-bought milk chocolate chips
1 cup chopped nuts (I used walnuts)

For the Glaze:
6 ounces premium-quality white chocolate, finely chopped, or 1 cup store-bought white chocolate chips
⅓ cup heavy cream

Getting Ready:
Center a rack in the oven and preheat the oven to 325 degrees F. Line a 9-inch square baking pan with foil, butter the foil and place the pan on a baking sheet.

Sift together the flour, cocoa, and salt.

To Make the Brownies:
Set a heatproof bowl over a saucepan of simmering water and add, in the following order, the butter, the two chocolates and the coffee. Keeping the pan over low heat, warm just until the butter and chocolates are melted – you don’t want the ingredients to get so hot they separate, so keep an eye on the bowl. Stir gently, and when the mixture is smooth, set it aside for 5 minutes.

Using a whisk or a rubber spatula, beat the sugar into the chocolate mixture. Don’t beat too vigorously – you don’t want to add air to the batter – and don’t be concerned about any graininess. Next, stir in the eggs one at a time, followed by the vanilla. You should have a smooth, glossy batter. If you’re not already using a rubber spatula, switch to one now and gently stir in the dry ingredients, mixing only until they are incorporated. Finally, stir in the milk chocolate chips and the nuts. Scrape the batter into the pan.

Bake for about 35 minutes, or until a thin knife inserted into the center comes out streaked but not thickly coated. Transfer the pan to a cooling rack and let the brownies rest undisturbed for at least 30 minutes. (You can wait longer, if you’d like.)

Turn the brownies out onto a rack, peel away the foil and place it under another rack – it will be the drip catcher for the glaze. Invert the brownies onto the rack and let cool completely.

To Make the Glaze:
Put the white chocolate in a heatproof bowl. Bring the heavy cream to a boil and pour it over the chocolate. Wait 30 seconds, then, using a rubber spatula, gently stir until the chocolate is melted and the glaze is smooth.

Hold a long metal icing spatula in one hand and the bowl of glaze in the other. Pour the glaze onto the center of the brownies and use the spatula to nudge it evenly over the surface. Don’t worry if it dribbles over the edges, you can trim the sides later (or not). Refrigerate the brownies for about 20 minutes to dry the glaze.

Cut into 16 squares, each roughly 2¼ inches on a side.

Note: These brownies can be frozen (even with the glaze) for up to two months. They can be stored at room temperature or enjoyed cold from the refrigerator.
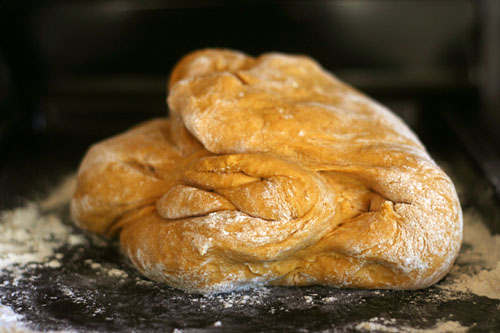
pumpkin cinnamon rolls

The problem with the internet is that you don’t get to believe, even for a minute, that you were the first to come up with an idea. First there was sushi bowls, most recently it was eggnog martinis, and last month there were pumpkin cinnamon rolls. I thought I was a genius. Pumpkin and cinnamon! A classic combination! I could just take pumpkin bread dough, roll it out, spike the cinnamon filling mixture with cloves and nutmeg, and top it with a cream cheese glaze. It’s the perfect combination of pumpkin and accents! I deserve accolades! Awards! At the very least, lots of blog hits!

Oops, never mind. Many many people have done this before. Still. I’m convinced that my pumpkin cinnamon rolls are better than theirs. It’s all about balance – cinnamon rolls should be decadent treat worth the splurge, but you might as well save the calorie-dense ingredients for where they’re going to make the most impact.

I’m convinced that a super rich dough for cinnamon rolls isn’t worth the calories. Once the dough is filled with a sugary spiced filling and topped with a creamy glaze, extra fat in the dough just gets lost. If you don’t notice it, why bother with it? On that same note, I used oil in the dough instead of butter. You can use butter if you prefer, but again – the taste of butter will be overpowered by the filling and glaze, but the added tenderness of oil compared to butter will not go unnoticed.

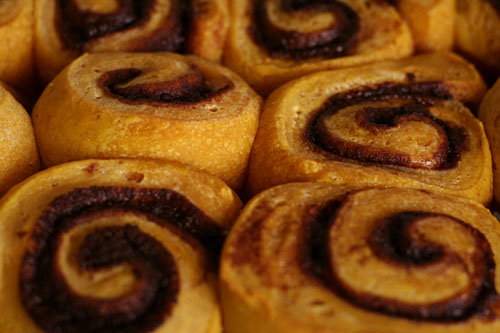
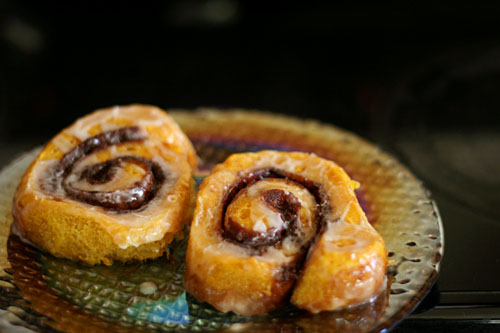
Pumpkin, cinnamon, cream cheese, and sugar – for breakfast! The dough part is light, soft, and orange; the filling is sweet and spice and everything nice; and the glaze, well, it has cream cheese. I told you I was a genius.

One year ago: Twice-Baked Potatoes
Two years ago: White Chocolate Lemon Truffles, Pumpkin Seed Brittle, Vanilla Bean Caramels

Pumpkin Cinnamon Rolls

You can chill the rolls after they’re shaped, rolled, and cut, but before rising. They’ll still need several hours in the morning to finish rising, bake, and cool, although you can speed the rising along by giving them a very warm place to get started.

A riskier method to get cinnamon rolls at a reasonable breakfast hour is to adjust the amount of yeast. I used ½ teaspoon yeast instead of 2 teaspoons. Your first rise will take several hours. Then you can roll, cut, and chill the dough (or freeze it and defrost in the refrigerator). Take the prepared, chilled rolls out of the fridge before you go to bed and they should be perfectly risen and ready to bake when you wake up.

Dough:
4-4 ½ cups (20 to 21¼ ounces) unbleached all-purpose flour
2 teaspoons instant yeast
⅓ cup (2.33 ounces) sugar
1½ teaspoons salt
2 eggs
1 (15-ounce) can pumpkin
4 tablespoons vegetable oil

Filling:
¾ cup packed (5¼ ounces) light brown sugar
1 tablespoon pumpkin pie spice (or a mixture of mostly cinnamon with some cloves, nutmeg, and ginger)
⅛ teaspoon salt
1 tablespoon melted butter

Glaze:
1 cup (4 ounces) confectioners sugar, sifted to remove lumps
1 ounce cream cheese, softened
½ teaspoon vanilla extract
1-2 tablespoons milk

1. Stand mixer: Mix the flour, yeast, sugar, and salt in the bowl of a stand mixer fitted with the dough hook. In a large measuring cup, lightly beat the eggs; whisk in the pumpkin and oil. With the mixer on low speed, gradually add the liquid ingredients. Continue mixing on medium-low until the dough is elastic and supple, about 8 minutes. You may need to add a little more flour or water to get the correct consistency – soft but not sticky.

By hand: Mix the flour, yeast, sugar, and salt in a large bowl. In a large measuring cup, lightly beat the eggs; whisk in the pumpkin and oil. Make a well in the middle of the dry ingredients and pour in the liquid ingredients. Stir the mixture until the dough comes together. Transfer it to a floured board or countertop and knead, incorporating as little flour as possible, for about 10 minutes, until the dough is elastic and supple. You may need to add a little more flour or water to get the correct consistency – soft but not sticky.

2. Mix together the filling ingredients in a small bowl. Grease a 13 by 9-inch baking dish.

3. After the dough has doubled in bulk, press it down and turn it out onto a lightly floured work surface. Using a rolling pin, shape the dough into a 16 by 12-inch rectangle, with a long side facing you. Sprinkle the filling evenly over the dough, leaving a ½-inch border at the far edges. Roll the dough, beginning with the long edge closest to you and using both hands to pinch the dough with your fingertips as you roll. Using unflavored dental floss or a serrated knife, cut the roll into 12 equal pieces and place the rolls cut-side up in the prepared baking dish. Cover with plastic wrap and place in a warm, draft-free spot until doubled in bulk, 1½ to 2 hours.

4. When the rolls are almost fully risen, adjust an oven rack to the middle position and heat the oven to 350 degrees. Bake the rolls until golden brown and an instant-read thermometer inserted into the center of one reads 185 to 188 degrees, 25 to 30 minutes. Cool for 10 minutes. Meanwhile, stir the glaze ingredients together until smooth. Glaze the rolls and serve.

cardamom crumb cake

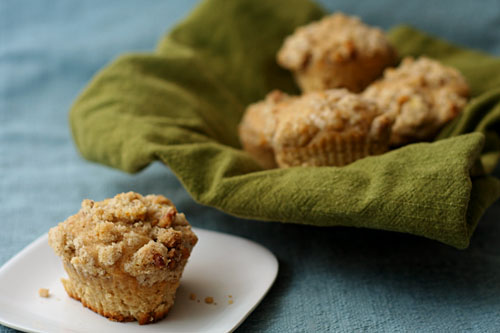
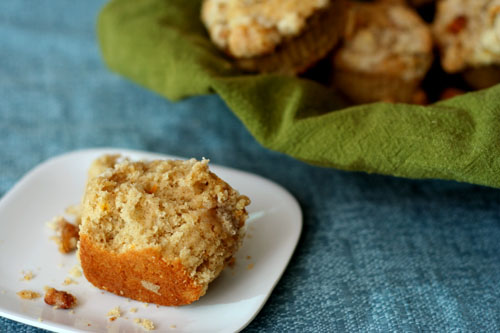
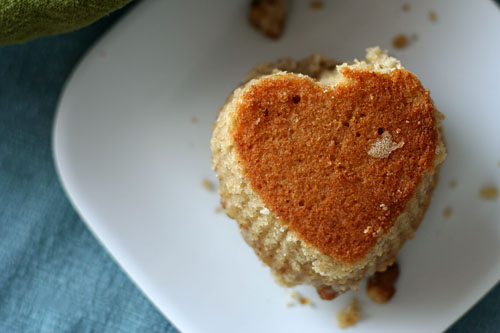
If you top cake with buttery sugary crumbs instead of buttery sugary frosting, suddenly it’s breakfast! Not that I’m complaining, mind you. And not that crumbs on top will stop me from eating it for dessert as well as breakfast.

It’s called cardamom cake, but cardamom isn’t the only important flavor. Orange zest in both the crumb and cake compete with coffee, and the orange wins but isn’t too strong. I suppose I wouldn’t have been opposed to more spice or even more bitter coffee, but the cake seemed pretty perfect just how it was. And really, what could be better than cake for breakfast?

Jill chose this recipe for Tuesdays with Dorie, and she has it posted. I doubled the salt.  (As well as baked it in heart-shaped muffin cups, obviously. The whole recipe makes 12 muffins. Bake at 400 degrees for about 18 minutes.)

One year ago: Cafe Volcano Cookies
Two years ago: Butterscotch Pudding

gingerbread cake

I’m very aware when putting up Christmas decorations that they’re going to need to be taken back down soon enough. I keep my decorations minimal. A 2-foot tree I bought in college, one string of lights, some pretty candles. When we get back from visiting our families a week after Christmas and start dreading the return to work on Monday, it’ll only take a few minutes to pack up the holidays until next year. I won’t make treats for that.
But I did make treats for decorating. It hardly seems worth it, since it took us longer to dig the box of Christmas stuff out of the garage than it did to spread the cheer around the living room, but everything is more fun with food. Gingerbread is the perfect accompaniment to Pandora’s Holiday Jazz station and the ceramic trees my Grandma gave me ten years ago.

I’ve never had a bad gingerbread, but this one – dense and spicy and moist – is just perfect for December. Maybe I will make another batch when we put the decorations away…

One year ago: Brussels Sprouts Braised in Cream
Two years ago: Candied Orange Peel

Printer Friendly Recipe
Gingerbread (from Claudia Fleming via Smitten Kitchen)

Please note that this cake is better if made a day in advance. After removing it from the pan, let it cool completely, then wrap it tightly in plastic wrap.

Cooks Illustrated recently published a recipe for gingerbread that’s very similar to this, except they stir the batter a bit more to give it more structure, to avoid the sinking that’s evident in the photo above.

1 cup oatmeal stout or Guinness Stout
1 cup dark molasses (not blackstrap)
½ teaspoon baking soda
2 cups (9.6 ounces) all-purpose flour
1½ teaspoons baking powder
2 tablespoons ground ginger
1 teaspoon ground cinnamon
¼ teaspoon ground cloves
¼ teaspoon freshly grated nutmeg
Pinch of ground cardamom
3 large eggs
1 cup (7 ounces) packed dark brown sugar
1 cup (7 ounces) granulated sugar
¾ cup vegetable oil
confectioners sugar for dusting
lightly sweetened whipped cream for serving (optional)

1. Preheat oven to 350°F. Generously butter a bundt pan and dust with flour, knocking out excess.

2. Bring the stout and molasses to a boil in a 2-quart saucepan and remove from heat. Whisk in baking soda; cool to room temperature.

3. Sift together the flour, baking powder, and spices in a large bowl. Whisk together the eggs and sugars in a separate bowl. Whisk the oil, then the molasses into the egg mixture. Add the egg mixture to the flour mixture; whisk until combined.

4. Pour the batter into the prepared pan and rap the pan sharply on counter to eliminate air bubbles. Bake in the middle of the oven until a tester comes out with just a few moist crumbs adhering, about 50 minutes. Cool cake in pan on a rack 5 minutes. Turn out onto rack and cool completely.

5. Serve cake, dusted with confectioners sugar, with whipped cream, if desired.

R.I.P. This cake stand, which I broke 30 seconds after taking these pictures.

red pepper risotto

This was one of the first recipes I ever made from the Food Network. Back before I had cable, I’d heard of a lot of the chefs, but I hadn’t seen any of their shows myself. Once when I was traveling, the hotel had cable, and I was transfixed.

I still remember the first shows I saw. Alton Brown, making tomato sauce; Rachael Ray, making crab salad served on endive leaves; and Emeril, making bagna cauda, red pepper risotto, beef in Barolo, and chocolate chestnut mousse. As soon as I got home, I invited a group of friends over for dinner and made the entire menu from Emeril’s episode. I even wrote reviews on the site later, the only I’ve ever written.

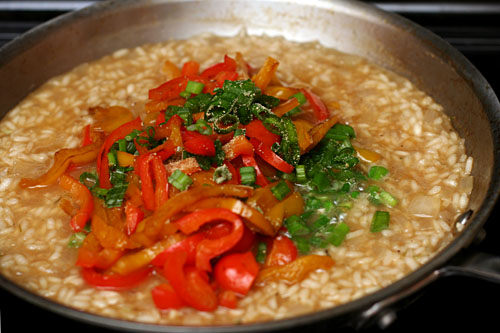
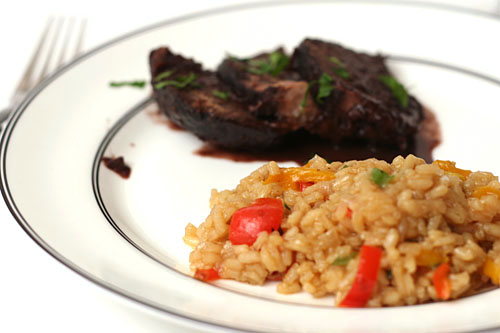
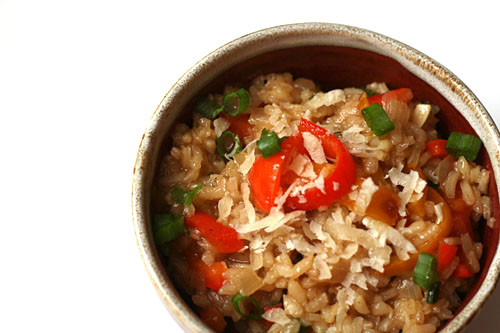
It was the first risotto I’d ever made and is still my go-to risotto recipe. It’s actually a very standard risotto – sweat onions, toast Arborio, evaporate wine, gradually add broth, stir in parmesan. I’ve tried other methods, but this one is my favorite. It’s perfectly adaptable too – I’ve added peas and leafy greens, but I still think the peppers are the best addition, especially if the risotto is being used to soak up delicious beef in Barolo juices.

One year ago: Steak au Poivre
Two years ago: Sausage Apple Hash

Printer Friendly Format
Risotto with Sweet Peppers (adapted slightly from Emeril)

6 cups chicken stock
1 tablespoon olive oil
1½ medium red bell peppers, seeded and diced
1½ medium yellow bell peppers, seeded and diced
2 tablespoons butter
½ onion, finely chopped
1 clove garlic, minced
1½ cups arborio or carnaroli rice
½ cup dry white wine
2 sprigs fresh thyme
4 scallions, green parts only, thinly sliced
1 teaspoon salt
½ teaspoon fresh cracked white pepper
1 cup grated Parmigiano-Reggiano

1. In a small saucepan, bring the stock to a simmer. Remove from the heat and cover to keep warm.

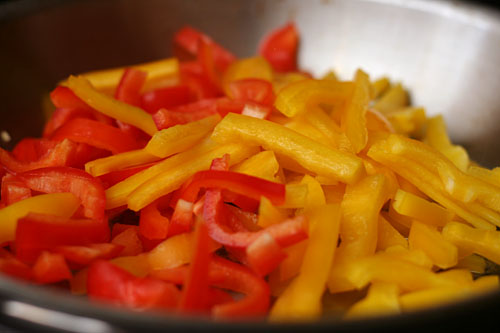
2. In a large skillet, heat the oil over medium-high heat. Add the peppers and cook, stirring frequently, until cooked through but still slightly crunchy, about 5 minutes. Remove from the heat and set aside.

3. In a large heavy saucepan, heat the butter over medium-high heat. Add the onions and cook, stirring, for 2 minutes. Add the garlic and cook until fragrant, about 30 seconds. Add the rice and cook, stirring constantly, until opaque, 2 minutes. Add the wine and cook, stirring until the rice nearly completely absorbs all the liquid, about 1 minute.

4. Reduce the heat to medium and stir in the thyme. Add 1½ cups of the hot stock, and cook, stirring frequently. Cook the risotto, adding more stock 1 cup at a time as it is absorbed, about 20 minutes total cooking time. Stir in the green onions and cooked bell peppers after 15 minutes cooking time. Season the risotto with 1 teaspoon of salt and white pepper. The rice should be slightly al dente.

5. Remove from the heat. Discard the thyme sprigs. Add the cheese, and stir well to mix. Adjust the seasoning, to taste, with salt and pepper. Serve immediately.

beef in barolo

I seem to be going through a phase. I was trying to choose what recipe to post about next, but everything I have to choose from seems so similar to Bolognese – Italian sauces based either on beef, tomatoes, or both. Maybe it’s because Dave and I are talking about visiting Italy next year, or maybe it’s because Italian beefy and/or tomatoey recipes are so perfect for winter (or what passes for winter in southeastern New Mexico).

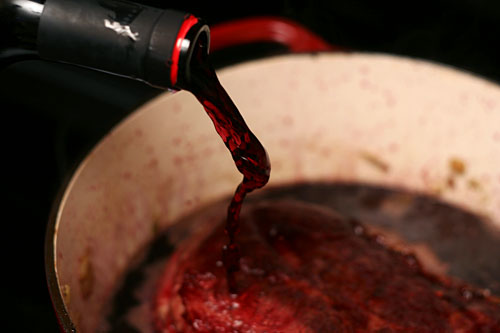
Although, if you cook the beef in Yellowtail Cabernet Sauvignon instead of Barolo, can you still call it an Italian recipe? I don’t imagine that I will ever cook with Barolo, and I certainly don’t recommend that you do either. Barolo is expensive. You’ll rarely find it for less than $50 per bottle and certainly never under $20. Don’t dump $40 worth of wine into your stew, please. And have you ever had Yellowtail’s cab? It’s perfectly drinkable, and at $5 per bottle, it’s a far more practical cooking wine.

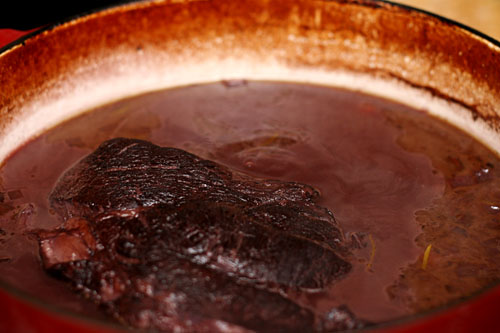
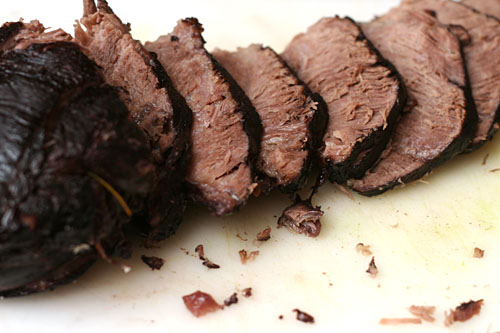
Yes, this pot roast is cooked with 2 whole bottles of wine. It’s intensely winey – obviously. In fact, the first night we had this for dinner, I was a little taken aback. The meat is purple and the flavor is so…winey. However, the leftovers the next night were perfectly balanced, so I suspect I didn’t cook it long enough initially, especially considering that the meat wasn’t quite as tender as I like my pot roast.

But that also means that this is one of those meals that is even better when it’s made in advance. It seems to me, then, that this is the perfect meal for guests – it’s convenient and delicious, but the wine makes it fancy. Even if it isn’t fancy wine.

One year ago: English Muffins
Two years ago: Red Velvet Whoopie Pies

Printer Friendly Recipe
Brasato al Barolo – Beef Braised in Barolo (adapted from Emeril)

6 servings

Oops, I just saw that the recipe calls for 1½ bottles of wine, not the 1½ liters, or two bottles, that I thought when I made this. So yours might not be quite as winey as mine. And now you have half a bottle to sip on while you wait for the beef to cook!

1 tablespoon olive oil
1 (3-pound) boneless beef chuck roast, patted dry
Salt and freshly ground black pepper
3 ounces pancetta, diced
1 yellow onion, diced
2 medium carrots, diced
2 celery stalks, diced
3 cloves garlic, minced
1½ bottles (4½ cups) Barolo, or other dry red wine
2 cups chicken stock
2 sprigs rosemary
2 bay leaves
1 cinnamon stick
¼ cup chopped fresh parsley, for garnish

1. Heat the oven to 325 degrees.

2. In a large Dutch oven, heat the oil over medium-high heat. Sprinkle the beef with salt and pepper. Add the beef to the pot and cook, turning every 2-3 minutes, to brown on all sides. Remove from the pan. To the fat in the pan, add the pancetta and cook until browned, about 3 minutes. Add the onions, carrots, celery and a pinch of salt; cook until caramelized, about 10 minutes. Add the garlic and cook until fragrant, about 30 seconds. Return the beef to the pan and add the wine, 2 cups of the stock, rosemary, bay leaves and cinnamon stick. Bring the liquid to a simmer over medium-high heat, then cover tightly and transfer the pot to oven.

3. Cook, turning the roast every 30 minutes, until fully tender and a meat fork slips in and out of meat very easily (3½-4 hours). Remove the meat from the pan and tent with foil to keep warm.

4. Remove the rosemary, bay leaves, and cinnamon stick, and place the pot over high heat. Cook until the sauce is reduced to a consistency thick enough to coat the back of a spoon, about 10 minutes. Adjust the seasoning to taste.

5. Thinly slice the beef across the grain into ¼-inch thick slices. Serve the beef ladled with the sauce. Garnish with parsley and serve.

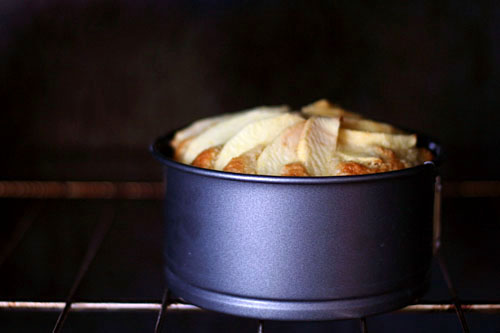
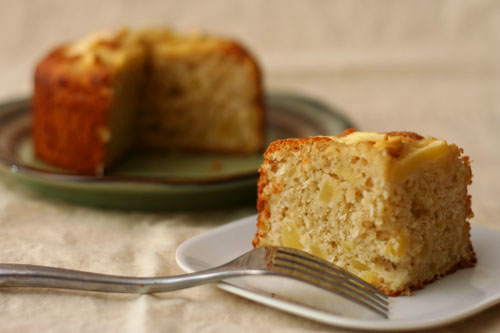
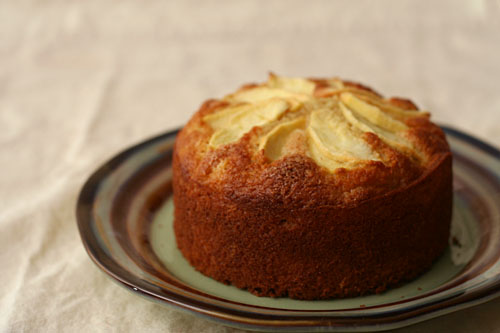
apple coconut family cake

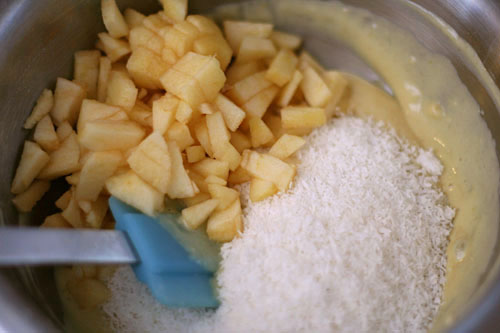
I try to maintain a fairly open mind about desserts. I mean, if chocolate and prunes can be great together, who knows what else is out there? But you can’t deny that apples and coconut is weird.

Most pairings are based on geographical and seasonal commonalities – lime and coconut, tomatoes and basil, strawberries and rhubarb. Coconuts are grown in the tropics; apples grow in temperate regions. Apples ripen in the fall; coconuts grow where there are no seasons. You just aren’t likely to find these two trees growing next to each other.

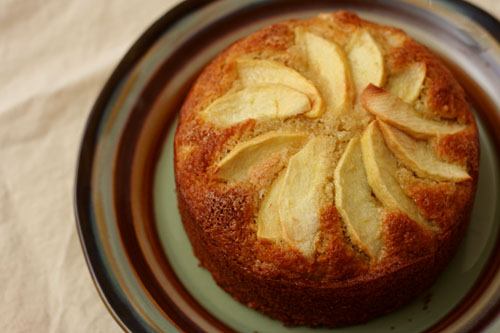
That doesn’t mean they make a bad combination, just an odd one. I didn’t not enjoy it. In fact, the cake was so fluffy and moist that I did enjoy it.  But not as much as chocolate and prunes.

Amber chose this cake for Tuesdays with Dorie, and she has the recipe posted.

One year ago: Sablés
Two years ago: Buttery Jam Cookies

oreo cheesecake cookies

I was feeling a bit crabby last week. I’ve been teaching in the evenings after work, which has fun aspects, but preparing lectures, grading labs, writing exams, and going to class has been seriously cutting into my kitchen time. I can’t remember the last time I baked an impromptu batch of cookies – when I had no one planned to eat my treats, when I saw a recipe and realized I had all of the ingredients lying around, when I had a spare hour or so to make a mess in the kitchen. No wonder I was feeling out of sorts.

Now that the semester is over, I have lofty goals of keeping my house cleaner, exercising more rigorously, and learning everything from the basics of Italian to the ins and outs of Photoshop. But the truth is that I’ll probably spend the bulk of my new spare time in the kitchen playing with butter, flour, and sugar.

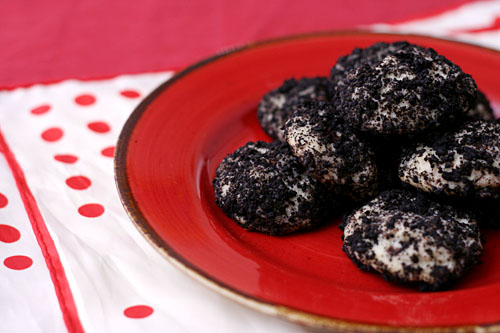
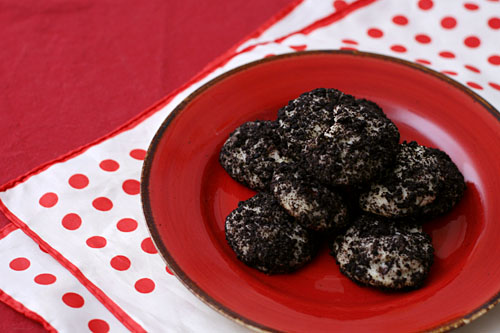
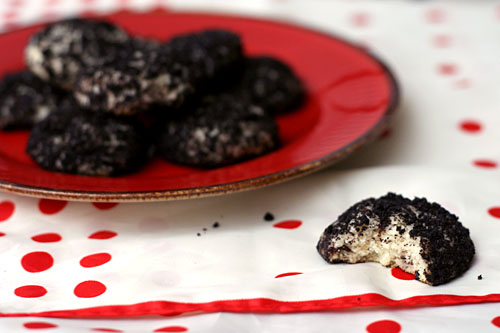
And cream cheese, if I’m lucky. As soon as someone says cream cheese, my ears perk up. And it’s all the better if it’s combined with oreos. These cream cheese cookies rolled in oreo crumbs are a fun take on that combination. There’s no egg in the dough, which not only simplified halving the recipe to use the odd bits and ends I had laying around, but gave the cookies a soft texture reminiscent of shortbread. Overall, they were the perfect way to end a baking dry period and put me in a better frame of mind.

One year ago: Bourbon Pound Cake
Two years ago: Cranberry Orange Muffins

Printer Friendly Recipe
Oreo Cheesecake Cookies (rewritten from multiplydelicious)

Makes about 30 cookies

8 tablespoons (1 stick) unsalted butter, softened
3 ounces cream cheese, softened
½ teaspoon salt
1 cup (7 ounces) sugar
1 teaspoon vanilla extract
1 cup (4.8 ounces) all-purpose flour
½ cup mini chocolate chips
1 cup oreo cookie sandwich crumbs (about 8 oreos)

1. Heat the oven to 375 degrees. Line 2 baking sheets with parchment paper or silicone mats.

2. In the bowl of a stand mixer fitted with the paddle attachment (or in a large bowl if using a hand mixer), beat the butter, cream cheese and salt on medium-low speed until smooth and creamy. Gradually add the sugar and continue beating until the mixture is light and fluffy, 1-2 minutes. Beat in the vanilla, and then add the flour and mix on low just until combined. Mix in the chocolate chips.

3. Roll the dough into 1-inch balls. Drop the dough balls into a bowl of oreo cookie crumbs and roll to coat. Arrange the dough balls 2 inches apart on the prepared baking sheets.

4. Bake the cookies for 8-10 minutes, until the edges just start to brown and the tops are set. Cool for a minute or two on the sheets, then transfer the cookies to wire racks and cool completely.

bolognese sauce comparison

(Anne Burrell’s recipe)

Have you ever had a traditional Bolognese sauce? Not just tomato sauce with ground meat mixed in, but one that involves milk and wine and hours of simmering. Just a few ingredients, but when they’re combined just right, the result is a complex, rich blend with incredible depth. Served over a bowl of creamy polenta with a sprinkling of parmesan cheese and a glass of good red wine on the side, there can be no more comforting, warming food.

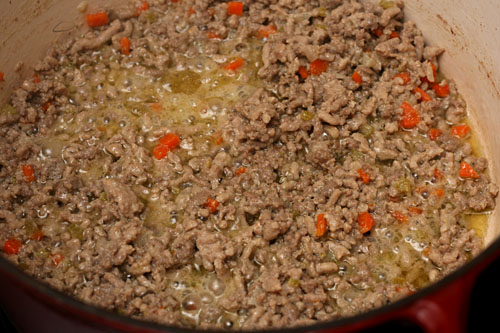
The first Bolognese I made was Marcella Hazen’s recipe. She is to Italian food what Julia Child is to French food; certainly a trusted source. In her method, a class mirepoix (or, technically, “soffritto” in Italian) of carrots, celery and onions is lightly cooked in butter, then ground meat is added and cooked just until it loses its pink. Stir in milk and let it bubble until only its delicious fat is left in the pot, then pour over some wine and let it simmer away, and only then, finally, after an hour of slow simmering, are the tomatoes (whole, canned) added – and simmered for 3 more hours.

After all that, however, I found Hazan’s recipe to be a little too vegetably. But Cooks Illustrated’s recipe for classic Bolognese is identical except for a smaller amount of vegetables. With only a couple tablespoons each of onions, carrots, and celery, it almost seems like they’re not worth adding, but there isn’t a thing I would change about the recipe.

Bolognese sauce takes a lot of time, yes, but it isn’t a lot of work. It’s my favorite type of recipe, in that it’s undemanding, but if you do happen to be in the kitchen (and I always am) you can stir to your heart’s content. But I suppose the long simmering time intimidates people, because there are a crop of supposedly weeknight friendly Bolognese sauce recipes popping up. In general, I’m not a fan of these types of recipes, because what they save in cooking time they make up for in ingredient prep.

(Cooks Illustrated’s Classic Bolognese)

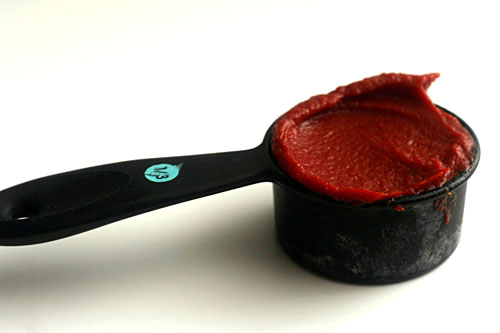
Then I kept seeing another type of Bolognese with great reviews. This one uses only tomato paste as its source of tomato flavor. And if anything can be identified as authentic in a recipe like Bolognese, it’s the tomato paste version, with a heavier meat influence and just a hint of tomatoes.

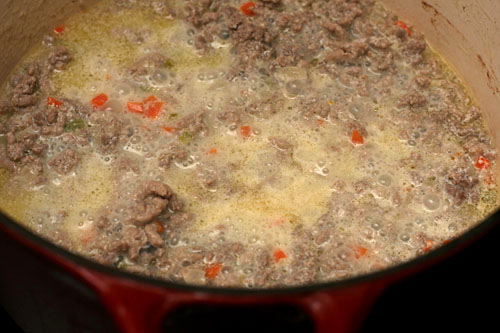
(Cooks Illustrated’s Classic Bolognese)

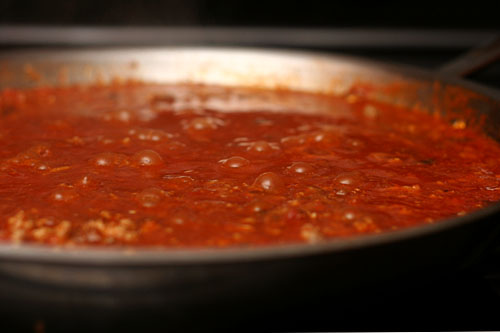
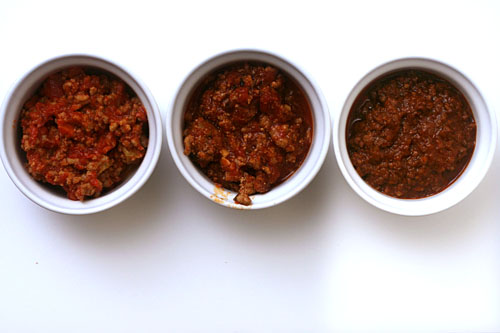
Authenticity aside, I wanted to know which was best. So I baked up three batches – my favorite version from Cooks Illustrated, their weeknight version, and Anne Burrell’s annoying (please don’t yell at me in the recipe, thank you) but well-reviewed tomato paste-based recipe.


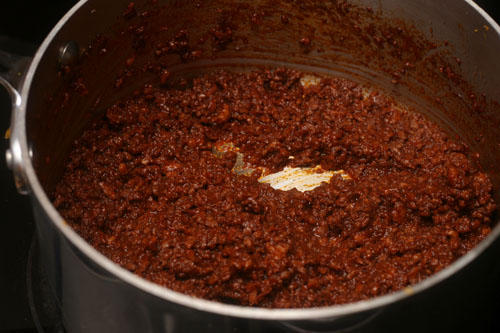
(Anne Burrell’s recipe)

The quicker “weeknight-friendly” recipe was, as I expected, the most work, with more ingredients and dishes necessary to mimic the slow-cooked flavor of the other two recipes. However, after all that and a shorter cooking time, its flavor did nicely mimic that of the other, more tomato-rich Cooks Illustrated recipe. I don’t believe Dave could tell the difference. My only complaint was that the meat was slightly tough.

Dave had a few interesting comments about Burrell’s Bolognese. The sauce is simply a classic mirepoix, beef, wine, tomato paste, and herbs, yet Dave detected flavors of mushrooms and possibly Worchestershire sauce in it – two ingredients high in umami, the fifth basic flavor that is best described by “meaty”. In fact, mushrooms are added to CI’s quick Bolognese to increase the meaty flavor that doesn’t have time to develop through a long simmer. One thing that was obvious to both me and Dave was the unusual texture of Burrell’s sauce; to me, it seemed slightly mealy, but Dave was kinder with “fine-grained”.

(Cooks Illustrated’s Weeknight Bolognese)

Dave couldn’t choose a favorite, with his usual “different but good” response, but I’m still stuck on my classic, tomato-heavy slow-simmered method. It’s intensely rich and meaty, but it has a bright balance from the tomatoes. Burrell’s meatier sauce was delicious too, and maybe all those tomatoes aren’t quite as traditional, but, frankly, I like tomatoes. And since Bolognese – any version – is one of those dishes that improves by being made in advance and will suffer no ill effects from being frozen, I see no reason to spend extra time cooking a supposedly quicker “weeknight-friendly” version. Besides, I like watching ingredients bubble away, increasing in intensity as they decrease in volume until they settle into something delicious.

left to right: CI Classic, CI Weeknight, Anne Burrell

One year ago: Thai-Style Chicken Soup
Two years ago: Pumpkin Ginger Muffins

Printer Friendly Recipe
Classic Bolognese (from Cooks Illustrated)

Enough to top 1 pound of dried pasta

If you double this recipe – and considering how well it freezes and reheats, you should – the simmering times will need to be extended.

3 tablespoons unsalted butter
2 tablespoons minced onion
2 tablespoons minced carrot
2 tablespoons minced celery
¾ pound ground beef chuck
table salt
1 cup whole milk
1 cup dry white wine
1 (28 ounce) can whole tomatoes, packed in juice, chopped fine, with juice reserved

1. Heat butter in large, heavy-bottomed Dutch oven over medium heat; add onion, carrot, and celery and sautè until softened but not browned, about 6 minutes. Add ground meat and ½ teaspoon salt; crumble meat with edge of wooden spoon to break apart into tiny pieces. Cook, continuing to crumble meat, just until it loses its raw color but has not yet browned, about 3 minutes.

2. Add milk and bring to simmer; continue to simmer until milk evaporates and only clear fat remains, 10 to 15 minutes. Add wine and bring to simmer; continue to simmer until wine evaporates, 10 to 15 minutes longer. Add tomatoes and their juice and bring to simmer; reduce heat to low so that sauce continues to simmer just barely, with an occasional bubble or two at the surface, until liquid has evaporated, about 3 hours. Adjust seasonings with extra salt to taste and serve. (Can be refrigerated in an airtight container for several days or frozen for several months. Warm over low heat before serving.)

Printer Friendly Recipe
Bolognese Sauce (slightly rewritten to remove all of Anne Burrell’s vulgarity)

Enough to top 1 pound of dried pasta

1 large onion or 2 small, cut into 1-inch dice
2 large carrots, cut into ½-inch dice
3 ribs celery, cut into 1-inch dice
4 cloves garlic
Extra-virgin olive oil, for the pan
Kosher salt
3 pounds ground chuck, brisket or round or combination
2 cups tomato paste
3 cups hearty red wine
Water
3 bay leaves
1 bunch thyme, tied in a bundle

1. In a food processor, puree onion, carrots, celery, and garlic into a coarse paste. Heat a large pan over medium heat; add a slick of oil. Add the pureed vegetables and season generously with salt. Bring the pan to medium-high heat and cook until all the water has evaporated and they brown, stirring frequently, about 15 to 20 minutes.

2. Add the ground beef and season again generously with salt. Cook, stirring occasionally, 15-20 minutes, until browned.

3. Add the tomato paste and cook until brown, 4 to 5 minutes. Add the red wine. Cook until the wine has reduced by half, another 4 to 5 minutes.

4. Add water to the pan until water is about 1 inch above the meat. Toss in the bay leaves and the bundle of thyme and stir to combine. Bring to a boil over medium-high heat, then reduce to a simmer, stirring occasionally. As the water evaporates you will gradually need to add more, about 2 to 3 cups at a time. Simmer, stirring occasionally, for 3½ to 4 hours. Adjust the seasoning with salt and serve immediately.

Printer Friendly Recipe
Weeknight Bolognese (from Cooks Illustrated)

Enough to top 1 pound of dried pasta

½ ounce dried porcini mushrooms
1¼ cup white wine (Riesling, gewürztraminer, white zinfandel, xx)
½ small carrot, peeled and chopped into rough 1/2-inch pieces
½ small onion, chopped into rough 1/2-inch pieces
3 ounces pancetta, cut into 1-inch pieces
28 ounces whole tomatoes with juice
1½ tablespoon unsalted butter
1 small garlic clove, pressed through garlic press or minced
1 teaspoon sugar
1¼ pound meatloaf mix or equal amounts 80 percent lean ground beef, ground veal, and ground pork
1½ cup whole milk
2 tablespoons tomato paste
Salt
⅛ teaspoon ground black pepper

1. Cover porcini mushrooms with ½ cup water in small microwave-safe bowl; cover bowl with plastic wrap, cut a few steam vents with paring knife, and microwave on high power for 30 seconds. Let stand until mushrooms have softened, about 5 minutes. Using fork, lift porcini from liquid and transfer to second small bowl; pour soaking liquid through mesh strainer lined with paper towel. Set porcini and strained liquid aside.

2. Bring wine to simmer in 10-inch nonstick skillet over medium heat; reduce heat to low and simmer until wine is reduced to 2 tablespoons, about 20 minutes. Set reduced wine aside.

3. Meanwhile, pulse carrot in food processor until broken down into rough ¼-inch pieces, about ten 1-second pulses. Add onion; pulse until vegetables are broken down to ⅛-inch pieces, about ten 1-second pulses. Transfer vegetables to small bowl. Process softened porcini until well ground, about 15 seconds, scraping down bowl if necessary. Transfer porcini to bowl with onions and carrots. Process pancetta until pieces are no larger than ¼ inch, 30 to 35 seconds, scraping down bowl if necessary; transfer to small bowl. Pulse tomatoes with juice until chopped fine, 6 to 8 one-second pulses.

4. Heat butter in 12-inch skillet over medium-high heat; when foaming subsides, add pancetta and cook, stirring frequently, until well browned, about 2 minutes. Add carrot, onion, and porcini; cook, stirring frequently, until vegetables are softened but not browned, about 4 minutes. Add garlic and sugar; cook until fragrant, about 30 seconds. Add ground meats, breaking meat into 1- inch pieces with wooden spoon, about 1 minute. Add milk and stir to break meat into ½-inch bits; bring to simmer, reduce heat to medium, and continue to simmer, stirring to break up meat into small pieces, until most liquid has evaporated and meat begins to sizzle, 18 to 20 minutes. Stir in tomato paste and cook until combined, about 1 minute. Add tomatoes, reserved porcini soaking liquid, ¼ teaspoon salt, and pepper; bring to simmer over medium-high heat, then reduce heat to medium and simmer until liquid is reduced and sauce is thickened but still moist, 12 to 15 minutes. Stir in reduced wine and simmer to blend flavors, about 5 minutes.

(Cooks Illustrated’s Weeknight Bolognese)

translucent maple tuiles

Sometimes I’m really on my game, and other times I am just not at all. For example, last month, I made a big turkey dinner feast for me and Dave, just for fun, and it went flawlessly except for the oven getting turned off in the middle of the day and no one noticing until an hour after I put the turkey in. Every recipe impressed me, I got the food to the table while it was still hot, the kitchen was mostly clean before we sat down to eat. That was me on my game.

These tuiles are a simple little recipe. They only have four ingredients. The dough can be made days in advance. They don’t spend long in the oven. It shouldn’t have been complicated.

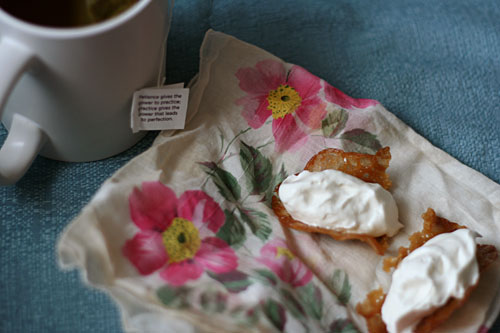
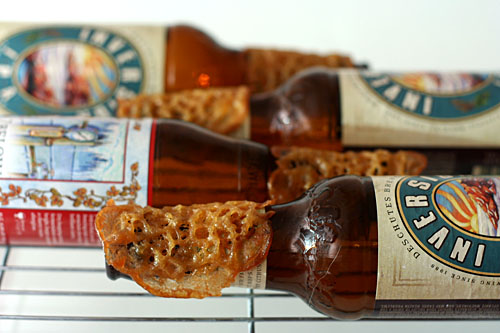
But I made mistakes at every step. First I added too little flour, which was solved easily enough by softening my chilled dough, working in more flour, and re-chilling. My tuiles baked up well and I only broke one during the transfer from baking pan to cooling rack (or beer bottle, in this case). But they were chewy, and I assumed they were supposed to be crisp, so I put them back in the oven for a few minutes, draped over the rungs of a cooling rack. You, being smarter than me, can probably tell where this went wrong – the tuiles dripped off of the cooling rack in pieces. And they didn’t get any crisper.

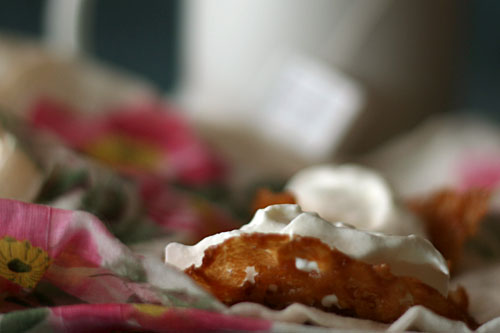
From there, it was just breaking the pieces every time I moved them and adding a ridiculous amount of brandy to the whipped cream filling. So. Tuiles. That was interesting.

Hindy chose this recipe for Tuesdays with Dorie, and she has it posted. I added a bit of salt to my dough. Dorie says to bake the tuiles on an unlined baking pan, but mine is really dark and burns things when it’s unlined, so I used parchment paper, which worked great.

One year ago: Rosy Pear and Pistachio Tart
Two years ago: Grandma’s All-Occasion Sugar Cookies