Archives for February 2012

butterscotch peanut butter chocolate rice krispy treats

rice krispie treats 8

I did something very, very stupid with this recipe. It calls for 1½ bags of butterscotch chips. The thing is, I don’t like butterscotch chips very much, so I didn’t want half a bag leftover that I would feel obligated to keep around indefinitely, where it would take up valuable cabinet space. I only bought one bag, deciding to wing it (always trouble) for the remainder.

rice krispie treats 3

I started regretting this shortly after leaving the store. Because obviously I could have just dumped that half bag of chips into a batch of chocolate chip cookies and they would be hardly noticeable. Or, heaven forbid, I could just throw a handful of butterscotch chips away if I didn’t plan to use them.

rice krispie treats 12

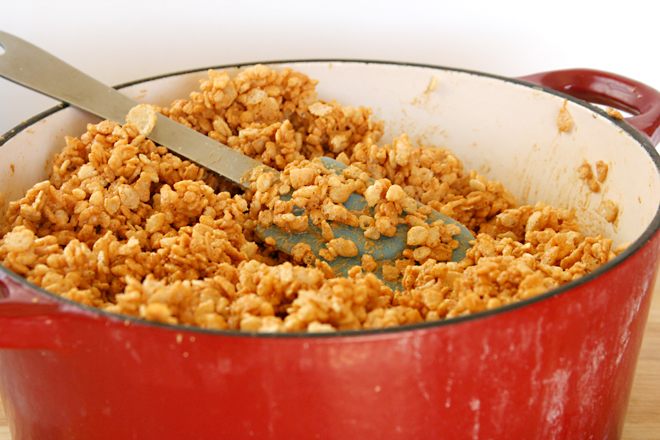
Instead of making an extra trip back to the store, I forged ahead. Things looked bad from the beginning when I measured out my single bag of butterscotch chips and it was even less than I was expecting. I still forged ahead, adding in a couple tablespoons of butter and another couple tablespoons of corn syrup to make up for the fat and sugar I was missing from the extra chips. I knew I was in bad shape when I poured in the entire box of cereal, and it filled my pot to the brim. I thought about shoveling some of the cereal out before mixing it into the melted butterscotch and peanut butter mixture but stubbornly forged ahead instead.

rice krispie treats 7

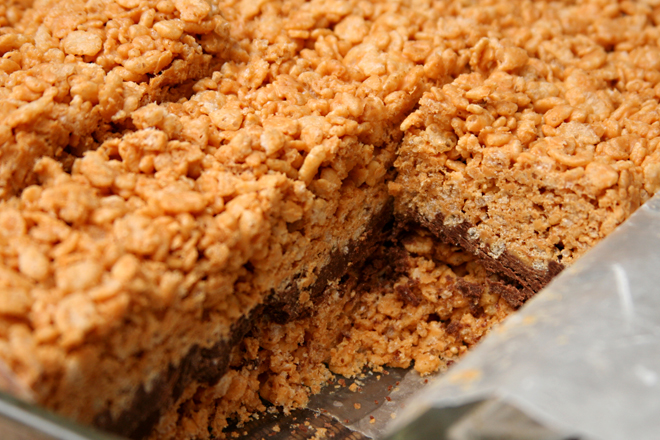
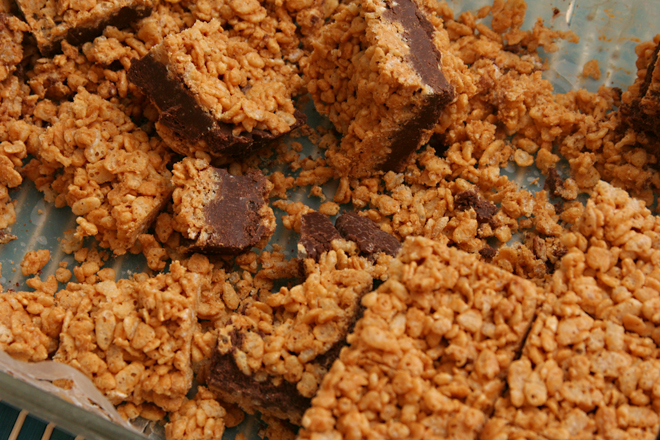
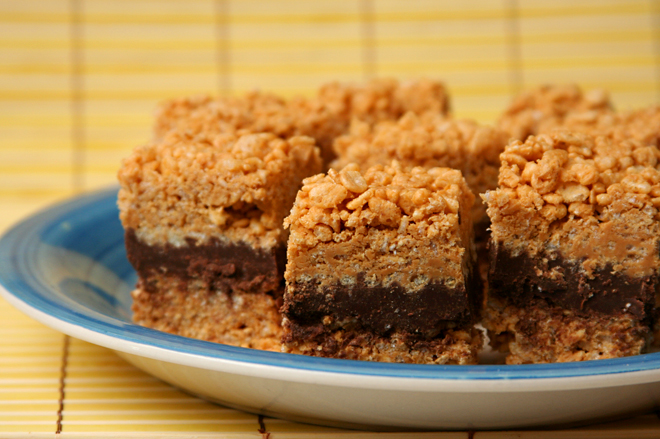
No one is surprised that my rice krispy bars were a crumbly mess, are they? There simply wasn’t enough glue to hold together all that cereal. They tasted good, like that classic combination of peanut butter and chocolate, but, while I did manage to cut a few clean squares, they’re so delicate that they crumble as soon as they’re touched. Of course I ate them anyway, because they’re butterscotch peanut butter chocolate rice krispy bars. Crumbles aside, what’s not to love? But next time, I’ll follow the directions, half bag of extra chips be damned.

rice krispie treats 10

One year ago: Strawberry Buttercream
Two years ago: Bacon-Wrapped Stuffed Dates
Three years ago: Beer-Battered Fish
Four years ago: Julia Child’s French Bread

Printer Friendly Recipe
Butterscotch Peanut Butter Chocolate Rice Krispy Treats (slightly adapted from Cara’s Cravings)

About 32 tall bar cookies

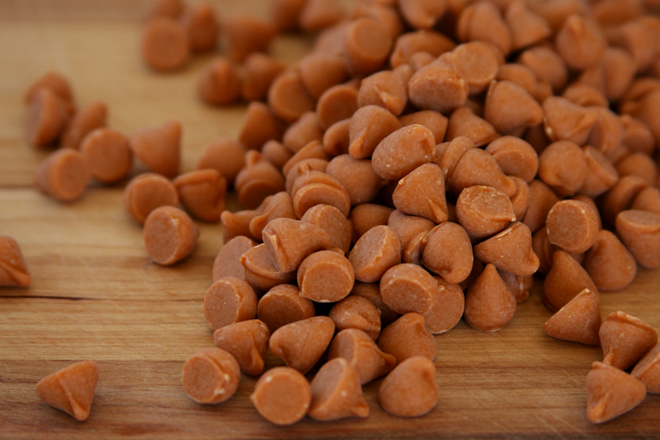
3 cups (1½ to 2 11-ounce bags) butterscotch chips
1½ cups (13½ ounces) creamy peanut butter
salt
1 (12-ounce) box crisp rice cereal
4 cups (2 12-ounce bags) semi-sweet chocolate chips
8 tablespoons (1 stick) butter, cut into ½-inch cubes
1½ cups (6 ounces) confectioners’ sugar
¼ cup water

1. Spray a 9-by-13 inch pan with cooking spray.

2. In a large (at least 5-quart) pot over medium-low heat, melt the butterscotch chips with the peanut butter and ¼ teaspoon salt. When the mixture is smooth, which will take 8-10 minutes, add the cereal and stir to thoroughly coat the cereal with the peanut butter mixture.

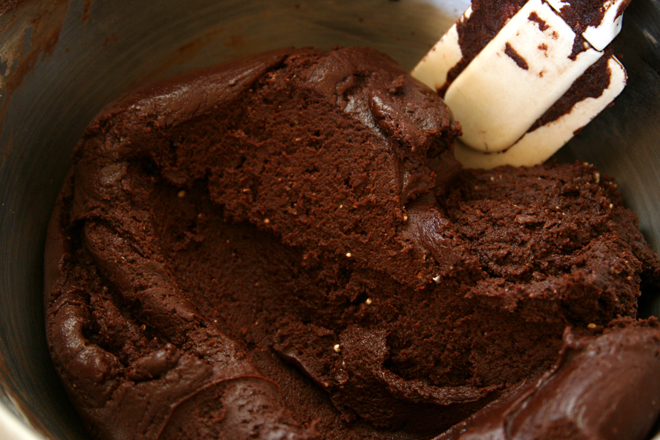
3. Meanwhile, bring 1-inch of water to a simmer in a saucepan. Place the chocolate, water, 1/8 teaspoon salt, and butter in a heatproof bowl and set it over the simmering water. Stir occasionally until the chocolate is melted and smooth, 6-8 minutes. Stir in the powdered sugar.

4. Transfer half of the cereal mixture to the prepared pan; use a rubber spatula or greased hands to pat the mixture into an even layer, pressing lightly to compact. Spread the chocolate mixture evenly over the cereal in the pan. Top with the remaining cereal mixture. Cover lightly with plastic wrap and refrigerate until set, about 2 hours.

rice krispie treats 9

Normally I wouldn’t waste your time describing such a mistake, but this recipe was on my list of 2012 goals for February.

ranch dressing

ranch dressing 6

I’ve made ranch dressing a few times before but hadn’t found the perfect recipe. One was too chunky; minced vegetables like red peppers don’t cling to dippers. Another time, I couldn’t put my finger on the problem, but it just wasn’t right. But now I’ve got it.

ranch dressing 1

Combining Greek yogurt and mayonnaise creates a rich creamy base with the balance of the yogurt’s tart flavors and mayo’s sweeter notes. On their own, that would be a little thick for salad dressing, so buttermilk loosens the consistency. Lemon juice brightens and mustard deepens.

ranch dressing 2

You don’t need a wide variety of herbs, but the ones you choose are key. The absolute essential one is chives, which gives the mixture onion flavor without raw onion’s sharp bite. Parsley fills in the bitter edge, and those are the only two that are necessary for a simple, but still great, ranch dressing. I had some dill around and added just a sprinkle, but even that was too much, because the dill tends to dominate.

ranch dressing 3

It seems like something as ubiquitous as ranch dressing should be more complicated. There’s nothing much here beyond a creamy base, a few flavor tweaks, and a handful of herbs. But it’s another recipe I’ve been wanting to perfect that has been checked off the list.

ranch dressing 5

One year ago: Braised White Bean with Zucchini, Tomatoes, and Potatoes
Two years ago: Roasted Garlic Balsamic White Bean Dip
Three years ago: Caramel Crunch Bars
Four years ago: Challah

Printer Friendly Recipe
Ranch Dressing

Makes about 1½ cups

To toast the garlic, heat a small unoiled not-nonstick skillet over medium heat. Add the unpeeled garlic. When the peel blackens, turn the clove over and toast a second side. This takes the bite out of the raw garlic, which can be overpowering in dressings.

If you want your dressing to be smoother, put it through the blender (or take an immersion blender to it).

½ cup Greek yogurt
½ cup mayonnaise
½ cup buttermilk
1 teaspoon lemon juice
½ teaspoon dijon mustard
1 clove garlic, toasted
¼ cup minced fresh chives
2 tablespoons minced fresh parsley
⅛ teaspoon paprika
½ teaspoon salt
⅛ teaspoon black pepper

Whisk everything together. If you can make it a couple hours in advance, the flavors will have a chance to meld a little.

ranch dressing 4

wine braised beef

wine braised beef 7

I don’t really consider myself a team player. I’ve never been excited about sharing or compromise (which makes me really fun to live with, as you can imagine). And yet, in the last several months, two good friends have asked me to collaborate with them on big projects.

wine braised beef 1

The first was a dinner party for twenty women. It didn’t need to be fancy or involved, except that we wanted it to be. Through a long series of emails, discussing the merits of lasagna versus baked stuffed chicken versus braised meat, we finally decided on a “deconstructed stew” theme, with glazed carrots, mashed potatoes, and beef slow-cooked in a pot of simmering wine and broth. And then just for kicks, we added pesto palmiers, cheese and crackers, mushroom farro soup, orange cream tarts, truffles, and cranberry bliss bars to the menu. Also mulled wine and flavored waters.

wine braised beef 3

Around this time, the call for proposals to present at the BlogHer Food conference was released, and Brady had asked me if I was interested in submitting a proposal with her about free photo post-processing software programs. Of course I was! Brady and I got our proposal accepted, and so we’re traveling to Seattle the second week of June to talk about editing photos, and, most importantly, doing it using free software.

wine braised beef 4

Surprisingly, to myself at least, both projects have been unqualified successes. The dinner party was great fun, to plan, to prepare, to serve, and to eat, and my friend invited me to host with her again next year, so I couldn’t have been too hard to work with! Brady and I are still in the beginning stages of planning our presentation for the BlogHer Food conference, but just the fact that our proposal was accepted is a positive sign of our ability to work together. Maybe I’m not so bad to team up with after all.

wine braised beef 6

One year ago: Toasted Almond Scones
Two years ago: Honey Wheat Cookies
Three years ago: Honey Yogurt Dip
Four years ago: Green Chile Chicken Enchiladas

Printer Friendly Recipe
Wine-Braised Beef

Serves 4-6

The goal was that the main dish be stew-like without being stew. It was going to be served on plates, so it couldn’t be too saucy, but we wanted meltingly tender chunks of beef. A cheaper cut of meat so we could serve a crowd was definitely a bonus. It also doesn’t hurt that there’s no last-minute work and it can be made in advance and actually improves with being stored overnight.

I’m a big fan of Yellowtail’s wine for recipes like this. It’s cheap but pretty good. I used a Shiraz/Cabernet Sauvignon blend.

1 tablespoon canola oil
1 (3 to 3½-pound) boneless beef chuck roast, cut into 2-inch cubes
Salt and freshly ground black pepper
1 ounce pancetta, diced into ⅛-inch cubes
1 yellow onion, diced fine
1 medium carrot, diced fine
1 celery stalk, diced fine
3 cloves garlic, minced
1½ cups dry red wine
1½ cups chicken broth
1 (15-ounce) can diced tomatoes, with juice
1 sprig thyme
2 tablespoons butter, room temperature
2 tablespoons all-purpose flour
2 tablespoons chopped fresh parsley, for garnish

1. Heat the oil in a 5-quart Dutch oven over medium-high heat. Pat the meat dry, season it generously with salt and pepper, and arrange the pieces, without touching, in the Dutch oven. (You may need to do this in two batches.) Cook the meat, without stirring or flipping, for 2-3 minutes, until the bottoms are deeply browned. Turn the chunks of meat and brown a second side. Transfer the meat to a plate. Discard any fat in the pan (but leave the cooked-on brown bits).

2. In the same pot over medium heat, cook the pancetta until fat starts to render, 3-5 minutes. Add the onion, carrot, and celery; cook, stirring occasionally, until the edges of the onions start to brown, about 6 minutes. Add the garlic; cook and stir for about one minute. Pour the wine into the pot, scraping up the sticky brown bits on the bottom of the pot. Add the stock, tomatoes with their juice, thyme sprig, and reserved meat back to the pot. Increase the heat to medium-high and bring to a simmer. Once the liquid simmers, reduce the heat to low, partially cover the pot, and simmer slowly until the meat is tender, about 3 hours.

3. Mix the butter and flour in a small bowl until smooth. Remove the thyme sprig from the pot. Whisk the butter/flour paste into the sauce. Increase the heat to medium to medium-high and simmer, uncovered, until the sauce is thickened. Serve, topping each portion with a sprinkling of parsley.

wine braised beef 5

strawberry buttermilk cake

strawberry buttermilk cake 6

I woke up yesterday wanting cake. Not wanting to eat cake, so much, although that part is nice, but wanting to watch butter and sugar swirl in the mixer bowl and gradually turn into a smooth batter. This despite plans to make Danish dough, two Danish fillings, fajitas, grapefruit cookies (which didn’t happen because I’d gotten my mixer fix with the cake), and a batch of Tartine country bread dough to freeze (which didn’t happen because I ran out of flour). No one said anything about being practical.

strawberry buttermilk cake 3

I started poking around the internet for recipes, and chose this one because it uses buttermilk, which I have right now, and it wasn’t loaded with butter, which is always nice when you’re planning to eat cake for breakfast. I did not have any fresh berries, but I always keep strawberries in the freezer for our weekday smoothies. And it didn’t require an hour in the oven; key on a government holiday that included sleeping in.

strawberry buttermilk cake 4

The cake was everything I’d been craving. The most important part of the craving was my favorite mixing method of beating butter and sugar until fluffy, whipping in an egg and vanilla, and alternating the additions of buttermilk and dry ingredients. But cake for breakfast doesn’t hurt either.

strawberry buttermilk cake 5

One year ago: Eggplant Rollatini
Two years ago: Pasta with Baked Ricotta and Sweet Tomato Sauce
Three years ago: Vegetarian Chili
Four years ago: Salmon Cakes, Flaky Biscuits, Hashed Brussels Sprouts

Printer Friendly Recipe
Berry Buttermilk Cake (rewritten but not changed from Gourmet via Smitten Kitchen)

Serves 6

Two things: The original recipe calls for fresh raspberries, which are probably a better choice than the (frozen) strawberries I used. Strawberries are juicier than other berries, so my cake was a little wetter than is probably ideal. I also thought it was too sweet, which could be because strawberries aren’t as tart as raspberries, but still, next time I’ll only use ½ cup of sugar.

1 cup (4.8 ounces) all-purpose flour
½ teaspoon baking powder
½ teaspoon baking soda
¼ teaspoon salt
½ stick unsalted butter, room temperature
⅔ cup (4.67 ounces) plus 1½ tablespoons sugar, divided
1 teaspoon grated lemon zest
½ teaspoon pure vanilla extract
1 large egg
½ cup well-shaken buttermilk
1 cup (5 ounces) fresh raspberries (or other berries)

1. Adjust a rack to the middle position and heat the oven to 400 degrees. Butter and flour a 9-inch round cake pan. In a small bowl, whisk together the flour, baking powder, baking soda, and salt.

2. In a stand mixer fitted with the paddle attachment (or in a medium bowl using a hand mixer), beat the butter, sugar, and lemon zest (if using) on medium-high speed until pale and fluffy, about 2 minutes. Add the egg and vanilla, beating until combined. Reduce the mixer speed to low; add one-third of the flour mixture, then half of the buttermilk. Continue alternating the dry ingredients and buttermilk, ending with the dry ingredients.

3. Scrape the batter into the prepared pan, smoothing the top. Scatter the berries evenly over the top, then sprinkle with the remaining 1½ tablespoons sugar. Bake until the cake is golden and a toothpick inserted into the center comes out clean, 25 to 30 minutes. Transfer the cake to a cooling rack; cool for 10 minutes. Remove the cake from the pan and cool another 10-15 minutes before serving.

strawberry buttermilk cake 7

black bean quinoa salad with tomatillo salsa

black bean quinoa 7

A few weeks ago, I was skiing, and I was having fun, but I felt stale. I felt like I was doing the same things I always do when I ski, back and forth across the slope, not too fast, just nice and comfortable. After a morning of this, I was getting impatient with myself – why are you so timid, I asked myself? Go faster, mix it up, challenge yourself, get out of that comfort zone. So I did, and I fell, and I twisted my knees, had to sit in the lodge and read a book the next day while my friends skied, and I couldn’t run or progress in my weightlifting routine for three weeks (and counting*).

black bean quinoa 1

My weeknight dinner routine has felt stale lately too. So many grain salads, so many beans. It seems like I always use quinoa the same way, in some sort of salad. And how many different ways can I possibly combine black beans, chiles, and avocadoes?

black bean quinoa 3

On the other hand, maybe I’m in this rut because it works – it’s healthy, it’s fast, and it’s good. Sometimes it’s better to stick with what works. Quinoa salads work. Black beans and cilantro works. And avocado works on everything. This was one of the best meals I’ve made lately. Mixing it up is overrated.

black bean quinoa 4

*Eventually, I decided that if resting wasn’t helping my knees heal, I might as well run. (Impeccable logic, right?) A couple runs in, my knees feel better than they have in weeks. Crossing my fingers to start weightlifting again this weekend!

black bean quinoa 6

One year ago: Chocolate Frosting (comparison of 3 recipes)
Two years ago: Dorie Greenspan’s Best Chocolate Chip Cookies
Three years ago: Devil’s Food White Out Cake
Four years ago: Cream Cheese Brownies

Printer Friendly Recipe
Black Bean Quinoa Salad with Tomatillo Salsa (adapted slightly from Cate’s World Kitchen)

Serves 3-4

I substituted about 4 ounces of roasted peeled Hatch green chiles for one of the jalapenos.

1 cup quinoa, rinsed
salt
4 tomatillos, papery skins removed
3 cloves garlic, unpeeled
2 jalapenos, stemmed and seeded
¾ cup cilantro, divided
juice of 1 lime
1 (15-ounce) can black beans, rinsed and drained
1 cup grape tomatoes, halved
1 avocado, diced

1. In a medium saucepan over high heat, bring 1 cup water, ¼ teaspoon salt, and the quinoa to a boil. Cover the pot, reduce the heat to low, and simmer for 15 minutes. After 15 minutes, remove the pot from the heat and let sit, still covered, for 10 minutes.

2. Meanwhile, adjust an oven rack to the upper-middle position and heat the broiler. Broil the tomatillos and garlic until the tomatillos are browned, 5-8 minutes. Peel the garlic; transfer it to a blender with the tomatillos, ½ teaspoon salt, jalapenos, and ½ cup cilantro. Puree.

3. Transfer the quinoa to a large bowl. Stir in the lime juice. Once the quinoa cools to slightly warmer than room temperature, add the beans, tomatoes, avocado, remaining ¼ cup cilantro, and salsa. Serve.

black bean quinoa 5

pasta with salmon in pesto cream sauce

salmon pesto pasta 3

I never know what to do about Valentine’s Day. On the one hand, I’m not interested in the traditional stuff; I don’t want gifts or chocolate or a heart-covered card with a canned message. I’ll never say no to flowers, although I don’t love the responsibility of keeping the cat from eating them. On the other hand, Valentine’s Day is hard to ignore, because the rest of the world is definitely into it. I’m not one to scoff at something because it’s mainstream; I’d rather join in on the fun.

salmon pesto pasta 1

I thought that, at the very least, I’d make a nice meal. But Valentine’s Day is on a Tuesday this year, so I couldn’t get too ambitious. Dave’s favorite meal, salmon pesto pasta, would have fit the bill perfectly. It hardly takes longer to cook than it takes pasta to boil, assuming that your pesto is already prepared.  For all that it’s so easy, the finished dish is deserving of being Dave’s all-time favorite dinner, with generous bites of salmon held to pasta by a sauce that’s creamy but not too heavy, since it’s made from evaporated milk instead of heavy cream.

salmon pesto pasta 2

But, we’ve been having salmon pesto pasta a lot lately, trying to use up last year’s surplus of pesto before this year’s basil starts growing. I decided it wasn’t special enough for Valentine’s Day, even my lazy attitude toward the holiday, so instead we’re having prosciutto-wrapped salmon, farro risotto, and roasted Brussels sprouts. Dave will be so disappointed, but it will be short-lived, because salmon pesto pasta is so easy that we can just have it next week for a non-holiday.

salmon pesto pasta 5

One year ago: Chocolate Oatmeal Drops
Two years ago: Jalapeno Baked Fish with Roasted Tomatoes and Potatoes
Three years ago: Pot Roast
Four years ago: Apple Galette

Printer Friendly Recipe
Pasta and Salmon with Pesto Cream Sauce

Serves 4

I usually make half of this recipe to serve two people, and the smaller 5-ounce can of evaporated milk is perfect.  I tried using more, so that the full recipe would use a whole 15-ounce can of evaporated milk, but all the dairy blunted the other flavors.

12 ounces pasta, preferably a short shape (rotini, penne, farfalle, orechiette)
salt
2 (6 to 8 ounce) salmon filets
10 ounces evaporated milk
½ lemon
½ cup pesto
parmesan, for serving

1. Adjust a rack to the upper position and heat the broiler. Line a baking sheet with foil.

2. Bring about 4 quarts of water to a boil over high heat. Once the water boils, add the pasta and 1 tablespoon of salt. Cook the pasta until it is slightly undercooked, about 1 minute less than the package indicates the pasta will be done. Drain.

3. Meanwhile, place the salmon, skin-side down, on the prepared baking sheet. Season it liberally with salt. Broil until the salmon is lightly browned on top and flakes easily with a fork, 6-10 minutes. Set aside to cool slightly.

4. Return the empty pasta-cooking pot to medium-high heat. Add the evaporated milk and ¼ teaspoon salt. Simmer, scraping the bottom of the pot often to prevent sticking, until the milk is reduced to about ⅓ cup, about 5 minutes. Add the pasta to the milk, and cook, stirring constantly, for about one more minute, until the pasta is al dente.

5. Use two spoons to break up the salmon into bite-sized pieces. Squeeze the lemon juice over the flaked salmon. Add the salmon and pesto to the pasta; stir gently to combine and serve immediately, topping with parmesan.

salmon pesto pasta 4

This is an update from a earlier blog entry. For a meal we love as much as this one, I thought a new entry was worthwhile.

yogurt hollandaise

yogurt hollandaise 4

I am totally fascinated by emulsions, those silky mixtures of water-based liquids and fat. I’d love to claim this has something to do with my chemistry background and an interest in immiscible liquids and amphiphilic molecules, but, in truth, I think it’s because I like the creamy rich mixtures that result. I love mayonnaise, an emulsion of oil and vinegar; vinaigrettes, in which mustard holds the oil and vinegar together, although not as well as the egg yolks in mayonnaise; and even cake batters, in which a few egg yolks work to hold the butter and milk (or whatever liquid) together, and have such trouble doing it that the ingredients need to be as close in temperature as possible to prevent curdling.

Hollandaise, an emulsion of butter and lemon juice, again held together by egg yolks (the kitchen’s favorite emulsifier), isn’t my thing though. It isn’t that I don’t like it – what isn’t to like, other than blowing your entire day’s worth of calories for breakfast? It’s just that I don’t see the point, when my old favorite pretend-fattening ingredient, Greek yogurt, does such a good job of mimicking the richness of traditional hollandaise.

yogurt hollandaise 1

You still add egg yolks to make the sauce silky smooth, and this yogurt-based sauce has all the same flavorings as a full-fat version, with the lemon juice, salt, and spice (hot sauce here instead of cayenne powder). A pinch of sugar and tiny squeeze of mustard round out the flavors. And in the spirit of being healthier but maybe not perfectly healthy, I usually stir some tiny cubes of butter into the sauce to add richness.

yogurt hollandaise 3

There’s no question that the main advantage of this sauce over traditional hollandaise is that you’re not pouring nearly pure butter over your eggs. But it doesn’t hurt that it’s easier and less finicky either, requiring nothing more than a quick whisk over a double boiler, with no worries about the emulsion breaking. I guess I like fake emulsions just as much as real ones.

yogurt hollandaise 2

One year ago: Yellow Cake (comparison of 3 recipes)
Two years ago: Rich Katz’s brownies for Julia Child
Three years ago: Red Velvet Cake (comparison of 5 recipes)
Four years ago: Salmon Pesto Pasta

Printer Friendly Recipe
Yogurt Hollandaise (adapted from Fine Cooking and A Food Centric Life)

Enough for 6 servings of eggs benedict

You can use any fat level of Greek yogurt you like. I always use low-fat, because that’s the easiest to find where I live.

Sometimes I also add a tablespoon of butter, cut into small cubes, and heat it with the other ingredients.

I didn’t make traditional eggs Benedict; I topped my English muffins with green chile, avocado, poached eggs, and hollandaise.

¾ cup plain Greek yogurt
1 tablespoon fresh lemon juice
3 egg yolks
½ teaspoon Dijon mustard
¼ teaspoon sea salt
¼ teaspoon granulated sugar
pinch of white pepper
dash hot Tabasco sauce

1. In the top of a double boiler or a heatproof bowl set over a saucepan of simmering water, whisk together the yogurt, lemon juice, egg yolks, mustard, salt, sugar, pepper and Tabasco sauce.

2. Cook over simmering water, stirring constantly, until the sauce is thick enough to coat the back of a spoon, 6 to 8 minutes. (The sauce can be set aside at room temperature for up to 1 hour; reheat gently in double boiler.)

yogurt hollandaise 5

sausage and spinach stuffed shells

stuffed shells 8

When I was a kid and cooked dinner for my family once or twice a week, stuffed shells from a freezer bag topped with jarred spaghetti sauce was one of my staples. It took 5 minutes to arrange the shells in a baking dish and dump the sauce over them, and another five minutes to make a salad from iceberg lettuce and mealy out-of-season tomatoes. My mom hated when I made this meal, but not as much as she hated the prospect of cooking dinner for a family of five every day after work. Who can blame her – for wanting a break and for not enjoying my pre-teen culinary prowess?

stuffed shells 2

These shells took longer to prepare than my standby meal as a kid, but at least by adding spinach to the filling and making my own (less-processed) tomato sauce, I figured I could skip the bland side salad. But I wasn’t just trying to add fiber to my meal, I wanted more flavor than the shells of my youth, which were stuffed with nothing but plain ricotta cheese.

stuffed shells 3

First, Italian sausage contributes more than just savory meatiness, but a range of spices. Spinach would provide earthiness (plus I had a bunch to use up). The ricotta would be richer and smoother – and, okay, fine, you can use regular store-bought ricotta too, if you haven’t become spoiled by the homemade stuff like others of us. The tomato sauce on top would be fresher and sweetened just slightly with nothing but lightly caramelized onions.

stuffed shells 4

This is a far cry from those pasta shells I made as a kid. For old time’s sake, though, I still ate them the same way I did back then, trimming off one corner of each shell for the first bite, then the next corner, then dividing the remaining square of pasta and filling into four equal bites. The biggest difference is that this filling is packed full of flavor – plus it took me almost an hour to make dinner instead of ten minutes.

stuffed shells 6

One year ago: Bourbon Bread Pudding for Tuesdays with Dorie
Two years ago: Toasted Vegetable Subs
Three years ago: Floating Islands for Tuesdays with Dorie
Four years ago: Comparison of 4 Vanilla Frosting recipes

Printer Friendly Recipe
Sausage and Spinach Stuffed Shells

Serves 6

You probably won’t use the whole box of shells, but a lot of them might be broken or could rip after being boiled, so it’s nice to have some extra.

Feel free to use whatever your favorite tomato sauce is. I’ve provided the recipe I used  below, which is a simple sauce I like for serving over rich pastas with a lot of their own flavors, like these shells.

1 (12-ounce) box jumbo pasta shells
salt
16 ounces Italian sausage
1 onion, diced
3 cloves garlic, minced
¼ teaspoon red pepper flakes
5 ounces spinach leaves, washed, coarsely chopped
1 (15-ounce) container ricotta (or 2 cups homemade ricotta)
8 ounces (2 cups) provolone, shredded
1 ounce (½ cup) parmesan, grated
2 eggs
Simple Tomato Sauce (recipe below, or 4 cups of your own sauce)

1. Adjust a rack to the middle position and heat the oven to 350 degrees.

2. Bring a large pot with at least 4 quarts of water to a boil. Add 1 tablespoon salt and the pasta shells; cook according to the package instructions. When the pasta is tender, use a large slotted spoon to transfer the shells to a dish towel.

3. Meanwhile, in a large skillet over medium-high heat, cook the sausage, breaking up large pieces, until it is no longer pink and has rendered some fat. Add the onion and ½ teaspoon salt; continue to cook, stirring occasionally, until the sausage is browned and the onion is softened. Add the garlic and red pepper flakes, stirring constantly for about 30 seconds, until fragrant. Remove the pan from the heat and stir in the spinach leaves, letting the residual heat wilt the leaves. Transfer the mixture to a large bowl; stir in the ricotta, provolone, parmesan, and eggs.

4. Lightly coat the bottom of a 9 by 13-inch baking dish with tomato sauce. Fill each shell with 3 to 4 tablespoons of filling. Transfer the filled shells to the baking dish. After all of the shells are filled, evenly distribute the remaining sauce over the shells. Cover the dish with aluminum foil.

5. Bake for 20 minutes; remove the foil and bake for about 10 minutes longer, until bubbling around the edges. Let rest 5 minutes before serving.

Simple Tomato Sauce

Makes about 4 cups

Chop the tomatoes right in the can using kitchen shears. You can use diced tomatoes instead, but they won’t break down as the sauce simmers.

2 teaspoons olive oil
½ small onion or 1 large shallot, diced fine
¼ teaspoon salt
2 cloves garlic, minced
¼ cup red or white wine
2 (28-ounce) cans whole tomatoes, undrained, chopped
1 tablespoon minced basil and/or parsley

In a large saucepan over medium heat, heat the oil until it flows like water when the pan is tilted. Add the onion and salt and cook, stirring occasionally, until the onion just starts to brown around the edges, about 8 minutes. Add the garlic and red pepper flakes and cook, stirring constantly, until fragrant, about 30 seconds. Add the wine, scraping up any browned residue on the bottom of the pan. Increase the heat to medium-high and add the tomatoes with their juice. Bring to a simmer, then reduce the heat to medium-low and simmer, stirring occasionally, about 15-20 minutes, until the sauce is thickened. Stir in the basil or parsley.

stuffed shells 9

chocolate sugar cookies

chocolate sugar cookies 4

Once the holidays ended and we got into the slower part of the year, I started thinking about what I wanted to do with my newfound free time. Get my garden up, which we can do early in the year where I live; fix up my house a bit; set up a recipe database; get better at Photoshop; relearn how to ride a bike; and, maybe, if there’s time after everything else, decorate sugar cookies more often.

chocolate sugar cookies 1

I haven’t decorated sugar cookies since I made these, for Valentine’s Day last year. I distinctly remember staying up long after my normal bed time, on a weeknight, using toothpicks to manipulate royal icing into hearts, then cleaning mixing bowls and squeeze bottles at midnight. I think I’m up until midnight every time I decorate sugar cookies.

chocolate sugar cookies 2

Rationally, I know that when I decorate sugar cookies with royal icing, I should think of it as a day-long project – and that’s assuming that I’ve already made the cookie dough, rolled it out, cut shapes, and baked the cookies. But every time I actually work with royal icing, I wait until the end of the day, because I can’t convince myself that a simple outline and filling of sugar cookies could really take several hours. And then it takes that long, every time.

chocolate sugar cookies 3

These hearts, although not any less time-consuming than regular royal icinged sugar cookies, are at least more foolproof. Instead of painstakingly (at least it’s painstaking for me) detailing on top of hardened icing, you use toothpicks to manipulate two liquid royal icing colors. All you have to do is drag a toothpick through a dot to turn it into a heart.

chocolate sugar cookies 5

The over-the-topness of tiny hearts set into pink, red, and white icing on top of heart-shaped cookies should not detract from the chocolate cookie itself, which is soft, meltingly tender, and most importantly, intensely chocolately. It was almost worth the loss of several hours of sleep. Still, I’m not sure how often I see myself doing this, no matter how much free time I have.

chocolate sugar cookies 8

One year ago: Fettuccine Alfredo
Two years ago: Oatmeal Pancakes
Three years ago: Crispy Bagel Roll
Four years ago: Olive Oil Bread

I’m not qualified to give a royal icing tutorial. I used Karen’s tutorial for these hearts, and Annie later did one as well.

Printer Friendly Recipe
Chocolate Sugar Cookies (adapted from Smitten Kitchen)

I reduced the flour slightly from Deb’s original recipe; this increases the chocolate flavor, although it has the potential to lead to more spreading in the oven. But as you can see, the scalloped hearts retained their decorative edge after baking. Still, if you’re working with a delicate shape, freeze the dough until firm after cutting shapes, then bake the cookies directly from the freezer.

2¾ cups (13.2 ounces) all-purpose flour
⅔ cup unsweetened cocoa, sifted to remove lumps
½ teaspoon baking powder
16 tablespoons (2 sticks) unsalted butter, softened
¾ teaspoon salt
1½ cups (10.5 ounces) sugar
2 large eggs
1 teaspoon vanilla extract

1. In a medium bowl, combine the flour, cocoa, and baking powder; set aside. In a stand mixer fitted with the paddle attachment (or in a large mixing bowl if using a hand mixer), beat the butter and salt until creamy, about 1 minute. With the mixer running, gradually add the sugar; beat on medium speed until fluffy, about 2 minutes. Add the eggs, one at a time, mixing to incorporate each one before adding the next. Beat in the vanilla. Reduce the mixer speed to low; add the dry ingredients and mix just until combined, with no dry pockets of flour. Shape the dough into a 1-inch thick disk; wrap in plastic wrap and refrigerate for at least one hour.

2. Adjust a rack to the middle position and heat the oven to 350 degrees. Line a baking sheet with parchment paper or a silicone mat.

3. Lightly flour a large sheet of wax (or parchment) paper. Transfer the chilled dough to the paper and top with a second sheet of wax paper. Roll the dough into ⅛-inch thickness, flouring as needed to prevent the dough from sticking to the paper. Use floured cookie cutters to cut shapes; transfer the shapes to the prepared pan. Re-roll and cut shapes from the scraps, using as little flour as possible.

4. Bake the cookies until the tops look dry but are still slightly soft, about 8 minutes. Let the cookies cool on the pan for about 2 minutes, then transfer to a wire rack.

chocolate sugar cookies 6

marinated roasted tofu

marinated roasted tofu 10

I cannot eat another hard-boiled egg. For a long time, it seemed like the perfect snack to bring to work – portable, easy, packed full of protein and nutrients. And, most importantly, I loved hard-boiled eggs. The creamy yolk balances the watery white, and I would try to get just the right ratio of each in every bite.

marinated roasted tofu 3

A year and a half later, they’ve lost their charm. I considered switching to a new snack before it reached this point, but I couldn’t figure out what would have similar nutrient characteristics. I already eat plenty of beans, nuts, and dairy, so I needed a new protein source.

marinated roasted tofu 5

Soy is a comparable replacement, nutrition-wise, for eggs, but digging into a cube of spongy tofu wasn’t appetizing. But tofu is perfect for marinating, because it soaks up whatever flavor you add. Then you can roast it to concentrate the flavors of the marinade and firm up the texture.

marinated roasted tofu 6

I’ve eaten this tofu every afternoon at work for three weeks, and so far it’s one of my favorite daily snacks. (Still doesn’t hold a candle to my morning bagel, of course.) I’m sure I’ll go back to hard-boiled eggs eventually; maybe in another year and a half, when I get tired of tofu?

marinated roasted tofu 11

One year ago: Pasta e Fagioli
Two years ago: Oatmeal Raisin Muffins
Three years ago: World Piece Cookies
Four years ago: Chocolate Cupcakes

Printer Friendly Recipe
Marinated Roasted Tofu (adapted from Jeanne Lemlin’s Vegetarian Classics)

Serves 4

I like these plain as a snack, but they also make a good sandwich filling.

The pictures might be confusing – the first couple times I made these, I sliced the tofu into slabs and then cut the slabs into thirds.  Later, I got annoyed with arranging so many little tofu bites (I always make a double batch) on the cooling rack, so I kept the tofu as larger slices and cut them in half after baking.

1 pound firm tofu, drained
1½ tablespoons soy sauce
1 tablespoon dry sherry
1 tablespoon rice vinegar
1 teaspoon toasted sesame oil
1 teaspoon sriracha (optional)

1. On a dishtowel, slice the tofu crosswise into eight slabs approximately ½-inch thick. Arrange the slices in a single layer; cover with a second dish towel and pat dry.

2. Meanwhile, mix the remaining ingredients in an 8-inch square container or baking dish. Add the tofu to the marinade in the dish; stir gently and set aside for at least 30 minutes, or refrigerate, covered, overnight.

3. Heat the oven to 450 degrees. Arrange an oven-safe cooling rack on a baking sheet. Transfer the marinated tofu slices to the cooling rack. Roast until dry and browned at the edges, 25 to 30 minutes. (If you don’t have an oven-safe cooling rack, bake the tofu in a baking dish in a single layer.) The roasted tofu can be refrigerated for at least 5 days.

marinated roasted tofu 12