Search Results for: bagels

whole wheat bagels

It’s possible that bagels are my favorite food. Yes, more so than tomato soup, than macaroni and cheese, even more so than chocolate chip cookie dough! And so I eat one almost everyday. It’s basically my lunch break and it’s a happy little time for me with my bagel, my black tea, and my Google Reader.

But here’s the thing – if I’m going to be eating a bagel every single day, I better make sure it’s healthy. For years, I made bagels with half white and half whole wheat flour, and I felt like that was a nice compromise between delicious and nutritious. Bagels with no white flour would be like hockey pucks, right? And they would taste like whole wheat. The horror!

I know I’m becoming a broken record, but the answer, of course, is in Peter Reinhart’s Whole Grain Breads. All it takes is a little overnight soak, and those whole grains act like refined white flour – they taste sweeter, form supple doughs, and bake into tender, light breads.

Not that it was smooth-sailing from the beginning with this bagel recipe. The problem I was having with this is that it’s too simple. Most bagel recipes need an overnight retardation in the refrigerator before they can be boiled and baked. This recipe doesn’t require that, and in fact, doesn’t need much time for a second rise at all. I’ve had the hardest time getting this through my stubborn head, and so over and over, I was making over-risen, sunken, ugly bagels.

A year after I started using this recipe, I think I’ve finally nailed it. You know what I did? I followed the recipe closer. My happy little bagel break just got a little happier.

One year ago: Pasta with No-Cook Tomato Sauce and Fresh Mozzarella
Two years ago: Country Egg Scramble

Printer Friendly Recipe
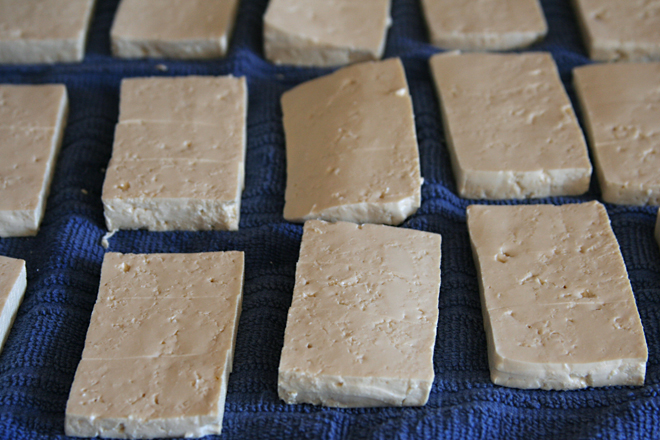
Whole Wheat Bagels (adapted from Peter Reinhart’s Whole Grain Breads)

Makes 8 large bagels or 12 small bagels

There are a few shortcuts in this compared to Reinhart’s original recipe. I make it every couple of weeks, so the faster I can get it done, the better!

I’ve played with the timing of this recipe quite a bit. The original results in fresh bagels 5-6 hours after you start (the second day). But I usually want them in the morning. You can refrigerate the dough in two places – either after the bagels are formed (in which case you should decrease the yeast slightly to prevent the bagels from over-rising) or right after kneading. The last time I refrigerated it after kneading, it rose overnight in the fridge, and in the morning, I immediately shaped the bagels and boiled them shortly afterward.

Pre-dough 1:
8 ounces whole wheat flour
¼ teaspoon instant yeast
6 ounces (¾ cup) water

Pre-dough 2:
2 tablespoons barley malt syrup
5 ounces water
8 ounces whole wheat flour
½ teaspoon salt

Final dough:
both pre-doughs
1 tablespoon water
2 teaspoons yeast
¾ teaspoon salt
7 tablespoons flour, plus more if necessary
1 tablespoon baking soda (for boiling)

1. In the bowl of a stand mixer fitted with the dough hook, mix all of the ingredients in Pre-dough 1 on medium-low speed until combined. Set aside for 5 minutes. Meanwhile, in a 1-cup measuring cup, stir together the barley malt syrup and the 5 ounces of water in Pre-dough 2. Set aside, stirring occasionally, until the barley malt syrup dissolves into the water. Return to Pre-dough 1 and knead on low speed for 1 minute. Transfer to a small bowl and cover with plastic wrap or a damp kitchen towel. Refrigerate overnight. Add the flour and salt for Pre-dough 2 to the empty mixer bowl; with the mixer on low speed, pour in the water-syrup mixture. Mix on medium-low just until combined. Cover the mixer bowl with plastic wrap or a damp kitchen towel and set aside at room temperature for at least 8 hours or overnight.

2. The following day, transfer the refrigerated Pre-dough 1 to room temperature for a couple hours to warm slightly. When you’re ready to make the final dough, stir together the 1 tablespoon water and the yeast. In the bowl of a stand mixer fitted with the dough hook, mix both pre-doughs, the water and yeast, and the salt on low speed until combined. While the mixer is running, add in the flour, 1 tablespoon at a time, until it’s fully absorbed by the dough. Knead on low speed for 5-6 minutes, adding more flour or water if necessary to form a smooth, firm dough. It shouldn’t be sticky.

3. Let the dough rise at room temperature until it increases to about 1½ times its original size, 1-2 hours.

4. Divide the dough into 8-12 pieces. Shape each piece into a smooth ball, then roll each piece into a rope about ¾-inch thick (slightly thicker for larger bagels). Bring the ends of the rope together and gently roll them on a flat surface to seal. Set aside for about 20 minutes.

5. Meanwhile, preheat the oven to 500 degrees, line a baking sheet with parchment paper or a silicone mat, and bring at least three inches of water to a boil in a large pot over high heat. Add 1 tablespoon baking soda, reduce the heat to medium-high and gently drop 2-4 bagels (as many as will fit without crowding) into the water. Boil for 1 minute, flipping the bagels halfway through.

6. Place the boiled bagels on the prepared baking sheet. Transfer the sheet to the oven, reduce the oven temperature to 450 degrees, and bake until the bagels are browned and feel hard, 13 minutes for small bagels and slightly longer for larger bagels. (The bagels will soften as they cool.) Cool completely before serving. (I can only fit one baking sheet, holding half a batch of bagels, in my oven at once, so I refrigerate the remaining unboiled bagels until the first pan is almost done baking, then boil and bake them.)

sourdough bagels

Copy of IMG_6204

After my initial trials with sourdough last year, in which I mixed up an easy starter and made a couple loaves of not-at-all sourdoughy bread, I gave up for a while. I ignored the starter I’d made until it eventually dried up and I had to throw it away. When I visited my parents last winter, I tried making bread with my mom’s sourdough starter, which is much older than mine was, to see if it would taste sour. It did, at least a little, so my mom sent me home with some of her starter.

Copy of IMG_6138

Which I, again, basically ignored, for six months, until I had a friend visit who is experienced in the ways of sourdough. She gave me some tips on how to bring my old neglected starter back to life, and, more importantly, helped me realize that sourdough starter can be used in all sorts of breads, not just rustic loaves that I want to taste sour.

Copy of IMG_6145

This was important because I don’t make rustic breads all that often, certainly not enough to keep my sourdough starter healthy. But there are some breads that I do make every week or so – pizza and bagels. The transition to sourdough was especially easy for bagels.

Copy of IMG_6151

I’ve been making bagels for years, usually using a slight adaptation of Peter Reinhart’s recipe. His recipe utilizes a sponge, a mixture of flour, yeast, and water that has to sit for a few hours before the recipe can be completed. I simply replaced that sponge with sourdough starter, so I saved myself a step and could more quickly move on to mixing and kneading the dough.

Copy of IMG_6176

The only problem with this method is that I don’t always keep enough starter around to make even half of Reinhart’s recipe. I was only able to make six small bagels. So I tried again, this time using half the amount of starter and mixing it with more flour and water. Once that was frothy, I continued with the recipe.

Copy of IMG_6179

Both batches of bagels were very good. Neither had a strong sourdough flavor, although it was slightly more intense in the first batch, where the starter completely replaced the sponge. In the future, I’ll make whichever recipe I have the right amount of starter for. Because the version that completely replaces the sponge with starter is quicker, plus sourdough starter is so easy to make, I’ll probably just make some extra starter the day before I want to make bagels. Altogether, it’s a great way to use my starter often enough to keep it active.

Copy of IMG_6202

One year ago: Mixed Berry Cobbler

Sourdough Bagels (adapted from Peter Reinhart’s Bread Baker’s Apprentice)

12 small bagels or 8 large bagels

My sourdough starter is half flour and half water, by weight.

16 ounces sourdough starter
¼ teaspoon instant yeast
1¾ cup (8 ounces) bread flour (approximately)
1½ teaspoons salt
1 tablespoon barley malt syrup
1 tablespoon cornmeal

1. Place the sourdough starter in the bowl of a standing mixer and leave it at room temperature until it loses its chill and becomes frothy, 1-2 hours, depending on how active your starter is.

2. Add the additional yeast to the starter and stir. Then add most of the remaining flour and all of the salt and malt. Mix on low speed with the dough hook until the ingredients form a ball, slowly working in the remaining flour to stiffen the dough.

3. Knead at low speed for 6 minutes. The dough should be firm and stiff, but still pliable and smooth. There should be no raw flour – all the ingredients should be hydrated. If the dough seems too dry and rips, add a few drops of water and continue kneading. If the dough seems tacky or sticky, add more flour to achieve the stiffness required. The kneaded dough should feel satiny and pliable but not be tacky.

4. Immediately divide the dough into 8-12 equal pieces. Form the pieces into smooth balls.

5. Cover the balls with plastic wrap and allow them to rest for 20 minutes. Dust a baking sheet with the cornmeal.

6. Form each dough ball into a rope 9 inches long by rolling it under your outstretched palms. Do not taper the ends of the rope. Overlap the ends of the rope about 1 inch and pinch the entire overlapped area firmly together. If the ends of the rope do not want to stick together, you can dampen them slightly. Place the loop of dough around the base of your fingers and, with the overlap under your palm, roll the rope several times, applying firm pressure to seal the seam. The bagel should be roughly the same thickness all the way around.

7. Place each of the shaped pieces about an inch apart on the prepared pan. Cover loosely with plastic wrap. Let the pan sit at room temperature for about 20 minutes.

8. Check to see if the bagels are ready to be retarded in the refrigerator by using the ‘float test.” Fill a small bowl with cool or room-temperature water. The bagels are ready to be retarded when they float within 10 seconds of being dropped into the water. Take one bagel and test it. If it floats immediately return the tester bagel to the pan, pat it dry, cover the pan, and place it in the refrigerator overnight (it can stay in the refrigerator for up to 2 days). If the bagel does not float, return it to the pan and continue to proof the dough at room temperature, checking back every 10 to 20 minutes or so until a tester floats. The time needed to accomplish the float will vary, depending on the ambient temperature and the stiffness of the dough.

9. The following day (or when you are ready to bake the bagels), adjust the rack to the middle position and preheat the oven to 450 degrees. Bring a large pot of water to a boil (the wider the pot the better). Have a slotted spoon or skimmer nearby. Line a baking sheet with parchment paper.

10. Remove the bagels from the refrigerator and gently drop them into the water, boiling only as many as comfortably fit (they should float within 10 seconds). Stir and submerge bagels with Chinese skimmer or slotted spoon until very slightly puffed, 30 to 35 seconds. Remove rings from water; transfer to wire rack, bottom side down, to drain.

11. Transfer boiled rings, rough side down, to parchment paper-lined baking sheet. Bake until deep golden brown and crisp, about 12 minutes.

12. Remove the pans from the oven and let the bagels cool on a rack for 10-15 minutes before serving.

Copy of IMG_6182

bagels

15.jpg

I absolutely love bagels. If it made nutritional sense, I would eat them several times each day – with butter, with cream cheese, with jam, as a breakfast sandwich with egg and cheese, as a lunch sandwich with turkey and mayonnaise. As it is, I eat one every day, half with butter, the other half with cream cheese. It’s one of my favorite meals of the day, and it never gets old.

23.jpg

I’ve been making my own for years. The first recipes I tried were fairly standard bread recipes with the added step of boiling the bagels between the second rise and baking. Once I discovered retarding the bagels – replacing the second rise with an overnight stay in the refrigerator – my bagels improved dramatically. They became even better when I started using a pre-ferment.

33.jpg

Unfortunately, all of these steps make homemade bagels a fair bit of effort. I had to take a break from making my own when my wedding became imminent, and I was moving and finishing my PhD and starting a new job. After eating perfectly good grocery store bagels for the past several months, I had to ask myself why I had bothered to make my own.

44.jpg

52.jpg

Now I remember – because mine are better. And not only are they very tasty, I can add whole wheat flour to my heart’s desire and better control the portion size. I also get to enjoy one fresh from the oven, and nothing beats that.

62.jpg

Bagels (adapted from Peter Reinhart’s The Bread Baker’s Apprentice and Cooks Illustrated)

Make 12 small or 8 large bagels

Bridget notes: I’ve found that I get the best bagels when I use Cooks Illustrated’s ingredient list and Peter Reinhart’s methods. The recipes are similar; the biggest difference is that Cook’s Illustrated uses a firmer dough (i.e., more flour).

Both recipes call for high-gluten flour, which is difficult to find. You can make your own by adding some gluten flour to bread flour. Sometimes I do that. This time, I simply used about half white bread flour and half whole wheat flour.

Update 4.14.08 – I reduced the flour in the recipe to reflect more accurately how much I’m usually able to mix in before the dough gets too dry (from 11 ounces in the dough to 8 ounces).

Sponge:
½ teaspoon instant yeast
1¾ cup (9 ounces) bread flour
1¼ cup (10 ounces) water, room temperature

Dough:
¼ teaspoon instant yeast
1 3/4 cup (8 ounces) bread flour (approximately)
1 1/2 teaspoons salt
1 tablespoon barley malt syrup
1 tablespoon cornmeal

1. To make sponge, stir the yeast into the flour in the bowl of a stand mixer. Add the water, stirring only until it forms a smooth, sticky batter (like pancake batter). Cover the bowl with plastic wrap and leave at room temperature for approximately 2 hours, or until the mixture becomes very foamy and bubbly. It should swell to nearly double in size and collapse when the bowl is tapped on the countertop.

2. To make the dough, add the additional yeast to the sponge and stir. Then add most of the remaining flour and all of the salt and malt. Mix on low speed with the dough hook until the ingredients form a ball, slowly working in the remaining flour to stiffen the dough.

3. Knead at low speed for 6 minutes. The dough should be firm and stiff, but still pliable and smooth. There should be no raw flour – all the ingredients should be hydrated. If the dough seems too dry and rips, add a few drops of water and continue kneading. If the dough seems tacky or sticky, add more flour to achieve the stiffness required. The kneaded dough should feel satiny and pliable but not be tacky.

4. Immediately divide the dough into 8-12 equal pieces. Form the pieces into smooth balls.

5. Cover the balls with plastic wrap and allow them to rest for 20 minutes. Dust a baking sheet with the cornmeal.

6. Form each dough ball into a rope 9 inches long by rolling it under your outstretched palms. Do not taper the ends of the rope. Overlap the ends of the rope about 1 inch and pinch the entire overlapped area firmly together. If the ends of the rope do not want to stick together, you can dampen them slightly. Place the loop of dough around the base of your fingers and, with the overlap under your palm, roll the rope several times, applying firm pressure to seal the seam. The bagel should be roughly the same thickness all the way around.

7. Place each of the shaped pieces about an inch apart on the prepared pan. Cover loosely with plastic wrap. Let the pan sit at room temperature for about 20 minutes.

8. Check to see if the bagels are ready to be retarded in the refrigerator by using the ‘float test.” Fill a small bowl with cool or room-temperature water. The bagels are ready to be retarded when they float within 10 seconds of being dropped into the water. Take one bagel and test it. If it floats immediately return the tester bagel to the pan, pat it dry, cover the pan, and place it in the refrigerator overnight (it can stay in the refrigerator for up to 2 days). If the bagel does not float, return it to the pan and continue to proof the dough at room temperature, checking back every 10 to 20 minutes or so until a tester floats. The time needed to accomplish the float will vary, depending on the ambient temperature and the stiffness of the dough.

9. The following day (or when you are ready to bake the bagels), adjust the rack to the middle position and preheat the oven to 450 degrees. Bring a large pot of water to a boil (the wider the pot the better). Have a slotted spoon or skimmer nearby. Line a baking sheet with parchment paper.

10. Remove the bagels from the refrigerator and gently drop them into the water, boiling only as many as comfortably fit (they should float within 10 seconds). Stir and submerge bagels with Chinese skimmer or slotted spoon until very slightly puffed, 30 to 35 seconds. Remove rings from water; transfer to wire rack, bottom side down, to drain.

11. Transfer boiled rings, rough side down, to parchment paper-lined baking sheet. Bake until deep golden brown and crisp, about 12 minutes.

12. Remove the pans from the oven and let the bagels cool on a rack for 10-15 minutes before serving.

72.jpg

lox and goat cheese omelets

lox goat cheese omelets 4

I stopped at the grocery store today and bought salmon, green beans, scallions, cream cheese, chocolate chips, and oreos. This pretty much sums up my overall diet – very healthy, except for when it isn’t.

lox goat cheese omelets 1

Weekend breakfasts used to sit more in the “isn’t” category, but I’ve been moving them more often than not over into the healthy side (especially, I have to admit, in the month or two before our annual trip to the beach). Of course healthy means different things to different people, but one thing I try to do when I step it up a notch is increase my protein and reduce my starches. This means less scones and more omelets.

lox goat cheese omelets 2

This recipe takes my favorite bagel toppings and mixes them with eggs instead of bread. I replace the traditional cream cheese with goat cheese not just because goat cheese isn’t quite as rich as cream cheese, but because the stronger flavor of goat cheese holds its own better with the salty salmon and capers and sharp bites of onion. Eggs instead of bread might sound like a sad substitution, especially for a bagel lover like me, but I never feel like I’m missing out when I’m eating these omelets.

lox goat cheese omelets 3

Printer Friendly Recipe
Lox and Goat Cheese Omelets

4 servings

I like a little raw onion on my lox bagels, but if you don’t, you probably won’t like it here either.

10 large eggs
¼ teaspoon salt
5 ounces goat cheese, crumbled
1 pint grape tomatoes, halved
¼ red onion, minced (optional)
2 tablespoons capers
6 ounces lox, diced
2 tablespoons olive oil

1. In a medium bowl, whisk the eggs, salt, and 2 ounces of goat cheese. In a second bowl, combine the remaining goat cheese, tomatoes, onion, capers, and lox.

2. Heat 1½ teaspoons olive oil in a medium skillet over medium heat. Add one-quarter of the egg mixture. Use a rubber spatula or wooden spoon to gently stir the eggs in a circular motion for about fifteen seconds. Reduce the heat to medium-low and let the eggs cook, without moving, for about a minute. Use the spatula to lift up a small section of cooked egg along the edge of the pan; tilt the pan so raw egg can flow underneath the lifted portion. Repeat this motion around the edge of the skillet. Add one-quarter of the lox mixture, spreading evenly over half of the eggs in the pan. Cover the pan and let cook for 2-4 minutes, until the eggs are just set. Fold the bare half of the eggs over the filling, then slide the omelet onto a plate. Repeat with the remaining eggs and filling.

lox goat cheese omelets 5

black bean burgers

black bean patties 4

I actually don’t have any need for a black bean burger. Because Dave and I eat either vegetarian or fish during the week, I’m always ready for some meat by the weekend. And I don’t eat much bread on weekdays either (other than my daily bagel at work – best part of the workday!), so I wouldn’t pair vegetarian burgers with buns. But on top of slaw, now that works.

black bean patties 1

This recipe doesn’t have (much of) my other issue with most vegetarian burgers, which is that they’re usually bound with large amounts of breadcrumbs or other grains, so you’re, in essence, putting carbs on a bun. This mix does have some bread crumbs, but it’s also bulked up with extra protein from cheese and nuts. They’re not there for your health though – they provide a nice variation in texture, so the burgers aren’t uniform, and they’re certainly not mushy, thanks to some time the beans spend in the oven getting dehydrated.

black bean patties 3

The mix itself was so good that I couldn’t stop eating it. Formed into patties and browned, it was that much better. What isn’t better with crisp, caramelized sides? I’m sure they’re great on a bun with your favorite burger toppings, but I loved them on a simple lime-cilantro slaw. I have finally found a place for black bean burgers in my life, and I have found the black bean burger to take that place.

black bean patties 6

Printer Friendly Recipe
Black Bean Burgers
(rewritten but hardly adapted from The Food Lab)

Makes 8 to 12 burgers (the patties in the pictures are each one-tenth of the recipe)

If your cashews aren’t toasted already, put them in the oven before the beans. Don’t do what I did and combine the two on one baking sheet; they’re treated separately in the food processor.

The recipe makes a lot. I formed the mixture into patties and froze most of them. They defrost and cook up perfectly.

According to the original recipe, you can grill these as well as pan-fry them, but I didn’t try it. You’d want to brush the sides with oil before grilling.

2 (15-ounce) cans black beans, rinsed and drained
3 tablespoons vegetable oil, divided
1 medium onion, finely chopped
1 large poblano pepper, finely chopped
3 medium cloves garlic, minced
1 chipotle chile in adobo sauce, finely chopped, plus 1 teaspoon sauce
¾ cup toasted cashews
½ cup finely crumbled feta or cotija cheese
¾ cup panko bread crumbs
2 tablespoons mayonnaise
1 large egg
Kosher salt and freshly ground black pepper

1. Heat the oven to 350 degrees. Spread the black beans evenly on a rimmed baking sheet; bake until the edges are splitting, about 20 minutes.

2. Meanwhile, heat 1 tablespoon oil in a large saucepan over medium heat. Add the onion, poblano, and a pinch of salt, and cook, stirring occasionally, until the onion is just beginning to brown at the edges, about 8 minutes. Add the garlic; cook, stirring constantly, until fragrant, about 1 minute. Remove from the heat and stir in the chipotle chile and sauce. Transfer the mixture to a large mixing bowl.

3. In a food process, pulse the cashews until the largest pieces are about ¼-inch. Transfer to the bowl with the vegetables. Transfer the dried black beans and cheese to the food processor and pulse until the largest pieces are about ¼-inch. Transfer to the bowl with the cashews. Add the bread crumbs, mayonnaise, egg, 1 teaspoon salt, and ½ teaspoon pepper to the mixing bowl. Stir until evenly combined.

4. Form the mixture into patties ¾-inch thick. You can make them any size you want; I made about ten patties from this recipe, and they were each about 4 inches in diameter.

5. In a large nonstick skillet, heat 1 tablespoon oil over medium heat. Add half of the patties and cook, without moving, until crisp and browned on the bottom, about 5 minutes. Flip the patties and continue cooking until the second side is browned, another 5 minutes. Repeat with the remaining patties.

Lime-Cilantro Slaw

½ cabbage, sliced thinly
¼ cup lime juice
½ cup Greek yogurt
4 green onions (or half of a small red onion), minced
¼ teaspoon salt
1 large or 2 small carrots, shredded
2 tablespoons finely chopped cilantro

Combine all ingredients.

black bean patties 5

barbecue cowboy beans

cowboy beans 7

I feel like I should wait and do a comparison post with this recipe, because I have a friend who makes some seriously good cowboy beans. Hers are full of meat with a dominant sweet flavor. They’re always one of my favorite dishes on the potluck table.

cowboy beans 2

For my own version though, I wanted something lighter to serve as a side dish to barbecued ribs. When you’re spending hours cooking big slabs of meat, you don’t really need ground beef in your side dish. A few slices of bacon provide plenty of meaty depth, combined with sweet-bitter molasses and a slew of acidic ingredients like ketchup and beer.

cowboy beans 3

To be honest, I’m not sure what makes a pot of beans “cowboy” instead of just “baked.” A lot of recipes contain ground meat, but not all of them. This is the only one with spicy chiles. But honestly, I don’t much care. What matters most is that these are perfect along barbecued meat, and if I want a chile-less, meatier version, I can have that too.

cowboy beans 4

One year ago: Grilled Pita Breads
Two years ago: Whole Wheat Bagels
Three years ago: Amaretto Cheesecake
Four years ago: Blackberry Swirl Ice Cream

Printer Friendly Recipe
Barbecue Cowboy Beans (adapted from Something Edible)

Serves 6

If you don’t want to buy two kinds of beans, feel free to choose one or the other.

I didn’t use the liquid smoke because I didn’t have any, so I can’t attest to how it affects the beans. I doubt adding smoky flavor would be a bad thing though.

6 ounces (about 1 cup) dry pinto beans, rinsed and sorted
2 ounces (about ⅓ cup) dry kidney beans
salt
6 slices (about 6 ounces) bacon, chopped
½ medium onion, chopped
2 cloves garlic, minced
1 teaspoon allspice ground
½ teaspoon ground coriander
½ teaspoon ground black pepper
1 teaspoon dry mustard
¼ cup beer
1 (10-ounce) can diced tomatoes with chiles
¼ cup ketchup
¼ cup molasses
1 tablespoon cider vinegar
1 teaspoon hickory liquid smoke (optional)

1. Heat the oven to 300 degrees. Place the beans and 1 teaspoon salt in a 5-quart Dutch oven; add enough water to cover the beans by 1½ inches. Bring the water to a boil over medium-high heat, then cover the pot and transfer it to the oven. Cook for 75 minutes, until the beans are tender. Drain the beans. Increase the oven temperature to 400 degrees.

2. Add the bacon to the now-empty Dutch oven. Cook over medium heat until fat begins to render, 3-4 minutes. Add the onion and cook, stirring occasionally, until softened and translucent, 5-6 minutes. Add the garlic, allspice, coriander, black pepper, and mustard; cook, stirring constantly, until fragrant, about 1 minute. Add the beer and scrape the bottom of the pot to release the browned bits. Add the tomatoes and chiles with their juice, the ketchup, molasses, cider vinegar, liquid smoke (if using), and 1 teaspoon salt. Bring to a simmer over medium-high heat.

3. Cover and transfer the beans to the oven. Bake for 4 hours. Serve.

cowboy beans 5

radiation sugar cookies

radiation cookies 8

If I don’t often talk about what I do for a living, it’s because it’s hard to explain. I don’t have one of those jobs that you can name in one word and people will get at least some idea of how you spend your days, like being a teacher or nurse or accountant or engineer. My official title is either Scientist 2 or Difficult Waste Expert.

radiation symbol

If I say I work with nuclear waste, you might start to picture Homer Simpson’s job, but mostly I work in an office with spreadsheets. Our official task is to come up with ways to get radioactive waste (stuff mostly left over from the Cold War; not spent nuclear fuel) safely disposed of. There is a radioactive waste repository near my town, half a mile underground in a salt deposit, but I never have any reason to go out there.

radiation containment suit

Even so, my coworkers and I are trained on what the radiation symbol looks like, including the colors – yellow and magenta, at least until you run out of magenta icing, and then black is acceptable. Not even one of the thirty or so people in my office have been required to wear hazmat suits for our current positions, but the idea was too cute to pass up.

radiation cookies 10

I was worried my nuclear containment guys would end up looking like yellow astronaut teddy bears, but I think I got the point across. Other than one manager who thought they might be eskimos, my coworkers loved these. And after another long day looking at computers, trying to make tiny steps toward solving the country’s nuclear waste problem, a distraction in the form of cute cookies is something we could all use.

One year ago: Baked Eggs in Mushrooms with Zucchini Ragout
Two years ago: Vanilla Bean Cupcakes
Three years ago: Sourdough Bagels
Four years ago: Apple Cheddar Scones

shrimp ricotta ravioli

shrimp ravioli 6

The day I made these was a Saturday with weather too unpleasant to spend time outside, so it was the perfect time to blast chick music and hang out in the kitchen. My dinner plans were fairly ambitious – crab cakes, roasted asparagus, goat cheese scallion muffins, and for dessert, pizzelles with ricotta filling. While I was already in the kitchen, I went ahead and prepared some things for later in the week, like bagel pre-doughs, burger patties, and hard-boiled eggs. And I thought, if I have extra energy and time, I’ll make shrimp ravioli.

shrimp ravioli 1

The problem is that the shrimp ravioli would be our first course of the night, so I’d have to make it before dinner – before I stood the chance of running out of energy and time. And making ricotta, pasta, seafood broth, shrimp filling, seafood cream sauce, and ravioli is exactly the sort of ambitious project with the potential for wearing me out.

shrimp ravioli 2

In the end, I did manage to get everything made, and what’s even more impressive is that I managed to have fun the entire time. But, all told, I spent about six hours in the kitchen that day. It was glorious. And exhausting.

shrimp ravioli 4

Everything I made turned out really well, but if I had to choose a favorite, I think it would be these ravioli. Even more than the muffins and the crab cakes and the pizzelle, although that’s a tough choice. (Asparagus is not my favorite vegetable; it never stood a chance.) The crab cakes and muffins are probably a better value for your time, but who cares about time when you’re stuck inside on a Saturday?

shrimp ravioli 5

One year ago: Quinoa with Salmon, Feta, and Dill
Two years ago: Cheddar Shortbread
Three years ago: Tiramisu Cake
Four years ago: Peanut Butter Torte

Printer Friendly Recipe
Shrimp Ravioli in Shellfish Cream Sauce

6-8 first-course servings

I really liked the seafood sauce I made, but I only used a bare amount of it, because I didn’t want to overpower the filling.

1 tablespoon butter
1 carrot, peeled and chopped
1 shallot, diced
1 tablespoon tomato paste
1 garlic clove, minced
⅛ teaspoon red pepper flakes
¼ cup white wine
1 cup clam juice
8 ounces shrimp, shells on
8 ounces ricot
1 egg
2 tablespoons grated parmesan
2 tablespoons minced parsley
½ cup heavy cream
1 recipe of fresh pasta, rolled to the second-to-last setting

1. For the seafood broth: In a medium saucepan over medium heat, heat the butter just until the foaming subsides. Add the carrot and shallot and cook, stirring occasionally, until the shallots start to brown around the edges. Add the tomato paste, garlic, and red pepper flakes; cook and stir until fragrant, about a minute. Increase the heat to medium-high, and add the white wine, clam juice, and the shrimp with their shells. Bring to a boil, then reduce the heat to medium-low to maintain a simmer. Remove the shrimp when they curl and turn pink, after about 3 minutes. Peel the shrimp and return the shells to the broth. Simmer uncovered for 20 minutes. Strain the broth, reserving the liquid and discarding the solids.

2. For the filling: Transfer the cooked shrimp to a food processor fitted with the steel blade. Pulse until minced. Combine the shrimp with the ricotta, egg, parmesan, and parsley.

3. For the ravioli: Place one rounded teaspoon of filling every 3 inches along the length of a pasta sheet. Using a pastry brush or your fingers, wet the pasta along the edges and in between the rounds of filling. If the pasta sheet is at least 4 inches wide, fold it lengthwise over the filling. If the pasta sheet is too thin to fold lengthwise, lay a second pasta sheet over the filling. Press around each ball of filling to seal the two layers of pasta together. Use a pizza roller to cut between the filling to form squares of ravioli. Transfer the formed ravioli to a dry dish towel until ready to cook (there’s no need to cover it). Repeat with the remaining dough and filling.

4. Bring a large pot of water to a boil; add a tablespoon of salt and lower the heat until the water is at a lively simmer. Cook the ravioli in small batches until al dente, 2 to 3 minutes, using a skimmer or large slotted spoon to remove the ravioli from the boiling water.

5. For the sauce: Combine the heavy cream and strained seafood broth in a small saucepan. Bring to a boil over medium-high heat, reduce the heat to medium, and simmer until thickened, 6-10 minutes. Gently toss the sauce with the drained ravioli; serve immediately.

shrimp ravioli 8

marinated roasted tofu

marinated roasted tofu 10

I cannot eat another hard-boiled egg. For a long time, it seemed like the perfect snack to bring to work – portable, easy, packed full of protein and nutrients. And, most importantly, I loved hard-boiled eggs. The creamy yolk balances the watery white, and I would try to get just the right ratio of each in every bite.

marinated roasted tofu 3

A year and a half later, they’ve lost their charm. I considered switching to a new snack before it reached this point, but I couldn’t figure out what would have similar nutrient characteristics. I already eat plenty of beans, nuts, and dairy, so I needed a new protein source.

marinated roasted tofu 5

Soy is a comparable replacement, nutrition-wise, for eggs, but digging into a cube of spongy tofu wasn’t appetizing. But tofu is perfect for marinating, because it soaks up whatever flavor you add. Then you can roast it to concentrate the flavors of the marinade and firm up the texture.

marinated roasted tofu 6

I’ve eaten this tofu every afternoon at work for three weeks, and so far it’s one of my favorite daily snacks. (Still doesn’t hold a candle to my morning bagel, of course.) I’m sure I’ll go back to hard-boiled eggs eventually; maybe in another year and a half, when I get tired of tofu?

marinated roasted tofu 11

One year ago: Pasta e Fagioli
Two years ago: Oatmeal Raisin Muffins
Three years ago: World Piece Cookies
Four years ago: Chocolate Cupcakes

Printer Friendly Recipe
Marinated Roasted Tofu (adapted from Jeanne Lemlin’s Vegetarian Classics)

Serves 4

I like these plain as a snack, but they also make a good sandwich filling.

The pictures might be confusing – the first couple times I made these, I sliced the tofu into slabs and then cut the slabs into thirds.  Later, I got annoyed with arranging so many little tofu bites (I always make a double batch) on the cooling rack, so I kept the tofu as larger slices and cut them in half after baking.

1 pound firm tofu, drained
1½ tablespoons soy sauce
1 tablespoon dry sherry
1 tablespoon rice vinegar
1 teaspoon toasted sesame oil
1 teaspoon sriracha (optional)

1. On a dishtowel, slice the tofu crosswise into eight slabs approximately ½-inch thick. Arrange the slices in a single layer; cover with a second dish towel and pat dry.

2. Meanwhile, mix the remaining ingredients in an 8-inch square container or baking dish. Add the tofu to the marinade in the dish; stir gently and set aside for at least 30 minutes, or refrigerate, covered, overnight.

3. Heat the oven to 450 degrees. Arrange an oven-safe cooling rack on a baking sheet. Transfer the marinated tofu slices to the cooling rack. Roast until dry and browned at the edges, 25 to 30 minutes. (If you don’t have an oven-safe cooling rack, bake the tofu in a baking dish in a single layer.) The roasted tofu can be refrigerated for at least 5 days.

marinated roasted tofu 12

prosecco raspberry gelee

raspberry gelee 7

One New Year’s Eve, I was standing in line at the grocery store buying sushi rice (because I had a very exciting evening of cooking ahead of me to ring in the new year), when I heard the person behind me tell someone on her cell phone, “I’m buying vodka…and Grandma got the good jello!”

raspberry gelee 4The advantage of only making a half recipe – half a bottle of champagne to use up!

What, I wonder, is the “good jello”? Jell-o brand, and not store brand? I assure you that the two will make equally gag-worthy but redeemingly drunk-making jello shots.

raspberry gelee 2

I think I have found my own good jello, and it involves, as all good things must, bubbly wine. Not precisely prosecco, because apparently that Italian sparkling wine isn’t available in my area, but I’m sure my favorite New Mexico champagne will work just as well.

raspberry gelee 5

And good wine is key here, because very little is done to it. It’s mixed with raspberries, of course, and solidified, and slightly sweetened, and that’s it. In the end, it’s a dessert that tastes almost exactly like champagne with fruit, and the best part is that it even keeps its fizz. It keeps its buzz too, as I accidentally learned on a pleasant Sunday afternoon. I wouldn’t call this a jello shot, but it’s definitely good jello.

raspberry gelee 6

One year ago: Whole Wheat Bagels
Two years ago: Quick Baking Powder Pizza Crust
Three years ago: Eclairs

printer friendly recipe
Prosecco Raspberry Gelée (from Bon Appétit)

Mixing fresh raspberries with sugar doesn’t do much if you don’t cut or crush them, but just go with it. You’ll end up breaking them up slightly when you mix them with the rest of the ingredients, which will tint your gelée a pretty blush color.

I might add a couple tablespoons more sugar next time, just to make this feel more like dessert and less like a glass of wine that happens to be solid(ish).

I did use the orange-flower water, and I recommend it if you have it.

2 cups (9 ounces) fresh raspberries
¾ cup plus 2 tablespoons sugar, divided
2 tablespoons fresh lemon juice, divided
1 750-ml chilled bottle Prosecco (Italian sparkling wine), divided
3½ teaspoon unflavored gelatin (measured from two 1/4-ounce envelopes)
¾ teaspoon orange-flower water (optional)

1. Place the raspberries, ¼ cup sugar, and 1 tablespoon lemon juice in a medium bowl; toss gently to combine. Let stand at room temperature until the raspberries release their juices, tossing occasionally, 20-30 minutes.

2. Place ½ cup Prosecco in a small bowl. Sprinkle the gelatin over it and let stand 5 minutes to soften. Bring 1 cup Prosecco to a boil with the remaining ½ cup plus 2 tablespoons sugar, stirring until the sugar is dissolved. Remove from the heat; add the gelatin mixture and stir until dissolved.

3. Transfer the gelatin mixture to a large pitcher. Add the raspberries with their juices, the remaining Prosecco, the remaining 1 tablespoon lemon juice, and orange-flower water (if using), stirring to dissolve any sugar.

4. Using a slotted spoon, divide the raspberries equally among coupe glasses or other small wide shallow glasses or cups. Divide the Prosecco mixture equally among the glasses, about ¾ cup per glass. Chill gelée until firm, about 3 hours. (Gelées can be made up to 2 days ahead. Cover and keep chilled.)

raspberry gelee 8