Search Results for: scones

mediterranean salmon salad

mediterranean salmon salad 6

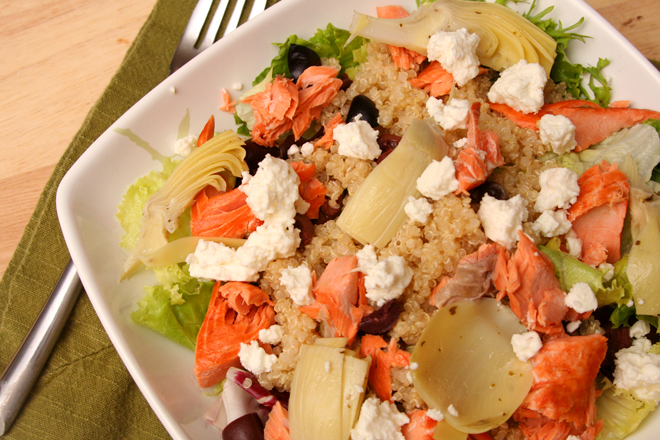
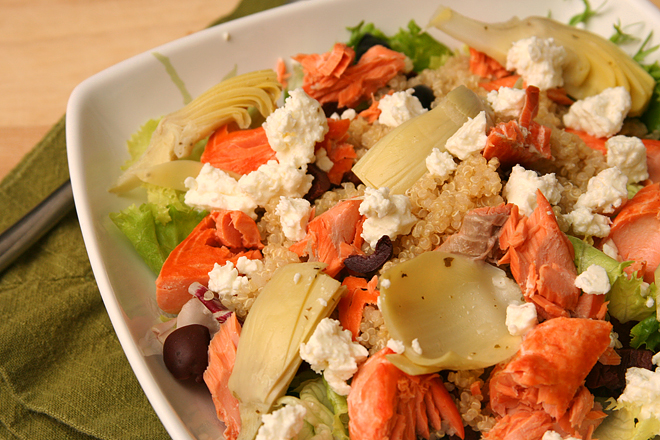
This salad ended up being something really special, one of those that I raved about all through dinner. But I can’t pinpoint exactly what made it stand out so much. I like all the ingredients, quite a bit actually, but I could say the same for a lot of salads that I like but don’t gush over like I did this one.

mediterranean salmon salad 1

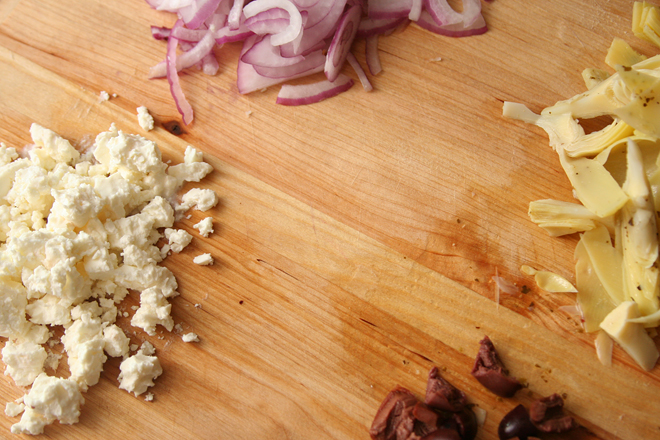
It might have been the wild sockeye salmon my store has been stocking, or the fancy block of feta. You can rarely go wrong with artichoke hearts and quinoa. I was worried the bite of raw onion would be distracting, but it blended in perfectly, and the occasional briny kalamata olive was a treat (for me; not so much for Dave the olive-hater). I think I have a new favorite salad.

mediterranean salmon salad 3

One year ago: Peaches and Cream Scones
Two years ago: Mint Brownies
Three years ago: Crockpot Chicken Broth
Four years ago: Chicken with Forty Cloves of Garlic

Printer Friendly Recipe
Mediterranean Salmon Salad (adapted from Weekly Bite via Prevention RD)

Serves 4

Dressing:
3 tablespoons red wine vinegar
2 tablespoons extra virgin olive oil
1 teaspoon mustard
salt and pepper to taste

Salad:
1 cup uncooked quinoa, rinsed
salt
24 ounces (1½ pounds) salmon filet
oil
8 cups spring mix, lightly packed
½ cup kalamata olives, halved
1 small red onion, thinly sliced
1 (14-ounce) can marinated quartered artichoke hearts, drained
1 cup (4 ounces) crumbled feta

1. In a small bowl, whisk all of the dressing ingredients together.

2. Bring 1 1/4 water and 1/4 teaspoon salt to a boil in a medium saucepan. Add the quinoa, reduce the heat to low, and cover; cook for 15 minutes, then remove the pan from the heat and let set, still covered, for another 10 minutes. Add 2 tablespoons of the dressing, using a fork to fluff the quinoa and evenly distribute the dressing.

3. Adjust an oven rack to the top position, about 3 inches from the broiler. Line a baking sheet with aluminum foil. Transfer the salmon to the foil-lined pan; season with salt and either spray or brush with a light layer of oil. Broil until the salmon is lightly browned and opaque in the center, about 10 minutes. Remove from the oven and let rest for a few minutes, then use two spoons to flake the salmon flesh into bite-sized pieces, leaving the skin stuck to the foil. Toss the flaked salmon with 1 tablespoon of dressing.

4. Add the lettuce to a large bowl; pour the remaining dressing over it and toss to evenly distribute. Mix in the quinoa, salmon, olives, onion, artichokes, and feta. Serve immediately.
mediterranean salmon salad 4

bacon mushroom breakfast skillet

bacon mushroom skillet 5

I’m pretty sure there was a time, not even that long ago, when I would make complicated breakfasts every weekend morning. (Well, every weekend morning that I wasn’t baking scones straight from the freezer.) I vaguely remember asking myself, while surrounded by dirty dishes, why I did this to myself. But the next weekend I’d be back in the same place, always unable to resist a shiny new recipe.

bacon mushroom skillet 1

Probably I’ll swing around to that phase again, but for now, I’m loving simple breakfasts – things that only briefly keep me away from drinking coffee while mindlessly surfing the internet. Even these quick meals are a lot more complicated than the yogurt and frozen berries I spend five minutes blending together every morning before work, so they’re still a treat.

bacon mushroom skillet 3

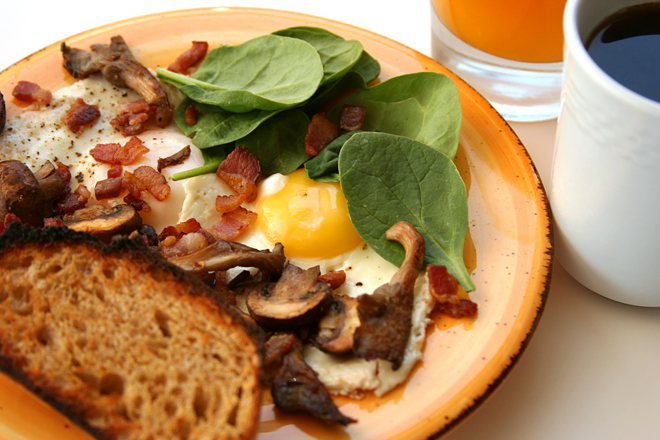
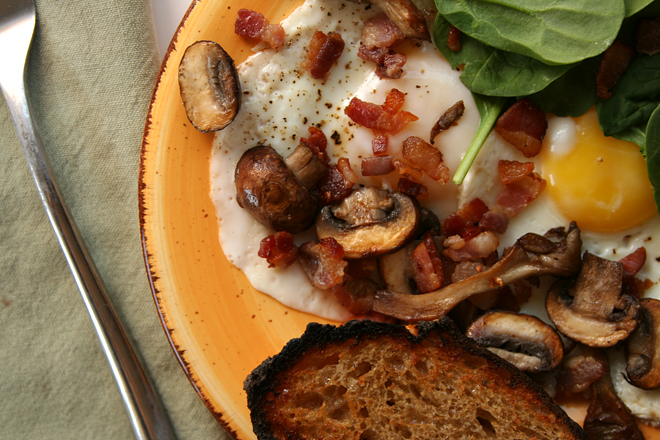
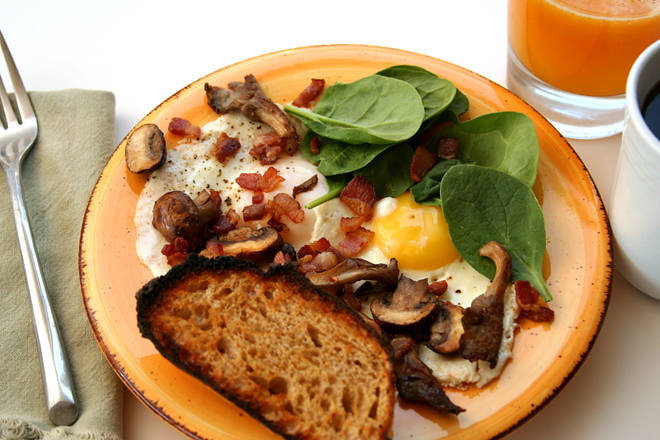
In this case, it’s a simple matter of cooking bacon and mushrooms, topping them with eggs (poached, fried, your choice; I chose fried because it’s easier), mixing in some spinach just until it softens, and if you want to get fancy, you can add a slice of toast.  I love the earthiness of the mushrooms and spinach combined with bacon, and getting in a serving of vegetables for breakfast is a great way to start the day.  But what makes me the happiest is that I get all that in well under half an hour, so I can get on with the rest of my weekend, whether than means working out, relaxing in the backyard, or spending all day messing up the kitchen with other projects.

bacon mushroom skillet 6

One year ago: Thai Grilled Beef Salad
Two years ago: Basic Pancakes
Three years ago: Brioche
Four years ago: Salad with Herbed Baked Goat Cheese

Printer Friendly Recipe
Bacon Mushroom Breakfast Skillet (adapted from Tyler Florence Family Meal via Joy the Baker)

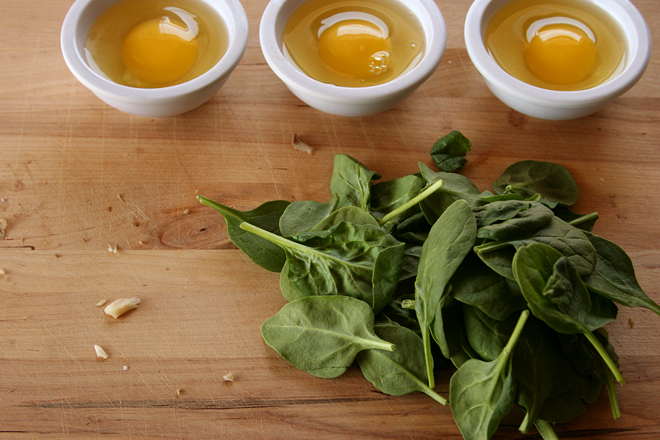
I did not wilt the spinach for the pictures, but I should have.

Serves 4

4 slices bacon, coarsely chopped
2 cup (8 ounces) cremini or button mushrooms, halved or quartered if large
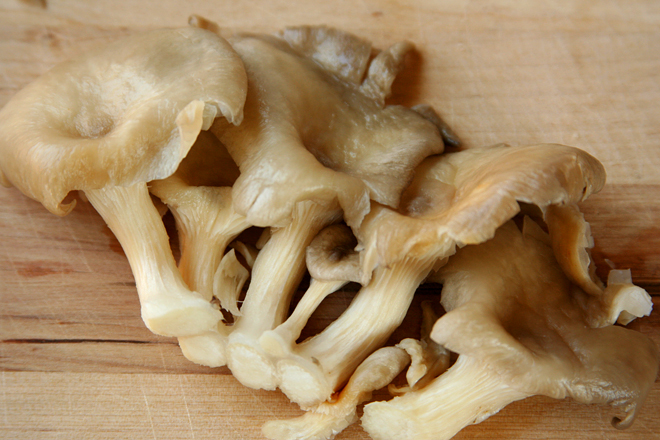
1 cup oyster mushrooms, coarsely chopped
6 to 8 eggs
salt
ground black pepper
2 cups spinach leaves

1. In a medium skillet over medium heat, cook the bacon until crisp.  Using a slotted spoon, transfer the bacon to a paper towel-lined plate.

2. Pour off all but about 1 tablespoon of fat from the skillet.  Add the mushrooms, increase the heat to medium-high, and cook, stirring occasionally, until brown, 8-10 minutes.

3. Meanwhile, heat about 1 tablespoon of bacon fat to a large nonstick skillet over medium-low heat. Add the eggs (I crack them into small dishes first), season with salt and pepper, cover the pan, and cook until the whites are set and the yolks are soft (or however you like your eggs), about 5-7 minutes.

4. When the eggs are ready, add the spinach and the cooked bacon to the mushrooms. Cook, stirring constantly, until the bacon is warm and the spinach just wilts, about a minute.  Serve, with the eggs, immediately.

bacon mushroom skillet 4

radiation sugar cookies

radiation cookies 8

If I don’t often talk about what I do for a living, it’s because it’s hard to explain. I don’t have one of those jobs that you can name in one word and people will get at least some idea of how you spend your days, like being a teacher or nurse or accountant or engineer. My official title is either Scientist 2 or Difficult Waste Expert.

radiation symbol

If I say I work with nuclear waste, you might start to picture Homer Simpson’s job, but mostly I work in an office with spreadsheets. Our official task is to come up with ways to get radioactive waste (stuff mostly left over from the Cold War; not spent nuclear fuel) safely disposed of. There is a radioactive waste repository near my town, half a mile underground in a salt deposit, but I never have any reason to go out there.

radiation containment suit

Even so, my coworkers and I are trained on what the radiation symbol looks like, including the colors – yellow and magenta, at least until you run out of magenta icing, and then black is acceptable. Not even one of the thirty or so people in my office have been required to wear hazmat suits for our current positions, but the idea was too cute to pass up.

radiation cookies 10

I was worried my nuclear containment guys would end up looking like yellow astronaut teddy bears, but I think I got the point across. Other than one manager who thought they might be eskimos, my coworkers loved these. And after another long day looking at computers, trying to make tiny steps toward solving the country’s nuclear waste problem, a distraction in the form of cute cookies is something we could all use.

One year ago: Baked Eggs in Mushrooms with Zucchini Ragout
Two years ago: Vanilla Bean Cupcakes
Three years ago: Sourdough Bagels
Four years ago: Apple Cheddar Scones

roasted rhubarb jam

rhubarb jam 7

One of the things I’m trying to do with my rhubarb surplus this year is not mix it with strawberries. (Please disregard this statement when my next post is strawberry rhubarb pie.) It isn’t that I have anything against strawberries and rhubarb together. Those two are often paired up for reasons beyond their aligned seasons. Sweet strawberries are a natural match for sour rhubarb.

rhubarb jam 3

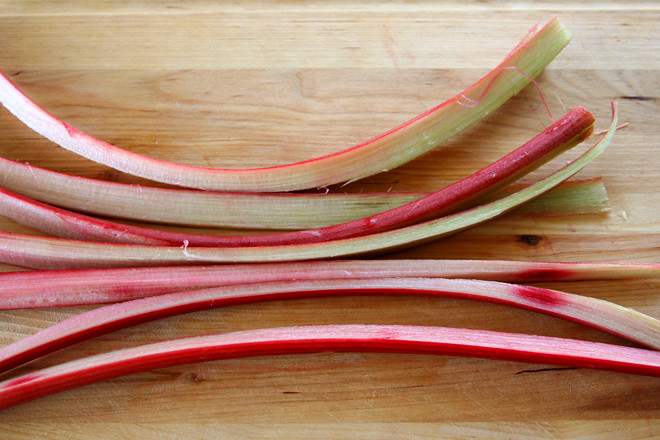
But now that I’m starting to realize how much I enjoy rhubarb for its own merit, I want to use it more often by itself. Mixing it into batter for muffins was a good start, but a simple mostly-hands-off jam is an even more direct way to enjoy rhubarb. All it takes is cutting it up, mixing it with sugar, and giving it a few stirs while the oven softens and sweetens the stalks.

rhubarb jam 4

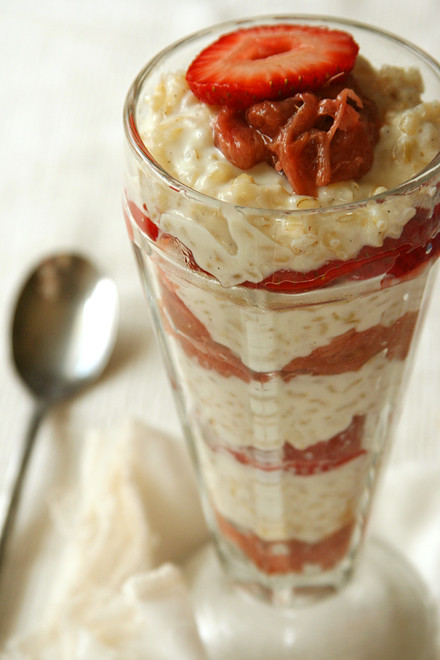
I used a spatula to mash up the roasted rhubarb, but if you wanted something smoother, you could puree it in a food processor or press it through a food mill. The chunky version would go wonderfully with tart plain yogurt, especially with some crunchy granola on top. And I can guarantee that it makes the perfect topping for brown rice pudding – along with some sliced strawberries, of course.

rhubarb jam 9

One year ago: Grapefruit Honey Yogurt Scones
Two years ago: Croissants (Martha Stewart’s recipe)
Three years ago: Rhubarb Scones
Four years ago: La Palette’s Strawberry Tart

Printer Friendly Recipe
Roasted Rhubarb Jam (from hogwash)

2 pounds rhubarb, cut into 1-inch pieces
½ cup (3.5 ounces) sugar
Pinch salt

Adjust a rack to the middle position and heat the oven to 400 degrees. In a 9-by-13-inch dish, mix the ingredients. Bake them, uncovered and stirring occasionally, until the rhubarb is soft enough to mash into a spread, about 1½ hours.

rhubarb jam 8

rhubarb muffins

rhubarb muffins 4

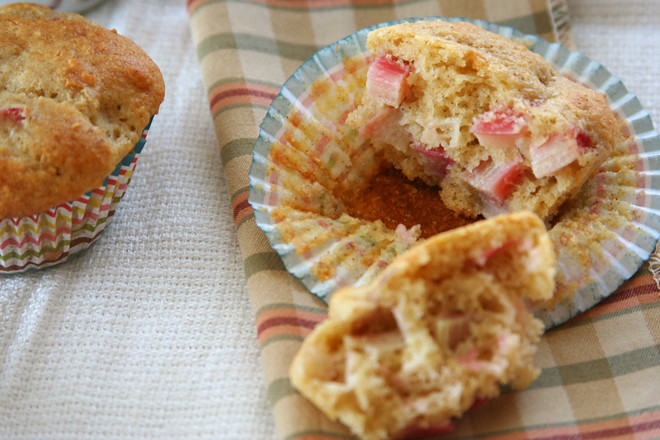
Year after year, rhubarb shows up at the grocery store, and I take note to come up with a recipe so I have a reason to buy it next time I’m at the store. And then I forget, and I see it at the store, and I swear that next time I’ll remember – and so it goes on, until rhubarb season is over. Not this year. This year, I am buying rhubarb every time I see it at the store and figuring out what to do with it later. And since I go there at least twice a week, that’s a lot of rhubarb.

rhubarb muffins 1

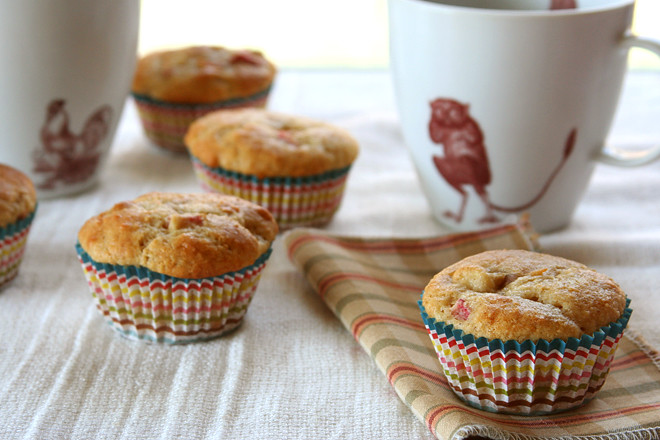
Now that rhubarb is a basically a staple around here, I’m free to try all sorts of recipes with it, from coffee cake to jam to pie to muffins. The coffee cake and the muffins were too similar to share both, and while my coworkers certainly seemed to appreciate the cake, I think the muffins were even better. Best of all, at least when you really want to soak up your brief opportunity for rhubarb, it’s a simple muffin with no distractions. It’s moist but craggy, like a muffin – not a cake – should be. The Greek yogurt (or sour cream) adds a zip of tang, just the right complement to the tart pockets of rhubarb.

rhubarb muffins 2

As good as the muffins are though, I can guarantee I won’t be making them again this year, not when I’ve already found several other tempting rhubarb recipes. Plus I still need to make my favorite rhubarb scones. Fortunately, with as much rhubarb as I’m buying this year, I might actually get to all the recipes I want to make.

rhubarb muffins 8

One year ago: Caramel Pots de Crème
Two years ago: Eggs in Tomato Sauce
Three years ago: Anadama Bread
Four years ago: French Chocolate Brownies

Printer Friendly Recipe
Rhubarb Muffins (slightly adapted from Fine Cooking)

Healthy tricks I almost always use with quick breads: Replace half of the white flour with whole wheat pastry flour. Replace sour cream with Greek yogurt. Replace 4 tablespoons of the butter with 2 tablespoons of oil, which keeps the bread moist (but leaving 4 tablespoons of butter in the recipe keeps it tasting great).

Usually I assume 4.8 ounces (by weight) per cup of flour, but the original recipe included weight measurements with flour at 4.5 ounces per cup. As always, if you can measure by weight, do it.

9 ounces (2 cups) all-purpose flour
2½ teaspoons baking powder
½ teaspoon baking soda
½ teaspoon table salt
½ teaspoon cinnamon
2 large eggs
¾ cup (5.25 ounces) granulated sugar
1 cup sour cream
8 tablespoons (1 stick) unsalted butter, melted and cooled slightly
1 teaspoon pure vanilla extract
1½ cups (7.25 ounces) ¼-inch-diced rhubarb

1. Position a rack in the center of the oven and heat the oven to 400 degrees. Line a 12-cup muffin tin with paper or foil baking cups.

2. In a large mixing bowl, combine the flour, baking powder, baking soda, cinnamon, and salt and whisk to blend. In a medium bowl, whisk together the eggs, sugar, sour cream, melted butter, and vanilla until smooth. Lightly stir the sour cream mixture into the dry ingredients with a spatula until the batter just comes together; do not overmix. Gently stir in the diced rhubarb. The batter will be thick.

3. Divide the batter among the muffin cups, using the back of a spoon or a small spatula to settle the batter into the cups. The batter should mound a bit higher than the tops of the cups.

4. Bake the muffins until they’re golden brown, spring back most of the way when gently pressed, and a pick inserted in the center comes out clean, 18 to 22 minutes. Transfer to a rack and let the muffins cool in the pan for 5 to 10 minutes. Carefully lift the muffins out of the pan—if necessary, loosen them with the tip of a paring knife—and let them cool somewhat. Serve warm.

rhubarb muffins 5

california roll burgers

sushi burgers 7

I am not the most effusive of food bloggers. I’m not much for “OMG OMG make this ASAP” types of statements. I understand that we all have different tastes, different health requirements, different time constraints; what is a perfect recipe for me might not seem so to you. But, most importantly, those types of statements need to be saved for the really special recipes.

sushi burgers 2

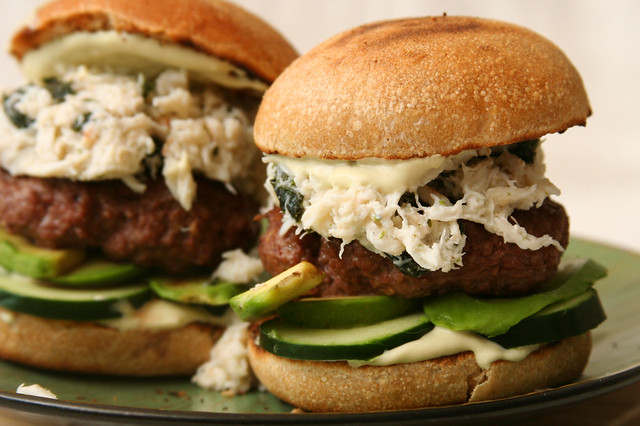
This is a really special recipe. If you consider the best burger I’ve ever eaten to be really special, that is. And I think it is, because I have eaten some pretty fantastic burgers, starting with the classic green chile cheeseburger, including lamb burgers with feta and tzatziki, and not to mention the fancy schmancy fig-glazed burger with onion jam.

sushi burgers 3

All are wonderful, and I don’t plan on giving them up, but this one is my new favorite burger. Admittedly, this is coming from a sushi lover who lives over 150 miles from the nearest sushi restaurant, so I’m always excited when I can get sushi flavors without requiring raw fish or hours of rolling.

sushi burgers 4

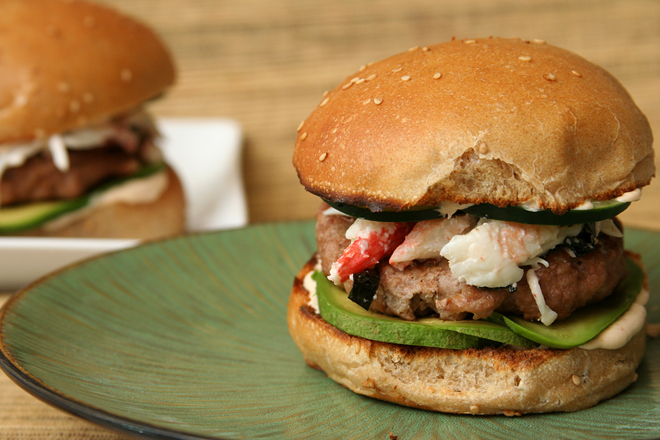
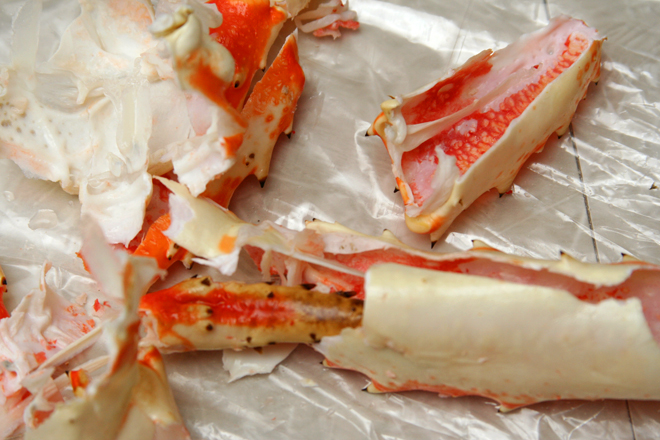
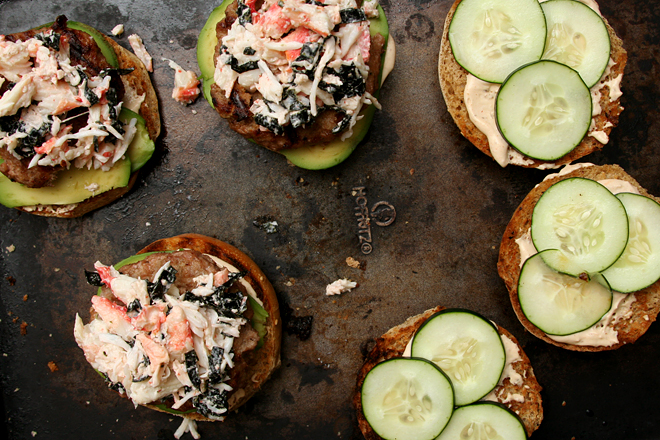
I thought at first that mild turkey burgers would work better with the light shellfish and vegetable toppings, but it turned out that the turkey was too timid, and I could hardly taste it over the king crab, avocado, and wasabi. It was still the best burger I’d ever had though. But I tried again, this time using hearty ground beef instead of turkey and pasteurized lump crab (soaked in milk for 20 minutes to null fishy odors, as per Cook’s Illustrated’s recent crab cake recipe) instead of king crab. And then that was the best burger I’d ever had.

sushi burgers 5

And next time, I’ll get the best of both worlds by using ground beef and king crab, and then that will be the best burger I’ve ever had. This small-town desert girl has figured out how to get her sushi fix, and that’s worth getting excited about.

sushi burgers 6

One year ago: Chocolate Chip Bundt Cake
Two years ago: Stuffed Butterflied Leg of Lamb
Three years ago: Fresh Strawberry Scones
Four years ago: Hash Browns with Sautéed Vegetables and Poached Eggs

Printer Friendly Recipe
California Roll Burgers (adapted from Use Real Butter)

6 burgers

The fish sauce replaces salt in this burger recipe, while also providing a dose of umami. I’ve tried it with regular burgers and didn’t notice any difference, but I like it here because the flavor matched the toppings I used for this burger. If it isn’t something you keep around, use ¾ teaspoon salt instead.

If you prefer, you can replace the Greek yogurt with additional mayonnaise.

1 pound ground beef (no leaner than 90%)
2 tablespoons fish sauce
¼ teaspoon sugar
¼ teaspoon black pepper
6 ounces shelled crab (from 2 king crab legs, or use pasteurized lump crab)
¼ cup mayonnaise, divided
2 sheets nori, cut into strips
¼ cup Greek yogurt
1-2 tablespoons powdered wasabi
1 tablespoon soy sauce
6 burger buns, halved horizontally
2 avocadoes, peeled, seeded, and sliced
1 cucumber, sliced thinly
sesame seeds

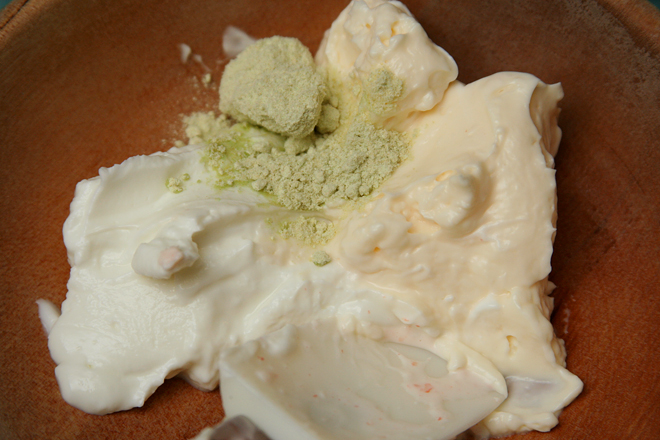
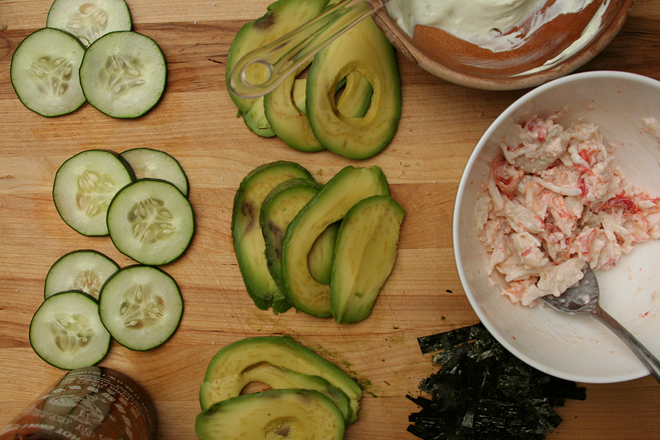
1. In a large bowl, combine the ground beef, fish sauce, sugar, and pepper. Form into 6 patties, about ½-inch thick and 4 inches wide. In a medium bowl, combine the crab, 2 tablespoons mayonnaise, and nori. In a small bowl, combine the remaining 2 tablespoons mayonnaise with the Greek yogurt, wasabi powder, and soy sauce.

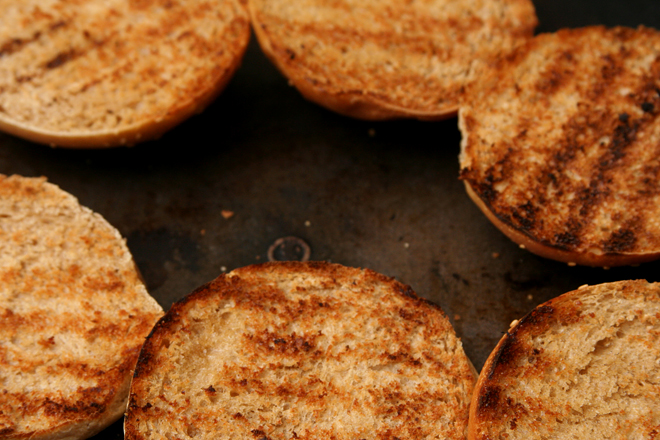
2. Prepare a medium-hot grill. Using a paper towel, grease the grate with vegetable oil. Grill the beef patties for 5 minutes; flip, and continue grilling another 5 minutes. Meanwhile, toast the burger buns on the hottest part of the grill.

3. Spread the wasabi mayonnaise on both sides of the buns. Top with slices of avocado, a burger patty, the crab salad, cucumber slices, and a sprinkle of sesame seeds. Serve immediately.
sushi burgers 9

wine braised beef

wine braised beef 7

I don’t really consider myself a team player. I’ve never been excited about sharing or compromise (which makes me really fun to live with, as you can imagine). And yet, in the last several months, two good friends have asked me to collaborate with them on big projects.

wine braised beef 1

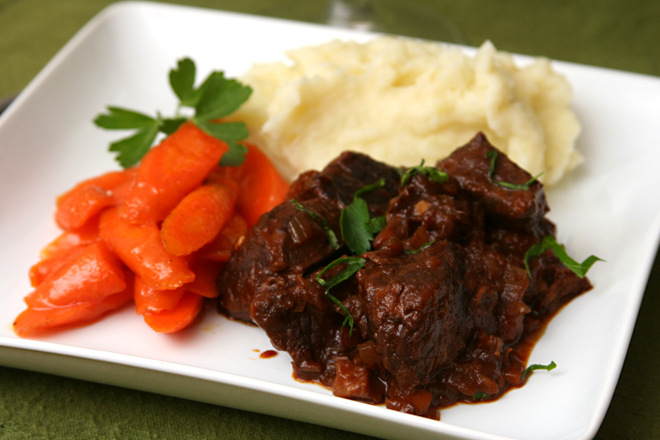
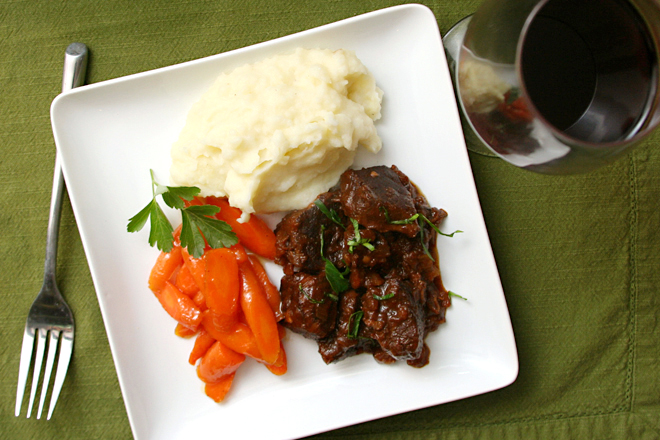
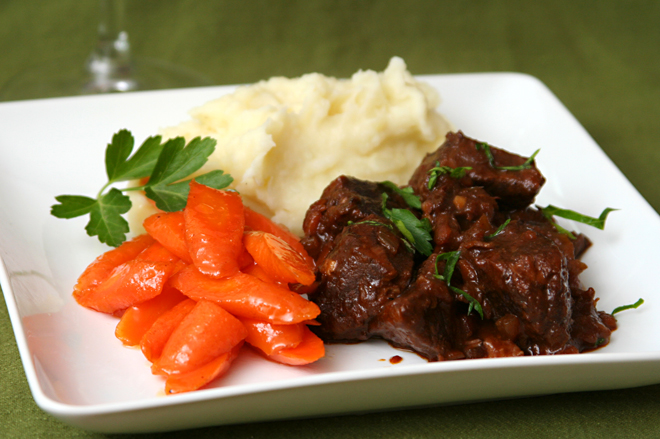
The first was a dinner party for twenty women. It didn’t need to be fancy or involved, except that we wanted it to be. Through a long series of emails, discussing the merits of lasagna versus baked stuffed chicken versus braised meat, we finally decided on a “deconstructed stew” theme, with glazed carrots, mashed potatoes, and beef slow-cooked in a pot of simmering wine and broth. And then just for kicks, we added pesto palmiers, cheese and crackers, mushroom farro soup, orange cream tarts, truffles, and cranberry bliss bars to the menu. Also mulled wine and flavored waters.

wine braised beef 3

Around this time, the call for proposals to present at the BlogHer Food conference was released, and Brady had asked me if I was interested in submitting a proposal with her about free photo post-processing software programs. Of course I was! Brady and I got our proposal accepted, and so we’re traveling to Seattle the second week of June to talk about editing photos, and, most importantly, doing it using free software.

wine braised beef 4

Surprisingly, to myself at least, both projects have been unqualified successes. The dinner party was great fun, to plan, to prepare, to serve, and to eat, and my friend invited me to host with her again next year, so I couldn’t have been too hard to work with! Brady and I are still in the beginning stages of planning our presentation for the BlogHer Food conference, but just the fact that our proposal was accepted is a positive sign of our ability to work together. Maybe I’m not so bad to team up with after all.

wine braised beef 6

One year ago: Toasted Almond Scones
Two years ago: Honey Wheat Cookies
Three years ago: Honey Yogurt Dip
Four years ago: Green Chile Chicken Enchiladas

Printer Friendly Recipe
Wine-Braised Beef

Serves 4-6

The goal was that the main dish be stew-like without being stew. It was going to be served on plates, so it couldn’t be too saucy, but we wanted meltingly tender chunks of beef. A cheaper cut of meat so we could serve a crowd was definitely a bonus. It also doesn’t hurt that there’s no last-minute work and it can be made in advance and actually improves with being stored overnight.

I’m a big fan of Yellowtail’s wine for recipes like this. It’s cheap but pretty good. I used a Shiraz/Cabernet Sauvignon blend.

1 tablespoon canola oil
1 (3 to 3½-pound) boneless beef chuck roast, cut into 2-inch cubes
Salt and freshly ground black pepper
1 ounce pancetta, diced into ⅛-inch cubes
1 yellow onion, diced fine
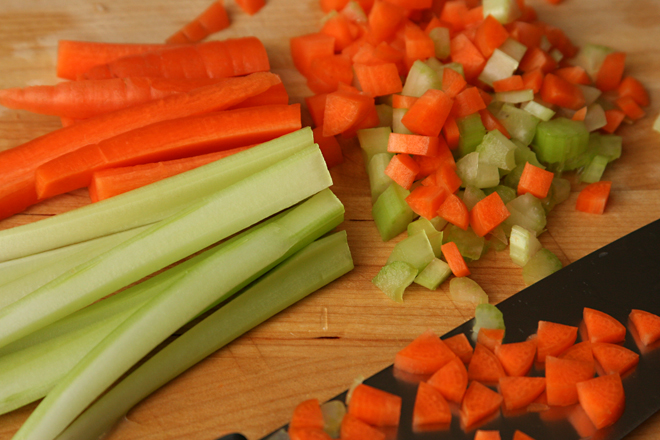
1 medium carrot, diced fine
1 celery stalk, diced fine
3 cloves garlic, minced
1½ cups dry red wine
1½ cups chicken broth
1 (15-ounce) can diced tomatoes, with juice
1 sprig thyme
2 tablespoons butter, room temperature
2 tablespoons all-purpose flour
2 tablespoons chopped fresh parsley, for garnish

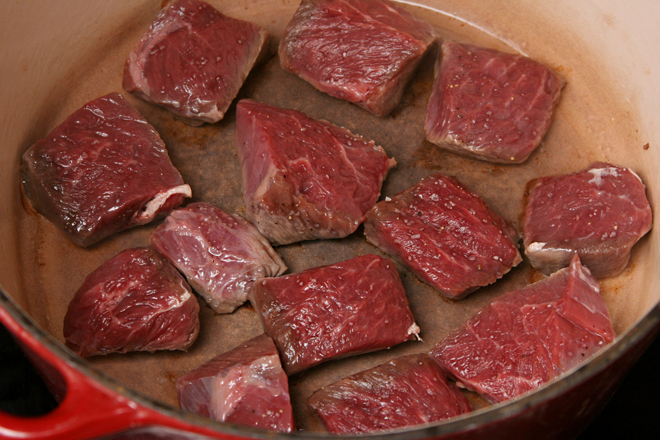
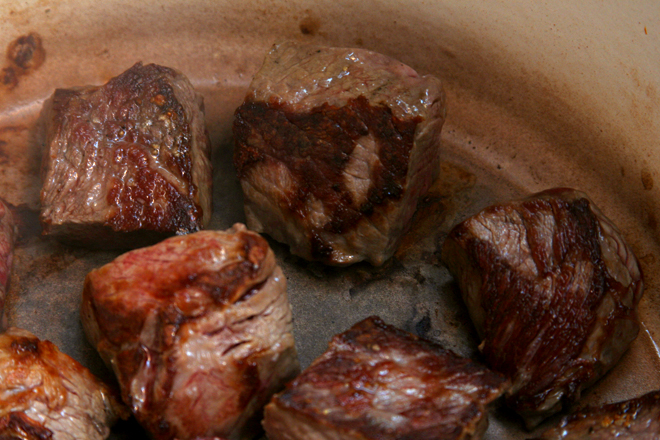
1. Heat the oil in a 5-quart Dutch oven over medium-high heat. Pat the meat dry, season it generously with salt and pepper, and arrange the pieces, without touching, in the Dutch oven. (You may need to do this in two batches.) Cook the meat, without stirring or flipping, for 2-3 minutes, until the bottoms are deeply browned. Turn the chunks of meat and brown a second side. Transfer the meat to a plate. Discard any fat in the pan (but leave the cooked-on brown bits).

2. In the same pot over medium heat, cook the pancetta until fat starts to render, 3-5 minutes. Add the onion, carrot, and celery; cook, stirring occasionally, until the edges of the onions start to brown, about 6 minutes. Add the garlic; cook and stir for about one minute. Pour the wine into the pot, scraping up the sticky brown bits on the bottom of the pot. Add the stock, tomatoes with their juice, thyme sprig, and reserved meat back to the pot. Increase the heat to medium-high and bring to a simmer. Once the liquid simmers, reduce the heat to low, partially cover the pot, and simmer slowly until the meat is tender, about 3 hours.

3. Mix the butter and flour in a small bowl until smooth. Remove the thyme sprig from the pot. Whisk the butter/flour paste into the sauce. Increase the heat to medium to medium-high and simmer, uncovered, until the sauce is thickened. Serve, topping each portion with a sprinkling of parsley.

wine braised beef 5

asian lettuce wraps

asian lettuce wraps 5

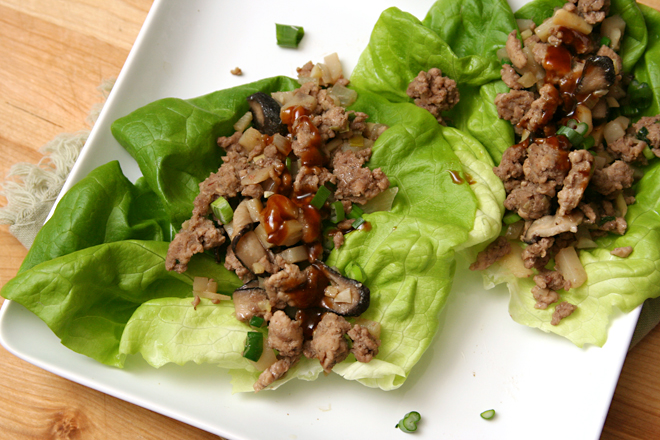
I try not to order dishes in restaurants that I can easily make at home, but PF Chang’s lettuce wraps had so many raving reviews that I had to get them the first time I ate there. They were just as good as I was hoping, but were also simple – too simple to pay someone else to make them for me. I made a mental note to try these at home.
asian lettuce wraps 3

That was years ago, but I still hadn’t gotten around to making this easy dish that promised to be just as tasty as it was healthy. That is why this recipe, which requires no great skill or time-investment, no new ingredients or techniques, made the list. Sometimes I just need a little extra push, even if it’s from myself.

asian lettuce wraps 4

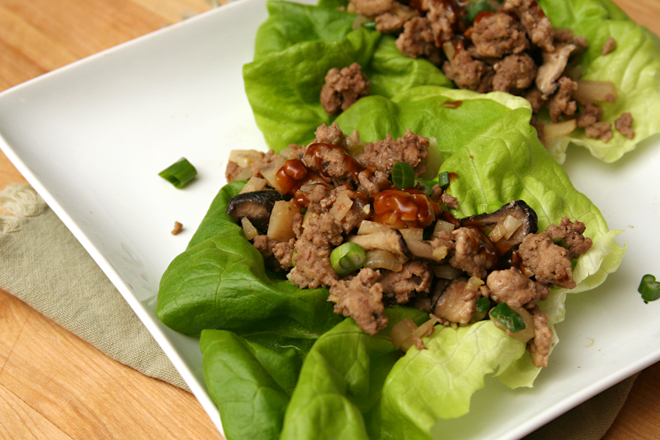
I don’t think I’ll need that extra push to make these again. It will be hard to forget how well the savory filling compliments the crisp mild lettuce and sweet hoisin sauce. I can’t compare them to the restaurant’s version, since it’s been years since I’ve had theirs. I won’t wait so long before I eat lettuce wraps again, not after this reminder of how good they are, and how easy they are to make myself.

asian lettuce wraps 6

One year ago: Stromboli
Two years ago: Maple Oatmeal Scones
Three years ago: Twice-Baked Potatoes with Broccoli, Cheddar and, Scallions
Four years ago: Mandarin Pancakes

Printer Friendly Recipe
Asian Lettuce Wraps (adapted from Rasa Malaysia)

Serves 4

I used a combination of ground pork and lean ground beef, but many recipes call for ground chicken. Use whatever lean ground meat you want; I particularly recommend chicken or pork.

Marinade:
2 tablespoons soy sauce
1 tablespoon dry sherry
½ teaspoon sugar
1 teaspoon cornstarch
1 green onion, finely chopped
chile-garlic sauce (optional)

Filling:
1 pound lean ground meat
1 tablespoon oil
1 shallot, minced
1 clove garlic, minced
1 tablespoon minced fresh ginger
5 ounces shiitake mushrooms, stems discarded, caps thinly sliced
1 (5-ounce) can water chestnuts, chopped
2 green onions, thinly sliced

1 small head of Boston or Bibb lettuce, leaves separated, rinsed, and dried

Dipping sauce:
2 tablespoons hoisin sauce
1 tablespoon soy sauce
1 tablespoon water
½ teaspoon sriracha (optional)

1. In a large bowl, combine all of the marinade ingredients. Add the ground meat; use a fork or your hands to coat the meat with the marinade, breaking up large chunks. Set aside for 15 minutes.

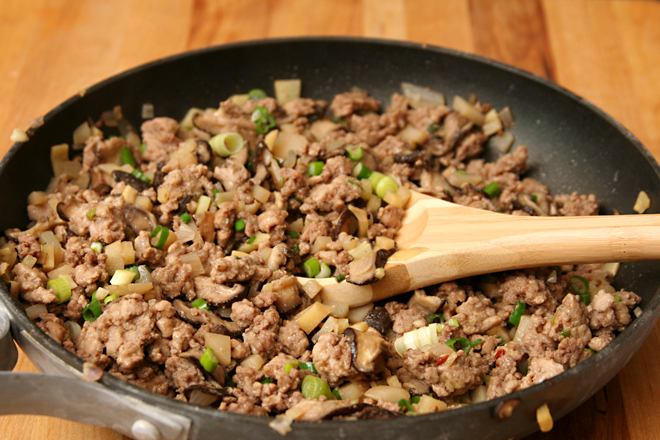
2. Heat the oil in a 12-inch nonstick skillet over medium-high heat until it flows like water when the pan is tilted. Add the shallot, garlic, and ginger; cook, stirring constantly, until fragrant, about one minute. Add the mushrooms and a pinch of salt and continue cooking, stirring occasionally, until the mushrooms soften. Add the chicken with its marinade and the water chestnuts; cook, breaking the meat into small pieces, until no pink remains, about 6 minutes. Stir in the green onions.

3. Combine all of the dipping sauce ingredients in a small bowl. Serve with the meat and lettuce leaves, filling the lettuce just before serving to prevent wilting.

asian lettuce wraps 8

ricotta

ricotta 12

Here are some things you need to know about making ricotta at home:

1) It really is as easy as they say. The process involves nothing more than heating milk and salt, stirring in lemon juice or vinegar, and straining the mixture.

2) It requires a lot of milk for a relatively small amount of cheese – you’ll start with about four times more volume of milk than you’ll end up with of cheese.

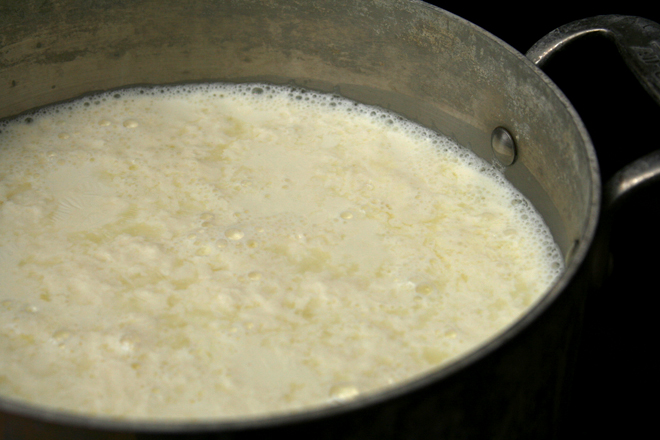
ricotta 3
right after adding the acids

3) About that milk – you can use the regular ol’ stuff from the grocery store, ultrapasteurization and all. That’s all I have access to, and I’ve made some nice ricotta with it.

4) If you’re feeling decadent, you can substitute some of the milk with cream. I started out using about seven times more milk than cream, but in the pictures you see here, I was almost out of cream and used about twenty times more milk than cream. I like this batch just as much as the others.

ricotta 4
right before straining

5) You can use either regular white vinegar or lemon juice. I read here that using all lemon juice gives the cheese a lemony flavor and vinegar is more neutral. However, I was worried about my cheese tasting like vinegar, which would be gross, so I always use a mixture of the two.

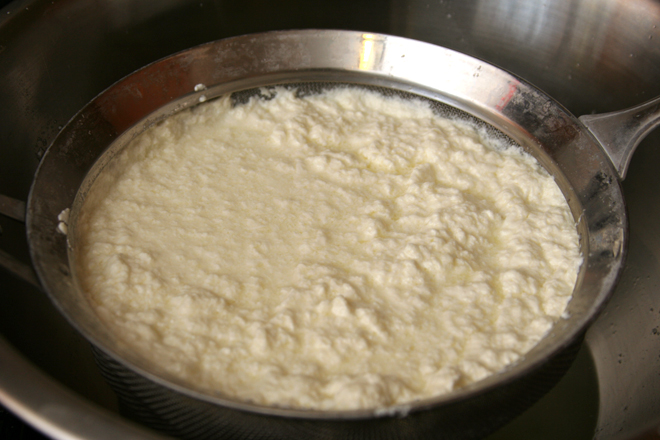
ricotta 5
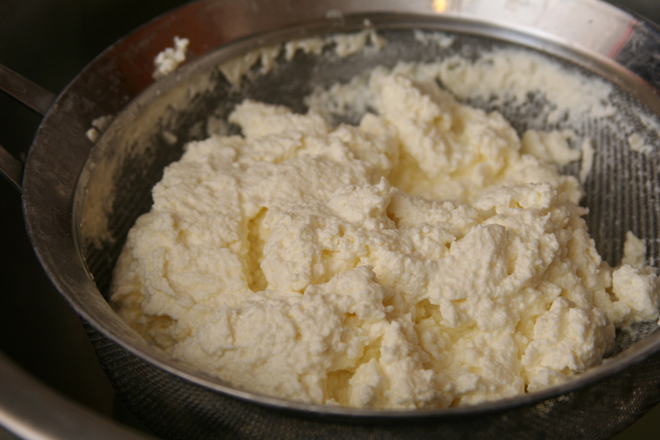
after 5 minutes of straining with no cheesecloth or paper towel liner

6) The pH of the acid you add to curdle the milk matters. That’s one reason vinegar is more dependable than lemon juice; the acidity of lemons varies. It also means you can’t substitute other vinegars, because they might not be as acidic as white vinegar. I learned this the hard way when I realized I was out of regular vinegar and tried to use white wine vinegar instead; the milk didn’t form many curds.

ricotta 6
after 15 minutes of straining with no cheesecloth or paper towel liner

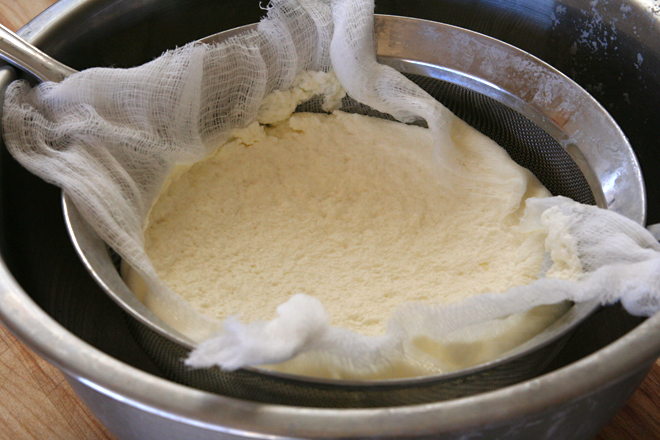
7) You don’t need cheesecloth. The first two times I made this cheese, I strained the mixture in my fine-mesh strainer. Worried that I was losing too much of good stuff, I tried using a double layer of paper towels, but it was draining too slowly and I got impatient and went back to just the strainer. That being said, I really am trying to remember to buy cheesecloth.

ricotta 7
after 15 minutes of straining with no liner, stirred

8 ) You’ll feel wasteful throwing all that whey down the drain, but the bit of internet research I did indicated that it isn’t good for bread dough, because the acid breaks the gluten molecules, weakening the dough’s structure.

9) It isn’t technically ricotta, which is made from the whey leftover from making other cheeses. (The word ricotta, in Italian, means re-cooked.) When I first heard this, I wondered why anyone would call it ricotta, since it isn’t made the same way. Then I made it myself and realized that it looks and tastes just like real ricotta.

ricotta 8
after 2 hours of straining with no liner

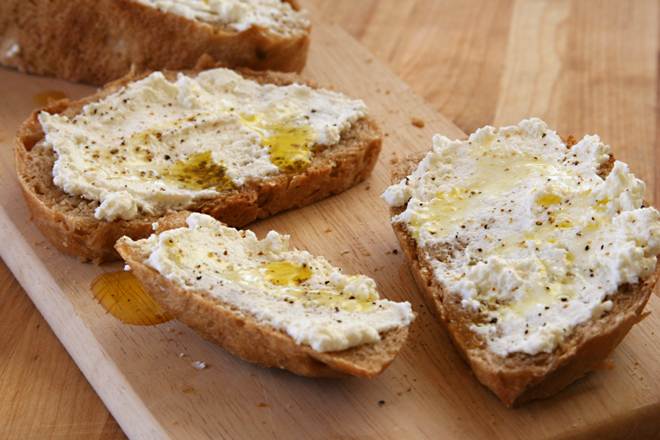
10) Homemade ricotta is better than the stabilizer-filled tubs you’ll find in most grocery stores. However, if you do happen to have access to real fresh ricotta, it’s probably cheaper to buy that rather than using half a gallon of milk to make 2 cups of cheese. As for which is better, the last time I bought fresh ricotta from an Italian market was a couple years ago, too long to remember the details of how good it was. I know it was really good, but I know this is really good too.

ricotta 10
finally bought cheesecloth; after 1 hour of straining with double layer of cheesecloth; smoother, creamier cheese

One year ago: Beef Short Ribs Braised in Tomato Sauce
Two years ago: Maple Oatmeal Scones
Three years ago: Chopped Salad
Four years ago: Country Crust Bread

Printer Friendly Recipe
Ricotta (adapted from Smitten Kitchen and Serious Eats)

Makes about 1 cup

You can adjust the amount of cream down (to 4 cups milk and no cream) or up (to 3 cups milk and 1 cup cream), depending on how rich you want the ricotta to be.

3½ cups whole milk
½ cup heavy cream
½ teaspoon salt
2 tablespoons white vinegar
1 tablespoon lemon juice

1. In a 2-quart saucepan over medium-high heat, heat the milk, cream, and salt to 190 degrees. Remove the pot from the heat, add the vinegar and lemon juice, stir once, and set aside for 5 minutes.

2. Place a fine-mesh strainer over a large bowl. Line the strainer with a double layer of cheesecloth or a single layer of paper towels. Pour the curdled milk mixture into the strainer. Set aside for about an hour. It will get thicker the longer it sits to drain.

ricotta 11

butternut squash pie

squash pie 7

The winter squashes are a multifaceted group. Pumpkin is obviously perfect with sweet flavors and can be used in custards, pies, cakes, quick breads, cookiesthe whole dessert (or breakfast!) spectrum. Pumpkin does take well to savory dishes, but it’s more common that you’ll see butternut squash used in dinner instead – despite their very similar flavor.

squash pie 3

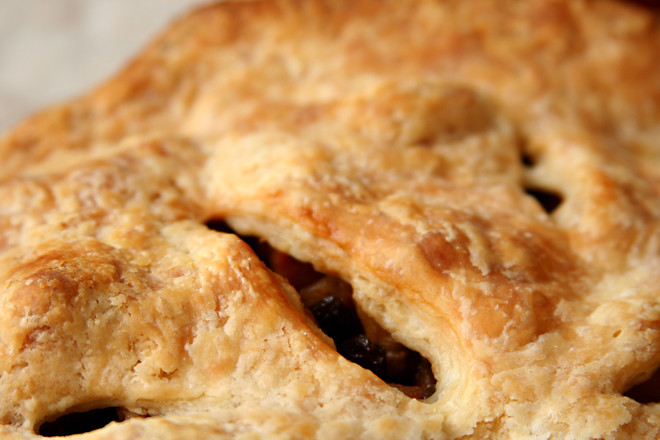
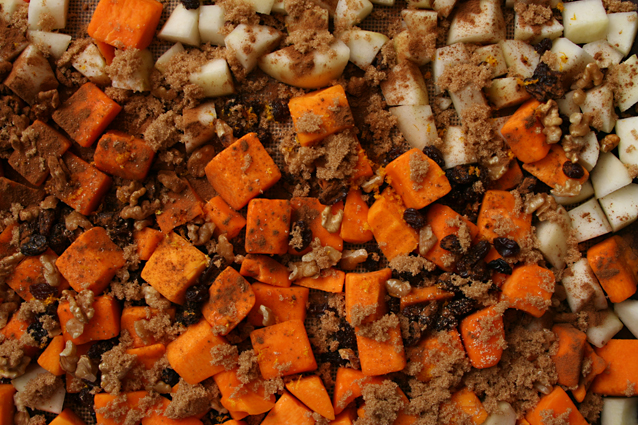
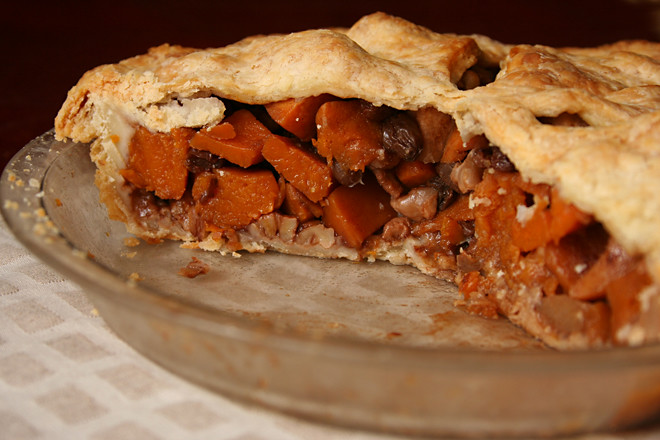
Furthermore, pumpkin in desserts is nearly always pureed. Squash in dinner is often diced, sometimes pureed. This pie, with its diced butternut squash, did not follow the rules.

squash pie 4

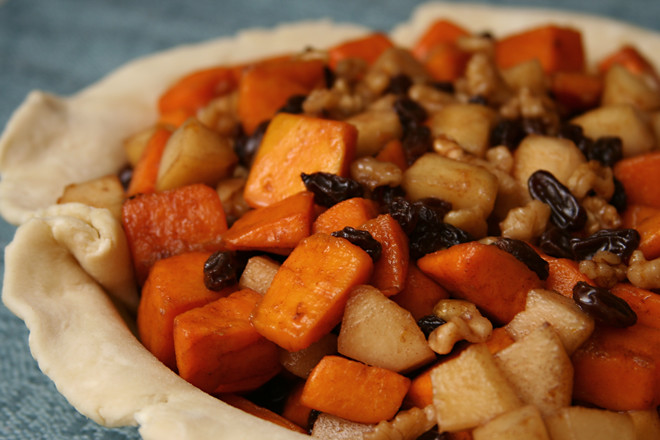
My brain had some trouble deciding if this was dessert or dinner, is what I’m saying. The pears and raisins were obviously sweet, but the big chunks of squash had a strong earthy tone. I think with more sugar and smaller chunks of squash, they would blend into the other pie ingredients, and the whole thing would seem more dessert-like. It isn’t bad as it is, but, perhaps, a little confusing.

squash pie 9

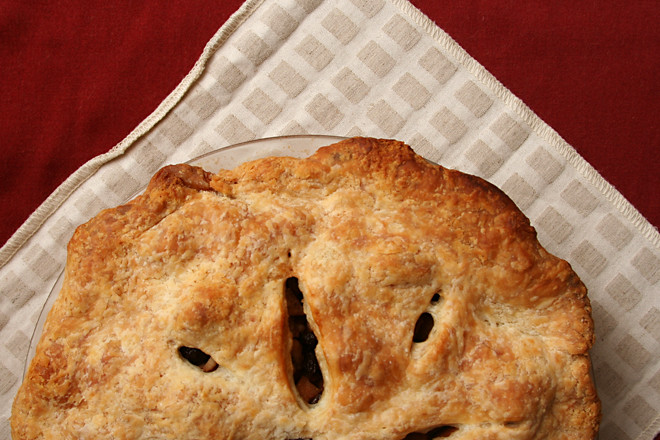
Valerie chose this for Tuesdays with Dorie, and she has the recipe posted. Instead of steaming the squash, I roasted all of the filling ingredients except the orange juice in the oven until the squash was softened, mostly because my oven was already on but also to potentially get some delicious caramelization.  Because roasting drove off some liquid, I didn’t feel I needed to add the breadcrumbs to the filling.

Two years ago: Buffalo Chicken Pizza
Three years ago: Gallitos (Costa Rican Breakfast Tacos)

squash pie 6