mediterranean salmon salad

mediterranean salmon salad 6

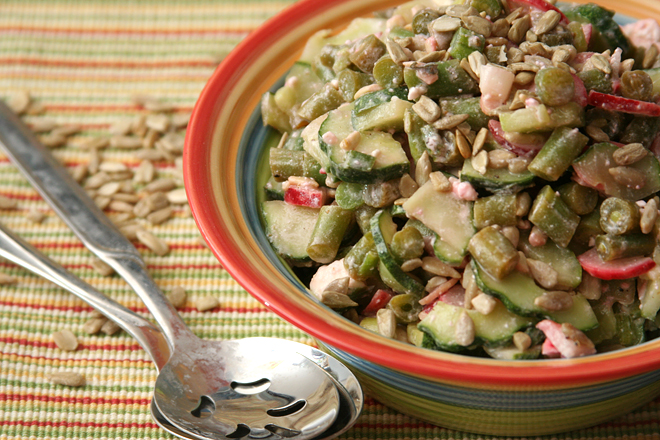
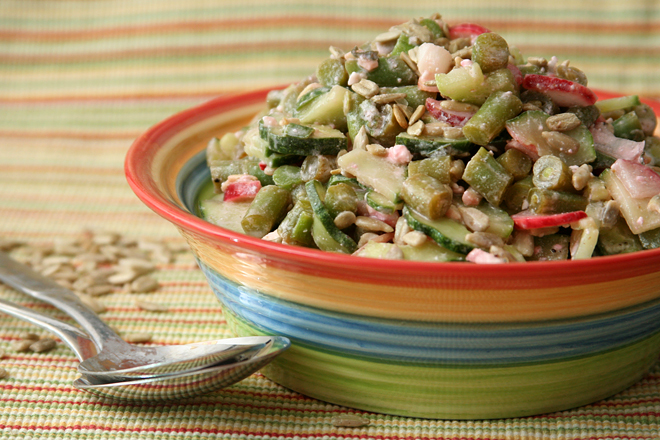
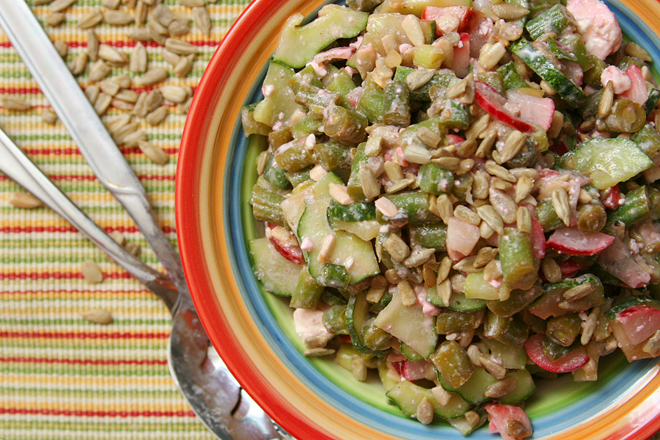
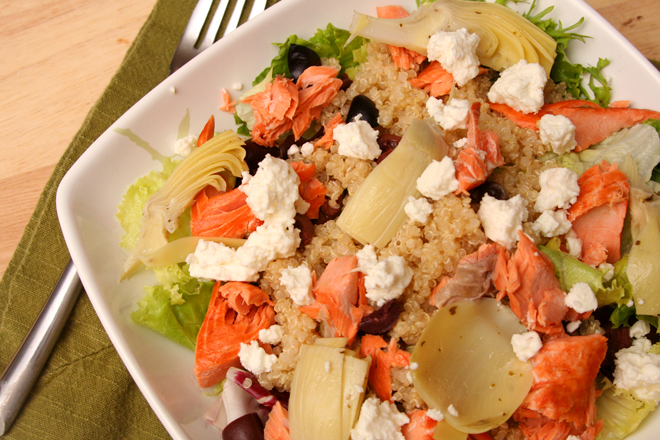
This salad ended up being something really special, one of those that I raved about all through dinner. But I can’t pinpoint exactly what made it stand out so much. I like all the ingredients, quite a bit actually, but I could say the same for a lot of salads that I like but don’t gush over like I did this one.

mediterranean salmon salad 1

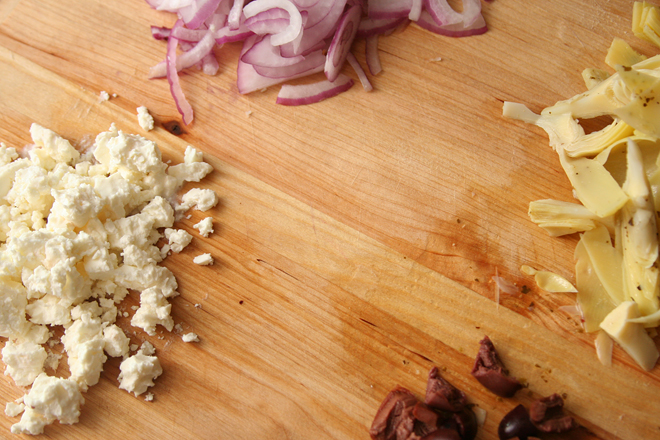
It might have been the wild sockeye salmon my store has been stocking, or the fancy block of feta. You can rarely go wrong with artichoke hearts and quinoa. I was worried the bite of raw onion would be distracting, but it blended in perfectly, and the occasional briny kalamata olive was a treat (for me; not so much for Dave the olive-hater). I think I have a new favorite salad.

mediterranean salmon salad 3

One year ago: Peaches and Cream Scones
Two years ago: Mint Brownies
Three years ago: Crockpot Chicken Broth
Four years ago: Chicken with Forty Cloves of Garlic

Printer Friendly Recipe
Mediterranean Salmon Salad (adapted from Weekly Bite via Prevention RD)

Serves 4

Dressing:
3 tablespoons red wine vinegar
2 tablespoons extra virgin olive oil
1 teaspoon mustard
salt and pepper to taste

Salad:
1 cup uncooked quinoa, rinsed
salt
24 ounces (1½ pounds) salmon filet
oil
8 cups spring mix, lightly packed
½ cup kalamata olives, halved
1 small red onion, thinly sliced
1 (14-ounce) can marinated quartered artichoke hearts, drained
1 cup (4 ounces) crumbled feta

1. In a small bowl, whisk all of the dressing ingredients together.

2. Bring 1 1/4 water and 1/4 teaspoon salt to a boil in a medium saucepan. Add the quinoa, reduce the heat to low, and cover; cook for 15 minutes, then remove the pan from the heat and let set, still covered, for another 10 minutes. Add 2 tablespoons of the dressing, using a fork to fluff the quinoa and evenly distribute the dressing.

3. Adjust an oven rack to the top position, about 3 inches from the broiler. Line a baking sheet with aluminum foil. Transfer the salmon to the foil-lined pan; season with salt and either spray or brush with a light layer of oil. Broil until the salmon is lightly browned and opaque in the center, about 10 minutes. Remove from the oven and let rest for a few minutes, then use two spoons to flake the salmon flesh into bite-sized pieces, leaving the skin stuck to the foil. Toss the flaked salmon with 1 tablespoon of dressing.

4. Add the lettuce to a large bowl; pour the remaining dressing over it and toss to evenly distribute. Mix in the quinoa, salmon, olives, onion, artichokes, and feta. Serve immediately.

mediterranean salmon salad 4

summer chopped salad with feta

summer chopped salad with feta 7

I wore out coleslaw. It was too convenient and easy and good and healthy, so I made it whenever we had pulled pork or burgers or barbecue. And that was fine for a while, for over a year, in fact, but now I’ve had enough. I needed something new to catch my fancy.

summer chopped salad with feta 1

I found it. This is my new favorite side salad for a number of reasons. For one thing, it passes the no-lettuce test; delicate lettuce-based salads seem so out of place next to a hearty burger. It goes without saying that a side salad should be healthy and easy, and this one is.

summer chopped salad with feta 3

And maybe most importantly, it’s adaptable. I’ve been making coleslaw nearly the exact same way for well over a year, but this salad can be made with different vegetables, different types of citrus juice, and different seasonings to match the meal you’re serving it with. The original recipe used lime juice and cumin for a southwestern vibe, but I wanted something more Mediterranean, so I went with lemon juice this time.  It went perfectly with spareribs.  Coleslaw has been relegated from my favorite summer side to just my favorite pulled pork topping.

summer chopped salad with feta 6

One year ago: Chocolate Chocolate Chunk Muffins
Two years ago: Tarte Noire
Three years ago: Seafood Lasagna
Four years ago: Salmon Clubs with Avocado Butter

Printer Friendly Recipe
Summer Chopped Salad with Feta (adapted from Smitten Kitchen)

Serves 8 as a side dish

I steamed the green beans for about 1 minute, then did not blanch them (dip them into ice water to stop the cooking). If you do plan to blanch your beans, cook them for another minute or two. My beans looks olive green instead of bright green in the photos because I took these pictures the day after I made the salad, and the citrus juice had darkened the beans.

16 ounces green beans, lightly cooked, chopped into ¼-inch pieces
2 cups (7 ounces) radishes, halved and thinly sliced
1 hothouse or 3 English cucumbers (5 ounces total), halved lengthwise and sliced
4 scallions, thinly sliced
1 cup (4 ounces) crumbled feta
¾ cup toasted sunflower seeds, salted or unsalted
¼ cup fresh lemon juice
½ teaspoon salt
freshly ground black pepper, to taste
2 tablespoons thinly sliced fresh mint leaves
2-4 tablespoons extra virgin olive oil

Mix everything except the olive oil.  Add the oil and more salt to taste.

summer chopped salad with feta 8

migas

migas 9

I’ve been raving about migas since the first time I made them, several months ago. They’re such a perfect breakfast for me that I’ve had them almost every weekend since. Somewhere along the way, after I talked my brother into making them, he pointed out that they’re basically just scrambled eggs.

migas 1

Which is true, and in a way, sums up what it is I love about them – their simplicity. Scrambled eggs is not a complicated breakfast, so that must mean that migas are also not a complicated breakfast. And beyond that, it’s healthy and filling and flexible.

migas 3

The recipe I’ve given here is one of my favorite ways to make it, and the simplest way I like it. First, I bake lightly oiled corn tortillas until browned. I tried frying them once, but since baking results in crisp tortillas every bit as good as those that are fried, but is healthier, I’m sticking with that. However, it’s not uncommon that I’ll use the crumbs at the bottom of the tortilla chip bag either, when they’re too small to dip in salsa but there’s too many to throw away.

migas 5

The other ingredients I consider crucial to migas are chiles and cheese. I use roasted and peeled Hatch green chiles, but any chile you like would be fine. I suspect that while beans are a common side, adding them to the migas themselves isn’t traditional, but the sweetness they add to the dish is too good to skip.

migas 2

In addition to these standards, I’ve also added chorizo (shown here), spaghetti squash, and random unlabeled spicy tomato stuff I found in the freezer (probably meant for this dish, but who can be sure). It’s not a dish that requires precision or even consistency. Every single time I’ve made it, it’s been different, but it always been delicious – and easy.

migas 6

One year ago: Greek Yogurt Dill Dip
Two years ago: Roasted Red Pepper Pasta Salad
Three years ago: White Cake (comparison of 3 recipes)
Four years ago: Danish Braids (for the Daring Bakers)

Printer Friendly Format
Migas (adapted from Homesick Texan)

4 servings

When I add chorizo, I brown it before adding the cooking the onion, replacing the oil with the fat rendered from the sausage. When I’ve added pre-cooked leftover squash, I add it with the beans and tortillas.  I often add the salsa with the beans too, although the texture of the finished isn’t as firm as when it’s added as a garnish.

8 corn tortillas
8 eggs
salt
4 ounces chopped green chiles
1 tablespoon oil
1 onion, chopped
2 garlic cloves, minced
½ teaspoon ground cumin
1 (15-ounce) can black or pinto beans, drained and rinsed
2 ounces (½ cup) shredded cheddar, Monterey jack, or pepper jack
salsa
cilantro

1. Heat the oven to 425 degrees. Arrange an oven-safe cooling rack on a baking sheet. Light spray both sides of the tortillas with nonstick spray; lay them in a single layer on the cooling rack and bake, flipping once, for 12-16 minutes, until browned and crisp. Break into bite-sizes pieces.

2. In a medium bowl, beat the eggs, ¼ teaspoon salt, and green chiles with a whisk until large bubbles start to form around the edges of the bowl.

3. In a large nonstick skillet, heat the oil over medium heat. Add the onions and a pinch of salt; sauté, stirring occasionally, until just browned around the edges, 5-8 minutes. Pour in the egg mixture and cook without stirring for about a minute, then drag a spatula through the eggs a few times to lightly stir them. Let the eggs set for approximately 30 seconds, then stir again. Add the tortilla pieces, beans, and cheese. Cook and stir the eggs until set. Serve immediately, topping each portion with salsa and cilantro.

migas 7

lemon ricotta cookies

lemon ricotta cookies 6

Due to the knee injury that’s kept me from working out at my normal intensity for four months (and counting), I mostly gave up baking for a while. Most of the baking I’ve done recently has been to use up the surplus of organic lemons I keep ending up with as a result of buying them in bags in the Big City. I hoard them until the week before I plan to head back to the Big City, and then I figure that I’d better get rid of them so I can justify buying more.

lemon ricotta cookies 1

I’m not sure my coworkers have noticed the prevalence of lemon treats I’ve brought in to share. It started with the pound cake, and then, weeks later (a departure from the once a week or so I used to bring stuff in), there were these cookies. Next week, it’ll be lemon cream tartelettes.

lemon ricotta cookies 2

I don’t think anyone has minded, considering that several people came by to tell me that these might be the best thing I’ve shared yet. (Questionable.) More tiny glazed cake than cookie, I definitely understand the popularity. But now that I’m almost back to my normal workouts, my coworkers better brace themselves for something besides lemon – by which I mean chocolate, of course.

lemon ricotta cookies 3

One year ago: Basic Coleslaw
Two years ago: Quinoa Tabbouleh
Three years ago: Croissants
Four years ago: Ricotta Spinach and Tofu Ravioli

Printer Friendly Format
Lemon Ricotta Cookies with Lemon Glaze (slightly adapted from Giada DeLaurentiis via Apple a Day)

Cookies:
2½ cups (12 ounces) all-purpose flour
1 teaspoon baking powder
8 tablespoons (1 stick) unsalted butter, softened
2 cups (14 ounces) granulated sugar
zest of 1 lemon
1 teaspoon table salt
2 large eggs
1 (15-ounce) container ricotta cheese
3 tablespoons lemon juice

Glaze:
1 cup (4 ounces) powdered sugar
3 tablespoons lemon juice
zest of 1 lemon

1. Preheat the oven to 375 degrees. Line 2 baking sheets with parchment paper or silicone mats. In a medium bowl, combine the flour and baking powder. Set aside.

2. Place the sugar, salt, and lemon zest in the bowl of a stand mixer fitted with the paddle attachment (or a large mixing bowl if you’re using a hand-held mixer). Beat on medium-low speed until the sugar looks slightly moist. Add the butter and continue beating on medium-low until the mixture is light and fluffy, about 2 minutes, scraping the sides of the bowl as needed. With the mixer running, add the eggs, one at a time. Add the ricotta and lemon juice, then continue mixing on medium speed for about 1 minute. Reduce the mixer speed to low and gradually add the flour mixture, mixing just until evenly combined.

3. Spoon the dough (about 1 tablespoon for each cookie) onto the baking sheets. Bake for 8-11 minutes, until slightly golden at the edges. Remove from the oven and let the cookies rest on the baking sheet for 15 minutes.

4. For the glaze: Combine the powdered sugar, lemon juice, and lemon zest in a small bowl and stir until smooth. Spoon about ½ teaspoon onto each cookie and use the back of the spoon to gently spread. Let the glaze harden for about 2 hours before serving.

lemon ricotta cookies 5

shrimp ricotta ravioli

shrimp ravioli 6

The day I made these was a Saturday with weather too unpleasant to spend time outside, so it was the perfect time to blast chick music and hang out in the kitchen. My dinner plans were fairly ambitious – crab cakes, roasted asparagus, goat cheese scallion muffins, and for dessert, pizzelles with ricotta filling. While I was already in the kitchen, I went ahead and prepared some things for later in the week, like bagel pre-doughs, burger patties, and hard-boiled eggs. And I thought, if I have extra energy and time, I’ll make shrimp ravioli.

shrimp ravioli 1

The problem is that the shrimp ravioli would be our first course of the night, so I’d have to make it before dinner – before I stood the chance of running out of energy and time. And making ricotta, pasta, seafood broth, shrimp filling, seafood cream sauce, and ravioli is exactly the sort of ambitious project with the potential for wearing me out.

shrimp ravioli 2

In the end, I did manage to get everything made, and what’s even more impressive is that I managed to have fun the entire time. But, all told, I spent about six hours in the kitchen that day. It was glorious. And exhausting.

shrimp ravioli 4

Everything I made turned out really well, but if I had to choose a favorite, I think it would be these ravioli. Even more than the muffins and the crab cakes and the pizzelle, although that’s a tough choice. (Asparagus is not my favorite vegetable; it never stood a chance.) The crab cakes and muffins are probably a better value for your time, but who cares about time when you’re stuck inside on a Saturday?

shrimp ravioli 5

One year ago: Quinoa with Salmon, Feta, and Dill
Two years ago: Cheddar Shortbread
Three years ago: Tiramisu Cake
Four years ago: Peanut Butter Torte

Printer Friendly Recipe
Shrimp Ravioli in Shellfish Cream Sauce

6-8 first-course servings

I really liked the seafood sauce I made, but I only used a bare amount of it, because I didn’t want to overpower the filling.

1 tablespoon butter
1 carrot, peeled and chopped
1 shallot, diced
1 tablespoon tomato paste
1 garlic clove, minced
⅛ teaspoon red pepper flakes
¼ cup white wine
1 cup clam juice
8 ounces shrimp, shells on
8 ounces ricot
1 egg
2 tablespoons grated parmesan
2 tablespoons minced parsley
½ cup heavy cream
1 recipe of fresh pasta, rolled to the second-to-last setting

1. For the seafood broth: In a medium saucepan over medium heat, heat the butter just until the foaming subsides. Add the carrot and shallot and cook, stirring occasionally, until the shallots start to brown around the edges. Add the tomato paste, garlic, and red pepper flakes; cook and stir until fragrant, about a minute. Increase the heat to medium-high, and add the white wine, clam juice, and the shrimp with their shells. Bring to a boil, then reduce the heat to medium-low to maintain a simmer. Remove the shrimp when they curl and turn pink, after about 3 minutes. Peel the shrimp and return the shells to the broth. Simmer uncovered for 20 minutes. Strain the broth, reserving the liquid and discarding the solids.

2. For the filling: Transfer the cooked shrimp to a food processor fitted with the steel blade. Pulse until minced. Combine the shrimp with the ricotta, egg, parmesan, and parsley.

3. For the ravioli: Place one rounded teaspoon of filling every 3 inches along the length of a pasta sheet. Using a pastry brush or your fingers, wet the pasta along the edges and in between the rounds of filling. If the pasta sheet is at least 4 inches wide, fold it lengthwise over the filling. If the pasta sheet is too thin to fold lengthwise, lay a second pasta sheet over the filling. Press around each ball of filling to seal the two layers of pasta together. Use a pizza roller to cut between the filling to form squares of ravioli. Transfer the formed ravioli to a dry dish towel until ready to cook (there’s no need to cover it). Repeat with the remaining dough and filling.

4. Bring a large pot of water to a boil; add a tablespoon of salt and lower the heat until the water is at a lively simmer. Cook the ravioli in small batches until al dente, 2 to 3 minutes, using a skimmer or large slotted spoon to remove the ravioli from the boiling water.

5. For the sauce: Combine the heavy cream and strained seafood broth in a small saucepan. Bring to a boil over medium-high heat, reduce the heat to medium, and simmer until thickened, 6-10 minutes. Gently toss the sauce with the drained ravioli; serve immediately.

shrimp ravioli 8

goat cheese scallion muffins

goat cheese scallion muffins 4

Goat cheese scallion muffins don’t sound very similar to garlic cheddar biscuits, and yet when Dave said these reminded him of Red Lobster’s Cheddar Bay biscuits, I agreed. They have some things in common – there’s cheese and aromatics in both, but goat cheese and cheddar are very different beasts. Besides, who would think that a muffin and a biscuit would have such similar textures?

goat cheese scallion muffins 1

It’s probably because I mixed the batter like I would a biscuit, by cutting the goat cheese into the dry ingredients before stirring in the liquids. The original recipe might have been more muffin-like, with a layer of goat cheese baked between dollops of dough, but I wanted bits of goat cheese spread evenly throughout the muffin. I also used buttermilk instead of milk, counting on the former’s sour tang to add the “zing” that many reviewers complained was missing from muffins made with the original recipe.

goat cheese scallion muffins 3

I must have done something right, because these had plenty of flavor; the goat cheese stood out nicely. It’s hard to say if they live up to the legacy of Red Lobster’s deservedly popular biscuits, but as irresistible as those are, they have one thing those don’t – goat cheese. And plenty of zing.

goat cheese scallion muffins 6

One year ago: Double/Triple Chocolate Cookies
Two years ago: Orange Oatmeal Currant Cookies
Three years ago: Burnt Sugar Ice Cream
Four years ago: Strawberry Cheesecake

Printer Friendly Format
Goat Cheese Scallion Muffins (adapted from Gourmet via epicurious)

Makes 12 muffins

1½ cups (7.2 ounces) all-purpose flour
2 teaspoons baking powder
½ teaspoon salt
1 teaspoon sugar
⅛ teaspoon baking soda
4 scallions, minced
1 egg
6 tablespoons butter, melted and cooled slightly
1 cup buttermilk
4 ounces goat cheese

1. Heat the oven to 400 degrees. Spray the bottoms of a 12-cup muffin pan with nonstick spray or line with paper liners. In a large bowl, combine the flour, baking powder, salt, sugar, baking soda, and scallions. In a small bowl, whisk together the egg, butter, and buttermilk.

2. Using a pastry blender, cut the goat cheese into the flour mixture until the largest cheese pieces are about pea-sized. Add the liquid ingredients; use a rubber spatula to stir until just combined.

3. Divide the batter evenly between the prepared muffin cups. Bake until a toothpick inserted into a muffin comes out clean, 18-22 minutes. Set the pan on a rack to cool slightly, about 5 minutes, then use a thin-bladed knife to remove the muffins from the pan. Serve warm.

goat cheese scallion muffins 5

pizza with lamb meatballs, caramelized onions, and parsley

lamb meatball pizza 7

The disadvantage of only working every other Friday is that the longer 5-day weeks seem like an eternity. When will it end? How can it be only Tuesday/Wednesday/Thursday? I have to wake up to an alarm again? Torture! It’s not that I don’t like my job, it’s just that I like the weekends so much more.

lamb meatball pizza 1

I get by by keeping my eye on the prize, and by “prize”, I mean when I come home from work on Friday afternoon, grab my book and a beer, and go sit in the backyard. I plan the rest of my week so that Friday after work is a No Chore Zone. The groceries should be shopped for, the dishwasher should be emptied, the house should not be a pigsty. I don’t want any detours between putting down my work bag and heading out to the backyard to read in the sun.

lamb meatball pizza 2

An hour or two later, refreshed, I’ll come in to make dinner. These long weeks always call for pizza on Friday. If I lived somewhere with a good takeout option, I would welcome that, but instead, I make my own, which has the added advantage of whole wheat crust and skim milk cheese (I think it melts better anyway). Not to mention – when was the last time you saw lamb meatballs on a pizza menu?

lamb meatball pizza 3

This pizza, one of the best I’ve made recently, is a perfect example of my pizza formula, with savory lamb, sweet onions, bitter parsley, and the traditional acidic tomato sauce and salty cheese. It’s more work than your average pizza, what with the onions needing to be cooked and, most tediously, the tiny meatballs, but it’s worth the extra effort, even on a Friday night after a long workweek – provided that I get my beer and book in the backyard first.

lamb meatball pizza 5

One year ago: Marbled Loaf Cake
Two years ago: Corned Beef Hash
Three years ago: Roasted Baby Artichokes
Four years ago: Rice and Beans

Printer Friendly Format
Pizza with Lamb Meatballs, Caramelized Onions, and Parsley (inspired by Bon Appétit)

Serves 6

I tried this with both fresh mozzarella and the firmer type, and while they were equally tasty, the firmer cheese did a better job of gluing the meatballs to the pizza. Lamb meatballs that roll onto the floor to get coated in cat hair are sad.

12 ounces ground lamb
1 egg
salt
freshly ground black pepper
2 tablespoons olive oil, divided
2 onions, halved and sliced 1/4-inch thick
2 pounds pizza dough (⅔ of this recipe), fully risen
1 (14-ounce) can whole or diced tomatoes packed in juice (not puree), drained
8 ounces (2 cup) shredded mozzarella
1 ounce (½ cup) grated parmesan
¼ cup minced parsley

1. Use your hands to evenly combine the lamb, egg, ½ teaspoon salt, and a pinch of black pepper. Form the mixture into balls about ½-inch in diameter. In a 10-inch nonstick skillet, heat 1 tablespoon oil over medium-high heat until almost smoking. Add the meatballs and cook until well browned on a couple sides, about 4 minutes, turning about once a minute with a spatula. Wipe out the skillet.

2. Heat the remaining tablespoon of oil in the now-empty skillet over medium-high heat until shimmering; stir in the onions and a pinch of salt, and cook, stirring frequently, until the onions just begin to brown, about 8 minutes. Reduce heat to medium-low and cook, stirring frequently, until the onions have softened and are medium golden brown, about 15 minutes longer.

3. Meanwhile, place a pizza stone on the bottom rack of the oven and preheat the oven to 500 degrees. Divide the dough in half; shape each portion into a ball. Let the balls of dough relax for 10 to 30 minutes.

4. Pulse the tomatoes in a food processor 10-12 times, until they’re pureed. Transfer them to a fine-mesh strainer set over a large bowl and let them drain, stirring occasionally, for at least 10 minutes. Discard the liquid in the bowl, transfer the tomatoes from the strainer to the now-empty bowl, and stir in a pinch of pepper and ⅛ teaspoon of salt.

5. Flatten the dough, then pick it up and gently stretch it out, trying to keep it as circular as possible. Curl your fingers and let the dough hang on your knuckles, moving and rotating the dough so it stretches evenly. If it tears, piece it together. If the dough stretches too much, put it down and gently tug on the thick spots.

6. Line a pizza peel (or the back of a baking sheet) with parchment paper and transfer the round of dough to the peel, rearranging it to something reasonably circular. Spread half of the sauce over the dough, then top with half of the mozzarella, meatballs, onions, and parmesan. Transfer the pizza to the hot pizza stone. Bake for 8-10 minutes, until the cheese is bubbling and the bottom of the crust is spotty brown. Remove the pizza from the oven, sprinkle half of the parsley over it, and let it cool on cooling rack for about 5 minutes before slicing and serving. Repeat with the remaining ingredients.

lamb meatball pizza 8

gougeres

gougeres 4

My list of 2012 goals isn’t going too well. I’m keeping up, for the most part (although it has not escaped my attention that the date on this April entry is May 1st), but I haven’t had great successes with all of the recipes. January started off strong, with the lettuce wraps and black bean brownies – which I even made far enough before the deadline that I could try them again with some changes. I was also happy with the ranch dressing.

gougeres 1

But then things started going downhill. The fancy rice krispy treats fell victim to my refusal to go back to the store for a missing ingredient; the mozzarella got skipped entirely while I search for the right type of milk; the dolmades tasted good but mostly fell apart; and the gougères? I suppose they had the opposite problem. They look just fine – puffy and golden – but they were sadly lacking in cheese flavor.

gougeres 2

And so, I’m writing this down so I don’t forget: Stop buying the Gruyere sold in this little town. I did this once before and didn’t learn my lesson then. It has the fancy label, but it tastes like wax.

gougeres 3

So maybe this wasn’t my greatest cooking success, although at least it wasn’t a huge fail – they look nice, after all. And as an added bonus, I realized that I’ve already made a recipe that, while it didn’t hold the title of gougères, is nearly the same thing made with cheddar and green onions. I guess I could have checked this one off the list of goals years ago! Maybe this list isn’t going so badly after all.

gougeres 7

One year ago: Fig-Glazed Burgers with Onion Jam
Two years ago: Home Corned Beef
Three years ago: Chocolate Cream Tart
Four years ago: Fluted Polenta and Ricotta Cake

Printer Friendly Recipe
Gougères (reworded slightly from David Lebovitz)

Makes 24-30

I was paranoid about my eggs cooking in the hot saucepan before they could be incorporated into the dough, so I transferred the flour mixture to another bowl before adding the eggs.

½ cup water
3 tablespoons butter, cut into cubes
¼ teaspoon salt
big pinch of chile powder, or a few turns of freshly-ground black pepper
½ cup (2.4 ounces) all-purpose flour
2 large eggs
¾ cup (about 3 ounces) grated gruyere, or another hard cheese

1. Preheat the oven to 425 degrees. Line a baking sheet with parchment paper or a silicone baking mat.

2. Heat the water, butter, salt, and chile or pepper in a saucepan until the butter is melted. Add the flour all at once and stir vigorously until the mixture pulls away from the sides of the pot into a smooth ball. Remove from heat and let rest two minutes.

3. Add the eggs, one at a time, whisking constantly. The batter will first appear lumpy, but after a minute or so, it will smooth out. Add most of the grated cheese, reserving some for topping; stir until well-mixed.

4. Scrape the mixture into a pastry bag fitted with a wide plain tip and pipe the dough into mounds, evenly-spaced apart, making each about the size of a small cherry tomato. (You can also divide the dough into mounds using two spoons.) Top each puff with a bit of the remaining cheese.

5. Bake for 10 minutes, then turn the oven down to 375 degrees; bake for an additional 20 to 25 minutes, until the gougeres are golden brown. Serve warm.

gougeres 6

tiramisu

tiramisu 12

I got confused when my coworker told me, while studiously avoiding eye contact, that the only thing they needed to figure out for another coworker’s rehearsal dinner was the dessert. I started trying to evaluate our previous history of eye contact. Was the lack of eye contact normal between us, or was that a hint? I was willing to help her out, but I was going to feel awfully silly if I jumped in to bake for thirty people I’d never met if it wasn’t necessary.

tiramisu 5

Well, I did volunteer, of course, because it was an opportunity to make desserts without eating them all myself! The dinner had an Italian theme, with big pans of lasagna, loaves of garlic bread, and pots of Italian wedding soup, so tiramisu was a natural choice. It didn’t hurt that I’d made this recipe once, years ago, and had wanted a reason to make it again ever since.

tiramisu 6

It’s the perfect balance of sweet and bitter and tinged with alcohol. The ladyfingers soak up just enough of the coffee and rum to turn soft and cakey, but not enough to get mushy. The creamy mascarpone layer is like a rich custard filling between layers of cake. The cocoa and grated chocolate (optional, but I added it) provide a welcome hint of chocolate, but it doesn’t dominate.

tiramisu 8

I made a double batch for the party (and was lucky enough to have a friend come over to dip and arrange nearly a hundred ladyfingers in the pan) and kept a tiny taster serving for myself. It was a smart move, because there wasn’t one bit leftover from the rehearsal dinner. Savoring my tiramisu at home that night, I didn’t regret volunteering to bake this dessert one bit.

tiramisu 13

One year ago: Lemon Ricotta Strawberry Muffins
Two years ago: Slaw Tartare
Three years ago: Chocolate Amaretti Torte
Four years ago: Breakfast Strata with Sausage, Mushrooms, and Monterey Jack

Printer Friendly Recipe
Tiramisù (from Cook’s Illustrated)

Cook’s Illustrated’s notes: Brandy and even whiskey can stand in for the dark rum. Cook’s Illustrated prefers a tiramisù with a pronounced rum flavor; for a less potent rum flavor, halve the amount of rum added to the coffee mixture in step 1. Do not allow the mascarpone to warm to room temperature before using it; it has a tendency to break if allowed to do so. Be certain to use hard, not soft ladyfingers.

2½ cups strong black coffee, room temperature
1½ tablespoons instant espresso powder
9 tablespoons dark rum
6 large egg yolks
⅔ cup (4.67 ounces) sugar
¼ teaspoon table salt
1½ pounds mascarpone cheese
¾ cup heavy cream (cold)
14 ounces ladyfingers (42 to 60, depending on size)
3½ tablespoons cocoa, preferably Dutch-processed
¼ cup semisweet or bittersweet chocolate, grated (optional)

1. Stir coffee, espresso, and 5 tablespoons of the rum in a wide bowl or baking dish until the espresso dissolves; set aside.

2. In the bowl of a standing mixer fitted with the whisk attachment, beat the yolks at low speed until just combined. Add the sugar and salt and beat at medium-high speed until pale yellow, 1½ to 2 minutes, scraping down the bowl with a rubber spatula once or twice. Add the remaining 4 tablespoons rum and beat at medium speed until just combined, 20 to 30 seconds; scrape the bowl. Add the mascarpone and beat at medium speed until no lumps remain, 30 to 45 seconds, scraping down the bowl once or twice. Transfer the mixture to a large bowl and set aside.

3. In the now-empty mixer bowl (there’s no need to clean the bowl), beat the cream at medium speed until frothy, 1 to 1½ minutes. Increase the speed to high and continue to beat until the cream holds stiff peaks, 1 to 1½ minutes longer. Using a rubber spatula, fold one-third of the whipped cream into the mascarpone mixture to lighten, then gently fold in the remaining whipped cream until no white streaks remain. Set the mascarpone mixture aside.

4. Working with one at a time, drop half of the ladyfingers into the coffee mixture, roll, remove, and transfer to 13 by 9-inch glass or ceramic baking dish. (Do not submerge the ladyfingers in the coffee mixture; the entire process should take no longer than 2 to 3 seconds for each cookie.) Arrange the soaked cookies in a single layer in the baking dish, breaking or trimming the ladyfingers as needed to fit neatly into the dish.

5. Spread half of the mascarpone mixture over the ladyfingers; use a rubber spatula to spread the mixture to the sides and into the corners of the dish and smooth the surface. Place 2 tablespoons of the cocoa in a fine-mesh strainer and dust the cocoa over the mascarpone.

6. Repeat the dipping and arrangement of ladyfingers; spread the remaining mascarpone mixture over the ladyfingers and dust with the remaining 1½ tablespoons cocoa. Wipe the edges of the dish with a dry paper towel. Cover with plastic wrap and refrigerate for 6 to 24 hours. Sprinkle with the grated chocolate, if using; cut into pieces and serve chilled.

tiramisu 11

ultimate seven-layer dip

seven layer dip 4

Seven layer dip has become a holiday tradition in my family, and most of the work is usually assigned to a son-in-law. The rest of us have long-since fallen into a routine; my mom makes the turkey, my sister makes mashed potatoes, my brother makes stuffing, my dad is coerced into making the green bean casserole. For a long time, my mom asked my sister’s husband to make seven layer dip, but recently, that job has often gone to Dave.

seven layer dip 1

With a can of refried beans, sour cream, mayonnaise, cheese, and guacamole, it’s an irresistible treat best saved for holidays. When I saw Cook’s Illustrated’s version, I thought I might be able to lighten it up. This recipe uses canned black beans, pureed with seasonings, for the bean layer. The sour cream could easily be replaced with lower fat Greek yogurt. Chopped salsa-like vegetables added freshness.

seven layer dip 2

It creates a number of extra steps that result in this recipe being considerably more effort than Dave would be willing to exert – I think. Because it also resulted in a dip that Dave and I both raved about as we ate. Dave, vegetable lover that he is, loves the lighter, fresher taste. For me, the biggest difference was that every bite wasn’t full of guilt. That’s worth some extra effort.

seven layer dip 5

One year ago: Strawberry Daiquiri Ice Cream
Two years ago: Chicken Fajitas
Three years ago: Black Bean Squash Burritos
Four years ago: Lemon Cream Tart

Printer Friendly Recipe
Ultimate Seven-Layer Dip (from America’s Test Kitchen Feed)

Serves 8 to 10

CI note: This recipe is usually served in a clear dish so you can see the layers. For a crowd, double the recipe and serve in a 13 by 9-inch glass baking dish. If you don’t have time to make fresh guacamole as called for, simply mash 3 avocados with 3 tablespoons lime juice and ½ teaspoon salt.

This is exactly the original recipe. I made just a few small changes: Greek yogurt for the sour cream, cheddar for the pepper Jack, and I made a simple guacamole as described in Cook’s Illustrated’s note, above.

4 large tomatoes, cored, seeded, and chopped fine
2 jalapeño chiles, seeded and minced
3 tablespoons minced fresh cilantro
6 scallions, 2 minced and 4 with green parts sliced thin (white parts discarded)
2 tablespoons fresh lime juice plus 2 teaspoons, from 2 limes
¼ teaspoon salt
1 can black beans (16-ounces), drained but not rinsed
2 cloves minced garlic
¾ teaspoon chili powder
1½ cups sour cream
4 cups (16 ounces) shredded pepper Jack cheese
3 cups chunky guacamole
Tortilla chips for serving

1. Combine the tomatoes, jalapeños, cilantro, minced scallions, and 2 tablespoons lime juice in a medium bowl. Stir in ⅛ teaspoon salt and let stand until the tomatoes begin to soften, about 30 minutes. Strain the mixture into a bowl and discard the liquid.

2. Pulse the black beans, garlic, remaining lime juice, chili powder, and remaining salt in the food processor until it resembles a chunky paste. Transfer to a bowl and wipe out the food processor. Pulse the sour cream and 2½ cups (10 ounces) of the cheese until smooth. Transfer to a separate bowl.

3. Spread the bean mixture evenly over the bottom of an 8-inch square glass baking dish or 1-quart glass bowl. Spread the sour cream mixture evenly over the bean layer, and sprinkle evenly with the remaining cheese. Spread the guacamole over the cheese and top with the tomato mixture. Sprinkle with the sliced scallions and serve with tortilla chips. (The dip can be refrigerated for up to 24 hours. Let the dip stand at room temperature for 1 hour before serving.)

seven layer dip 6