barbecue cowboy beans

cowboy beans 7

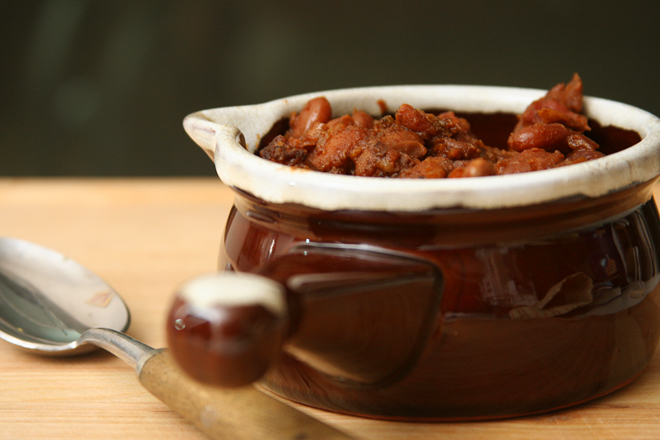
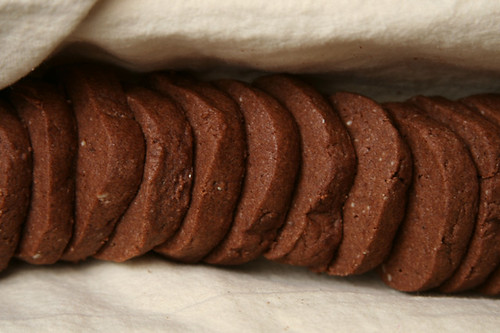
I feel like I should wait and do a comparison post with this recipe, because I have a friend who makes some seriously good cowboy beans. Hers are full of meat with a dominant sweet flavor. They’re always one of my favorite dishes on the potluck table.

cowboy beans 2

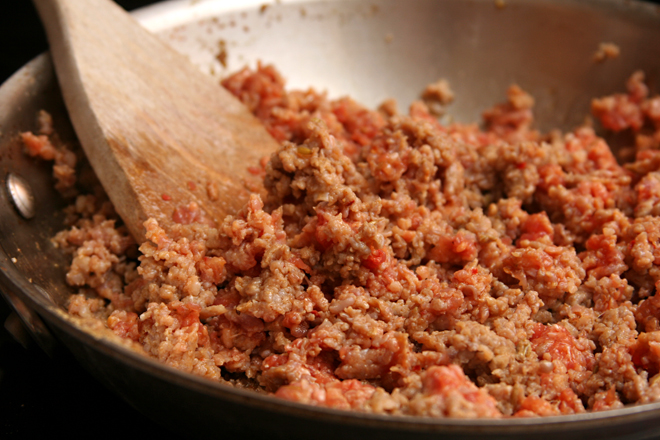
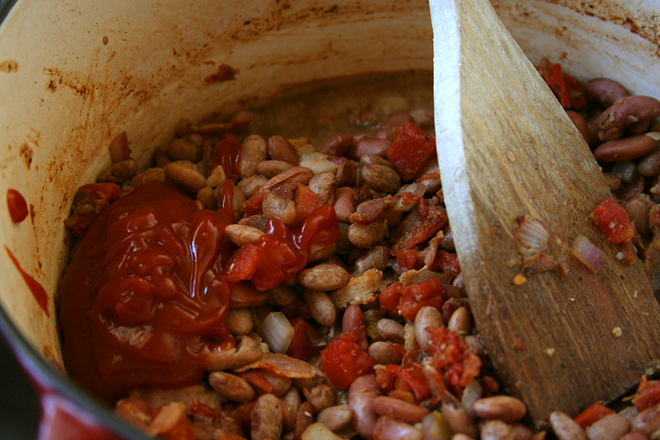
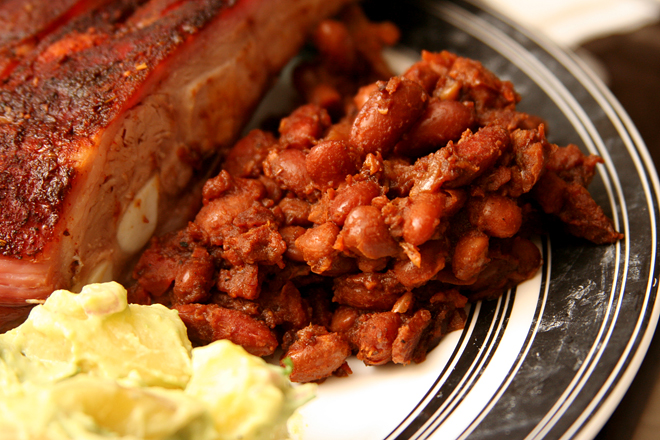
For my own version though, I wanted something lighter to serve as a side dish to barbecued ribs. When you’re spending hours cooking big slabs of meat, you don’t really need ground beef in your side dish. A few slices of bacon provide plenty of meaty depth, combined with sweet-bitter molasses and a slew of acidic ingredients like ketchup and beer.

cowboy beans 3

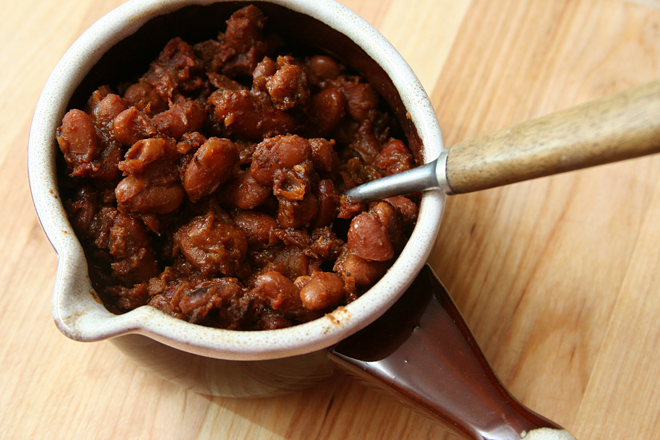
To be honest, I’m not sure what makes a pot of beans “cowboy” instead of just “baked.” A lot of recipes contain ground meat, but not all of them. This is the only one with spicy chiles. But honestly, I don’t much care. What matters most is that these are perfect along barbecued meat, and if I want a chile-less, meatier version, I can have that too.

cowboy beans 4

One year ago: Grilled Pita Breads
Two years ago: Whole Wheat Bagels
Three years ago: Amaretto Cheesecake
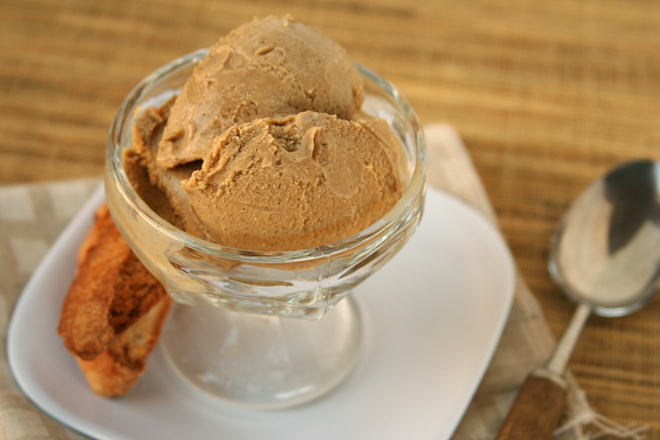
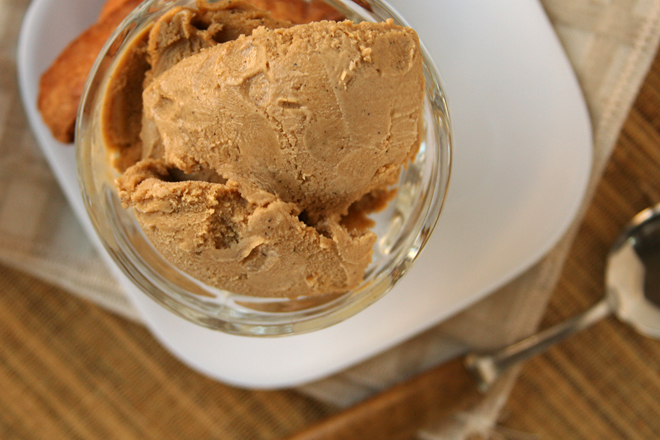
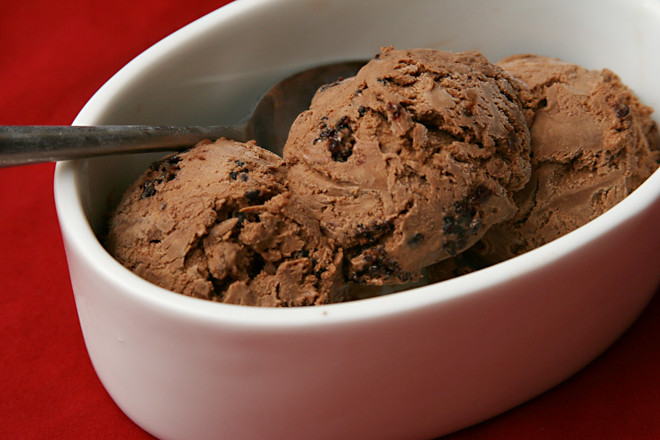
Four years ago: Blackberry Swirl Ice Cream

Printer Friendly Recipe
Barbecue Cowboy Beans (adapted from Something Edible)

Serves 6

If you don’t want to buy two kinds of beans, feel free to choose one or the other.

I didn’t use the liquid smoke because I didn’t have any, so I can’t attest to how it affects the beans. I doubt adding smoky flavor would be a bad thing though.

6 ounces (about 1 cup) dry pinto beans, rinsed and sorted
2 ounces (about ⅓ cup) dry kidney beans
salt
6 slices (about 6 ounces) bacon, chopped
½ medium onion, chopped
2 cloves garlic, minced
1 teaspoon allspice ground
½ teaspoon ground coriander
½ teaspoon ground black pepper
1 teaspoon dry mustard
¼ cup beer
1 (10-ounce) can diced tomatoes with chiles
¼ cup ketchup
¼ cup molasses
1 tablespoon cider vinegar
1 teaspoon hickory liquid smoke (optional)

1. Heat the oven to 300 degrees. Place the beans and 1 teaspoon salt in a 5-quart Dutch oven; add enough water to cover the beans by 1½ inches. Bring the water to a boil over medium-high heat, then cover the pot and transfer it to the oven. Cook for 75 minutes, until the beans are tender. Drain the beans. Increase the oven temperature to 400 degrees.

2. Add the bacon to the now-empty Dutch oven. Cook over medium heat until fat begins to render, 3-4 minutes. Add the onion and cook, stirring occasionally, until softened and translucent, 5-6 minutes. Add the garlic, allspice, coriander, black pepper, and mustard; cook, stirring constantly, until fragrant, about 1 minute. Add the beer and scrape the bottom of the pot to release the browned bits. Add the tomatoes and chiles with their juice, the ketchup, molasses, cider vinegar, liquid smoke (if using), and 1 teaspoon salt. Bring to a simmer over medium-high heat.

3. Cover and transfer the beans to the oven. Bake for 4 hours. Serve.

cowboy beans 5

coffee gelato

coffee gelato 4

I knew before going to Italy last fall that gelato was A Thing there, but because ice cream isn’t A Thing with me, I figured I would try some to say I did and that would be that. It turns out, though, that I vastly misjudged my penchant for gelato. By the end of the trip, in my obsessive travel journal, in which I recorded everything we did (“sat in the square some more” sums up most of my memories from Siena) and every meal we ate, I was adding notes on what flavor of gelato I ate each day.

coffee gelato 1

I miss a lot of things about that trip to Italy; daily gelato is just one of many, in addition to cappuccino every morning, wine at lunch and dinner, and a couple breathtaking sites per day. Daily gelato isn’t a good idea in real life anyway, but I wondered if I could even replicate it at home. What, exactly, is the difference between Italian gelato and American ice cream?

coffee gelato 3

It turns out that gelato has less air churned into it, which means that it can be made with less fat and still feel creamy. It also means that it’s easy to make something similar at home, simply by churning it in your ice cream mixer for less time. I can’t say it was as good as what we had in Italy, but then, I might feel differently if I had eaten it while sitting in the square some more.

coffee gelato 5

One year ago: Summer Berry Pie
Two years ago: Triple Chocolate Espresso Brownies
Three years ago: Mushroom Salad
Four years ago: Mixed Berry Cobbler

Printer Friendly Recipe
Coffee Gelato (adapted from David Lebovitz’s The Perfect Scoop)

Makes about 1 pint

I accidentally used twice this amount (so ½ cup) of coffee beans. It seemed to work, and I didn’t think the coffee flavor was overpowering, but I’m sure ¼ cup will get the job done just fine too.

2 cups whole milk
¾ cup (5.25 ounces) sugar
¼ cup coffee beans, coarsely ground
1 vanilla bean, halved lengthwise, seeds scraped out
pinch of salt
1 cup heavy cream, divided
5 egg yolks
1 teaspoon vanilla

1. In a medium saucepan over medium heat, warm the milk, sugar, coffee beans, vanilla pod and seeds, salt, and ½ cup cream until steaming but not boiling. Remove the pot from the heat, cover, and steep for 1 hour at room temperature.

2. Fill a large bowl one-third full of ice water. Set a medium bowl in the larger bowl and set a fine-mesh strainer in the medium bowl.

3. Reheat the milk mixture over medium heat until steaming. Meanwhile, in a small bowl, whisk the egg yolks. When the milk it hot, very slowly pour it into the yolks, whisking constantly. Once about half the milk is mixed into the yolks, pour the egg mixture into the remaining milk in the pot. Heat over medium heat, whisking constantly, until the mixture thickens enough to coat the back of a spoon, 5-6 minutes.

4. Pour the custard through the fine-mesh strainer into the medium bowl set over ice. Add the remaining ½ cup heavy cream and the vanilla. Let the custard cool to room temperature, stirring occasionally. Cover and refrigerate until cold.

5. Freeze the ice cream custard in your ice cream maker according to the manufacturer’s instructions. Once frozen to the consistency of a thick custard (not as thick as the soft serve consistency you’d look for in American ice cream), transfer the ice cream to a chilled bowl and freeze until firm.

coffee gelato 6

sausage and spinach stuffed shells

stuffed shells 8

When I was a kid and cooked dinner for my family once or twice a week, stuffed shells from a freezer bag topped with jarred spaghetti sauce was one of my staples. It took 5 minutes to arrange the shells in a baking dish and dump the sauce over them, and another five minutes to make a salad from iceberg lettuce and mealy out-of-season tomatoes. My mom hated when I made this meal, but not as much as she hated the prospect of cooking dinner for a family of five every day after work. Who can blame her – for wanting a break and for not enjoying my pre-teen culinary prowess?

stuffed shells 2

These shells took longer to prepare than my standby meal as a kid, but at least by adding spinach to the filling and making my own (less-processed) tomato sauce, I figured I could skip the bland side salad. But I wasn’t just trying to add fiber to my meal, I wanted more flavor than the shells of my youth, which were stuffed with nothing but plain ricotta cheese.

stuffed shells 3

First, Italian sausage contributes more than just savory meatiness, but a range of spices. Spinach would provide earthiness (plus I had a bunch to use up). The ricotta would be richer and smoother – and, okay, fine, you can use regular store-bought ricotta too, if you haven’t become spoiled by the homemade stuff like others of us. The tomato sauce on top would be fresher and sweetened just slightly with nothing but lightly caramelized onions.

stuffed shells 4

This is a far cry from those pasta shells I made as a kid. For old time’s sake, though, I still ate them the same way I did back then, trimming off one corner of each shell for the first bite, then the next corner, then dividing the remaining square of pasta and filling into four equal bites. The biggest difference is that this filling is packed full of flavor – plus it took me almost an hour to make dinner instead of ten minutes.

stuffed shells 6

One year ago: Bourbon Bread Pudding for Tuesdays with Dorie
Two years ago: Toasted Vegetable Subs
Three years ago: Floating Islands for Tuesdays with Dorie
Four years ago: Comparison of 4 Vanilla Frosting recipes

Printer Friendly Recipe
Sausage and Spinach Stuffed Shells

Serves 6

You probably won’t use the whole box of shells, but a lot of them might be broken or could rip after being boiled, so it’s nice to have some extra.

Feel free to use whatever your favorite tomato sauce is. I’ve provided the recipe I used  below, which is a simple sauce I like for serving over rich pastas with a lot of their own flavors, like these shells.

1 (12-ounce) box jumbo pasta shells
salt
16 ounces Italian sausage
1 onion, diced
3 cloves garlic, minced
¼ teaspoon red pepper flakes
5 ounces spinach leaves, washed, coarsely chopped
1 (15-ounce) container ricotta (or 2 cups homemade ricotta)
8 ounces (2 cups) provolone, shredded
1 ounce (½ cup) parmesan, grated
2 eggs
Simple Tomato Sauce (recipe below, or 4 cups of your own sauce)

1. Adjust a rack to the middle position and heat the oven to 350 degrees.

2. Bring a large pot with at least 4 quarts of water to a boil. Add 1 tablespoon salt and the pasta shells; cook according to the package instructions. When the pasta is tender, use a large slotted spoon to transfer the shells to a dish towel.

3. Meanwhile, in a large skillet over medium-high heat, cook the sausage, breaking up large pieces, until it is no longer pink and has rendered some fat. Add the onion and ½ teaspoon salt; continue to cook, stirring occasionally, until the sausage is browned and the onion is softened. Add the garlic and red pepper flakes, stirring constantly for about 30 seconds, until fragrant. Remove the pan from the heat and stir in the spinach leaves, letting the residual heat wilt the leaves. Transfer the mixture to a large bowl; stir in the ricotta, provolone, parmesan, and eggs.

4. Lightly coat the bottom of a 9 by 13-inch baking dish with tomato sauce. Fill each shell with 3 to 4 tablespoons of filling. Transfer the filled shells to the baking dish. After all of the shells are filled, evenly distribute the remaining sauce over the shells. Cover the dish with aluminum foil.

5. Bake for 20 minutes; remove the foil and bake for about 10 minutes longer, until bubbling around the edges. Let rest 5 minutes before serving.

Simple Tomato Sauce

Makes about 4 cups

Chop the tomatoes right in the can using kitchen shears. You can use diced tomatoes instead, but they won’t break down as the sauce simmers.

2 teaspoons olive oil
½ small onion or 1 large shallot, diced fine
¼ teaspoon salt
2 cloves garlic, minced
¼ cup red or white wine
2 (28-ounce) cans whole tomatoes, undrained, chopped
1 tablespoon minced basil and/or parsley

In a large saucepan over medium heat, heat the oil until it flows like water when the pan is tilted. Add the onion and salt and cook, stirring occasionally, until the onion just starts to brown around the edges, about 8 minutes. Add the garlic and red pepper flakes and cook, stirring constantly, until fragrant, about 30 seconds. Add the wine, scraping up any browned residue on the bottom of the pan. Increase the heat to medium-high and add the tomatoes with their juice. Bring to a simmer, then reduce the heat to medium-low and simmer, stirring occasionally, about 15-20 minutes, until the sauce is thickened. Stir in the basil or parsley.

stuffed shells 9

pasta with tiny meatball sauce

tiny meatball sauce 15

I haven’t been this excited about a cookbook in a while. This is the type of cookbook that makes me eager to get into the kitchen, particularly because I want to make every recipe in the book. I thought I would start with one of the most involved recipes, one of those “choose your own adventure” recipes that has you page flipping to find all the different components.

tiny meatball sauce 11

The first is fresh pasta, which I’ve made before, but the recipe in the book differed from my usual with the inclusion of semolina, salt, nutmeg, and, most significantly, oil. Once the pasta was cooked and sauced, I didn’t notice the extra flavorings, but the oil seemed to make rolling easier. I also made a new shape that required less rolling and cooked up pleasantly toothsome.

tiny meatball sauce 1

The second part is the sauce, which is a slow-cooked meat sauce, but with a twist. Instead of simmering the sauce with ground meat, or with beef meant to be shredded and added back to the sauce, the meat is kept in this sauce through hours of simmering, and then is removed. And not added back in. The meat is not part of the sauce, it’s just there to infuse it with flavor. It’s like you’re making tomato broth.

tiny meatball sauce 2

The last part, then, is the tiny meatballs. It’s a simple mixture, no bread for tenderizing, just meat, seasoning, and an egg to bind it. The recipe instructs you to form the meatballs “just larger than a chickpea”, but I’m not insane and would prefer to stay that way, so my tiny meatballs were about twice that size, and still plenty tiny for me. Twelve ounces of meat turned into 72 tiny meatballs.

tiny meatball sauce 7

I loved the tiny meatballs. I can see myself making them again sometime, even though I do not love forming tiny meatballs. I’ve also started to add a dribble of olive oil into my pasta dough, although I skip the semolina, nutmeg, and salt for simplicity’s sake.

tiny meatball sauce 8

While I enjoyed everything about the sauce – the flavor, the plateful of tomatoey meat we ate as an appetizer, the fun of braising – I’ll make it differently in the future. The original recipe calls for three types of meat, and it’s impractical for most home cooks to buy small portions of a variety of meats. Instead, I’ll just stick to our favorite – lamb – and I’ll use a bony cut like blade chops, because I suspect the bone will add even more flavor to the sauce than the meat did.

tiny meatball sauce 9

Obviously making a slow-braised sauce, homemade pasta, and forming 72 tiny meatballs is not an insignificant amount of effort. But it was the most fun I’ve had in the kitchen in months, with the added bonus that I learned some new tricks. I can’t wait to choose another recipe from my favorite new cookbook and do it again.

tiny meatball sauce 14

One year ago: Curry Coconut Chickpea Soup
Two years ago: Baked Ziti
Three years ago: Fresh Ginger and Chocolate Gingerbread
Four years ago: Deviled Eggs with Tuna

Printer Friendly Recipe
Maccheroni alla Chitarra with Ragù all’Abruzzese and Palottine, aka Pasta with Tiny Meatball Sauce (completely rewritten but hardly changed from Domenica Marchetti’s The Glorious Pasta of Italy)

Serves 8

I went ahead and bought three different types of meat for this, but I don’t think it’s necessary. Pick your favorite and buy just that one cut.

I don’t usually cook with veal, so I used 8 ounces ground beef plus 4 ounces ground pork plus ⅛ teaspoon gelatin, dissolved in the egg, in the meatballs instead.

Ragù:
2 (28-ounce) cans whole tomatoes with their juice
2 tablespoons olive oil
6 ounces boneless beef chuck roast, cut into four equal pieces
6 ounces boneless pork shoulder, cut into three equal pieces
6 ounces boneless lamb shoulder cut into three equal pieces
Salt
Freshly ground black pepper
1 onion, finely diced

Pasta:
4 cups (18 ounces) all-purpose flour
2 tablespoons semolina flour
1 teaspoon table salt
Pinch ground nutmeg
6 large eggs
2 tablespoons extra virgin olive oil

Meatballs:
12 ounces ground veal
½ teaspoon salt
Pinch freshly grated nutmeg
1 large egg, lightly beaten
Vegetable oil for cooking

1. For the ragù: If you have a food mill, press the tomatoes through the disk with the smallest holes, discarding the solids. If you don’t have a food mill, puree the tomatoes in a food processor or blender.

2. Generously season the meat with salt and black pepper. In a 5-quart Dutch oven over medium-high heat, heat the oil until it just starts to smoke. Add the meat and cook, without moving, until deeply browned on one side, about 2 minutes. Rotate the meat and brown on the second side. Transfer the meat to a plate.

3. Reduce the heat to medium, add the onion, and cook, stirring occasionally, until the onion softens but does not brown, about 4 minutes. Add the tomatoes, raise the heat to medium-high, and bring to a simmer. Add the meat back to the pot, reduce the heat to medium-low, and simmer, uncovered, for about 3 hours, until the meat is tender and the sauce is thickened. Remove the meat before using the sauce; reserve for another use (or just eat it right then, because it’s delicious).

4. For the pasta: Place the flours, salt, and nutmeg in the bowl of a food processor; pulse to combine. Add the eggs and oil; process until the mixture clumps together in large crumbs. Form a small portion of dough into a ball; if it’s too dry to stick together, add up to 2 tablespoons more oil; if it’s sticky, add up to ½ cup more flour. Wrap the dough in plastic wrap and set it aside for 30 minutes to rest.

5. Divide the dough into 8 portions. Work with one at a time, keeping the others covered with plastic wrap or a damp dishtowel. Flatten the dough and pass it through a pasta roller on the widest setting. Fold the dough in thirds, like a letter, and roll it through the widest setting again. Repeat the rolling and folding 3-4 more times, until the dough is smooth. Flour the dough (with semolina flour if you have it) as much as needed to prevent sticking. Adjust the pasta roller to the next-thinnest setting and roll the dough through twice, then repeat on the third-thinnest setting. Thin the dough to the fourth-narrowest setting on your pasta roller. Repeat the rolling, folding, and thinning with the remaining balls of dough. Pass each strip of dough through the thin cutters on the pasta roller to form long noodles that are approximately square in cross section.

6. For the meatballs: Use your hands to evenly combine the veal, salt, nutmeg, and egg. Form the mixture into balls about ½-inch in diameter.

7. In a 12-inch skillet, heat 3 tablespoons oil over medium-high heat until almost smoking. Add the meatballs, and cook until well browned a couple sides, about 4 minutes, turning about once a minute with a spatula. Transfer to the pot with the ragù; keep warm.

8. Bring a large pot of water to a boil. Add about a tablespoon of salt and the pasta and cook until al dente, about 5 minutes. Drain, reserving about a cup of the cooking water.

9. Return the drained pasta to the pot; toss with about two-thirds of the sauce and meatballs, adding some of the reserved cooking water if the sauce is too thick. Transfer the pasta to a warmed serving bowl (or individual bowls) and spoon the remaining sauce over the top. Serve immediately, with parmesan and crushed red pepper flakes to pass.

tiny meatball sauce 13

berry chocolate ice cream

chocolate berry ice cream 6

I’m not a big ice cream lover. When I saw how rich and thick and chocolately this custard was right before being churned into ice cream, I was tempted to leave it just like that. The only thing that stopped me was knowing I wouldn’t be able to resist something so like chocolate mousse.

chocolate berry ice cream 2

So I poured it into the ice cream maker. After a few minutes, I tested a spoonful to see how it would taste when it was partially frozen. And then I tested more and more spoonfuls, until it became clear that any claims I might want to make about not loving ice cream are wishful thinking.

chocolate berry ice cream 3
pre-frozen, like smooth rich chocolate pudding

Laurie chose this for Tuesdays with Dorie, and she has the recipe posted. Other than adding a pinch of salt to bring out the flavors and using the boysenberry preserves I had in my fridge instead of buying blueberry preserves, I followed the recipe exactly.  I’m glad I did, because Dorie is right about how well the dark chocolate and bright berries compliment each other.

One year ago: Oreo Cheesecake Cookies
Two years ago: English Muffins
Three years ago: Cranberry Orange Muffins

chocolate berry ice cream 4

lentil marinara

lentil marinara 5

When my coworker came back to work after spending weeks in the hospital (and in my small town, that means a hospital over two hours away from home) with his sick newborn baby, I figured they could use a home-cooked meal. I thought tomato soup, homemade bread, and some nice cheese to make grilled sandwiches would be the perfect comfort food. Unfortunately, it would require a trip to the store and a couple free hours to cook, and when I saw how exhausted my friend was, I figured getting something to him soon was more important than getting the perfect meal to him.

lentil marinara 1

So I made extras of what I was having for dinner that night. Spaghetti is warm and familiar, so fits the comfort food bill, and who doesn’t like the pasta and tomato sauce combination? The lentils, though, might seem strange to some people.

It makes perfect sense to me, because lentils are a great protein source, and while I can’t claim that they taste like beef, there is something meaty-like about them. Besides, what’s more comforting than knowing that your dinner is not only delicious, it’s healthy?

lentil marinara 2

And now I have another friend who needs comfort food after the death of her father on Thanksgiving day. Unfortunately, I can’t just bring her my leftovers, because she lives a thousand miles away. I don’t think virtual comfort food is quite the same, but at least she’ll know I’m thinking about her and her family and wishing them the best during a difficult time.

lentil marinara 3

One year ago: Pasta with Brussels Sprouts and Pine Nuts
Two years ago: Thai-Style Chicken Soup
Three years ago: Pumpkin Ginger Muffins

Printer Friendly Recipe
Lentil Marinara (adapted from Branny Boils Over)

6-8 servings

I simmered this for 30-45 minutes, but, if you have the time, I suspect that a longer simmering time while covered would really help the lentils absorb the tomato flavor.

I like canned whole tomatoes for sauce because they break down better, but if you don’t mind larger tomato chunks in your sauce, diced tomatoes will work fine. I chop canned whole tomatoes by sticking kitchen shears into the can and snipping away.

Update 4/23/12 – I’ve made this a couple more times, and I’ve decided that it’s probably too heavy on the lentils.  Using up a whole bag at once is nice, but 8 ounces of lentils for 2 cans of tomatoes will make a tastier sauce.

2 tablespoons oil
1 onion, diced
4 garlic cloves, minced
¼ teaspoon red pepper flakes
½ teaspoon oregano
¼ cup white or red wine
2 (28-ounce) cans whole tomatoes, coarsely chopped
1 (1-pound) bag brown lentils, rinsed and picked over
3 cups water
1 teaspoon salt

1. In a large saucepan over medium heat, heat the oil until it flows like water when the pan is tilted. Add the onion and a pinch of salt and cook, stirring occasionally, until the onion just starts to brown around the edges, about 8 minutes. Add the garlic and red pepper flakes and cook, stirring constantly, until fragrant, about 30 seconds.

2. Add the wine, scraping any browned residue on the bottom of the pan. Increase the heat to medium-high and add the remaining ingredients. Bring to a simmer, then reduce the heat to medium-low and cook, stirring occasionally, about 30 minutes, until the lentils are tender and the sauce is thickened.

lentil marinara 4

cheddar puffs with green onions

cheddar puffs 5

Are you afraid of yeast? Or at least resistant to adding complicated rising schedules to your already-stressful Thanksgiving to-do list? Try these puffs instead of yeast bread. They take about 10 minutes to put together, and you can shape the dough and freeze it until the big day. Then you just pop them in the oven while the turkey rests.

cheddar puffs 2

I admit that they don’t make the best gravy mop, but they have such great flavor on their own that you don’t really want to bury it anyway – even with this gravy. They resemble cream puffs, except instead of a sweet creamy filling, they’re full of onions bits and shredded cheese. They taste perfect with the turkey, and they fit perfectly into the turkey roasting schedule.

cheddar puffs 3

Two years ago: Croissants (Martha Stewart)
Three years ago: Asian Peanut Dip

Printer Friendly Recipe
Cheddar Puffs with Green Onions (adapted from Bon Appétit via epicurious)

Makes 24 puffs

½ cup water
2 tablespoon butter, cut into 4 pieces
¼ teaspoon salt
½ cup + 1 tablespoon (2.7 ounces) all-purpose flour
2 large eggs
3 ounces grated extra-sharp cheddar cheese
¼ cup minced green onions

1. Heat the oven to 375 degrees. Line 2 baking sheets with parchment paper.

2. Bring the water, butter, and salt to a boil in a heavy medium saucepan. Remove from the heat; mix in the flour. Stir over medium heat until the mixture becomes slightly shiny and pulls away from sides of the pan, about 3 minutes; transfer to a stand mixer fitted with the paddle attachment. Add the eggs one at a time, mixing well after each addition to form a sticky dough. Mix in the cheese and green onions.

3. Divide the dough into 24 equal portions; drop onto the baking sheet one inch apart. (Can be made ahead. Wrap in plastic, then foil. Refrigerate up to 2 days or freeze up to 2 weeks.)

3. Bake the cheese puffs until golden, about 30 minutes if at room temperature and 35 minutes if chilled or frozen. Serve immediately.

cheddar puffs 4

chocolate allspice cookies

chocolate allspice cookies 5

September is an ambiguous time. School and football, two signs of fall, have started. Labor Day is over. It might not be meltingly hot out every single day. On the other hand, that all important sign of autumn, fire-colored leaves, hasn’t started except in the most extreme of climates. And besides, tomatoes are still in season. Everyone knows that tomatoes belong to summer.

chocolate allspice cookies 1

When I lived in upstate New York, where summer was disappointingly short, I refused to acknowledge fall until October 1st. I wouldn’t make anything with pumpkin or apples, and I wouldn’t buy candy corn for Dave. (I’m mean.)

chocolate allspice cookies 2

But come October 1st, I was all about fall. I love it for all the reasons everyone loves fall – the colors, the chill, the apple cider. We don’t get any of those things in southern New Mexico, so I welcome what little there is here that feels like fall, no matter when it happens.

Dave thinks anything with ginger or allspice or cloves tastes like Christmas. I say it tastes like fall. And even in early September, I’m not complaining.

chocolate allspice cookies 3

Jessica, who chose these cookies for Tuesdays with Dorie, has the recipe posted. I doubled the spice, plus I freshly ground my allspice berries in a coffee grinder just before mixing the dough. I also increased the salt.  I had ground almonds to use up, so I made the dough in the mixer instead of the food processor.

One year ago: Peanut Butter Crisscrosses
Two years ago: Espresso Cheesecake Brownies
Three years ago: Chocolate Whopper Malted Drops

chocolate allspice cookies 4

pesto

pesto 4

Pesto is super simple, right? Just dump some ingredients into the food processor, and thirty seconds later, you have pesto. And while that’s true, with a few extra simple steps, you can ensure that your pesto will live up to its maximum potential every single time.

pesto 1

Traditionally, pesto was made in a mortar and pestle, which smashes the ingredients into each other instead of cutting them like the food processor does. It sounds horribly tedious. You don’t want to do that.

pesto 2

However, it is important to do more than slice basil with the food processor blade. Consider that when you want to smell an herb, what do you do? You rub it between your fingers, not tear it in half, because bruising the leaves is what produces flavor. So to maximize the flavor of your basil, you need to bruise the leaves before cutting them.

pesto 3

You can do this with almost no extra effort using a trick I picked up from Jamie Oliver – just put the basil in the food processor, but with the plastic dough blade instead of the knife blade. It takes only a few seconds longer and produces just one more small utensil to clean, but it makes a big difference in flavor. Before I started using this trick, sometimes my pesto would taste grassy, but now it always tastes basil-y.

pesto 8

You probably also know that toasting nuts brings out their flavor, and it isn’t hard to do on the stovetop. I also like to toast the garlic, because I am not a fan of the tongue-stinging sharpness of raw garlic. Toasting the unpeeled cloves in a dry skillet tames garlic’s bite with very little effort. And that’s it – you’ve maximized the potential of every ingredient in pesto, ensuring dependably outstanding pesto, and it only took an extra minute or two.

pesto 7

One year ago: Yogurt-Marinated Lamb Kebabs
Two years ago: Tortellini Soup with Carrots, Peas, and Leeks
Three years ago: Summer Rolls

Printer Friendly Recipe
Pesto

2 ounces pine nuts
2 cloves garlic, unpeeled
Salt
1 large bunch (6 ounces) basil leaves, washed and dried
1-3 tablespoons extra virgin olive oil
½ ounce (¼ cup) freshly grated parmesan

1. Heat a small empty not-nonstick skillet over medium heat for several minutes. Add the pine nuts and cook, stirring constantly, for about a minute, until they’re golden brown and fragrant. Pour the nuts into a food processor bowl fitted with the knife attachment. Add the garlic to the skillet and toast, without stirring, for about 1 minute. When the first side is dark brown, turn the garlic cloves onto another flat side and continue toasting for another minute. Peel the garlic and transfer it to the food processor with the pine nuts.

2. Add ¼ teaspoon salt to the garlic and pine nuts. Process until the nuts and garlic are finely ground, 10-15 seconds. Replace the knife attachment with the plastic dough blade. Add the basil to the food processor and pulse until the basil is bruised and fragrant, about ten 1-second pulses. Remove the dough blade from the bowl and return the knife attachment. Process until basil is finely chopped, a few seconds.

3. With the machine running, slowly pour the oil into the feed tube. Scrape the sides of the bowl; process until evenly mixed. Stir in the parmesan. Serve, refrigerate for a few days, or freeze for months.

pesto 5

green pea ravioli in lemon broth

My notes call this Saturday night cooking adventure “Light Italian Meal”. I was experimenting with wet scallops – scallops that have been treated with sodium triphosphate to help them retain moisture. Cooks Illustrated has a recipe designed to make wet scallops palatable, so I gave it a go. I tried to keep the rest of the meal relatively light to compliment the scallops, starting with these ravioli, then moving onto insalata di crudita before serving the seared scallops with almond cream sauce. Pinot grigio and whole wheat ciabatta accompanied every part of the meal.

This was the only recipe I made that night that I was really excited by. The only reason the ciabatta doesn’t qualify is because I didn’t follow much of a recipe, and the salad, although crisp and fresh, was a fairly typical side salad. The scallops were a disaster. Not only was the almond cream sauce too rich, but the scallops themselves didn’t brown until they had overcooked into balls of rubber. What’s worse, while I set them aside to finish the sauce, the cooked scallops released a freaky blue liquid. I choked a down few and filled up on bread.

I wish I had made enough ravioli to fill up on those, rather than teasing myself with a small starter course serving. These pasta pouches with their vibrant filling were the highlight of my meal that night. There aren’t many ingredients in the filling, but each one has something to offer: the peas are both sweet and earthy, the shallots are bright, the parmesan salty. This humble mixture might have not had much to live up to compared to the rest of the meal, but it would have been just as special on its own.

One year ago: Vodka Gimlets
Two years ago: Pasta with Roasted Red Pepper Sauce
Three years ago: Cinnamon Rolls

Printer Friendly Recipe
Green Pea Ravioli with Lemon Broth (adapted from Gourmet via epicurious)

6 servings

I’ve doubled the amount of filling, because I only had enough filling for 9 ravioli, not the 18 the original recipe indicates.

Pasta:
1⅓ cups (6.4 ounces) all-purpose flour
2 eggs, lightly beaten

Filling:
2 cups baby peas, defrosted
1 tablespoon olive oil
2 shallots, minced
Salt
6 tablespoons freshly grated parmesan
6 tablespoons fresh bread crumbs

Broth:
4 cups chicken broth
2 garlic cloves, smashed
1 teaspoon freshly grated lemon zest
Squeeze fresh lemon juice

Garnish: fresh chervil or parsley and cooked peas

1. Combine the flour and eggs until smooth (either by hand, with a food processor, or with a stand mixer). Add more flour if the dough is sticky or more water if it’s crumbly. If you stick a dry finger into the center of the dough, it should come out nearly clean. Wrap the dough in a damp towel and set aside to rest while you prepare the filling.

2. Force the peas through the fine disk of a food mill into a bowl to remove their skins. Heat the oil in a small skillet over medium heat; add the shallot and a pinch of salt; cook until shallot is softened, 3-4 minutes, stirring occasionally. Combine the pea puree, cooked shallot, parmesan, and bread crumbs.

3. Divide the dough into 6 portions. Working with one portion at a time, flatten it and fold in thirds, like a letter. Roll it through the widest setting on a pasta roller. Repeat the folding and rolling 3-4 more times, flouring the dough as needed to prevent sticking. Adjust the pasta roller to the next thinnest setting; roll the pasta sheet through. Continue thinning the pasta until the next-to-thinnest setting. Lay the thinned pasta sheet on a dry dish towel. Repeat with the remaining portions of pasta.

4. Place one rounded teaspoon of filling every 3 inches along the length of a pasta sheet. Using a pasta brush or your fingers, wet the pasta in between the rounds of filling. If the pasta sheet is at least 4 inches wide, fold it lengthwise over the filling. If the pasta sheet is too thin to fold lengthwise, lay a second pasta sheet over the filling. Press around each ball of filling to seal the two layers of pasta together. Use a pizza roller to cut between the filling to form squares of ravioli. Store the ravioli on a dry dish towel (there’s no need to cover it). Repeat with the remaining dough and filling.

5. Combine the broth, garlic, lemon zest, and salt and pepper to taste in a saucepan; bring to a simmer. Lower the heat and cover to keep warm.

6. Bring a large pot of water to a boil; add a tablespoon of salt and lower the heat until the water is at a lively simmer. Cook the ravioli in small batches until al dente, 2 to 3 minutes, using a skimmer or large slotted spoon to remove the ravioli from the boiling water. Divide the cooked ravioli between six soup bowls.

7. Discard the garlic in the broth. Ladle the hot broth over the ravioli. Garnish with herbs and cooked peas, if desired; serve immediately.