pizza with caramelized onions and fennel

After a year and a half living in a small town, I still haven’t fully adjusted to the grocery store situation. I don’t think I’ve walked out of the store here once without thinking wistfully of Wegman’s. My new store isn’t a bad place; I’m just spoiled. They do occasionally stock random items, and I’ve learned to jump on those opportunities and worry about finding recipes later.

Sometimes I buy the item just to encourage the store to keep it up. In the last few months, we’ve eaten haricot vert, Copper River salmon, yellow carrots, and now fennel. Since I moved here, I’ve bitterly overlooked fennel recipes, thinking my fennel days were over, and then once I found fennel, I could only remember one of those recipes.

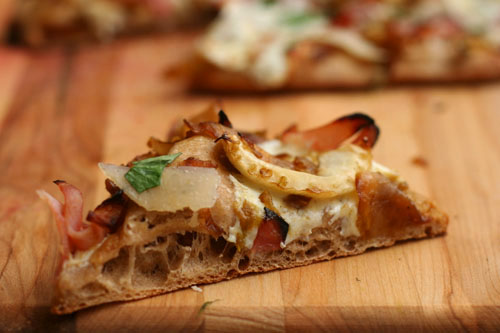
It’s a memorable recipe because it has a lot going for it. For one thing, it’s pizza, which is always good, but it’s even better since I’ve started playing with a new crust recipe recently (which will be the next blog entry). For another, the onions and fennel are caramelized, and who doesn’t like turning vegetables into candy?

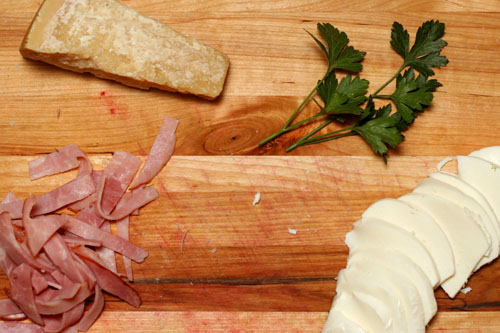
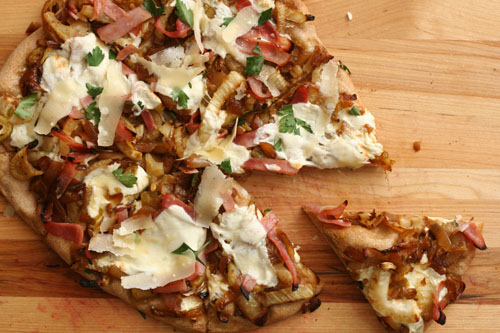
Lindsay laments that this pizza was pale and homely, so I added some color in the form of black forest ham (ideally prosciutto, but my store was out of it) and a sprinkle of parsley. Not only is the splatter of pink and scattering of green welcome, but the salty bites of ham and bitter bits of parsley complimented the sweet onions and the licorice of the fennel. It’s too bad I don’t know when the next time I’ll find fennel is, because I’d love to make this one again.

One year ago: Quinoa Tabbouleh
Two years ago: Croissants
Three years ago: Franks and Beans

Printer Friendly Recipe
Pizza with Caramelized Onions, Fennel, and Fresh Mozzarella (adapted from Love and Olive Oil)

Serves 6

I cooked the onions and fennel separately (not because I love doing dishes and wanted to use more than necessary; I had leftover caramelized onions to be used), and I found that the fennel didn’t caramelize, it just browned slightly. It may behave differently if onions are around.

1 pound pizza dough, fully risen and at room temperature (½ of this recipe)
1 tablespoon olive oil
1 large onion, thinly sliced
1 large fennel bulb, cored and thinly sliced
Salt
8 ounces whole-milk fresh mozzarella cheese, coarsely grated
4 ounces prosciutto, cut into slivers
freshly shaved Parmesan cheese
sprinkling parsley

1. Place a pizza stone on the bottom rack of the oven and preheat the oven to 500ºF. Divide the dough in two and shape each portion into a ball. Set the balls of dough aside, loosely covered, to allow the gluten to relax.

2. Heat the oil in a medium nonstick skillet over medium heat. Add the onions, fennel, and ¼ teaspoon salt; cook, stirring occasionally, until the onions start to brown, about 5 minutes. Reduce the heat to medium-low and continue cooking and occasionally stirring until the onions are golden brown, about 15 minutes.

3. Work with one ball of dough at a time on a lightly floured surface or a damp cloth. Flatten the dough, then pick it up and gently stretch it out, trying to keep it as circular as possible. Curl your fingers and let the dough hang on your knuckles, moving and rotating the dough so it stretches evenly. If it tears, piece it together. If the dough stretches too much, put it down and gently tug on the thick spots. Transfer the round of dough to a large square of parchment paper; slide onto a pizza peel.

4. Top the dough with half of each of the caramelized vegetables, cheese, and prosciutto. Slide the pizza with the parchment onto the hot baking stone. Bake for 8-10 minutes, until the crust is browned around the edges. Transfer the pizza to a cooling rack without the parchment; top with parmesan slivers and a sprinkle of parsley. Let the pizza rest for 5 minutes before serving. Repeat with the remaining ingredients.
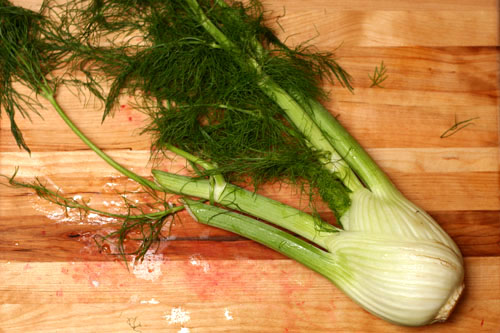
semolina bread

Supposedly, my freezer is organized to have a shelf for meat, one for bread, one for prepared foods, and one for ingredients (mostly green chile and egg whites). In reality, bread tends to find its way onto each of the other shelves and eventually takes over. During my last freezer overhaul, I gave baked bread its own shelf and bread dough got moved to the ingredient shelf, which has plenty of open space now because we are, sadly, almost out of last year’s crop of green chile.

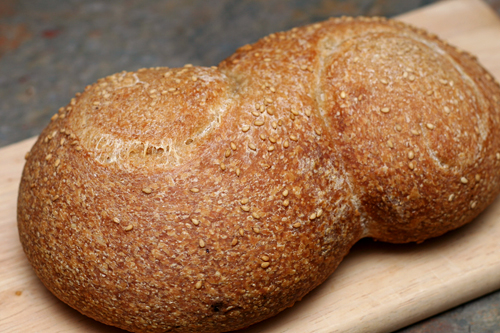
Besides our weekday snack supply of muffins (for Dave) and whole wheat bagels (for me), there’s usually homemade hamburger buns, hot dog buns, and sandwich thins, several bags of pizza dough, odds and ends of loaves whose genesis I don’t remember, and both baked and unbaked versions of whatever rustic bread I’m playing with at the time. The lovely s-curve of this semolina bread recipe caught my eye as soon as I got Peter Reinhart’s Bread Baker’s Apprentice, years ago. I know I could have used that shape for any free-form loaf, but I saved it until I made the recipe it accompanies.

The three loaves of this semolina bread, one baked immediately and two frozen after shaping, didn’t last long in the freezer. I found every opportunity to bake up another loaf of this chewy golden bread. I’d start a new batch if there was any room in the freezer for what we don’t eat in one night.

One year ago: Brown Sugar Cookies
Two years ago: Brandied Berry Crepes
Three years ago: Breakfast Strata with Mushrooms, Sausage and Monterey Jack

Printer Friendly Recipe
Semolina Bread (adapted from Pane Siciliano from Peter Reinhart’s Bread Baker’s Apprentice)

1 recipe pate fermentée (recipe follows)
1¾ cups (8 ounces) bread flour
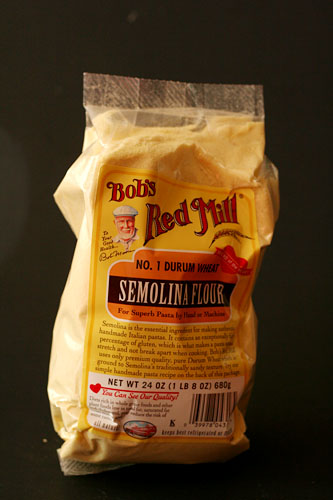
1¾ cups (8 ounces) semolina flour
1¼ teaspoon salt
1¼ teaspoon instant yeast
2 tablespoons olive oil
1 tablespoon honey
1¼ cups water, room temperature
sesame seeds

1. Remove the pate fermentée from the refrigerator 1 hour before mixing the final dough.

2. Stand mixer: Mix the pate fermentée, flours, salt, yeast, oil, honey, and water in the bowl of a stand mixer fitted with the dough hook. Mix on medium-low speed until the dough is elastic and supple, about 8 minutes. You may need to add a little more flour or water to get the correct consistency – smooth and tacky, but not sticky. Transfer the dough to an oiled bowl and cover with plastic wrap or a damp dishtowel.

By hand: Cut the pate fermentée into 8-12 pieces. Mix the flours, salt, and yeast in a large bowl. Make a well in the middle of the dry ingredients and add the pate fermentée, olive oil, honey, and water. Stir the mixture until the dough comes together. Transfer it to a floured board or countertop and knead, incorporating as little flour as possible, for about 10 minutes, until the dough is elastic and supple. You may need to add a little more flour or water to get the correct consistency – smooth and tacky, but not sticky. Transfer the dough to an oiled bowl and cover with plastic wrap or a damp dishtowel.

3. Ferment at room temperature for about 2 hours, until the dough doubles in size.

4. Divide the dough into three equal portions. Very gently pull the edges of each portion around to one side and pinch them together to form a ball. Roll the dough between the palm of your hand and a lightly floured board or a damp kitchen towel (my preferred method). With the seam side up, push the sides of your thumbs into the dough, pulling the dough into an oblong. Pinch the seam together; repeat the process once more on the same dough ball to form a rope. Roll the rope, pushing it out into a longer rope, until it’s about 24 inches long. If it resists you at any point, let it rest for a few minutes before trying again. Then, working with each end simultaneously, coil the dough toward the center, forming an S-shape. Arrange the shaped loaves on parchment paper and sprinkle them with sesame seeds. Cover loosely with plastic wrap and refrigerate overnight.

5. The next day, remove the dough from the refrigerator. Let it warm up and, if necessary, finish rising, which will take a couple hours. The dough is ready to bake when it has doubled in size and remains dimpled when poked.

6. While the dough is rising, place a baking stone on the bottom rack of the oven and a heavy metal baking pan on the top rack. Heat the oven to 500 degrees.

7. Transfer the risen loaves with the parchment paper to the hot baking stone. Pour 1 cup hot water into the metal pan on the top rack and close the door. After 30 seconds, open the door and spritz the sides of the oven with water. Repeat twice more at 30 second intervals. After the final spray, lower the oven temperature to 450 degrees and bake for 25 to 30 minutes longer, until the crust is golden brown and the internal temperature is between 200 and 205 degrees.

8. Transfer the bread to a wire rack; cool 45 minutes before serving.

Pate fermentée

1⅛ cups (5 ounces) unbleached all-purpose flour
1⅛ cups (5 ounces) unbleached bread flour
¾ teaspoon salt
½ teaspoon instant yeast
¾ cup to ¾ cup plus 2 tablespoons (6 to 7 ounces) water

1. Stir together the flours, salt, and yeast in a 4-quart bowl (or in the bowl of a standing mixer). Add ¾ cup of the water, stirring until everything comes together and makes a coarse ball (or mix on low speed for 1 minute with the paddle attachment). Adjust the flour or water, according to need, so that the dough is neither too sticky nor too stiff. (It is better to err on the sticky side, as you can adjust easier during kneading. It is harder to add water once the dough firms up.)

2. Sprinkle some flour on the counter and transfer the dough to the counter. Knead for 4 to 6 minutes (or mix on medium speed with the dough hook for 4 minutes), or until the dough is soft and pliable, tacky but not sticky. The internal temperature should be 77 to 81 degrees.

3. Lightly oil a bowl and transfer the dough to the bowl, rolling it around to coat it with oil. Cover the bowl with plastic wrap and ferment at room temperature for 1 hour, or until it swells to about 1½ times its original size.

4. Remove the dough from the bowl, knead it slightly to degas, and return it to the bowl, covering the bowl with plastic wrap. Place the bowl in the refrigerator overnight. You can keep this in the refrigerator for up to 3 days, or freeze it in an airtight plastic bag for up to 3 months.

I’m donating my Bourbon Pound Cake to Bloggers Bake for Hope.  This and over fifty other treats are available to be shipped directly to you. You can bid on your favorites starting May 4th; all proceeds go to Massachusetts Komen for the Cure.


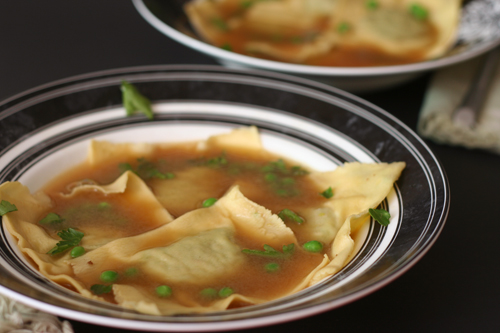
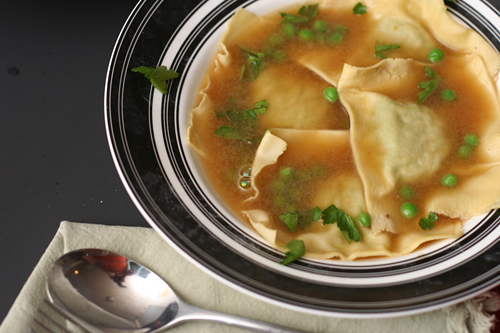
green pea ravioli in lemon broth

My notes call this Saturday night cooking adventure “Light Italian Meal”. I was experimenting with wet scallops – scallops that have been treated with sodium triphosphate to help them retain moisture. Cooks Illustrated has a recipe designed to make wet scallops palatable, so I gave it a go. I tried to keep the rest of the meal relatively light to compliment the scallops, starting with these ravioli, then moving onto insalata di crudita before serving the seared scallops with almond cream sauce. Pinot grigio and whole wheat ciabatta accompanied every part of the meal.

This was the only recipe I made that night that I was really excited by. The only reason the ciabatta doesn’t qualify is because I didn’t follow much of a recipe, and the salad, although crisp and fresh, was a fairly typical side salad. The scallops were a disaster. Not only was the almond cream sauce too rich, but the scallops themselves didn’t brown until they had overcooked into balls of rubber. What’s worse, while I set them aside to finish the sauce, the cooked scallops released a freaky blue liquid. I choked a down few and filled up on bread.

I wish I had made enough ravioli to fill up on those, rather than teasing myself with a small starter course serving. These pasta pouches with their vibrant filling were the highlight of my meal that night. There aren’t many ingredients in the filling, but each one has something to offer: the peas are both sweet and earthy, the shallots are bright, the parmesan salty. This humble mixture might have not had much to live up to compared to the rest of the meal, but it would have been just as special on its own.

One year ago: Vodka Gimlets
Two years ago: Pasta with Roasted Red Pepper Sauce
Three years ago: Cinnamon Rolls

Printer Friendly Recipe
Green Pea Ravioli with Lemon Broth (adapted from Gourmet via epicurious)

6 servings

I’ve doubled the amount of filling, because I only had enough filling for 9 ravioli, not the 18 the original recipe indicates.

Pasta:
1⅓ cups (6.4 ounces) all-purpose flour
2 eggs, lightly beaten

Filling:
2 cups baby peas, defrosted
1 tablespoon olive oil
2 shallots, minced
Salt
6 tablespoons freshly grated parmesan
6 tablespoons fresh bread crumbs

Broth:
4 cups chicken broth
2 garlic cloves, smashed
1 teaspoon freshly grated lemon zest
Squeeze fresh lemon juice

Garnish: fresh chervil or parsley and cooked peas

1. Combine the flour and eggs until smooth (either by hand, with a food processor, or with a stand mixer). Add more flour if the dough is sticky or more water if it’s crumbly. If you stick a dry finger into the center of the dough, it should come out nearly clean. Wrap the dough in a damp towel and set aside to rest while you prepare the filling.

2. Force the peas through the fine disk of a food mill into a bowl to remove their skins. Heat the oil in a small skillet over medium heat; add the shallot and a pinch of salt; cook until shallot is softened, 3-4 minutes, stirring occasionally. Combine the pea puree, cooked shallot, parmesan, and bread crumbs.

3. Divide the dough into 6 portions. Working with one portion at a time, flatten it and fold in thirds, like a letter. Roll it through the widest setting on a pasta roller. Repeat the folding and rolling 3-4 more times, flouring the dough as needed to prevent sticking. Adjust the pasta roller to the next thinnest setting; roll the pasta sheet through. Continue thinning the pasta until the next-to-thinnest setting. Lay the thinned pasta sheet on a dry dish towel. Repeat with the remaining portions of pasta.

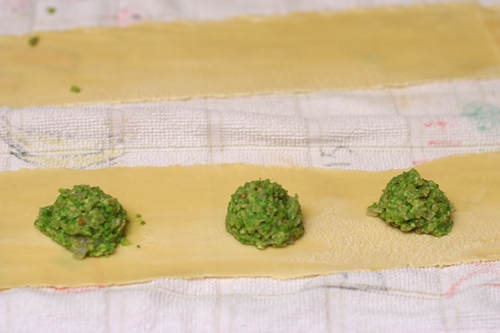
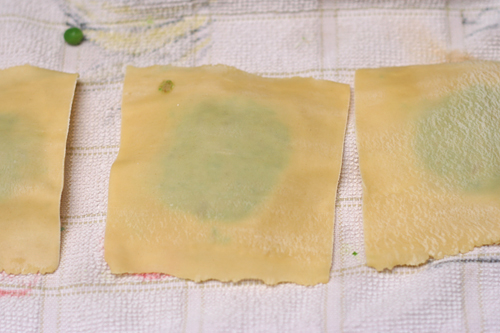
4. Place one rounded teaspoon of filling every 3 inches along the length of a pasta sheet. Using a pasta brush or your fingers, wet the pasta in between the rounds of filling. If the pasta sheet is at least 4 inches wide, fold it lengthwise over the filling. If the pasta sheet is too thin to fold lengthwise, lay a second pasta sheet over the filling. Press around each ball of filling to seal the two layers of pasta together. Use a pizza roller to cut between the filling to form squares of ravioli. Store the ravioli on a dry dish towel (there’s no need to cover it). Repeat with the remaining dough and filling.

5. Combine the broth, garlic, lemon zest, and salt and pepper to taste in a saucepan; bring to a simmer. Lower the heat and cover to keep warm.

6. Bring a large pot of water to a boil; add a tablespoon of salt and lower the heat until the water is at a lively simmer. Cook the ravioli in small batches until al dente, 2 to 3 minutes, using a skimmer or large slotted spoon to remove the ravioli from the boiling water. Divide the cooked ravioli between six soup bowls.

7. Discard the garlic in the broth. Ladle the hot broth over the ravioli. Garnish with herbs and cooked peas, if desired; serve immediately.

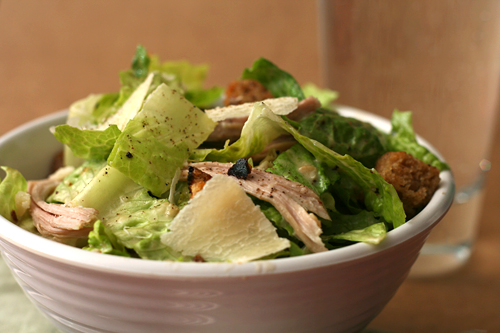
caesar salad

I didn’t always get Caesar salad. It seemed like it was just salad that was all lettuce and no goodies. Where’s the tomatoes, hard-boiled eggs, carrots, or cured meats?

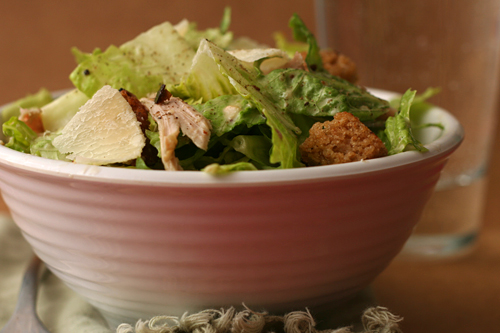
I understand now that that’s the point of it – that even without a range of colors, a salad can have a range of textures and flavors. Crisp lettuce, crunchy croutons, creamy dressing; salty parmesan, lightly bitter romaine, and most importantly, stinky garlic and wonderful savory anchovies.

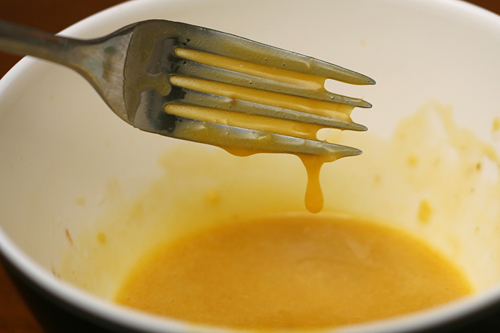
Not everyone thinks anchovies are wonderful, I know. Some people – people who are otherwise not picky at all despite their reticence toward brownies – think they’re actually quite disgusting. Those people were not implicitly told about the anchovies in this recipe, and even when the amount was accidentally doubled one time, those people (or the one of those people I regularly cook for) still raved about the salad. Do not fear the anchovy.

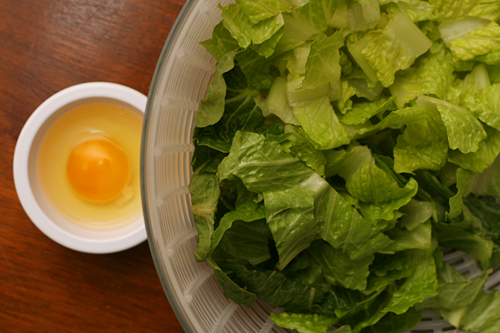
But if you want to fear the raw egg (which I do not, as we all know from my cookie dough habit), you may, because I tested this out with mayonnaise instead of the yolks, and it was nearly as good as the original. With the addition of some leftover shredded chicken, this salad becomes a simple (if surprisingly unhealthy) meal.

One year ago: Cherry Tomato Salad
Two years ago: Lemon Poppy Seed Waffles
Three years ago: Sushi Rolls

Printer Friendly Recipe
Caesar Salad (from Cooks Illustrated)

Serves 4

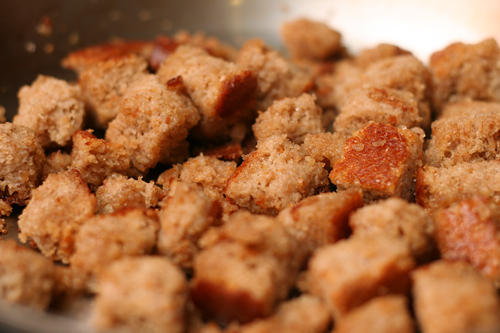
I confess that I did not care for this method of toasting the croutons. I was not able to achieve evenly browned croutons on the stovetop, probably because I wasn’t willing to use the full amount of oil. I’ll reproduce the original recipe below, but in the future, I’ll toast the lightly oiled croutons the oven and then toss them with the oil/garlic mixture.

If you don’t want to work with raw egg, substitute 1-2 tablespoons of mayonnaise for the yolks.  This will result in a slightly thicker dressing, but not a bad one.

Croutons:
5 tablespoons extra virgin olive oil
1 medium garlic clove, pressed through a garlic press (or pureed on the tines of a fork)
5 cups (¾-inch) ciabatta bread cubes
¼ cup water
¼ teaspoon table salt
2 tablespoons finely grated Parmesan

Salad:
1 large garlic clove, pressed through a garlic press (or pureed on the tines of a fork)
2-3 tablespoons juice from 1 to 2 lemons
½ teaspoon Worcestershire sauce
6 anchovy fillets, mashed to a paste with a fork (1 tablespoon)
2 large egg yolks
5 tablespoons canola oil
5 teaspoons extra virgin olive oil
1½ ounces (¾ cup) finely grated Parmesan
Ground black pepper
2-3 romaine hearts, cut crosswise into ¾-inch-thick slices, rinsed, and dried very well (8-9 lightly pressed cups)

1. For the croutons: Combine 1 tablespoon oil and garlic paste in small bowl; set aside. Place bread cubes in large bowl. Sprinkle with water and salt. Toss, squeezing gently so bread absorbs water. Place remaining 4 tablespoons oil and soaked bread cubes in 12-inch nonstick skillet. Cook over medium-high heat, stirring frequently, until browned and crisp, 7 to 10 minutes.

2. Remove skillet from heat, push croutons to sides of skillet to clear center; add garlic/oil mixture to clearing and cook with residual heat of pan, 10 seconds. Sprinkle with Parmesan; toss until garlic and Parmesan are evenly distributed. Transfer croutons to bowl; set aside.

3. For the salad: Whisk garlic paste and 2 tablespoons lemon juice together in large bowl. Let stand 10 minutes.

4. Whisk Worcestershire sauce, anchovies, and egg yolks into garlic/lemon juice mixture. While whisking constantly, drizzle canola oil and extra virgin olive oil into bowl in slow, steady stream until fully emulsified. Add ½ cup Parmesan and pepper to taste; whisk until incorporated.

5. Add romaine to dressing and toss to coat. Add croutons and mix gently until evenly distributed. Taste and season with up to additional 1 tablespoon lemon juice. Serve immediately, passing remaining ¼ cup Parmesan separately.

scampi fra diavolo

I remember last semester, when I was teaching in the evenings, I had all these plans for what I wanted to do once the semester ended. I was going to organize my recipes and study photoshop and learn Italian and basically rule the world. Instead, I’ve been cooking.

So if you’re in my little town on a Saturday night, the best meal in town is at my house. There’ll be appetizers, there’ll be wine, there’ll be some sort of meaty main course, there’ll be a dessert you have no room for but can’t resist anyway. There’ll probably be bread. In between courses, there’ll be live music courtesy of Dave. You’re all invited! Just keep in mind that I live hundreds of miles from a major airport. Plus Dave thinks you’re all secretly rapists. Okay, I take it back, you’re not invited.

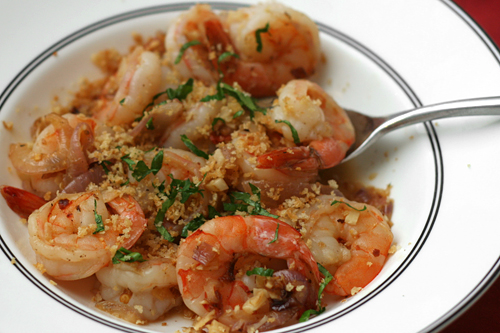
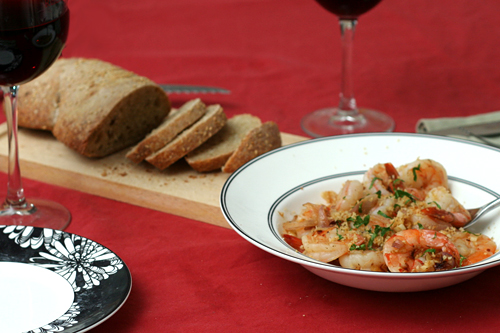
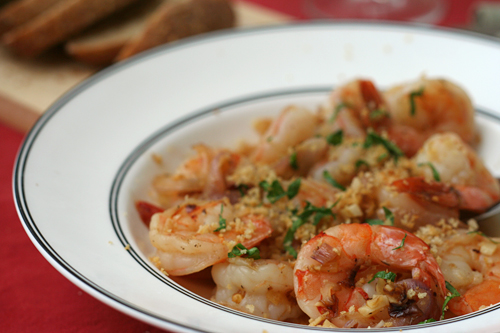
Which is too bad, because you’ll be missing out on some good food, the best of which I believe was this shrimp. A cross between the bright flavors of shrimp scampi and the heat of shrimp fra diavolo (“shrimp of the devil”), this fresh spicy dish was the perfect opening to a evening of cooking and eating. Around these parts, that’s just an average Saturday night.

One year ago: Whole Wheat Brioche
Three years ago: Almost No-Knead Bread

Scampi fra Diavolo (tweaked from Bon Appétit via epicurious)

3 tablespoons butter, divided
⅓ cup panko (Japanese breadcrumbs)
½ cup chopped fresh Italian parsley, divided
1¼ pounds uncooked large shrimp, peeled, deveined, tails left intact
2 tablespoons olive oil
1½ cups thinly sliced red onion
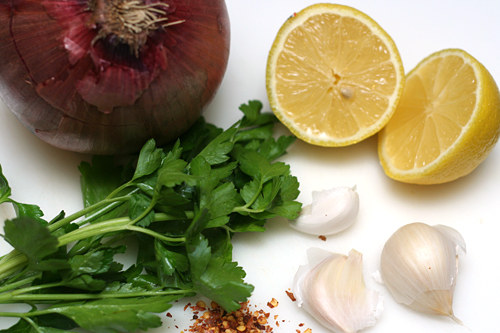
5 garlic cloves, minced
½ teaspoon dried crushed red pepper
⅔ cup dry white wine (preferably Sauvignon Blanc)
Lemon wedges

1. Melt 1 tablespoon butter in a medium nonstick skillet over medium-high heat. Add the panko and stir until it’s golden and crisp, about 2 minutes. Transfer to a small bowl; mix in 2 tablespoons of parsley. Wipe out skillet.

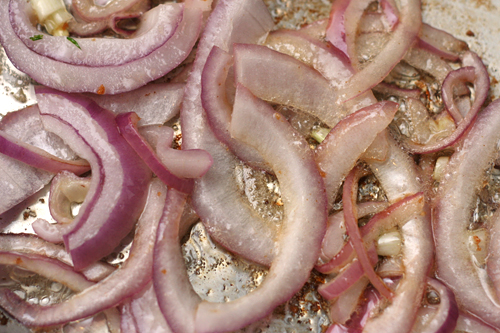
2. Sprinkle the shrimp with salt and pepper. Melt the remaining 2 tablespoons of butter with the olive oil in the same skillet over medium-high heat. Add the red onion and sauté until it’s beginning to soften, about 3 minutes. Stir in the garlic and crushed red pepper and sauté 1 minute. Add the shrimp and sauté until barely opaque in center, about 1 minute per side. Add the white wine and simmer until the liquid is slightly thickened and reduced, 2 to 3 minutes. Season to taste with salt and pepper. Stir in the remaining parsley. Transfer to a shallow bowl. Top with the sautéed panko and serve with lemon wedges.

eggplant rollatini

The only thing I can remember cooking for the last several years that turned out so badly that not only did I refuse to eat it, but even Dave did, is grilled eggplant. I don’t remember what went wrong – cook time too long? cook temp too low? too high? salt, don’t salt, cut thicker cut thinner, I don’t know – but the resulting mush of eggplant goo is all too vivid still.

I hadn’t eaten eggplant since. I’ve seen recipes in which every other component sounded like something I would enjoy, but as soon as I spotted that nefarious eggplant in the ingredient list, I scrolled right on past. I knew I’d have to try eggplant again someday. But I wasn’t ready then.

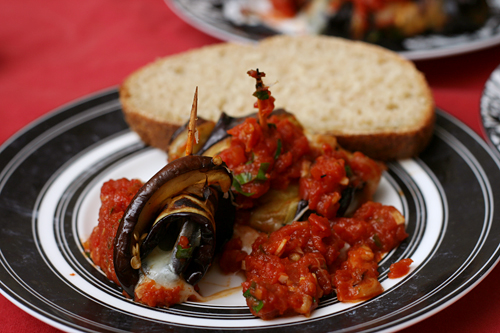
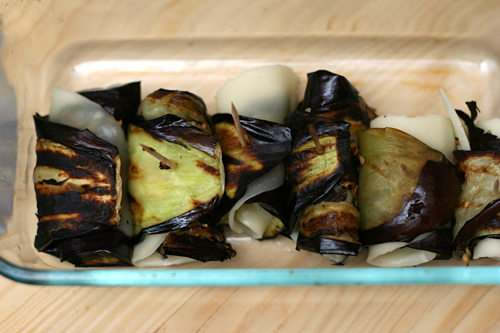
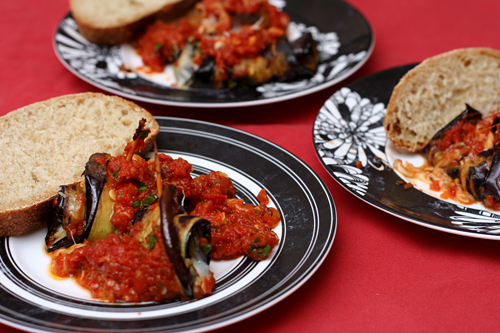
Now I am. Cheese and tomato sauce is never a bad way to ease into an ingredient. Each grilled slice of eggplant is rolled with a slice of cheese, then topped with a quick marinara sauce and heated until the flavors meld and the cheese softens. For me, they were too messy to serve as a hand-held hors d’œuvre, but instead made for a very nice plated first course. That’s right, a recipe with eggplant was very nice. I’m one step closer toward liking eggplant again.

One year ago: Pasta with Baked Ricotta and Sweet Tomato Sauce
Two years ago: Vegetarian Chili
Three years ago: Salmon Pesto Pasta

Printer Friendly Recipe
Eggplant Rollatini (adapted from Cara’s Cravings)

I just stick a pair of kitchen shears into the can of tomatoes and chop away a bit. It’s coarser than a puree, but still just fine for sauce. If you want it smoother, puree the tomatoes in the food processor.

We grilled the eggplant; I haven’t personally tried the roasting technique recommended in the original Gourmet recipe.

4 small Italian eggplants or 2 regular eggplants
Kosher salt
1 tablespoon olive oil
2 garlic cloves, finely chopped
¼ teaspoon dried hot red-pepper flakes
1 (15-ounce) can diced tomatoes, chopped, undrained
½ teaspoon salt
¼ cup coarsely chopped fresh basil
16 thin slices provolone cheese
½ ounce (¼ cup) finely grated parmesan cheese

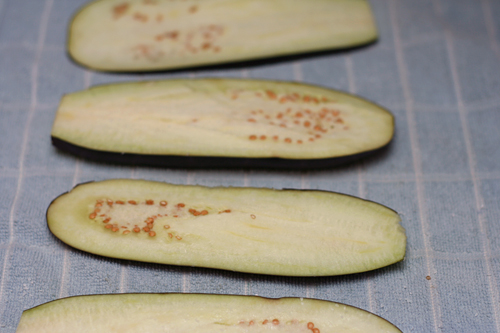
1. Peel 2 opposite long sides of each eggplant. Cut each eggplant lengthwise (to form long skinny ovals) into 1/4-inch slices. Sprinkle both sides of the slices with kosher salt; set aside for 30 minutes. Heat the oven to 425 degrees.

2. Heat the oil in a medium skillet over medium heat until it flows like water when the pan is tilted; add the garlic and red pepper flakes and cook, stirring constantly, until fragrant, about 30 seconds. Add the tomatoes and ½ teaspoon salt; cook, stirring occasionally, until thickened, 8-12 minutes. Remove from heat; stir in the basil.

3. Prepare a grill for direct-heat cooking over moderate heat (or line a large baking sheet with foil and heat the oven to 450 degrees). Brush any remaining salt crystals from the eggplant; pat the slices dry and spray both sides with nonstick spray. Grill the eggplant, turning once, until tender, about 4 minutes total (or bake for 20 minutes, turning once). Transfer to a work surface.

4. Top each slice of eggplant with a slice of cheese; starting at a short end, roll the eggplant and cheese into a spiral and seal with a toothpick. Repeat with the remaining eggplant and cheese. Arrange the eggplant spirals in a shallow baking pan and top with the sauce; bake until the cheese is melted, about 10 minutes.

fettuccine alfredo

I am healthy. I am not perfect. But I am thin. I am fit. And I’m tired of holding myself up to an impossible standard.

I eat more fruits, vegetables, and whole grains than anyone I know. I exercise regularly. I don’t drink alcohol on weekdays. My lifestyle now is healthier than has it ever been.

And yet it is not enough. Not enough to feel confident in a bathing suit, not enough to lose this bit of pudge around my belly, maybe not enough to balance my slowing metabolism.

I’ve spent most of my life convinced I should exercise harder or more intensely, I should eat as healthy on weekends as I do on weekdays, I shouldn’t eat until I’m overfull. I should be perfect, or at least perfecter than I am now.

It will never happen. It isn’t worth it to me. I won’t give up baking or the batter-eating that accompanies it, I won’t give up sharing a bottle of champagne with Dave on Sunday afternoons, I won’t give up the too many hobbies that keep me from longer workouts, I won’t give up eating sushi rolls until I nearly burst, I won’t give up pasta, I won’t give up butter, I won’t give up cream.

Instead, I will give up bikinis. I will give up pants that don’t quite fit. I will give up guilt. I will not eat differently than I do now, but I will stop believing I should.

I am healthy. I am thin. I am fit. And I can eat pasta coated in cream and still be all of those things. I will never give up pasta and cream, but I will give up feeling bad about myself for eating it.

One year ago: Oatmeal Raisin Muffins
Two years ago: Crispy Bagel Roll
Three years ago: Fish Tacos

Printer Friendly Recipe
Fettuccine Alfredo
(from Cooks Illustrated’s The New Best Recipe)

6 appetizer servings

I’ve reproduced Cooks Illustrated’s recipe exactly below. But, in step 1, I found I needed to heat the cream-butter mixture over higher heat (medium-low to medium) for the cream to simmer.

To heat the bowls, either put them in a warm oven for a few minutes or ladle some of the hot pasta water into the bowls; leave the water in the bowl while you mix the pasta and sauce.

1⅔ cups heavy cream, preferably not ultrapasteurized
5 tablespoons unsalted butter
Salt
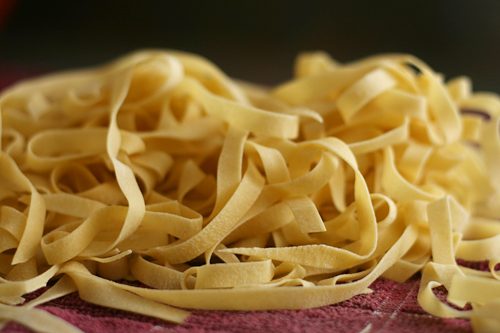
1 recipe fresh egg pasta, cut into fettuccine (below)
2 ounces (1 cup) parmesan cheese, freshly grated
Ground black pepper
Pinch freshly grated nutmeg

1. Bring 4 quarters water to a rolling boil in a large pot.

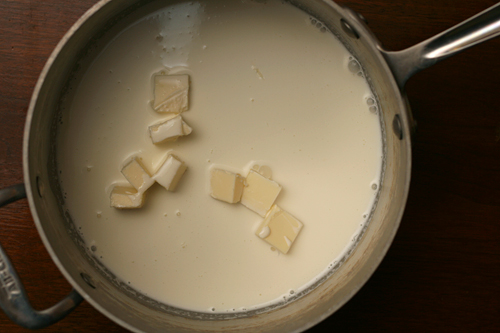
2. Combine 1⅓ cups of the cream and the butter in a sauté pan large enough to accommodate the cooked pasta. Heat over low heat until the butter is melted and the cream comes to a bare simmer. Turn off the heat and set aside.

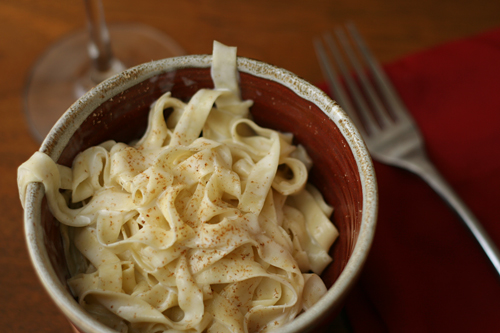
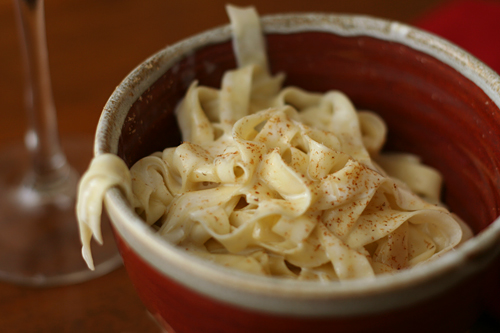
3. When the water comes to a boil, add 1 tablespoon salt and the pasta to the boiling water and stir to separate the noodles. Cook until almost al dente. Drain the pasta and add it to the sauté pan. Add the remaining ⅓ cup cream, the parmesan, ½ teaspoon salt, pepper to taste, and the nutmeg. Cook over very low heat until the sauce is slightly thickened, 1 to 2 minutes. Serve the fettuccine immediately in heated pasta bowls.

Fresh Egg Pasta (adapted from Cooks Illustrated)

You can mix this in the food processor, but for me, it’s easier to mix two ingredients by hand than it is to wash the food processor (even in the dishwasher).

You can also use store-bought pasta dough instead of making your own. You’ll need a pound for the amount of sauce in the alfredo recipe.

2 cups (10 ounces) all-purpose flour
3 eggs

1. Measure out the flour into a large bowl. Make a well in the center and add the eggs. Use a fork to break up the eggs slightly. Use a rubber spatula to mix the eggs into the flour until the dough is smooth. If it’s sticky, knead in more flour. If it’s too dry to mix in all the flour, knead in water ½ teaspoon at a time until the dough comes together.

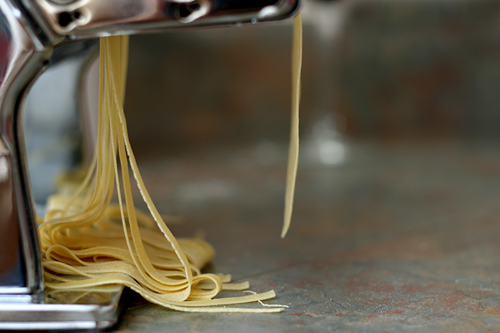
2. Divide the dough into 6 portions. Spread dry kitchen towels under the pasta roller and over the counter. Set the pasta machine at its widest opening. Working with one portion of dough at a time and keeping the others covered, roll the dough through the pasta roller. Fold it in thirds like a letter and roll it through the wide setting again. Repeat four more times, adding flour as needed to prevent the dough from sticking to the machine.

pasta e fagioli

Living in southern New Mexico, I’m out of touch with all of the weather systems the rest of the country gets. The weather here is always the same – sunny, dry, cold at night and warm in the afternoon (hot at night and hotter in the afternoon in the summer), windy in the spring. So even though I know most of you are burned out on cold and snow, I’m very excited right now that we’ve gotten a taste of real winter here.

And, even better, a snow day. A snow day! Not that it takes much snow to get a snow day here, but that’s even better – a snow day with no shoveling to do!

The first time I made this soup was years ago, and it was just as cold that day. I remember that Dave and I went to a political rally in Ithaca, and afterward, we were talking while I made the soup, and I got distracted and added the pepper flakes twice. Sadly, that ruined the soup. It was almost inedibly spicy; so much for the careful balance of flavors I was hoping for.

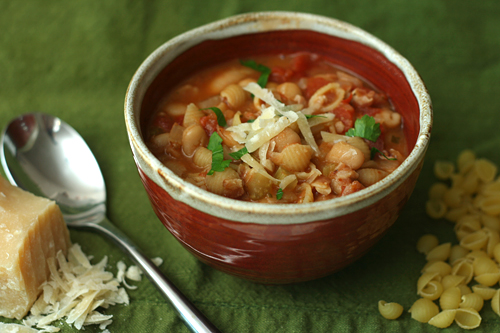
The soup is a whole lot better when you make it correctly. Just a bit spicy, all mixed in with tomatoes and vegetables and beans. A warm hearty bowl of soup is the perfect way to cap off a snow day.

One year ago: Butternut Squash Macaroni and Cheese
Two years ago: Tofu Croutons
Three years ago: Deviled Eggs with Tuna

Printer Friendly Recipe
Pasta e Fagioli (from Cooks Illustrated)

I added 2 cups less water than the recipe calls for. I’m sure the original recipe is fine too; I was just in the mood for something thicker. If you do this, make sure you decrease the salt to ½ teaspoon.

1 tablespoon extra-virgin olive oil, plus more for drizzling
3 ounces pancetta or bacon, chopped fine
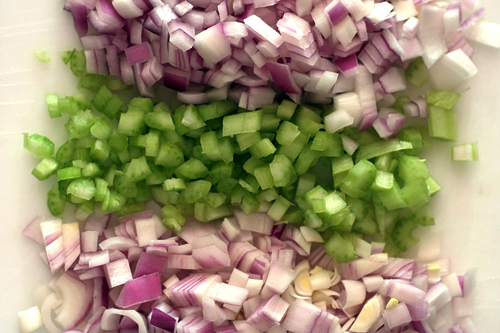
1 medium onion, chopped fine
1 celery rib, chopped fine
4 medium garlic cloves, minced or pressed through garlic press
1 teaspoon dried oregano
¼ teaspoon red pepper flakes
3 anchovy fillets, minced to paste
1 (28-ounce) can diced tomatoes with liquid
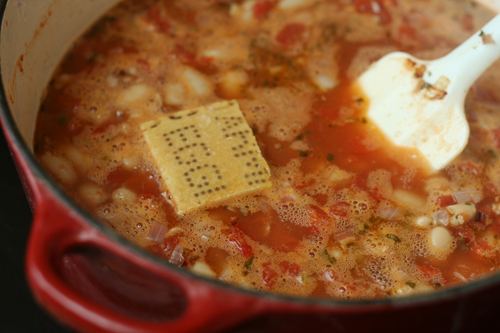
1 piece Parmesan cheese rind, about 5 inches by 2 inches
2 (15½-ounce) cans cannellini beans, drained and rinsed
3½ cups homemade or low-sodium chicken broth
2½ cups water
salt
8 ounces small pasta
¼ cup chopped fresh parsley leaves
ground black pepper
2 ounces (1 cup) grated Parmesan cheese

1. Heat the oil in a large Dutch oven over medium-high heat until shimmering but not smoking, about 2 minutes. Add the pancetta and cook, stirring occasionally, until it’s beginning to brown, 3 to 5 minutes. Add the onion and celery; cook, stirring occasionally, until the vegetables are softened, 5 to 7 minutes. Add the garlic, oregano, red pepper flakes and anchovies; cook, stirring constantly, until fragrant, about 1 minute. Add the tomatoes, scraping up any browned bits from bottom of the pan. Add the cheese rind and beans; bring to a boil, then reduce the heat to low and simmer to blend the flavors, 10 minutes.

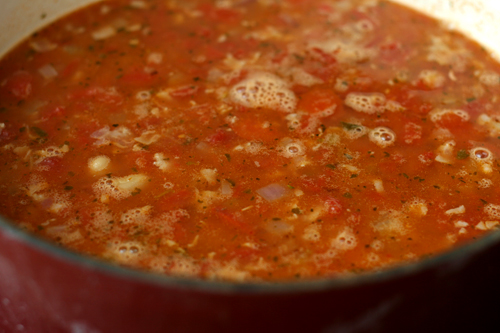
2. Add chicken the broth, water and 1 teaspoon salt; increase the heat to high and bring to a boil. Add the pasta and cook until tender, about 10 minutes (refer to package instructions to better estimate pasta cooking time).

3. Discard the cheese rind. Off the heat, stir in 3 tablespoons of the parsley; adjust the seasoning with salt and pepper. Ladle the soup into individual bowls; drizzle each serving with olive oil and sprinkle with a portion of the remaining parsley. Serve immediately, passing the grated parmesan separately.

almond biscotti

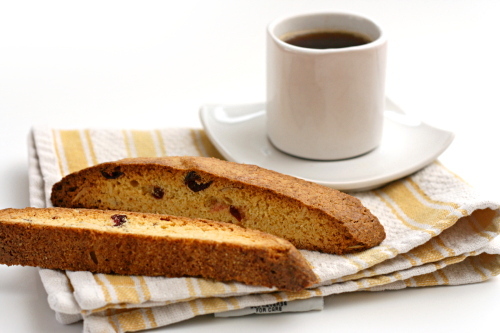
When faced with three bowls of Bolognese and a spoon, Dave declared them all good. “Different, but good.” Which is better? “I don’t know. They’re all good.” Carne adovada? “They all taste the same.” Sugar cookies? “They need frosting.”

I can’t really complain about having someone to cook for who appreciates everything I make (unless it has olives), but feedback isn’t Dave’s strongpoint. He used to tell me that he could only give a good opinion if he was served similar dishes side-by-side, which started this whole thing, but not even that always works.

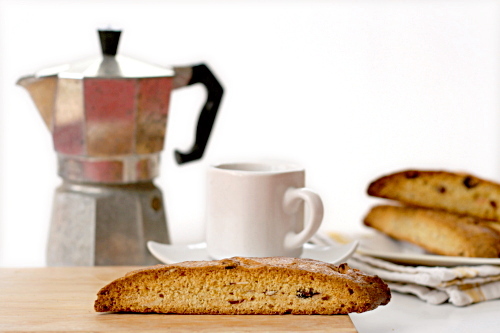
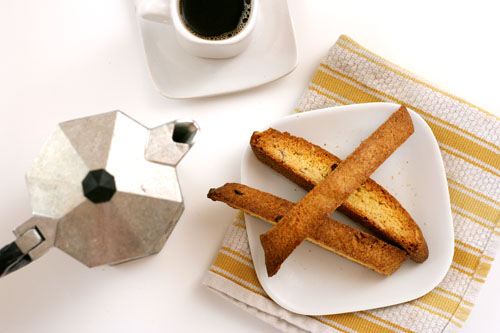
Unless it concerns almond biscotti. I have made at least four almond biscotti recipes, over the course of well over a year, and Dave has unequivocally identified his favorite. It was the first I tried, and nothing else has ever lived up. He loves these because they’re just crunchy enough to dip into his coffee without getting soggy, but not so crisp that they’re a challenge to bite into.

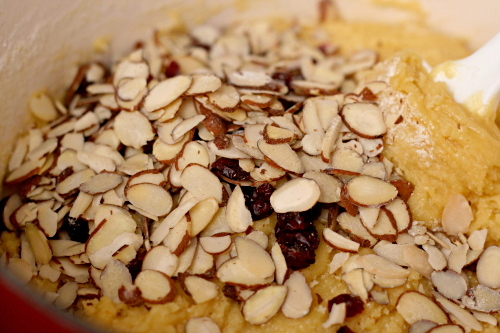
I like them because the recipe is simple to mix up and is easily adaptable. Usually I use slivered blanched almonds, but if I need to use up sliced almonds, those work just fine as well. If I’m in the mood for variety, I can add different nuts and dried fruit, although if I do, Dave will be disappointed. Pure, unadulterated almond biscotti is one of Dave’s favorites, up there with banana cream pie and salmon pesto pasta. At least this recipe is.

One year ago: Tartine’s Banana Cream Pie
Two years ago: Crispy Baked Chicken Strips
Three years ago: Mu Shu Pancakes

Printer Friendly Recipe
Almond Biscotti (adapted from Bon Appetit via Smitten Kitchen)

There’s no need to toast the nuts before mixing the dough; they’ll brown in the oven.

You’ll only use a bit of the egg white, plus I dislike using only one part of an egg. Instead, I steal just a bit of egg white from one of the eggs that gets mixed into the dough to use for the egg wash instead of using a separate egg white.

1 large egg white
3¼ cups (15.6 ounces) all-purpose flour
1 tablespoon baking powder
3 large eggs
10 tablespoons (1¼ sticks) unsalted butter, melted
1/3 teaspoon salt
1½ cups (10.5 ounces) sugar
1 tablespoon vanilla extract
1 tablespoon Grand Marnier or orange liqueur
1 tablespoon orange zest
1 cup slivered or sliced almonds

1. Heat the oven to 350 degrees. Line a large baking sheet with parchment paper or a silicone mat. Whisk the single egg white until frothy. In a medium bowl or large measuring cup, mix the flour and baking powder.

2. In a large pot over medium-low heat, heat the butter just until melted. Remove the pot from the heat; stir in the sugar and salt. Stir in the eggs, one at time; add the extract, liqueur, and zest. Slowly mix in the flour mixture, then the almonds.

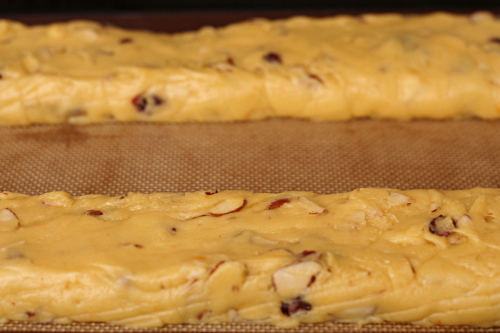
3. Divide the dough in half. On the prepared baking sheet, shape each half into a log 2-inches across and ¾-inch high. Brush with the egg white. Bake for 30 minutes, until puffed and golden.

4. Carefully transfer the logs to a cooling rack (I use two large spatulas for this); cool for 30 minutes.

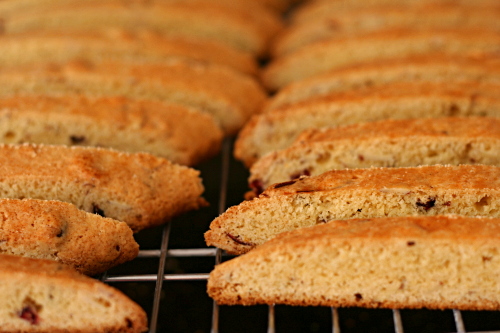
5. Slice each log on the diagonal into ½-inch thick cookies. Lay half of the cookies cut side down on the baking sheet. Bake 11 minutes; remove the pan from the oven and, using tongs, turn each cookie over onto its other cut side. Bake 7 minutes, until the edges are browned. Transfer to a cooling rack. Repeat with the remaining cookies.

I have blogged about this recipe before. At the time, I could only tell you that they were good. Now I can tell you that they are the best.

stromboli

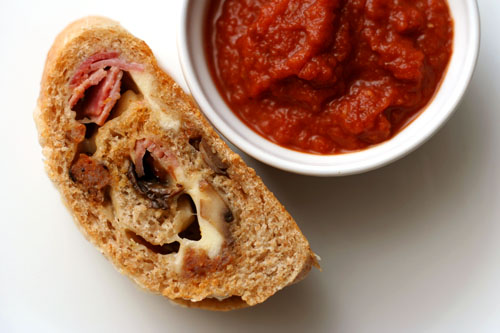
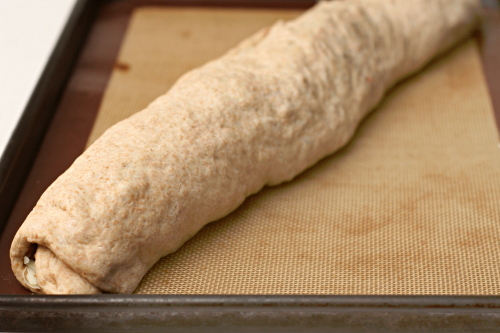
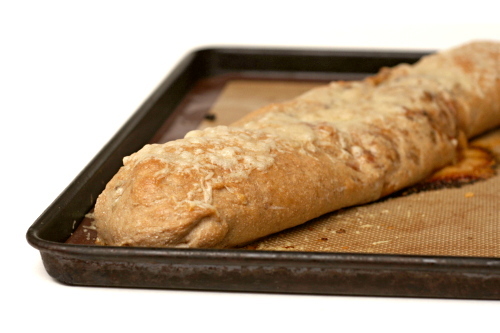
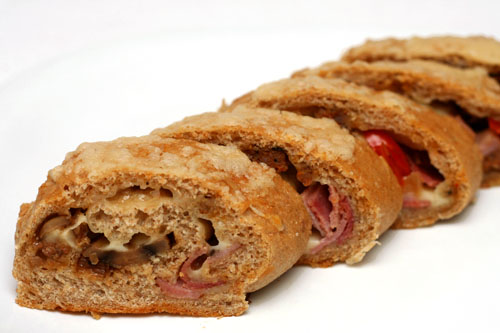
If you roll your dough and toppings into a spiral instead of keeping them flat, it’s a whole new recipe and totally different from the normal Friday night pizza routine!

Friday evenings are pretty much my favorite part of the week. It’s one of the only times I just STOP. I don’t worry about chores, or exercise, or even hobbies. I just hang out in the kitchen with a beer, rolling out dough, shredding cheese, slicing toppings.

I’m not too interested in varying from this routine. I’m occasionally willing to get takeout sushi instead of make pizza, and, sometimes, I might really get wild and change the shape of the pizza. Usually that means calzones and this time it was stromboli, but let’s face it, it’s all basically the same thing.

You can certainly roll anything you want up in pizza dough, but sometimes I like to let other people do the thinking for me, so I follow a specific recipe. Emeril’s stromboli has three kinds of pork, green peppers (gross!), and jalapenos, so I was pretty sure I could get away with some paring down of ingredients. With only two kinds of meat and one type of pepper, plus three types of cheese, there were still plenty of flavors for me. Oh Friday. How I love your carbs, cheese, and freedom.

One year ago: Maple Oatmeal Scones
Two years ago: Twice-Baked Potatoes with Broccoli, Cheddar, and Scallions
Three years ago: Country Crust Bread

Printer Friendly Recipe
Stromboli (adapted from Emeril)

Serves 6

Based on the pictures, it appears I sautéed some sliced mushrooms with the peppers. Yum!

1 recipe pizza dough
1 tablespoon milk
⅛ teaspoon salt
¼ teaspoon sugar
8 ounces hot Italian sausage, removed from casings and crumbled
8 ounces ham, diced
1 large red onion, chopped fine
1 red pepper, diced small
4 cloves garlic, minced
8 ounces (2 cups) provolone, shredded
8 ounces (2 cups) mozzarella, shredded
2 ounce (1 cup) finely grated Parmesan

1. Preheat the oven to 375 degrees F. Line two large baking sheets with parchment paper or silicone mats. In a small bowl, mix the milk, salt, and sugar; set aside.

2. In a large skillet, cook the sausage over medium-high heat until it’s browned and the fat is rendered, about 5 minutes. Remove with a slotted spoon. Discard all but 1 tablespoon of fat from the pan. Add the ham, onions, and bell peppers; cook, stirring occasionally, until very soft and slightly browned, 5 to 8 minutes. Add the garlic and cook, stirring constantly, for 1 minute. Remove from the heat and cool.

3. Divide the dough in half. On the prepared baking sheet, stretch out one half of the dough to a large rectangle, about 10 by 14 inches. (If it becomes too elastic, let it rest for a few minutes, lightly covered.) Spread half of the cooled sausage mixture across the dough, leaving a 1-inch border. Top with half of each of the mozzarella and provolone. Using a pastry brush, paint the border of a long edge with the milk mixture. Starting at the other long end, roll up the dough into a cylinder, pinching the edges to seal. Repeat with the remaining ingredients. Let the dough rise for 20 to 30 minutes.
4. Brush the top of each stromboli with the milk mixture. Bake, one at a time, until nearly completely golden brown and starting to crisp, about 20 minutes. Sprinkle the stromboli with parmesan cheese and return to the oven until the cheese is melted and the dough is golden brown, about 5 minutes.
5. Remove from the oven and let stand 10 minutes. Slice thickly and serve with your favorite sauce.