Archives for September 2010

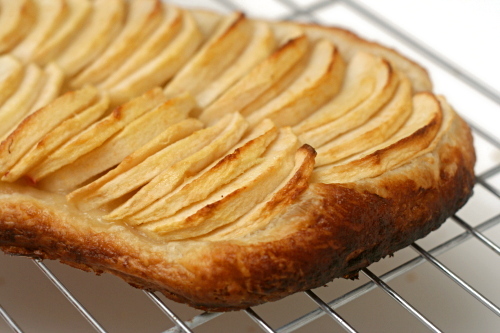
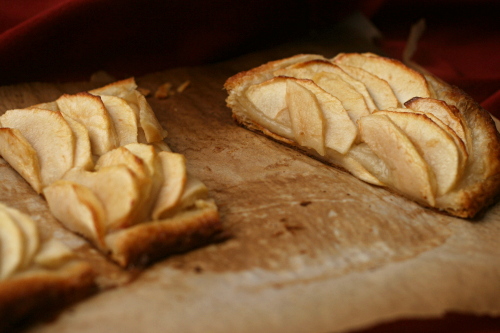
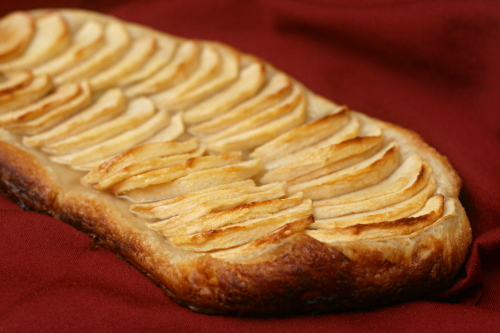
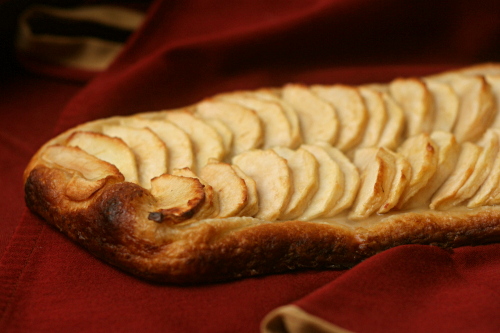
tarte fine

My boss and I both teach a course at the local community college, in addition to our day job. It keeps us busy. Yesterday he said that he’s considered taking semesters off from teaching, but then he wonders what he would do with the extra time.

I’m taking next semester off, and I can tell you all sorts of things I’m going to do with that time. I’m going to work out more. I’m going to brew beer. I’m going to pay attention to my husband in the evenings. I’m going to keep in closer touch with my friends. I’m going to make petits fours again. I’m going to go to bed earlier and buy birthday presents on time and keep my house cleaner. (Okay probably none of that last stuff will happen, because I’ll be too busy making petits fours and brewing beer.)

Until then, thank goodness for easy apple tarts that can be made after a Sunday evening faculty meeting; whose flaky crust and softened apples make for a just reward for going to a work meeting on the weekend, while softening the blow of another rushed week ahead.

Leslie chose this tart for Tuesdays with Dorie, and she has the recipe posted. In between grading exams and writing blog entries on Sunday, I managed to make my own puff pastry. I’d forgotten how easy it is.

One year ago:  Flaky Apple Turnovers
Two years ago: Crème Brulée
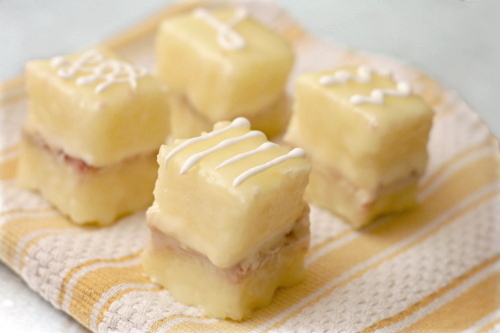
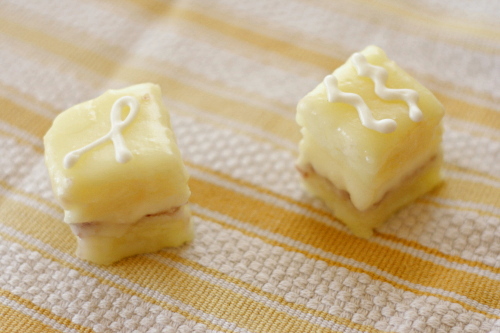
raspberry lemon petits fours

Making petits fours is like giving birth. Right afterwards, you’re convinced, NEVER AGAIN, because that freaking sucked. As time passes, you start thinking, well, maybe I could do that again. It’s worth it in the end, right?
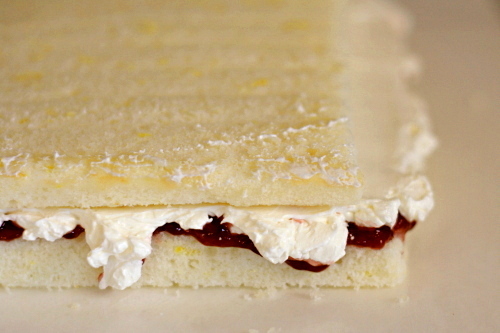
It all seemed so simple at first. I baked the cake in advance and froze it. I wasn’t going to brush the cakes with syrup, and the filling I was using was storebought jam – how hard could this be? You smear your cake with jam and frosting, cut it into cubes, drizzle pourable fondant over everything, and slap on some decorations. Clearly every blog entry I’d read on petits fours, in which the person swore that they would never be doing that again, was an exaggeration.

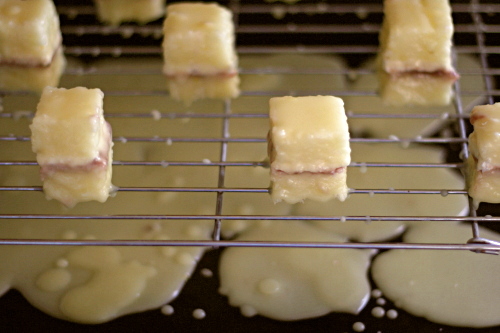
It’s the fondant that complicates things. Pourable fondant, made of warmed powdered sugar and water and corn syrup, is, quite frankly, a big pain in the ass. You’re lucky if ten percent of it stays on the squares of cake; the remainder drips onto a pan below. The lost fondant repeatably needs to be scraped off the pan back into a double boiler to reheat. It doesn’t coat very thickly, so multiple coats are necessary, and it doesn’t dry very solid, so the finished petits fours are sticky.

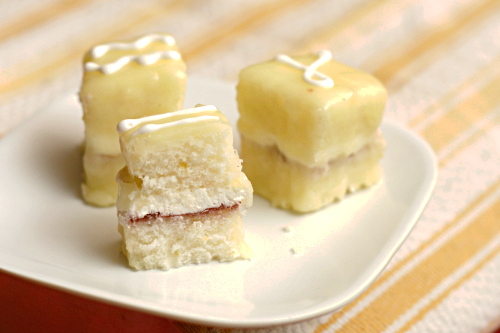
Okay, so they’re not perfect, and the process was frustrating and made me late for work. (This was back in those days when “work” was teaching one course in the evenings, which now I do in addition to my full-time day job.) On the other hand, they’re so cute! And completely delicious, since they are really nothing more than cake, filling, and frosting. Yes, I will definitely be trying again. If you’d asked me four months ago, when I made these, I don’t think I would have been so certain.

One year ago: Green Chile Huevos Rancheros
Two years ago: Pan-Seared Steak with Red Wine Pan Sauce

Printer Friendly Recipe
Raspberry Lemon Petits Fours

Makes about 30 petits fours

This is what I did, which is not the same as what I’ll do next time. Next time I’ll use Dorie’s Perfect Party Cake, because it isn’t as moist, and regular, rolled, fondant, probably a marshmallow version.

For decorations, consider fresh fruit to match your flavors; royal icing flowers (purchased or homemade); piped royal icing; or something more interesting that I’m not creative enough to come up with.

½ recipe White Cake (my adaptation), baked in a 9×13-inch pan for 16-22 minutes
¼ cup raspberry jam
½ recipe of Dorie Greenspan’s Buttercream
1 recipe Pourable Lemon Fondant (recipe follows)
decorations

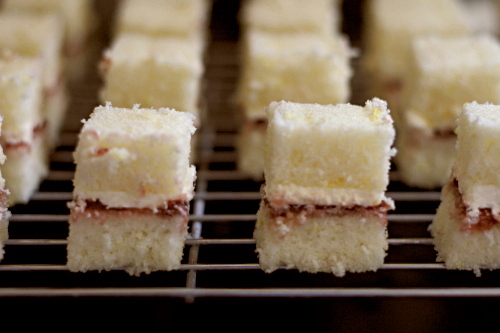
Cut cake in half crosswise. Spread jam over one cake half. Spread buttercream over jam; you might not use it all. Top with remaining cake half. With a serrated knife, trim cake edges; cut cake into 1¼-inch squares. Arrange the squares on a cooling rack set over a baking sheet. Use a squeeze bottle, pastry bag, or ziploc bag with a hole cut from a corner to cover cake squares with fondant. As necessary, scrape fondant from baking sheet back into double boiler; rewarm. Allow fondant to dry before adding decorations.

Pourable Lemon Fondant: (from Use Real Butter)
2¼ cups (10 ounces) confectioner’s sugar
¼ cup water
2 tablespoons light corn syrup
¼ teaspoon vanilla
¼ teaspoon lemon extract
drop of yellow food coloring (optional)

Combine all ingredients except coloring in double boiler. Heat until lukewarm. Remove from heat and stir in food coloring.

whiskey compound butter

I love grilled steaks – who doesn’t? – but I do miss the fond left behind on the pan when you pan-fry steaks. Nothing beats the sauce you can make by adding some alcohol, herbs, and cream to the scraped up bits of meat left on the pan. The grilling equivalent is compound butters, and I won’t say no to those either.

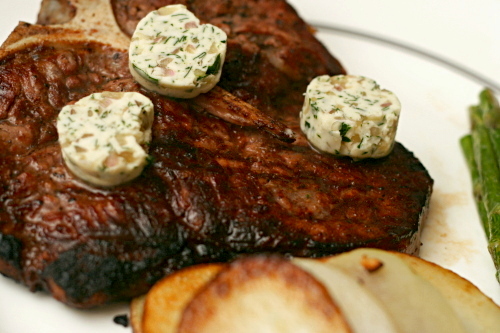
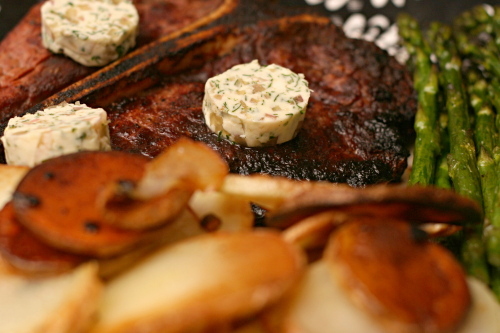
I also don’t say no to whiskey – at least when it’s mixed with butter to top my steak. Between the shallots, alcohol, and herbs, this compound butter has nearly everything my favorite pan sauces do. And unlike a pan sauce, which requires some last minute frenzy, a compound butter can be made hours (days! weeks! months!) in advance. Most importantly, it’s accompanying a beautiful charcoal-grilled steak.

One year ago: Twice-Baked Potato Cups
Two years ago: Banana and Peanut Butter Stuffed French Toast

Printer Friendly Recipe
Whiskey Compound Butter
(adapted from epicurious.com)

Makes enough to top 6-8 steaks

1 shallot, minced
1 tablespoon whiskey or bourbon
8 tablespoons (1 stick) unsalted butter, softened
1 tablespoon minced parsley
½ teaspoon Worcestershire sauce
½ teaspoon Dijon mustard
¼ teaspoon sea salt
black pepper to taste

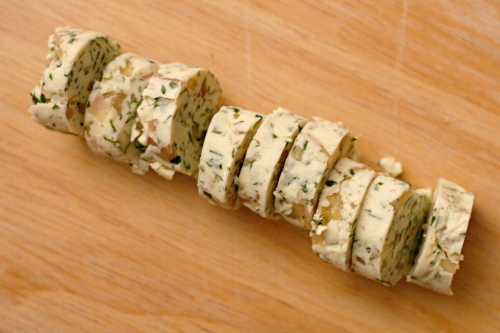
Combine the shallot and whiskey; let rest for about 15 minutes. Meanwhile, add the remaining ingredients to the bowl of a stand mixer. Mix well. On a 12-by-8 inch square of wax paper, drop butter in spoonfuls to form a log. Roll butter in wax paper and smooth out to form a round log. Refrigerate until hard and easy to slice into round, coin-shaped pieces, at least three hours. Serve with grilled steak.

coffee break muffins

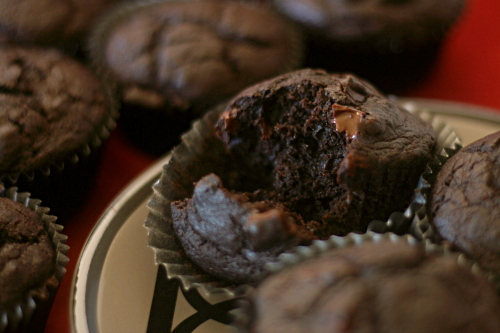
I wasn’t in the mood for these the day I made them. What I was in the mood for was the Chocolate Chunk Muffins a couple pages later. If you’ve flipped through Dorie’s book, you must have seen the ones I’m talking about – dark, rich muffins studded with big chunks of bittersweet chocolate. They’re not breakfast, but I bet they’re delicious.

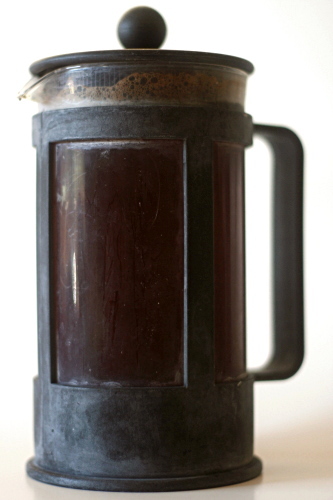
They are, however, not this week’s Tuesdays with Dorie recipe. This week’s recipe is espresso muffins. But I got to thinking about how coffee enhances the flavor of chocolate and wondered if the reverse were true. Could I add just a bit of chocolate to give these another flavor dimension?

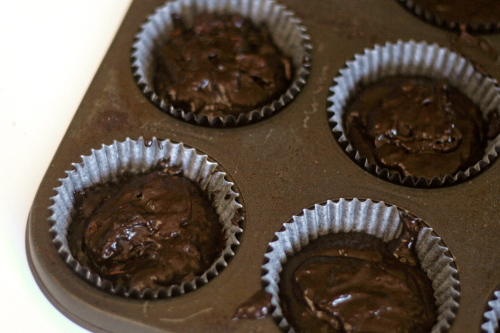
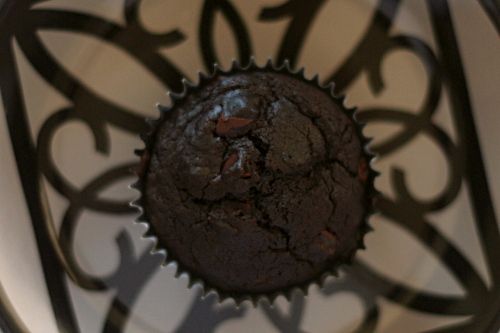
I replaced a quarter of the flour with cocoa powder, and, to just a few of the muffins, stirred in some chopped semisweet chocolate. And I was surprised that these ended up tasting just how I’d imagined the double chocolate muffins I’d been craving in the first place. The espresso flavor was timid, hiding behind the dominant chocolate. More chocolate flavor isn’t going to get any arguments from me, but now I’m curious about how the non-chocolate, pure espresso version would be. Next time I’ll have to try harder to resist my urge to eat chocolate for breakfast.

Rhiani chose these muffins, and she has the recipe posted. I replaced ½ cup of the flour with cocoa and added a few chocolate chips.

One year ago: Flaky Apple Turnovers
Two years ago: Dimply Plum Cake

taco pasta salad

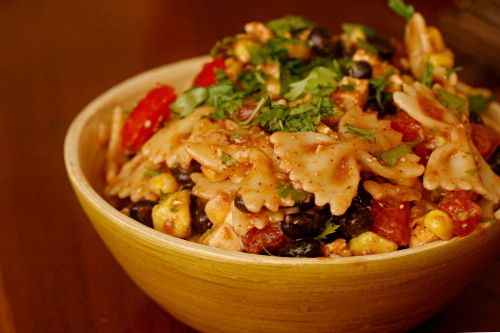
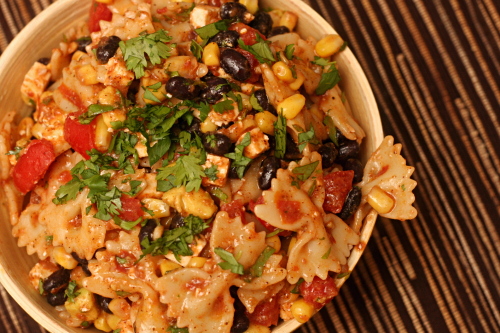
My inclination to overthink was very clearly exhibited with this recipe. I’ve heard approximately eight thousand raving reviews of this pasta salad. And still, I doubted. Salsa mixed with pasta? Cheddar cheese in pasta salad? I wasn’t convinced.

I asked Cara for advice. Really? Salsa? She said she never thinks twice about it, because this dish is always a hit. Shredded yellow cheese? Yes, she said. Stop asking questions and just go make it, she probably wanted to say.

I started slowly, adding only a third of the salsa called for, thinking I’d just mix in extra fresh tomatoes and some red onions and a jalapeno separately if I didn’t like the salsa. And then I realized – yes, salsa mixed with pasta. And I stirred in the rest of the salsa.

Right after those two ingredients were mixed is when I started nibbling. And then I added black beans… cilantro… avocado… tomatoes… cheese… corn… dressing… and I just kept nibbling and nibbling as I went. And the salad just kept getting better and better.  Forget instincts. I should just trust the recipe.

One year ago: Risotto with Swiss Chard
Two years ago: Gazpacho

Printer Friendly Recipe
Taco Pasta Salad (adapted slightly from Cara’s Cravings)

Serves 8-12

Apparently there’s no wagon wheel pasta in my little town. Bowties worked just fine.

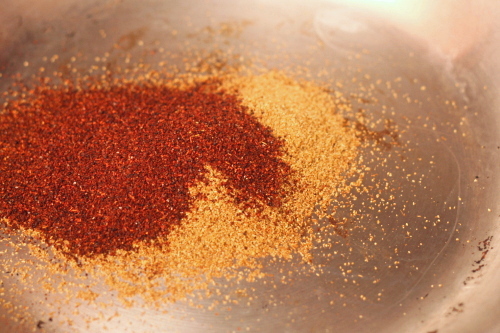
I toasted the spices before mixing them into the dressing. Just heat a small not-nonstick pan over medium heat for a few minutes, then add the spices and stir them around just until they start to smoke, no longer than a minute.

1 pound wagon wheel pasta
salt
1 (10-ounce) package frozen corn
1½ cups salsa
1 (15-ounce) can black beans, drained and rinsed
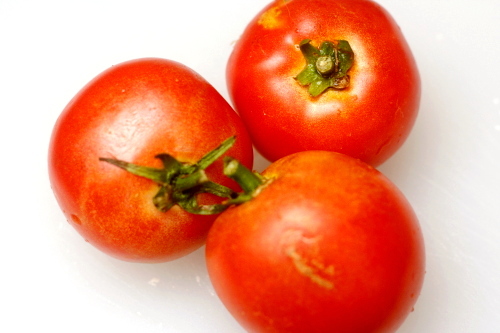
2 medium tomatoes, diced
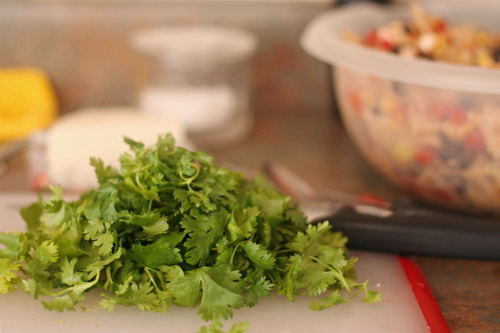
½ cup chopped fresh cilantro
8 ounces (2 cups) shredded cheddar cheese
3-4 tablespoons lime juice
1 large (or 2 small) avocado, peeled, seeded, and diced
1 tablespoon cumin
2 teaspoon chili powder
¼ teaspoon freshly ground pepper
2 garlic cloves, minced
¼ cup olive oil

1. Bring a large pot of water to a boil. Add 1 tablespoon salt and the pasta. Cook according to the package directions. Drain; stir the frozen corn into the pasta to cool the pasta and defrost the corn. Stir the salsa into the pasta and corn, then add the beans, tomatoes, cilantro, and cheese.

2. Squeeze the lime juice into a small bowl and add the avocado; stir to coat the avocado. Remove the avocado from the lime juice and stir it into the pasta mixture. Add the spices, garlic, and ½ teaspoon salt to the lime juice, then slowly whisk in the oil. Stir the dressing into the salad. Serve immediately or chill for up to 1 day (longer if you don’t add the avocado).

peach upside-downer

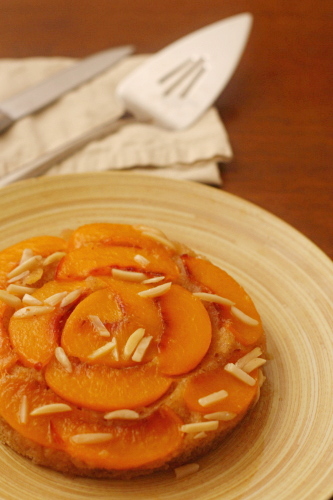
I’ve struggled with September the last few years. I’m never ready to give up summer, but I can’t deny the signs of impending fall either. Tomatoes are just starting to come into their own in September, and there are still peaches, although the berries are gone and you can’t depend on corn anymore.

Down here in the desert, you actually can deny the signs of fall in September. Our high temperatures are still in the 90s. I won’t be making chili and cornbread for a while yet, and I certainly don’t think I’ll be able to find cranberries. The peaches, however, are ripe and fragrant.

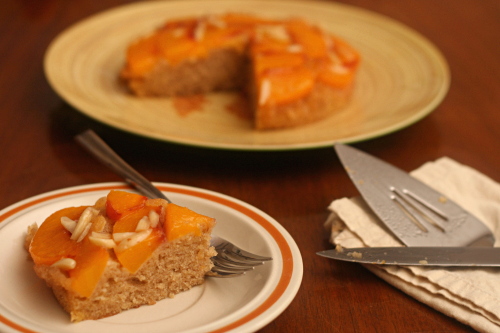
You know what makes good peaches better? Cake. Especially cake with a little bit of cinnamon and whole lot of butter. This was good with late summer peaches, and, I think for once, I’m looking forward to the fall version of something, in this case with cranberries, even more.

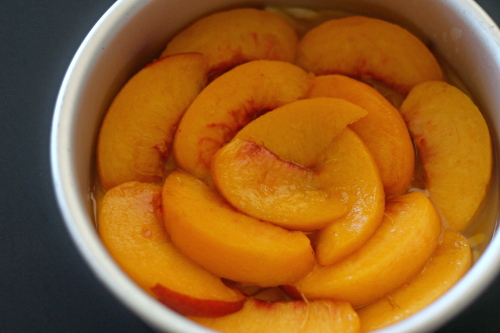
Sabrina chose this for Tuesdays with Dorie, and she has the recipe posted. You’ll need about two peaches, peeled and pitted, to replace the cranberries. Dorie recommends skipping the nuts for the peach version, but I enjoyed a few sliced almonds. Peaches are sweeter than cranberries; I recommend reducing the sugar in the glaze to 4 tablespoons if you make this substitution.

One year ago: Flaky Apple Turnovers
Two years ago: Chocolate Chunkers

cheesecake comparison

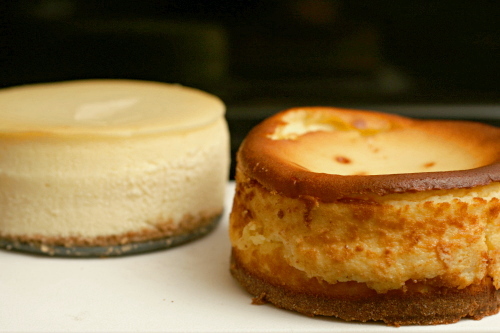
The problem with a cheesecake comparison is that so much of what makes a cheesecake perfect, especially a New York cheesecake, is its texture, and the texture depends so much on the baking technique, and the baking technique will vary depending on the pan size. So the only really fair comparison would be to make three full cheesecakes and use a thermometer to test doneness. But three cheesecakes makes for a ridiculous amount of cheesecake. Plus my instant-read thermometer was on vacation when I made two of these. I did my best.

I baked the first cheesecake for a family holiday. Then I drove with it for four hours to my parents’ house, served half of it, drove back four hours with the remainder and stuck it in the freezer. I baked the other two a month later in a 5-inch springform pan. I overbaked one and underbaked the other. This is not my most comprehensive comparison post, I admit.

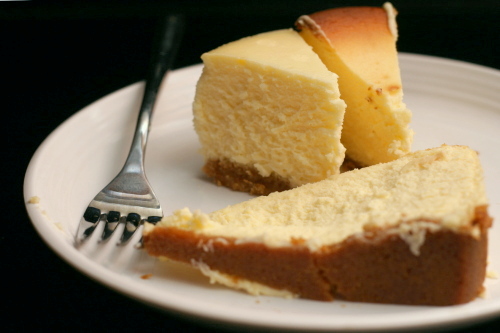
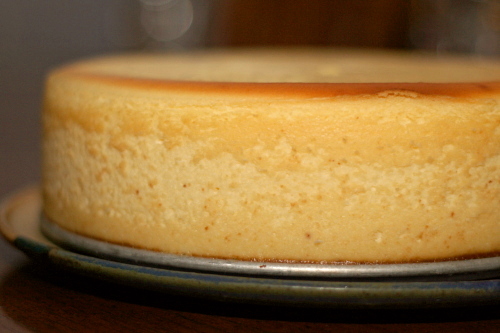
Still, I think we were able to draw some conclusions. Not that the opinions of my four tasters were aligned; that would be too easy. (Full disclosure: This comparison was actually done months ago, after cocktails. My notes have the cakes labeled as “brown”, “pale”, and “mess”; apparently one cake didn’t slice well.)

Mess, aka Cooks Illustrated’s New York Cheesecake: After the abuse of eight hours in the car, being half-eaten, frozen, and defrosted, is it any wonder it didn’t slice cleanly? Regardless, it was without question my favorite, as well as Dave’s. The texture ranges from solid and dry on the edge to soft and luscious in the center. The flavor is balanced between the cream cheese and the sweetness and the flavorings. In my opinion, this is cheesecake perfection.

Pale, aka Dorie Greenspan’s Tall and Creamy Cheesecake: I undercooked this one; still, this is one good cheesecake. While I liked Cooks Illustrated’s NY Cheesecake better, I almost feel like it’s an unfair comparison because they’re not meant to be similar cheesecakes. Dorie’s cheesecake is soft and melty with a good balance of sweet and tangy (if you use sour cream instead of the also suggested heavy cream). It isn’t the same style as a New York cheesecake, and there’s nothing wrong with that. It was my sister’s favorite. (My sister started this whole complicated comparison in the first place, by reminding me that cheesecake is one of her favorite foods and then visiting shortly afterwards.)

Brown, aka (Goumet via) Smitten Kitchen’s New York Cheesecake: I’m not a big enough person to take all of the responsibility for overcooking this one. Deb admits that the cooking times are risky – 500 degrees until the top begins to brown, then a far lower temperature. I don’t need to tell you that it didn’t work for me; you can see that overbrowned, blown-out top for yourself. Besides that, most of us felt that the citrus flavor was overbearing, even with the reduced amounts of zest that Deb recommends. With all of the stars aligned and with less zest, this might be a great cheesecake. But with other stars around, why bother with the struggle?

Overall, a flawed comparison, but I learned my preferences. For New York cheesecake, Cooks Illustrated. For non-New York cheesecake, Dorie Greenspan. But always, I just want cheesecake.

One year ago: 100% Whole Wheat Sandwich Bread
Two years ago: Lemon Pancakes with Blueberry Syrup

Printer Friendly Recipe
New York Cheesecake (from Cooks Illustrated)

For the crust:
5 tablespoons unsalted butter, melted, plus 1 additional tablespoon, melted, for greasing the pan
4 ounces (approximately 8 whole) graham crackers, broken into rough pieces and processed into fine, even crumbs
1 tablespoon sugar

For the cheesecake:
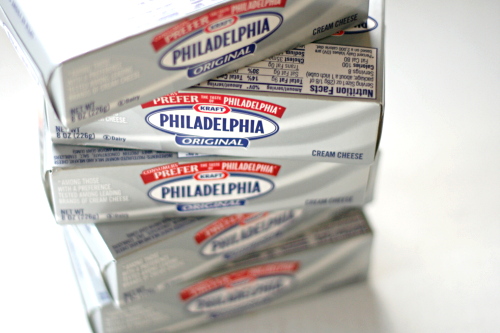
2½ pounds (5 8-ounce packages) cream cheese, room temperature
⅛ teaspoon salt
1½ (10.5 ounces) cups sugar
⅓ cup sour cream
2 teaspoons freshly squeezed lemon juice
2 teaspoons vanilla extract
2 large egg yolks plus 6 large eggs, at room temperature

1. To make the crust, adjust an oven rack to the lower-middle position and heat the oven to 325 degrees F. Brush the bottom and sides of a 9-inch springform pan with ½ tablespoon of the melted butter. In a medium bowl combine the graham cracker crumbs, 5 tablespoons melted butter, and sugar. Toss with a fork until the crumbs are evenly moistened. Transfer the crumbs to the springform pan and use the bottom of a ramekin to firmly press the crumbs evenly into the pan bottom. Bake until fragrant and beginning to brown around the edges, about 13 minutes. Cool on a wire rack while preparing the filling.

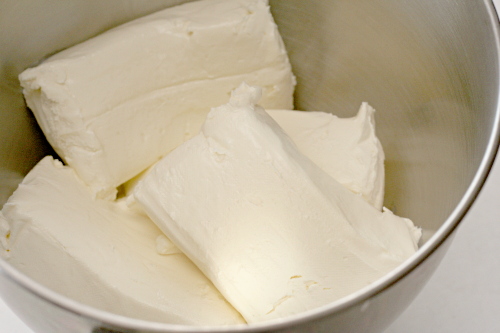
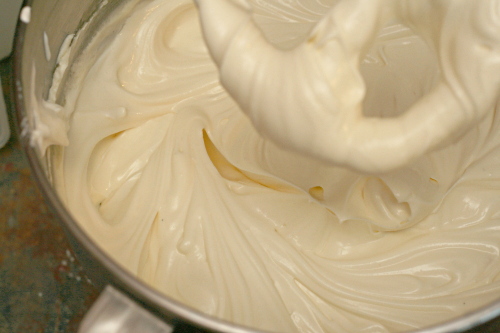
2. Increase the oven temperature to 500 degrees F. In the bowl of a stand mixer fitted with the paddle attachment, beat the cream cheese at medium-low speed to break up and soften it slightly, about 1 minute. Scrape the beater and the bottom and sides of the bowl well with a rubber spatula; add the salt and about half of the sugar and beat at medium-low speed until combined, about 1 minute. Scrape the bowl; beat in the remaining sugar until combined, about 1 minute. Scrape the bowl; add the sour cream, lemon juice, and vanilla. Beat at low speed until combined, about 1 minute. Scrape the bowl; add the egg yolks and beat at medium-low speed until thoroughly combined, about 1 minute. Scrape the bowl; add the remaining eggs 2 at a time, beating until thoroughly combined, about 1 minute, scraping the bowl between additions.

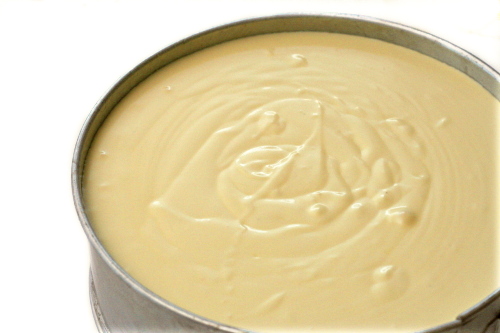
3. Brush the sides of the springform pan with the remaining ½ tablespoon melted butter. Set the pan on a rimmed baking sheet to catch any spills in case the pan leaks. Pour the filling into the cooled crust and bake 10 minutes; without opening the oven door, reduce the oven temperature to 200 degrees and continue to bake until the cheesecake reads about 150 degrees on an instant-read thermometer inserted in the center, about 1½ hours. Transfer the cake to a wire rack and cool until barely warm, 2½ to 3 hours. Run a paring knife between the cake and the springform pan sides. Wrap tightly in plastic wrap and refrigerate until cold, at least 3 hours.

4. To unmold the cheesecake, removed the sides of the pan. Slide a thin metal spatula between the crust and the bottom of the pan to loosen, then slide the cake onto a serving plate. Let the cheesecake stand at room temperature about 30 minutes, then cut into wedges and serve. (Use a long, thin, sharp knife that has been run under hot water and then dried for slicing. Wipe the blade clean and rewarm between slices.)

Printer Friendly Recipe
Tall and Creamy Cheesecake
(from Dorie Greenspan’s Baking: From my Home to Yours)

I prefer using sour cream instead of heavy cream.

Makes 16 servings

For the crust:
1¾ cups graham cracker crumbs
3 tablespoons sugar
pinch of salt
½ stick (4 tablespoons) unsalted butter, melted

For the cheesecake:
2 pounds (four 8-ounce boxes) cream cheese, at room temperature
1⅓ cups (9.67 ounces) sugar
½ teaspoon salt
2 teaspoons pure vanilla extract
4 large eggs, at room temperature
1⅓ cups sour cream or heavy cream, or a combination of the two

To make the crust:
Butter a 9-inch springform pan—choose one that has sides that are 2 ¾ inches high (if the sides are lower, you will have cheesecake batter leftover) — and wrap the bottom of the pan in a double layer of aluminum foil; put the pan on a baking sheet.

Stir the crumbs, sugar and salt together in a medium bowl. Pour over the melted butter and stir until all of the dry ingredients are uniformly moist. (I do this with my fingers.) Turn the ingredients into the buttered springform pan and use your fingers to pat an even layer of crumbs along the bottom of the pan and about halfway up the sides. Don’t worry if the sides are not perfectly even or if the crumbs reach above or below the midway mark on the sides—this doesn’t have to be a precision job. Put the pan in the freezer while you preheat the oven.

Center a rack in the oven, preheat the oven to 350°F and place the springform on a baking sheet. Bake for 10 minutes. Set the crust aside to cool on a rack while you make the cheesecake.

Reduce the oven temperature to 325°F.

To make the cheesecake:
Put a kettle of water on to boil.

Working in a stand mixer, preferably fitted with a paddle attachment, or with a hand mixer in a large bowl, beat the cream cheese at medium speed until it is soft and lives up to the creamy part of its name, about 4 minutes. With the mixer running, add the sugar and salt and continue to beat another 4 minutes or so, until the cream cheese is light. Beat in the vanilla. Add the eggs one by one, beating for a full minute after each addition—you want a well-aerated batter. Reduce the mixer speed to low and stir in the sour cream and/or heavy cream.

Put the foil-wrapped springform pan in the roaster pan.

Give the batter a few stirs with a rubber spatula, just to make sure that nothing has been left unmixed at the bottom of the bowl, and scrape the batter into the springform pan. The batter will reach the brim of the pan. (If you have a pan with lower sides and have leftover batter, you can bake the batter in a buttered ramekin or small soufflé mold.) Put the roasting pan in the oven and pour enough boiling water into the roaster to come halfway up the sides of the springform pan.

Bake the cheesecake for 1 hour and 30 minutes, at which point the top will be browned (and perhaps cracked) and may have risen just a little above the rim of the pan. Turn off the oven’s heat and prop the oven door open with a wooden spoon. Allow the cheesecake to luxuriate in its water bath for another hour.

After 1 hour, carefully pull the setup out of the oven, lift the springform pan out of the roaster—be careful, there may be some hot water in the aluminum foil—remove the foil. Let the cheesecake come to room temperature on a cooling rack.

When the cake is cool, cover the top lightly and chill the cake for at least 4 hours, although overnight would be better.

Serving:
Remove the sides of the springform pan— I use a hairdryer to do this (use the dryer to warm the sides of the pan and ever so slightly melt the edges of the cake)—and set the cake, still on the pan’s base, on a serving platter. The easiest way to cut cheesecake is to use a long, thin knife that has been run under hot water and lightly wiped. Keep warming the knife as you cut slices of the cake.

Storing:
Wrapped well, the cake will keep for up to 1 week in the refrigerator or for up to 2 months in the freezer. It’s best to defrost the still-wrapped cheesecake overnight in the refrigerator.

Printer Friendly Recipe
New York Cheesecake (adapted from Gourmet via Smitten Kitchen)

Crust:
8 ounces (15 4¾-by-2½-inch sheets) graham crackers
8 tablespoons (1 stick) unsalted butter, melted
½ cup (3.5 ounces) sugar
¼ teaspoon salt

Filling:
5 (8-ounce) packages cream cheese, softened
1¾ cups (12.25 ounces) sugar
3 tablespoons all-purpose flour
1 teaspoon finely grated lemon zest
1 teaspoon finely grated orange zest
5 large eggs
2 large egg yolks
½ teaspoon vanilla

1. For the crust: Stir together crust ingredients and press onto bottom and up the sides, stopping one inch shy of the top rim, of a buttered 9-inch (or 24 cm) springform pan. Put the crust in the freezer while you prepare the filling.

2. Filling: Preheat oven to 550 degrees. Beat together cream cheese, sugar, flour and zest with an electric mixer until smooth. Add vanilla, then eggs and yolks, one at a time, beating on low speed until each ingredient is incorporated. Scrape bowl down between additions.

3. Put the springform pan with the crust in a shallow baking pan (to catch drips). Pour the filling into the crust (the springform pan will be completely full) and bake in baking pan in the middle of the oven for 12 minutes or until puffed. Please watch your cake because some ovens will top-brown very quickly and if yours does too fast, turn the oven down as soon as you catch it. Reduce the temperature to 200 degrees and continue baking until the cake is mostly firm (center will still be slightly wobbly when pan is gently shaken), about one hour more.

4. Run a knife around the top edge of the cake to loosen it and cool the cake completely in the springform pan on a rack, then chill it, loosely covered, for at least 6 hours.

pappa al pomodoro

My dad called Marlena de Blasi’s A Thousand Days in Venice “the most unrealistic true story [he’s] ever read.” He has a point – life-changing decisions based on love at first sight and all – but I still enjoyed Marlena’s attitude. It’s all about soaking up the good stuff, not sweating the small stuff, living life to the fullest – all of the things we know we should be doing, but too often let the rest of life get in the way.

(I can’t resist telling you that I used an excerpt from this book as a reading in our wedding. “As a couple there is some sense about us that feels like risk, like adventure, like the tight, sharp bubbles of a good champagne.” <romantic gushy sigh>)

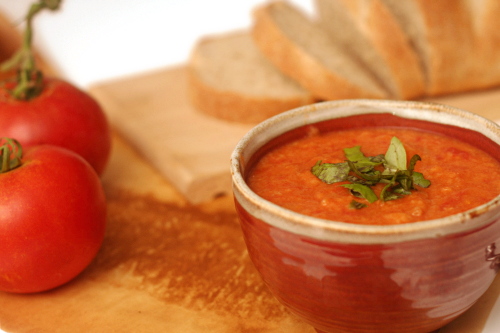
She also has recipes in the book, all of which are about soaking up the good stuff, not sweating the small stuff, tasting food to the fullest. I’ve always remembered in particular the pappa al pomodoro, because it combines so many of my favorite things: fresh tomatoes, bread, tomato soup.

Well, I didn’t use her recipe. There are so many variations, and I’m sure they’re all traditional in one sense or another, so I chose the one that seemed the most fun for me. Because that’s what this is all about, right?

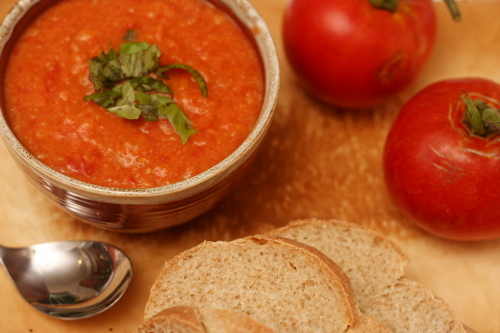
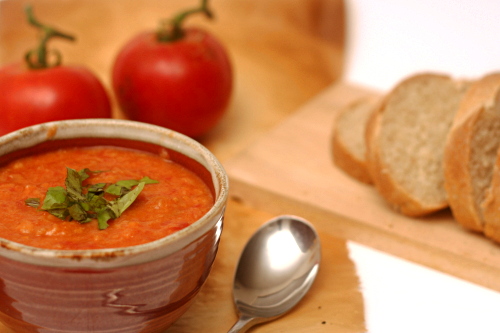
Pappa al pomodoro tastes equally of summer tomatoes and of good bread. Although I should stop calling it soup, because it isn’t. It’s porridge, thick and homey and comforting. When food tastes like this and is as much fun as this was to make, you can’t help but focus on what life is really about.

One year ago: Zucchini Bread
Two years ago: Shrimp, Roasted Tomato, and Farmers Cheese Pizza

Printer Friendly Recipe
Pappa al Pomodoro
(adapted from The Zuni Cafe Cookbook via Orangette)

Serves 4-6

When my mom made this, she used a potato masher to break up the bread and tomatoes, which seems to me like the perfect way to get the mushy but not pureed texture of pappa al pomodoro.

2 pounds tomatoes
2 tablespoons olive oil
1 medium yellow onion, diced
salt
3 cloves garlic, chopped
1 (4-8 inch) sprig fresh basil, leaves removed and torn into pieces
3 cups broth (any kind) or water
pinch sugar
8 ounces stale (or dried in an oven) rustic bread, cut into 1-inch pieces
freshly ground black pepper
extra virgin olive oil for serving

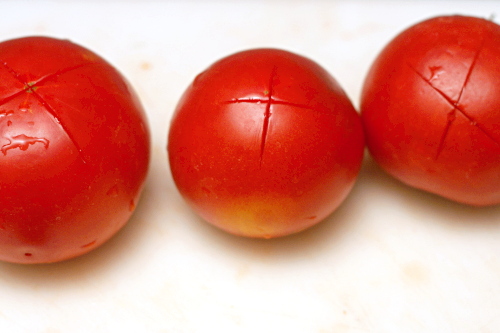
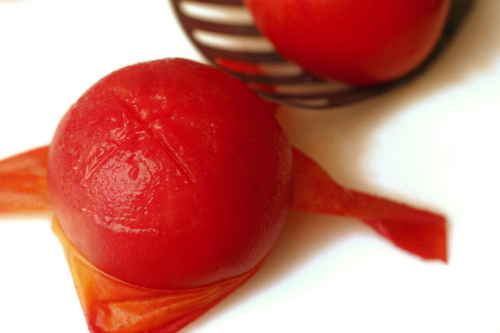
1. Bring a medium saucepan of water to a boil over high heat. Meanwhile, score a small ‘X’ on the underside of each tomato, cutting just through the skin. Dip the tomatoes in the boiling water for 10-15 seconds, until the skin around the X starts to curl. Remove the tomatoes from the water. Peel the tomatoes by pulling the skin back from the X; core and roughly chop the tomatoes.

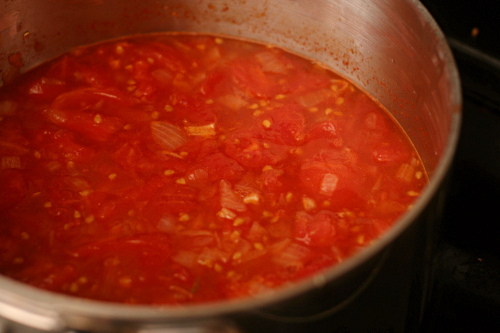
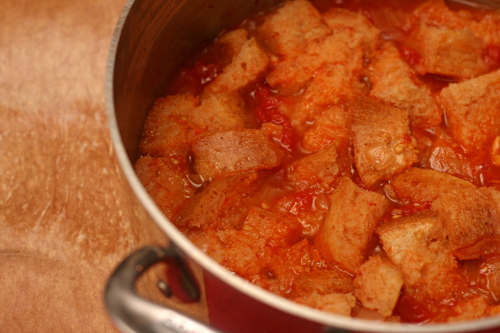
2. In a large pot, heat the olive oil over medium heat. Add the onions and a pinch of salt; cook, stirring occasionally, until the onions are soft and just starting to brown at the edges, about 8 minutes. Add the garlic and cook, stirring constantly, for about 30 seconds, then add the chopped tomatoes. Cook and stir until they start to release their liquid, 2-3 minutes, then add the basil stem (not the leaves), ½ teaspoon salt, and the broth. Taste and add a pinch of sugar if the soup seems too acidic. Bring to a simmer over medium-high heat, then lower the heat to maintain a slow simmer and cook for 10 minutes. Stir in the bread, turn off the heat, and let the mixture set for 15 minutes.

3. When ready to serve, either stir the soup to break up the bread chunks, or, if you’d like a smoother mixture, process it lightly with an immersion blender. Taste for seasoning, stir in the basil leaves, and top with freshly ground black pepper and extra virgin olive oil. Serve.

peanut butter crisscrosses

I have a bad habit of losing touch with friends before I get their best recipes from them. I never asked my Spanish/Puerto Rican friend for the basics of his paella, and when I asked him how he makes his rice and beans, he beat around the bush about how I’d never be able to find the right ingredients in the US.

My college roommate made the most amazing peanut butter cookies. I didn’t know I was a fan of peanut butter cookies until hers, and I haven’t been a fan of peanut butter cookies since. But I could never get enough of those.

I’ve been simultaneously keeping an eye out for another perfect peanut butter cookie recipe and afraid to try any because they might not live up to my memory. But I’ve heard nothing but good reviews of Dorie’s recipe.  My friend’s cookies didn’t have mix-ins in them, so I left out the peanuts Dorie suggests, and I underbaked the cookies to get the soft texture I love.

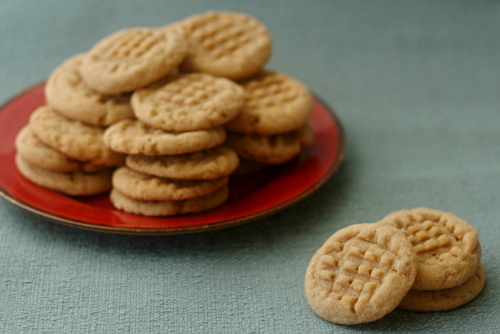
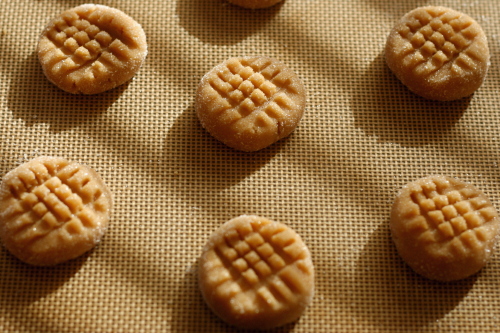
Pretty darn close. Nothing tastes as good as a memory, but soft, sweet peanut butter cookies can come pretty darn close. Jasmine has the recipe posted since she chose these for Tuesdays with Dorie. I left out the salted peanuts and increased the salt to 1 teaspoon.

One year ago: Chocolate Soufflé
Two years ago: Chocolate Malted Whopper Drops

grilled corn salad

It’s green chile season! My sister recently told me that, for her, fall in New Mexico means green chiles roasting, the state fair, and the Balloon Fiesta. Fall isn’t so bad out here, even without rolling hills of trees that turn brown, red, pink, maroon, orange, yellow. I will miss the crisp air, pumpkins, apples, and chill days of fall on the East coast, but when I was out there, I missed green chile. So I win either way.

The only problem is that I tend to get into a hoarding pattern with my annual green chile supply. I buy them every fall when they come into season, roast them, and freeze them to last until the following September. And then, aside from the occasional huevos rancheros, I mostly ignore them, because what if I run out? This is a mindset I’m determined to get out of. Not only is that not the kind of life I want to lead, but, as Jen warns, they seem to get hotter as they’re frozen for longer periods.

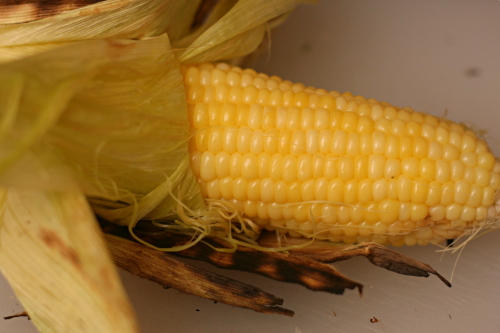
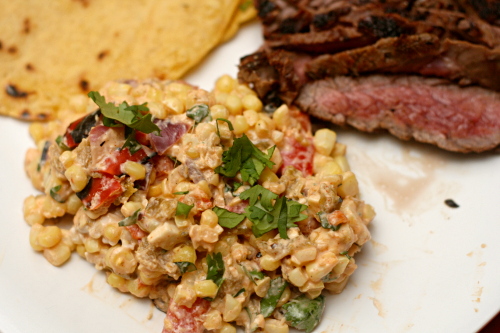
This corn salad doesn’t even call for green chile, but I had some leftover from the previous day’s burgers, so I went ahead and added them. They’ve been in the freezer for about a year, and maybe that’s why the dish ended up so, um, kind of painful to eat, actually. The heat was somewhat dulled by the dairy in the recipe, and once I smooshed the corn into a tortilla with some flank steak, it was downright edible. Not that the corn even needed extra flavor, what with having been grilled and mixed with chili powder, cilantro, lime juice and salty cotija. But I need to use up some of these chiles in my freezer to make room for the new crop!

One year ago: Pickled Coleslaw
Two years ago: Sausage and Red Pepper Hash

Printer Friendly Recipe
Grilled Corn Salad (from Bobby Flay via Savory Spicy Sweet)

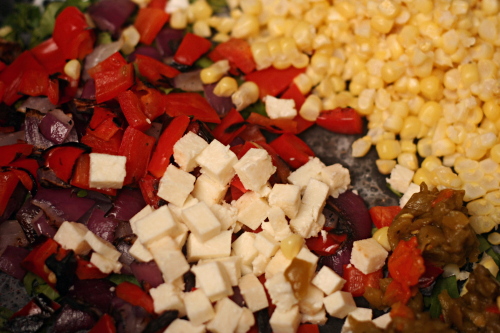
I used a not-nonstick skillet on the stove instead of a cast iron pan on the grill, and I substituted greek yogurt for the crème fraiche. And I added an ounce or two of very spicy diced Hatch green chiles, plus some diced red pepper and red onion.

8 ears fresh corn, silks removed, husk on, soaked in cold water 30 minutes
canola oil
salt and freshly ground black pepper
¼ cup creme fraiche
2 limes, juiced and 1 zested
1 tablespoons ancho chili powder
¼ cup chopped fresh cilantro leaves
¼ cup grated cotija cheese

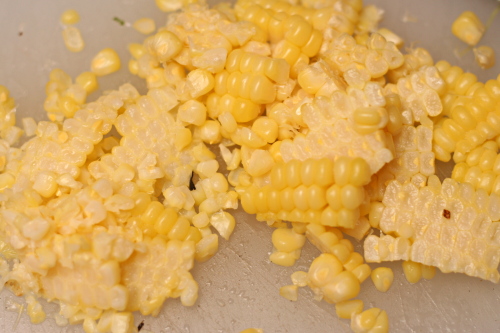
1. Heat grill to high. Grill corn until charred on all sides, 10 or so minutes. Take off the grill and remove the kernels with a sharp knife. While you are cutting the corn, put a cast iron skillet on the grill to heat.

2. Add the corn and the remaining ingredients to the hot pan and cook, stirring occasionally, until creamy and heated through. Serve.