Search Results for: comparisons

rustic bread (comparison of 3 recipes)

rustic bread 23
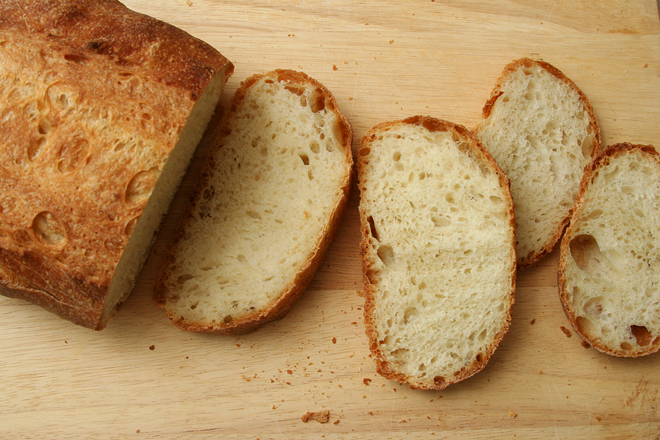
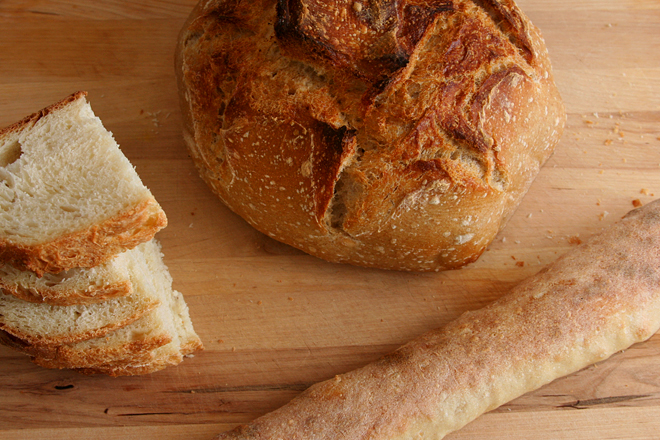
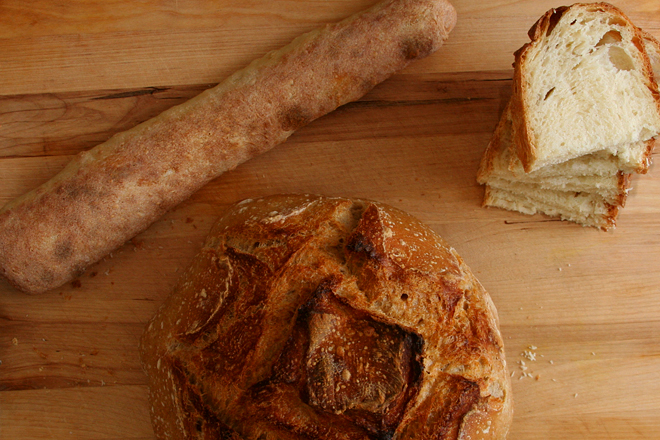
baguette: PR; slices: CI; round loaf: T

I love bread so much. I always have – who doesn’t? – but I’ve been having even more fun with it lately. Besides hot dog and burger buns, my focus has almost exclusively been on rustic breads for the last couple years. If we spend Saturday night at home, I’ll often make a really nice meal, and wine seems like a natural accompaniment (to be honest, often the meal is planned around the wine), and bread and wine are so good together.
rustic bread 1
CI biga

With all these opportunities to experiment, I started working on this comparison years ago. I slowly narrowed down recipes until I had three that were so good that the comparison would undoubtedly be a reflection of personal taste and not quality of the recipe, thus defeating the purpose of doing a tasting at all. But at least I (and my friends) got to eat a lot of good bread along the way.
rustic bread 2
CI dough

The recipes that made the cut were Cook’s Illustrated’s Italian Bread recipe (CI), Peter Reinhart’s Pain a l’Ancienne (PR), and Tartine’s Country Bread (T). I’d previously made all three of these recipes many times and loved them all. I’d need to taste them side-by-side to choose a favorite.

rustic bread 3
CI dough mid-turn

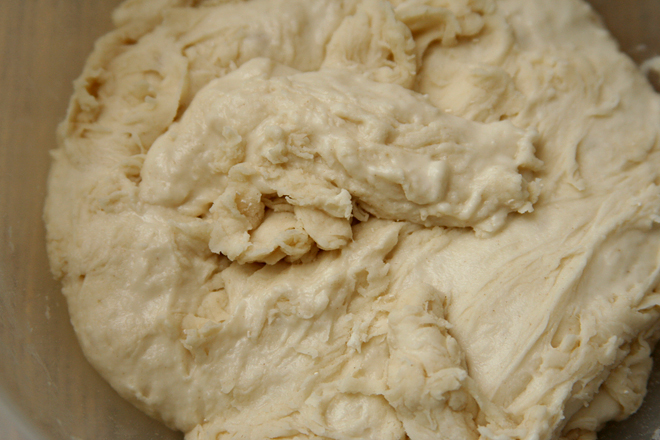
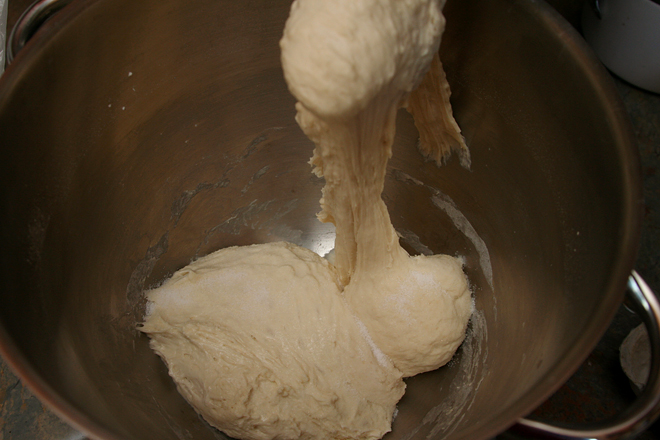
CI – This bread starts with a biga, a mixture of flour, water, and yeast that’s stirred together, left at room temperature for a few hours to ferment, then transferred to the refrigerator overnight. A second mixture of flour, water, and yeast is later mixed and allowed to set for just 20 minutes before the biga and salt is added and the dough is kneaded.

rustic bread 5
CI dough completed turn

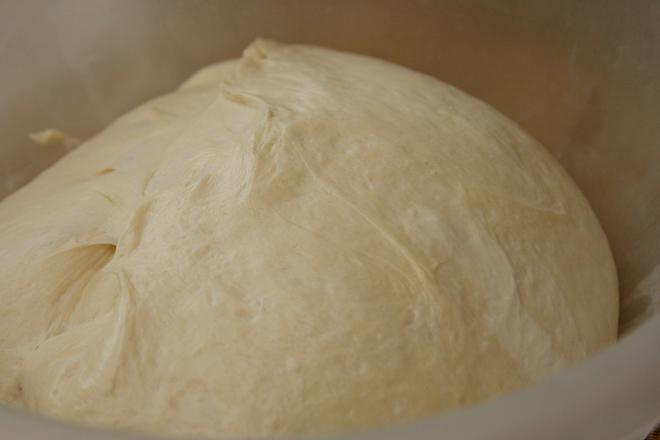
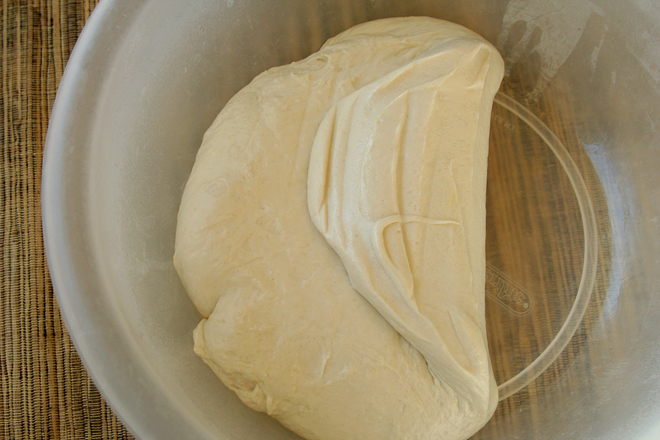
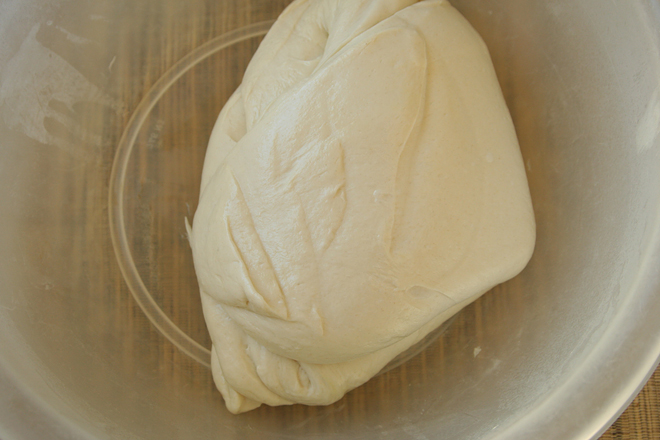
The dough goes through a long rise at room temperature with several “turns” in the middle – basically folding the dough over itself a couple times. It’s supposed to lead to the final loaf rising up and not out, and it’s a trick I like enough that I incorporate it in other bread recipes. After shaping, the dough goes through a second rise and is baked on a stone at 500 degrees for 10 minutes and then 400 degrees. The dough is sprayed with water before baking, but no other steam is added.

rustic bread 8
CI risen dough

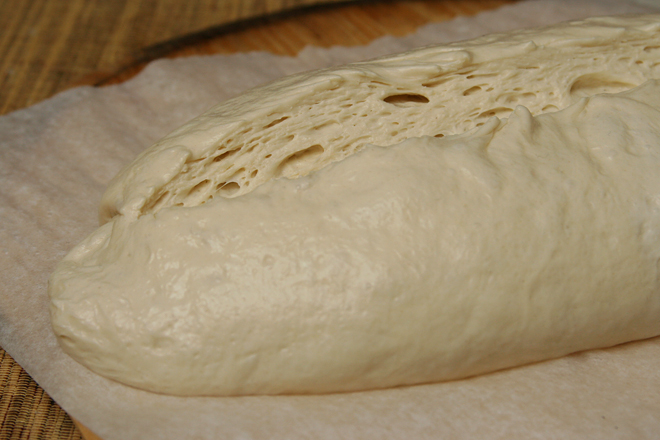
PR – This is the easiest bread in this lineup. Flour, yeast, salt, and ice water are mixed and kneaded, then chilled overnight. The next day, after it warms up and rises a bit, the very sticky dough is cut into smaller portions, which are pulled and pushed into something vaguely baguette-like. These are baked soon after shaping. Reinhart calls for a few shots of water to be sprayed on the sides of the oven, plus a pan of hot water in the oven with the bread to create steam during baking.

rustic bread 9
CI ready to bake

T – This dough requires a lot of babysitting and a lot of patience, although not necessarily a lot of work. The flour and water are mixed with sourdough starter and allowed to rest for a bit, then salt is mixed in. The dough isn’t kneaded, it’s just turned, as described above, every half an hour or so for about four hours. After being shaped into rounds, it’s chilled overnight in the refrigerator. It’s kept covered in a heavy Dutch oven for the first part of baking to trap steam, then the lid is removed so the crust can brown.

rustic bread 10
CI

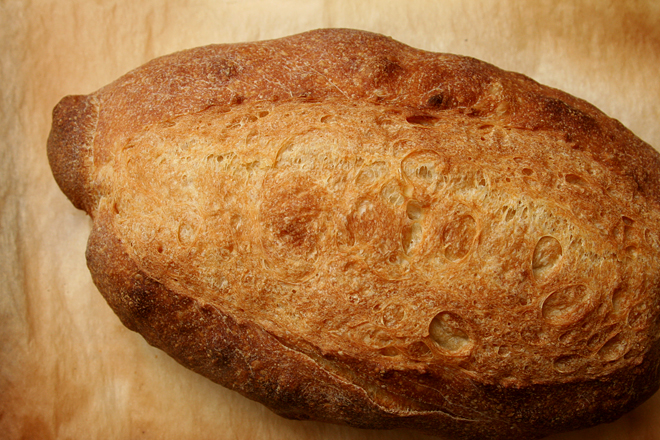
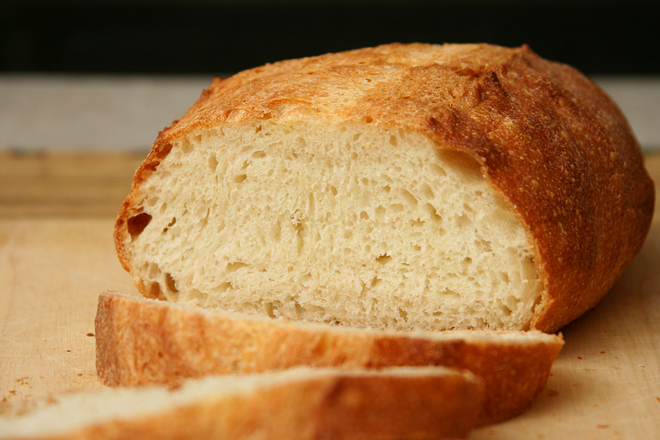
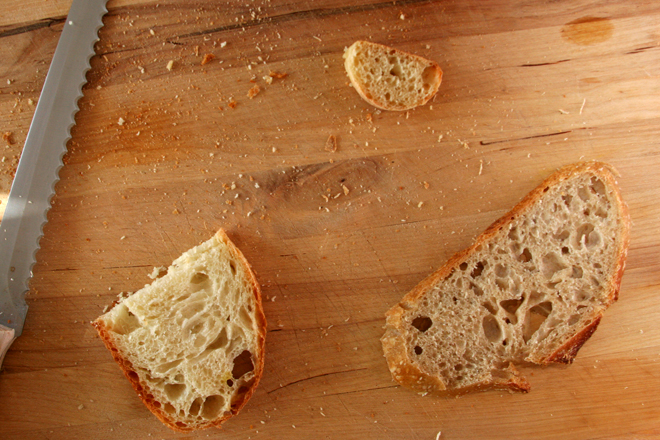
In retrospect, the breads are pretty different. The Italian bread (CI) has an even, relatively tight structure, while the pain a l’ancienne (PR) is open and airy. Tartine’s country bread (T) has a slight but unignorable sourdough flavor.

rustic bread 11
CI

CI – Described as denser and drier. The chewy crust got compliments. While one friend thought it was sweeter than the other breads, to me, it didn’t have as much flavor. This might be because I eat so many whole grains lately that a bread made with all white flour seems plain.

PR – Tasters thought the bread might be buttery or eggy, despite a lack of both of those ingredients in the recipe. They also thought it was chewy and moist and liked the crust.

T – The sourdough flavor was picked out immediately. It was also described as yeastier and more floury.

rustic bread 12
CI

With five people comparing the breads, no clear winner emerged. A friend who grew up eating sourdough pancakes preferred Tartine’s country bread. An Italian friend loved CI’s Italian bread, as did a friend who liked the sweeter flavor. PR’s pain a l’ancienne was Dave’s favorite and no one’s least favorite. Those who favored Tartine country bread said CI’s Italian bread was their least favorite and vice versa, although everyone liked all of the breads. I was just happy because I got to eat — and bake — so much bread.

rustic bread 25
clockwise from top: PR, T, CI

Tartine Country Bread

Pain a l’ancienne

Printer Friendly Recipe
Italian Bread (from Cook’s Illustrated’s The New Best Recipe)

This recipe requires a standing mixer to make the dough, a spray-bottle filled with water for spritzing, a rectangular baking stone, and an instant-read thermometer for gauging doneness. It also requires a bit of patience — the biga, which gives the bread flavor, must be made 11 to 27 hours before the dough is made.

This recipe makes a gigantic loaf of bread.  I always divide the dough into two portions and make smaller loaves.

I really didn’t intend for all of the pictures in this post to be of this recipe.  Fortunately, there are separate entries dedicated to the other two recipes.

Biga:
11 ounces bread flour (2 cups)
¼ teaspoon instant yeast
8 ounces water (1 cup), room temperature

Dough:
16½ ounces bread flour (3 cups), plus extra for dusting hands and work surface
1 teaspoon instant yeast
10.7 ounces water (1⅓ cups), room temperature
2 teaspoons table salt

1. For the biga: Combine flour, yeast, and water in bowl of standing mixer fitted with dough hook. Knead on lowest speed (stir on KitchenAid) until it forms a shaggy dough, 2 to 3 minutes. Transfer biga to medium bowl, cover tightly with plastic wrap, and let stand at room temperature until beginning to bubble and rise, about 3 hours. Refrigerate biga at least 8 hours or up to 24 hours.

2. For the dough: Remove biga from refrigerator and let stand at room temperature while making dough. Combine flour, yeast, and water in bowl of standing mixer fitted with dough hook; knead on lowest speed until rough dough is formed, about 3 minutes. Turn mixer off and, without removing dough hook or bowl from mixer, cover bowl loosely with plastic wrap; let dough rest 20 minutes.

3. Remove plastic wrap, add biga and salt to bowl, and continue to knead on lowest speed until ingredients are incorporated and dough is formed (dough should clear sides of bowl but stick to very bottom), about 4 minutes. Increase mixer speed to low (speed 2 on KitchenAid) and continue to knead until dough forms a more cohesive ball, about 1 minute. Transfer dough to large bowl (at least 3 times dough’s size) and cover tightly with plastic wrap. Let dough rise in cool, draft-free spot away from direct sunlight, until slightly risen and puffy, about 1 hour.

4. Remove plastic wrap and turn the dough by sliding a plastic bench scraper under one side of the dough; gently lift and fold one third of the dough toward the center. Fold the opposite side of the dough toward the center. Finally, fold the dough in half, perpendicular to first folds. Dough shape should be a rough square. Replace plastic wrap; let dough rise 1 hour. Turn dough again, replace plastic wrap, and let dough rise 1 hour longer.

5. To shape the dough: Dust work surface liberally with flour. Gently scrape and invert dough out of bowl onto work surface (side of dough that was against bowl should now be facing up). Dust dough and hands liberally with flour and, using minimal pressure, push dough into rough 8- to 10-inch square. Fold the top left corner diagonally to the middle; repeat step 2 with top right corner. Gently roll dough from top to bottom until it forms a rough log. Roll the dough into its seam, and, sliding hands underneath each end, transfer the dough to parchment paper. Gently shape dough into 16-inch football shape by tucking bottom edges underneath. Dust loaf liberally with flour and cover loosely with plastic wrap; let loaf rise until doubled in size, about 1 hour. Meanwhile, adjust oven rack to lower-middle position, place baking stone on rack, and heat oven to 500 degrees.

6. To bake: Using a lame, single-edged razor blade, or sharp chef’s knife, cut slit ½ inch deep lengthwise along top of loaf, starting and stopping about 1½ inches from ends; spray loaf lightly with water. Slide parchment sheet with loaf onto baker’s peel or upside-down baking sheet, then slide parchment with loaf onto hot baking stone in oven. Bake 10 minutes, then reduce oven temperature to 400 degrees and quickly spin loaf around using edges of parchment; continue to bake until deep golden brown and instant-read thermometer inserted into center of loaf registers 210 degrees, about 35 minutes longer. Transfer to wire rack, discard parchment, and cool loaf to room temperature, about 2 hours.
rustic bread 24

triple chocolate cupcake comparison

triple chocolate cupcakes 13
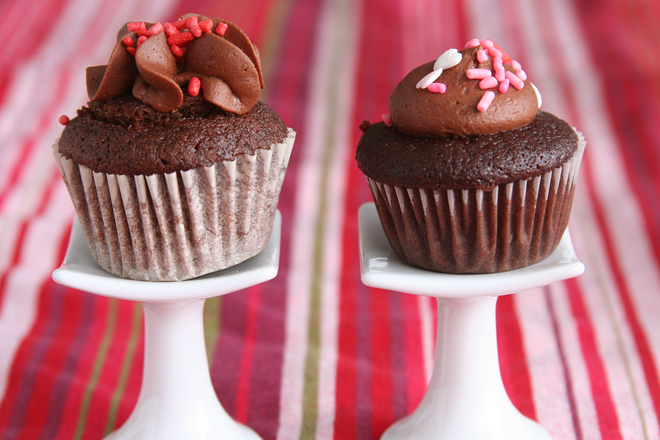
left – annie; right – josie

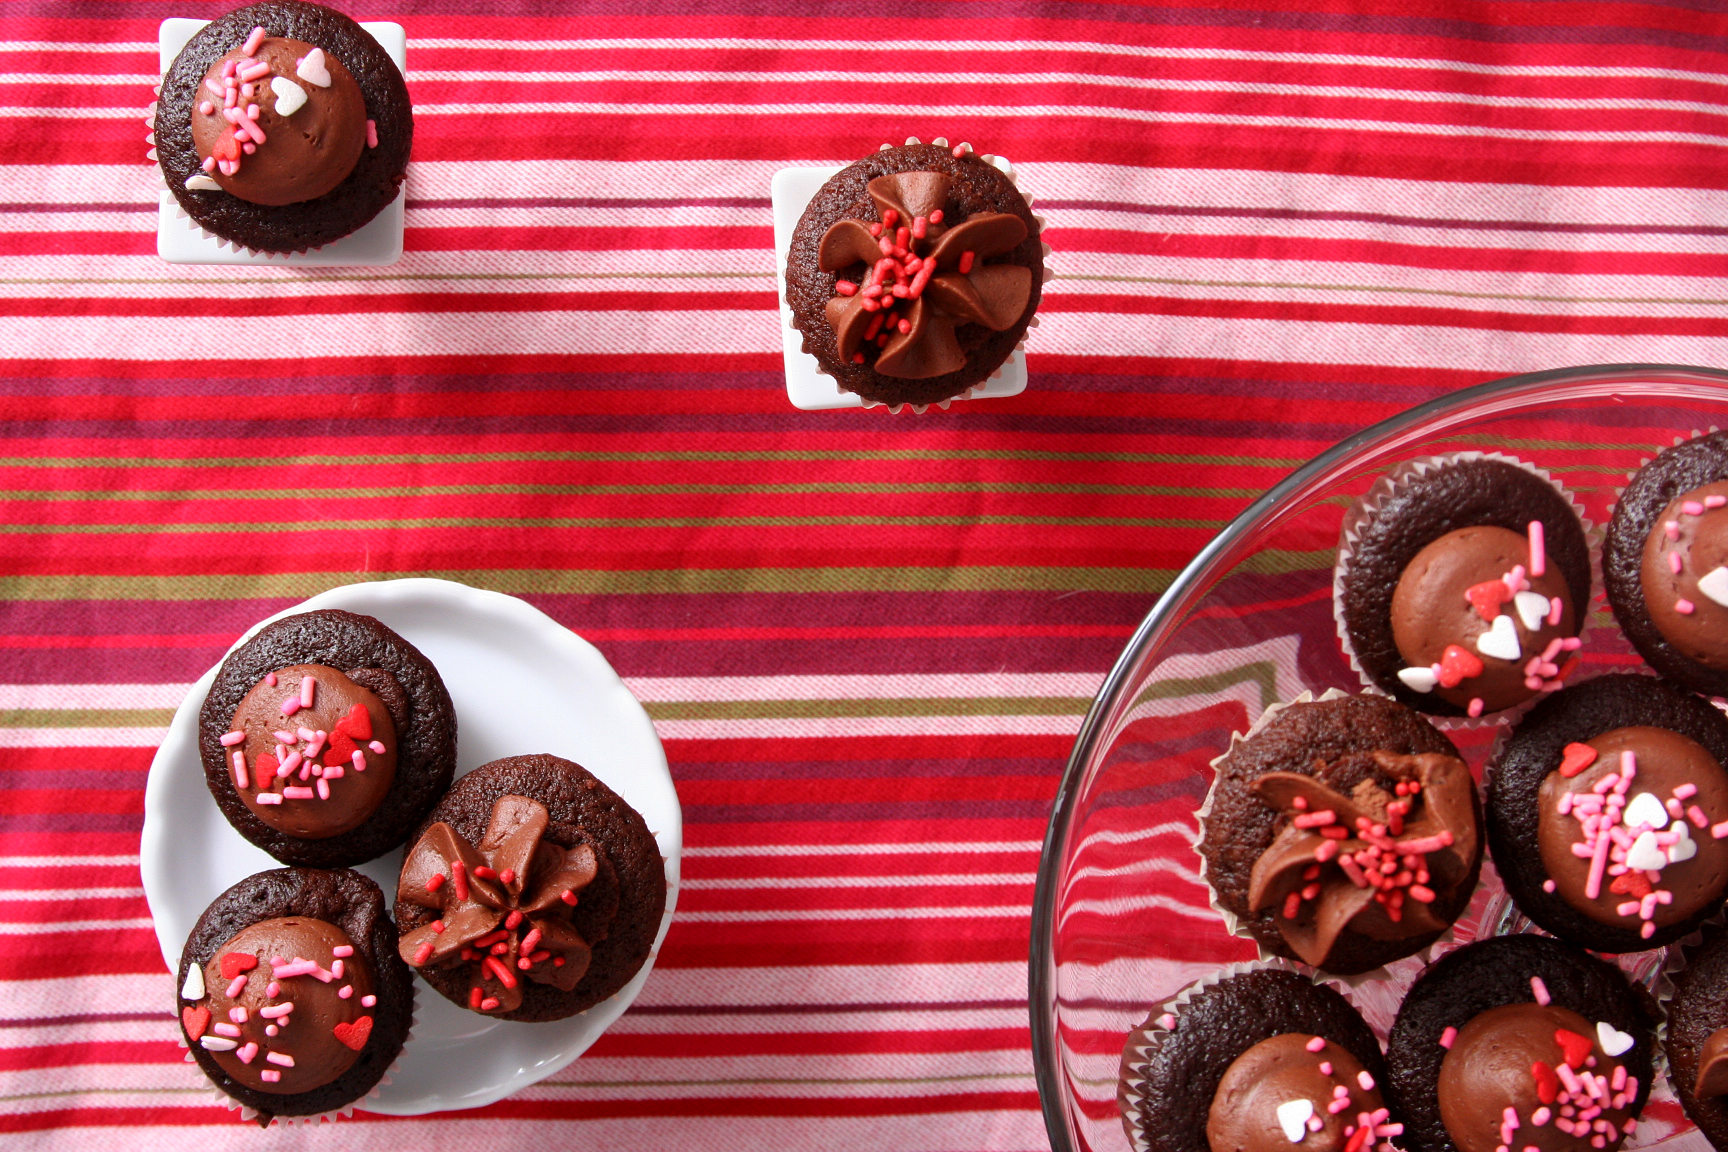
Annie and Josie, two peas in a pod as usual, published chocolate cupcakes with chocolate ganache and chocolate frosting within a week of each other. They differed, however, on the recipes they used. Josie chose the recently published Cook’s Illustrated recipe, while Annie went a different direction with a combination of Martha Stewart’s cake recipe filled with Dorie Greenspan’s ganache recipe and frosted with Martha Stewart’s recipe.

triple chocolate cupcakes 1
annie

Clearly, as I said four years ago, a comparison was in order. There were two main differences between the recipes – the cake recipe itself, including the ingredients and the mixing method, and the way the ganache is added to the cake. I did not compare the frosting recipes associated with each cupcake recipe, because I did that in a past comparison it was late and I was tired and I ran out of chocolate.

triple chocolate cupcakes 2
annie

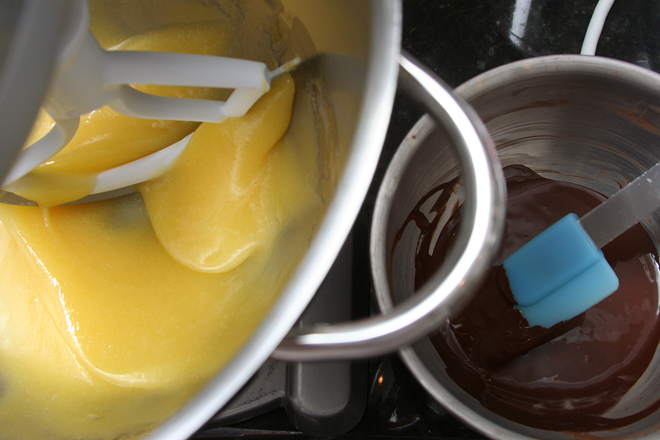
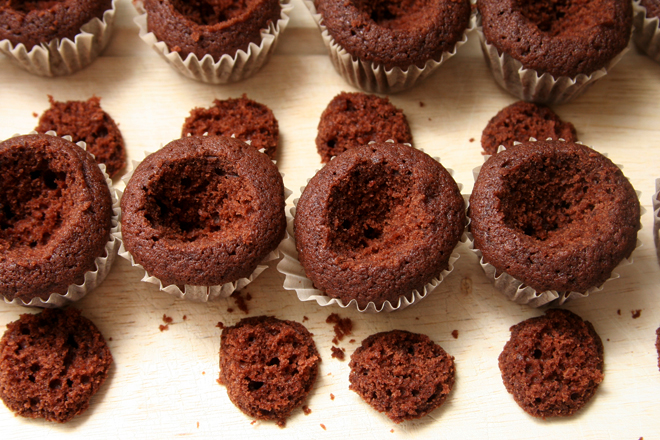
Annie – This cupcake starts out in an usual way, in that the butter is melted with the sugar, and then that mixture is beaten together. The rest goes like most cake batters do – an egg is added, then a mixture of cocoa and hot water, and finally the dry ingredients alternating with the wet ingredient, in this case sour cream. The only source of chocolate is cocoa. A hole is carved out of the baked cupcakes and is filled with ganache.

triple chocolate cupcakes 4
annie

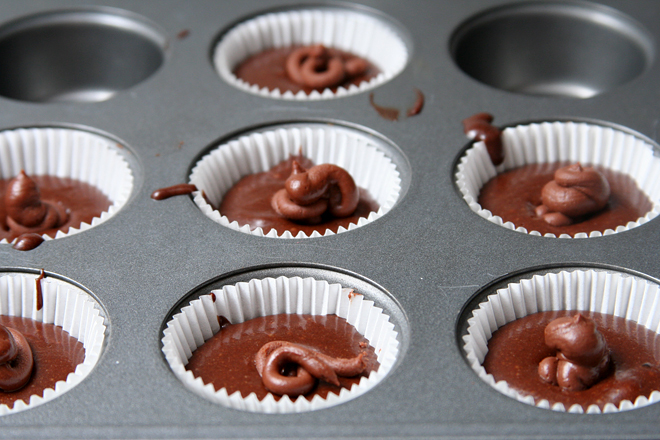
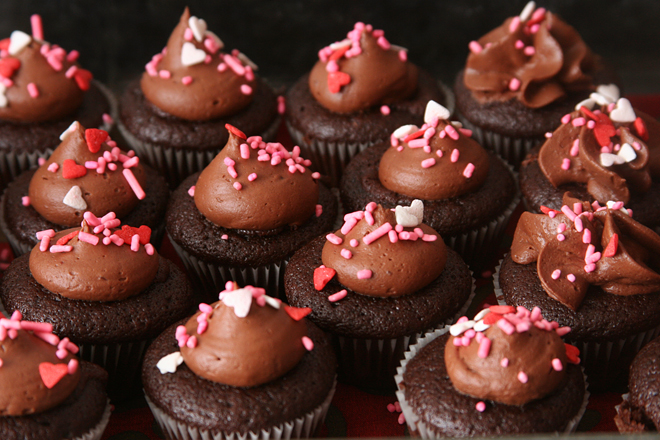
Josie – The wet ingredients and chocolatey ingredients (cocoa and bittersweet chocolate, plus coffee) are whisked together, then the dry ingredients are added. The batter is divided between the muffin cups, and then, before baking, the ganache is placed on top of the cupcakes (see photo of ganache looking either like poop or intestines; I’m sorry).

triple chocolate cupcakes 5
josie

This was the first time I’ve brought a comparison to work and had my coworkers vote, but I loved it – and I suspect they didn’t mind either. The overwhelming favorite was the recipe from Annie’s blog. There were a couple complaints of bitterness in the recipe from Josie’s blog (Cook’s Illustrated’s recipe), which could be due to the coffee.

triple chocolate cupcakes 7
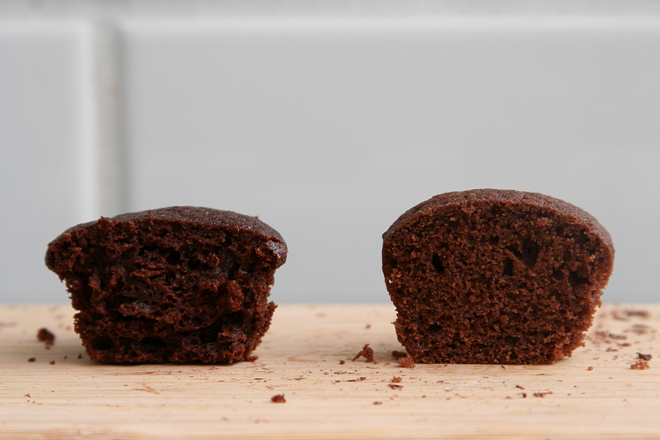
left – josie; right – annie; no filling in either

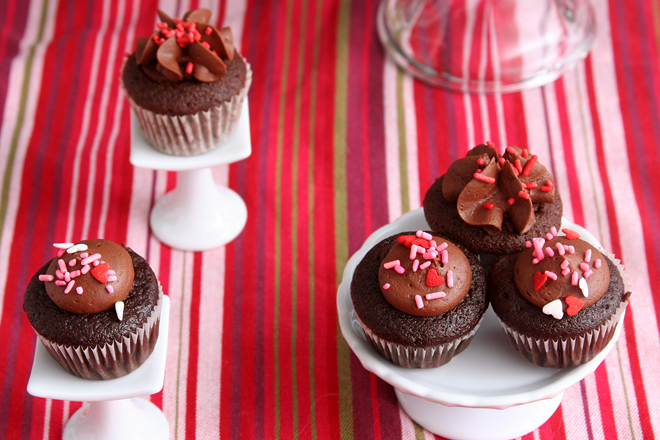
The real key though was adding ganache to the center of the cupcake after it was baked; people loved that chunk of chocolate in the middle of the chocolate cupcake. When the ganache was added before baking, it seemed to meld into the cupcake itself. You can see that there’s no distinct ganache in the finished cupcake, but I assure you that it was added.

triple chocolate cupcakes 14
left – annie; right – josie; both with fillings

I’m so glad to have a clear winner in a comparison post for once, although, let’s face it, with this much chocolate in the kitchen, my coworkers were the real winners. As with almost all comparisons I do, both recipes were stars, which is why having the side-by-side is so helpful.  The real lesson seems to be to add ganache to a baked cupcake for the ultimate chocolatey experience.  Josie and Annie, thanks for two great very chocolately recipes.

triple chocolate cupcakes 12

Printer Friendly Recipe
Triple Chocolate Cupcakes (rewritten from Annie’s Eats, cake adapted from Martha Stewart, ganache adapted from Dorie Greenspan)

12 to 14 cupcakes

For the cupcakes:
¼ cup plus 2 tablespoons unsweetened Dutch-process cocoa powder
¼ cup plus 2 tablespoons hot water
1½ cups (7.2 ounces) all-purpose flour
½ teaspoon baking soda
½ teaspoon baking powder
½ teaspoon table salt
12 tablespoons (1½ sticks) unsalted butter
1 cup plus 2 tablespoons (7.85 ounces) granulated sugar
2 large eggs, at room temperature
2 teaspoons vanilla extract
½ cup sour cream, at room temperature

For the ganache filling:
½ cup plus 1 tablespoon heavy cream
4 ounces bittersweet chocolate, finely chopped
2 tablespoons unsalted butter, cut into 4 pieces, at room temperature

1. For the cake: Adjust a rack to the middle position and heat the oven to 350 degrees. Line a 12-cup muffin pan with paper liners. In a small bowl or measuring cup, whisk together the cocoa and water. In a medium bowl, mix the flour, baking soda, baking powder, and salt.

2. In a medium saucepan, melt the butter, then stir in the sugar. Transfer the mixture to the bowl of a mixer fitted with the paddle attachment (or a large bowl with a handheld mixer) and beat on medium-low speed until cooled to room temperature, 4-5 minutes. Add the eggs, one at a time, then beat in the vanilla and cocoa mixture. Reduce the mixer speed to low and add one-third of the dry ingredients, followed by half of the sour cream. Repeat with another third of the dry ingredients, the remaining sour cream, and the remaining dry ingredients, beating just until combined.

3. Divide the batter between the prepared cupcake liners. Bake until a toothpick inserted into a cupcake comes out clean, 18 to 20 minutes. Transfer the pan to a wire rack; after five minutes, remove the cupcakes from the pan and let cool completely on a wire rack before filling and frosting.

4. For the ganache: In small saucepan, heat the cream until it just simmers; pour it over the chocolate. Let set about one minute, the whisk to combine. Whisk in the butter. Chill, uncovered, until solid but not hard, stirring occasionally, about 20 minutes.

5. Use a paring knife to remove a 1½ inch-diameter cone from the center of each cupcake. Cut off the bottom of each cone and discard. Fill the well will ganache, then cover with the top of each cone. Frost as desired.

triple chocolate cupcakes 9
josie

Printer Friendly Recipe
Ultimate Chocolate Cupcakes (from Cook’s Illustrated via Pink Parsley)

12 cupcakes

Ganache Filling
2 ounces bittersweet chocolate, chopped fine
¼ cup heavy cream
1 tablespoon confectioners’ sugar

Chocolate Cupcakes
3 ounces bittersweet chocolate, chopped fine
⅓ cup (1 ounce) Dutch-processed cocoa
¾ cup hot coffee
¾ cup (4⅛ ounces) bread flour
¾ cup (5¼ ounces) granulated sugar
½ teaspoon table salt
½ teaspoon baking soda
6 tablespoons vegetable oil
2 large eggs
2 teaspoons white vinegar
1 teaspoon vanilla extract

1. For ganache filling: Place chocolate, cream, and confectioners’ sugar in medium microwave-safe bowl. Heat in microwave on high power until mixture is warm to touch, 20 to 30 seconds. Whisk until smooth; transfer bowl to refrigerator and let stand until just chilled, no longer than 30 minutes.

2. For cupcakes: Adjust oven rack to middle position and heat oven to 350 degrees. Line standard-size muffin pan (cups have ½-cup capacity) with baking-cup liners. Place chocolate and cocoa in medium bowl. Pour hot coffee over mixture and whisk until smooth. Set in refrigerator to cool completely, about 20 minutes. Whisk flour, sugar, salt, and baking soda together in medium bowl; set aside.

3. Whisk oil, eggs, vinegar, and vanilla into cooled chocolate-cocoa mixture until smooth. Add flour mixture and whisk until smooth.

4. Divide batter evenly among muffin pan cups. Place one slightly rounded teaspoon ganache filling on top of each cupcake. Bake until cupcakes are set and just firm to touch, 17 to 19 minutes. Cool cupcakes in muffin pan on wire rack until cool enough to handle, about 10 minutes. Carefully lift each cupcake from muffin pan and set on wire rack. Cool to room temperature before frosting, about 1 hour.

triple chocolate cupcakes 11

chocolate chip cookie comparison 2

chocolate chip comparison 2
The Chewy

I’ve done all these comparisons and experiments with chocolate chip cookies, and yet, I don’t make any of those recipes. Usually, I make chocolate chip cookies to please myself, because I think it’s fun, so I’m more concerned with which recipe I most enjoy baking instead of which recipe has the best result. But maybe this isn’t so bad – maybe my hacked combination of recipes could stand up to the originals.

chocolate chip comparison 1
The Chewy dough

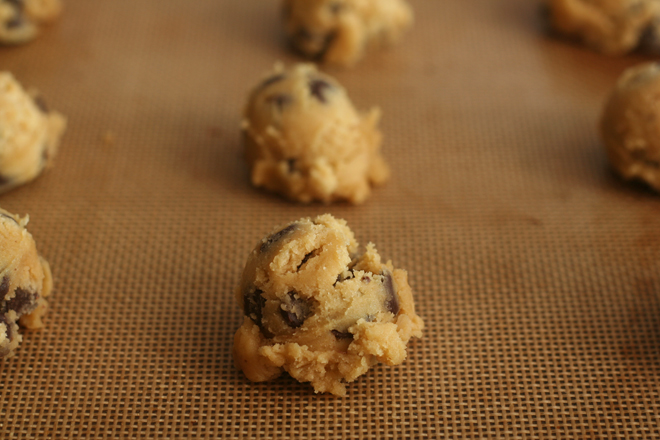
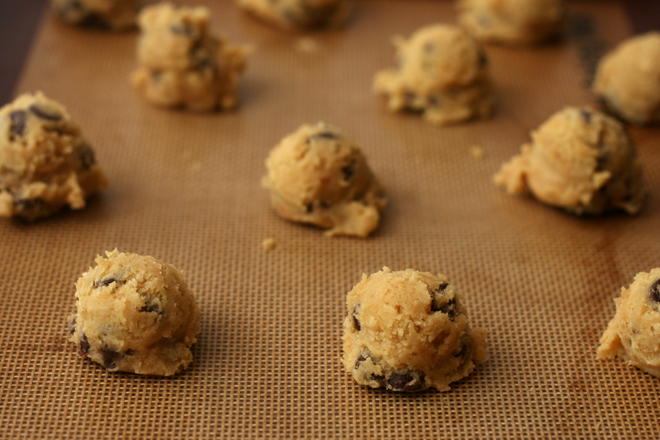
It was time to find out. For a comparison of the best of the best, I chose Alton Brown’s The Chewy recipe, winner of my last comparison; Cook’s Illustrated’s Perfect Chocolate Chip Cookie, a true standout; Kelsey’s Best Ever Chewy Chocolate Chip Cookies (adapted from Anna Olson’s original recipe), which are the most popular post on her blog; and the one I always make when I’m too lazy to follow an actual recipe.

chocolate chip comparison 3
The Chewy

What sets Alton’s recipe apart is the use of bread flour instead of regular and the replacement of an egg white with milk. Cook’s Illustrated Perfect recipe is designed to mimic the effects of the overnight rest of the dough recommended by the New York Times, which it does using melted browned butter. Compared to the traditional Tollhouse recipe, Kelsey’s recipe uses a higher ratio of flour (plus a bit of cornstarch). My recipe has some similar traits to those above, like bread flour instead all-purpose and an overnight chill to enhance the butterscotch flavor.

chocolate chip comparison 4
my recipe dough

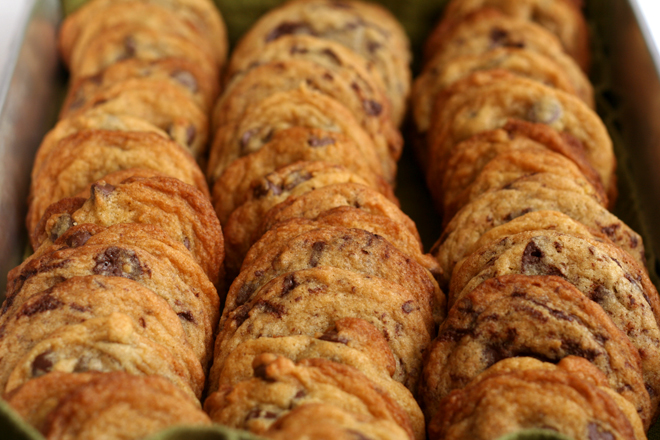
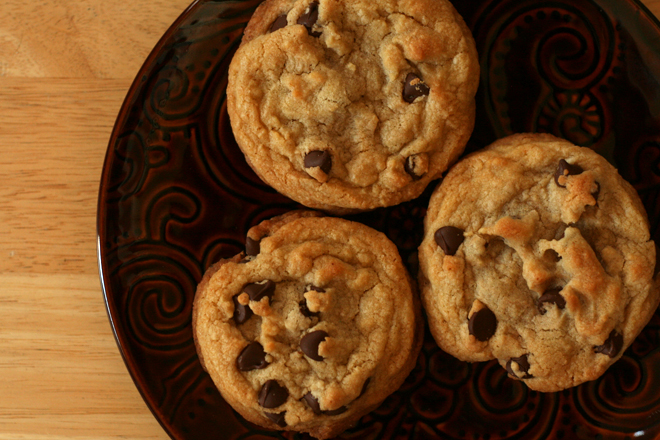
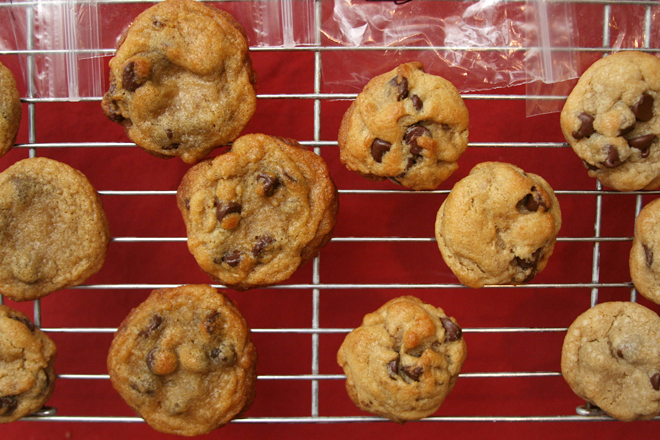
Between the four tasters I had, there was no unanimous favorite. Dave’s favorite was CI’s Perfect cookies. My sister and her husband both chose Alton Brown’s The Chewy as their favorite; it was chewier, but, to Dave, it was too greasy. Kelsey’s recipe was drier than the others; compared to the ultra-rich versions it was being compared to, it had less flavor. My hacked together recipe was the most traditional, crispy around the edges and gooey in the middle.

chocolate chip comparison 6
Cook’s Illustrated’s Perfect

As for me, I’ll certainly keep making the version I have been, now that I know that it can hold its own with the big dogs. I love it because I don’t have to look at a recipe and the dough is perfect for snacking. The Chewy tends to come out a little too flat, and I don’t like the dough for CI’s Perfect (which makes it the recipe of choice when self-control is necessary!), plus it simply isn’t as fun to make cookies with a whisk as it is with a mixer. Slight differences aside, these were all standout recipes, but I appreciate the validation to keep being lazy with my hacked together version.

chocolate chip comparison 5
left to right: The Chewy, my recipe, Kelsey’s Best-Ever, Cook’s Illustrated’s Perfect

One year ago: Kofta
Two years ago: Grilled Corn Salad
Three years ago: Espresso Cheesecake Brownies
Four years ago: Chunky Peanut Butter and Oatmeal Chocolate Chipsters

Printer Friendly Recipe
Accidental Variation of The Chewy (adapted from Alton Brown)

As I was writing up this recipe, I realized I did not actually make The Chewy, which I now see is supposed to use melted butter. I used room temperature solid butter. The recipe below is what I did. This means that the only difference between my recipe and The Chewy is a lower ratio of brown sugar to white and the use of an egg white instead of milk.

16 tablespoons (2 sticks) unsalted butter, room temperature
2¼ cups (11.25 ounces) bread flour
1 teaspoon table salt
1 teaspoon baking soda
¼ cup granulated sugar
1¼ cups brown sugar
1 egg
1 egg yolk
2 tablespoons milk
1½ teaspoons vanilla extract
2 cups (12 ounces) semisweet chocolate chips

1. Heat oven to 375 degrees. Sift together the flour, salt, and baking soda and set aside.

2. Add the butter to the mixer’s work bowl with the sugars. Cream the butter and sugars on medium speed. Add the egg, yolk, 2 tablespoons milk, and vanilla extract, and mix until well combined. Slowly incorporate the flour mixture until thoroughly combined. Stir in the chocolate chips.

3. Scoop the dough in heaping tablespoons onto the prepared baking sheets. Bake the cookies, one sheet at a time, until they are browned around the edges and do not look wet on top, 8-12 minutes. Let the cookies cool on the cookie sheets for 5 minutes, then transfer to wire racks to cool completely.

Printer Friendly Recipe
Perfect Chocolate Chip Cookies (from Cook’s Illustrated May/June 2009)

I baked smaller cookies – tablespoon-sized dollops of dough – for about 9 minutes at 375 degrees.

1¾ cups (8¾ ounces) unbleached all-purpose flour
½ teaspoon baking soda
14 tablespoons (1¾ sticks) unsalted butter
½ cup (3½ ounces) granulated sugar
¾ cup (5¼ ounces) packed dark brown sugar
1 teaspoon table salt
2 teaspoons vanilla extract
1 large egg
1 large egg yolk
1¼ cups semisweet chocolate chips or chunks
¾ cup chopped pecans or walnuts, toasted (optional)

1. Adjust oven rack to middle position and heat oven to 375 degrees. Line 2 large baking sheets with parchment paper. Whisk flour and baking soda together in medium bowl; set aside.

2. Heat 10 tablespoons butter in 10-inch skillet over medium-high heat until melted, about 2 minutes. Continue cooking, swirling pan constantly until butter is dark golden brown and has nutty aroma, 1 to 3 minutes. Remove skillet from heat and, using heatproof spatula, transfer browned butter to large heatproof bowl. Stir remaining 4 tablespoons butter into hot butter until completely melted.

3. Add both sugars, salt and vanilla to bowl with butter and whisk until fully incorporated. Add egg and yolk and whisk until mixture is smooth with no sugar lumps remaining, about 30 seconds. Let mixture stand for 3 minutes, then whish for 30 seconds. Repeat process of resting and whisking 2 more times until mixture is thick, smooth and shiny. Using rubber spatula or wooden spoon, stir in flour mixture until just combined, about 1 minute. Stir in chocolate chips and nuts (if using), giving dough final stir to ensure no flour pockets remain.

4. Divide dough into 16 portions, each about 3 tablespoons (or use a #24 cookie scoop). Arrange 2 inches apart on prepared baking sheets, 8 dough balls per sheet.

5. Bake cookies 1 tray at a time until cookies are golden brown and still puffy, and edges have begun to set but centers are still soft, 10-14 minutes, rotating baking sheet halfway through baking. Transfer baking sheet to wire rack; cool cookies completely before serving.

Printer Friendly Recipe
Best-Ever Chocolate Chip Cookies (rewritten but not changed from Kelsey’s Apple a Day, who adapted it from Anna Olson)

2 cups (9.6 ounces) all-purpose flour
2 teaspoons cornstarch
1 teaspoon baking soda
½ teaspoon table salt
12 tablespoons (1½ sticks) unsalted butter, softened
¾ cup (5.25 ounces) brown sugar
¼ cup (1.75 ounces) granulated sugar
1 egg
2 teaspoons vanilla extract
1 cup (6 ounces) bittersweet chocolate chips

1. Heat the oven to 350 degrees. Line two baking sheets with parchment paper or silicone mats. In a medium bowl, mix the flour and baking soda.

2. In the bowl of a stand mixer fitted with the paddle attachment (or a large bowl if using a stand mixer), beat the butter, salt, and sugars on medium speed until light and fluffy, 1-2 minutes. Add the egg, beating until incorporated, then mix in the vanilla. Reduce the mixer speed to low and gradually add the flour, mixing just until incorporated. Stir in the chocolate chips.

3. Scoop the dough in heaping tablespoons onto the prepared baking sheets. Bake the cookies, one sheet at a time, until they are slightly browned around the edges, 8-10 minutes. Let the cookies cool on the cookie sheets for 5 minutes, then transfer to wire racks to cool completely.

Printer Friendly Recipe
Chocolate Chip Cookies (adapted from nearly every single chocolate chip cookie recipe I’ve ever read)

I haven’t found a dependable measurement for the weight of 1 cup of bread flour.  I used to assume 5 ounces for 1 cup of bread flour, but I think this is on the high side, so I’m changing the volume measurement in this recipe from 2¼ cups to 2⅓ cups.  Unfortunately,  it could be as high as 2½ cups, depending on how you measure your flour.  If you can, definitely measure by weight and not volume (food scales are cheap!)!

16 tablespoons (2 sticks) unsalted butter, room temperature
1 teaspoon table salt
1 cup (7 ounces) brown sugar
½ cup (3.5 ounces) white sugar
2 eggs
1 teaspoon vanilla
2¼ cups (11.25 ounces) bread flour
1 teaspoon baking soda
2 cups (12 ounces) semisweet chocolate chips

1. Heat the oven to 375 degrees. Line two baking sheets with parchment paper or silicone mats. In a medium bowl, mix the flour and baking soda.

2. In the bowl of a stand mixer fitted with the paddle attachment (or a large bowl if using a stand mixer), beat the butter, salt, and sugars on medium speed until light and fluffy, 1-2 minutes. Add the eggs, one at a time, beating until incorporated, then mix in the vanilla. Reduce the mixer speed to low and gradually add the flour, mixing just until incorporated. Stir in the chocolate chips.

3. Scoop the dough in heaping tablespoons onto the prepared baking sheets. Bake the cookies, one sheet at a time, until they are browned around the edges and do not look wet on top, 8-12 minutes. Let the cookies cool on the cookie sheets for 5 minutes, then transfer to wire racks to cool completely.

barbecue cowboy beans

cowboy beans 7

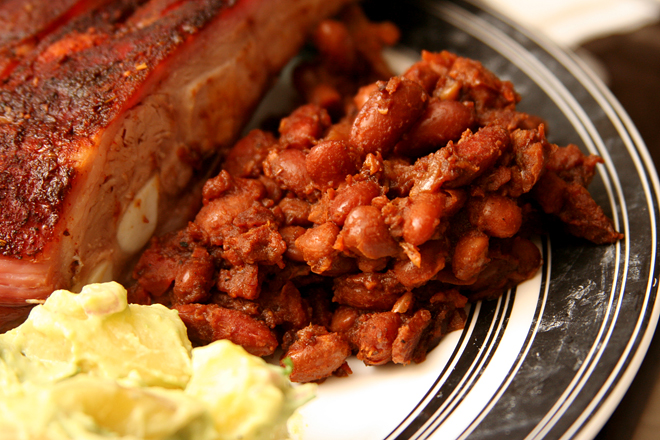
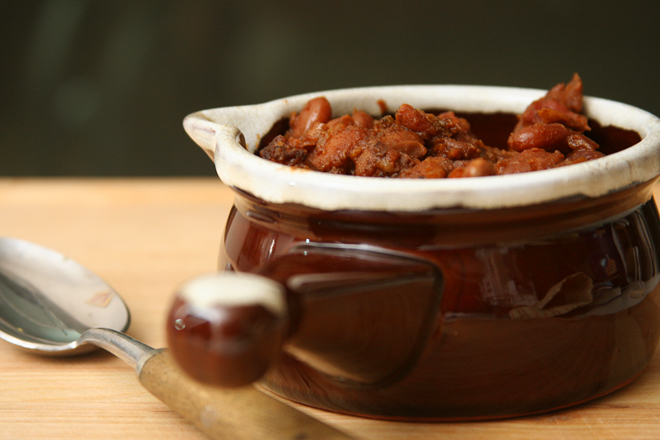
I feel like I should wait and do a comparison post with this recipe, because I have a friend who makes some seriously good cowboy beans. Hers are full of meat with a dominant sweet flavor. They’re always one of my favorite dishes on the potluck table.

cowboy beans 2

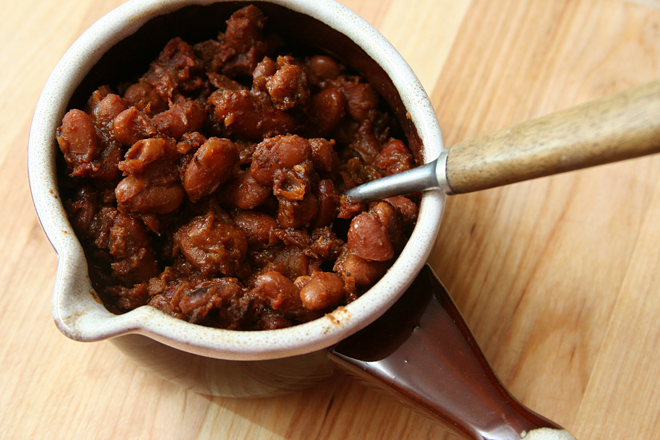
For my own version though, I wanted something lighter to serve as a side dish to barbecued ribs. When you’re spending hours cooking big slabs of meat, you don’t really need ground beef in your side dish. A few slices of bacon provide plenty of meaty depth, combined with sweet-bitter molasses and a slew of acidic ingredients like ketchup and beer.

cowboy beans 3

To be honest, I’m not sure what makes a pot of beans “cowboy” instead of just “baked.” A lot of recipes contain ground meat, but not all of them. This is the only one with spicy chiles. But honestly, I don’t much care. What matters most is that these are perfect along barbecued meat, and if I want a chile-less, meatier version, I can have that too.

cowboy beans 4

One year ago: Grilled Pita Breads
Two years ago: Whole Wheat Bagels
Three years ago: Amaretto Cheesecake
Four years ago: Blackberry Swirl Ice Cream

Printer Friendly Recipe
Barbecue Cowboy Beans (adapted from Something Edible)

Serves 6

If you don’t want to buy two kinds of beans, feel free to choose one or the other.

I didn’t use the liquid smoke because I didn’t have any, so I can’t attest to how it affects the beans. I doubt adding smoky flavor would be a bad thing though.

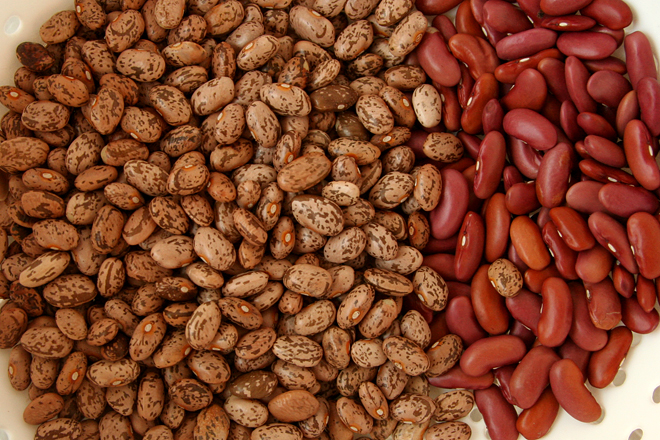
6 ounces (about 1 cup) dry pinto beans, rinsed and sorted
2 ounces (about ⅓ cup) dry kidney beans
salt
6 slices (about 6 ounces) bacon, chopped
½ medium onion, chopped
2 cloves garlic, minced
1 teaspoon allspice ground
½ teaspoon ground coriander
½ teaspoon ground black pepper
1 teaspoon dry mustard
¼ cup beer
1 (10-ounce) can diced tomatoes with chiles
¼ cup ketchup
¼ cup molasses
1 tablespoon cider vinegar
1 teaspoon hickory liquid smoke (optional)

1. Heat the oven to 300 degrees. Place the beans and 1 teaspoon salt in a 5-quart Dutch oven; add enough water to cover the beans by 1½ inches. Bring the water to a boil over medium-high heat, then cover the pot and transfer it to the oven. Cook for 75 minutes, until the beans are tender. Drain the beans. Increase the oven temperature to 400 degrees.

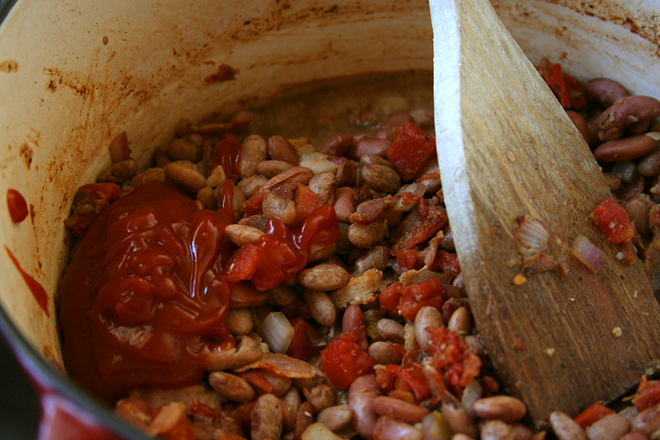
2. Add the bacon to the now-empty Dutch oven. Cook over medium heat until fat begins to render, 3-4 minutes. Add the onion and cook, stirring occasionally, until softened and translucent, 5-6 minutes. Add the garlic, allspice, coriander, black pepper, and mustard; cook, stirring constantly, until fragrant, about 1 minute. Add the beer and scrape the bottom of the pot to release the browned bits. Add the tomatoes and chiles with their juice, the ketchup, molasses, cider vinegar, liquid smoke (if using), and 1 teaspoon salt. Bring to a simmer over medium-high heat.

3. Cover and transfer the beans to the oven. Bake for 4 hours. Serve.

cowboy beans 5

bittersweet brownies

bittersweet brownies 4

There have been a lot of brownies around here lately, and there hasn’t been a one that I haven’t enjoyed. But I think I’m starting to feel like Dave – without having them side by side, it’s hard to pick favorites. When it comes to something that’s defined by being a square of buttery floury chocolate, it’s the nuances that set recipes apart.

bittersweet brownies 1

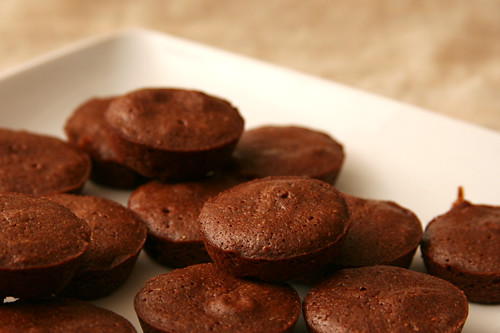
This recipe, like Dorie’s classic brownies and her ginger brownies, show her preference for a squat, dense bar cookie. These brownies don’t have a bit of cake fluffiness to them, but they aren’t greasy like some so-called fudgy brownies. They’re tender, almost as if a sablé could be a brownie.

bittersweet brownies 2

In short, I like them. Really, I like any brownie with good chocolate flavor, which these certainly have. I won’t complain about making three different brownie recipes that, to me, all seemed similar, because they were similarly good.

bittersweet brownies 6

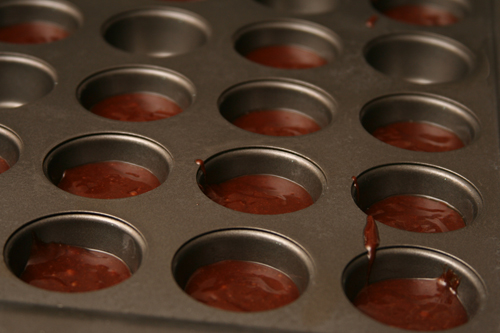
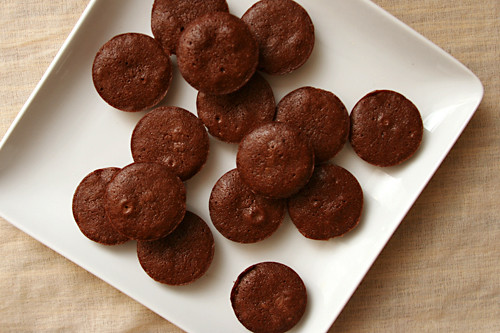
Leslie chose these for Tuesdays with Dorie, and she has the recipe posted. I followed the mixing instructions exactly, but then decided to change things up and bake these in a mini muffin pan. I baked them at 325 degrees (the temperature called for in the original recipe) for about 12 minutes.

One year ago: Cranberry Apple Galette
Two years ago: Cran-Apple Crisps
Three years ago: Rice Pudding

bittersweet brownies 5

tapioca pudding comparison

tapioca pudding 11

Everyone knows there’s science in cooking – reactions occur when heat is applied to ingredients or even just mixed together, like the bubbles that form when baking powder is stirred into batter. But rarely when I cook do I feel like a scientist. I understand some of what’s happening on a molecular level, but following the steps in a recipe, or even hashing out my own path on the stovetop, does not feel like doing science.

tapioca pudding 2

Recipe comparisons are when I get to be an experimentalist and a cook/baker all at once, and that’s why I love them, despite all the work they entail. I thought a tapioca pudding comparison would be easier, and so I wouldn’t mind sharing it with Jen as part of her Friday Favorites series. And besides, Jen’s an engineer – that’s just a scientist with a purpose. It wasn’t until later that I found out that Jen doesn’t like pudding.

tapioca pudding 9

I would have loved for my first shared comparison to be one of those rarities in which there’s a clear favorite, but there wasn’t even one recipe that we loved. Cooks Illustrated’s had a weird gritty texture, Kraft’s was lacking flavor, and I completely messed up Mark Bittman’s recipe – although that one ended up being Dave’s favorite. Clearly more experimentation is in order, and that is absolutely fine with me. Check out Jen’s blog to get the full analysis, more photos, and the recipes – the very first pudding recipes in her blog, and perhaps the only ones she’ll ever post!

One year ago: Tacos al Pastor
Two years ago: Crockpot Chicken Broth
Three years ago: Chicken with Forty Cloves of Garlic

tapioca pudding 10

chocolate mousse comparison

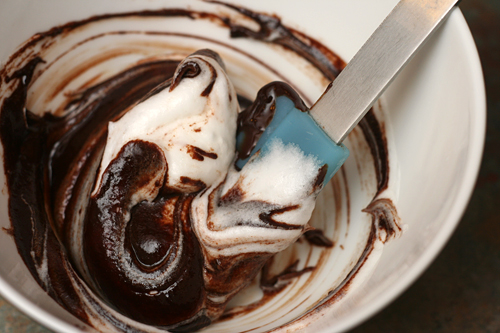
I realized something potentially important with this comparison. When Dave and I and whoever else participate in comparisons, we just dive in and start throwing out adjectives. That’s never been a problem before, but this time, Dave and I had some confusion over what we each wanted in a mousse. Perhaps my tasters and I should clarify beforehand what we’re looking for. I know I wanted an exceptionally chocolately flavor and an exceptionally light texture. I don’t think Dave knew what he wanted…or even what chocolate mousse is supposed to be.

I compared David Lebovitz’s recipe from A Sweet Life in Paris (DL), Cooks Illustrated’s Premium Chocolate Mousse recipe from 2006 (CI Premium), and Cooks Illustrated’s older Chocolate Mousse recipe (found in The New Best Recipe) (CI). It drives me crazy when Cooks Illustrated publishes multiple recipes for the same thing without referencing the previous recipe. I’m always left wondering which is the better version. What better way to find out than to make them both?

DL – This recipe is simple: chocolate melted with water, egg yolks added, beaten egg whites folded in. I haven’t read A Sweet Life and couldn’t find this recipe on David’s blog, but according to Annie, he explains in his book that this is the most traditional version of chocolate mousse.

CI Premium – This recipe is designed specifically for fancy schmancy chocolate. (I was using Valrhona.) The recipe contains the chocolate, water, and eggs called for in Lebovitz’s recipe, but spices things up with cocoa (balanced by the addition of sugar), brandy, and espresso powder. Folding in whipped cream lightens the mixture.

CI – Unlike the other two recipes, this one contains butter and no water. In addition to the requisite chocolate and eggs, it includes coffee (or alcohol), vanilla, sugar and whipped cream.

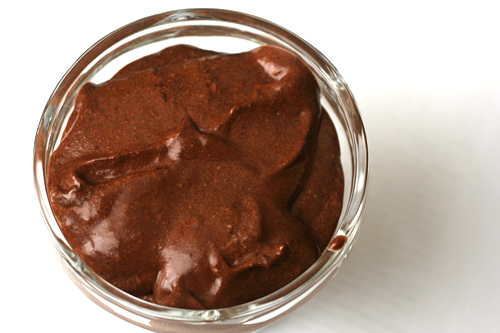
DL – Lightened by only beaten egg whites and not whipped cream, this was the heaviest mousse of the three. It was thicker, grainy, and more solid, with a cocoa-like flavor (despite containing no cocoa) and a bitter aftertaste. For Dave, it was too much – too rich and too dense.  For me, it just wasn’t as light as I want my mousse.

CI Premium – This was softer and sweeter than the other mousses. Dave thought it was the most balanced.

CI – This was light and airy and chocolately, and for me, perfect in every way. I love its bittersweetness, I love the meringue bubbles that pop in my mouth, I love how it’s firm but light.

The confusion came when Dave said that none of them were as good as my standard recipe – but I hadn’t made chocolate mousse in nearly four years, and CI’s recipe from The New Best Recipe was what I used then. Furthermore, Dave’s favorite of the three was CI’s Premium recipe, because it was “puddinglike”. But a mousse shouldn’t be puddinglike (and I confess it probably hadn’t chilled long enough).

It looks like for this comparison, there is only one opinion that matters, and that is mine, of course. Good thing Cooks Illustrated’s Chocolate Mousse was so clearly the winner. Well, I was the winner too, because I got to eat three delicious chocolate mousses – and one perfect mousse – in one sitting.


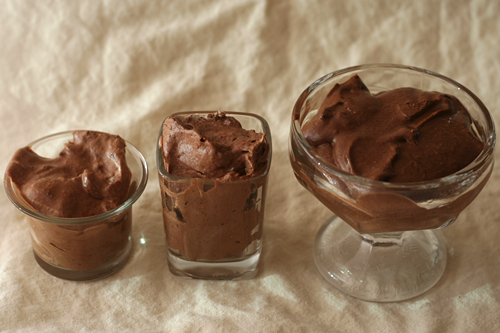
left to right: CI Premium, CI, DL

One year ago: Chicken Mushroom Spinach Lasagna
Two years ago: Pecan Sour Cream Biscuits
Three years ago: Spaghetti and Meatballs

Printer Friendly Recipe
Chocolate Mousse
(from Cooks Illustrated’s The New Best Recipe)

6 ounces bittersweet or semisweet chocolate, chopped coarse
4 tablespoons (½ stick) unsalted butter
Pinch salt
1 teaspoon vanilla extract
2 tablespoons strong coffee or 4 teaspoons brandy, orange-flavored liqueur, or light rum
4 large eggs, separated
2 tablespoons sugar
½ cup chilled heavy cream, plus more for serving

1. Melt the chocolate in a medium bowl set over a large saucepan of barely simmering water or in an uncovered Pyrex measuring cup microwaved at 50 percent power for 3 minutes, stirring once at the 2-minute mark. Whisk the butter into the melted chocolate, 1 tablespoon at a time. Stir in the salt, vanilla, and coffee until completely incorporated. Whisk in the yolks, one at a time, making sure that each is fully incorporated before adding the next; set the mixture aside.

2. Stir the egg whites in a clean mixing bowl set over a saucepan of hot water until slightly warm, 1 to 2 minutes; remove the bowl from the saucepan. Beat with an electric mixer set at medium speed until soft peaks form. Raise the mixer speed to high and slowly add the sugar; beat to soft peaks. Whisk a quarter of the beaten whites into the chocolate mixture to lighten it, then gently fold in the remaining whites.

3. Whip the cream to soft peaks. Gently fold the whipped cream into the mousse. Spoon portions of the mousse into 6 or 8 individual serving dishes or goblets. Cover and refrigerate to allow the flavors to blend, at least 2 hours. (The mousse may be covered and refrigerated for up to 24 hours.) Serve with additional whipped cream.
Printer Friendly Recipe
Dark Chocolate Mousse
(from Cooks Illustrated)

8 ounces bittersweet chocolate, 62 to 70 percent cacao, chopped fine
3 tablespoons granulated sugar
2 tablespoons cocoa powder, preferably Dutch-processed
1 teaspoon instant espresso powder
7 tablespoons water
1 tablespoon brandy
3 large eggs, separated
⅛ teaspoon table salt
1 cup heavy cream, plus 2 more tablespoons (chilled)

1. Melt the chocolate, 2 tablespoons sugar, cocoa powder, espresso powder, water, and brandy in a medium heatproof bowl set over a saucepan filled with 1 inch of barely simmering water, stirring frequently until smooth. Remove from the heat.

2. Whisk the egg yolks, 1½ teaspoons sugar, and salt in a medium bowl until the mixture lightens in color and thickens slightly, about 30 seconds. Pour the melted chocolate into the egg mixture and whisk until thoroughly combined. Let cool until slightly warmer than room temperature, 3 to 5 minutes.

3. In the clean bowl of a standing mixer fitted with the whisk attachment, beat the egg whites at medium-low speed until frothy, 1 to 2 minutes. Add the remaining 1½ teaspoons sugar, increase the mixer speed to medium-high, and beat until soft peaks form when the whisk is lifted, about 1 minute. Detach the whisk and bowl from the mixer and whisk the last few strokes by hand, making sure to scrape any unbeaten whites from the bottom of the bowl. Using the whisk, stir about one-quarter of the beaten egg whites into the chocolate mixture to lighten it; gently fold in the remaining egg whites with a rubber spatula until a few white streaks remain.

4. Whip the heavy cream at medium speed until it begins to thicken, about 30 seconds. Increase the speed to high and whip until soft peaks form when the whisk is lifted, about 15 seconds longer. Using a rubber spatula, gently fold the whipped cream into the mousse until no white streaks remain. Spoon the mousse into 6 to 8 individual serving dishes or goblets. Cover with plastic wrap and refrigerate until set and firm, at least 2 hours. (The mousse may be covered and refrigerated for up to 24 hours.)
Printer Friendly Recipe
Chocolate Mousse
(from David Lebovitz via Annie’s Eats)

I just got David Lebovitz’s The Sweet Life in Paris, which contains this original recipe, in the mail. I’ve copied the recipe in his words. I also noticed that he calls for 2 tablespoons brandy or coffee, which I didn’t use.

7 ounces bittersweet or semisweet chocolate, finely chopped
3 tablespoons water
4 large eggs, at room temperature, separated
Pinch of coarse salt

1. In a medium-sized bowl set over a pan of barely simmering water, begin melting the chocolate with the water, making sure not to let it get too hot. Take the bowl off the heat when the chocolate is almost completely melted, then stir gently until smooth. Set aside.

2. In a clean, dry bowl, whip the egg whites with the salt until they form stiff peaks when you lift the whip. They should still be smooth and creamy, not grainy.

3. Stir the egg yolks into the chocolate, then fold one-third of the whites into the chocolate to lighten it up.

4. Fold the remaining egg whites into the chocolate just until there are no visible streaks of whites. Cover the bowl with plastic wrap and chill for at least 3 hours. (You can also divide the mousse into individual custard cups, ramekins, or goblets before serving.)
 

almond biscotti

When faced with three bowls of Bolognese and a spoon, Dave declared them all good. “Different, but good.” Which is better? “I don’t know. They’re all good.” Carne adovada? “They all taste the same.” Sugar cookies? “They need frosting.”

I can’t really complain about having someone to cook for who appreciates everything I make (unless it has olives), but feedback isn’t Dave’s strongpoint. He used to tell me that he could only give a good opinion if he was served similar dishes side-by-side, which started this whole thing, but not even that always works.

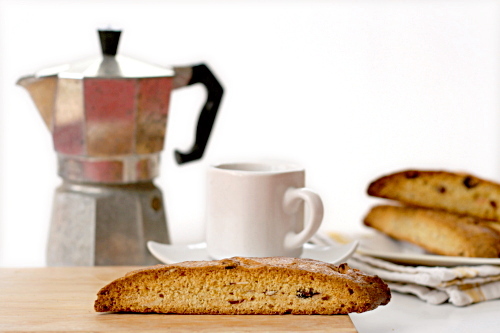
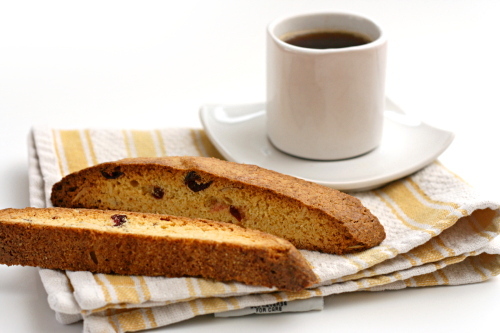
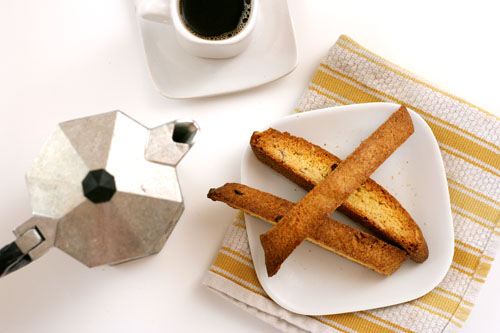
Unless it concerns almond biscotti. I have made at least four almond biscotti recipes, over the course of well over a year, and Dave has unequivocally identified his favorite. It was the first I tried, and nothing else has ever lived up. He loves these because they’re just crunchy enough to dip into his coffee without getting soggy, but not so crisp that they’re a challenge to bite into.

I like them because the recipe is simple to mix up and is easily adaptable. Usually I use slivered blanched almonds, but if I need to use up sliced almonds, those work just fine as well. If I’m in the mood for variety, I can add different nuts and dried fruit, although if I do, Dave will be disappointed. Pure, unadulterated almond biscotti is one of Dave’s favorites, up there with banana cream pie and salmon pesto pasta. At least this recipe is.

One year ago: Tartine’s Banana Cream Pie
Two years ago: Crispy Baked Chicken Strips
Three years ago: Mu Shu Pancakes

Printer Friendly Recipe
Almond Biscotti (adapted from Bon Appetit via Smitten Kitchen)

There’s no need to toast the nuts before mixing the dough; they’ll brown in the oven.

You’ll only use a bit of the egg white, plus I dislike using only one part of an egg. Instead, I steal just a bit of egg white from one of the eggs that gets mixed into the dough to use for the egg wash instead of using a separate egg white.

1 large egg white
3¼ cups (15.6 ounces) all-purpose flour
1 tablespoon baking powder
3 large eggs
10 tablespoons (1¼ sticks) unsalted butter, melted
1/3 teaspoon salt
1½ cups (10.5 ounces) sugar
1 tablespoon vanilla extract
1 tablespoon Grand Marnier or orange liqueur
1 tablespoon orange zest
1 cup slivered or sliced almonds

1. Heat the oven to 350 degrees. Line a large baking sheet with parchment paper or a silicone mat. Whisk the single egg white until frothy. In a medium bowl or large measuring cup, mix the flour and baking powder.

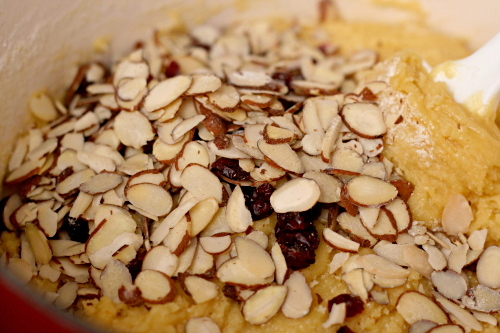
2. In a large pot over medium-low heat, heat the butter just until melted. Remove the pot from the heat; stir in the sugar and salt. Stir in the eggs, one at time; add the extract, liqueur, and zest. Slowly mix in the flour mixture, then the almonds.

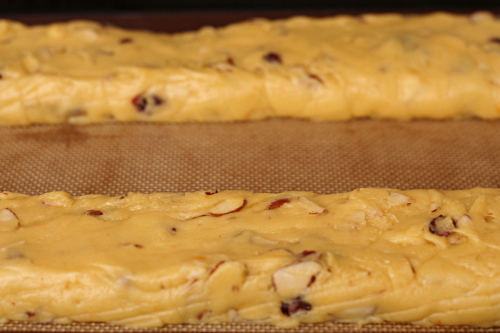
3. Divide the dough in half. On the prepared baking sheet, shape each half into a log 2-inches across and ¾-inch high. Brush with the egg white. Bake for 30 minutes, until puffed and golden.

4. Carefully transfer the logs to a cooling rack (I use two large spatulas for this); cool for 30 minutes.

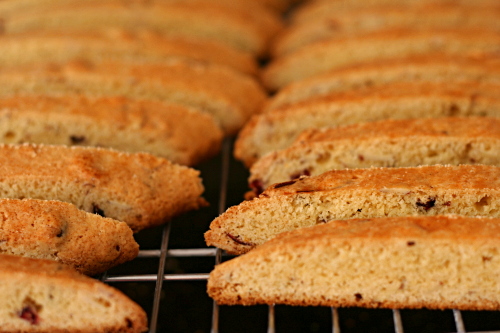
5. Slice each log on the diagonal into ½-inch thick cookies. Lay half of the cookies cut side down on the baking sheet. Bake 11 minutes; remove the pan from the oven and, using tongs, turn each cookie over onto its other cut side. Bake 7 minutes, until the edges are browned. Transfer to a cooling rack. Repeat with the remaining cookies.

I have blogged about this recipe before. At the time, I could only tell you that they were good. Now I can tell you that they are the best.

2010 favorites

The food I prepare echoes the events in my life. Last winter, after moving from Philadelphia to New Mexico, we got our first house with a yard – and soon after, our first grill. In May, I started my first full time job and became limited to quicker meals on weekdays. During the fall, I taught in the evenings after working at my day job, and – well, we ate a lot of leftovers for a few months. Now that things are settling down and I should have some more free time, I’m itching to get started on 2011’s list of favorites. But first, I want to make each of last year’s favorites a few more times…

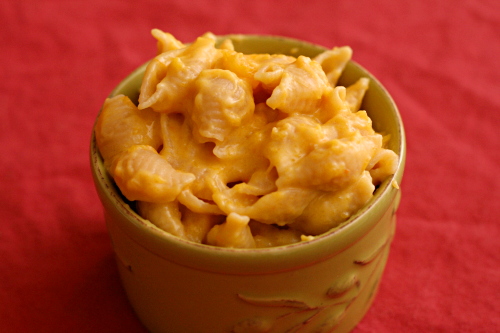
Butternut Squash Macaroni and Cheese – This has all of the creaminess and richness that I love in traditional regular macaroni cheese, with the added sweetness, color, and wholesomeness of winter squash.

Jalapeno-Baked Fish with Roasted Tomatoes and Potatoes – There are very few meals I make more than once a month, and this has become one. I like to make extra sauce to store in the freezer to make this meal even easier.

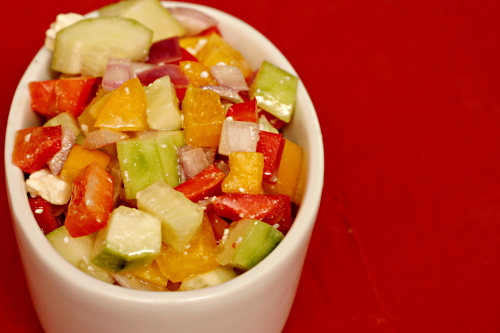
Mediterranean Pepper Salad – I went through a gyro phase last summer, and this salad started out as the perfect side dish and morphed into the perfect topping. I’m impatient for the weather to warm up enough to grill so I can start another gyro phase.

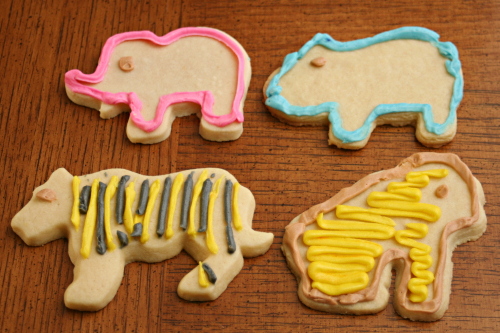
Roll-Out Sugar Cookie comparison – It’s so rare when my comparisons have a clear result, and I love when it happens. But after spending the holidays at my mother-in-law’s and surviving almost entirely on her perfect sugar cookies, I think a rematch with her recipe is in order.

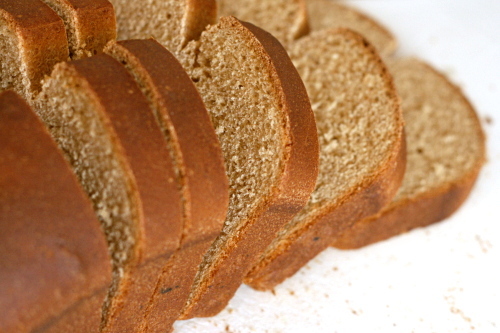
How to adapt any bread to be whole wheat – I use this trick – just a few minutes to mix up flour, salt, and yeast the night beforehand – nearly every time I make bread.


Vodka Gimlet – I drank a lot of these this summer. And then too many one night in October, and I haven’t had once since.

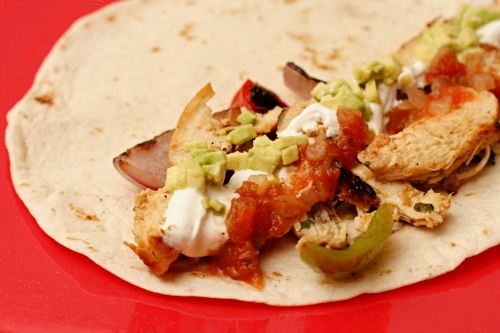
Chicken Fajitas – Chances were good that if it was a Sunday evening during the summer, if I wasn’t making some sort of gyro, Dave and I were grilling these.

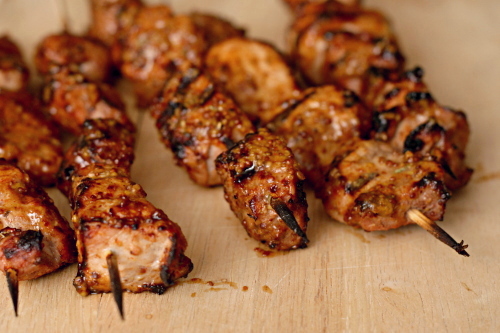
Garlic Mustard Glazed Skewers – I make these when I need to be reminded that recipes don’t have to be complicated to be perfect.

Whole Wheat Bagels – Combined with a mug of strong black tea, these bagels make up the best part of my workday.

Bolognese Sauce – Despite this being one of those dreaded comparisons with no winner, it resulted in a freezer full of one of my favorite foods.

cheesecake comparison

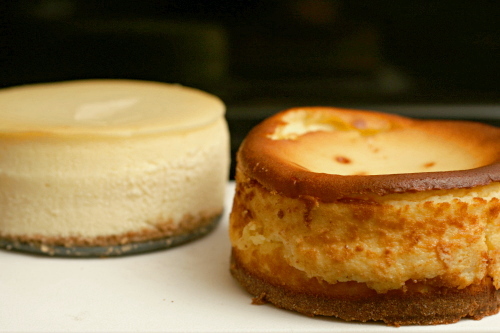
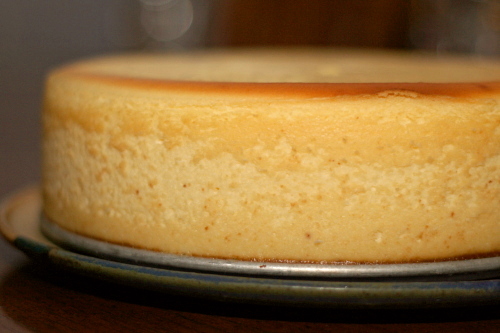
The problem with a cheesecake comparison is that so much of what makes a cheesecake perfect, especially a New York cheesecake, is its texture, and the texture depends so much on the baking technique, and the baking technique will vary depending on the pan size. So the only really fair comparison would be to make three full cheesecakes and use a thermometer to test doneness. But three cheesecakes makes for a ridiculous amount of cheesecake. Plus my instant-read thermometer was on vacation when I made two of these. I did my best.

I baked the first cheesecake for a family holiday. Then I drove with it for four hours to my parents’ house, served half of it, drove back four hours with the remainder and stuck it in the freezer. I baked the other two a month later in a 5-inch springform pan. I overbaked one and underbaked the other. This is not my most comprehensive comparison post, I admit.

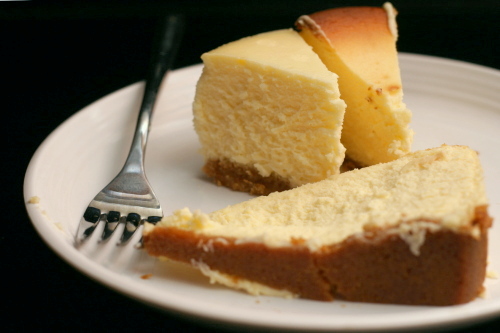
Still, I think we were able to draw some conclusions. Not that the opinions of my four tasters were aligned; that would be too easy. (Full disclosure: This comparison was actually done months ago, after cocktails. My notes have the cakes labeled as “brown”, “pale”, and “mess”; apparently one cake didn’t slice well.)

Mess, aka Cooks Illustrated’s New York Cheesecake: After the abuse of eight hours in the car, being half-eaten, frozen, and defrosted, is it any wonder it didn’t slice cleanly? Regardless, it was without question my favorite, as well as Dave’s. The texture ranges from solid and dry on the edge to soft and luscious in the center. The flavor is balanced between the cream cheese and the sweetness and the flavorings. In my opinion, this is cheesecake perfection.

Pale, aka Dorie Greenspan’s Tall and Creamy Cheesecake: I undercooked this one; still, this is one good cheesecake. While I liked Cooks Illustrated’s NY Cheesecake better, I almost feel like it’s an unfair comparison because they’re not meant to be similar cheesecakes. Dorie’s cheesecake is soft and melty with a good balance of sweet and tangy (if you use sour cream instead of the also suggested heavy cream). It isn’t the same style as a New York cheesecake, and there’s nothing wrong with that. It was my sister’s favorite. (My sister started this whole complicated comparison in the first place, by reminding me that cheesecake is one of her favorite foods and then visiting shortly afterwards.)

Brown, aka (Goumet via) Smitten Kitchen’s New York Cheesecake: I’m not a big enough person to take all of the responsibility for overcooking this one. Deb admits that the cooking times are risky – 500 degrees until the top begins to brown, then a far lower temperature. I don’t need to tell you that it didn’t work for me; you can see that overbrowned, blown-out top for yourself. Besides that, most of us felt that the citrus flavor was overbearing, even with the reduced amounts of zest that Deb recommends. With all of the stars aligned and with less zest, this might be a great cheesecake. But with other stars around, why bother with the struggle?

Overall, a flawed comparison, but I learned my preferences. For New York cheesecake, Cooks Illustrated. For non-New York cheesecake, Dorie Greenspan. But always, I just want cheesecake.

One year ago: 100% Whole Wheat Sandwich Bread
Two years ago: Lemon Pancakes with Blueberry Syrup

Printer Friendly Recipe
New York Cheesecake (from Cooks Illustrated)

For the crust:
5 tablespoons unsalted butter, melted, plus 1 additional tablespoon, melted, for greasing the pan
4 ounces (approximately 8 whole) graham crackers, broken into rough pieces and processed into fine, even crumbs
1 tablespoon sugar

For the cheesecake:
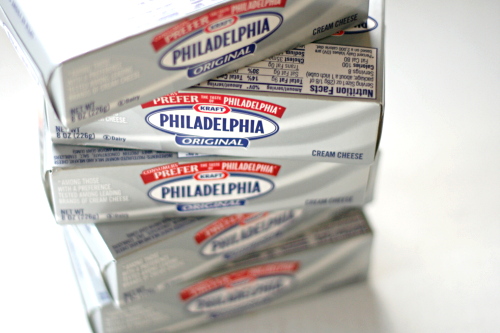
2½ pounds (5 8-ounce packages) cream cheese, room temperature
⅛ teaspoon salt
1½ (10.5 ounces) cups sugar
⅓ cup sour cream
2 teaspoons freshly squeezed lemon juice
2 teaspoons vanilla extract
2 large egg yolks plus 6 large eggs, at room temperature

1. To make the crust, adjust an oven rack to the lower-middle position and heat the oven to 325 degrees F. Brush the bottom and sides of a 9-inch springform pan with ½ tablespoon of the melted butter. In a medium bowl combine the graham cracker crumbs, 5 tablespoons melted butter, and sugar. Toss with a fork until the crumbs are evenly moistened. Transfer the crumbs to the springform pan and use the bottom of a ramekin to firmly press the crumbs evenly into the pan bottom. Bake until fragrant and beginning to brown around the edges, about 13 minutes. Cool on a wire rack while preparing the filling.

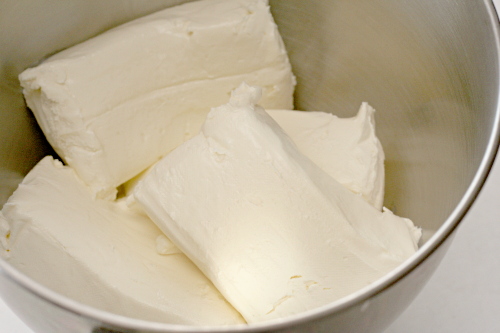
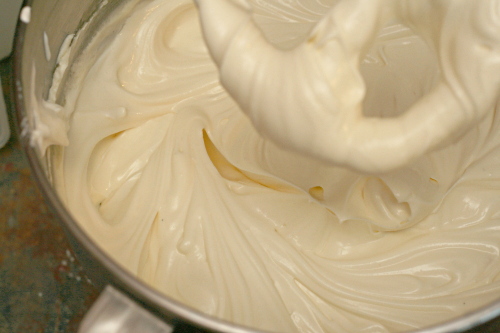
2. Increase the oven temperature to 500 degrees F. In the bowl of a stand mixer fitted with the paddle attachment, beat the cream cheese at medium-low speed to break up and soften it slightly, about 1 minute. Scrape the beater and the bottom and sides of the bowl well with a rubber spatula; add the salt and about half of the sugar and beat at medium-low speed until combined, about 1 minute. Scrape the bowl; beat in the remaining sugar until combined, about 1 minute. Scrape the bowl; add the sour cream, lemon juice, and vanilla. Beat at low speed until combined, about 1 minute. Scrape the bowl; add the egg yolks and beat at medium-low speed until thoroughly combined, about 1 minute. Scrape the bowl; add the remaining eggs 2 at a time, beating until thoroughly combined, about 1 minute, scraping the bowl between additions.

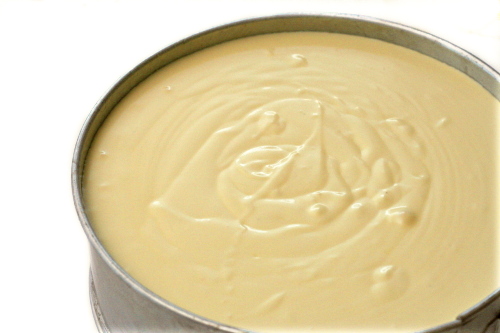
3. Brush the sides of the springform pan with the remaining ½ tablespoon melted butter. Set the pan on a rimmed baking sheet to catch any spills in case the pan leaks. Pour the filling into the cooled crust and bake 10 minutes; without opening the oven door, reduce the oven temperature to 200 degrees and continue to bake until the cheesecake reads about 150 degrees on an instant-read thermometer inserted in the center, about 1½ hours. Transfer the cake to a wire rack and cool until barely warm, 2½ to 3 hours. Run a paring knife between the cake and the springform pan sides. Wrap tightly in plastic wrap and refrigerate until cold, at least 3 hours.
4. To unmold the cheesecake, removed the sides of the pan. Slide a thin metal spatula between the crust and the bottom of the pan to loosen, then slide the cake onto a serving plate. Let the cheesecake stand at room temperature about 30 minutes, then cut into wedges and serve. (Use a long, thin, sharp knife that has been run under hot water and then dried for slicing. Wipe the blade clean and rewarm between slices.)

Printer Friendly Recipe
Tall and Creamy Cheesecake
(from Dorie Greenspan’s Baking: From my Home to Yours)

I prefer using sour cream instead of heavy cream.

Makes 16 servings

For the crust:
1¾ cups graham cracker crumbs
3 tablespoons sugar
pinch of salt
½ stick (4 tablespoons) unsalted butter, melted

For the cheesecake:
2 pounds (four 8-ounce boxes) cream cheese, at room temperature
1⅓ cups (9.67 ounces) sugar
½ teaspoon salt
2 teaspoons pure vanilla extract
4 large eggs, at room temperature
1⅓ cups sour cream or heavy cream, or a combination of the two

To make the crust:
Butter a 9-inch springform pan—choose one that has sides that are 2 ¾ inches high (if the sides are lower, you will have cheesecake batter leftover) — and wrap the bottom of the pan in a double layer of aluminum foil; put the pan on a baking sheet.

Stir the crumbs, sugar and salt together in a medium bowl. Pour over the melted butter and stir until all of the dry ingredients are uniformly moist. (I do this with my fingers.) Turn the ingredients into the buttered springform pan and use your fingers to pat an even layer of crumbs along the bottom of the pan and about halfway up the sides. Don’t worry if the sides are not perfectly even or if the crumbs reach above or below the midway mark on the sides—this doesn’t have to be a precision job. Put the pan in the freezer while you preheat the oven.
Center a rack in the oven, preheat the oven to 350°F and place the springform on a baking sheet. Bake for 10 minutes. Set the crust aside to cool on a rack while you make the cheesecake.

Reduce the oven temperature to 325°F.

To make the cheesecake:
Put a kettle of water on to boil.

Working in a stand mixer, preferably fitted with a paddle attachment, or with a hand mixer in a large bowl, beat the cream cheese at medium speed until it is soft and lives up to the creamy part of its name, about 4 minutes. With the mixer running, add the sugar and salt and continue to beat another 4 minutes or so, until the cream cheese is light. Beat in the vanilla. Add the eggs one by one, beating for a full minute after each addition—you want a well-aerated batter. Reduce the mixer speed to low and stir in the sour cream and/or heavy cream.

Put the foil-wrapped springform pan in the roaster pan.

Give the batter a few stirs with a rubber spatula, just to make sure that nothing has been left unmixed at the bottom of the bowl, and scrape the batter into the springform pan. The batter will reach the brim of the pan. (If you have a pan with lower sides and have leftover batter, you can bake the batter in a buttered ramekin or small soufflé mold.) Put the roasting pan in the oven and pour enough boiling water into the roaster to come halfway up the sides of the springform pan.

Bake the cheesecake for 1 hour and 30 minutes, at which point the top will be browned (and perhaps cracked) and may have risen just a little above the rim of the pan. Turn off the oven’s heat and prop the oven door open with a wooden spoon. Allow the cheesecake to luxuriate in its water bath for another hour.

After 1 hour, carefully pull the setup out of the oven, lift the springform pan out of the roaster—be careful, there may be some hot water in the aluminum foil—remove the foil. Let the cheesecake come to room temperature on a cooling rack.

When the cake is cool, cover the top lightly and chill the cake for at least 4 hours, although overnight would be better.

Serving:
Remove the sides of the springform pan— I use a hairdryer to do this (use the dryer to warm the sides of the pan and ever so slightly melt the edges of the cake)—and set the cake, still on the pan’s base, on a serving platter. The easiest way to cut cheesecake is to use a long, thin knife that has been run under hot water and lightly wiped. Keep warming the knife as you cut slices of the cake.

Storing:
Wrapped well, the cake will keep for up to 1 week in the refrigerator or for up to 2 months in the freezer. It’s best to defrost the still-wrapped cheesecake overnight in the refrigerator.

Printer Friendly Recipe
New York Cheesecake (adapted from Gourmet via Smitten Kitchen)

Crust:
8 ounces (15 4¾-by-2½-inch sheets) graham crackers
8 tablespoons (1 stick) unsalted butter, melted
½ cup (3.5 ounces) sugar
¼ teaspoon salt

Filling:
5 (8-ounce) packages cream cheese, softened
1¾ cups (12.25 ounces) sugar
3 tablespoons all-purpose flour
1 teaspoon finely grated lemon zest
1 teaspoon finely grated orange zest
5 large eggs
2 large egg yolks
½ teaspoon vanilla

1. For the crust: Stir together crust ingredients and press onto bottom and up the sides, stopping one inch shy of the top rim, of a buttered 9-inch (or 24 cm) springform pan. Put the crust in the freezer while you prepare the filling.

2. Filling: Preheat oven to 550 degrees. Beat together cream cheese, sugar, flour and zest with an electric mixer until smooth. Add vanilla, then eggs and yolks, one at a time, beating on low speed until each ingredient is incorporated. Scrape bowl down between additions.

3. Put the springform pan with the crust in a shallow baking pan (to catch drips). Pour the filling into the crust (the springform pan will be completely full) and bake in baking pan in the middle of the oven for 12 minutes or until puffed. Please watch your cake because some ovens will top-brown very quickly and if yours does too fast, turn the oven down as soon as you catch it. Reduce the temperature to 200 degrees and continue baking until the cake is mostly firm (center will still be slightly wobbly when pan is gently shaken), about one hour more.

4. Run a knife around the top edge of the cake to loosen it and cool the cake completely in the springform pan on a rack, then chill it, loosely covered, for at least 6 hours.