yellow cake comparison

I was going to wait to post this because now I want to do more yellow cake experiments. But this week I have a couple batches of cookies I want to make, and last week it was bread pudding and chocolate mousse, and next week it’ll be something else. By the time I find an opportunity to make more yellow cake, I’ll have forgotten everything about this batch.

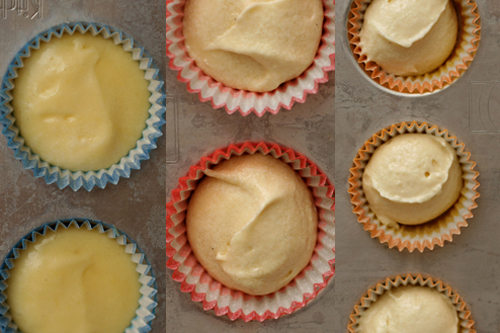
The three recipes I chose for this comparison are Cooks Illustrated’s Fluffy Yellow Cake (CI), Martha Stewart’s Yellow Butter Cake (MS), and Smitten Kitchen’s Best Birthday Cake (SK). Like all yellow cakes, they all include butter, whole eggs (unlike white cake, which only uses the whites), granulated sugar, vanilla, salt, leavener, flour (cake or all-purpose), and dairy (whole milk or buttermilk). I baked them all as mini cupcakes at the same temperature for the same amount of time.  I used the same size scoop to transfer the batter to the muffin cups.

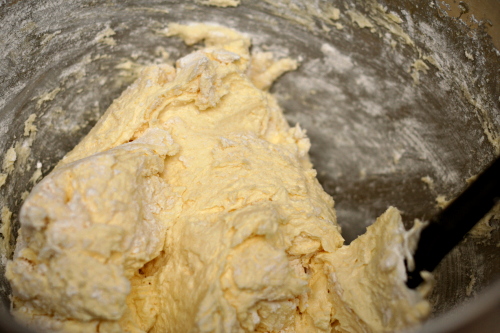
CI (blue wrappers), which uses cake flour and buttermilk, is unique among these recipes in its inclusion of oil and extra egg yolks. It is also mixed like a chiffon cake, in which the dry ingredients and liquid ingredients (including melted butter) are combined, then beaten egg whites are folded in.

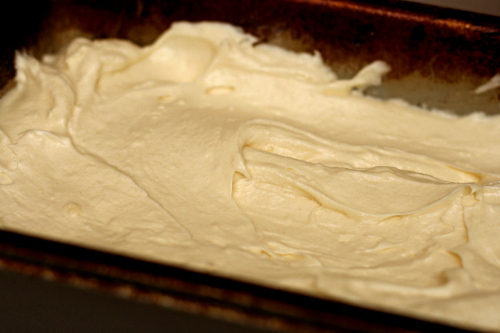
MS (red wrappers) uses a mixture of all-purpose flour and cake flour, as well as whole milk instead of buttermilk (it is therefore missing the baking soda the other two recipes require to balance the acidity of the buttermilk). It is mixed using the creaming method, in which the butter and sugar are combined, the eggs are added, then the milk and dry ingredients.

SK (yellow wrappers) also uses cake flour and buttermilk. There are no tricks up this cake’s sleeves. It is also mixed with the creaming method.

CI (blue) was buttery and moist with a nice sponginess. The top was a little sticky (easily covered up with frosting, but we were testing them plain) and crisp. It was my and Dave’s favorite.

MS (red) was less sticky and fluffier, but it was also less buttery, and, to be honest, a little bland. It has half the salt as the other recipes, so that’s probably the culprit, although it could be the use of whole milk instead of buttermilk.

SK (yellow) had a nice, buttery flavor, but a solid, flat top. For cupcakes, the flat-topped spreading is a deal breaker for me, but I believe it would be fine for a layer cake. And because this cake has over three times more baking soda than CI, I suspect that cutting it in half would solve the spreading problem, which I attribute to overrising.
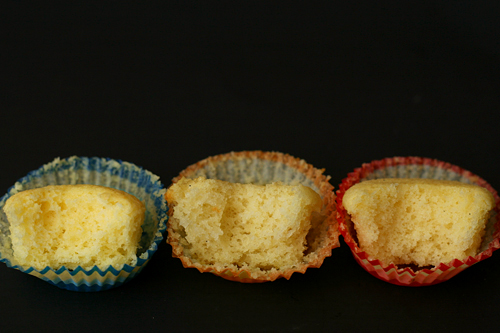

(sorry I switched the order around in this photo)

So the cake with the best texture (MS) – fluffy, slightly domed, with no stickiness or overly hard tops – had the least impressive flavor. I’m inclined to think that it would be easier to bump up the flavor of that recipe than it would be to adjust the texture of the others. I would also love to try SK as a layer cake and/or with less baking soda. To complicate matters further, a reader recently pointed out another yellow cake comparison with several more recipes I’d like to try.

In the meantime, Cooks Illustrated’s Fluffy Yellow Layer Cake has the best balance of these three recipes of full, buttery flavor and a light texture. And once the cakes were smothered with chocolate frosting, I couldn’t tell the difference between them anyway.

(Oh, were you wondering what the best chocolate frosting is? It turns out I compared three chocolate frosting recipes in the same (exhausting) night. I’ll discuss those next.)

One year ago: Oatmeal Pancakes
Two years ago: Red Velvet Cake comparison (odd coincidence)
Three years ago: Potstickers

Printer Friendly Recipe
Fluffy Yellow Layer Cake (from Cooks Illustrated)

Makes two 9-inch round cakes

2½ cups (10 ounces) cake flour, plus extra for dusting pans
1¼ teaspoon baking powder
¼ teaspoon baking soda
¾ teaspoon table salt
1¾ cups (12.25 ounces) sugar
10 tablespoons unsalted butter, melted and cooled slightly
1 cup buttermilk, at room temperature
3 tablespoons vegetable oil
2 teaspoons vanilla extract
6 large egg yolks plus 3 large egg whites, at room temperature

1. Adjust an oven rack to the middle position and heat the oven to 350 degrees. Grease two 9-inch cake pans and line the bottoms with parchment paper. Grease the paper rounds, dust the pans with flour, and knock out the excess. Whisk the flour, baking powder, baking soda, salt and 1½ cups (10.5 ounces) sugar together in a large bowl. In a 4-cup liquid measuring cup or medium bowl, whisk together the melted butter, buttermilk, oil, vanilla, and yolks.

2. In the clean bowl of a stand mixer fitted with the whisk attachment, beat the egg whites at medium-high speed until foamy, about 30 seconds. With the machine running, gradually add the remaining ¼ cup (1.75 ounces) sugar; continue to beat until stiff peaks just form, 30 to 60 seconds (whites should hold peak but mixture should appear moist). Transfer to a bowl and set aside.

3. Add the flour mixture to the now-empty mixing bowl fitted with the whisk attachment. With the mixer running at low speed, gradually pour in the butter mixture and mix until almost incorporated (a few streaks of dry flour will remain), about 15 seconds. Stop mixer and scrape the whisk and sides of the bowl. Return the mixer to medium-low speed and beat until smooth and fully incorporated, 10 to 15 seconds.

4. Using rubber spatula, stir ⅓ of the whites into the batter to lighten, then add the remaining whites and gently fold into the batter until no white streaks remain. Divide the batter evenly between the prepared cake pans. Lightly tap the pans against the counter 2 or 3 times to dislodge any large air bubbles.

5. Bake until the cake layers begin to pull away from sides of pans and a toothpick inserted into the center comes out clean, 20-22 minutes. Cool the cakes in the pans on a wire rack for 10 minutes. Loosen the cakes from the sides of the pan with a small knife, then invert onto a greased wire rack and peel off the parchment. Invert the cakes again and cool completely on rack, about 1½ hours.

Printer Friendly Recipe
Yellow Butter Cake (from Martha Stewart via Annie’s Eats)

Makes two 9-inch round cakes

16 tablespoons (2 sticks) unsalted butter, at room temperature, plus more for greasing pans
1½ cups (7.2 ounces) all-purpose flour, plus more for dusting pans
1½ cups (6 ounces) cake flour
1 tablespoon baking powder
½ teaspoon salt
1¾ cups (12.15) granulated sugar
4 large eggs, room temperature
2 teaspoons vanilla extract
1¼ cups milk, at room temperature

1. Preheat the oven to 350˚ F. Line the bottoms of two 9-inch round cake pans with parchment paper. Butter and flour the edges of the pans, tapping out the excess; set aside. In a medium bowl, combine the all-purpose flour, cake flour, baking powder, and salt; whisk together to blend well and set aside.

2. In the bowl of an electric mixer, combine the butter and sugar. Beat on medium-high speed until light and fluffy, about 4 minutes, scraping down the bowl as needed. Mix in the eggs one at a time, beating well after each addition. Blend in the vanilla. With the mixer on low speed, add in the dry ingredients in three additions, alternating with the milk. Beat each addition just until incorporated.

3. Divide the batter between the prepared baking pans. Bake, rotating the pans halfway through baking, until the cakes are golden and a toothpick inserted in the center comes out clean, 30-35 minutes. Transfer the pans to a wire rack and let cool 20 minutes. Run a knife around the edge of the pans to help remove the cakes. Invert the cakes onto the rack and peel off the parchment. Let the cakes cool completely before frosting. Level the cakes if necessary.

Printer Friendly Recipe
Best Birthday Cake (from Smitten Kitchen)

Makes two 9-inch rounds

4 cups plus 2 tablespoons (16.6 ounces) cake flour
2 teaspoons baking powder
1½ teaspoons baking soda
1 teaspoon salt
16 tablespoons (2 sticks) unsalted butter, softened
2 cups (14 ounces) sugar
2 teaspoons pure vanilla extract
4 large eggs, at room temperature
2 cups buttermilk, well-shaken

1. Preheat oven to 350°F. Butter two 9-inch round cake pans and line with circles of parchment paper, then butter parchment. (Alternately, you can use a cooking spray, either with just butter or butter and flour to speed this process up.)

2. Sift together flour, baking powder, baking soda, and salt in a medium bowl. In a large mixing bowl, beat butter and sugar in a large bowl with an electric mixer at medium speed until pale and fluffy, then beat in vanilla. Add eggs one at a time, beating well and scraping down the bowl after each addition. At low speed, beat in buttermilk until just combined (mixture will look curdled). Add flour mixture in three batches, mixing until each addition is just incorporated.

3. Spread batter evenly in cake pan, then rap pan on counter several times to eliminate air bubbles. Bake until golden and a wooden pick inserted in center of cake comes out clean, 35 to 40 minutes. Cool in pan on a rack 10 minutes, then run a knife around edge of pan. Invert onto rack and discard parchment, then cool completely, about 1 hour.

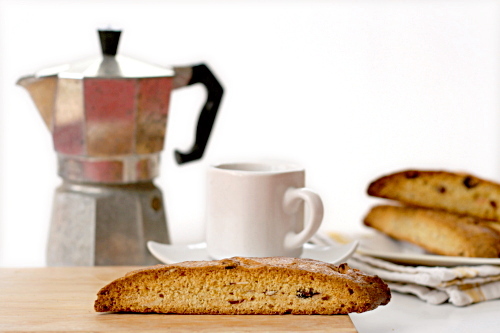
almond biscotti

When faced with three bowls of Bolognese and a spoon, Dave declared them all good. “Different, but good.” Which is better? “I don’t know. They’re all good.” Carne adovada? “They all taste the same.” Sugar cookies? “They need frosting.”

I can’t really complain about having someone to cook for who appreciates everything I make (unless it has olives), but feedback isn’t Dave’s strongpoint. He used to tell me that he could only give a good opinion if he was served similar dishes side-by-side, which started this whole thing, but not even that always works.

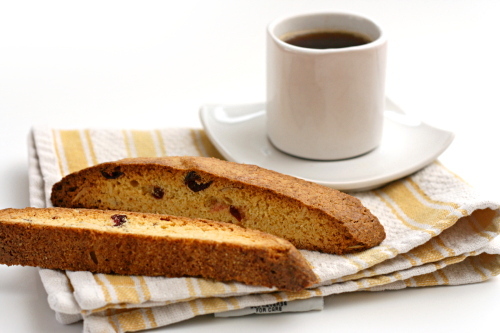
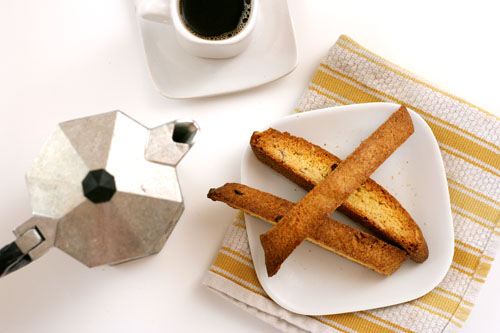
Unless it concerns almond biscotti. I have made at least four almond biscotti recipes, over the course of well over a year, and Dave has unequivocally identified his favorite. It was the first I tried, and nothing else has ever lived up. He loves these because they’re just crunchy enough to dip into his coffee without getting soggy, but not so crisp that they’re a challenge to bite into.

I like them because the recipe is simple to mix up and is easily adaptable. Usually I use slivered blanched almonds, but if I need to use up sliced almonds, those work just fine as well. If I’m in the mood for variety, I can add different nuts and dried fruit, although if I do, Dave will be disappointed. Pure, unadulterated almond biscotti is one of Dave’s favorites, up there with banana cream pie and salmon pesto pasta. At least this recipe is.

One year ago: Tartine’s Banana Cream Pie
Two years ago: Crispy Baked Chicken Strips
Three years ago: Mu Shu Pancakes

Printer Friendly Recipe
Almond Biscotti (adapted from Bon Appetit via Smitten Kitchen)

There’s no need to toast the nuts before mixing the dough; they’ll brown in the oven.

You’ll only use a bit of the egg white, plus I dislike using only one part of an egg. Instead, I steal just a bit of egg white from one of the eggs that gets mixed into the dough to use for the egg wash instead of using a separate egg white.

1 large egg white
3¼ cups (15.6 ounces) all-purpose flour
1 tablespoon baking powder
3 large eggs
10 tablespoons (1¼ sticks) unsalted butter, melted
1/3 teaspoon salt
1½ cups (10.5 ounces) sugar
1 tablespoon vanilla extract
1 tablespoon Grand Marnier or orange liqueur
1 tablespoon orange zest
1 cup slivered or sliced almonds

1. Heat the oven to 350 degrees. Line a large baking sheet with parchment paper or a silicone mat. Whisk the single egg white until frothy. In a medium bowl or large measuring cup, mix the flour and baking powder.

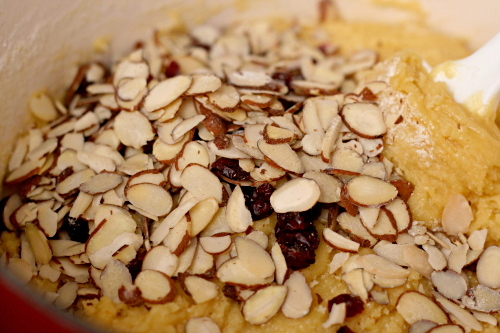
2. In a large pot over medium-low heat, heat the butter just until melted. Remove the pot from the heat; stir in the sugar and salt. Stir in the eggs, one at time; add the extract, liqueur, and zest. Slowly mix in the flour mixture, then the almonds.

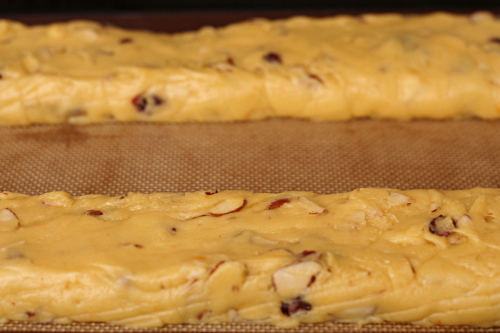
3. Divide the dough in half. On the prepared baking sheet, shape each half into a log 2-inches across and ¾-inch high. Brush with the egg white. Bake for 30 minutes, until puffed and golden.

4. Carefully transfer the logs to a cooling rack (I use two large spatulas for this); cool for 30 minutes.

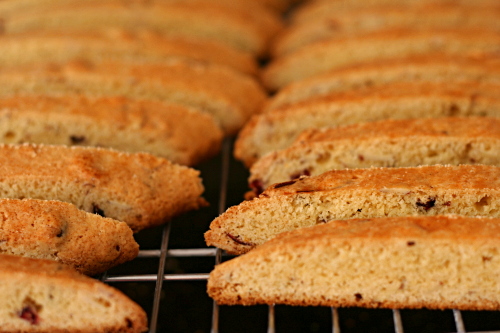
5. Slice each log on the diagonal into ½-inch thick cookies. Lay half of the cookies cut side down on the baking sheet. Bake 11 minutes; remove the pan from the oven and, using tongs, turn each cookie over onto its other cut side. Bake 7 minutes, until the edges are browned. Transfer to a cooling rack. Repeat with the remaining cookies.

I have blogged about this recipe before. At the time, I could only tell you that they were good. Now I can tell you that they are the best.

bolognese sauce comparison

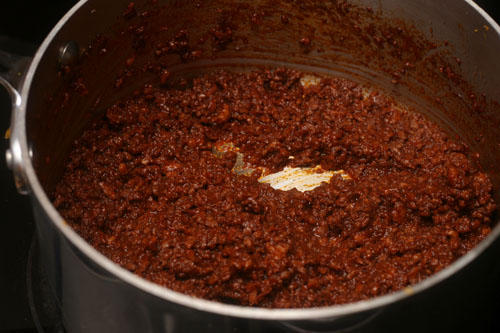
(Anne Burrell’s recipe)

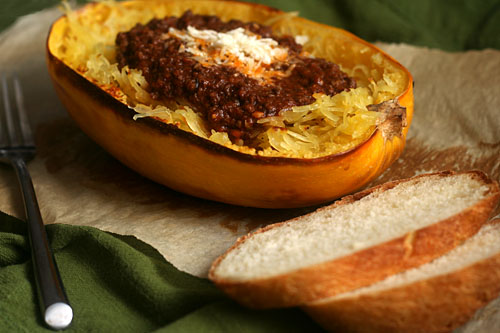
Have you ever had a traditional Bolognese sauce? Not just tomato sauce with ground meat mixed in, but one that involves milk and wine and hours of simmering. Just a few ingredients, but when they’re combined just right, the result is a complex, rich blend with incredible depth. Served over a bowl of creamy polenta with a sprinkling of parmesan cheese and a glass of good red wine on the side, there can be no more comforting, warming food.

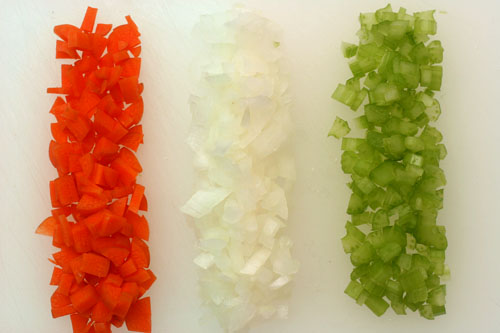
The first Bolognese I made was Marcella Hazen’s recipe. She is to Italian food what Julia Child is to French food; certainly a trusted source. In her method, a class mirepoix (or, technically, “soffritto” in Italian) of carrots, celery and onions is lightly cooked in butter, then ground meat is added and cooked just until it loses its pink. Stir in milk and let it bubble until only its delicious fat is left in the pot, then pour over some wine and let it simmer away, and only then, finally, after an hour of slow simmering, are the tomatoes (whole, canned) added – and simmered for 3 more hours.

After all that, however, I found Hazan’s recipe to be a little too vegetably. But Cooks Illustrated’s recipe for classic Bolognese is identical except for a smaller amount of vegetables. With only a couple tablespoons each of onions, carrots, and celery, it almost seems like they’re not worth adding, but there isn’t a thing I would change about the recipe.

Bolognese sauce takes a lot of time, yes, but it isn’t a lot of work. It’s my favorite type of recipe, in that it’s undemanding, but if you do happen to be in the kitchen (and I always am) you can stir to your heart’s content. But I suppose the long simmering time intimidates people, because there are a crop of supposedly weeknight friendly Bolognese sauce recipes popping up. In general, I’m not a fan of these types of recipes, because what they save in cooking time they make up for in ingredient prep.

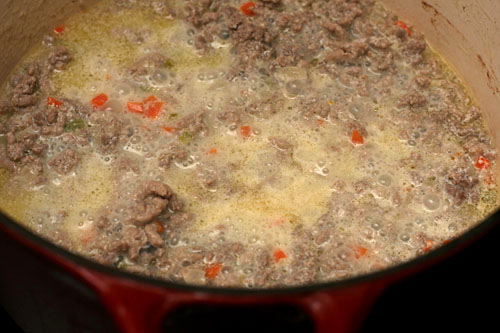
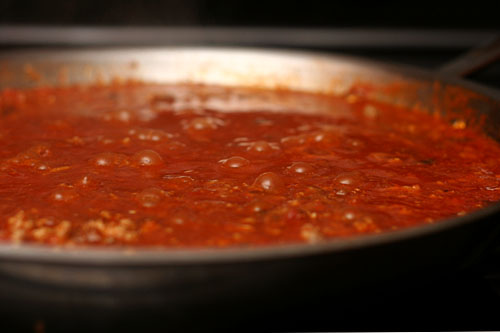
(Cooks Illustrated’s Classic Bolognese)

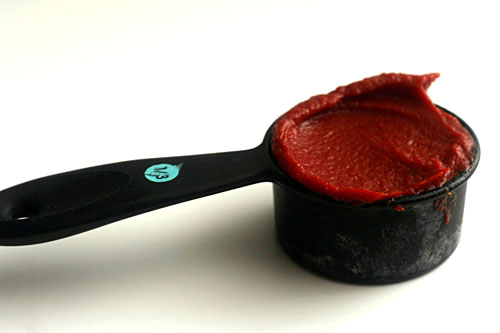
Then I kept seeing another type of Bolognese with great reviews. This one uses only tomato paste as its source of tomato flavor. And if anything can be identified as authentic in a recipe like Bolognese, it’s the tomato paste version, with a heavier meat influence and just a hint of tomatoes.

(Cooks Illustrated’s Classic Bolognese)

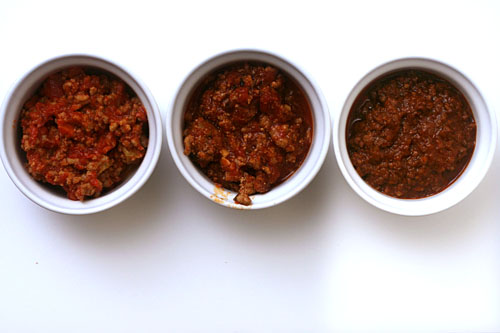
Authenticity aside, I wanted to know which was best. So I baked up three batches – my favorite version from Cooks Illustrated, their weeknight version, and Anne Burrell’s annoying (please don’t yell at me in the recipe, thank you) but well-reviewed tomato paste-based recipe.


(Anne Burrell’s recipe)

The quicker “weeknight-friendly” recipe was, as I expected, the most work, with more ingredients and dishes necessary to mimic the slow-cooked flavor of the other two recipes. However, after all that and a shorter cooking time, its flavor did nicely mimic that of the other, more tomato-rich Cooks Illustrated recipe. I don’t believe Dave could tell the difference. My only complaint was that the meat was slightly tough.

Dave had a few interesting comments about Burrell’s Bolognese. The sauce is simply a classic mirepoix, beef, wine, tomato paste, and herbs, yet Dave detected flavors of mushrooms and possibly Worchestershire sauce in it – two ingredients high in umami, the fifth basic flavor that is best described by “meaty”. In fact, mushrooms are added to CI’s quick Bolognese to increase the meaty flavor that doesn’t have time to develop through a long simmer. One thing that was obvious to both me and Dave was the unusual texture of Burrell’s sauce; to me, it seemed slightly mealy, but Dave was kinder with “fine-grained”.

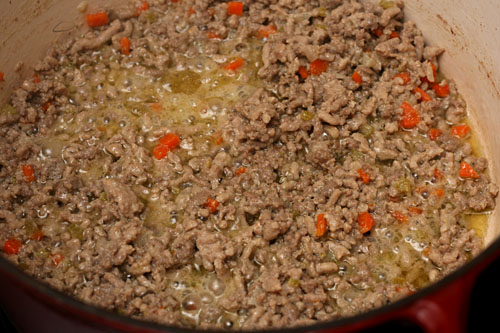
(Cooks Illustrated’s Weeknight Bolognese)

Dave couldn’t choose a favorite, with his usual “different but good” response, but I’m still stuck on my classic, tomato-heavy slow-simmered method. It’s intensely rich and meaty, but it has a bright balance from the tomatoes. Burrell’s meatier sauce was delicious too, and maybe all those tomatoes aren’t quite as traditional, but, frankly, I like tomatoes. And since Bolognese – any version – is one of those dishes that improves by being made in advance and will suffer no ill effects from being frozen, I see no reason to spend extra time cooking a supposedly quicker “weeknight-friendly” version. Besides, I like watching ingredients bubble away, increasing in intensity as they decrease in volume until they settle into something delicious.

left to right: CI Classic, CI Weeknight, Anne Burrell

One year ago: Thai-Style Chicken Soup
Two years ago: Pumpkin Ginger Muffins

Printer Friendly Recipe
Classic Bolognese (from Cooks Illustrated)

Enough to top 1 pound of dried pasta

If you double this recipe – and considering how well it freezes and reheats, you should – the simmering times will need to be extended.

3 tablespoons unsalted butter
2 tablespoons minced onion
2 tablespoons minced carrot
2 tablespoons minced celery
¾ pound ground beef chuck
table salt
1 cup whole milk
1 cup dry white wine
1 (28 ounce) can whole tomatoes, packed in juice, chopped fine, with juice reserved

1. Heat butter in large, heavy-bottomed Dutch oven over medium heat; add onion, carrot, and celery and sautè until softened but not browned, about 6 minutes. Add ground meat and ½ teaspoon salt; crumble meat with edge of wooden spoon to break apart into tiny pieces. Cook, continuing to crumble meat, just until it loses its raw color but has not yet browned, about 3 minutes.

2. Add milk and bring to simmer; continue to simmer until milk evaporates and only clear fat remains, 10 to 15 minutes. Add wine and bring to simmer; continue to simmer until wine evaporates, 10 to 15 minutes longer. Add tomatoes and their juice and bring to simmer; reduce heat to low so that sauce continues to simmer just barely, with an occasional bubble or two at the surface, until liquid has evaporated, about 3 hours. Adjust seasonings with extra salt to taste and serve. (Can be refrigerated in an airtight container for several days or frozen for several months. Warm over low heat before serving.)

Printer Friendly Recipe
Bolognese Sauce (slightly rewritten to remove all of Anne Burrell’s vulgarity)

Enough to top 1 pound of dried pasta

1 large onion or 2 small, cut into 1-inch dice
2 large carrots, cut into ½-inch dice
3 ribs celery, cut into 1-inch dice
4 cloves garlic
Extra-virgin olive oil, for the pan
Kosher salt
3 pounds ground chuck, brisket or round or combination
2 cups tomato paste
3 cups hearty red wine
Water
3 bay leaves
1 bunch thyme, tied in a bundle

1. In a food processor, puree onion, carrots, celery, and garlic into a coarse paste. Heat a large pan over medium heat; add a slick of oil. Add the pureed vegetables and season generously with salt. Bring the pan to medium-high heat and cook until all the water has evaporated and they brown, stirring frequently, about 15 to 20 minutes.

2. Add the ground beef and season again generously with salt. Cook, stirring occasionally, 15-20 minutes, until browned.

3. Add the tomato paste and cook until brown, 4 to 5 minutes. Add the red wine. Cook until the wine has reduced by half, another 4 to 5 minutes.

4. Add water to the pan until water is about 1 inch above the meat. Toss in the bay leaves and the bundle of thyme and stir to combine. Bring to a boil over medium-high heat, then reduce to a simmer, stirring occasionally. As the water evaporates you will gradually need to add more, about 2 to 3 cups at a time. Simmer, stirring occasionally, for 3½ to 4 hours. Adjust the seasoning with salt and serve immediately.

Printer Friendly Recipe
Weeknight Bolognese (from Cooks Illustrated)

Enough to top 1 pound of dried pasta

½ ounce dried porcini mushrooms
1¼ cup white wine (Riesling, gewürztraminer, white zinfandel, xx)
½ small carrot, peeled and chopped into rough 1/2-inch pieces
½ small onion, chopped into rough 1/2-inch pieces
3 ounces pancetta, cut into 1-inch pieces
28 ounces whole tomatoes with juice
1½ tablespoon unsalted butter
1 small garlic clove, pressed through garlic press or minced
1 teaspoon sugar
1¼ pound meatloaf mix or equal amounts 80 percent lean ground beef, ground veal, and ground pork
1½ cup whole milk
2 tablespoons tomato paste
Salt
⅛ teaspoon ground black pepper

1. Cover porcini mushrooms with ½ cup water in small microwave-safe bowl; cover bowl with plastic wrap, cut a few steam vents with paring knife, and microwave on high power for 30 seconds. Let stand until mushrooms have softened, about 5 minutes. Using fork, lift porcini from liquid and transfer to second small bowl; pour soaking liquid through mesh strainer lined with paper towel. Set porcini and strained liquid aside.

2. Bring wine to simmer in 10-inch nonstick skillet over medium heat; reduce heat to low and simmer until wine is reduced to 2 tablespoons, about 20 minutes. Set reduced wine aside.

3. Meanwhile, pulse carrot in food processor until broken down into rough ¼-inch pieces, about ten 1-second pulses. Add onion; pulse until vegetables are broken down to ⅛-inch pieces, about ten 1-second pulses. Transfer vegetables to small bowl. Process softened porcini until well ground, about 15 seconds, scraping down bowl if necessary. Transfer porcini to bowl with onions and carrots. Process pancetta until pieces are no larger than ¼ inch, 30 to 35 seconds, scraping down bowl if necessary; transfer to small bowl. Pulse tomatoes with juice until chopped fine, 6 to 8 one-second pulses.

4. Heat butter in 12-inch skillet over medium-high heat; when foaming subsides, add pancetta and cook, stirring frequently, until well browned, about 2 minutes. Add carrot, onion, and porcini; cook, stirring frequently, until vegetables are softened but not browned, about 4 minutes. Add garlic and sugar; cook until fragrant, about 30 seconds. Add ground meats, breaking meat into 1- inch pieces with wooden spoon, about 1 minute. Add milk and stir to break meat into ½-inch bits; bring to simmer, reduce heat to medium, and continue to simmer, stirring to break up meat into small pieces, until most liquid has evaporated and meat begins to sizzle, 18 to 20 minutes. Stir in tomato paste and cook until combined, about 1 minute. Add tomatoes, reserved porcini soaking liquid, ¼ teaspoon salt, and pepper; bring to simmer over medium-high heat, then reduce heat to medium and simmer until liquid is reduced and sauce is thickened but still moist, 12 to 15 minutes. Stir in reduced wine and simmer to blend flavors, about 5 minutes.

(Cooks Illustrated’s Weeknight Bolognese)

all-american, all-delicious apple pie

I’ve made all manner of banana cream pies for Dave, and yet he remains convinced that nothing beats Baker’s Square’s. I have my doubts, as I don’t believe he’s been to a Baker’s Square since I started baking for him. But I keep trying.

By contrast, he declared the first apple pie I made for him the best apple pie he’d ever had. Not that that keeps me from trying new recipes. Just last month (a few days before October’s Tuesdays with Dorie recipes were announced and I realized I’d be making more apple pie soon), I made a rum raisin apple pie that sounded great, but didn’t have quite the perfection of my normal recipe.

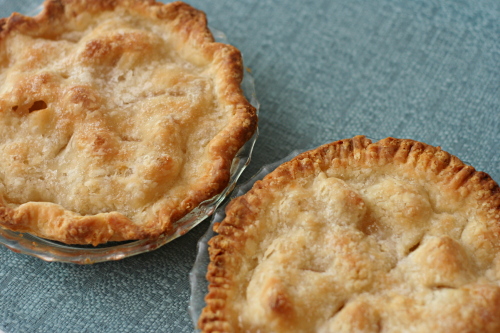
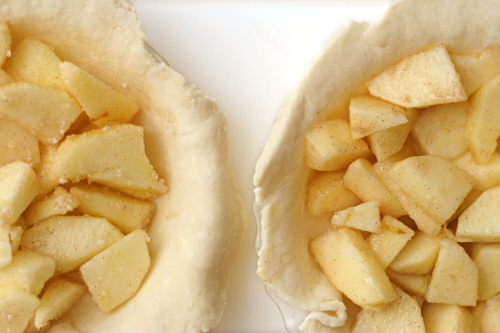
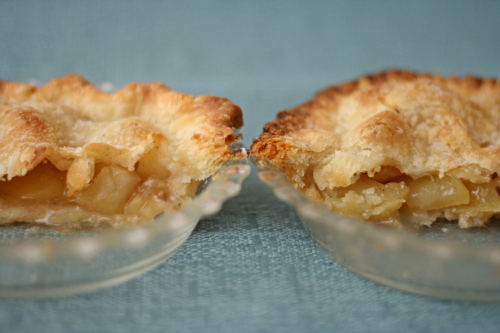
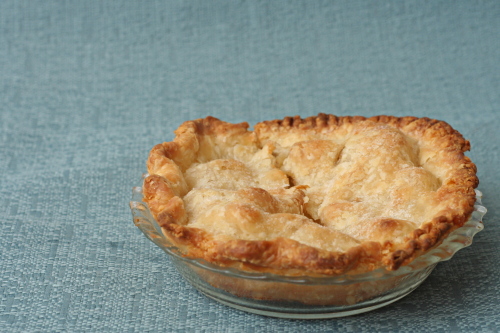
Clearly this calls for a comparison, especially because Dorie calls for tapioca as a thickener instead of apple pie’s standard flour. My original plan was to make side-by-side versions of Dorie’s recipe and my old favorite, but, like many cooking endeavors when I’m rushed, this one went awry. I underfilled both mini-pies (although at least I underfilled them equally), forgot the breadcrumbs and butter in Dorie’s, didn’t adequately stir the zest into the filling… Because the recipes are very similar, with the same ratio of apples to sugar to spices to thickener, it really ended up being a comparison of tapioca versus flour.

I couldn’t tell a difference – not in taste, not in texture, not in soupiness. Dave really enjoyed them both as well. Now I just need to keep him from trying Baker’s Square’s apple pie. One impossible pie standard to live up to is quite enough, thank you.

Emily chose this recipe for TWD, and she has it posted. My other favorite apple pie recipe is by Cooks Illustrated. It’s very similar, with an equal amount of flour substituting for the tapioca in Dorie’s, no breadcrumbs or butter, and 1 teaspoon lemon zest plus 1 tablespoon lemon juice instead of the larger amount of zest that Dorie recommends.  In all photos, Dorie’s recipe is to the left (with the crimped edge, not forked).

One year ago: Allspice Crumb Muffins
Two years ago: Chocolate Cupcakes

cheesecake comparison

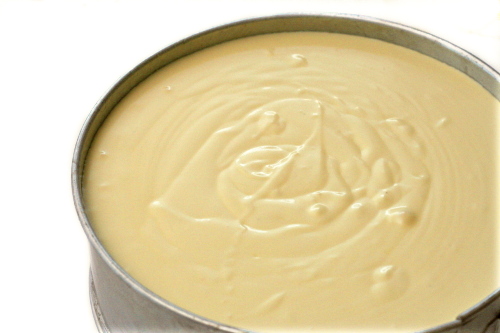
The problem with a cheesecake comparison is that so much of what makes a cheesecake perfect, especially a New York cheesecake, is its texture, and the texture depends so much on the baking technique, and the baking technique will vary depending on the pan size. So the only really fair comparison would be to make three full cheesecakes and use a thermometer to test doneness. But three cheesecakes makes for a ridiculous amount of cheesecake. Plus my instant-read thermometer was on vacation when I made two of these. I did my best.

I baked the first cheesecake for a family holiday. Then I drove with it for four hours to my parents’ house, served half of it, drove back four hours with the remainder and stuck it in the freezer. I baked the other two a month later in a 5-inch springform pan. I overbaked one and underbaked the other. This is not my most comprehensive comparison post, I admit.

Still, I think we were able to draw some conclusions. Not that the opinions of my four tasters were aligned; that would be too easy. (Full disclosure: This comparison was actually done months ago, after cocktails. My notes have the cakes labeled as “brown”, “pale”, and “mess”; apparently one cake didn’t slice well.)

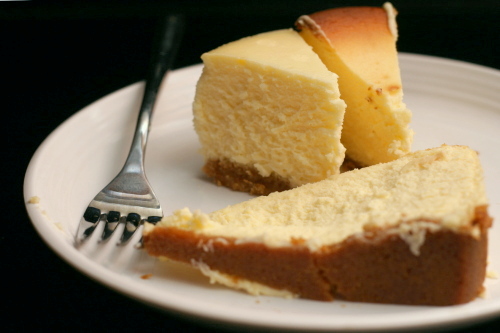
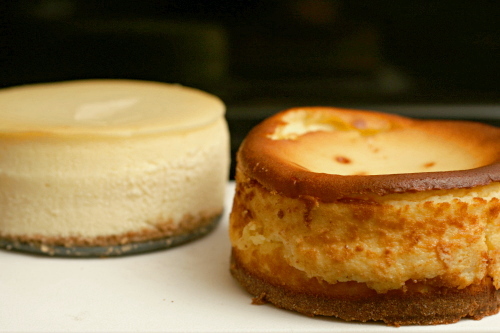
Mess, aka Cooks Illustrated’s New York Cheesecake: After the abuse of eight hours in the car, being half-eaten, frozen, and defrosted, is it any wonder it didn’t slice cleanly? Regardless, it was without question my favorite, as well as Dave’s. The texture ranges from solid and dry on the edge to soft and luscious in the center. The flavor is balanced between the cream cheese and the sweetness and the flavorings. In my opinion, this is cheesecake perfection.

Pale, aka Dorie Greenspan’s Tall and Creamy Cheesecake: I undercooked this one; still, this is one good cheesecake. While I liked Cooks Illustrated’s NY Cheesecake better, I almost feel like it’s an unfair comparison because they’re not meant to be similar cheesecakes. Dorie’s cheesecake is soft and melty with a good balance of sweet and tangy (if you use sour cream instead of the also suggested heavy cream). It isn’t the same style as a New York cheesecake, and there’s nothing wrong with that. It was my sister’s favorite. (My sister started this whole complicated comparison in the first place, by reminding me that cheesecake is one of her favorite foods and then visiting shortly afterwards.)

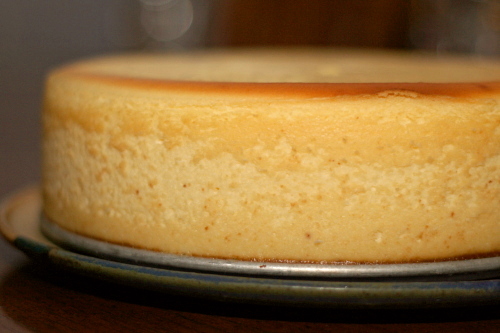
Brown, aka (Goumet via) Smitten Kitchen’s New York Cheesecake: I’m not a big enough person to take all of the responsibility for overcooking this one. Deb admits that the cooking times are risky – 500 degrees until the top begins to brown, then a far lower temperature. I don’t need to tell you that it didn’t work for me; you can see that overbrowned, blown-out top for yourself. Besides that, most of us felt that the citrus flavor was overbearing, even with the reduced amounts of zest that Deb recommends. With all of the stars aligned and with less zest, this might be a great cheesecake. But with other stars around, why bother with the struggle?

Overall, a flawed comparison, but I learned my preferences. For New York cheesecake, Cooks Illustrated. For non-New York cheesecake, Dorie Greenspan. But always, I just want cheesecake.

One year ago: 100% Whole Wheat Sandwich Bread
Two years ago: Lemon Pancakes with Blueberry Syrup

Printer Friendly Recipe
New York Cheesecake (from Cooks Illustrated)

For the crust:
5 tablespoons unsalted butter, melted, plus 1 additional tablespoon, melted, for greasing the pan
4 ounces (approximately 8 whole) graham crackers, broken into rough pieces and processed into fine, even crumbs
1 tablespoon sugar

For the cheesecake:
2½ pounds (5 8-ounce packages) cream cheese, room temperature
⅛ teaspoon salt
1½ (10.5 ounces) cups sugar
⅓ cup sour cream
2 teaspoons freshly squeezed lemon juice
2 teaspoons vanilla extract
2 large egg yolks plus 6 large eggs, at room temperature

1. To make the crust, adjust an oven rack to the lower-middle position and heat the oven to 325 degrees F. Brush the bottom and sides of a 9-inch springform pan with ½ tablespoon of the melted butter. In a medium bowl combine the graham cracker crumbs, 5 tablespoons melted butter, and sugar. Toss with a fork until the crumbs are evenly moistened. Transfer the crumbs to the springform pan and use the bottom of a ramekin to firmly press the crumbs evenly into the pan bottom. Bake until fragrant and beginning to brown around the edges, about 13 minutes. Cool on a wire rack while preparing the filling.

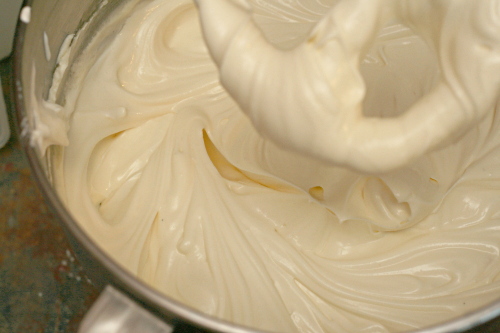
2. Increase the oven temperature to 500 degrees F. In the bowl of a stand mixer fitted with the paddle attachment, beat the cream cheese at medium-low speed to break up and soften it slightly, about 1 minute. Scrape the beater and the bottom and sides of the bowl well with a rubber spatula; add the salt and about half of the sugar and beat at medium-low speed until combined, about 1 minute. Scrape the bowl; beat in the remaining sugar until combined, about 1 minute. Scrape the bowl; add the sour cream, lemon juice, and vanilla. Beat at low speed until combined, about 1 minute. Scrape the bowl; add the egg yolks and beat at medium-low speed until thoroughly combined, about 1 minute. Scrape the bowl; add the remaining eggs 2 at a time, beating until thoroughly combined, about 1 minute, scraping the bowl between additions.

3. Brush the sides of the springform pan with the remaining ½ tablespoon melted butter. Set the pan on a rimmed baking sheet to catch any spills in case the pan leaks. Pour the filling into the cooled crust and bake 10 minutes; without opening the oven door, reduce the oven temperature to 200 degrees and continue to bake until the cheesecake reads about 150 degrees on an instant-read thermometer inserted in the center, about 1½ hours. Transfer the cake to a wire rack and cool until barely warm, 2½ to 3 hours. Run a paring knife between the cake and the springform pan sides. Wrap tightly in plastic wrap and refrigerate until cold, at least 3 hours.

4. To unmold the cheesecake, removed the sides of the pan. Slide a thin metal spatula between the crust and the bottom of the pan to loosen, then slide the cake onto a serving plate. Let the cheesecake stand at room temperature about 30 minutes, then cut into wedges and serve. (Use a long, thin, sharp knife that has been run under hot water and then dried for slicing. Wipe the blade clean and rewarm between slices.)

Printer Friendly Recipe
Tall and Creamy Cheesecake
(from Dorie Greenspan’s Baking: From my Home to Yours)

I prefer using sour cream instead of heavy cream.

Makes 16 servings

For the crust:
1¾ cups graham cracker crumbs
3 tablespoons sugar
pinch of salt
½ stick (4 tablespoons) unsalted butter, melted

For the cheesecake:
2 pounds (four 8-ounce boxes) cream cheese, at room temperature
1⅓ cups (9.67 ounces) sugar
½ teaspoon salt
2 teaspoons pure vanilla extract
4 large eggs, at room temperature
1⅓ cups sour cream or heavy cream, or a combination of the two

To make the crust:
Butter a 9-inch springform pan—choose one that has sides that are 2 ¾ inches high (if the sides are lower, you will have cheesecake batter leftover) — and wrap the bottom of the pan in a double layer of aluminum foil; put the pan on a baking sheet.

Stir the crumbs, sugar and salt together in a medium bowl. Pour over the melted butter and stir until all of the dry ingredients are uniformly moist. (I do this with my fingers.) Turn the ingredients into the buttered springform pan and use your fingers to pat an even layer of crumbs along the bottom of the pan and about halfway up the sides. Don’t worry if the sides are not perfectly even or if the crumbs reach above or below the midway mark on the sides—this doesn’t have to be a precision job. Put the pan in the freezer while you preheat the oven.

Center a rack in the oven, preheat the oven to 350°F and place the springform on a baking sheet. Bake for 10 minutes. Set the crust aside to cool on a rack while you make the cheesecake.

Reduce the oven temperature to 325°F.

To make the cheesecake:
Put a kettle of water on to boil.

Working in a stand mixer, preferably fitted with a paddle attachment, or with a hand mixer in a large bowl, beat the cream cheese at medium speed until it is soft and lives up to the creamy part of its name, about 4 minutes. With the mixer running, add the sugar and salt and continue to beat another 4 minutes or so, until the cream cheese is light. Beat in the vanilla. Add the eggs one by one, beating for a full minute after each addition—you want a well-aerated batter. Reduce the mixer speed to low and stir in the sour cream and/or heavy cream.

Put the foil-wrapped springform pan in the roaster pan.

Give the batter a few stirs with a rubber spatula, just to make sure that nothing has been left unmixed at the bottom of the bowl, and scrape the batter into the springform pan. The batter will reach the brim of the pan. (If you have a pan with lower sides and have leftover batter, you can bake the batter in a buttered ramekin or small soufflé mold.) Put the roasting pan in the oven and pour enough boiling water into the roaster to come halfway up the sides of the springform pan.

Bake the cheesecake for 1 hour and 30 minutes, at which point the top will be browned (and perhaps cracked) and may have risen just a little above the rim of the pan. Turn off the oven’s heat and prop the oven door open with a wooden spoon. Allow the cheesecake to luxuriate in its water bath for another hour.

After 1 hour, carefully pull the setup out of the oven, lift the springform pan out of the roaster—be careful, there may be some hot water in the aluminum foil—remove the foil. Let the cheesecake come to room temperature on a cooling rack.

When the cake is cool, cover the top lightly and chill the cake for at least 4 hours, although overnight would be better.

Serving:
Remove the sides of the springform pan— I use a hairdryer to do this (use the dryer to warm the sides of the pan and ever so slightly melt the edges of the cake)—and set the cake, still on the pan’s base, on a serving platter. The easiest way to cut cheesecake is to use a long, thin knife that has been run under hot water and lightly wiped. Keep warming the knife as you cut slices of the cake.

Storing:
Wrapped well, the cake will keep for up to 1 week in the refrigerator or for up to 2 months in the freezer. It’s best to defrost the still-wrapped cheesecake overnight in the refrigerator.

Printer Friendly Recipe
New York Cheesecake (adapted from Gourmet via Smitten Kitchen)

Crust:
8 ounces (15 4¾-by-2½-inch sheets) graham crackers
8 tablespoons (1 stick) unsalted butter, melted
½ cup (3.5 ounces) sugar
¼ teaspoon salt

Filling:
5 (8-ounce) packages cream cheese, softened
1¾ cups (12.25 ounces) sugar
3 tablespoons all-purpose flour
1 teaspoon finely grated lemon zest
1 teaspoon finely grated orange zest
5 large eggs
2 large egg yolks
½ teaspoon vanilla

1. For the crust: Stir together crust ingredients and press onto bottom and up the sides, stopping one inch shy of the top rim, of a buttered 9-inch (or 24 cm) springform pan. Put the crust in the freezer while you prepare the filling.

2. Filling: Preheat oven to 550 degrees. Beat together cream cheese, sugar, flour and zest with an electric mixer until smooth. Add vanilla, then eggs and yolks, one at a time, beating on low speed until each ingredient is incorporated. Scrape bowl down between additions.

3. Put the springform pan with the crust in a shallow baking pan (to catch drips). Pour the filling into the crust (the springform pan will be completely full) and bake in baking pan in the middle of the oven for 12 minutes or until puffed. Please watch your cake because some ovens will top-brown very quickly and if yours does too fast, turn the oven down as soon as you catch it. Reduce the temperature to 200 degrees and continue baking until the cake is mostly firm (center will still be slightly wobbly when pan is gently shaken), about one hour more.

4. Run a knife around the top edge of the cake to loosen it and cool the cake completely in the springform pan on a rack, then chill it, loosely covered, for at least 6 hours.

croissants 3 (martha stewart)

I worked in a lab for years, but I never absolutely loved it. You’d think I would have, considering that I basically mixed up ingredients and baked them, but I guess without that crucial eating-the-batter – sorry, of course I mean that eating-the-result step, it just wasn’t as fun.

Plus I could never get the hang of keeping good records in the lab. My notebook seemed to be both unorganized and lacking crucial information. I took detailed notes on the amount and type of ingredients used and the baking temperature and time, but whenever I needed to look up details of the result, I was left with a few marginally descriptive words.

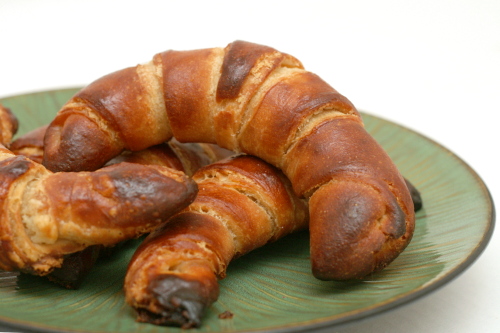
In the kitchen, it’s the opposite. The result, now that’s memorable, especially in this case – slightly sweet, intensely flaky, dark golden brown, impossible to resist, always leaving me wanting another.

The path to that result isn’t as memorable, particularly in the amount of instant dry yeast I used. Probably I should have written that down somewhere. I’m going to hypothesize – remember, hypothesizing is not the same thing as guessing! It’s an educated guess, which is to say, don’t skip out on this recipe just because the fresh yeast called for in the original recipe is dumb and I’m bad at note-taking, because the chances are very good that my estimate of the amount of yeast I used isn’t too terribly terrible, and anyway, it’s yeast and yeast always does its job eventually.

Anyway. I’m going to hypothesize that I used about one packet of yeast. Please accept my apologies for not taking thirty seconds to write it down. This must be why I now have an office job instead of a lab job.

One year ago: Anadama Bread
Two years ago: Baba Ghanoush and Falafel

Printer Friendly Recipe
Croissants (adapted from Martha Stewart’s Baking Handbook)

Makes 12

1 cup cold milk
1 tablespoon honey
14 ounces (about 3 cups) all-purpose flour
¼ cup (1.75 ounces) sugar
2¼ teaspoons salt
2¼ teaspoons (1 packet) instant yeast
20 tablespoons (2½ sticks) unsalted butter, cold
1 large egg, lightly beaten with a pinch of salt and a dribble of water or milk

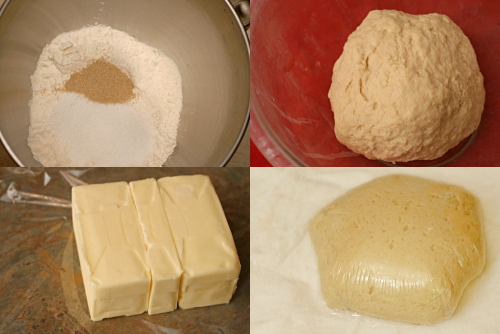
1. Make the dough package: Pour the milk and honey into a 2-cup liquid measuring cup, and stir to combine; set aside. In the bowl of an electric mixer fitted with the dough hook, stir together 12 ounces (about 2¾ cups) of the flour, the sugar, yeast, and salt; stir to combine. Add the milk mixture and mix on low speed until the dough just comes together, 2 to 3 minutes.

2. Turn out the dough onto a lightly floured work surface; gently knead to form a smooth ball, about 45 seconds. Wrap in plastic and refrigerate at least 1 hour or overnight.

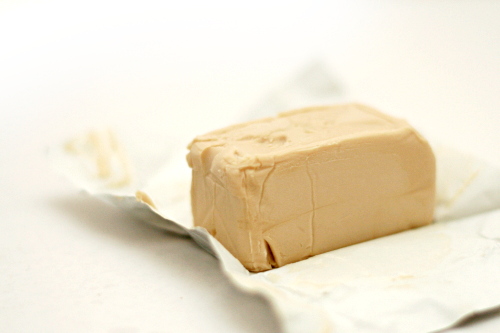
3. Make the butter package: Lay the butter sticks side by side on a piece of plastic wrap, and sprinkle with the remaining 1 ounce (about 2 tablespoons) flour. Pound with a rolling pin until the flour is incorporated; roll into a 4- by 3-inch rectangle. Wrap tightly and refrigerate for at least 1 hour or overnight.

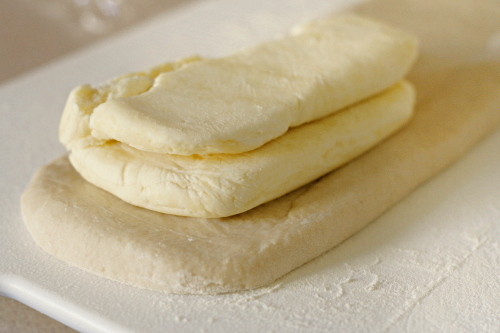
4. Remove the dough package from the refrigerator; place on a lightly floured work surface. Roll out to an 8-by-10-inch rectangle, about ½ inch thick, with a short side facing you. Remove the butter package from the refrigerator; place on the bottom half of the dough; fold the top half of the dough over the butter, and pinch the edges to seal.

5. Roll out the dough to a 10-by-10-inch square about ½ inch thick; keep the corners as square as possible. Remove any excess flour with a dry pastry brush. Starting at the far end, fold the square in thirds, as you would a business letter. This completes the first of three turns. Wrap in plastic and refrigerate for 1 hour.
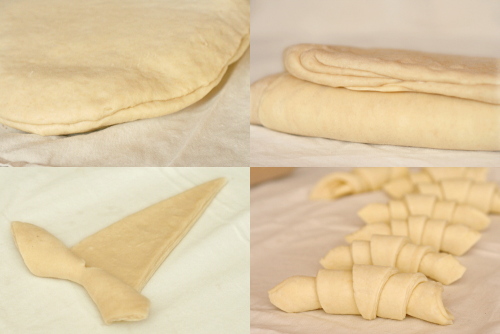
6. Repeat rolling and folding as above two more times, starting with the flap opening on the right, as if it were a book, and refrigerate at least 1 hour between turns. To help you remember how many turns have been completed, mark the dough after each: Make one mark for the first turn, two for the second, and three for the third. After the third, wrap the dough in plastic, and refrigerate 6 to 8 hours, or overnight.

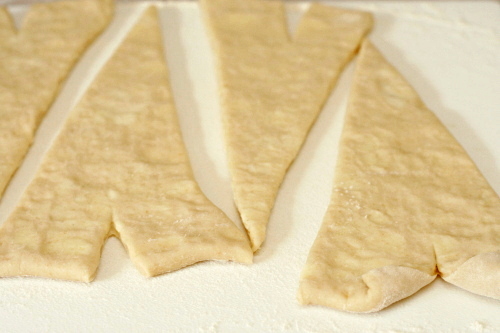
7. Turn out the chilled dough onto a lightly floured work surface. Roll out the dough to a 30-by-8-inch rectangle. (If the dough becomes too elastic, cover with plastic wrap, and let rest in the refrigerator for 10 minutes.) Using a pizza wheel, cut the dough into triangles, each with a 4-inch base (you will have scraps of dough at both ends). Cut a 1-inch slit in the center of the base of each triangle. Place triangles in a single layer on a clean work surface.

8. To shape the croissants, stretch the two lower points of each triangle to enlarge the slit slightly. Fold the inner corners formed by the slit toward the outer sides of the triangles, and press down to seal. Using your fingertips, roll the base of each triangle up and away from you, stretching the dough slightly outward as you roll; the tip should be tucked under the croissant. Pull the two ends toward you to form a crescent. Transfer the crescents to a parchment-lined baking sheets, 2 inches apart. Cover loosely with plastic wrap, and let rise in a warm place until very spongy and doubled in bulk, 45 to 60 minutes.

9. Preheat the oven to 400ºF, with a rack in the middle position. Lightly brush the crescents with the beaten egg. Bake until the croissants are puffed and golden brown, about 15 to 20 minutes. Transfer the sheet to a wire rack to cool. Serve warm or at room temperature.

roll-out sugar cookie comparison

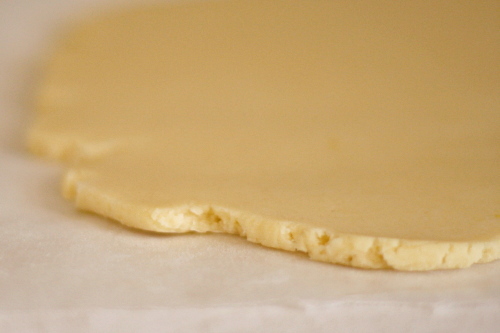
You know those people who decorate sugar cookies so beautifully it’s hard to believe those works are art are edible? Yeah, I am not one of them. I haven’t made sugar cookies in months, and you know why? It’s a pain in the butt, and the results of my decorating are never up to my standards.

You know what’s even more of a pain in the butt? Making five different recipes! On the other hand, if I’m going to go through the trouble of mixing, rolling, baking, and decorating cookies, I want to be sure I’m using the best recipe I can, and it’s hard to know that without making a bunch and comparing. So that’s what I did.

I asked around to see what recipes people recommended and settled on this one from Annie’s Eats, this one from Ashlee’s Year in the Kitchen, this one from Martha Stewart, and the version I’ve been using for the last year or so, an adaptation of this one. (That’s only four recipes and I said I made five – I messed one up and had to remake it.) Because it’s easy to adapt the flavorings to personal preference, I used the same amount of vanilla, almond extract, and lemon zest in each recipe.

What I’m looking for in a sugar cookie is full flavor – some are bland – and tenderness without being too delicate. It needs to hold its shape of course, although I’m not opposed to a slight puff in the oven. I think a few flecks of lemon zest give sugar cookies a more balanced flavor without making them noticeably lemony. I am not particularly interested in recipes that do not require an overnight rest, as they tend to require too much flour, resulting in a bland, tough cookie. This actually makes sugar cookies a convenient comparison post because I could divide the tasks into separate days – making the dough, rolling it out, baking it, and decorating the cookies.

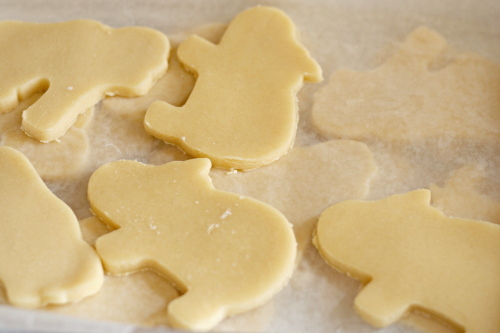
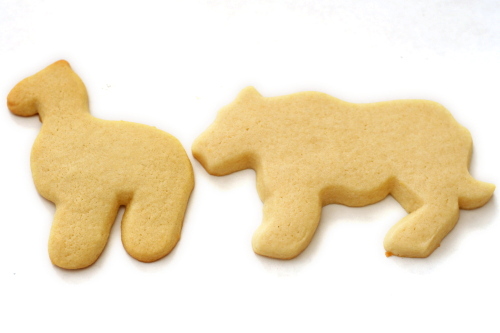
I thought all of the recipes were equally easy to mix up and roll out. I thought they all held their shape adequately during baking, although Ashlee’s cookies puffed a bit more than the others, while Annie’s were on the other extreme, retaining perfectly straight sides in the oven.

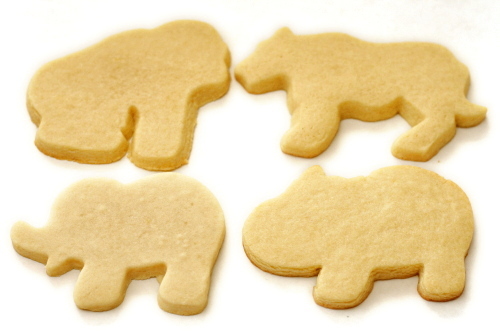
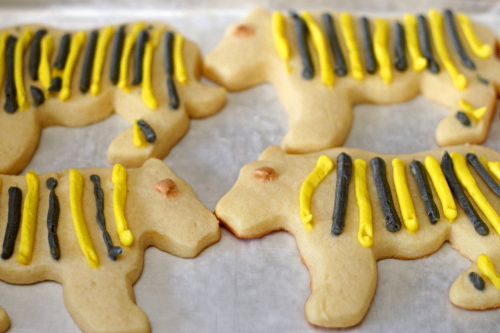
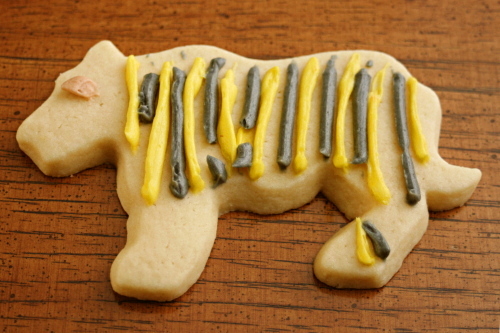
After tasting, the two favorite recipes were mine and Ashlee’s. The cookies from my recipe (the gorillas) were described as soft, chewy and flavorful. Ashlee’s (the tigers) were puffy, fluffy, and soft – tasters like the texture better but there was a slight preference for the flavor of my recipe.

Annie’s cookies (the elephants) were soft, although not chewy, but they were powdery and not as flavorful. Because this recipe uses only powdered sugar with no granulated sugar, the powdery texture is not a surprise. I’m sure this all relates to how well they hold their shape during baking as well, in addition to the lack of any chemical leavener. The universal least favorite was Martha Stewart’s recipe (the hippos), which was too hard, too chewy, and too dense, perhaps because it uses less butter than any of the others.


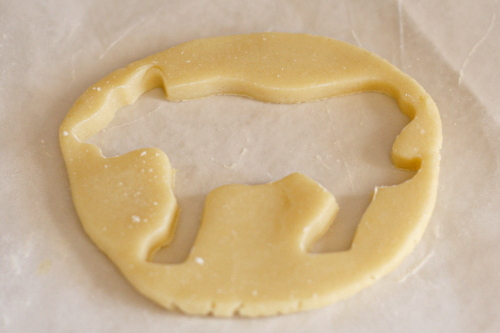
(I would just like to clarify that Dave outlined the hippo and gorilla. I was happy for his help, and I think he might even have had a little bit of fun.)

Which will I choose in the future? Oh, who knows. Probably my recipe, because it’s a classic sugar cookie recipe. There are no tricks up its sleeve; it just happens to have just the right ratio of ingredients. And for the record, the one thing that all of my tasters agreed on after I made them compare the cookies pre-frosting was that buttercream makes sugar cookies that much better.

One year ago: Lemon Cream Cheese Bars
Two years ago: Raspberry Bars (these are wonderful)

Printer Friendly Recipe
Roll-out Sugar Cookies

2½ cups (12 ounces) all-purpose flour
1 teaspoon baking powder
1 egg
½ teaspoon vanilla extract
¼ teaspoon almond extract
16 tablespoons (2 sticks) unsalted butter, room temperature
½ teaspoon salt
1 cup (7 ounces) granulated sugar
¼ teaspoon lemon zest

1. In a medium bowl, mix the flour and baking powder. In a one-cup measuring cup, lightly beat the egg with the extracts.

2. In the bowl of a standing mixer (or in a large bowl with a handheld mixer), beat the butter and salt on medium speed until smooth. With the mixer running, gradually pour in the sugar; add the lemon zest. Beat on medium until fluffy, about 1 minute. With the mixer running, pour in the egg mixture and continue beating until incorporated. Scrape down the sides of the mixer bowl. With the mixer on low, gradually add the flour and mix just until evenly blended.

3. Lightly knead the dough to form a ball, press it into a disk 1-inch thick, and wrap tightly in plastic wrap. Refrigerate for 2 hours or overnight.

4. Line a baking sheet with parchment paper or a silicone baking mat. Adjust a rack to the middle position and heat the oven to 375F. If you’ve chilled the dough overnight, it’ll need to sit at room temperature for half an hour or so to soften slightly. On a very lightly floured sheet of wax paper with a sheet of plastic wrap on top of the dough, roll the dough out to ¼-inch thick. Cut cookies using a floured cookie cutter. Re-roll scraps, always using as little flour as necessary.

5. Bake the cookies, one sheet at a time, for 5-9 minutes, until they no longer look wet on top. The baking time will depend on the size of the cookies you’ve cut. You don’t want the bottoms to be browned, except for maybe just a bit on the edges. Let the cookies rest for a couple minutes on the sheets before transferring them to cooling racks to finish cooling. Decorate as desired.


(The snakes are a mixture of the last dough scraps from all five recipes.)

Printer Friendly Recipe
Ashlee’s Famous Sugar Cookies (rewritten from Ashlee’s Year in the Kitchen)

For my comparison, I used the same amount of vanilla, almond extract, and lemon zest for each recipe. This was significantly less lemon zest than Ashlee’s recipe calls for. A full tablespoon will give the cookies a distinct lemon flavor.

Ashlee indicates that the dough can be rolled and cut right after mixing, but I have my doubts. I chilled overnight just for convenience, but it was a very soft dough, and I think it would be difficult to cut and transfer cookies while the dough is room temperature.

24 tablespoons (3 sticks) unsalted butter, room temperature
1½ cups (10.5 ounces) granulated sugar
½ cup (2 ounces) powdered sugar
4 eggs
1 teaspoon vanilla
½ teaspoon almond extract
1 tablespoon lemon zest
5 cups (24 ounces) all-purpose flour
2 teaspoons baking powder
1 teaspoon salt

1. Adjust a rack to the middle position and heat the oven to 400F. Line a baking sheet with parchment paper or a silicone baking mat.

2. In the bowl of a standing mixer (or in a large bowl with a handheld mixer), beat the butter and sugars on medium speed for 5 minutes. Add the eggs one at a time, mixing until each is incorporated before adding the next. Add the extracts and lemon zest and beat for 10 seconds. Add the baking powder and salt and beat until combined. With the mixer on low, add the flour 1 cup at a time, mixing for 15 seconds between each addition.

3. Wrapped tightly in plastic wrap, the dough can be refrigerated for up to a week, or it can be rolled and cut right away (see note). Roll out to a thickness of ¼-inch and use a floured cookie cutter to cut desired shapes.

4. Bake on the prepared sheet for about 7 minutes, until light golden brown on the bottom edges.

Printer Friendly Recipe
Ella’s White Sugar Cookies (rewritten from Annie’s Eats)

16 tablespoons (2 sticks) unsalted butter, room temperature
1 cup (4 ounces) powdered sugar
1 egg, beaten
1½ teaspoon almond extract
1 teaspoon vanilla
1 teaspoon salt
2½ cups (12 ounces) all-purpose flour

1. In the bowl of a standing mixer (or in a large bowl with a handheld mixer), beat the butter on medium speed until smooth. Add the powdered sugar and continue mixing until evenly blended. With the mixer running, pour in the egg, extracts, and salt and continue beating until incorporated. Scrape down the sides of the mixer bowl. With the mixer on low, gradually at the flour and mix just until evenly blended.

2. Refrigerate for 2 hours or overnight.

3. Line a baking sheet with parchment paper or a silicone baking mat. Adjust a rack to the middle position and heat the oven to 375F.

4. Roll to ¼-inch thickness on a well-floured surface. Cut with floured cookie cutters. Place on prepared cookie sheets. Bake at 375°F for 8-10 minutes. Cookies should not brown. Transfer to wire racks to cool completely.

Printer Friendly Recipe
Sugar Cookie Cutouts (from Martha Stewart)

4 cups sifted all-purpose flour
1 teaspoon baking powder
½ teaspoon salt
1 cup (2 sticks) unsalted butter, room temperature
2 cups granulated sugar
2 large eggs
2 teaspoons pure vanilla extract

1. Sift flour, baking powder, and salt into a bowl.

2. Put butter and sugar in the bowl of an electric mixer fitted with the paddle attachment. Mix on medium speed until pale and fluffy. Mix in eggs and vanilla. Reduce speed to low. Gradually mix in flour mixture. Divide dough into quarters; flatten each quarter into a disk. Wrap each in plastic. Refrigerate until firm, at least 1 hour or overnight.

3. Preheat oven to 325 degrees with racks in upper and lower thirds. Let one disk of dough stand at room temperature just until soft enough to roll, about 10 minutes. Roll out dough between two pieces of plastic wrap to ¼-inch thickness. Remove top layer of plastic wrap. Cut out cookies with a 4-to-5-inch cookie cutter. Transfer cookie dough on plastic wrap to a baking sheet. Transfer baking sheet to freezer, and freeze until very firm, about 15 minutes. Remove baking sheet from freezer, and transfer shapes to baking sheets lined with nonstick baking mats. Roll out scraps, and repeat. Repeat with remaining disk of dough.

4. Bake, switching positions of sheets and rotating halfway through, until edges turn golden, 15 to 18 minutes. Let cool on sheets on wire racks.

And – this is what happens when you add baking soda to your sugar cookies instead of baking powder.  They puff and turn yellow.   The tiger is the recipe made correctly, with baking powder; the giraffe has baking soda.

bourbon pound cake

Copy of IMG_1180

Sometimes it’s the recipes that seem the simplest that can give us the most trouble. I can’t tell you how many times I’ve heard people lamenting about their chocolate chip cookies. We think that because the recipe is ubiquitous that we should all do it well, but truthfully, many cookies are finicky – if your butter is too warm, or your flour measurements are off slightly, or your oven temperature isn’t stable, your cookies can end up flat or greasy or burned.

Copy of IMG_0585

Pound cake, with only a few ingredients, is often even more fussy. Those ingredients need to be combined just right to produce a light, moist, buttery cake. In fact, I think pound cake is the perfect recipe to teach yourself the particulars of baking, because every detail counts – the eggs should be room temperature, the butter needs to be soft but not too soft, the sugar and eggs have to be gradually added to the butter mixture, the flour must be sifted and gently folded into the batter. These steps can make or break a traditional pound cake, and following them carefully will also improve your cookies and layer cakes.

Copy of IMG_0566

Fortunately, this recipe makes it easy on you by separating the eggs, beating the whites until they’re fluffy and light, and folding the meringue mixture into the dough at the end. The light egg whites provide insurance against a dense cake without making it dry.

Copy of IMG_1166

Also, bourbon. Is good.  I suppose you can leave it out if you’re not into alcohol or you just want a great classic pound cake, but the bourbon is great in this because the flavor really stands out. Primarily because the bourbon’s mild smokiness compliments the other flavors, but also because that’s just a heck of a lot of bourbon to add to a cake.

Copy of IMG_1172

I used to think this other recipe was my favorite pound cake, but not anymore. This one is not only more dependable, it’s just better. It rises higher, plus? It tastes like bourbon.

Copy of IMG_1173

If you’ve been directed here from the Intelligencer and would like to see the cookies also discussed in the article, click here.

Printer Friendly Recipe
Bourbon Pound Cake

12-16 slices

It’s easier to separate eggs when they’re cold, but they behave better in baking when they’re at room temperature. I suggest separating them when you take the butter out of the fridge to warm, then leaving them at room temperature for about an hour, until you’re ready to bake.

The easiest way to sift ingredients if you don’t have a sifter is to put them in a fine-mesh strainer and shake and tap the pan over the bowl that you’re sifting into.

You can also double this recipe and bake it in a tube pan for about 90 minutes.

4 eggs, separated
1¼ cup (8¾ ounces) sugar, divided
16 tablespoons (2 sticks) unsalted butter, softened
½ teaspoon salt
3 tablespoons bourbon
1 teaspoon vanilla extract
1½ cup (6 ounces) cake flour

1. Adjust an oven rack to the middle position and heat the oven to 350ºF. Butter and flour (or spray with baking spray) a 9-by-5-inch loaf pan.

2. In a stand mixer fitted with the whisk attachment (or in a medium-sized mixing bowl with a hand-held mixer), beat the egg whites on medium-high speed until foamy. Increase the speed to high and continue beating until they form soft mounds. With the mixer on medium-high speed, gradually add ½ cup (3.5 ounces) of sugar. Increase the speed to high and beat until the mixture is glossy and holds stiff peaks. If you’re using a stand mixer and only have one bowl, transfer the egg white mixture to another bowl and rinse and dry the mixer bowl.

3. Fit the mixer with the paddle attachment and add the butter to the mixer bowl (or a large mixing bowl with a hand-held mixer). Beat on medium-low speed until the butter is soft and creamy, about 1 minute. Add the salt, then, with the mixer running, slowly pour in the remaining ¾ cup (5.25 ounces) sugar. Continue mixing on medium speed until the mixture is light and fluffy, 2-3 minutes. Meanwhile, whisk the egg yolks with the bourbon and vanilla extract in a small measuring cup. With the mixer running, slowly pour in the egg yolk mixture. Once the eggs are in, stop and scrape the sides of the bowl, then continue beating for another 2-3 minutes.

4. Sift one-third of the flour over the butter/egg mixture. Using a large rubber spatula, gently fold in the flour until it’s evenly dispersed but not completely mixed in (as shown in the fourth photo). Add half of the beaten egg whites and continue folding until evenly dispersed. Repeat with another third of the flour, then the rest of the egg whites. Sift the remaining flour into the batter and fold until it’s completely mixed in and there are no pockets of dry flour.

5. Scrape the batter into the prepared pan and smooth the top. Bake until golden brown and a toothpick inserted into the center of the loaf comes out clean, 45-60 minutes. If the top of the cake is getting too dark before the center is baked, lay a sheet of aluminum foil loosely over the cake. Cool the cake in the pan on a wire rack for 15 minutes, then use a thin knife or spatula to loosen the cake from the edges of the pan. Invert the pan onto the wire rack, then turn it right-side up to continue cooling. Serve the cake at room temperature.

Copy of IMG_0631

I compared this cake made with cake flour (left) and all-purpose flour (right).  The version made with cake flour rose higher and was lighter and fluffier, but the cake made with all-purpose flour was still very good.

carne adovada

Copy of IMG_5067

A carne adovada comparison post is a very bad idea because:

1. I don’t love cooking with meat, with the constant hand-washing and being careful not to contaminate cooked meat tools with raw meat tools.

Copy of IMG_7465

2. My limited counter space makes working with large roasts difficult.

3. The oven was on for four hours – in July.

Copy of IMG_7470

4. One of the recipes includes the warning “Don’t breathe the fumes!”

5. Another warning, this time from my sister: “My coworker said to be careful because red chile can give some people the runs if they aren’t used to eating it.”

Copy of IMG_4864

6. Carne adovada is red. Deep, dark red, and yes, of course it stains.

7. Who, outside of New Mexico, has even heard of carne adovada?

Copy of IMG_7487

Oh, and then, the outcome?

8. Dave thought all three recipes tasted the same anyway.

Copy of IMG_4879

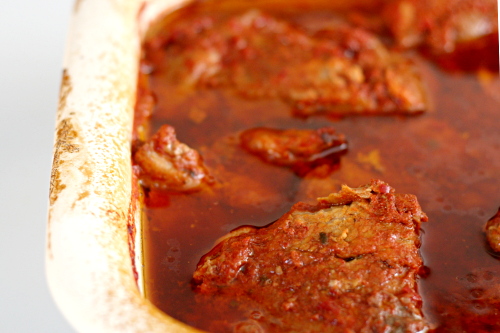
Carne adovada is pork marinated in red chile sauce, then slow roasted. It isn’t something that I’ve eaten a lot of; my dad made it once when I was young and it was crazy ridiculously painfully spicy, and I’ve pretty much been scared of it since. Of course now I realize that the level of spiciness will vary with the heat of the chiles.

Copy of IMG_4881

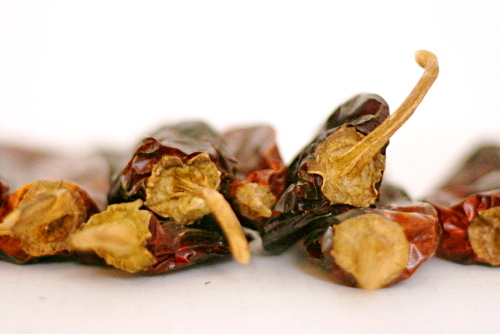
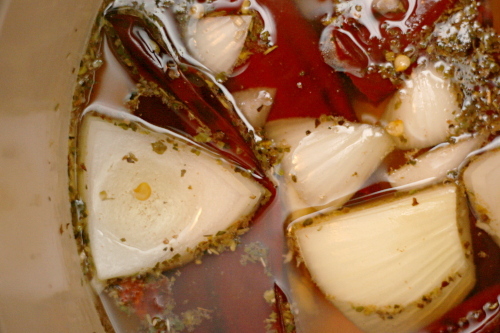
Unable, as usual, to decide on a recipe, I decided to compare a few. The meat in all recipes is marinated and cooked using the same method and cooking time; the difference is in the red chile sauce. At its most simple, the red chiles are soaked in hot water to rehydrate them, then blended with onions, garlic, and salt. Jen’s method is only slightly more complicated, with the added step of toasting the dried chiles before soaking them.

Copy of IMG_4871

Kate’s recipe is a little more complicated – and uses far, far more red chiles. It’s similar but significantly more fussy, with a soak followed by a simmer instead of just a soak, and then the blended ingredients need to be pushed through a sieve, a step I find tedious in most recipes that call for it.

Copy of IMG_7463

I let the meat marinate for about 24 hours, but if you can swing longer, up to 2 full days, I really think that’s the way to go. The more red chile flavor, the better.

Copy of IMG_7505

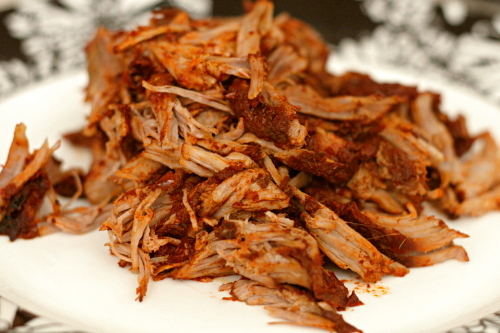
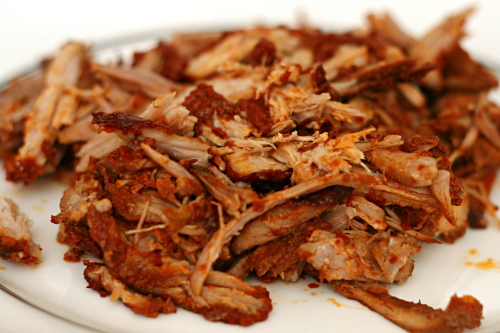
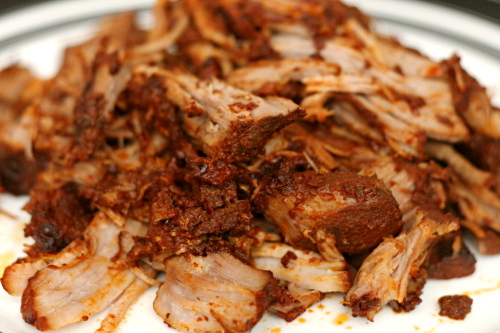
After finding enough properly-sized baking pans, jigsawing the pans into the oven, roasting the meat for hours, letting it cool slightly, and shredding all three pans of meat while trying to keep straight which was which so I could identify the photos, Dave and I decided that they were very, very similar.

Copy of IMG_7514

Dave would say identical. I would say that they’re oh-so-slightly different, but equally good. Kate’s recipe, which used so much more chiles, was spiciest. The recipe that did not require toasting the chiles tasted lighter and fresher, while the recipe with toasted chiles had a deeper flavor.

Copy of IMG_7523

My favorite was probably the simplest recipe; I liked that fresh flavor. Plus, if they all taste essentially the same, I might as well make the easiest, right? I guess a comparison was necessary, just so I know that, in this case, simple works just fine.

Copy of IMG_4929

Update: I thought I should add that neither of us had any, ah, digestive issues after eating the red chile, despite the concerns of my sister and her coworker.

One year ago: Baked Eggs with Spinach and Mushrooms

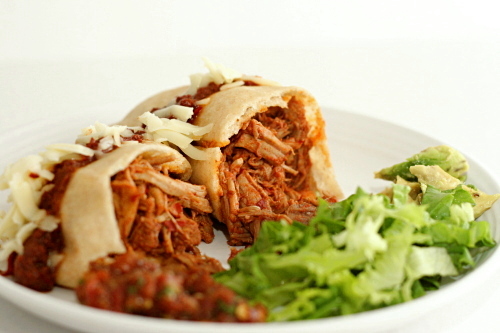
Serving suggestions: Burritos, stuffed sopaipillas (shown in the top photo), quesadillas, tacos, breakfast burritos.  You can also add potatoes to the mixture before cooking, and then serve the potatoes and meat as a main dish with beans and rice as sides.

Printer Friendly Recipe
Carne Adovada
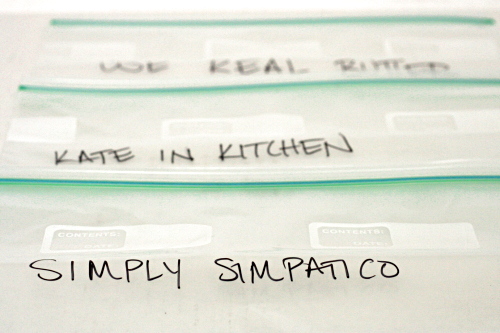
(adapted from Simply Simpatico, by the Junior League of Albuquerque)

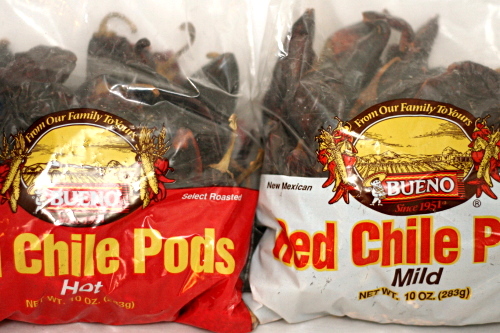
16-18 dried red chile pods
hot water
3 cloves garlic
2 teaspoons salt
1 tablespoon dried oregano
4 pounds pork shoulder, trimmed of thick layer of fat and sliced ½-inch thick

1. Remove stems and seeds from the chile pods. Place the pods in a large bowl or pot and pour in enough hot water to cover them. Soak for 1 hour. Strain, reserving the soaking liquid.

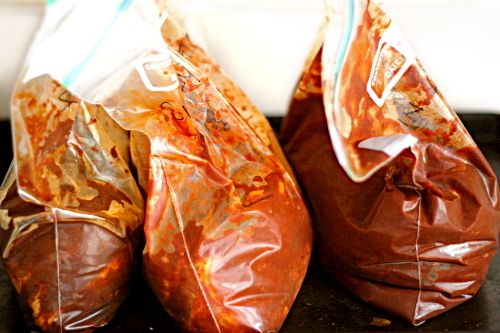
2. Place the chiles, garlic, and salt in a blender and add enough soaking liquid to just cover. Making sure there’s about two inches of headspace, blend until the skins disappear and the mixture is smooth, 2-3 minutes. Pour the sauce over meat, cover tightly, and marinate in the refrigerator for 24-28 hours.

3. Adjust a rack to the middle position and heat the oven to 350ºF. Place the meat and chile sauce marinade in a baking pan and cover tightly with foil. Bake the carne adovada until the meat is falling apart tender, about 4 hours. (You can also cook the carne adovada in a crockpot on low heat for 7-9 hours.) When the meat is done, shred it or cut it into 1-inch pieces. Serve.

Copy of IMG_7527

Printer Friendly Recipe
Carne Adovado
(adapted from Jen at Use Real Butter, who adapted it from Sante Fe Recipe)

16 dried red chile pods
1 tablespoon salt
4 cloves garlic
2 teaspoons oregano
5 pounds pork shoulder, trimmed of thick layer of fat and sliced ½-inch thick

1. Adjust an oven rack to the middle position and heat the oven to 325ºF. Remove the stems from the chile pods; place the pods in a pan and bake for 5-10 minutes, stirring occasionally, until the chiles are lightly roasted. Leave the oven door open, and don’t breathe the fumes! Shake the seeds out of the pods and discard them.

2. Place the chiles in a medium bowl and cover them with boiling water. Let them sit for 30 minutes. Drain the water, reserving about 2 cups. Place the chiles in a food processor or blender; add the salt, garlic, and oregano. Cover the mixture with the reserved chile water, and blend or process for 2 minutes or until the skins disappear.

3. Pour the sauce over meat, cover tightly, and marinate in the refrigerator for 24-28 hours.

4. Adjust a rack to the middle position and heat the oven to 350ºF. Place the meat and chile sauce marinade in a baking pan and cover tightly with foil. Bake the carne adovada until the meat is falling apart tender, about 4 hours. (You can also cook the carne adovada in a crockpot on low heat for 7-9 hours.) When the meat is done, shred it or cut it into 1-inch pieces. Serve.

Copy of IMG_7526

Printer Friendly Recipe
Carne Adovada
(adapted from Kate in the Kitchen , who adapted it from Sante Fe Hot and Spicy Recipes)

12 ounces dried red chile peppers
1 large onion, chopped
8 cloves fresh garlic, smashed with skins removed
2 teaspoons dried oregano
2 teaspoons ground cumin
2 teaspoon kosher salt
3-4 pounds pork shoulder, trimmed of thick layer of fat and sliced ½-inch thick
4 teaspoons red pepper flakes
2 sticks cinnamon

1. De-stem and de-seed chile peppers; place in a large stock pot and cover with hot water. Soak for 30 minutes. Add the remaining ingredients to the pot; bring to a boil. Reduce the heat to low and simmer for 30 minutes.

2. Strain, reserving liquid. Allow to cool slightly, then process solids in batches in a food processor using reserve liquid for proper consistency. Strain through a wire sieve, pressing on the solids to extract the liquids.

3. Pour the sauce over meat, add the cinnamon and red pepper flakes, cover tightly, and marinate in the refrigerator for 24-28 hours.

4. Adjust a rack to the middle position and heat the oven to 350ºF. Remove the cinnamon stick. Place the meat and chile sauce marinade in a baking pan and cover tightly with foil. Bake the carne adovada until the meat is falling apart tender, about 4 hours. (You can also cook the carne adovada in a crockpot on low heat for 7-9 hours.) When the meat is done, shred it or cut it into 1-inch pieces. Serve.

Copy of IMG_7524

croissants 2 (martha stewart)

Copy of IMG_5667

Hey, remember, uh, a long time ago? When I said I was going to do a series on croissants? Whatever happened to that anyway? I certainly didn’t stop making croissants. I just stopped talking about it. I suck!

Copy of IMG_5609

Part of the problem was that these, the second batch of croissants I made, were just so bad. And it was all my fault. Well, mostly my fault; really I blame the yeast.

Copy of IMG_5618

This is one of the only recipes I’ve made that calls for fresh yeast. I know you can substitute instant yeast, but my grocery store sells the fresh stuff, and I was curious to try it.

Copy of IMG_5648

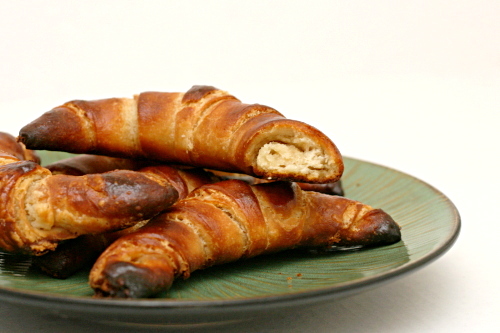
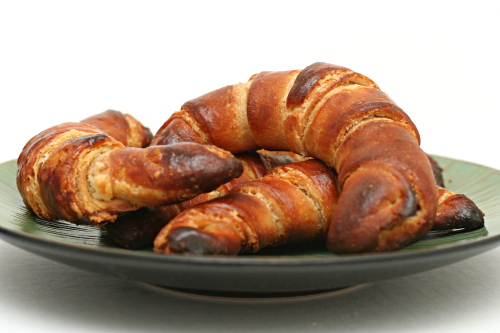
It ended up being probably the worst bread I’ve ever made. Maybe my fresh yeast wasn’t so fresh? Clearly something went very, very wrong. These croissants were dense dense dense, without any trace of flakiness.  My only other attempt at bread made with fresh yeast was a failure as well.

Copy of IMG_5654

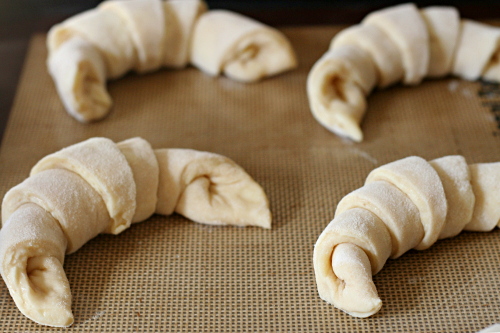
Definitely not a success, and it’s hard to fairly judge the recipe when so much of what went wrong was my fault. Still, I learned things: 1) No more fresh yeast for me. 2) I like Martha’s method for shaping the crescents, where she stretches the wider part of the triangle a bit so that the center of each croissant isn’t so thick. 3) And the obvious: if the rolls don’t look like they’ve risen, they probably haven’t, and it might be best not to bake them yet, even if it’s already been over twice as long as the recipe recommends.

Copy of IMG_5659

I should really try this recipe again using the type of yeast I’m more familiar with, because I’m sure this attempt didn’t do it justice. When I do, I’ll be sure to update with a continuation of my experiments with croissants. And this time I’ll try not to wait six months.

Copy of IMG_5668

One year ago: Asian Peanut Dip

Printer Friendly Recipe
Croissants (from Martha Stewart’s Baking Handbook)

Makes 2 dozen

If using dry yeast instead of fresh, heat the milk to about 100ºF, then stir in the yeast to dissolve. Let stand until foamy, about five minutes, and proceed with the recipe. The dough can be made ahead through all of the turns and frozen for up to three months; before using, defrost the dough in the refrigerator for twenty-four hours. After baking, croissants are best eaten within six hours.

2 cups cold milk
2 tablespoons honey
1½ pounds (about 4 ½ cups) bread flour, plus more for dusting
4 ounces (1 scant cup) unbleached pastry flour
½ cup sugar
1½ ounces fresh yeast, crumbled
1 tablespoon plus 1½ teaspoons salt
1¼ pounds (5 sticks) unsalted butter, cold
1 large egg, lightly beaten

1. Make the dough package: Pour the milk and honey into a 1-quart liquid measuring cup, and stir to combine; set aside. In the bowl of an electric mixer fitted with the dough hook, stir together 1 pound 6 ounces (about 4¼ cups) bread flour, the pastry flour, sugar, yeast, and salt; stir to combine. Add milk mixture, and mix on low speed until the dough just comes together, 2 to 3 minutes.

2. Turn out dough onto a lightly floured work surface; gently knead to form a smooth ball, about 45 seconds. Wrap in plastic and refrigerate at least 1 hour or overnight.

3. Make the butter package: Lay the butter sticks side by side on a piece of plastic wrap, and sprinkle with the remaining 2 ounces (about ¼ cup) flour. Pound with a rolling pin until flour is incorporated, and roll into an 8-inch square. Wrap tightly and refrigerate for at least 1 hour or overnight.

4. Remove dough package from the refrigerator; place on a lightly floured work surface. Roll out to a 16-by-10-inch rectangle, about ½ inch thick, with a short side facing you. Remove butter package from the refrigerator; place on the bottom half of the dough; fold the top half of the dough over the butter, and pinch the edges to seal.

5. Roll out the dough to a 20-by-10 rectangle about ½ inch thick, with a short side facing you; keep the corners as square as possible. Remove any excess flour with a dry pastry brush. Starting at the far end, fold the rectangle in thirds, as you would a business letter. This completes the first of three turns. Wrap in plastic and refrigerate for 1 hour.
6. Repeat rolling and folding as above two more times, starting with the flap opening on the right, as if it were a book, and refrigerate at least 1 hour between turns. To help you remember how many turns have been completed, mark the dough after each: Make one mark for the first turn, two for the second, and three for the third. After the third, wrap dough in plastic, and refrigerate 6 to 8 hours, or overnight.
7. Turn out chilled dough onto a lightly floured work surface. Roll out the dough to a 30-by-16-inch rectangle. (If the dough becomes too elastic, cover with plastic wrap, and let rest in the refrigerator for 10 minutes.) Using a pizza wheel or pastry cutter, cut the dough in half lengthwise to form two 30-by-8-inch rectangles. Stack one piece of dough on top of the other, lining up the edges. Using the pizza wheel, cut dough into triangles, each with a 4-inch base (you will have scraps of dough at both ends). Cut a 1-inch slit in the center of the base of each triangle. Place triangles in a single layer on a clean work surface.

8. To shape croissants, stretch the two lower points of each triangle to enlarge the slit slightly. Fold the inner corners formed by the slit toward the outer sides of the triangles, and press down to seal. Using your fingertips, roll the base of each triangle up and away from you, stretching the dough slightly outward as you roll; the tip should be tucked under the croissant. Pull the two ends toward you to form a crescent. Transfer the crescents to two parchment-lined baking sheets, 2 inches apart (12 on each sheet). Cover loosely with plastic wrap, and let rise in a warm place until very spongy and doubled in bulk, 45 to 60 minutes.

9. Preheat the oven to 400ºF, with the racks in the upper and lower thirds. Lightly brush crescents with the beaten egg. Bake, rotating sheets halfway through, until the croissants are puffed and golden brown, about 20 to 25 minutes. Transfer sheets to a wire rack to cool. Serve warm or at room temperature.

Copy of IMG_5664