Search Results for: honey ice cream

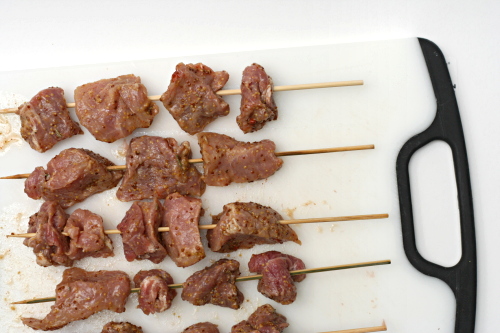
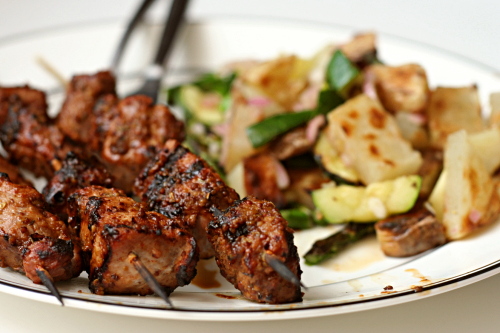
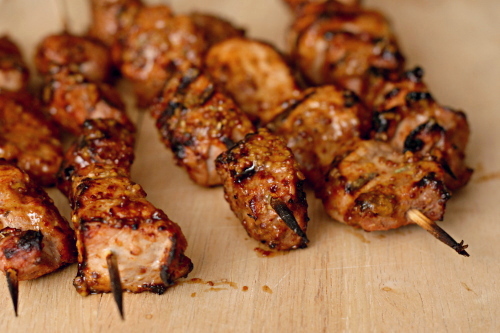
garlic-mustard glazed skewers

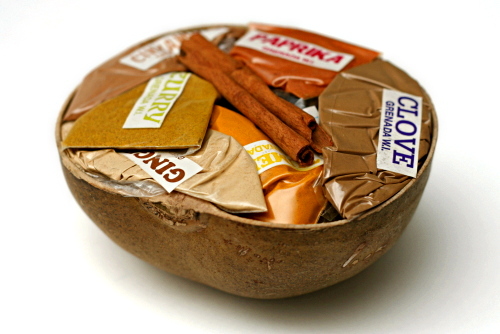
My parents went to Bolivia, Hungary, Hawaii, New Zealand, Romania, Costa Rica, China, Panama, and Peru, and all I got was these lousy spices. Okay, actually, they’re pretty nice spices, especially the saffron (and three mystery spices) my mom just brought back from the Istanbul spice market. Besides, when your parents go on 2-3 international trips per year, you don’t need a cheap T-shirt from each place. Spices, tea, and the occasional funky hat for Dave are perfect.

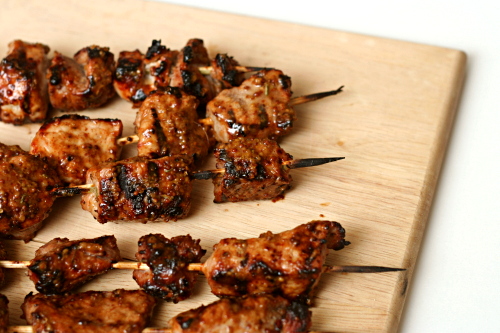
And it was a good thing I had a random set of spices from various foreign countries, because I was out of my normal paprika supply, and it would have been very very sad to miss out on this recipe. My gosh, this was good. Mustardy, garlicky, vinegary, herby – so many complimentary flavors.

Even better, I stumbled upon this weird grilled potato and vegetable salad to go with it that I was expecting to be just edible, and what do you know, it ended up being fantastic.  In all, another Saturday night dinner that knocked my socks off. That’s happened more and more since we got the grill, and I am not complaining one bit.

One year ago: Seafood Lasagna
Two years ago: Vanilla Ice Cream

Printer Friendly Recipe
Garlic-Mustard Glaze (adapted from Bobby Flay via Smitten Kitchen)

Makes about ¾ cup of glaze, or enough to cover and baste 2 pounds of meat

I used pork, but Deb used chicken (I think) and Bobby Flay uses beef tenderloin. Just be sure you choose a cut that is appropriate for fast cooking. Your cooking time will depend on the type of meat you use.

¼ cup whole grain mustard
2 tablespoons Dijon mustard
4 cloves garlic, crushed
2 tablespoons white wine vinegar
1 tablespoon low-sodium soy sauce
1 tablespoon honey
1 tablespoon finely chopped fresh rosemary leaves
2 teaspoons Spanish paprika
¼ teaspoon kosher salt
¼ teaspoon freshly ground black pepper
2 pounds meat, cubed

1. In a small bowl, whisk together all of the ingredients except the meat. Reserve ¼ cup of the glaze; add the meat to the remaining glaze, cover, and refrigerate for at least 30 minutes and up to 4 hours before using.

2. Prepare a medium-hot fire. Grill the meat, turning three times and brushing with the reserved glaze, for 4 to 8 minutes, until golden brown, slightly charred, and cooked to your desired level of doneness. Let the meat rest for 5 minutes before serving.
raisin swirl bread

Dave has recently encountered an enviable problem. After starting to exercise a few months ago for the first time in years, he started losing weight too fast.

Losing weight. Too fast.

So now we’re trying to come up with ways to get him more healthy calories that don’t create much more work. Hard-boiled eggs, peanut butter, protein shakes, and bread. Making a loaf of bread every couple of weeks for him to eat at work does require more effort, but it isn’t work, because I like making bread.

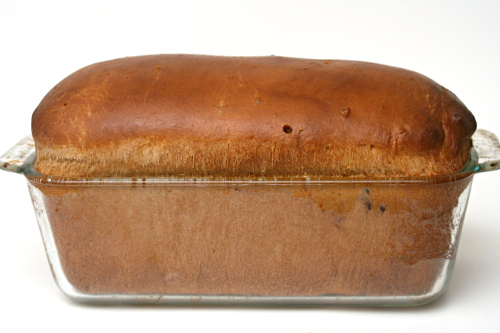
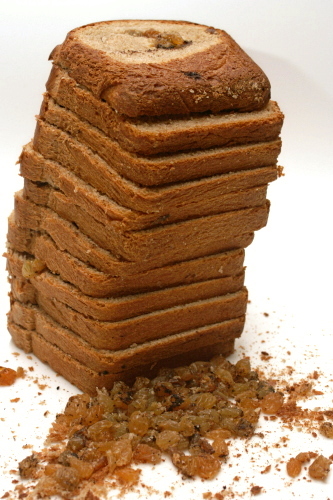
I haven’t bought bread since moving to New Mexico last winter, and I haven’t made pure white bread since discovering I could adapt any recipe to be at least partially whole wheat with no detriment to flavor or texture. It worked just as well with this bread as it has in the past, giving me a light, tender loaf of bread made a little more special with a spiral of raisins and sugar and cocoa. Not that I got to eat more than a slice, since most of this loaf went to He Who is Super Annoying Because He Gets to Eat Twice as Much Food as Me.

Susan chose this bread for Tuesdays with Dorie, and she has the recipe posted. I mixed 2 cups (9.6 ounces) of whole wheat flour with ¾ cup of the milk and ½ teaspoon of the salt and let it sit overnight before combining it with the rest of the ingredients. And for whatever reason, 1 cup of raisins was way too much for me and they all fell out when I cut into the bread. But no one else had this problem, so apparently I’m just a weirdo. Still, next time, ½ cup of raisins.

One year ago: Honey Peach Ice Cream
Two years ago: Cappuccino Cream Puff Rings

brioche raisin snails

Copy of IMG_6438

I’m very comfortable cutting recipes in half. Some people say that they don’t like to deal with the math, but I come from a family of three engineers and a math teacher, so I can handle math. Plus, I’m cooking for just two people now, and I lived alone for six years before that, so my options are either to make half-recipes, throw a lot of food away, or eat the same thing for weeks. Given those choices, I take fractions all the way.

Copy of IMG_6424

Even if a recipe specifically recommends making the full recipe because smaller amounts are harder to work with – eh. Whatever. I usually cut it in half anyway. Cakes, caramel, bread dough, whatever. You’d be surprised what you can get away with, although you might, as in this case, have to split the occasional egg in half.

Copy of IMG_6425

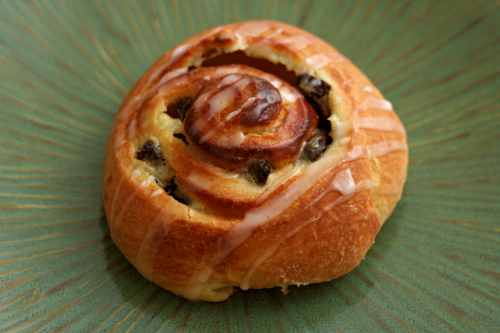
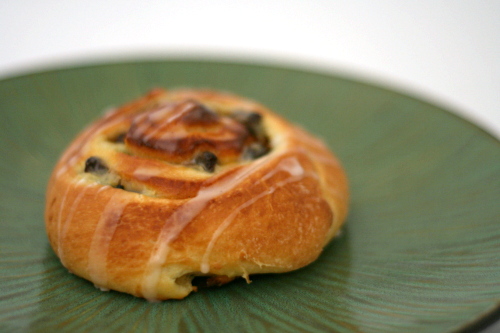
Dorie’s brioche raisin snails are a rich yeast dough with pastry cream and flambéed raisins rolled into it. It probably sounds like quite a bit of work, and frankly, it is, but it’s a nice change from cinnamon rolls if you find yourself making those often.

Copy of IMG_6426

If you follow the recipe exactly, you’ll end up with twice as much brioche as you need for the snails, so you can always make some of Dorie’s fantastic sticky buns too. Or, just cut the brioche recipe in half like I did. Does anyone really need two different kinds of buttery tender breakfast breads tempting them at once?

Copy of IMG_6429

One year ago: Pumpkin Ginger Muffins

Printer Friendly Recipe
Brioche Raisin Snails
(from Dorie Greenspan’s Baking: From My Home to Yours)

Makes about 12 snails

You’ll only need half of the brioche dough, and while Dorie recommends making the full recipe and saving half for later (the dough takes well to freezing), I found that I could successfully make half the recipe if I used a faster mixing speed than the recipe recommends. If you find that there isn’t enough dough for the dough hook to work effectively, knead with the paddle attachment, switching to the dough hook for just the last few minutes of kneading. The full recipe is presented below.

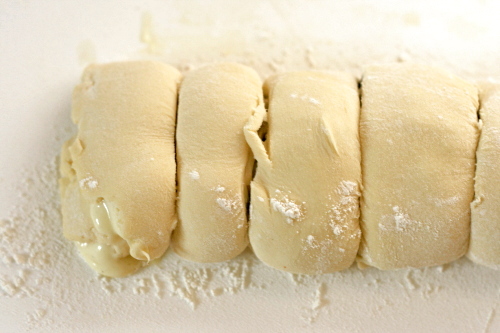
You can shape the rolls into a log and then wrap the log well and freeze it. When you’re ready to bake, let the log defrost in the refrigerator overnight, then cut the rolls and let them rise at room temperature.

Brioche:
2 packets (4½ teaspoons) instant yeast
⅓ cup warm water
⅓ cup warm milk
3¾ cups (27.6 ounces) all-purpose flour
2 teaspoons salt
3 large eggs, at room temperature
¼ cup sugar
24 tablespoons (3 sticks) unsalted butter, at room temperature but still slightly firm

Pastry cream:
1 cup whole milk
3 large egg yolks
¼ cup (1.75 ounces) sugar
2½ tablespoons cornstarch, sifted
¾ teaspoon pure vanilla extract
1½ tablespoons unsalted butter, at room temperature, cut into bits

Assembly:
1 cup moist, plump raisins
3 tablespoons dark rum
1½ teaspoons sugar
Scant ¼ teaspoon ground cinnamon

Glaze:
¾ cup confectioners’ sugar
about 1 teaspoon water
drop of pure vanilla extract

For the brioche: Put the yeast, water, and milk in the bowl of a stand mixer and, using a wooden spoon, stir until the yeast is dissolved. Add the flour and salt, and fit the mixer with the dough hook, if you have one. Toss a kitchen towel over the mixer, covering the bowl as completely as you can – this will help keep you, the counter and your kitchen floor from being showered in flour. Turn the mixer on and off in a few short pulses, just to dampen the flour (yes, you can peek to see how you’re doing), then remove the towel, increase the mixer speed to medium-low and mix for a minute or two, just until the flour is moistened. At this point you’ll have a fairly dry, shaggy mass.

Scrape the sides and bottom of the bowl with a rubber spatula, set the mixer to low and add the eggs, followed by the sugar. Increase the mixer speed to medium and beat for about 3 minutes, until the dough forms a ball. Reduce the speed to low and add the butter in 2-tablespoon-size chunks, beating until each piece is almost incorporated before adding the next. You’ll have a dough that is very soft, almost like a batter. Increase the speed to medium-high and continue to beat until the dough pulls away from the sides of the bowl, about 10 minutes.

Transfer the dough to a clean bowl (or wash out the mixer bowl and use it), cover with plastic wrap and leave at room temperature until nearly doubled in size, 40 to 60 minutes, depending upon the warmth of your room.

Deflate the dough b lifting it up around the edges and letting it fall with a slap into the bowl. Cover the bowl with plastic wrap and put it in the refrigerator. Slap the dough down in the bowl every 30 minutes until it stops rising, about 2 hours, then leave the covered dough in the refrigerator to chill overnight.

Divide the dough in half, reserving half for another use.

For the pastry cream: Bring the milk to a boil in a small saucepan.

Meanwhile, in a medium heavy-bottomed saucepan, whisk the yolks together with the sugar and cornstarch until thick and well blended. Still whisking, drizzle in about 2 tablespoons of the hot milk – this will temper, or warm, the yolks so they won’t curdle. Whisking all the while, slowly pour in the remainder of the milk. Put the pan over medium heat and, whisking vigorously, constantly and thoroughly (making sure to get into the edges of the pot), bring the mixture to a boil. Keep at a boil, still whisking, for 1 to 2 minutes, then remove the pan from the heat.

Whisk in the vanilla extract. Let sit for 5 minutes, then whisk in the bits of butter, stirring until they are fully incorporated and the pastry cream is smooth and silky. Scrape the cream into a bowl. You can press a piece of plastic wrap against the surface of the cream to create an airtight seal and refrigerate the pastry cream until cold or, if you want to cool is quickly, put the bowl into a larger bowl filled with ice cubes and cold water, and stir the pastry cream occasionally until it is thoroughly chilled, about 20 minutes.

To assemble: Line one large or two smaller baking sheets with parchment or silicone mats.

Put the raisins in a small saucepan, cover them with hot water and let them steep for about 4 minutes, until they are plumped. Drain the raisins, return them to the saucepan and, stirring constantly, warm them over low heat. When the raisins are very hot, pull the pan from the heat and pour over the rum. Standing back, ignite the liquor. Stir until the flames go out, then cover and set aside. (The raisins and liquor can be kept in a covered jar for up to 1 day.)

Mix the sugar and cinnamon together.

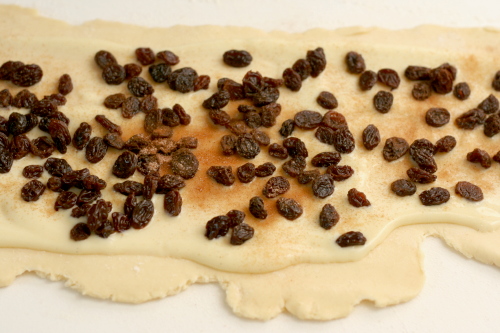
On a flour dusted surface, roll the dough into a rectangle about 12 inches wide and 16 inches long, with a short end toward you. Spread the pastry cream across the dough, leaving 1-inch strip bare on the side farthest from you. Scatter the raisins over the pastry cream and sprinkle the raisins and cream with the cinnamon sugar. Starting wit the side nearest you, roll the dough into a cylinder, keeping the roll as tight as you can. (At this point, you can wrap the dough airtight and freeze it up to 2 months; see Storing for further instructions. Or, if you do not want to make the full recipe, use as much of the dough as you’d like and freeze the remainder.)

With a bread knife or unflavored floss, trim just a tiny bit from the ends if they’re ragged or not well filled, then cut the log into rounds a scant 1 inch thick. Put the snails on the lined baking sheet(s), leaving some puff space between them.

Lightly cover the snails with wax paper and set the baking sheet(s) in a warm place until the snails have doubles in volume – they’ll be puffy and soft – about 1 hour and 30 minutes.

When the snails have almost fully risen, preheat the oven: depending on the number of baking sheets you have, either center a rack in the oven or position the racks to divide the oven into thirds and preheat the oven to 375ºF.

Remove the wax paper, and bake the snails for about 25 minutes (rotate the sheets, if you’re using two, from top to bottom and front to back after 15 minutes), or until they are puffed and richly browned. Using a metal spatula, transfer the snails to a cooling rack.

Copy of IMG_6434

TWD and DB Recipes

Some of these recipes I’ve loved, and some I haven’t been as enthused about.  Since they were chosen for me to make by someone else, they don’t necessarily reflect the types of food I would normally blog about.  Therefore, I am keeping them separate from my main Recipes page.  Recipes that I’ve made independently and happen to overlap with a baking group appear on both pages.

I’ve marked my favorites with an asterisk.

Tuesdays with Dorie

-Quick Breads
Allspice Crumb Muffins
Apple Cheddar Scones
Apple Nut Muffin Cake
Basic Biscuits
Blueberry Crumb Cakes
Cappuccino Muffins
Cardamom Crumb Cake
Carrot Spice Muffins
Chocolate-Chocolate Chunk Muffins
Citrus Sunshine Currant Muffins
Coco-Nana Muffins
Coconut Scones
Coffee Break Muffins
Corniest Corn Muffins
Cornmeal Bacon Loaf
Flip-Over Cherry Cake
Fresh Mango Bread
Great Grains Muffins
Honey Nut Scones
Lemon Poppy Seed Muffins
Maple Cornmeal Biscuits
Oatmeal Breakfast Bread
Oatmeal Nutmeg Scones
Orange Berry Muffins
Peaches and Cream Scones
Pecan Sour Cream Biscuits
Pumpkin Muffins
Savory Corn and Pepper Muffins
Sweet Cream Biscuits
Sweet Potato Biscuits
Toasted Almond Scones

-Yeast Breads
Brioche Plum Tart*
Brioche Raisin Snails
Golden Brioche Loaves
Kugelhopf
Pecan Honey Sticky Buns*
Raisin Swirl Bread

-Cookies
Applesauce Spice Bars
Bittersweet Brownies
Brownie Buttons
Brown Sugar Honey Madeleines*
Brrrownies
Buttery Jam Cookies
Cafe Volcano Cookies
Caramel Crunch Bars
Chewy Chunky Blondies
Chipster-Topped Brownies
Chockablock Cookies
Chocolate Allspice Cookies
Chocolate Chip Cookies
Chocolate Hazelnut Biscotti
Chocolate Madeleines
Chocolate Oatmeal Almost-Candy Bars
Chocolate Oatmeal Drops
Chocolate Whopper Malted Drops*
Chunky Peanut Butter and Oatmeal Chocolate Chipsters*
Classic Brownies
Cocoa Almond Meringues
Coconut Butter Thins
Cottage Cheese Pufflets
Chocolate Chunkers
Cornmeal Shortbread Cookies
Dulce de Leche Duos*
Earl Grey Madeleines
Espresso Cheesecake Brownies
Espresso Chocolate Shortbread
French Chocolate Brownies*
Ginger-Jazzed Brownies
Gingered Carrot Cookies*
Granola Grabbers
Honey Nut Brownies
Honey-Wheat Cookies
Kid’s Thumbprints
Lenox Almond Biscotti
Linzer Sablés
Midnight Crackles
Mrs. Vogel’s Sherben
Peanut Butter Blondies
Peanut Butter Crisscrosses
Pecan Powder Puffs
Quintuple Chocolate Brownies
Rick Katz’s Brownies for Julia Child
Rugelach*
Sablés
Salt and Pepper Cocoa Shortbread
Snickery Squares*
Sour Cream Chocolate Cake Cookies*
Sugar-Topped Molasses Spice Cookies
Thumbprints for Us Big Guys*
Traditional Madeleines
Translucent Maple Tuiles
Tribute to Katharine Hepburn Brownies
White Chocolate Brownies
World Peace Cookies

-Cakes
All-in-One Holiday Bundt Cake
Almost Fudge Gateau
Apple Coconut Family Cake
Banana Bundt Cake
Berry Surprise Cake
Black and White Banana Loaf
Black and White Chocolate Cake
Brown Sugar Apple Cheesecake*
Brown Sugar Blueberry Plain Cake
Caramel Peanut-Topped Brownie Cake
Cardamom Crumb Cake
Carrot Cake
Cherry-Fudge Brownie Torte
Chocolate Amaretti Torte
Chocolate Caramel Chestnut Cake
Chocolate Chip Bundt Cake*
Chocolate Cupcakes
Chocolate Whiskey Cake*
Cocoa-Buttermilk Birthday Cake
Coconut Roasted Pineapple Dacquoise
Coconut Tea Cake
Cranberry Shortbread Cake*
Date Nut Loaf
Devils Food White-Out Cake*
Dimply Plum Cake
Double Apple Bundt
Dressy Chocolate Cake
Far Breton
Fluted Polenta and Ricotta Cake
French Yogurt Cake
Fresh Ginger and Chocolate Gingerbread
Gooey Chocolate Cakes
Lots of Ways Banana Cake
Low and Lush Chocolate Cheesecake
Marbled Loaf Cake
Milk Chocolate Bundt Cake
Mocha Walnut Marbled Bundt Cake
Nutty Chocolately Swirly Sour Cream Bundt Cake
Peach Upside Downer
Peanut Butter Torte
Perfect Party Cake*
Perfection Pound Cake
Rum-Drenched Vanilla Cake
Swedish Visiting Cake
Tall and Creamy Cheesecake*

-Pies and Tarts
All-American All-Delicious Apple Pie
Alsatian Apple Tart
Apple Pie Cake*
Banana Cream Pie*
Blueberry Pie
Butternut Squash Pie
Caramel Pumpkin Pie
Chocolate Cream Tart
Chocolate-Crunched Caramel Tart
Classic Berry Tart
Cranberry Apple Galette
Crunchy and Custardy Peach Tart
Florida Pie
Fold-Over Pear Torte
French Pear Tart
Fresh Orange Cream Tart
Hidden Berry Cream Cheese Torte
Ice Cream Pie
La Palette’s Strawberry Tart
Lemon Cream Tart
Lime Cream Meringue Pie
Normandy Apple Tart*
Parisian Strawberry Tartlets*
Pecan Pie*
Puffed Poached Pear Tart
Rosy Poached Pear and Pistachio Tart
Soft Chocolate and Berry Tart*
Sour Cream Pumpkin Tart*
Summer Fruit Galette
Tart Fine
Tart Noire*
Tartest Lemon Tart*
Thanksgiving Twofer Pie*
Toasted Coconut Custard Tart
Tourtely Apple Tart

-Fruit Desserts
Cherry Rhubarb Cobbler
Cran-Apple Crisps
Devilish Shortcakes
Flaky Apple Turnovers
Mixed Berry Cobbler*
Strawberry Double Crisp*
Tender Shortcakes
Tropical Crumble

-Custards and Ice Cream
Berry Chocolate Ice Cream
Blancmanger
Blueberry Sour Cream Ice Cream
Bourbon Bread Pudding
Burnt Sugar Ice Cream
Butterscotch Pudding
Cappuccino Cream Puff Rings
Caramel Pots de Creme
Caramel-Topped Flan
Cherry Bread Pudding
Chocolate Banded Ice Cream Torte
Chocolate Bread Pudding
Chocolate Ganache Ice Cream*
Chocolate Pots de Creme
Chocolate Pudding
Chocolate Sorbet
Chocolate Souffle
Crème Brûlée*
Floating Islands
Ice Cream Tart
Honey Peach Ice Cream
Lemon Cup Custard
Marshmallows
Rice Pudding
Split-Level Pudding
Vanilla Ice Cream

Bread Bakers Apprentice
Anadama Bread
Artos (Greek Celebration Bread)
Sourdough Bagels*
Brioche*
Casatiello*

Daring Bakers
Caramel Cake
Cheesecake Pops
Croissants (Tartine)*
Danish Braids
Eclairs
Filbert Gateau with Praline Buttercream
French Bread (Julia Child)
Lavash Crackers
Lemon Meringue Pie
Perfect Party Cake*
Pizza Dough (Peter Reinhart)
Orange Vanilla Opera Cake
Vanilla Bean Caramels*
Yule Log

eclairs (daring bakers)

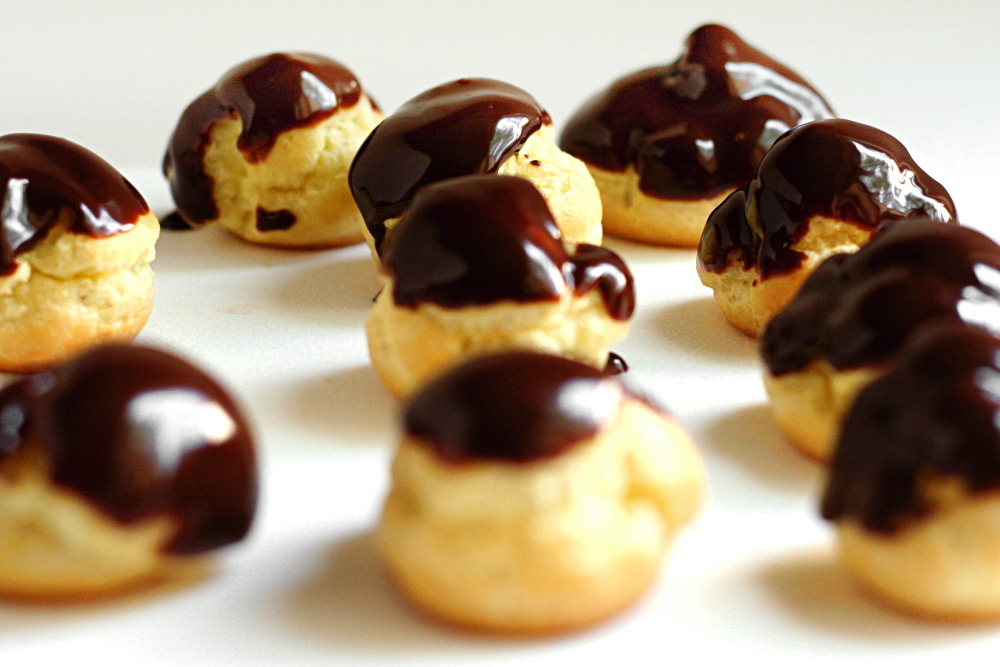
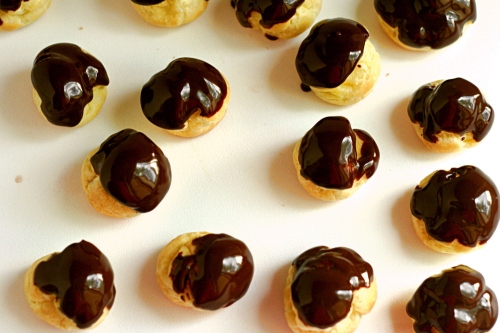
I was happy about Tony and Meeta’s choice of Chocolate Eclairs for this month’s Daring Baker recipe because I actually have some experience making éclairs, but I haven’t found a recipe that’s convinced me to use it faithfully. And because I’m somewhat confident in my éclair-making ability, I was comfortable tweaking the recipe.

When I was in college, there was a dessert shop nearby that made the best mini-cream puffs. My friends and I went there at least once per week, and sometimes I would bypass all of the beautiful and tempting cakes and pies so that I could have just a pile of little cream puffs. But usually I would get a wonderful slice of chocolate layer cake with a cream puff on the side. I could never resist those cream puffs. Those mini-cream puffs are what I strived to recreate with this recipe.

I used the chocolate glaze recipe suggested by Tony and Meeta.  The glaze was very good, although the recipe is perhaps unnecessarily complicated, requiring a chocolate sauce to be made first, which is then used as an ingredient in the chocolate glaze. I’m assuming this is only because Pierre Herme assumes that anyone who owns his book Chocolate Desserts will keep a supply of the chocolate sauce around. It was a good glaze, and I may use it in the future, but I’ll condense the steps to bypass the separate sauce-making process.

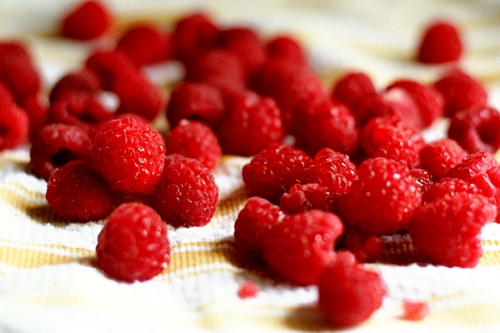
I used a raspberry pastry cream filling instead of the chocolate pastry cream that Herme suggests. While I suppose that all’s well that ends well, it’s not a recipe that I would recommend to others. I simply took my favorite vanilla pastry cream recipe and mixed in raspberry puree at the end. Unfortunately, there was too much puree and the pastry cream never set. I tried some other stuff, but ultimately I had to dissolve some gelatin in half-and-half and mix that in to stabilize the cream enough to be piped.

One thing I’ve never liked about regular-sized cream puffs and éclairs is how they have to be cut in half, filled, and stuck back together. I wanted to fill my miniature cream puffs without cutting them open, so I put my pastry cream into a bag with a simple round tip and squeezed pastry cream into the cream puffs through a small hole in the bottom. It wasn’t completely successful – the inside of the cream puffs were often split into two or more large portions, and only one portion got filled with this method. I think I could also squirt pastry cream into the cream puff from a hole in the top, which will then be covered with glaze.

These were the best cream puffs I’ve ever made. I do want to tweak the dough recipe, and obviously the pastry cream was kind of a bust, but they were the perfect size and so easy to eat. Every time I’ve made éclairs I’ve gotten better at it, and I hope next time it’ll be just perfect.

Pierre Hermé’s Chocolate Éclairs (adapted from Chocolate Desserts by Pierre Hermé, except for the pastry cream, which is adapted from Cooks Illustrated)

The pastry cream didn’t work out. But I already had the recipe written down and don’t want redo it.

Makes 20-24 eclairs

Cream Puff Dough:
½ cup (125g) whole milk
½ cup (125g) water
1 stick (4 ounces; 115 g) unsalted butter, cut into 8 pieces
¼ teaspoon sugar
¼ teaspoon salt
1 cup (140 g) all-purpose flour
5 large eggs, at room temperature

Raspberry Pastry Cream:
6 ounces raspberries
2 cups half-and-half
½ cup granulated sugar
pinch table salt
5 large egg yolks,
3 tablespoons cornstarch
4 tablespoons unsalted butter (cold), cut into 4 pieces
1½ teaspoons vanilla extract

Chocolate Sauce:
0.9 oz (26 g) bittersweet chocolate, finely chopped
3 tablespoons (50 g) water
5 teaspoons (25 g) crème fraîche or heavy cream
1 tablespoon (14 g) sugar

Chocolate Glaze:
⅓ cup (80 g) heavy cream
3½ ounce (100 g) bittersweet chocolate, finely chopped
4 teaspoon (20 g) unsalted butter, cut into 4 pieces, at room temperature
7 tablespoon (110 g) Chocolate Sauce, warm or at room temperature

For the éclairs:
1. Preheat your oven to 375 degrees F (190 degrees C). Divide the oven into thirds by
positioning the racks in the upper and lower half of the oven. Line two baking sheets with
waxed or parchment paper.

2. In a heavy bottomed medium saucepan, bring the milk, water, butter, sugar and salt to the boil.

3. Once the mixture is at a rolling boil, add all of the flour at once, reduce the heat to medium and start to stir the mixture vigorously with a wooden spoon. The dough comes together very quickly. Do not worry if a slight crust forms at the bottom of the pan, it’s supposed to. You need to carry on stirring for a further 2-3 minutes to dry the dough. After this time the dough will be very soft and smooth.

4. Transfer the dough into a bowl of a mixer fitted with the paddle attachment, or using your hand mixer or if you still have the energy, continue by hand. Add the eggs one at a time, beating after each egg has been added to incorporate it into the dough. You will notice that after you have added the first egg, the dough will separate, once again do not worry. As you keep working the dough, it will come back all together again by the time you have added the third egg. In the end the dough should be thick and shiny and when lifted it should fall back into the bowl in a ribbon. (Once the dough is made you need to shape it immediately. Or, you can pipe the dough and the freeze it. Simply pipe the dough onto parchment-lined baking sheets and slide the sheets into the freezer. Once the dough is completely frozen, transfer the piped shapes into freezer bags. They can be kept in the freezer for up to a month.

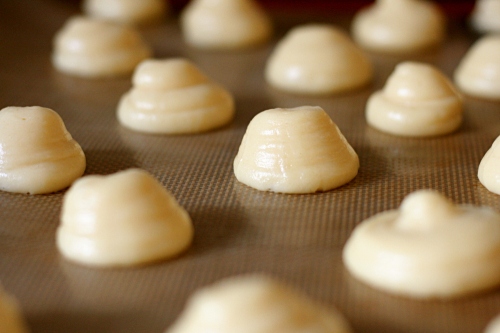
5. Fill a large pastry bag fitted with a 2/3-inch (2cm) plain tip nozzle with the warm cream puff dough. Pipe the dough onto the baking sheets in long, 4 to 4½ inches (about 11 cm) chubby fingers. Leave about 2 inches (5 cm) space in between each dough strip to allow them room to puff. The dough should give you enough to pipe 20-24 éclairs.

6. Slide both the baking sheets into the oven and bake for 7 minutes. After the 7 minutes, slip the handle of a wooden spoon into the door to keep it ajar. When the éclairs have been in the oven for a total of 12 minutes, rotate the sheets top to bottom and front to back. Continue baking for a further 8 minutes or until the éclairs are puffed, golden and firm. The total baking time should be approximately 20 minutes. (The éclairs can be kept in a cool, dry place for several hours before filling.)

For the pastry cream:
7. While the éclairs are baking, set a mesh strainer over a medium bowl. Add the raspberries to the strainer and use a spoon to mash them and press them through the strainer to create a seedless raspberry puree.

8. Heat half-and-half, 6 tablespoons sugar, and salt in medium heavy-bottomed saucepan over medium heat until simmering, stirring occasionally to dissolve sugar.

9. Meanwhile, whisk egg yolks in medium bowl until thoroughly combined. Whisk in remaining 2 tablespoons sugar and whisk until sugar has begun to dissolve and mixture is creamy, about 15 seconds. Whisk in cornstarch until combined and mixture is pale yellow and thick, about 30 seconds.

10. When half-and-half mixture reaches full simmer, gradually whisk simmering half-and-half into yolk mixture to temper. Return mixture to saucepan, scraping bowl with rubber spatula; return to simmer over medium heat, whisking constantly, until 3 or 4 bubbles burst on surface and mixture is thickened and glossy, about 30 seconds. Off heat, whisk in butter and vanilla. Strain the pastry cream through a fine-mesh sieve set over a medium bowl. Stir in the raspberry puree. Press plastic wrap directly on surface, and refrigerate until cold and set, at least 3 hours or up to 48 hours.

For the chocolate sauce:
11. Place all the ingredients into a heavy-bottomed saucepan and bring to a boil, making sure to stir constantly. Then reduce the heat to low and continue stirring with a wooden spoon until the sauce thickens.

12. It may take 10-15 minutes for the sauce to thicken, but you will know when it is done when it coats the back of your spoon. (You can make this sauce ahead of time and store it in the refrigerator for two weeks. Reheat the sauce in a microwave oven or a double boiler before using.)

For the chocolate glaze:
13. In a small saucepan, bring the heavy cream to a boil. Remove from the heat and slowly begin to add the chocolate, stirring with a wooden spoon or spatula.

14. Stirring gently, stir in the butter, piece by piece, followed by the chocolate sauce. (If the chocolate glaze is too cool (i.e. not liquid enough) you may heat it briefly in the microwave or over a double boiler.)

For the assembly:
15. Slice the éclairs horizontally, using a serrated knife and a gently sawing motion. Set aside the bottoms and place the tops on a rack over a piece of parchment paper.

16. The glaze should be barely warm to the touch (between 95 – 104 degrees F or 35 – 40 degrees C, as measured on an instant read thermometer). Spread the glaze over the tops of the éclairs using a metal icing spatula. Allow the tops to set and in the meantime fill the bottoms with the pastry cream.

17. Pipe or spoon the pastry cream into the bottoms of the éclairs. Make sure you fill the bottoms with enough cream to mound above the pastry. Place the glazed tops onto the pastry cream and wriggle gently to settle them.

18. The éclairs should be served as soon as they have been filled.

carrot cake (twd)

I don’t really get carrot cake. I don’t hate it. But what’s the appeal? Vegetables in cake – it just ain’t right. Wouldn’t you rather have a more logical flavoring for cake – chocolate or vanilla or strawberries or butter? If it’s the spices you love, pair them with apples. If it’s the cream cheese frosting, spread it on chocolate cake. But don’t put vegetables in my dessert. It just ain’t right.

So I can’t say I was ecstatic to see Amanda’s choice for this week’s TWD recipe. Plus, while I usually enjoy the creativity that comes from having someone else choose a recipe for me, it’s a problem when I already have a similar recipe picked out to try. I’ve had my eye on Cooks Illustrated’s carrot cake recipe for years, I guess with the idea that if anyone could make me love carrot cake, it would be CI.

I thought I could kill two birds with one stone – I’d make Dorie’s recipe and CI’s, and that way I could compare them. My mom has a recipe she loves, so I threw that into the mix as well. They each call for four eggs, so it would be easy to quarter each recipe. Then I decided that that would still be too much carrot cake, so I got all OCD and decided to use one egg total, but still make all three recipes, so I made one twelfth of each recipe. It was a pain in the ass even with good math skills and a digital scale. I skipped all of the chunky ingredients (coconut, raisins, nuts) in Dorie’s recipe so that the recipes would be more equivalent and comparable.

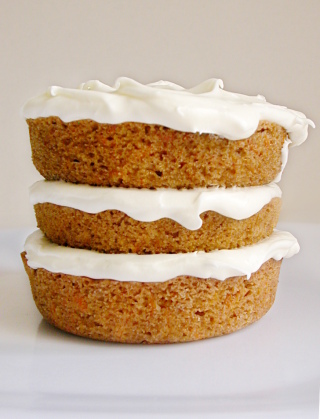
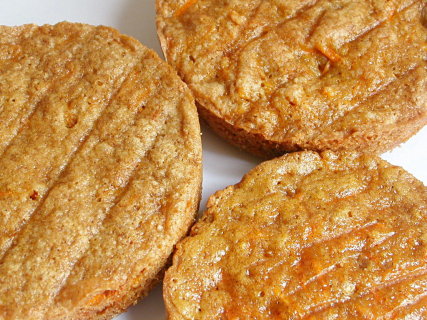
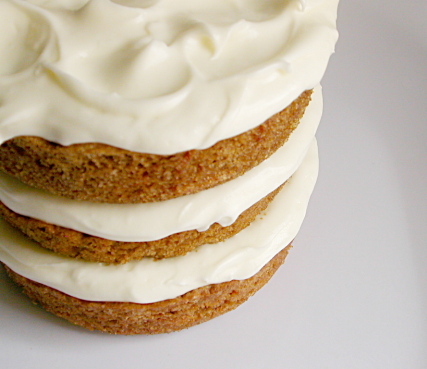
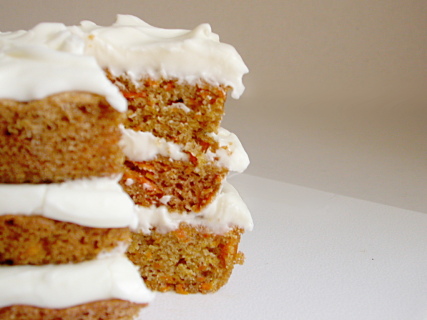
The three recipes weren’t drastically different in their ingredient lists, although the mixing method varied. After baking, Dorie’s and CI’s carrot cakes look very similar, but my mom’s recipe, which was the only one that didn’t call for baking powder, didn’t rise nearly as much. (CI’s is the bottom layer, then my mom’s recipe, then Dorie’s.)

Unfortunately, I can’t give a good comparison of the three cakes. I’ve only had one slice, and the cream cheese frosting pleasantly dominated the taste of the cake. I’ll try harder next time, scraping off the frosting and eating the cake plain. And then finishing dessert off with a spoonful of pure, unadulterated sugary cream cheese frosting.

Update/Comparison: I really didn’t eat much of this cake, so I can’t give a very good comparison.  That being said, I think Dorie’s recipe was my favorite.  My mom’s needs baking powder so it will rise higher.  Cooks Illustrated uses both brown and granulated sugar, and I think using all granulated sugar gave the cake more flavor.  I do like CI’s mixing method though.  Because most of the ingredients are similar, in the future, I’ll probably use CI’s recipe with all granulated sugar.

Bill’s Big Carrot Cake (from Dorie Greenspan’s Baking: From My Home to Yours)

10 servings

For the cake:
2 cups all purpose flour
2 teaspoons baking powder
2 teaspoons baking soda
2 teaspoons ground cinnamon
¾ teaspoon salt
3 cups grated carrots (about 9 carrots, you can grate them in food processor fitted w/ a shredding a blade or use a box grater)
1 cup coarsely chopped walnuts or pecans
1 cup shredded coconut (sweetened or unsweetened)
½ cup moist, plump raisins (dark or golden) or dried cranberries
2 cups sugar
1 cup canola oil
4 large eggs

For the frosting:
8 ounces cream cheese, room temperature
8 tablespoons (1 stick) unsalted butter, at room temperature
1 pound (16 ounces) confectioners’ sugar
1 tablespoon fresh lemon juice or ½ teaspoon pure lemon extract
½ cup shredded coconut (optional)

Finely chopped toasted nuts and/or toasted shredded coconut (optional)

Getting ready: Position the racks to divide the oven into thirds and preheat the oven to 325 degrees Fahrenheit. Butter three 9- by 2-inch round cake pans, flour the insides, and tap out the excess. Put the two pans on one baking sheet and one on another.

To make the cake:
Whisk the flour, baking powder, baking soda, cinnamon and salt. In another bowl, stir together the carrots, chopped nuts, coconut, and raisins.

Working with a stand mixer, preferably fitted with a paddle attachment, or with a hand mixer in a large bowl, beat the sugar and oil together on a medium speed until smooth. Add the eggs one by one and continue to beat until the batter is even smoother. Reduce the speed to low and add the flour mixture, mixing only until the dry ingredients disappear. Gently mix the chunky ingredients. Divide the batter among the baking pans.

Bake for 40-50 minutes, rotating the pans from top to bottom and front to back at the midway point, until a thin knife inserted into the centers comes out clean. The cakes will have just started to come away from the sides of the pans. Transfer the cakes to cooling racks and cool for about 5 minutes, then run a knife around the sides of the cakes and unmold them. Invert and cool to room temperature right side up.

The cakes can be wrapped airtight and kept at room temperature overnight or frozen for up to 2 months.

To make the frosting:
Working with a stand mixer, preferably fitted with a paddle attachment or with a hand mixer in a large bowl, beat the cream cheese and butter together until smooth and creamy. Gradually add the sugar and continue to beat until the frosting is velvety smooth. Beat in the lemon juice or extract.

If you’d like coconut in the filling, scoop about half of the frosting and stir the coconut into this position.

To assemble the cake:
Put one layer top side up on a cardboard cake round or a cake plate protected by strips of wax or parchment paper. If you added the coconut to the frosting, use half of the coconut frosting to generously cover the first layer (or generously cover with plain frosting). Use an offset spatula or a spoon to smooth the frosting all the way to the edges of the layer. Top with the second layer, this time placing the cake stop side down, and frost with the remainder of the coconut frosting or plain frosting. Top with the last layer, right side up, and frost the top- and the sides- of the cake. Finish the top with swirls of frosting. If you want to top the cake with toasted nuts or coconut, sprinkle them on now while the frosting is soft.

Refrigerate the cake for 30 minutes, just to set the frosting before serving.
Serving: This cake can be served as soon as the frosting is set. It can also wait, at room temperature and covered with a cake keeper overnight. The cake is best served in thick slices at room temperature and while it’s good plain, it’s even better with vanilla ice cream or some lemon curd.

Storing: The cake will keep at room temperature for 2 to 3 days. It can also be frozen. Freeze it uncovered, then when it’s firm, wrap airtight and freeze for up to 2 months. Defrost, still wrapped, overnight in the refrigerator.

Simple Carrot Cake with Cream Cheese Frosting (from Cooks Illustrated’s The New Best Recipe)

2½ cups unbleached all-purpose flour
1¼ teaspoons baking powder
1 teaspoon baking soda
1¼ teaspoons ground cinnamon
½ teaspoon ground nutmeg
1/8 teaspoon gound cloves
½ teaspoon salt
1 pound (6-7 medium) carrots, peeled
1½ cups granulated sugar
½ cup packed light brown sugar
4 large eggs
1½ cups safflower, canola or vegetable oil

Cream cheese frosting

8 ounces cream cheese, softened but still cool
5 tablespoons unsalted butter, softened but still cool
1 tablespoon sour cream
½ teaspoon vanilla extract
1¼ cups confectioners’ sugar

For the cake:

1. Adjust an oven rack to the middle position and heat the oven to 350 degrees. Spray a 13 by 9-inch baking pan with nonstick cooking spray. Line the bottom of the pan with parchment and spray the parchment.

2. Whisk together the flour, baking powder, baking soda, cinnamon, nutmeg, cloves and salt in a large bowl; set aside.

3. In a food processor fitted with a large shredding disk, shred the carrots (you should have about 3 cups); transfer the carrots to a bowl and set aside. Wipe out the food processor workbowl and fit with the metal blade. Process the granulated and brown sugars and eggs until frothy and thoroughly combined, about 20 seconds. With the machine running, add the oil through the feed tube in a steady stream. Process until the mixture is light in color and well emulsified, about 20 seconds longer. Scrape the mixture into a medium bowl. Stir in the carrots and the dry ingredients until incorporated and no streaks of flour remain. If you like nuts in your cake, stir 1½ cups toasted chopped pecans or walnuts into the batter along with the carrots. Raisins are also a good addition; 1 cup can be added along with the carrots. If you add both nuts and raisins, the cake will need and additional 10 to 12 minutes in the oven. Pour into the prepared pan and bake until a toothpick or skewer inserted into the center of the cake comes out clean, 35 to 40 minutes, rotating the pan halfway through the baking time. cool the cake to room temperature in the pan on a wire rack, about 2 hours.

For the frosting
1. When the cake is cool, process the cream cheese, butter, sour cream, and vanilla in a clean food processor workbowl until combined, about 5 seconds, scraping down the bowl with a rubber spatula as needed. Add the confectioners’ sugar and process until smooth, about 10 seconds.

2. Run a paring knife around the edge of the cake to loosen from the pan. Invert the cake onto a wire rack, peel off the parchment, then invert again onto a serving platter. Using an icing spatula, spread the frosting evenly over the surface of the cake. Cut into squares and serve.

Carrot Cake (from my mom, and I don’t know where she got the recipe)

1½ (10.5 ounces) cup sugar
2 cups (10 ounces) flour
2 teaspoons baking soda
1 teaspoon salt (scant)
2 teaspoons cinnamon
1 cup cooking oil
3 cups (16 ounces) finely grated carrots (raw)
4 whole eggs

Sift dry ingredients into a large mixing bowl making sure they are thoroughly mixed. Add cooking oil and blend. Add eggs ONE at a time and mix (by hand). Stir in carrots. Bake in two deep cake pans sprayed with Pam. Bake at 350 for 30 to 40 minutes until cakes spring back in center or toothpick comes clean. Cool 10-15 minutes. Remove from pans and frost while warm.

Cream cheese frosting:
1 8 ounce package cream cheese (regular, not low or non-fat)
8 tablespoons (1 stick) butter
4½ cups (16 ounces) powdered sugar
1 teaspoons vanilla
1 cup chopped pecans (optional)

Let cheese and butter sit at room temperature for half an hour, then mix thoroughly. Add powdered sugar slowly, alternating with vanilla. Stir in nuts last. Frost and enjoy.

smitten kitchen recipes

t1.jpg

Smitten Kitchen is my new favorite cookbook. In the past month since discovering Deb’s blog, I’ve made seven of her recipes. When I’m trying to come up with cooking ideas, I just scan through her recipe page. Rather than rehash each dish in detail, I’m combining them into one entry.

bft.jpg

Boozy Baked French Toast

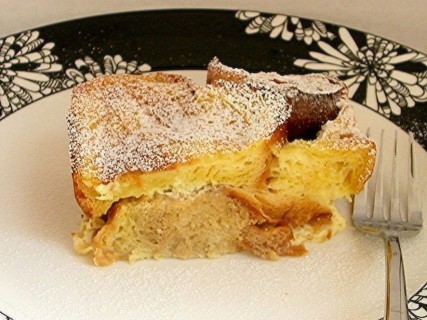
Of all of Deb’s recipes that I’ve made recently, this is my and Dave’s favorite. For one thing, it takes all of 10 minutes to put together, and that can be done the night before. In the morning, just cook it in the oven for half an hour, and voila – a great breakfast. The recipe is supposedly adaptable to whatever flavors you’re in the mood for or you have available, but I’ve only made it one way. I was planning to follow Deb’s recent favorite, with triple sec and orange zest, but I use “planning” loosely, as I didn’t actually bother to get either triple sec or orange zest. Instead, I used Grand Marnier as the alcohol, the zest of one grapefruit, and a splash of vanilla extract. It was fantastic. It was like Creamsicle French Toast. I made it again a week later, exactly the same way. This is why I have a loaf of challah in my freezer right now, and a grapefruit languishing in my crisper drawer, waiting for me to get back from New Mexico and make this great and easy dish for my friends who will be visiting.

copy-of-dscn3652.jpg

Artichoke Ravioli

I love the idea of homemade ravioli. I enjoy working with fresh pasta, and I like the option of customizing my ravioli filling to whatever strikes my interest – mushrooms, squash, seafood, and in this case, artichokes. The problem is, I sort of suck at making it. Both times I’ve tried, the pasta has been too watery after being boiled. This particular recipe is baked after being boiled, which helped dry it out somewhat, but clearly I need to work on my technique. Ravioli is too much tedious work to get anything less than amazing results. I’m not ready to give up yet. This filling was, fortunately, very good. The simple sauce was good too, although I used canned tomatoes instead of fresh, it being February and all.

copy-of-dscn3833.jpg

Creamy Baked Macaroni and Cheese

I already have a macaroni and cheese recipe that I love, but Deb’s photos of a crispy cheesy crust and creamy cheesy sauce had me intrigued to try a new recipe. Did I mention that it’s cheesy? This recipe uses twice as much cheese per pasta as my other favorite recipe. So I made it, and it was delicious, but Dave and I couldn’t decide if it was as good as my other favorite. So I made them side-by-side, which was, well, confusing. Neither recipe is particularly difficult, but I was making half recipes of each sauce, then storing half of that in the fridge so we could have an easy but fresh meal a few days later, which means that each sauce was topping only a quarter recipe of pasta. There was a screw-up here and there, but nothing vital. We weren’t able to pick a favorite. I know they’re both macaroni and cheese, but it felt like comparing apples and oranges. The Cooks Illustrated recipe is creamy and smooth, both in texture and flavor, while the new recipe was far sharper (did I mention that it has twice as much cheese as the other?) and a bit grainy, but oh, that crisp crust was fun. I think I’ll be combining the two in the future. I know Cooks Illustrated uses half cheddar because of its great flavor, and half Monterey jack because of its smooth melting qualities, but I’m going to try using 75% cheddar and 25% Monterey jack next time to get some more of that sharp flavor. I’m also going to skip the bread crumb topping and use more cheese instead, then put that under the broiler to brown the cheese. I think this will combine my favorite aspects of each recipe. (I was also just reminded of a recipe I used to love that uses smoked gouda, so I need to revisit that one. Hey, I love cheesy pasta.)

ribs.jpg

Hoisin and Honey Pork Ribs

When I was a kid, pork ribs were my favorite meal, and I requested them for every birthday. I grew out of that when I decided that ribs were too much effort and mess to eat when there was so little meat. But these ribs were certainly worth the effort. I wanted to make them because I recently tried hoisin sauce for the first time and loved it. This was my first time cooking pork ribs, plus I’m not usually very good with the broiler, but everything worked out great. Because the ribs are boiled first, the broiler is just to crisp them and caramelize the sauce, so it was easy.

ddl2b.jpg

Dulce de Leche Cheesecake Squares

This recipe called to me as soon as Deb posted it. Cheesecake filling, graham cracker crust, chocolate glaze, all mixed up with dulce de leche. I’m not really familiar with dulce de leche, but caramelized milk certainly sounds great. But wow, these were rich. I can usually handle rich foods without a problem, but these were too much even for me. It helped when I thought of them like candy instead of like a bar cookie and started cutting them into the 1-inch squares that the recipe recommends. I did enjoy them, but I don’t think I’ll be making them again.

t3.jpg

Truffles

It sounds like Valentine’s Day is becoming mostly an excuse for couples to enjoy a good meal together, which I think is great. Dave and I weren’t even going to do that (we were having the second day of mac and chz comparison on V-Day), and I was okay with that. I found out on February 13th that Dave wanted to do something extra, so I surprised him by making truffles the next day. I loosely followed the recipe for Robert Linxe’s truffles, except, less fancy. I didn’t use Volrhona chocolate, I didn’t wear gloves, and I didn’t simmer the cream multiple times. It wasn’t worried about details this time. It was my first time making truffles, and I think they came out well. I want to try them again, but comparing a number of different quality chocolates to see how much it really matters.

Pizza Dough

Deb discussed a recipe for pizza dough that replaced some of the water with white wine and added a little honey. I tried it, and while the dough wasn’t sweet and the wine flavor wasn’t obvious, it made a really good pizza crust. Even Dave, who didn’t know that I had changed the recipe, pointed out that it was particularly good. I forgot that this recipe was related to this entry in my blog, so I didn’t think to take a picture, which is unfortunate because the crust was really crisp and light.

Next on the list is Lighter-Than-Air Chocolate Cake. Flourless chocolate cakes are usually dense confections, so I’m interested in this very light version. And then, who knows? World Peace Cookies? Pretzel rolls? Risotto alla Barolo? There’s so many great recipes to choose from, all beautifully photographed and enticingly described.

ddl1.jpg

because i’ve always been your biggest flan (creme caramel/flan)

1.jpg

Flan, crème caramel, whatever. Turns out, there’s only the teeniest of differences. I was struggling to think of a dessert that fit a precise set of requirements – compatibility with the red wine we’d be drinking that night, not chocolate, and most importantly, not requiring any trips to the store. I really thought I’d hit on the perfect idea with flan, and it had even been on my list of things I’m all too eager to cook for some time now. But I kept hitting a snag, in that most of the recipes on epicurious called for sweetened condensed milk, and I didn’t have any.

Finally, I hit upon one that I had all the ingredients for. And I noticed something – the only significant difference between this recipe and Cooks Illustrated’s recipe for crème caramel is the fat content of the dairy. The flan recipe uses almost twice as much whipping cream as milk, whereas the crème caramel recipe uses an equal amount of light cream and milk. This was perfect for me, because I had made the crème caramel before and found the custard to be a little too light for my tastes. Furthermore, I had heavy cream on hand.

Well, I sort of had heavy cream. What I actually had was not one, but two expired cartons of cream, neither of which was the ultra-pasteurized stuff that lasts forever. Eww. But I was determined to make this, and I decided that one of the cartons was passable. I didn’t tell Dave about the questionable dairy in the custard, as I don’t think he’d have been pleased.

Oh, this dessert turned out really well. Much better than the previous time I’d made the crème caramel, when I believe I had overcooked the caramel. This time I fussed over it determinedly, swirling and watching, and even getting a container of honey out so I could judge just when the caramel became the “honey-caramel color” that the recipe instructed. It was perfect. I did have a little adventure with divvying up the caramel among only 3 ramekins instead of the four I was supposed to use, then hurriedly trying to scoop quickly hardening caramel into the 4th ramekin.

copy-of-2.jpg

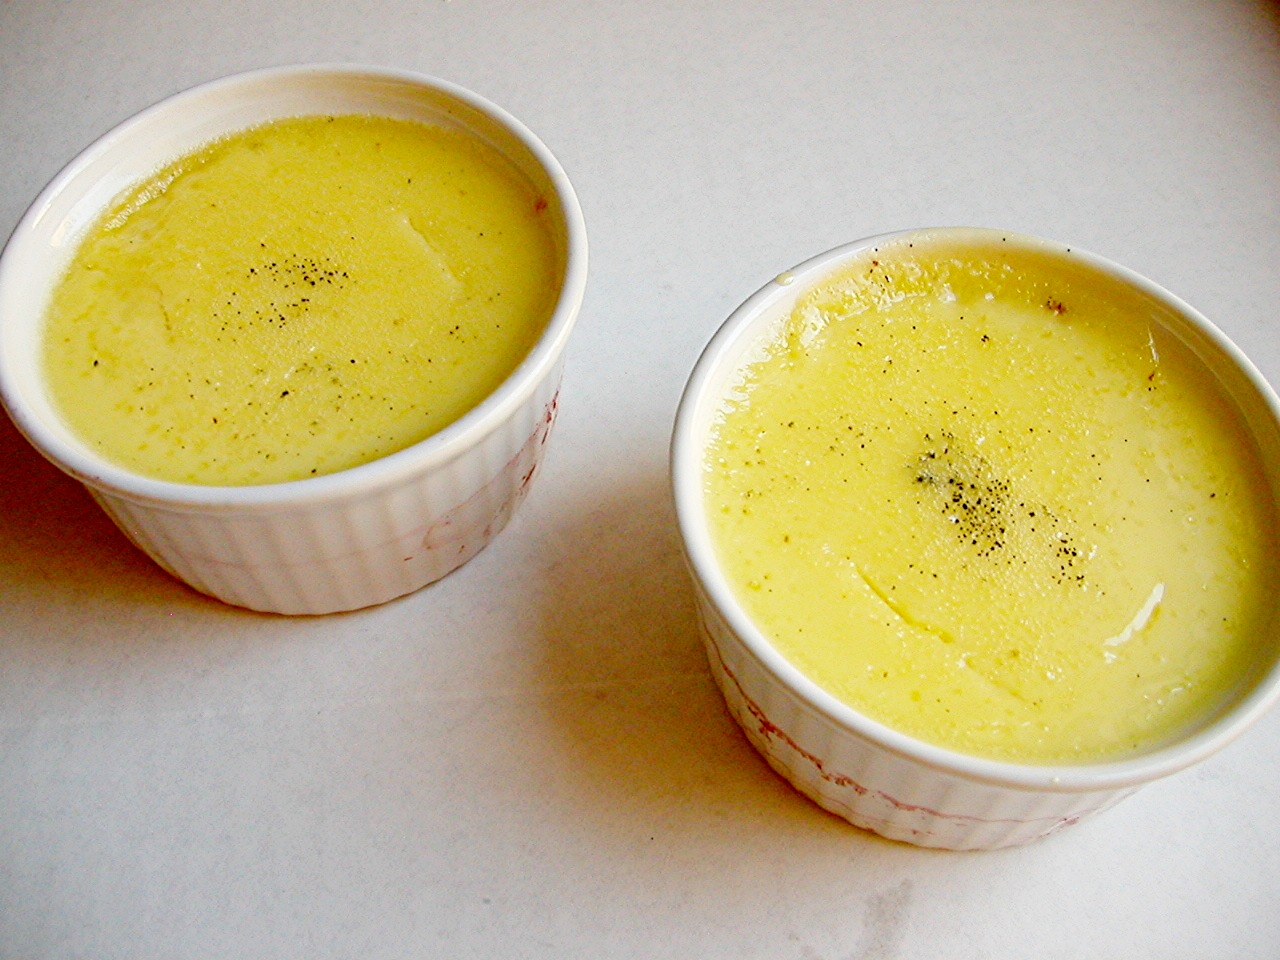
After that, everything went pretty smoothly. This really isn’t a hard dessert to make, although the water bath is a bit of a pain. The blood-colored streaks on the ramekins are stains from the maroon towel I used to keep the ramekins stable in the water bath. Don’t they look so appetizing? Oh, and the stab wounds are from my tests to check if the custard was done cooking. Next time I need to be careful not to puncture the caramel. Between the bloody ramekins and the knife marks, I bet these just look so tempting, right? But this is actually an easy, fairly cheap, impressive recipe that can be made days in advance, and might therefore be perfect for a dinner party.

copy-of-3.jpg

Classic Crème Caramel (from Cooks Illustrated)

CI note: Though you can make one large creme caramel, we find that custards baked in individual ramekins cook faster, are more evenly textured, and unmold more easily. You can vary the amount of sugar in the custard to suit your taste. Most tasters preferred the full two-thirds cup, but you can reduce that amount to as little as one-half cup to create a greater contrast between the custard and the sweetness of the caramel. Cook the caramel in a pan with a light-colored interior, since a dark surface makes it difficult to judge the color of the syrup. Caramel can leave a real mess in a pan, but it is easy to clean. Simply boil lots of water in the pan for 5 to 10 minutes to loosen the hardened caramel.

Crumblycookie changes: I used heavy cream instead of light cream, 2% milk instead of whole milk, ½ of a vanilla bean instead of extract, and vanilla sugar instead of regular sugar.

Serves 8

Caramel
1 cup granulated sugar
1/3 cup water
2 tablespoons corn syrup
¼ teaspoon lemon juice

Custard
1½ cups whole milk
1½ cups light cream
3 large eggs
2 large egg yolks
2/3 cup granulated sugar
1½ teaspoons vanilla extract
Pinch table salt

1. For the caramel: In a medium nonreactive saucepan and without stirring, bring sugar, water, corn syrup, and lemon juice to simmer over medium-high heat, wiping sides of pan with wet cloth to remove any sugar crystals that might cause syrup to turn grainy. Continue to cook until syrup turns from clear to golden, swirling pan gently to ensure even browning, about 8 minutes. Continue to cook, swirling pan gently and constantly, until large, slow bubbles on mixture’s surface turn honey-caramel in color, 4 to 5 minutes longer. Remove pan immediately from heat and, working quickly but carefully (the caramel is over 300 degrees and will burn you if it touches your skin), pour a portion of the caramel into each of 8 ungreased 6-ounce ovenproof ramekins. Allow caramel to cool and harden, about 15 minutes. (Can be covered with plastic wrap and refrigerated for up to 2 days; return to room temperature before adding custard.)

2. For the custard: Adjust oven rack to center position and heat oven to 350 degrees. Heat milk and cream, stirring occasionally, in medium saucepan over medium heat until steam appears and/or an instant-read thermometer held in the liquid registers 160 degrees, 6 to 8 minutes; remove from heat. Meanwhile, gently whisk eggs, yolks, and sugar in large bowl until just combined. Off heat, gently whisk warm milk mixture, salt, and vanilla into eggs until just combined but not at all foamy. Strain mixture through fine mesh sieve into large measuring cup or container with pouring spout; set aside.

3. Bring 2 quarts water to boil in kettle. Meanwhile, fold dish towel to fit bottom of large baking dish or roasting pan and position in pan. Divide reserved custard mixture among ramekins; place filled ramekins on towel in pan (making sure they do not touch) and set pan on oven rack. Fill pan with boiling water to reach halfway up ramekins; cover entire pan loosely with aluminum foil so steam can escape. Bake until a paring knife inserted halfway between center and edge of the custards comes out clean, 35 to 40 minutes. Transfer custards to wire rack; cool to room temperature (Can be covered with plastic wrap and refrigerated up to 2 days.)

4. To unmold, slide a paring knife around entire mold perimeter, pressing knife against side of the dish. Hold serving plate over top of ramekin and invert; set plate on work surface and shake ramekin gently to release custard. Serve immediately.

For one large crème caramel: Follow recipe for Classic Crème Caramel, pouring caramel and custard into 1½-quart straight-sided soufflé dish rather than individual ramekins. Fill roasting pan with boiling water to reach halfway up sides of soufflé dish; increase baking time to 70 to 75 minutes or until an instant-read thermometer inserted in center of custard registers 175 degrees.

The Perfect Flan (from epicurious)

1¾ cups whipping cream
1 cup milk (do not use low-fat or nonfat)
Pinch of salt
½ vanilla bean, split lengthwise

1 cup sugar
1/3 cup water

3 large eggs
2 large yolks
7 tablespoons sugar

Position rack in center of oven and preheat to 350°F. Combine cream, milk and salt in heavy medium saucepan. Scrape seeds from vanilla bean into cream mixture; add bean. Bring to simmer over medium heat. Remove from heat and let steep 30 minutes.

Meanwhile, combine 1 cup sugar and 1/3 cup water in another heavy medium saucepan. Stir over low heat until sugar dissolves. Increase heat to high and cook without stirring until syrup turns deep amber, brushing down sides of pan with wet pastry brush and swirling pan occasionally, about 10 minutes. Quickly pour caramel into six ¾-cup ramekins or custard cups. Using oven mitts as aid, immediately tilt each ramekin to coat sides. Set ramekins into 13x9x2-inch baking pan.

Whisk eggs, egg yolks and 7 tablespoons sugar in medium bowl just until blended. Gradually and gently whisk cream mixture into egg mixture without creating lots of foam. Pour custard through small sieve into prepared ramekins, dividing evenly (mixture will fill ramekins). Pour enough hot water into baking pan to come halfway up sides of ramekins.

Bake until centers of flans are gently set, about 40 minutes. Transfer flans to rack and cool. Chill until cold, about 2 hours. Cover and chill overnight. (Can be made 2 days ahead.)

To serve, run small sharp knife around flan to loosen. Turn over onto plate. Shake gently to release flan. Carefully lift off ramekin allowing caramel syrup to run over flan. Repeat with remaining flans and serve.

copy-of-4.jpg